Transcript
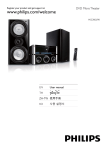
Micro DVD Theater
1
What’s in the box
MCD802
C
Remote control
Composite video
cable (yellow)
Connect speakers
Control cable
Right speaker
Left speaker
XXXXXXX
XXXXXX
XXXXXX
Connect
Setup
Enjoy
Eng
Power cord
1
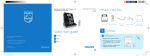
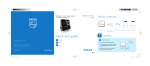
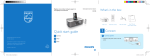
Quick start guide
1
2
3
A
FM wire antenna
D
1
Connect the power cord to the AC
MAINS~ jack on the main unit.
2
Connect the power plug to the wall outlet.
Connect the supplied FM wire antenna to
1
2
Open the battery compartment.
3
Close the battery compartment.
Insert 2 AAA batteries with correct
polarity (+/-) as indicated.
• Risk of electric shock! When you unplug
the AC power cord, always pull the plug
from the socket. Never pull the cord.
E
Connect control cable
Connect the supplied control cable to the
CONTROL CABLE jacks on the main unit.
C Caution
• Risk of product damage! Ensure that the
power supply voltage corresponds to
the voltage printed on the back or the
underside of the unit.
• Before connecting the AC power cord,
ensure you have completed all other
connections.
Connect TV
1
TV
Connect the supplied composite video
cable to:
• the VIDEO socket on this unit.
• the video input socket on the TV.
E Tip
• See the User Manual for how to connect
other devices to this system.
3
Setup
Set the clock
C
In standby mode, press CLOCK to activate
the clock setting mode.
Press /
Press
to set the minute.
Press and hold CLOCK to select 12-hour
or 24-hour format.
1
Press CLOCK to confirm.
2 Press .
» All detected radio stations are stored.
» Once complete, it tunes to the first preset
radio station.
• To stop auto tuning, press 9.
3
A
1
2
3
Press TUNER.
» ‘AUTO INSTALL ... PRESS PLAY’ is displayed.
Enjoy
Reinstall and listen to radio stations
Play disc
Press DISC to select the disc source.
Press
to open the disc compartment.
Insert a disc with the printed side facing
up, then close the disc compartment.
» Play starts automatically.
• To pause/resume play, press
.
• To stop play, press 9.
B
l s id e
ab e
1
2
Press TUNER to select the tuner source.
3
Press J/K to select a preset number.
Press and hold PROG for more than 2 seconds to activate automatic program mode.
» All available stations are programmed in the
order of waveband reception strength.
E Tip
• Detailed features and additional functions are
described in the user manual.
Play from USB
1
Flip open the USB socket cover on the
front panel.
2
Insert the USB plug of a USB device into
the USB socket.
3
Program and tune to radio
stations
First time tuning
When you access to radio mode for the first
time, follow the instructions to install the radio
stations.
to set the hour.
/
Enjoy
E Tip
• For optimal reception, fully extend and adjust
the position of the FM antenna.
» The time digits are displayed and begin to blink.
» If the time digits are not displayed, press
and hold for more than 2 seconds to
switch to standby mode, then repeat step 1.
5
Connect FM antenna
1
1
2
3
4
Release the socket flap.
Install remote control batteries
1
F
A
Connect power
Hold down the socket flap.
the FM ANTENNA socket on the unit.
Setup
B
1
2
3
User manual
Connect
Connect
Enjoy
Quick start guide
D Note
• Ensure that the colors of the speaker
wires and terminals are matched.
2
Connect
Insert the stripped part of the wire completely.
• Insert the right speaker wires to
“SPEAKER RIGHT”, left speaker wires
to “SPEAKER LEFT”.
Quick start guide
1
2
2
1
Connect
L
Welcome to Philips!
Register your product and get support at
www.philips.com/welcome
Press USB to select the USB source.
» Play starts automatically.
• To pause/resume play, press
.
• To stop play, press 9.
© Royal Philips Electronics N.V. 2009
All rights reserved.
Specifications are subject to change without notice.
Trademarks are the property of Koninklijke Philips
Electronics N.V. or their respective owners.
Printed in China
MCD802_12_QSG_V2.0
EN
MCD802_12_QSG_AEN.indd
2-7
5/13/2009
4:01:56 PM