Transcript
d4262qsg_e_7.fm Page 1 Thursday, August 4, 2005 11:17 AM
BEFORE YOU BEGIN
For more information, please refer to the Basic & Advanced
Manuals or visit: www.olympusamerica.com/support
Start Here
Quick Start Guide
VH176701
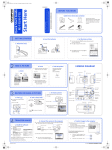
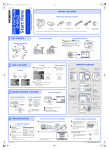
Charge the battery (recommended*)
W
Gather these items (box contents)
LI-12B Lithium Ion Battery
3
Digital Camera
Strap
LI-10C Battery Charger
USB Cable (light gray)
LI-10C Battery
Charger
LI-12B Lithium Ion
Battery
Video Cable (black)
Charging Indicator
Lit red: Charging
Lit green: Charging complete
(Charging time: Approx. 120 minutes)
OLYMPUS Master
software CD-ROM
2
c. Set the date and time
b. Insert the battery
1 Press o n button to turn the camera on.
1 Slide
AC Wall
Outlet
*Battery comes partially charged.
Items not shown: Advanced Manual (CD-ROM), Basic Manual, warranty card.
Contents may vary depending on purchase location.
GET STARTED
Power Cable
1
2 Lift
o n Button
2 Press Z to display the top menu, and select [MODE
a. Attach the strap
MENU] > [SETUP] > [X].
3 Press O/N to set an item. Press X/Y to select the
next field.
Z Button
Strap
Date format
SETUP MEM CAM
1
Pull the strap tight so that it does
not come loose.
RESET
FILE NAME
2005 . 01 . 01
PIXEL MAPPING
3 Insert
DUAL TIME
SETUP
Y
M
D
00 : 00
’05.01.01
00:00
OFF
SELECT
SET
GO OK
Operation guide
Battery lock knob
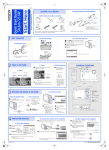
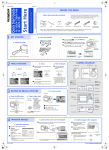
TAKE A PICTURE
b. Focus
c. Take the picture
1 Using the monitor, place the AF target mark
1 Press the shutter button
over your subject.
a. Zoom
Zoom Out:
completely to take the
picture.
Green Lamp
CAMERA DIAGRAM
Shutter Button
Strap Eyelet
Multi-Connector
o n Button
Self-Timer Lamp
Flash
Zoom In:
4
HQ 2816×2112
(Pressed Halfway)
(Pressed Completely)
Shutter Button
Shutter Button
AF Target Mark
2 Press and hold the shutter button halfway
to lock the focus.
HQ 2816×2112
4
HQ 2816×2112
4
DC-IN Jack
The green lamp indicates the focus is locked.
Lens
Connector Cover
Monitor
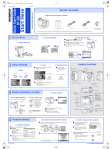
REVIEW OR ERASE A PICTURE
a. Press the q button
Next
Picture
m Button
(Shooting Mode)
DISP./GUIDE Button
q Button
(Playback Mode)
Arrow Pad (O/N/X/Y)
Z Button (OK/MENU)
ERASE
Press T or W to
zoom in or out.
Press Z to return
to the original size.
Press O/N or X/Y
to scroll around.
Zoom Button
Prev.
Picture
c. To erase a picture
b. Take a closer look
The last picture taken will be
displayed.
q Button
Press the m button to
return to shooting mode.
YES
NO
SELECT
S Button (Erase)
< Button (Print)
GO OK
S Button
1 Display the picture you want to erase.
2 Press the S button.
3 Select [YES], and press Z.
The picture is permanently erased.
Battery Compartment/Card
Cover
Arrow Pad
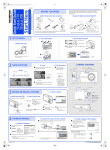
TRANSFER IMAGES
b. Connect the camera to the computer
1 Connect the camera and computer using the USB cable (included).
a. Install the software
1 Insert the OLYMPUS Master CD-ROM.
2 Windows:
1 With the camera now connected,
open OLYMPUS Master.
The monitor will turn on automatically.
2
Macintosh:
Double-click the “Installer“
icon.
[Transfer Images] window
The [Transfer Images] window is
displayed.
USB cable
2 Select the images you want to
1
transfer, and click the [Transfer
Images] button.
2 Select [PC] on the monitor, and press Z.
If the [Transfer Images] window is not
displayed automatically:
USB
P C
EASY PRINT
3 Simply follow the on-screen
a.
Click the “Transfer Images” icon
on the OLYMPUS Master main
menu.
b.
Click the “From Camera” icon.
CUSTOM PRINT
instructions.
Remember to register your camera when you install OLYMPUS
Master or visit:
www.olympusamerica.com/prodreg
Tripod Socket
c. Transfer images to the computer
Click the “OLYMPUS
Master“ button.
Printed in China
Zoom Button
EXIT
Your PC will now recognize your camera as a
removable storage drive.
SELECT
GO OK
© 2005
[Transfer Images]
button