Transcript
d4317qsg_e_7.fm Page 1 Monday, December 19, 2005 9:19 AM
BEFORE YOU BEGIN
For more information,
please refer to the Basic & Advanced Manual
or visit www.olympusamerica.com/support
Start Here
Quick Start Guide
FE-115/X-715
VH504901
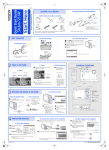
GETTING STARTED
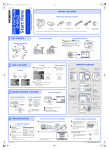
Gather these items (box contents)
This box also contains:
Advanced Manual (CD-ROM), Basic
Manual, Warranty card. Contents
may vary depending on purchase
location.
Digital Camera
Strap
AA Batteries (two)
USB Cable (light gray)
Video Cable (black)
OLYMPUS Master software
CD-ROM
b. Insert the batteries
c. Set the date and time
1 Turn the mode dial to
and press the power switch
to turn the camera on.
a. Attach the strap
Lock button
2 Press
1
to display the menu screen.
3
2006_01_01
3 Press [/\ to set an item. Press ^/] to
2
select the next field.
Strap eyelet
Operation guide
Pull the strap tight so that it does not
come loose.
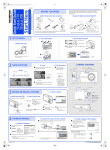
TAKE A PICTURE
b. Focus
a. Zoom
or
Press the shutter button
completely to take the
picture.
(Press Completely.)
Green lamp
Zoom in:
CAMERA DIAGRAM
c. Take the picture
1 Using the monitor, place the AF
target mark over your subject.
Zoom out:
2006 . 01 . 01
Battery compartment/card cover
Flash
Strap Eyelet
(Pressed Halfway)
Shutter Button
Connector Cover
Self-Timer Lamp
Shutter button
Shutter button
AF target mark
VIDEO OUT Jack
2 Press and hold the shutter
button halfway to lock focus.
z The green lamp indicates
focus is locked.
The cursor moves to
the left or right
according to the
degree of zoom.
USB Connector
DC-IN Jack
Lens
POWER Switch
Zoom Button
Mode Dial
Monitor
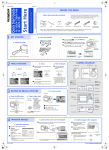
REVIEW OR ERASE A PICTURE
c. To erase a picture
1 Display the picture you want to erase.
2 Press
a. Press k
.
b. Take a closer look
z Press T (U) to enlarge
the image.
z Press W (G) to
return to normal.
z Press [/\ or ^/]
to scroll around.
z The last picture taken will be
displayed.
Playback button (k )
Zoom button
Shooting Button
(l )
Playback Button
(k )
Erase Button (
Menu Button (
Erase button (
Orange Lamp
Green Lamp
OK Button (i)
Arrow Pad
([\]^)
)
)
)
Flash Mode Button (
Tripod Socket
)
Lock Button
OK button (i)
PUSH
OPEN
3 Select [YES], and press i.
z The picture is
permanently erased.
Arrow pad
Press l to return to shooting
mode.
Prev.
picture
Next
picture
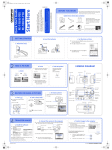
TRANSFER IMAGES
Battery Compartment/Card Cover
b. Connect the camera to the computer
1 Connect the camera and computer using the USB cable (included).
a. Install the software
1 Insert the OLYMPUS Master
z The monitor will turn on automatically
Connector cover
Remember to register your camera when you install
OLYMPUS Master or by visiting:
www.olympusamerica.com/prodreg
Printed in China
[Transfer Images] window
OLYMPUS Master.
2 Select the images you want to transfer, and
click the [Transfer Images] button.
USB cable
2 Windows: Click the
“OLYMPUS Master“
button.
Macintosh:Double-click
the “Installer“ icon.
3 Simply follow the onscreen instructions.
1 With the camera now connected, open
The [Transfer Images] window is displayed.
Look for this mark.
CD-ROM.
c. Transfer images to the computer
USB port
USB connector
2 Select [PC] on the monitor, and press i
z Your PC will now recognize your
camera as a removable storage drive.
If the [Transfer Images] window is not
displayed automatically:
a.
Click the “Transfer Images” icon
on the OLYMPUS Master main
menu.
b.
Click the “From Camera” icon.
[Transfer images]
button
© 2006