1
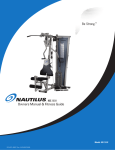
Be Strong.™
Assembly Manual
NS 75X
Model: NS 75X
P/N: 001-7006 Rev A (10/04/2006)
TABLE OF CONTENTS
Before You Assemble..................... 3
Product Specifications................... 4
Product Features............................ 4
Parts List / Box Contents.............. 5
Exploded View................................ 6
Hardware and Tool List................. 7
Assembly Guide............................. 8
Warranty Information.................... 15
Important Contact Numbers......... 16
before you assemble
Basic Assembly Principles
Here are a few basic tips that will aid in the assembly of the Nautilus® NS75X. By using these
principles, you can simplify each process and save yourself extra time and effort.
1. T
o make the assembly process go faster, gather the pieces you need for each step and
thoroughly read the assembly instructions for that step prior to starting assembly for the step.
2. W
hen tightening a locknut on a bolt, use a combination wrench to grip the locknut and ensure
that it is fastened securely.
3. W
hen attaching two pieces, gently lift and look through the bolt holes to help guide the bolt
through the holes.
4. A
s a general rule, and for all bolts and nuts on your NS75X Bench, turn bolts or nuts toward
the right to tighten and left to loosen. Or you can remember the mnemonic: “Righty tighty, lefty
loosey.”
Nautilus NS75X
product Specifications
NOTE: All instructions in the manual are given with the orientation
of sitting on the machine ready to exercise.
User Weight Capacity:
300lbs / 136.1Kg
Dimensions:
56”w x 76”l x 46”h / 142 cm x 193 cm x 117 cm
Shipping Weight:
207 lbs / 93.9 kg
Net Weight:
185 lbs / 83.9 kg
Parts list / Box Contents
#
DESCRIPTION
QTY
1 Main Base Assembly ........................ 1
2 Connecting Tube Assembly ............. 1
3 Seat Tube Assembly . ........................ 1
4 Seat Handle......................................... 2
5 Vertical Pulley Bracket ..................... 1
6 Cable Retaining Bracket ................... 1
7 Angled Pulley Bracket ...................... 1
8 Leg Press Top Link . ........................... 1
9 Foot Plate Assembly .......................... 1
10 Leg Press Front Link Left.................... 1
11 Leg Press Front Link Right ................ 1
12 Leg Press Rear Link Left ................... 1
13 Leg Press Rear Link Right . ............... 1
14 Leg Press Power Arm ....................... 1
15 Leg Press Power Link . ...................... 1
16 Seat Back Support Assembly ......... 1
17 Seat Back Adjuster . ......................... 1
18 Ab Crunch Support Arm . ................. 1
19 Ab Crunch Arm .................................. 1
20 Ab Crunch Handle . ........................... 1
21 Ab Crunch Pad Support ................... 1
22 Ab Crunch Pad .................................. 1
23 Leg Press Seat Pad ........................... 1
24 Leg Press Back Pad .......................... 1
25 Leg Press Cable w/ Termination ..... 1
26 3 1/2” Pulley ........................................ 4
27 4 1/2” Pulley ........................................ 3
28 Plastic Cap .......................................... 1
29 Pivot Shaft ........................................... 5
HARDWARE
30 Hex Bolt - 1/2” x 7”L .......................... 1
31 Hex Bolt - 1/2” x 3”L .......................... 2
32 Hex Bolt 3/8” x 3 1/4”L . ..................... 7
33 Hex Bolt 3/8” x 3”L ............................ 14
34 Hex Bolt 3/8” x 2 3/4”L . ..................... 5
35 Hex Bolt 3/8” x 2”L ............................. 3
37 Hex Bolt 3/8” x 1”L ............................ 13
38 Button Head Screw
3/8” x 3/4”L w/ Thread Lock ............ 15
39 1” x 1/2” Flat Washer ........................ 6
40 3/8” Flat Washer ............................... 60
41 Shim Washer ...................................... 1
42 1/2” Lock Nut ...................................... 3
43 3/8” Lock Nut ..................................... 30
44 Step Spacer - 5/8”H . ......................... 8
Nautilus NS75X
Exploded view
19
20
18
22
17
24
21
7654
4
16
23
9
11
13
3
8
14
1
15
10
12
5
6
2
7
• Compare the Bill of Materials to the box contents to insure that all parts are present before installation begins.
Hardware and tools
NS-75
Nautilus NS75X
NS75X Leg Press attachment can be assembled in a right or left configuration for
use on the NS300X ,NS200X, NS600X and NS700X. You may also mount the Ab Crunch arm on
either side to most efficiently use space.
STEP 1
Assembly
NS200X,NS300X & NS600X
RIGHT OR LEFT SIDE
(OPPOSITE OF WEIGHT
STACK)
5
33
33
3/8" x 3"L
3/8" x 3"L
LEG PRESS CABLE
REMOVE CABLE
BRACKET
2
32
3/8" x 3 1/4"L
43
40
NS 700X
RIGHT SIDE ONLY
33
3/8" x 3"L
LEG PRESS CABLE
2
40
43
Note: If NS75X is attached to NS700X
use 3/8” x 3 1/2” Hex Bolt
A. Attach the Connecting Tube Assembly (2) to the gym
with hardware shown above. If using a NS200X,NS300X or NS600X
Step 1 Components:
# Component 2 Connecting Tube Assembly 5 Vertical Pulley Bracket 32 Hex Bolt - 3/8” x 3 1/4”L 33 Hex Bolt - 3/8” x 3”L 40 3/8” Flat Washer 43 3/8” Lock Nut 45 Hex Bolt - 3/8” x 3 1/2”L Procedure:
Qty
1
1
1
3
8
6
2
A. Attach the Connecting Tube Assembly (2) to the gym
with hardware shown above. If using a NS200X,NS300X or NS600X
gym, remove the Cable Bracket and the rear bolt on the
gyms foot plate.
B. If using a NS200X,NS300X or NS600X attach the Vertical Pulley
Bracket (5) to the connecting Tube Assembly (2) using the hardware
shown above.
C. Tighten all hardware securely.
Nautilus NS75X
Assembly
STEP 2
3/8" x 3 1/4"L
3/8" x 2 3/4"L
32
16
34
4
3
32
33
33
3/8" x 3"L
3/8" x 3 1/4"L
3/8" x 3"L
40
43
2
1
Step 2 Components:
# Component 1 Main Base Assembly 3 Seat Tube Assembly 4 Seat Handle 16 Seat Back Support Assembly 32 Hex Bolt - 3/8” x 3 1/4”L 33 Hex Bolt - 3/8” x 3”L 34 Hex Bolt - 3/8” x 2 3/4”L 40 3/8” Flat Washer 43 3/8” Lock Nut 10
Procedure:
Qty
1
1
2
1
6
4
1
22
11
A. Position the Seat Back Support Assembly (16) over the
rear holes of the Main Base Assembly (1) and position
next to the Connecting Tube Assembly (2). Secure parts
with hardware shown above, but do not tighten.
B. Slide the Seat Tube Assembly (3) over the Seat Back
Support Assembly (16) and the Main Base Assembly (1).
Secure parts with hardware shown above, but do not
tighten.
C. Attach the Seat Handles (4) to the Seat Tube Assembly
(3) using the hardware shown above. After the cable is
routed in Step #6
D. Tighten all hardware securely.
Assembly
STEP 3
29
9
11
38
13
8
39
31
1/2" x 3"L
15
14
42
10
38
3/8" x 3/4"L w/ THREAD LOCK
12
Step 3 Components:
# Component 8 Leg Press Top Link 9 Foot Plate Assembly 10 Leg Press Front Link Left 11 Leg Press Front Link Right 12 Leg Press Rear Link Left 13 Leg Press Rear Link Right 14 Leg Press Power Arm 15 Leg Press Power Link 29 Pivot Shaft 31 Hex Bolt - 1/2” x 3”L 38 Button Head Screw 3/8” x 3/4”L w/ Thread Lock 39 1/2” Flat Washer 42 1/2” lock Nut Procedure:
Qty
1
1
1
1
1
1
1
1
5
2
15
4
2
A. Attach all the Pivot Shafts (29) to the Leg Press Front
Link Right (11) and the Leg Press Rear Link Right (13)
using the hardware shown above.
B. Slide the shafts into position on the Main Base Assembly.
C. Slide the Leg Press Top Link (8) and the Leg Press
Power Arm (14) into position as shown above.
D. Position the Leg Press Front and Rear Link Left (10, 12)
over the shafts and attach with the hardware shown above.
E. Connect the Leg Press Power Arm (14) to the Leg Press
Top Link (8) using the Leg Press Power Link (15) and the
hardware shown above. Intsall short end of Leg Press
Power Link (15) up.
F. Attach the Foot Plate Assembly (9) to the Leg Press Top
Link (8) using the hardware shown above.
G. Tighten all hardware securely.
Nautilus NS75X
11
Assembly
STEP 4
20
3/8" x 3"L
33
42
19
39
30
21
18
1/2" x 7"L
40
33
43
3/8" x 3"L
41
28
7
33
3/8" x 3"L
Procedure:
Step 4 Components:
# Component 7 Angled Pulley Bracket 18 Ab Crunch Support Arm 19 Ab Crunch Arm 20 Ab Crunch Handle 21 Ab Crunch Pad Support 28 Round Plastic Cap 30 Hex Bolt - 1/2” x 7”L 33 Hex Bolt - 3/8” x 3”L 39 1/2” Flat Washer 40 3/8” Flat Washer 41 Shim Washer 42 1/2” Lock Nut 43 3/8” Lock Nut 12
Qty
1
1
1
1
1
1
1
6
2
12
1
1
6
A. Attach the Angled Pulley Bracket (7) to the Connecting
Tube Assembly using the hardware shown above.
B. Attach the Ab Crunch Support Arm (18) with preinstalled
Ab Crunch Arm (19) to the Seat Back Support Assembly
using the hardware shown above. (This can be done to
the right or left.)
C. Cover the hardware by snapping the Round Plastic Cap
(28) over the Shim Washer (41).
D. Attach the Ab Crunch Pad Support (21) to the Ab
Crunch Arm (19) using the hardware shown above.
E. Attach the Ab Crunch Handle (20) to the Ab Crunch Pad
Support (21) using the hardware shown above. Do not
over tighten the hardware as the handle may bind.
F. Tighten all hardware securely.
Assembly
STEP 5
22
17
34
56
7
24
37 3/8" x 1"L
23
37 3/8" x 1"L
40
37
3/8" x 1"L
Step 5 Components:
# Component 17 Seat Back Adjuster 22 Ab Crunch Pad 23 Seat Pad 24 Seat Back Pad 37 Hex Bolt - 3/8” x 1”L 40 3/8” Flat Washer Procedure:
Qty
1
1
1
1
12
12
A. Attach the Ab Crunch Pad (22) to the Ab Crunch Pad
Support using the hardware shown above.
B. Attach the Seat Back Pad (24) to the Seat Back Adjuster
(17) using the hardware shown above. Slide the Seat
Back Adjuster in to the Seat Back Support Assembly and
secure with the Pop Pin.
C. Attach the Seat Pad (23) to the Seat Tube Assembly
using the hardware shown.
Nautilus NS75X
13
Assembly
STEP 6
37 3/8" x 1"L
43
25
26
34
35 3/8" x 2"L
6
44
34 3/8" x 2 3/4"L
43
NOT USED ON THE
NS700X
27
40
3/8" x 2 3/4"L
34
26
27
35
34
35 3/8" x 2"L
3/8" x 2"L
25
Step 6 Components:
# Component Qty
25 Leg Press Cable w/ Termination 1
26 3 1/2” Pulley 4
27 4 1/2” Pulley 3
34 Hex Bolt - 3/8” x 2 3/4”L 4
35 Hex Bolt - 3/8” x 2”L 3
37 Hex Bolt - 3/8” x 1”L 1
40 3/8” Flat Washer 6
43 3/8” Lock Nut 8
44 Step Spacer 8
14
Procedure:
A. Attach the looped end of the Leg Press Cable (25) to the cable bracket
located on the Seat Back Support Assembly using the hardware
shown above.
B. Place two 3 1/2” Pulleys in the Seat Back Support Assembly using the
hardware shown above. Pass the Leg Press Cable over the pulleys
and slide the cable through the Seat Tube Assembly out the front.
C. Run the cable over the 3 1/2” Pulleys and attach them to the Seat
Tube Assembly using the hardware shown.
D. Attach a 4 1/2” Pulley to the Leg Press Power Arm using the hardware
shown above. Pass the cable over the top of the pulley and then over
the top of the lower 3 1/2” pulley in step C.
E. Wrap the cable around a 4 1/2” Pulley and secure in place using the
hardware shown and the L Cable Retainer (6) to the Angled Pulley
Bracket (7).
F. Connect the Leg Press Cable Termination to the Gym Cable.
G. Adjust the cable tension using the adjustments located on the gym.
H. Attach leg press handles as shown in Step #2.
WARRANTY INFORMATION
What Is Covered
Nautilus Fitness Products warrants to the original purchaser
of this Nautilus Home Gym to be free from defects in
materials or workmanship, with the exceptions stated below.
This warranty is not transferable or applicable to any person
other than the original purchaser.
Nautilus Home Gyms
The frame and welds of the Nautilus Home Gyms are
warrantied to the original purchaser for life from date of
original purchaser. Upholstery, pulleys, bushings and
bearings are warrantied for ten years to the original
purchaser from date of purchase. Cables, grips, and all other
parts are warrantied to the original purchaser for a period of
1 year from date of purchase.
Warranties Do Not Cover
• A machine purchased for commercial or institutional use.
• Damage due to use by persons who weigh more than 300
pounds.
• Damage due to abuse, misuse, accident or acts of God
(such as floods).
• Consequential or incidental damages.
What We Will Do
Nautilus Fitness Products will repair any product that proves
to be a defect in materials or workmanship. In the event repair
is not possible, Nautilus Fitness Products, at its option, will
either replace your Nautilus Home Gym or refund your
purchase price.
How To Get Service
To obtain service for a Nautilus Fitness Product, contact an
authorized Nautilus Fitness Retailer. You may also contact a
Nautilus company representative at 800-864-1270 to help you
locate a dealer in your area.
How State Law Applies
This warranty gives you specific legal rights, and you may also
have other rights which vary from state to state.
Some states do not allow the exclusion or limitation of incidental or consequential damages, so the above limitation or
exclusion may not apply to you.
Nautilus NS75X
15
IMPORTANT CONTACT NUMBERS
If you need assistance, please have both the serial number of your machine and the date of purchase available when you
contact the appropriate Nautilus office listed below.
WORLDWIDE CUSTOMER SERVICE
INTERNATIONAL CUSTOMER SERVICE
• NORTH AMERICA OFFICE
Nautilus, Inc.
World Headquarters
16400 S.E. Nautilus Drive
Vancouver, Washington, USA 98683
Phone: 800-NAUTILUS (628-8458)
Fax: 800-686-6466
e-mail: [email protected]
• INTERNATIONAL OFFICE
Nautilus International S.A.
Rue Jean Prouvé 6
1762 Givisiez / Switzerland
Tel: +41-26-460-77-77
Fax: +41-26-460-77-70
E-mail: [email protected]
• NAUTILUS INNOVATION CENTER
Nautilus, Inc.
1886 Prairie Way
Louisville, Colorado, USA 80027
Phone: 800-864-1270
Fax: 800-898-9410
INTERNATIONAL OFFICES:
• CORPORATE HEADQUARTERS
Nautilus, Inc.
World Headquarters
16400 S.E. Nautilus Drive
Vancouver, Washington, USA 98683
Phone: 800-NAUTILUS
• GERMANY and AUSTRIA OFFICE
Nautilus GmbH
Tel: +49 2203/20 20-0
Fax: +49 2203/20 20-45 45
• SWITZERLAND OFFICE
Nautilus Switzerland S.A.
Tel: +41-26-460-77-66
Fax: +41-26-460-77-60
• ITALY OFFICE
Nautilus Italy s.r.l.
Tel: +39-051-664-6201
Fax: +39-051-664-7461
• UNITED KINGDOM OFFICE
Nautilus UK Ltd.
Tel: +44-1908-267-345
Fax: +44-1908-267-346
• CHINA OFFICE
Nautilus Representative Office
Tel: +86-21-523-707-00
Fax: +86-21-523-707-09
16
Be Strong.™
For more information about our Nautilus NS75X Leg Press or other Nautilus ®
equipment for your home, visit www.Nautilus.com.
© 2006 Nautilus, Inc. All rights reserved. Nautilus, the Nautilus logo, My Nautilus, Heart Strong, Changing the Game in Health and Fitness, REACT, ROC, Remote Operation Control, SuperSoft, Hyperdrive, Be Strong
are either registered trademarks or trademarks of Nautilus, Inc.
Nautilus, Inc. World Headquarters, 16400 SE Nautilus Drive, Vancouver, Washington, USA 98683, 1-800-628-8458, www.Nautilus.com.
Nautilus NS75X
17