1
IMPORTANT SAFETY
INSTRUCTIONS!
as a bookcase or rack unless proper ventilation is
provided or the manufacturer’s instructions have
been adhered to.
CAUTION: RISK OF ELECTRIC
SHOCK! DO NOT OPEN!
8. Heat – This product should be situated away
from heat sources such as radiators, heat registers, stoves, or other products (including amplifiers) that produce heat.
CAUTION! To reduce the risk of electric shock
and fire, do not remove the cover or back plate of
the device enclosure. There are no user serviceable parts inside. Refer servicing to a Klipsch
authorized service center.
CAUTION! The international symbol of a lightning
bolt inside a triangle is intended to alert the user
to uninsulated "dangerous voltage" within the
device enclosure. The international symbol of an
exclamation point inside a triangle is intended to
alert the user to the presence of important operating, maintenance and servicing information in
the manual accompanying the device.
WARNING! To reduce the risk of fire or electrical
shock, do not expose this equipment to rain or
moisture.
1. Read Instructions – All safety and operating
instructions should be read before operating the
device.
2. Retain Instructions – The safety and operating
instructions should be retained for future reference.
3. Heed Warnings – All warnings on the device
and in the operating instructions should be
adhered to.
4. Follow Instructions – All operating and safety
instructions should be followed.
5. Attachments – Do not use attachments not recommended by the product manufacturer as they
may cause hazards.
6. Water and Moisture – Do not use this product
near water (for example, near a bath tub, wash
bowl, kitchen sink, or laundry tub; in a wet basement; or near a swimming pool; and the like).
7. Ventilation – Slots and openings in the cabinet
are provided for ventilation and to ensure reliable
operation of the product and to protect it from
overheating, and these openings must not be
blocked or covered. The openings should never
be blocked by placing the product on a bed,
sofa, rug, or other similar surface. This product
should not be placed in a built-in installation such
9. Power Sources – This product should be operated only from the type of power source indicated
on the marking label. If you are not sure of the
type of power supply in your home, consult with
your product dealer or the local power company.
For products intended to operate from battery
power, or other sources, refer to the operating
instructions.
10. Polarization – This product may be equipped
with a polarized alternating-current line plug (a
plug having one blade wider than the other). This
plug will fit into the power outlet only one way.
This is a safety feature. If you are unable to insert
the plug fully into the outlet, try reversing the plug.
If the plug should stilll fail to fit, contact your electrician to replace your obsolete outlet. Do not
defeat the safety purpose of the polarized plug.
11. Power-Cord Protection – Power-supply cords
should be routed so that they are not likely to be
walked on or pinched by items placed upon or
against them, paying particular attention to cords
at plugs, convenience receptacles, and the point
where they exit from the product.
12. Overloading – Do not overload wall outlets,
extension cords, or integral convenience receptacles as this can result in a risk of fire or electrical
shock.
13. Lightning and Periods of Non-Use – For
added protection for this product during a lightning storm, or when it is left unattended and
unused for long periods of time, unplug it from
the wall outlet and disconnect the antenna or
cable system. This will prevent damage to the
product due to lightning and powerline surges.
14. Cleaning – Unplug this product from the wall
outlet before cleaning. Do not use liquid cleaners or
aerosol cleaners. Use a damp cloth for cleaning.
15. Object and Liquid Entry – Never push objects
of any kind into this product through openings as
they may touch dangerous voltage points or shortout parts that could result in a fire or electric shock.
Never spill liquid of any kind on the product.
16. Damage Requiring Service – Unplug this
product from the wall outlet and refer servicing to
qualified service personnel under the following
conditions:
a) When the power-supply cord or plug
is damaged,
b) If liquid has been spilled, or objects
have fallen into the product,
c) If the product has been exposed to
rain or water,
d) If the product does not operate normally
by following the operating instructions.
Adjust only those controls that are
covered by the operating instructions as
an improper adjustment of other controls
may result in damage and often will
require extensive work by a qualified
technician to restore the product to its
normal operation,
e) If the product has been dropped or
damaged in any way, and
f) When the product exhibits a distinct
change in performance – this indicates a
need for service.
17. Replacement parts – When replacement
parts are required, be sure the service technician
has used replacement parts specified by the manufacturer or have the same characteristics as the
original parts. Unauthorized substitutions may
result in fire, electric shock, or other hazards.
18. Safety Check – Upon completion of any service or repairs to this product, ask the service technician to perform safety checks to determine that
the product is in proper operating condition.
19. Servicing – Do not attempt to service this
product yourself as opening or removing covers
may expose you to dangerous voltage or other
hazards. Refer all servicing to qualified service
personnel.
If this unit is purchased outside of the U.S., please
contact your local dealer or distributor for service
center information. If purchased inside the U.S.
and dealer service is not available, contact
Klipsch Customer Service for a return authorization (RA) number before shipping. For further
service information, contact:
KLIPSCH CUSTOMER SERVICE
3502 WOODVIEW TRACE, SUITE 200
INDIANAPOLIS, IN 46268-1104
1-888-554-5665
WWW.KLIPSCH.COM
Welcome to the Klipsch ProMedia ®
SWS subwoofer system.
Your SWS subwoofer will add a new
dimension to your enjoyment of your
multimedia sound system. We have
designed the SWS subwoofers to work
with almost any type of speaker system, from stereo to 5.1 surround. In
this manual, we will explain the three
basic connection scenarios for your
SWS subwoofer, based on the type of
system you will be using it with, and
how to operate it in each of them.
IMPORTANT NOTE:
Before You Begin!
Do not plug in the SWS’s power cor d
until all other wiring is completed.
Make sure that all other parts of the
system, including the computer, are
turned off or disconnected from power
while you are installing the SWS. Be
especially careful not to connect or disconnect any signal cables while power
is applied. Failure to observe this caution may result in loud hums, buzzes,
or pops that will at the very least be
startling and annoying and that in the
extreme may damage your speakers.
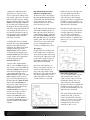
FIGURE 1
Signal Connections
The Klipsch ProMedia SWS subwoofer
can be used with any ProMedia® or
multimedia speaker system. It can also
be used to supplement the bass output
from a TV set or home audio system
that has appropriate line-level output
jacks, although the signal connections
are different. Connections are also different when the SWS is used with
Klipsch ProMedia speaker systems that
have the SWS-Link subwoofer output
jacks. Each type of signal connection is
described and diagramed separately
later, followed by directions on connecting the volume-control module,
attaching multiple SWS subwoofers,
and placement and setup.
FIGURE 2
SETUP
Multimedia Speaker System
(Figs. 1 & 2)
The SWS subwoofer allows pass
through connection of as many as six
channels from your computer’s sound
card to your multimedia speaker system, using standard stereo minijack
connectors. The subwoofer picks up
and reproduces low frequencies from
the signals on all these channels as
they pass through it on the way to the
main speaker system.
On the subwoofer’s back panel are
three input/output minijack pairs: one
green pair for left and right front channels (FRONT L/R) , a second black
pair for left and right surround channels (REAR L/R), and a third orange
pair for center channel and subwoofer
(CENTER/SUB). If you have a twospeaker system, you will use only the
first pair. If you have a three-piece
speaker system, you will use the first
pair, and if you have a 4.1 system,
you will use the second pair as well.
If you have a 5.1-channel speaker
system, you will use all three pairs.
1. Unplug your multimedia speaker
system from your computer’s sound
card or sound outputs, making careful
note of which output jack is associated
with each speaker connection. Usually
the plugs and jacks will be color-coded
GREEN for front left/right and BLACK
for surrounds (rear), with the front jack
directly above the surround jack on the
back of the sound card. Placement and
color coding of the jack used for center/subwoofer (center/bass) output, if
any, varies from card to card; Klipsch
uses ORANGE miniplugs and minijacks for this connection.
2. Plug the cables from your speaker
system into the corresponding OUTPUT
minijacks on the SWS subwoofer’s
back panel. The cable for the front left
and right speakers plugs into the
GREEN OUTPUT jack. The cable for
surround speakers (if any) plugs into
the BLACK OUTPUT jack. The cable for
a center speaker and a separate bass
module (if any) plugs into the
ORANGE OUTPUT jack.
3. Use the cables supplied with the
SWS to connect its INPUT minijacks to
your computer’s sound card. Attach the
cable with a GREEN miniplug at each
end to the front left/right sound card
output and the SWS subwoofer’s
FRONT L/R INPUT. Plug the cable with
BLACK miniplugs into the surround
(rear) sound card output (if any) and
the SWS subwoofer’s REAR L/R INPUT.
Plug the cable with ORANGE miniplugs into the center/ subwoofer (center/bass) sound card output (if any)
and the SWS subwoofer’s
CENTER/SUB INPUT. Your input connections to and output connections
from the SWS should match. For
example, if the REAR L/R output is
connected, so should the REAR L/R
input. But if the REAR L/R output is not
connected, neither should the REAR
L/R input.
Klipsch ProMedia Speaker System
with Subwoofer Outputs (Fig. 2)
The directions in this section apply to
Klipsch ProMedia multimedia speaker
systems which have the SWS-link subwoofer output jacks. For earlier
ProMedia models, follow the instructions in the previous section.
black) inner ring, the other with a red
inner ring. (RCA jacks with yellow
inner rings are for video.) Use an
audio interconnect cable with RCA
plugs at each end (one is supplied with
the SWS) to connect one of these output jacks to the RCA INPUT jack on the
SWS subwoofer’s back panel.
On the SWS subwoofer’s back panel is
an RCA (phono) INPUT jack. Use an
RCA audio interconnect cable (one is
supplied with the SWS) to connect this
input to the RCA SUBWOOFER OUTPUT (SWS-link) jack on your ProMedia
speaker system. This is the only signal
connection you need to make unless
you are using multiple SWS subwoofers (see “Multiple Subwoofers”).
Even if the TV’s audio output is stereo,
use only one of the two jacks; this will
not impair performance. If the TV has
one set of audio outputs labeled
"Fixed" or "Fixed Level" and another
labeled "Variable" or "Variable Level,"
make sure you use one of the variablelevel jacks.
TV Set (Fig. 3)
An SWS subwoofer can add a solid
bass foundation to the sound from a
TV set’s built-in speakers, if the TV has
a line-level audio output jack. You will
need to make a single connection to
the RCA (phono) INPUT jack on the
SWS subwoofer’s back panel.
Most TV sets sold today have one
(mono) or two (stereo) audio line output jacks on their back panels. A
mono audio output will be a single
RCA (phono) jack, usually with a black
inner ring for identification. A stereo
audio output will be two RCA jacks,
one with a white (or occasionally
FIGURE 4
Home Audio System (Fig. 4)
You can connect the SWS to any home
audio system that has a subwoofer
output or preamp outputs for its front
left and right channels. Just use an
audio interconnect cable with RCA
plugs at each end (one is supplied with
the SWS) to connect one of these output jacks to the RCA INPUT jack on the
SWS subwoofer’s back panel.
If the system has both subwoofer and
preamp output jacks, use the subwoofer output. And if the subwoofer
output is on an A/V receiver or amplifier, make sure you go into its bassmanagement setup menu and set
Subwoofer to "On" or "Yes."
FIGURE 3
Caution: In actual use, stacking more than
three units high is not recommended.
SWS
P ro M e d i a ® S u b w o o f e r S y s t e m
Volume Control Connection
(Fig. 5)
The SWS comes with an
external remote volumecontrol module for
adjusting subwoofer level.
You can place it wherever is
convenient. Just run the cable from it
back to the SWS and plug it into the
back-panel minijack labeled VOLUME.
In the passthrough configuration used
with most multimedia speaker systems,
the volume controls on the SWS and
your main speakers are independent.
That is, changing the volume on one
does not affect the volume on the
other. So if you change the volume set ting on the main speakers, you must
readjust the SWS volume control as
well in order to maintain the same
tonal balance. For this reason, it is
usually more convenient to use the
SWS volume control only to adjust the
balance between it and the main
speakers and not to use the volume
control on the main speakers at all
once you have completed initial setup.
Instead, use the software volume control in your computer’s operating system as the master volume control.
Figure 5
When the SWS is connected to a
Klipsch ProMedia speaker with the
SWS link output jack, to a TV set with
variable-level audio output jacks, or to
a home audio system, the volume-control module is used only to adjust the
balance of bass from the SWS to higher sounds from the other speakers (see
“Placement and Setup”). The volume
control on your ProMedia speaker system, TV set, or audio system will function as a master volume control for the
entire system.
Multiple Subwoofers
It is easy to daisy-chain multiple SWS
subwoofers for higher performance
and output capability, using the SWSlink, loop-through RCA input and output jacks on the back of each SWS.
Just connect the included audio interconnect cable with RCA (phono) plugs
on each end from the RCA OUTPUT
jack on the back of the first SWS to
the RCA INPUT jack on the back of the
second. To add another, connect the
OUTPUT on the second subwoofer to
the INPUT on the third, and so on. The
volume-control module connected to
the first SWS in the chain adjusts the
level for all.
Placement and Setup
Because the SWS reproduces only very
low frequencies, you can place it
almost anywhere with good results. In
most cases, however, you will get best
performance with it placed in a corner.
If that’s not practical, try to start out
with it against a wall, since proximity
to room boundaries strengthens lowfrequency output. Bass response will
vary according to the position of a
subwoofer in the room, so you may
want to experiment with different
placements until you get the result you
find most pleasing.
Once you have completed all signal
connections and chosen an initial location for the SWS, you’re ready to plug
it into a wall outlet and restore power
to the rest of the system. Then you can
make your final adjustments.
Power Switch Options (Fig.5)
On the SWS subwoofer’s back panel is
a power switch with three positions:
OFF, ON, and AUTO-ON. If you select
AUTO-ON, the SWS will turn itself on
when it detects an audio signal at one
of its inputs and off after a period has
elapsed with no input signal. You
probably will want to leave the switch
set to AUTO-ON most of the time.
Crossover-Frequency and
Level Adjustment (Fig.5)
On the back of SWS is a switch
labeled FREQUENCY, which adjusts
the crossover frequency between 60
and 90 Hz. Only signals below the
selected frequency will be reproduced
by the SWS. You will need to adjust
the FREQUENCY control and the SWS
volume control to achieve a pleasing
balance of bass to higher sounds.
Phase Switch 0/180 (Fig.5)
This control is used to acoustically
match the subwoofer’s output to your
main speakers. You want to select one
of the two positions, either 0 or 108,
in which your sub has more output at
your listening position.
You’re done! Enjoy your new Klipsch
ProMedia SWS subwoofer.
SWS
P ro M e d i a ® S u b wo o f e r S y s t e m
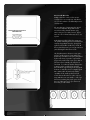
More Fun with More Subs
Multiple subwoofers can be used to increase
sound pressure over a single unit, and efficient
use of room boundaries can additionally increase
sound pressure.
Like any other type of engineering, the art and
science of loudspeaker design often revolves
around overcoming obstacles thrown up by
nature. Every once in a while, however, physics
turns out to be our friend. Subwoofers are a case
in point.
FIGURE 1
At the frequencies where subwoofers operate, you
can get fairly astonishing increases in maximum bass
output by using multiple subwoofers, placing them
against room boundaries (walls, floor), or both. At
the very lowest frequencies, you even get some boost
just from having the subwoofer in a room.
This last phenomenon is known as "room gain,"
and you actually get more of it in small rooms
than in large ones. Below a frequency determined
by the room volume, a speaker’s output will be
progressively reinforced at a rate close to that at
which its response naturally rolls off below its
lower limit. So a subwoofer that has flat response
to 30 Hz outdoors would hold up strongly to
below 20 Hz in a typical living room. In a typical
bedroom or small office, the boost might begin at
40 or 50 Hz, which dovetails nicely with the
capabilities of the smaller speakers and subwoofers that would tend to be used in such settings. Make the room even smaller — well, if you
have been wondering how people get so much
bass out of their cars, here is your answer! A
freer lunch you will not find.
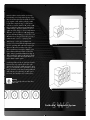
FIGURE 2
Controls all subs downstream 444444
Room boundaries work a similar sort of magic,
but uniformly over a fairly wide frequency range.
Move dual subwoofers from the middle of a room
to up against a wall, and they will play 12-dB
louder than a single sub (Fig. 1). Slide the two
subs inot a corner fo another 6-dB, yields +18dB
(Fig. 2). What does that mean? A 1-dB (decibel)
volume change is about the smallest we can recognize as a level change. To hear a really obvious
difference, you need about a 3-dB change. And
to get a subjective doubling you need about a 10dB level boost. So the gain achieved by moving a
subwoofer into a corner is a pretty big deal.
Which brings us to the glory of multiple subwoofers. Put a second subwoofer right next to your
first one, operating at the same level, and you get
about a 6-dB increase in total acoustic output.
That’s equivalent to increasing the amplifier power
by four times! Double the number of subwoofers
again, and you get another 6-dB increase (Fig. 3).
That’s equivalent to another quadrupling of amplifier power, or sixteen times the original. And so on.
It’s the ultimate scalable system.
FIGURE 3
Combining all these tricks can yield quite formidable bass from very compact subwoofers, right
down to the very lowest audible frequencies. Over
time, you can build the sonic equivalent of a much
larger subwoofer just by daisy-chaining additional
SWS subs into your system (Fig. 4). Not quite a
free lunch, but certainly a very economical one.
Warning
Do not vertically stack more than three
SWS units!
FIGURE 4
SWS
P ro M e d i a ® S u bw o o f e r S y s t em
WA R R A N T Y
U.S. AND CANADA
KLIPSCH, LLC ("KLIPSCH") warrants
this product to be free from defects in
materials and workmanship (subject to
the terms set forth below) for a period
of one (1) year from the date of purchase. During the warranty period,
KLIPSCH will repair or replace (at
KLIPSCH's option) this product or any
defective parts. Proof of purchase in
the form of a bill of sale or receipted
invoice, which is evidence that this
product is within the warranty period,
must be presented or included to
obtain warranty service.
This warranty does not cover damage
due to misuse, abuse, negligence, acts
of God, accident, commercial use or
modification of, or to any part of this
product. This warranty does not cover
damage due to improper operation,
maintenance or installation, or
attempted repair by anyone other than
KLIPSCH or someone authorized by
KLIPSCH to do warranty work. Any
unauthorized repairs will void this
warranty. This warranty does not cover
product sold AS IS or WITH ALL
FAULTS. This warranty is invalid if the
factory applied serial number or date
stamp has been altered or removed
from this product.
This Warranty is only valid for the
original purchaser and will automati cally terminate prior to expiration
if this product is sold or otherwise
transfer red to another party .
REPAIRS OR REPLACEMENTS AS PROVIDED UNDER THIS WARRANTY ARE
THE EXCLUSIVE REMEDY OF THE
CONSUMER. KLIPSCH SHALL NOT BE
LIABLE FOR ANY INCIDENTAL OR
CONSEQUENTIAL DAMAGES FOR
BREACH OF ANY EXPRESS OR
IMPLIED WARRANTY ON THIS
PRODUCT. EXCEPT TO THE EXTENT
PROHIBITED BY LAW, THIS WARRANTY IS EXCLUSIVE AND IN LIEU OF ALL
OTHER EXPRESS AND IMPLIED WARRANTIES WHATSOEVER, INCLUDING
BUT NOT LIMITED TO, THE WARRANTY OF MERCHANTABILITY AND FITNESS FOR A PRACTICAL PURPOSE.
Some states do not allow the exclusion
or limitation of incidental or consequential damages or implied warranties so the above exclusions may
not apply to every customer. This warranty gives you specific legal rights,
and you may have other rights which
vary from State to State.
TO OBTAIN WARRANTY SERVICE,
PLEASE FOLLOW THESE DIRECTIONS:
1. If you purchased this product from a
retail store, please return this product to such store in its original packaging along with proof of purchase.
2. If you purchased this product from a
computer manufacturer, please contact that manufacturer.
3. For purchases made through
www.klipsch.com, please call
KLIPSCH Customer Service at
1-888-554-5665. Product may
only be returned to KLIPSCH after a
Return Authorization number has
been obtained from KLIPSCH.
Returned product must be shipped,
freight prepaid to KLIPSCH in either its
original packaging or packaging
affording an equal degree of protection, along with proof of purchase.
OUTSIDE THE U.S. AND CANADA
The warranty on this product if it is
sold to a consumer outside of the
United States or Canada shall comply
with applicable law and shall be the
sole responsibility of the distributor that
supplied this product. To obtain any
applicable warranty service, please
contact the dealer from which you purchased this product, or the distributor
that supplied this product.
SWS
P ro M e d i a ® S u bw o o f e r S y s t e m
CUT ALONG DOTTED LINE AND MAIL
N O W REGISTER ONLINE AT WWW.KLIPSCH.COM!
For multiple speaker purchases, please fill out only one warranty card.
Name:
Street Address:
City/State/Zip:
Home Phone:
Work Phone:
E-mail Address:
Would you like to receive the latest product updates and news via e-mail?
❑ Yes ❑ No
Model: ProMedia SWS
®
Where did you purchase your Klipsch products from?
❑ Retail Store ❑ On-line at www.klipsch.com ❑ Computer Manufacturer
How did you hear about Klipsch?
❑ Audio/Home Theater Magazine ❑ Gaming Magazine ❑ Computer Magazine ❑ Radio
❑ Newspaper ❑ Television ❑ Trade Show ❑ Friend ❑ Retail Dealer ❑ Direct Mail
Have you purchased Klipsch products before?
❑ Yes ❑ No
If yes, what products?
Product Name(s):
When do you hope to purchase additional loudspeakers?
❑ 6 mos. – 1 yr. ❑ 1–2 yrs.
How likely are you to consider Klipsch products for your upcoming purchases?
❑ Very likely ❑ Somewhat likely ❑ Doubtful
If doubtful, why?
❑ Don’t carry product I’m looking for ❑ Too expensive ❑ Klipsch dealer too far away ❑ Other
Please tell us about you!
❑ Married ❑ Single ❑ Student ❑ Male ❑ Female
Age:
❑ Under 15 ❑ 15-17 ❑ 18-24 ❑ 25-35 ❑ 36-45 ❑ 46-55 ❑ 55-64 ❑ 65+
Annual Household Income:
❑ Under $25,000 ❑ $25-35,000 ❑ $35-50,000 ❑ $50-75,000 ❑ $75-100,000 ❑ $100,000+
SWS
P ro M e d i a ® S u b w o o f e r Sy s t e m
Make sure you return your warranty
card so that we may keep you up-todate on new Klipsch products and pr omotions. As always, if you have any
questions, contact your local authorized
Klipsch dealer or Klipsch Customer
Service at 1-888-554-5665
FOR YOUR RECORDS:
Model: ProMedia ® SWS
Date Purchased:
3502 WOODVIEW TRACE, SUITE 200
INDIANAPOLIS, IN 46268-1104
1. 800 . KLIPSCH
WWW.KLIPSCH.COM
COPYRIGHT ©2002 KLIPSCH AUDIO TECHNOLOGIES