1
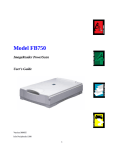
Model FB935 ImageReader ScanPro Color Flatbed Scanner User's Manual Version 1.0 Info Peripherals, Inc. 1997 Trademarks Microsoft is a U.S. registered trademark of Microsoft Corporation. Windows and MS-DOS are trademarks of Microsoft Corporation. IBM, PC, AT, XT are registered trademarks of International Business Machines Corp. Other brands and product names herein are trademarks or registered trademarks of their respective holders. Copyright All rights reserved. No part of this publication may be reproduced, transmitted, transcribed, stored in a retrieval system, or translated into any language or computer language, in any form or by any means, electronic, mechanical, magnetic, optical, chemical, manual, or otherwise, without the prior written permission of Info Peripherals. Material scanned by this product may be protected by governmental laws and other regulations, such as copyright laws, the customer is solely responsible for complying with all such laws and regulations. Warranty The information contained in this document is subject to change without notice. Info Peripherals makes no warranty of any kind with regard to this material, including, but not limited to, the implied warranties of fitness for a particular purpose. Info Peripherals shall not be liable for errors contained herein or for incidental or consequential damages in connection with the furnishing, performance, or use of this material. i FCC Radio Frequency Interference Statement This equipment has been tested and found to comply with the limits for a class B digital device, pursuant to Part 15 of the FCC rules. These limits are designed to provide reasonable protection against harmful interference in a residential installation. This equipment generates, uses, and can radiate radio frequency energy and, if not installed and used in accordance with the instruction manual, may cause harmful interference to radio communication. However, there is no guarantee that interference will not occur in a particular installation. If this equipment does cause harmful interference to radio or television reception, which can be determined by turning the equipment off and on, the user is encouraged to try to correct the interference by one or more of the following measures: * Reorient or relocate the receiving antenna. * Increase the separation between the equipment and receiver. * Connect the equipment into an outlet on a circuit different from that to which the receiver is connected. * Consult the dealer or an experienced radio/TV technician for help. CAUTION: Any changes or modifications not expressly approved by the manufacture of this device could void the user's authority to operate the equipment. ii Table of Contents 1. INTRODUCTION...........................................................1-1 2. SCANNER INSTALLATION........................................2-1 2.1 PRECAUTIONS 2.2 CONNECTING THE CABLE 2.3 AUTO INSTALLATION 2-1 2-2 2-3 3. USING YOUR SCANNER.............................................3-1 3.1 TWAIN SETTINGS.............................................3-1 3.2 SCANNER OPERATION AND DOCUMENT PRINTING .........................................................3-5 3.3 DOCUMENT PLACEMENT..............................3-6 3.4 USING TOUCHSCAN........................................3-8 3.5 PRINTING........................................................3-13 4. MAINTENANCE............................................................4-1 APPENDIX A Glossary of Terms......................................................A-1 APPENDIX B TROUBLESHOOTING...........................................B-1 B.1 QUESTIONS AND ANSWERS.......................B-1 B-2 SPECIFICATIONS............................................B-5 iii Chapter 1 1-1 Introduction Welcome Thank you for purchasing an Info ImageReader Scanner. This product is the result of our efforts to develop high technology computer peripherals that are easy to use, affordably priced, and that enhance your computing experience. The FB9 is designed in an exact A4 size and less weight in an aim to save the most space possible while maintaining the highest quality scanning results as well as quality optical resolution at 300 x 600 dpi. Using this manual This manual includes complete instructions for scanner installation, use, and maintenance. Note that “use,” in this context, refers to scanner operation independent of the task performed with the application software. This guide is organized in a “do as you read” format. For best results, perform the tasks as they are presented. This manual assumes that you have a basic understanding of the DOS and Windows operating system. As a convention, this guide presents all references to guide names or sections in italics, and commands you must type at a command line are presented in a different typeface. Assistance If you experience difficulties and cannot find solutions within this guide, please contact Info’s Technical Support Department at (800) 313-3300, Monday through Friday, between 8:00 AM and 4:30 PM, Pacific time. If you wish, you may fax questions to (408) 538-2577, or email questions to [email protected]. Provide a fax number or email 1-1 address for return contact. We maintain a BBS at (408) 5382580 that contains the latest updates to our software, as well as a web site at www.infoconnection.com, and fax on demand system at (408) 538-2585. What is TWAIN? TWAIN is the interface that links the scanner with scanning software applications. TWAIN is an industry standard that enables you to use the ImageReader with any TWAIN-compliant software application. With the introduction of Windows 95, the TWAIN specification has been overhauled to take advantage of the 32-bit architecture. Your scanner installation software contains two TWAIN sources — one for using your scanner with 16-bit applications (i.e. InfoCenter Lite) and one for using your scanner with 32bit applications (i.e. ImageDock). Use the following as a guide to select the appropriate source. 16-bit applications are legacy Windows 3.x programs that you are running under Windows 95. 32-bit applications are programs specifically designed for Windows 95, to take advantage of performance enhancements provided by the new architecture. Please Note: Windows 3.1x does not support 32-bit applications, therefore the 16-bit scanning source should always be selected when running Windows 3.1x. You may experience scanning problems if you do not use the appropriate source. A note about application software The scanner hardware by itself is not very useful. It takes a combination of the scanner hardware and application software to perform any task. Before scanning, you need to choose the appropriate application(s) to use for the task at hand. Please read this section to gain an understanding of the types of scanning software there are. 1-2 Scanning software generally falls into two groups, Graphics (image editing), or OCR (Optical Character Recognition). Each type has specific features designed to address the technical challenges faced in the scanning of graphics or of text. Graphics software provides the user with image editing tools for performing extensive modifications to art, photographs, or other continuous tone images. While having the ability to scan text, unlike OCR software it is not designed to specifically identify individual characters. Any image scanned using a graphics program can only be saved in a graphics file format (i.e. Tiff or Gif). It cannot be saved as an editable text file. Your system software CD includes iPhoto Express image editing software to facilitate your image editing requirements. OCR: Software in this category is designed to recognize alphanumeric characters in preparation for export to word processing and desktop publishing applications. In other terms, it creates text files. OCR software will not provide image editing capabilities. If there is no intention of editing a given piece of text (with or without graphics), it may be simpler to scan and save it as a graphic. OCR is one of many scanning control features included in the InfoCenter application software included on your system software CD. Additional types of applications are available that offer solutions for special or unique tasks. These include document storage, form scanning, fax utilities, copy utilities, custom screen saver creation, photo album creation, and so on. If applications are intended to link directly to the scanning device, look for the TWAIN-compliant specification. If compliant, you may use these application to scan with your ImageReader scanner. 1-3 1-2 System Requirements System requirements are largely dependent on the “work” performed. By work, we are referring to the task or operation performed using the scanner in conjunction with application software. Because scanners are capable of inputting large amounts of data in relatively short periods of time, they commonly push computer systems to the limits of their capabilities. Before beginning any scanning task or operation, carefully consider your system’s processing capabilities, especially processor speed, RAM, and available hard disk space. OCR processes, fax operations, and the processing of simple black & white graphics are least demanding. High resolution scanning of large images in full color creates an extreme demand for processor time and memory. When you are scanning with the TWAIN interface, the number labeled image size (calculated in bytes) provides the working file size that is the result of the selected scanning mode, resolution, and image size. Take careful note of this information. Minimum and recommended system requirements are: * IBM compatible PC 486, Pentium or later; * Microsoft Windows 3.1,Windows 95; * One printer port available (enhanced parallel port required); * 20 Megabytes of available hard disk space for installation; * 8 Megabytes of RAM (16 Megabytes or higher recommended); * A video graphics array (VGA) monitor; * A Microsoft Windows-compatible pointing device (e.g., mouse); * A CD ROM drive. 1-4 1-3 Scanner Contents Please check that your scanner package contains all the following items. If there are any missing or damaged parts, please contact your nearest dealer immediately for replacement or repair. 1. Power Adapter 2. Cushion 3. Manual, Driver Kit, CD 4. D25P Cable, etc 5. Scanner 6. Carton 1-5 Chapter 2 Scanner Installation 2.1 Precautions • Keep the scanner out of direct sunlight. Direct exposure to the sun or excessive heat may cause damage to the unit. • Do not install the scanner in a humid or dusty place. • Be sure to use the proper AC power source. • Place the scanner securely on an even, flat surface. Tilted or uneven surfaces may cause mechanical or paper-feeding problems. • Retain the scanner box and packing materials for shipping purposes. 2-1 2.2 Connecting the Cable Connect the power cable and signal cable as shown below. Figure 2-2 ImageReader ScanPro scanner cable connection 1. Scanner Parallel Port 2-2 2. Power Supply 3. Scanner Interface Cable 5. Your Printer Cable 4. PC 2.3 Auto-Installation Program The FB9 scanner software installation is automatic and will detect if you are running a Win 95 or Win 3.1 platform and install one of the included software programs accordingly. Installation procedures of FB9 Scanner driver with Info Peripherals Auto-installation Program are as follows: 1. Insert the System Software CD-ROM into your computer’s CD-ROM drive. The installation should begin automatically, if not: Win 95 users select Start > Run Win 3.1x users select File > Run 2. At the Run command Line type D:\setup.exe (fig 22) substitute appropriate drive letter if your CDROM drive is designated another letter. Tip: Windows 95 users- if unsure about your CD-ROM drive letter designation, select My Computer from your desktop to view your computer’s drives. 3. The installation should now be running. When finished, restart your computer. 2-3 Fig. 2.1 Fig. 2.2 2-4 Chapter 3 Using Your Scanner When using your ImageReader ScanPro scanner with any application program, all scans will be performed using the TWAIN interface (except when using the Touchscan - two button feature). The TWAIN interface is a screen that allows you to tell the scanner what settings or scanning modes you would like to use for each scan. The following chapter describes each of the TWAIN scanning options available when using your ImageReader ScanPro. FB9 TWAIN user interface: 16 15 14 13 1 12 2 11 3 10 4 9 5 6 7 8 Figure 3.1 TWAIN interface 3-1 3.1 TWAIN Settings The FB9 TWAIN interface allows you to make numerous adjustments to the scan settings and then preview the scanned image before performing your final scan. Please note: Resolution settings are only applied to final scan, preview scans are performed at a default resolution setting of 72 dots per inch (dpi). The following section describes the options available in the TWAIN interface. Please refer to figure 4.1 when reading these descriptions. 1. Basic scan settings Prompts basic scan setting dialog box in which user may select to Flip the scan, invert it’s colors or make adjustments to the scan mode and resolution. 2. Brightness/Contrast settings Allows user to adjust the brightness and/or contrast settings of the scan. Reset button allows user to return to the brightness/contrast default settings. 3. Job Manager Allows user to apply different scan settings to seperate - user defined areas of the same image and perform multiple scan jobs of the same image during one scanning job. 4. Shadow/Highlight setting Allows user to adjust the foreground and background information of an image. 5. Resolution setting Allows user to enter desired scanning resolution indicated by the number of dpi (dots (pixels) per square inch) that the FB9 uses for a scan. Generally, denser pixel coverage per square inch (higher resolution) results in sharper images. Please note: Scanning 3-2 resolution has a direct impact on the scanned image resolution settings for your scanning task (refer to the scanning software User Guide for reccommended resolution settings). 6. Preview Performs a “prescan” allowing user to preview scanned image for any neccessary adjustment to scanning size before performing final scan. 7. Scan Performs final scan in which image is captured and transferred from the TWAIN interface to TWAIN compliant application being used. 8. Close Exits the TWAIN interface. 9. About Displays information about the scanner driver in use. 10. Image Information Displays information regarding current previewed image. 11. Auto Settings Defines the default settings for different types of image scanning i.e. color photograph, gray photograph, user defined setting, text document and business card. 12. Gamma Curve Activates the gamma curve dialog box in which the user can adjust the gamma curves. An images gamma setting is defined as the contrast affecting the midlevel grays or midtones of an image. Adjusting the gamma of an image allows you to change brightness values of the middle range of gray tones without dramatically altering the shadows and highlights. 3-3 13. Paper size Allows user to select from a set of predefined paper sizes representing the size of the document to be scanned: 2” x 3”, 3” x 5”, 4” x 6”, maximum size and custom size - in which user can define their own scanning size. 14. Zoom - Out Allows user to zoom out (view larger area) of previewed image. 15. Zoom - in Allows user to zoom in (magnify) a previewed image. Zoom does not effect final scan. 16. Frame Prompts frame dialog box in which user can adjust the scanning size. Tip: smaller scanning size = less scanning time. 3-4 3.2 Scanner Operation & Document Printing Scanning Images from within any Application (TWAIN) 1. Open your TWAIN compliant application and choose Select Source from the File menu. If the Select Source menu options are not available from the File menu, see the user guide of your application to learn how the TWAIN link is used. 2. A dialog box appears containing the different TWAIN sources that you can choose from to bring an image into your application. 3. If you are scanning from a 16-bit application (i.e. InfoCenter Lite or ImagePals GO!) you need to select the 16-bit scanning source - ImageReader ScanPro\16. If scanning from a 32-bit application (i.e. Adobe Photoshop or iPhoto Express) select the 32-bit scanning source - ImageReader ScanPro\32. Check your application manuals if you are unsure whether you are scanning from a 16 or 32 bit application. Please note: The 32-bit scanning source is only available under Windows 95. Windows 3.1 users should always select the 16-bit scanning source. If the wrong source is selected you will receive a TWAIN scanner driver error message. Repeat steps 1-3 and select the correct source. If the problem persists, restart your computer with the correct source selected. 4. If you have previously selected a different source, you will need to select the ImageReader ScanPro source again prior to scanning with the ImageReader ScanPro scanner. 5. Place the image to be scanned face down on the glass (Fig. 3-2). 3-5 3.3 Document Placement As shown in Figure 3-2, place the document on the glass with the text facing away from you. Figure 3-2 Document Placement 1. Document Cover 3. Reference Frame 5. Document Board 2. Document Pad 4. Glass 6. Document 6. From the File menu, select Acquire. 7. FB9 TWAIN user interface will pop up on the screen. Click on the Preview (preview allows your to make adjustments to the scan area prior to final scan) or Scan button to scan the image. 3-6 3-4 Using TouchScan - Two Button Scanning TouchScan is a quick and easy way to scan and Print (Copier Function), scan and Fax and Scan and Email using the two buttons on the front of your scanner. TouchScan is is automatically installed on your system with your System Software CD-ROM installation. How TouchScan Works TouchScan is activated by clicking either of the two buttons on the front of your scanner. Note: Your computer must be on for TouchScan to be activated. The scanner’s Shift button (left button) allows you to cycle through the main screen or any list of options. The scanner’s Enter button (right button) allows you to select an option on the TouchScan screen or from a drop-down list of options. Press enter when the desired option is highlighted. 3-7 TouchScan Options Place Document As Shown (There are no submenu choices) To ensure your image always comes out rightside up and not sideways, be sure to put it into the scanner with the top edge aligned with the front right edge of the scanner (the edge closest to you when you open the cover). Select Document Size Match your scanning area to the size that is the closest to the size of your original. If you choose a smaller size than the original, you will not get a complete scan. • 3" x 5": standard index cards • 4" x 6": large index cards and photos • 5" x 7": photos • Letter, 8 1/2" x 11": standard documents • A4, 8 1/2" x 11 3/4" : A4 documents Select Resolution Match the resolution to your intended destination. • Economic - 150 dpi: Desktop, Mail, Printer • Normal - 300 dpi: Desktop, Mail, Fax, Printer • Fine - 600 dpi: Desktop, Mail, Printer Went printing a scanned image, choose the resolution that most closely matches the resolution of your printer. 3-8 Select Image Mode Match the mode to your intended destination. • Color: Desktop, Mail, Printer • Gray (Grayscale): Desktop, Mail, Fax, Printer • Black & White (LineArt): Desktop, Mail, Fax, Printer If your printer is not a color printer, your color scans will be printed in grayscale. Select Destination Select from one of the following final destinations for your scanned image/text: Desktop When the scan is completed, the image is Interface saved as a Bitmap file (BMP) TouchScan in the TouchScan\Temp folder or directory. The exact path and name of the file is shown on screen after it has been created. To view the file, you can open it in a graphics program that supports Bitmaps, such as Windows Paint or Paintbrush. Mail When the scan is completed, TouchScan will open your email client software (such as MS-Exchange, Eudora, Netscape Mail, etc) and begin a new email message. The image will be attached as a Bitmap file (BMP). Follow your email client’s directions to mail the item. To view the file, after downloading it, the recepiant can open it in a graphics program that supports Bitmaps, such as Windows 3-9 Paint or Paintbrush. Fax When the scan is completed, Tcouchscan will open your faxing software (such as MS-Fax, MSExchange, FaxWorks, etc) with the image setup as the document to be faxed. Follow your fax program’s directions to fax the item. Printer When the scan is completed, the image will be processed by your printer driver and sent to your printer. Note: Higher resolution or color images may take a few moments to process before they begin printing. Ready to Scan Begins the scanning process. The lights on the front of the scanner display the scanning progress. When the scan is completed, TouchScan will process it according to your chosen destination. • Additional Settings Opens the TWAIN interface window so you can make further adjustments to the scan settings: brightness, contrast, scanning area, resolution, etc. Refer to the User’s Guide for these settings. • Default Settings Resets the defaults for the scanner. • Cancel Cancels your current TouchScan settings 3-10 Minimize TouchScan Minimizes the TouchScan window to the task bar. About TouchScan Information sheet including the version number. Exit TouchScan Close the TouchScan window. 3-11 3.5 Printing Connect the printer cable as shown below. 1. Scanner 2. Power Supply 4. PC Parallel port 3. D25P Cable 5. Printer Cable Caution: 1. Be sure to power on the scanner if you want to do pass-through printing. 2. Do not scan and print at the same time. 3. If your PC does not support EPP mode or have passthrough compatibility problem, please contact your authorized local computer dealer or Info Peripherals, Inc. at (800) 313-3300 to order an EPP interface card. 3-12 Chapter 4 4.1 Maintenance Clean the Document Board Glass: As shown in Figure 4-1, wipe the scanner glass with a piece of soft clean cloth to rid the glass of dust or toner particles. 1. Document Board Glass Figure 4-1 Cleaning the document board glass. 3-13 Appendix A Glossary of Terms 16-bit & 32-bit This refers to the operating system or an application written for a specific operating system. Windows 3.x is 16-bit and Windows 95 is 32-bit. Programs that work in both Windows 3.x and Windows 95 are 16-bit (also called Legacy programs). Programs written only for Windows 95 are 32-bit and will not work in Windows 3.x. When a you are choosing a source, if you are using a 16-bit application, you should choose a 16-bit source. If you are using a 32-bit application, you should choose a 32-bit source. 3rd party software can be either 16bit or 32-bit and an appropriate source should be chosen. Application Software Any software that manipulates images or text in some manner. Different scanning software has different functions: some allow you to manipulate and modify images (see Image Editing) and some allow you to convert a scanned document into editable text (see OCR). Some software, such as ImageDock, is more fully featured providing a broader range of uses, such as OCR and document storage, but also has some limited image editing features. Image Editing You can take any image, either scanned or from a file and manipulate the image in a variety of ways. Many image editing software applications are also scanning applications. There is a wealth of 3rd party twain-compliant image editing software: Aobe Photoshop, Print Shop Pro, Corel, Fractal Painter, Paint, Paint Brush, etc. With image editing software, it is possible to save your image in a variety of file formats depending on the software you are using, see Graphics Formats. 4-1 Pixel Represents a single dot of the picture. Pixels are used by the computer to represent image information in digital computer language. TWAIN Refers to an industry standard that has been developed for scanning or other external imaging devices to communicate with the computer. ImageDock and InfoCenter Lite are TWAIN compliant applications. 24-bit color Color images composed of three 8-bit channels: red, green, and blue. With 24-bit color, it is possible to have over 16 million possible color combinations providing for a more photo-realistic image. Also called True Color. 24-bit color has nothing to do with the operating system. 30-bit color Color images composed of three 10-bit channels: red, green, and blue. Over 50 billion color combinations are possible, providing for more vivid color reproductions with subtle gradiations of hue. 30-bit color has nothing to do with the operating system. Brightness The balance of dark and light shades determine the intesity of an image. Contrast The range between the darkest and the lightest shades determine the number of shades in an image. An image with low contrast can look dull and flat. Gamma Changing the gamma allows you to alter the brightness of the middle range tones without affecting the shadows or highlights. A-1 Grayscale An image made up of shades of gray, like a black and white photo. Generally, grayscale is either 4-bit, allowing 16 shades, or 8-bit, allowing 256 shades and providing a more photo-realistic quality. Halftone Halftone images are composed of a pattern of black dots that simulate grayscale, such as many newspaper photos. Hue Hue provides the contrast between colors, what distinguishes one color from antother. Interpolated Resolution The resolution of an image is enhanced by the software of the scanner driver. Invert Reversting the color values in an image. Inverting a color image will yield something that has the appearance of a negative. Inverting a black and white image will reverse the black with the white. Line Art Images that are purely black and white, such as black type writing on white paper or many line drawings. Optical Resolution The true resolution of the scanner determined by its hardware optics. Optical resolution is often enhanced by the scanner driver yielding an interpolated resolution. Saturation The amount of color or intensity in a single hue. Zoom A-2 Changes the view of an image without changing its actual size. Appendix B Troubleshooting If you experience an operational problem, please check the following troubleshooting hints. 6.1 Questions and Answers Question: Why do I receive the error message “Scanner Test Failed” when attempting to scan? The following steps should also be followed if your scanner connection test (described in step 3 of Quick Start Guide) is unsuccesful. Answer 1: Verify that the correct scanning source was selected. Open “Select Source” from the File menu. If you are using a 16 bit application to scan (i.e. InfoCenter Lite) select the 16-bit scanning source (ImageReader ScanPro 16) If you are scanning from a 32-bit application (i.e. ImageDock) select the 32-bit scanning source (ImageReader ScanPro 32). Then attempt to scan - if the problem persists - restart your computer. Please note: The 32-bit source is only available under Windows 95. Windows 3.1 users should always select the 16-bit scanning source. Answer 2: Check that your scanner is connected and tightly screwed in to the computer’s port Answer 3: Check that the AC power cord is connected to the scanner and power outlet. Answer 4: Follow instructions below to adjust your A-3 computer’s BIOS printer port setting to EPP, ECP or SPP (according to what your computer supports) A-4 Changing your BIOS Setting The FB935 - ImageReader ScanPro requires that your computer is a PC System with a 486 or Pentium Processor with PCI slots, it must have a motherboard that supports EPP, ECP or SPP parallel port. EPP is recommended in order to achieve the fastest scans. After installing the scanner, you may need to change Printer Port (LPT type) in your BIOS or CMOS settings to accommodate desired (EPP, ECP or SPP) connection. Please consult your computer’s hardware manual for instructions if you are unsure about how to accomplish this. If your system does not support EPP, SPP or ECP call (800) 777-3208 ext. 2534 to order an EPP interface card. Caution! Changing your BIOS or CMOS settings can render your computer system inoperable. Use caution to ensure that only the Parallel mode is changed. Please consult your computer hardware manual for instructions specific to your system. To Change Your Parallel Port Mode Setting (in most systems): 1. Restart your computer and when in start-up mode press your delete key, this will take you to the BIOS or CMOS menu. 2. locate the Parallel Port option, it will tell you what address the parallel port is set for and the mode of the port. 3. Read your screen for instructions on how to change settings, and change your LPT setting to EPP or ECP. 4. Save changes and exit. Question: Why do my scanning results seem dark? Answer: 1) Modify the Gamma setting to 1.8 for your monitor and, when printing, set Gamma to 2.2 for your printer (refer to your monitor/printer manuals for instructions on performing gamma adjustments). 2) Prior to scanning, increase the Brightness setting of the TWAIN user interface. B-1 Question: The scanning speed of my scanner is much slower than that of those installed at other computers. Can I speed it up? Answer: Set your PC printer port to the EPP mode in your BIOS setup. EPP is the fastest and most recommended mode to use. If you do not have this option, you may need topurchase an EPP Interface card. Call Info Peripherals at (800) 313-3300. Question: How long does it take for the scanner to initialize? Answer: If your printer port supports SPP mode only, it takes about two minutes for the scanner to initialize. If your printer port supports EPP mode, the initialization speed is much faster, about 20 seconds. Printer Questions Question: What is the function of the Pass-Through Port? Answer: The ImageReader ScanPro is conveniently equipped with a pass-through port. This port allows you to connect any other parallel port device such as a printer to the scanner so that they can share the same port from your computer. Question: How do I use the pass-through port? Answer: Connect the printer’s cable to the port labeled Printer on the back of the scanner. Both the scanner and the printer are now sharing the same parallel port and can be used at any time, except in tandem. Question: B-2 Sometimes my pass-through printing does not work at all, why? Answer: Your scanner may be off. When performing pass-through printing, be sure the scanner is on (indicated by the power light on scanner front). Question: After installing Works for Windows, my overall printing speed has slowed dramatically. Why? Answer: Works for Windows adds entries into your win.ini file for the Windows Printing System (WPS). This entry will slow your printing speed considerably. To correct the problem, perform the following adjustments: 1. Edit your win.ini file. From Windows 3.x, click File. Select Run. Type sysedit. Click OK. In Windows 95, click Start, select Run. Type sysedit . Click OK. 2. Close all windows except the C:\windows\win.ini window (title may be different if you have windows on different drive or different directory name. In either case you will see win.ini at the end of it) 3. Click Search then Find. Type in the text: MS Text Converters and click Find. 4. You should see 2 lines, one that starts with MSWorksWin. The line below it starts with Works for Dos 2.0.At the end of both lines delete the entry ,wps. 5. Now click File then Exit. When prompted to save changes, do so. After a restart of your computer, your printing should be back to normal If you are experiencing any printer problems check the following: B-3 1) Check scanner cable connection. Be sure the cable is plugged into the port marked Printer on the back of the scanner 2) Adjust your printer spooler. Occasionally there may be a conflict between ImageReader ScanPro scanner and specific printers. An indication of this occurs when an attempt to print prompts the error message “Printer not found” or “Printer not recognized” (assuming your computer’s BIOS or CMOS is already set to EPP). In this case, you need to adjust your printer spooler to print directly to your printer: To modify the printer spooler: 1. Click on START> SETTINGS> PRINTERS. 2. Right click with your mouse on your default printer, then select Properties from the drop-down menu 3. Click on the Details tab 4. Click on the Spool settings button. 5. In the spool settings window select the option to Print Directly To The Printer. 6. Click on OK then OK once again. 7. If prompted to reboot please do so. If the problem persists, you will need to disable the BiDirectional printing option. To disable the Bi-Directional printing option: The process of disabling the bi-directional printing option is different for individual printers. Please consult your printer manual or contact the printer manufacturer for instructions specific to your printer. Please note: Pass-through printing may pose a problem for some printers. In this case, you may need to add a B-4 B-2. Specifications All specifications are subject to change without notice. Model: FB9 Scanner Type: Optical Resolution: (H*V) Maximum Resolution: Scanning Modes: Flatbed Scanner Up to 300 dpi * 600 dpi 9600 dpi Black & White mode Halftone mode (64-step) Error diffusion 10-bit gray scale 30-bit color Document Size Interface: A4, B5, A5, business card Printer port (supports SPP/EPP for PC) Power Source: 100Vac~240Vac, 50~60Hz, exter nal Power Consumption: 12 watts (12Vdc,1A) Dimensions: (WxDxH) 399 x 260 x 73 (mm) Weight: 2.7kg (5.96lbs) B-5 EC Declaration of Conformity According to EN45014 Manufacturer’s Name: Info Peripherals Model Number : FB9 conforms to the following Product Specifications: Emission: EN 50081-1 (1992) EN 55022 (Class B) (Conducted Radiated) (1994) EN 60555-2 (Harmonics) (1987) EN 60555-3 (Flicker) (1987) Immunity: EN50082-1 (1992) IEC 1000-4-2 (ESD) (1995) IEC 1000-4-3 (RS) (1995) IEC 1000-4-4 (EFT/Burst) (1995) IEC 1000-4-5 (SURGE) (1995) Date: December 1995 B-6