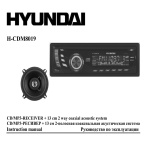
Download Hyundai H-CDM8047 User's Manual
Transcript
H- CDM8047
CD/MP3-RECEIVER
Instruction manual
CD/MP3-
Dear customer!
Thank you for purchasing our product. For safety, it is strongly recommended to read this manual carefully before connecting,
operating and/or adjusting the product and keep the manual for reference in the future.
Table of contents
Table of contents ........................................................................................................................................................................... 2
Important safeguards..................................................................................................................................................................... 3
Installation/ Connections............................................................................................................................................................... 4
Panel controls ............................................................................................................................................................................... 9
General operations ...................................................................................................................................................................... 10
RDS (Radio Data System)........................................................................................................................................................... 14
MP3 playback ............................................................................................................................................................................. 17
USB/SD/MMC MP3 playback .................................................................................................................................................... 21
Anti-theft system ........................................................................................................................................................................ 22
Handling compact discs .............................................................................................................................................................. 23
Cleaning ..................................................................................................................................................................................... 23
Components ................................................................................................................................................................................ 24
Troubleshooting guide................................................................................................................................................................. 25
Specification ............................................................................................................................................................................... 26
2
Important safeguards
Read carefully through this manual to familiarize yourself with this high-quality sound system.
Use only in a 12-volt DC negative-ground electrical system.
Disconnect the vehicle's negative battery terminal while mounting and connecting the unit.
When replacing the fuse, be sure to use one with an identical amperage rating. Using a fuse with a higher amperage rating may
cause serious damage to the unit.
DO NOT attempt to disassemble the unit. Laser beams from the optical pickup are dangerous to the eyes.
Make sure that foreign objects do not get inside the unit; they may cause malfunctions, or create safety hazards such as electrical
shock or laser beam exposure.
If you have parked the car for a long time in hot or cold weather, wait until the temperature in the car becomes normal before
operating the unit.
Keep the volume at a level at which you can hear outside warning sounds (horns sirens, etc.).
DO NOT open covers and do not repair yourself. Consult the dealer or an experienced technician for help.
Make sure you disconnect the power supply and aerial if you will not be using the system for a long period or during a
thunderstorm.
Make sure you disconnect the power supply if the system appears to be working incorrectly, is making an unusual sound, has a
strange smell, has smoke emitting from it or liquids have got inside it. Have a qualified technician check the system.
DO NOT raise the volume level too much, as this will block outside sounds, making driving dangerous.
Stop the car before performing any complicated operation.
3
Installation/ Connections
Attention:
REMOVE THE TRANSPORT CD STOPPER (2 SCREWS)
BEFORE USE.
Din front-mount (method 1)
After inserting the holder into the dashboard, select the
appropriate tab and bend them inwards to secure the holder in place.
Insert fingers into the groove in the front of frame and
remove it.
Insert the levers supplied with the unit to the grooves at
both sides. The unit can be installed or removed from the dashboard.
1.
2.
3.
4.
5.
6.
7.
Dashboard
Nut (5mm)
Spring washer
Screw (5 x 25mm)
Screw
Strap
Plain washer
4
Removing the unit
a. Frame
b. Insert fingers into the groove in the front of frame and pull out to remove the frame.
(When reattaching the frame, point the side with a groove down wards and attach it.)
c. Insert the levers supplied with the unit into the grooves at both sides of the unit as
shown in figure until they click. Pulling the levers makes it possible to remove the
unit from the dashboard.
Din rear-mount (method 2)
Installation using the screw holes at both sides of the unit.
1. Select a position where the screw holes of the main unit are fitted for aligned, and tighten the screws at 2 positions at each sides.
Use either truss screws (5 x 8mm) or flush surface screws (4 x 8mm), depending on the shape of the screw holes in the bracket.
2. Screw.
3. Factory radio mounting bracket.
4. Dashboard or Console.
5. Hook (Remove this parts).
Note: The mounting box, outer trim ring, and the half-sleeve are not used for this method of installation.
5
Detachable control panel
Detaching the control panel
Turn the Power off.
Press the Panel release button.
Remove the control panel.
Attaching the control panel
Insert the right side of the control panel into the main unit.
Note: the control panel must be attached into the T-Joint.
Press the control panel on to the left side of middle of
it until a click sound is heard.
Caution:
DO NOT insert the control panel from the left side. It can damage the control panel.
The control panel can easily be damaged by shocks. After removing it, place it in a protective case and be careful not
to drop it or subject it to strong shocks.
The rear connector that connects the main unit and the control panel is an extremely important part. Be careful not to
damage it by pressing on it with fingernails, pens, screwdrivers, etc.
Note:
If the control panel is dirty, wipe off the dirt with soft, dry cloth only. And use a cotton swab soaked
in isopropyl alcohol to clean the socket on the back of the control panel.
6
Electrical connections
7
8
Panel controls
1.
2.
3.
4.
5.
6.
7.
8.
9.
10.
11.
12.
13.
14.
15.
16.
17.
18.
19.
20.
21.
22.
23.
24.
Panel release button
DSP (preset equalizer) button
Power button
Volume level control
Tuning seek up, down/ Track up, down buttons
LCD display
Scan button
DISP button
AF (Alternative Frequencies) button
Open button
Mode button
Menu button/ MP3 enter button
AMS (Auto Memory Store) button/
MP3 search button
Play/ Pause button
Intro play
Track repeat play
Track random play
Track 10 down
Track +10 up
Preset memory station buttons
PTY (Program Type) button
USB socket
Band button
TA (Traffic Announcement) button
9
General operations
Power button [3]
Press Power button to turn on/ off the unit.
Encoder volume knob [4]
When the Menu function is not activated, rotate this knob to change the volume level.
When Menu function is activated, rotate this knob to navigate through different menu items.
Mode button [11]
Press this button to select different mode, sequence as follow:
- Tuner mode (radio)
- CDP/ MP3 (only if a CD or MP3 disc is inserted)
- USB (only if a USB drive is inserted)
- SD/ MMC (only if a SD or MMC card is inserted)
Mode priority
Whenever a USB or SD/ MMC is being inserted, unit will automatically switch to USB or SD/ MMC mode, does not matter the
unit is currently in what mode.
When in USB or SD/ MMC mode, if the USB or SD/ MMC is being removed, unit will automatically switch to radio mode.
Menu button [12]
You can operate the following function through Menu button.
1. Audio operation
Press Menu button for less than 1 second to open the Audio menu.
Press Menu repeatedly to navigate through the following functions:
10
VOLUME (VOL) > BASS (BAS) > TREBLE (TRE) > BALANCE (BAL) > FADER (FAD).
Rotate Volume control to adjust desired level within 5 seconds.
Note: bass and treble will be skipped if DSP mode is activated.
2. Other operations
Press Menu button for more than 2 seconds to open another set of menu.
Press Menu button repeatedly to navigate through the menu items, while the desired menu item is displayed.
Use Volume control to adjust the selected function:
a.
TA (Traffic Announcement) mode
To determine what action will the radio take if the newly tuned station does not receive TP (Transport Program) information for 5
seconds.
There are 2 modes: TA ALARM and TA SEEK.
- TA SEEK
During searching the radio retunes to a different station, which contains TP information.
- TA ALARM
During searching the radio does not retune but beeps will come out.
b.
Mask mode
PI is referred to Different PI (Program Information) with same AF (Alternative Frequency) .
During AF search, PI stations and non-RDS (Radio Data Station) stations with strong signal will be masked, in the latter case, the
non-RDS stations may cause interference, resulting the real AF to be masked due to the misjudgment of the radio under
interference.
- MASK PI
To mask only the AF with different PI.
11
- MASK ALL
To mask both PI and strong signal non-RDS station.
c.
Retune L, retune S
To determine the initial time of automatic TA (Traffic Announcement) search.
There are 2 modes: RETUNE L and RETUNE L.
- RETUNE L:180 seconds.
- RETUNE S: 45 seconds.
d.
Loud mode
Use this mode to increase bass output.
e.
ESP mode (Electronic Shock Protection)
You can select the second of ESP as follow:
- ESP 12 second: for normal road condition.
- ESP 45 second: for road condition extremely unusual.
f.
Beep mode
There are 2 modes: BEEP ON and BEEP OFF.
- BEEP OFF: disable audible beep tone when any function is accessed.
- BEEP ON: enable audible beep tone.
g.
Seek mode (Seek 1/ Seek 2)
You can choose from Seek tuning mode 1 and mode 2 by using Volume control.
While the desired Seek tuning mode is selected, the following operations can be performed:
- SEEK1: Press the Tuning up/ down button briefly to increase or decrease the frequency by 1 step size.
12
-
Press and hold the Tuning up/ down button to seek the band in up or down direction and stop when a station is received.
SEEK2: Press the Tuning up/ down button briefly to increase or decrease the frequency by 1 step size.
Press and hold the Tuning up/ down button increase or decrease the frequency rapidly until the button is released, the
different between the same operation at Seek 1 mode is that this time the radio will not stop at any station.
h.
Stereo mode
Use this mode to select stereo or monaural reception for FM radio stations. You can sometimes improve reception of distant
stations by selecting mono mode.
i.
DX mode
Use this mode to change between Local and Distant (-DX) tuning mode. Local mode improves reception in some areas where the
signal is too strong.
DSP button (preset equalizer) [2]
POP > ROCK > CLASSIC > FLAT > DSP OFF
At DSP off mode preset equalizer will be controlled by Bass/ Treble setting.
Display button (DISP) [8]
At Radio mode press this button to view frequency of the station in listening, clock time and program type (PTY).
Scan button (SCAN) [7]
Press this button, the radio will tune up to search stations, the available stations will blinking and stay on the display for a few
seconds.
13
Tuning up/ down button [5]
Press this button to search for radio stations. Depends on whether SEEK1 or SEEK 2 mode is selected, different operations can be
performed, refer to Seek mode paragraph for detail.
Reset button
In case of abnormal operation, use a pencil tip or other non-metallic object to press the Reset
button located behind the front panel. Reset button is to be activated for the following reasons:
- Initial installation of the unit when all wiring is completed.
- All the control function buttons do not operate.
- Abnormal or error symbol shown on the display.
RDS (Radio Data System)
RDS service availability varies with areas. Please understand if RDS service is not available in you area, the following service is not
available, either. The following functions are available when receiving RDS stations.
Auto memory store/ preset scan button (AMS) [13]
-
-
Preset scan: press AMS button for less than 1 second to scan all preset stations in the memories of the current band and stay on
each memory stations for about 5 seconds. The memory location indicator on the LCD will flash during the process. To stop
preset scan, press AMS button again.
Auto memory store: press AMS button for more than 1 second to enter auto store mode. The radio will automatically store 6
stations to the 6 preset memories of the current band. To stop auto store, press AMS button again.
14
Station preset buttons (1-6) [20]
You can store and recall six preset radio stations by pressing 1-6 buttons.
To store a station:
- Select a band (if needed)
- Select a station by Tuning up/ down button
- Hold a Preset button which you want store the station for at least 2 seconds. The preset number will appear on the display
accompanied by a beeps sound.
To recall a station:
- Select a band (if needed)
- Press a Preset button briefly to recall the stored station.
Band button [23]
Press this button to change between band FM, MW(AM) and OIRT.
AF button (Alternative Frequencies) [9]
When pressed short, AF switching mode is selected.
When AF switching mode is selected, the radio check the signal strength of the AF all the time.
When pressed long, it is activated as regional mode ON/ OFF.
Regional mode ON:
AF Switching or PI SEEK is implemented to the station which have all PI codes are same as current station. REG segment is
turned on, in LCD display.
Regional mode OFF:
The Regional code in the format of PI code is ignored when AF switching or PI SEEK is implemented.
Some broadcasting stations may change their program from normal broadcasting to regional broadcasting for a certain period.
When regional mode is off, the region identification in the PI code is ignored; the radio may switch to a local variant of the
15
current program. When region mode is on, the radio will only switch to a program carrying the exact same PI code.
Note: When AF switch is on, at this moment use tuning up/ down to search station will only stop at station which has RDS
broadcasting.
TA button (Traffic Announcement) [24]
- When pressed short, it is activated as TA mode on or off.
- When TA mode is on and traffic announcement is transmitted.
- When the unit is in CD mode, it will switch to radio mode temporarily.
- If the volume lever was under the threshold point, it will be raised to the threshold point.
- When TP station is received, TP segment is turned on in LCD display.
Note: when TA switch is on, at this moment use tuning up/down to search station will only stop at station which has TA broadcasting.
PTY button [21]
Each time when this button is pressed, the PTY mode will toggle in the following order:
PTY Music Group > PTY Speech Group >PTY Off
The current PTY code is displayed on the LCD, use the 6 Preset buttons to select the other PTY code, the distribution of program type
are as follow:
When PTY code is selected, the radio will search the band for the station that matches the PTY code.
16
MP3 playback
Notes on MP3
MP3 is short for MPEG Audio Layer 3 and refers to an audio compression technology standard.
This product allows playback of MP3 files on CD-ROM, CD-R or CD-RW discs.
The unit can read MP3 files written in the format compliant with ISO 9660. However it does not support the MP3 data written by
the method of packet write.
The unit can not read an MP3 file that has a file extension other than .mp3 .
If you play a non- MP3 file that has the .mp3 extension, you may hear some noise.
In this manual, we refer to what are called MP3 file and folder in PC terminology as track and album , respectively.
Maximum number of directory level is 128, including the root directory. Maximum number of files and folders per disc is 1000.
The unit may not play tracks in the order of Track numbers.
The unit supports all MPEG bitrate including free format for MPEG1 audio layer 3, supports all MPEG bitrate except 8kbps and
free format for MPEG2 audio layer3 .
The unit supports 32/44.1/48 kHz sampling rate for MPEG1 audio layer 3, 32/44.1/48 kHz and 16/22.05/24 kHz sampling rate for
MPEG2 audio layer 3, and 44.1 kHz sampling rate for VBR (Variable Bit Rate).
Notes on creating your own CD-Rs or CD-RWs containing MP3 files
To enjoy high quality sound, we recommend converting to MP3 files with a sampling frequency of 44.1 kHz and a fixed bit rate of
128 kbps.
DO NOT store more than 1000 MP3 files per disc, 2000 MP3 files for USB flash (FAT 12/16).
For ISO 9660 - compliant format, the maximum allowable depth of nested folders is 8, including the root directory (folder).
When CD-R disc is used, playback is possible only for discs, which have been finalized.
Make sure that when MP3 CD-R or CD-RW is burned that it is formatted as a data disc and NOT as an audio disc.
You should not write non-MP3 files or unneeded folders along with MP3 files on the disc otherwise it takes a long time until the
unit starts to play MP3 files.
17
With some CD-R or CD-RW media, data may not be properly written depending on their manufacturing quality. In this case, data
may not be reproduced correctly. High quality CD-R or CD-RW disc is recommended.
Up to 16 characters are displayed for the name of an Album or a Track. ID3TAG version 1.x and 2.x is required.
Note: the unit may not play tracks in the order that you wrote them to the disc.
Loading the CD
Press the Open [10] to fold down the front panel, insert the disc through CD slot.
The disc will be automatically loaded and playback will also start.
CD eject button
Press this button to eject the CD. Since this button is located behind the front panel, fold down the panel before accessing this button.
CD play/ pause and first track button [14]
Press this button briefly to pause CD play, press again to release pause.
Press this button long to activate First track function, the first song will be played.
Intro scan button [15]
Press this button to select Intro Scan function, the first 10 seconds of each track will be played sequentially until this button is pressed
again, then normal play will resume at the current track.
Repeat button [16]
Pressing this button will activate Repeat Function in the following order : Repeat On
The RPT indicator will turn on.
18
Repeat Off
Random play button [17]
When random play mode is selected, the tracks will be played in random order, press this key one more time to cancel random play
mode.
Track up and track down buttons [18, 19]
Under normal play mode, press the Track up button for less than 1 second to skip the playback to the next track, or press the Track
down button for less than 0.5 seconds to return to the beginning of the current track, press this button one more time to skip to the
previous track.
When any of these buttons is pressed for more than 1 second, the CD player will enter Cue/ Review mode, this is indicated by the
flashing track number on the LCD. When the key is released, normal play will resume.
ID3 tag
Press Band button repeatedly to Display ID3 TAG information.
If the MP3 file is available with ID3 TAG, pressing the Band button repeatedly will show information in the following sequence:
FILE NAME > FOLDER NAME > SONG TITLE > ARTIST > ALBUM TITLE.
If any of the ID3-TAG information is not available, pressing the Band button repeatedly will only show The FILE NAME and
FOLDER NAME of the MP3 file and will scroll repeatedly through the display during the playing of the MP3 file.
Searching by track
Pressing the MP3 Search button once will turn on track search mode, the LCD will show TRK SCH . If no action is taken for
about 5 seconds, normal play will resume.
At Track search mode, press Enter button once, the display will show 001 , use Volume up/ down control to select the desired
track.
The track number can be either 1-digit, 2-digit or 3-digit. They are selected by the following procedures.
- Digit track number
19
After selecting the desired track number, press Enter button for more than 1 second to confirm, playback will start.
- Digit and 3-Digit track number
Enter the left-most digit first (for example, if the track number is 123, enter
first, following by
and
), then press Enter
button for less than 1 second to shift the number by one digit, repeat this procedure until all digits has been entered. Long press
Enter button for more than 1 seconds to start playing.
If a wrong track number is entered, press AMS button to clear the digits. Then enter the correct number.
Searching by folder
While the LCD is showing TRK SCH , press MP3 Search button one more time, the LCD changes to FILE SCH , the unit is at
Folder Search mode, if no action is taken for about 5 seconds, normal play will resume.
At Folder Search mode, press Enter button once, the first folder will be shown, use Volume up/ down Control to scroll through all
folders. When the desired folder is found, press the Enter button long to start playing the first track under selected folder, or press
the Enter button short less than 1 seconds to display the tracks or folders under this folder. Repeat this procedure to navigate
through the folders up to 8 levels deep.
During folder search, not only folders are shown but also the tracks, but they can be easily identified because they have their own
icon display on LCD.
Searching by character
This model also has song name (character) search function for MP3 disc playback, Press MP3 Search button three times until
CHAR SCH is shown on display, then press Enter button once, character
blinks, use volume up or down to select desired
st
character (1 letter), press Enter button to confirm your choice and second character
blinks to select other letters (max, 8
characters). After entering your song name, press Enter button more than 1 second to start the search. If no such song, NOT FND
will be shown.
20
USB/SD/MMC MP3 playback
Loading SD/MMC ard
Insert the SD/MMC card into the slot, with the front side at right.
The unit will display the music automatically and the LCD will show MEM-CARD.
Take out SD/MMC ard
Push SRC button and switch to non MEM-CARD mode, then push SD/MMC card, take out the card when part of the card flip up.
Loading USB equipment
Open the rubber cap, put the USB into the connector the head unit will display the music, stored in the USB equipment, and the LCD
will show USB-DRIV.
Take out USB equipment
Push the SRC button and switch to non USB-DRIV mode, then take off the USB equipment, close the rubber cap.
USB/SD/MMC Notes:
- USB functions (flash memory type) MP3 music play
- SD/MMC card support
- USB flash memory 2in1 (SD/ MMC) support
- FAT 12/ FAT 16/ FAT 32 is possible: FAT 12/16 (dir: 200 support, file:500 support), -FAT 32 (dir: 200 support, file:500 support)
- Filename: 32 byte/ dir name: 32 byte
- Tag (id3tag ver2.0): title/artist/album: 32 byte support
- Multi card reader not support
- USB 1.1 support, USB 2.0 support (it cannot support USB 2.0 speed. Just, tag name:32byte get be same speed with USB 1.1).
21
Note: SD cards brands: Canon, Fujifilm, Palm, Motolora, Microsoft, IBM, HP, Compaq, Sharp, Samsung, etc. Capacity: 8MB ~ 2Gb.
MMC cards brands: Ericsson, Nokia, Motolora, HP, Palm, Sanyo, Microsystems, etc. Capacity: 16MB ~ 2Gb.
Anti-theft system
This unit is equipped with a slide-down detachable panel. Removing this panel makes the radio totally inoperable.
Place the detachable panel into the case.
1.
2.
3.
4.
Switch off the power of the unit.
Press the REL button [1] and remove the detachable panel.
Gently press the button of the case and open the cover.
Place the panel into the case and take it with you when you leave the car.
Install Detachable panel
1.
2.
Fix right part of face plate I the right part of panel slot of the unit.
Press down the left side of the face plate until if clicks into the panel slot of the unit.
Remove the unit
1.
2.
3.
4.
Switch off the power of the unit.
Remove the panel and the trim plate.
Insert both L-Keys into the hole on the front of the set until they lock.
Pull out the unit.
22
Handling compact discs
Dirty, scratched or warped discs may cause skip ping or noise.
Handle the disc only by the edges. To keep clean do not touch its surface.
Discs should be stored in their cases after use to avoid scratches.
Do not expose discs to direct sunlight, high humidity, high temperature or dust.
Prolonged exposure to extreme temperature can wrap the disc (such as leaving the discs in your car during summertime).
Do not stick or write anything on either side of disc. Sharp writing instruments, or the inks used in some felt-tip pens, may
damage its surface.
DO NOT touch the unlabeled side.
DO NOT attach any seal, label or data protection sheet to either side of a disc.
This unit cannot play 3-inch ( 8cm ) CDs.
Never insert a 3-inch CD contained in the adapter or an irregularly shaped CD. The unit may not be able to eject it, resulting in a
malfunction.
Cleaning
Cleaning the cabinet
Wipe with a soft cloth. If the cabinet is very dampen (not dropping wet) the cloth with a weak solution of soapy water, and then wipe
clean.
Cleaning discs
Fingerprints should be carefully wiped from the surface of disc with a soft cloth. Unlike conventional records, compact discs have no
grooves to collect dust and macroscopic dirt, so gently wiping them with a soft cloth should remove must panicles. Wipe in a straight
motion from the center to the edge.
Never use thinner benzine, record cleaner or anti static spray on a compact disc.
Such chemicals can damage its plastic surface.
23
Components
1.
2.
3.
4.
5.
6.
7.
8.
9.
Mounting collar
Tapping screws M5x6 mm
M4x6 mm
Mounting bolt (50 mm)
Wire connector
Removable face plate case
Trim plate
T-key
Operating instructions
Rubber cushion
1 pc.
4 pcs.
4 pcs.
1 pc.
1 pc.
1 pc.
1 pc.
2 pcs.
1 pc.
1 pc.
24
Troubleshooting guide
General
No power or no sound
Disc
Disc is inside but no sound
Disc sound skips, tone quality
is low
Sound skips due to vibration
The operation keys don t work
Radio
Much noise in broadcasts
Error display messages
Car engine switch is not on. Turn your car's key to ACC or ON.
Cable is not correctly connected. Check connection.
Fuse is burnt. Replace fuse. Check volume or mute on/ off.
Disc is upside down. Place disc in the correct direction, and the label side up.
Disc is dirty or damaged. Clean disc or change another disc.
Volume is in minimum. Adjust volume to desired level.
Wire is not properly connected. Check wiring connection.
Temperature inside the car is too high. Cool off until the ambient temperature returns to
normal.
Disc is dirty or damaged. Clean CD or change another CD.
Mounting angle is over 30º. Adjust mounting angle to less than 30º.
Instable mounting. Mount the unit securely with the mounting parts.
The built-in microcomputer is not operating properly due to noise. Press the RESET
button.
Front panel is not properly fixed into its place.
Station is too far, or signals are too weak. Select other stations of higher signal level.
The antenna cable is not connected. Insert the antenna cable firmly.
ERROR 1: Mechanism error: Press the RESET button. If the error code does not
disappear consult your nearest service dealer.
ERROR 2: Servo error: Press the RESET button. If the error code does not disappear,
consult your nearest service dealer.
25
Specification
General. Power supply:
11-14 V DC, negative ground
Maximum power output:
Rated power output (RMS):
Suitable speaker impedance:
Pre-Amp output voltage:
Fuse:
Dimensions (WxHxD)/ Weight:
ESP:
FM Stereo Radio. Frequency range:
Frequency response:
Stereo separation:
Image response ratio/ IF response ratio:
Signal/ noise ratio:
AM Radio. Frequency range:
Usable sensitivity(S/N=40dB):
Disc Player. System:
Frequency response:
Signal/ noise ratio:
Total harmonic distortion:
Wow and flutter:
Channel separation:
50 Wx4 channels
25 Wx4 channels (4 10% T.H.D.)
4 ohms
2.0V(CD play mode: 1 KHz, 0 dB, 10 K load)
15A
178 50 166 mm/ 1.7 kg
CD (45 s), MP3 (120 s)
65.0 108.0 MHz
30 Hz-15 kHz
25 dB (1 kHz )
50dB / 70dB
50 dB
522-1620 kHz
45 dB
Compact disc audio system
5 Hz - 20 kHz
>70 dB
Less than 0.2 %(1 kHz)
Below measurable limits
>60 dB
Specifications are subject to change without notice. Mass and dimension are approximate.
26
!
.
,
.
RDS (
............................................................................................................................................................................... 27
.......................................................................................................................................................... 28
/
........................................................................................................................................................... 29
...................................................................................................................................................... 35
................................................................................................................................................................... 36
)................................................................................................................................................... 41
3 .............................................................................................................................................................. 44
USB/SD/MMC MP3 ..................................................................................................................................... 48
......................................................................................................................................................... 50
................................................................................................................................................. 51
............................................................................................................................................................................ 52
............................................................................................................................................................................ 52
.......................................................................................................................... 53
.................................................................................................................................................... 54
27
,
.
12 .
.
,
.
,
.
.
,
,
.
,
,
.
.
,
,
,
.
,
(
.).
.
,
,
.
,
,
,
,
,
.
.
,
,
.
.
28
/
:
CD
.
,
,
,
.
1.
2.
3.
4.
5.
6.
7.
(5
)
(5 x 25
)
29
.
.)
,
,
,
,
.
,
,
.
,
.
.
1.
,
.
.
(5 8
),
(4
.
2.
3.
4.
5.
.
.
.
(
).
:
,
.
30
8
),
.
(
(
. 1).
. 2).
.1
1.
.2
,
,
2.
3.
(
.3).
(
,
,
.
. 4).
,
.
.3
.4
:
.
.
:
,
.
.
.
,
,
,
.
.
31
,
.
32
20.
1
2
3
4
5
6
7
8
9
10
11
12
13
14
15
16
17
18
19
20
/
(-)
(+)
(+)
(-)
(+)
(-)
(+)
(-)
(+)
33
ISO (4
+8
)
/
4
5
7
8
1
2
3
4
5
6
7
8
(+)
(+)
(-)
(+)
(-)
(+)
(-)
(+)
(-)
34
1.
2.
3.
4.
5.
6.
7.
8.
9.
10.
11.
12.
13.
14.
15.
16.
17.
18.
19.
20.
21.
22. USB
23.
24.
REL
DSP (
)
PWR
/
/
SCAN
DISP
AF
OPEN
MODE
MENU/ ENTER
AMS/
MP3
/
INT
RPT (
RDM (
PTY (
BAND
TA (
)
)
)
)
35
/
PWR [3]
,
.
[4]
,
,
,
MODE (
.
,
.
) [11]
,
-
CD/MP3 (
USB (
USB
SD/MMC (
SD
:
- CD
MMC
)
)
USB
SD/MMC,
SD/MMC
,
USB
,
USB
MENU (
MP3
)
.
SD/MMC
,
) [12]
:
1.
MENU,
.
MENU
,
:
VOLUME (VOL) > BASS (BAS) > TREBLE (TRE) > BALANCE (BAL) > FADER (FAD)
36
.
,
:
DSP
.
,
BASS
TREBLE
.
2.
MENU
MENU
.
2-3
,
,
(
FMTA SEEK
-
,
.
.
:
)
RDS,
,
TA ALARM
TP (
.
TA,
)
,
.
TA SEEK:
-
,
TP (Traffic Program
)
,
,
PI (
,
),
TP.
TP
,
,
PI
PI.
,
,
.
-
ALARM:
,
.
,
,
TP
"NO TP, TA".
.
37
.
MASK
,
,
201
,
100
PI,
(AF),
,
AF.
AF,
,
,
PI
CD,
,
100
PI "
".
,
,
.
AF
.
,
:
2
-
:
MASK PI:
.
-
MASK ALL:
,
,
RDS.
38
. Retune R, Retune S
Retune-S
Retune-L
- Retune-S:
,
- Retune-L:
,
:
Retune
.
TA Seek.
TA SEEK 45
.
TA SEEK 180
.
TA Seek.
TA
LOUD
.
.
ESP (
)
.
,
.
ESP 12
ESP 45
:
:
:
.
.
BEEP
2
-
BEEP ON:
BEEP OFF:
-
SEEK 1:
-
SEEK 2:
:
,
.
.
.
:
(
,
/
),
.
(
,
/
),
.
.
39
.
.
.
.
DX
LOCAL
DISTANCE (DX) (
).
DSP (
) [2]
: POP > ROCK > CLASSIC > FLAT > DSP OFF (DSP
BASS/ TREBLE
.
DSP
(
/
) [5]
:
/
:
DISP (
).
.
/
2
.
) [8]
,
(PTY).
SCAN (
) [7]
,
.
RESET (
)
,
(
-
.).
:
.
. -
.
40
RDS (
)
RDS
.
.
,
RDS
RDS
,
:
AMS [13]
-
1
6
5
1
.
.
,
AMS
-
2
.
,6
1
AMS
6.
,
.
(1-6) [20]
6
.
:
-
(
).
.
,
.
.
:
-
(
).
.
BAND (
) [23]
BAND
3 FM
.(
2 W
,
(FM1, FM2, FM3(OIRT)).
6
41
CD).
30
(MW1, MW2).
.
AF (
) [9]
,
AF
AF
.
.
2
/
.
:
AF
.
,
REG
.
:
AF
.
,
,
.
,
.
.
.
:
AF,
RDS
,
.
TA (
) [24]
.
:
-
,
.
-
,
.
,
:
.
/
.
42
,
PTY (
) [21]
FM-
,
RDS,
PTY
PTY Music Group > PTY Speech Group > PTY Off.
.
:
.
6
,
,
:
,
,
43
.
3
3
3-
MPEG 3
.
3
3,
,
3,
CD-ROM, CD-R
CD-RW.
ISO 9660.
.
3,
3
,
,
.mp3 .
.mp3 ,
MP3
,
.
,
PC
.
8,
.
1000.
.
,
VBR
8
,
3.
,
. VBR:
.
CD-R
CD-RW,
MP3
3
128
1000
,
(
.
3
ISO 9660,
, 2000
44,1
USB (FAT 12/16).
8,
).
CD-R
,
44
.
,
MP3 CD-R
3
,
CD-RW
CD-R
CD-RW
,
.
3
,
3.
.
.
CD-RW
CD-R
.
16
.
,
1.
,
ID3 TAG (
3
2. ID3TAG.
.
,
)
.
.
Open [10],
,
.
.
EJECT
,
/
.
.
[14]
.
,
.
,
.
,
,
.
45
INTRO (
10
,
) [15]
Intro.
10
,
RPT (
.
.
) [16]
,
.
RDM (
.
) [17]
,
.
.
[18, 19]
,
10
.
ID3
3
CD
)
, USB/SD/MMC
.
ID3 TAG (
BAND
:
.
ID3
.
,
3
AMS
TRACK SCH .
,
001 .
46
,
ID3
100,
,
.
0,5
100,
.
.
.
.
,
:
.
,
,
.
3
AMS
.
FILE SCH .
.
,
0,5
.
,
.
.RDS (
RDS
.
,
.
)
RDS
,
RDS
AMS
,
:
«CHAR SCH» (
« ».
,
,
0.5
1-
).
,
« ».
,
.
« »
.
0.5
2-
.
,
.
47
USB/SD/MMC MP3
1.
SD/MMC
SD/MMC
,
.
MEM-CARD.
2.
SD/MMC
SRC
3.
,
USB
,
,
4.
USB
USB-DRIV.
-
.
,
USB
USB
SRC
-
.
USB/SD/MMC
:
MP3
USB
(
SD/MMC ( 2 )
USB
2 1 (SD/MMC)
FAT 12/FAT16/FAT32
FAT 12/16 (
200
, 500
)
FAT 32 (
200
, 500
)
: 32
/
: 32
,
.
).
48
-
(id3tagver2.0)
:
-
32
USB 1.1
USB 2.0 (
USB 2.0
USB 2.0
USB 1.1)
. USB-
:
SD
:8M ~2 .
MMC
: 16 M ~ 2 .
: Canon, Fujifilm, Palm, Motolora, Microsoft, IBM, HP, Compaq, Sharp, Samsung,
: Ericsson, Nokia, Motolora, HP, Palm, Sanyo, Microsystems,
49
.
. .
.
,
.
1.
POWER
0,5
.
2.
3.
4.
,
.
.
,
1.
.
,
,
.
2.
1.
2.
3.
4.
,
.
.
.
,
.
50
.
,
.
,
.
,
,
.
,
.
(
,
).
.
,
,
.
,
.
,
.
CD
CD
,
3
3
,
(8
).
,
.
51
CD
.
.
(
,
),
,
.
.
,
,
,
.
,
.
,
.
.
6
6
(50
)
1
4
4
1
1
1
1
2
1
1
.
.
.
.
.
.
.
.
.
.
52
.
ACC
.
.
.
.
.
,
,
,
.
.
.
.
.
.
.
.
.
.
,
ON.
.
.
.
.
30 ,
.
.
30
.
.
RESET.
.
.
,
.
.
.
.
ERROR 1:
:
RESET.
.
,
ERROR 2:
,
:
53
RESET.
.
.
11-14 ,
50
4
25
4
(4 10 %
4
2.0 (
15
178 50 166
/ 1.7
CD (45 ), MP3 (120 )
65.0 108.0
(RMS)
(
)/
FM
.
ESP
/
30
15
50 / 70
50
522-1620
IF/
/
AM
.
= 40
)
/ 25
(1
.D.)
CD: 1
,0
, 10
)
)
45
.
/
5 - 20
> 80 / > 55
0.2 % (1
)
.
.
54


