1
HP StoreAll Storage CLI Reference Guide
Abstract
This document describes commands provided with StoreAll software. It is intended for system administrators managing 9300
Storage Gateway, 9320 Storage, X9720 Storage, and 9730 Storage. For the latest StoreAll guides, browse to
http://www.hp.com/support/StoreAllManuals.
nl
HP Part Number: TA768-96091
Published: June 2013
Edition: 9
© Copyright 2009, 2013 Hewlett-Packard Development Company, L.P.
Confidential computer software. Valid license from HP required for possession, use or copying. Consistent with FAR 12.211 and 12.212, Commercial
Computer Software, Computer Software Documentation, and Technical Data for Commercial Items are licensed to the U.S. Government under
vendor's standard commercial license.
The information contained herein is subject to change without notice. The only warranties for HP products and services are set forth in the express
warranty statements accompanying such products and services. Nothing herein should be construed as constituting an additional warranty. HP shall
not be liable for technical or editorial errors or omissions contained herein.
Acknowledgments
Microsoft, Microsoft® and Windows® are U.S. registered trademarks of Microsoft Corporation.
UNIX® is a registered trademark of The Open Group.
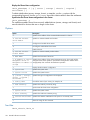
Revision History
Edition Date
Software
Description
Version
1
November 2009 5.3.1
Initial release of HP StoreAll Software
2
April 2010
Added or updated the following commands: ibrix_async_replicate, ibrix_auth,
ibrix_cifs, ibrix_edquota, ibrix_fm, ibrix_fs, ibrix_fs_ops,
ibrix_migrator, ibrix_online_quotacheck, ibrix_replicate,
ibrix_supportticket
3
December 2010 5.5
Added or updated the following commands: ibrix_auth, ibrix_certificate,
ibrix_cifs, ibrix_edquota, ibrix_ftpconfig, ibrix_ftpshare,
ibrix_httpconfig, ibrix_httpshare, ibrix_httpvhost, ibrix_localgroups,
ibrix_localusers, ibrix_migrator, ibrix_ndmpconfig, ibrix_ndmpsession,
ibrix_rebalance, ibrix_server, ibrix_tape
4
April 2011
Updated ibrix_nic, ibrix_snmptrap
5
September 2011 6.0
Added or updated the following commands: ibrix_auth, ibrix_caseinsensitive,
ibrix_cluster, ibrix_collect, ibrix_crr, ibrix_crr_export,
ibrix_crr_nic, ibrix_datavalidation, ibrix_edquota, ibrix_exportfs,
ibrix_fm, ibrix_fs, ibrix_ftpconfig, ibrix_httpconfig, ibrix_hostpower,
ibrix_httpshare, ibrix_onlinequotacheck, ibrix_powersrc,
ibrix_reten_adm, ibrix_snap, ibrix_snapreclamation, ibrix_task,
ibrix_vs_snap, ibrix_vs_snapstrategy
6
June 2012
6.1
Added or updated the following commands: ibrix_auth, ibrix_av, ibrix_avconfig,
ibrix_certificate, ibrix_chassis, ibrix_cifs, ibrix_cifsmonitor,
ibrix_cifsperms, ibrix_crr, ibrix_datavalidation, ibrix_edquota,
ibrix_evacuate, ibrix_event, ibrix_fm, ibrix_fm_tune, ibrix_fs,
ibrix_fstune, ibrix_fsck, ibrix_health, ibrix_ldapconfig,
ibrix_ldapidmapping, ibrix_migrator, ibrix_mount, ibrix_mountpoint,
ibrix_phonehome, ibrix_rebalance, ibrix_reports, ibrix_reten_adm,
ibrix_server, ibrix_stats, ibrix_vs, upgrade60, verify_client_update
7
December 2012 6.2
Added or updated the following commands: ibrix_archiving, ibrix_audit_reports,
ibrix_avquarantine,ibrix_avscan, ibrix_crrhealth, ibrix_datavalidation,
ibrix_fm_tune, ibrix_fs, ibrix_fs_tune, ibrix_pv, ibrix_reports,
ibrix_snmpagent, ibrix_snmpgroup, ibrix_snmptrap, ibrix_snmpuser,
ibrix_snmpview, MDexport, MDimport
8
March 2013
6.3
Updated the branding to StoreAll. Added or updated the following commands:
ibrix_avconfig, ibrix_avquarantine, ibrix_cifs, ibrix_client,
ibrix_collect, ibrix_crr, ibrix_datavalidation, ibrix_fm, ibrix_fm_tune,
ibrix_fs, ibrix_httpconfig, ibrix_httpshare, ibrix_httpvhost,
ibrix_ldapconfig, ibrix_migrator, ibrix_mount, ibrix_mountpoint,
ibrix_phonehome, ibrix_reten_adm
9
May 2013
6.3
Updated the ibrix_fs command. Updated information about SMB share creation.
Replaced references of the 9000 with StoreAll.
5.4.0
5.6
Contents
1 General CLI information..............................................................................6
Executing StoreAll software commands........................................................................................6
Command syntax......................................................................................................................6
Command messages.................................................................................................................6
2 StoreAll software commands........................................................................7
ibrix_activedirectory..................................................................................................................7
ibrix_archiving.........................................................................................................................9
ibrix_audit_reports..................................................................................................................12
ibrix_auth..............................................................................................................................15
ibrix_av.................................................................................................................................17
ibrix_avconfig........................................................................................................................18
ibrix_avquarantine..................................................................................................................20
ibrix_avscan..........................................................................................................................22
ibrix_caseinsensitive................................................................................................................23
ibrix_certificate.......................................................................................................................24
ibrix_chassis..........................................................................................................................26
ibrix_cifs................................................................................................................................27
ibrix_cifsconfig.......................................................................................................................29
ibrix_cifsmonitor.....................................................................................................................31
ibrix_cifsperms.......................................................................................................................32
ibrix_client.............................................................................................................................33
ibrix_cluster...........................................................................................................................35
ibrix_clusterconfig...................................................................................................................36
ibrix_collect...........................................................................................................................39
ibrix_crr................................................................................................................................44
ibrix_crr_export......................................................................................................................48
ibrix_crrhealth........................................................................................................................49
ibrix_crr_nic...........................................................................................................................50
ibrix_datavalidation................................................................................................................52
ibrix_dbck.............................................................................................................................54
ibrix_edquota.........................................................................................................................55
ibrix_evacuate........................................................................................................................58
ibrix_event ............................................................................................................................59
ibrix_exportfs ........................................................................................................................63
ibrix_fm.................................................................................................................................65
ibrix_fm_tune.........................................................................................................................67
ibrix_fs..................................................................................................................................71
ibrix_fs_ops...........................................................................................................................79
ibrix_fs_tune..........................................................................................................................80
ibrix_fsck...............................................................................................................................84
ibrix_ftpconfig........................................................................................................................86
ibrix_ftpshare.........................................................................................................................88
ibrix_haconfig........................................................................................................................90
ibrix_hba...............................................................................................................................92
ibrix_health............................................................................................................................94
ibrix_healthconfig...................................................................................................................96
ibrix_host_tune.......................................................................................................................97
ibrix_hostgroup....................................................................................................................100
ibrix_hostpower ...................................................................................................................102
ibrix_httpconfig....................................................................................................................103
ibrix_httpshare.....................................................................................................................105
Contents
3
ibrix_httpvhost......................................................................................................................108
ibrix_ldapconfig...................................................................................................................110
ibrix_ldapidmapping.............................................................................................................112
ibrix_license ........................................................................................................................114
ibrix_localgroups..................................................................................................................115
ibrix_localusers....................................................................................................................116
ibrix_lv................................................................................................................................118
ibrix_migrator......................................................................................................................120
ibrix_mount .........................................................................................................................124
ibrix_mountpoint ..................................................................................................................126
ibrix_ndmpconfig..................................................................................................................128
ibrix_ndmpsession................................................................................................................129
ibrix_nic..............................................................................................................................130
ibrix_onlinequotacheck..........................................................................................................133
ibrix_phonehome..................................................................................................................135
ibrix_powersrc .....................................................................................................................137
ibrix_profile.........................................................................................................................139
ibrix_pv...............................................................................................................................140
ibrix_rebalance....................................................................................................................142
ibrix_reports........................................................................................................................144
ibrix_reten_adm...................................................................................................................146
ibrix_server .........................................................................................................................149
ibrix_sh...............................................................................................................................152
ibrix_snap...........................................................................................................................153
ibrix_snapreclamation...........................................................................................................155
ibrix_snmpagent...................................................................................................................156
ibrix_snmpgroup..................................................................................................................158
ibrix_snmptrap.....................................................................................................................160
ibrix_snmpuser.....................................................................................................................162
ibrix_snmpview....................................................................................................................164
ibrix_stats............................................................................................................................165
ibrix_tape............................................................................................................................166
ibrix_task.............................................................................................................................167
ibrix_tier..............................................................................................................................169
ibrix_umount........................................................................................................................170
ibrix_version........................................................................................................................171
ibrix_vg...............................................................................................................................172
ibrix_vs...............................................................................................................................174
ibrix_vs_snap.......................................................................................................................176
ibrix_vs_snap_strategy...........................................................................................................178
MDexport............................................................................................................................180
MDimport............................................................................................................................181
upgrade60.sh......................................................................................................................182
3 Commands for StoreAll Linux clients and file serving nodes..........................184
ibrix_df...............................................................................................................................184
ibrix_lwhost ........................................................................................................................185
ibrix_lwmount .....................................................................................................................187
ibrix_lwumount ....................................................................................................................188
ibrix_top .............................................................................................................................189
verify_client_update..............................................................................................................191
4 Support and other resources....................................................................192
Contacting HP......................................................................................................................192
Related information...............................................................................................................192
HP websites.........................................................................................................................192
4
Contents
Subscription service..............................................................................................................192
5 Documentation feedback.........................................................................193
Glossary..................................................................................................194
Index.......................................................................................................196
Contents
5
1 General CLI information
Executing StoreAll software commands
The commands in “StoreAll software commands” (page 7) must be executed on the Fusion
Manager host. Root privileges are required to run these commands.
The commands in “Commands for StoreAll Linux clients and file serving nodes” (page 184) can be
executed on file serving nodes and/or StoreAll Linux clients. Any user can run these commands.
All commands are run from the working directory /usr/local/ibrix/bin.
Command syntax
Names. When naming physical volumes, volume groups, logical volumes, file systems, and other
cluster entities, use only alphanumeric characters and the underscore ( _ ). Do not use any other
characters unless they are specifically required in the command syntax.
Lists. Use a comma to separate list items in a command. Spaces are not allowed. In the following
command, the -s option takes a list of items:
# <installdirectory>/bin/ibrix_lv -l -s ilv1,ilv2,ilv3
Ranges. Many commands allow a range of values instead of an explicit list of values. To enter a
range, enclose the pattern to be matched in square brackets. The range specified in the following
command matches all Logical Volumes from ilv1 to ilv3:
# <installdirectory>/bin/ibrix_lv -l -s ilv[1-3]
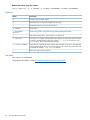
Command messages
CLI commands typically report whether the command succeeded or failed. Some commands also
display intermediate messages about the operation being performed. For example, the
ibrix_mount command displays messages as the file system is mounted on each node. You
might also see intermediate messages reporting a partial error or a situation affecting the command,
such as an exclusive write lock temporarily blocking an operation.
6
General CLI information
2 StoreAll software commands
This chapter lists commands used to configure and manage StoreAll software. The commands must
be run on the Fusion Manager host.
ibrix_activedirectory
Configures and lists Active Directory settings.
Description
Active Directory settings must be configured on the Fusion Manager to allow Windows StoreAll
clients to query the Active Directory server when reading or writing on a file serving node. Windows
StoreAll clients use the proxy user to query the Active Directory server to resolve
UID/GID-to-Windows SID mappings. If mappings cannot be resolved, the user named by the -W
WIN_USER_NAME option is displayed as the owner of the file.
Execute this command on every Fusion Manager that Windows StoreAll clients will need to access.
Synopsis
All references to domains are to Active Directory domains.
Configure Active Directory for static user mapping:
ibrix_activedirectory -S [-d DOMAIN_NAME] [-i DOMAIN_CONTROLLER_IPs]
[-u PROXY_USER] [-p PROXY_PASSWORD] [-E UID_FIELD_NAME] [-F
GID_FIELD_NAME] [-W DEFAULT_WIN_USER_NAME]
For the -u option, enter the proxy user name in the format "domainname\username" where
domainname is the name of the NIS domain in Active Directory. The double quotes are required,
as shown below.
ibrix_activedirectory -S -d fm1.hp.com -i 192.168.1.1
-u "mydomain\fusion_proxy" -p mypass -W hp_winuser
If Active Directory is running on Windows Server 2003 R2, the -E and -F options are required.
Configure Active Directory for automatic user mapping:
ibrix_activedirectory -A [-d DOMAIN_NAMES] [-L] [-W
DEFAULT_WIN_USER_NAME]
The -L option allows mapping of local users.
List Active Directory settings in effect on the Fusion Manager:
ibrix_activedirectory -l
The output includes the domain name, domain server IP, proxy user name, default Windows user
name, and the UID and GID field names.
Options
Option
Description
-A
Configures automatic user mapping.
-E UID_FIELD_NAME
A UID field name. On Windows Server 2003 SP2, this is Read
msSFU30UidNumber. On Windows Server 2003 R2, it is Read UidNumber.
-F GID_FIELD_NAME
A GID field name. On Windows Server 2003 SP2 this is Read
msSFU30GidNumber. On Windows Server 2003 R2, it is Read gidNumber.
-L
Allows local user mapping.
ibrix_activedirectory
7
Option
Description
-S
Configures static user mapping.
-W WIN_USER_NAME
Sets the “Unknown” Windows user, who takes ownership of files when a mapping
cannot be resolved.
-d DOMAIN_NAME
Identifies a fully qualified Active Directory domain name.
-i DOMAIN_CONTROLLER_IP
The domain controller IP address.
-l
Displays Active Directory settings on this Fusion Manager.
-p PROXY_PASSWORD
Sets the Active Directory proxy password.
-u PROXY_USER
Sets the Active Directory proxy user name, specified in the format
"domainname\username".
-?
Shows the usage for this command.
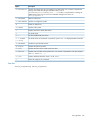
See also
“Windows StoreAll client” in the HP StoreAll Storage Installation Guide
8
StoreAll software commands
ibrix_archiving
Manages the archiving system.
Description
The ibrix_archiving manages the Express Query system, including the database and scanner
daemons. You can display the status of the Express Query system and start, stop, or restart the
daemons.
The Express Query database for each file system is stored on that file system. The Express Query
database is closed before the file system is unmounted. Because closing the database can take a
long time, the -F option can be used to forcefully stop the Express Query daemons and disable
database access to all file systems enabled for Express Query. When you restart the daemons after
using the -F option, the database enters in recovery mode, which can take a long time to complete
depending on the size of the database.
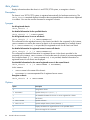
Synopsis
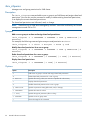
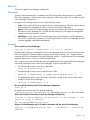
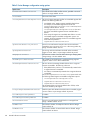
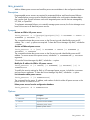
Display the status of the archiving system:
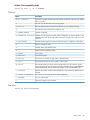
ibrix_archiving -l
Lists the file systems registered to Express Query to maintain an up-to-date database. Shows the
status of each file system's database.
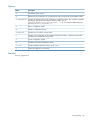
The possible states are:
Status
Description
OK
Express Query is available.
DaemonStarting
Fusion Manager is in the process of starting Express Query for this filesystem.
DaemonNotStarted
Some error has happened and Archiving Infrastructure was unable to start. Please, check
the event log for possible causes.
OfflineSync
Express Query is being synchronized with the filesystem contents. Express Query might
return incomplete results during the synchronization.
OnlineSync
Express Query is being re-synchronized with the filesystem contents.
AbnormalFilesystem
Express Query is offline because of an abnormal filesystem state. Express Query will
remain offline until the filesystem state returns to normal.
AbnormalScanner
Express Query is offline because of an abnormal scanner state. Express Query will remain
offline until the scanner state returns to normal.
FSNotAdded
Filesystem could not be added to the archiving infrastructure.
AbnormalDatabase
Express Query is offline because of an abnormal database state. Express Query will
remain offline until the database state returns to normal.
DBNotAdded
Filesystem could not be added to the Express Query.
Recovery
Express Query is being reconstructed because of a previous abnormal termination. Express
Query is offline during the recovery.
MIF
Manual Intervention Failure (MIF). Express Query detected an unrecoverable data issue.
User action is required. See ibrix_archiving -C [FSNAME] for information on how
recover.
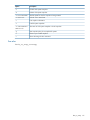
Clears the Manual Intervention Failure (MIF) state for the file system named in the command:
ibrix_archiving -C [FSNAME]
A file system is assigned a Manual Intervention Failure (MIF) state when Express Query detects
that the file system’s database is in an inconsistent state that Express Query cannot automatically
ibrix_archiving
9
correct. When a database is in a MIF state, all changes to files in this file system continue to be
logged, but they are not processed into the database tables. The contents of the database are not
updated until you correct the problem in the database. If you are not sure how to correct the
problem, contact HP support.
After you manually correct the problem that caused the MIF state, run the ibrix_archiving
-C [FSNAME] command to re-enable the use of this database. After you enter the
ibrix_archiving -C [FSNAME] command, the file system attempts to recover and the state
(shown by the ibrix_archiving -l command) becomes RECOVERY. If the recovery fails, the
file system goes into a MIF state again. If recovery succeeds, the file system’s state is set to OK
and it processes all outstanding logged file system changes and it will continue to update the
database of new changes.
Display the status of the Express Query system:
ibrix_archiving -i
Displays the status of the Express Query system. For example:
AJ Database Status
AJ Scanner Status
Command succeeded!
:
:
OK
OK
Start the set of Express Query Daemons:
ibrix_archiving -s
Stop the archiving system:
ibrix_archiving -S [-F] [-t timeout secs]
Stops the set of Express Query daemons.
The -t option specifies the time (in seconds) to wait for the Express Query daemons to stop
gracefully.
The -F option forcefully stops the daemons and disables database access to all file systems enabled
for Express Query.
NOTE: The database is stored on the file system, and it is closed before the file system is
unmounted. Because closing the database can take a long time, the -F option can be used to
forcefully stop the archiving daemons and disable database access to all file systems enabled for
Express Query. When you restart the archiving system after using the -F option, the database
enters in recovery mode, which can take a long time to complete depending on the size of the
database.
Restart the archiving system:
ibrix_archiving -r
Stops and immediately restarts the set of Express Query daemons.
Change the timeout period for the archiving component watchdog:
ibrix_archiving -w [timeout]
Changes the timeout period for the Express Query watchdog. The default timeout is 30 seconds.
The watchdog periodically checks the health of the daemon processes and restarts them if necessary.
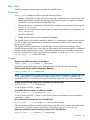
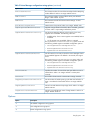
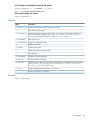
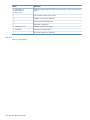
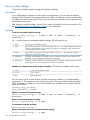
Options
10
Option
Description
-C
Clears Manual intervention Failure State.
-F
Forcefully stops the Express Query daemons.
-S
Stops the Express Query daemons.
StoreAll software commands
Option
Description
-i
Displays the status of the Express Query system.
-l
Lists file systems registered to Express Query.
-r
Restarts the Express Query daemons.
-s
Starts the Express Query daemons.
-t timeout secs
Sets the time (in seconds) to wait for Express Query to stop gracefully.
-w [timeout]
Changes the timeout period for the Express Query watchdog.
?
Shows the usage for this command.
ibrix_archiving
11
ibrix_audit_reports
Generates audit reports.
Description
The ibrix_audit_reports command generates reports for events stored in an Express Query
database’s audit log tables for a given file system. You can select the types of events you want to
include in the report, and you can specify a start and end date for the report.
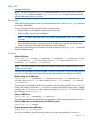
Synopsis
Generate an audit report:
ibrix_audit_reports -t SORT_ORDER -f FILESYSTEM [-p PATH] [-b BEGIN_DATE]
[-e END_DATE] [-o class1[,class2,...]]
Generates an audit report. The report output file is stored in the file system to which it applies, in
the directory <mountpoints>/.archiving/reports. The file name has the pattern
audit_report_for_<file_system_name>_type_<report type>_at_<integer epoch
timestamp>.csvThe file is in a comma-separated value (CSV) format with a header row.
The -t option specifies the sort order of the report, where SORT_ORDER is one of the following:
•
time — lists all events ordered by timestamp
•
path — lists all file events ordered by pathname
The -o option specifies the classes of events to be included in the report. (See “Audit events,” later
in this section, for the supported events.) Enter all to include all events.
The following example provides a chronological event history of the ibrixfs1 file system. The
event list includes all events from 01/17/2011 (because no time is supplied, the report starts at
00:00:00) to 01/17/2011 at 10:30.
ibrix_audit_reports -t time -f ibrixfs1 -o all -b "01/17/2011" -e
"01/17/2011 10:30"
The next example provides a chronological event history of the file /logs/secret.txt in the
ibrixfs1 file system. The event list includes only the file_created and report_ended
events.
ibrix_audit_reports -t path -f ibrixfs1 -p /logs/secret.txt -o
file_created,report_ended
Set the expiration policy for audit reports on a file system:
ibrix_audit_reports -s POLICY -f FILESYSTEM
The POLICY is one of the following:
•
forever — audit reports are not deleted from the file system
•
xxD — audit reports are kept for the specified number of days (for example, 90D specifies
that reports should be kept for 90 days)
•
xxM — audit reports are kept for the specified number of months
•
xxY — audit reports are kept for the specified number of years
Display the current expiration policy for a file system or all file systems:
ibrix_audit_reports -g [-f FILESYSTEM]
Set the global audit report expiration schedule of a file system:
ibrix_audit_reports -y SCHEDULE -f FILESYSTEM
Sets the global audit report expiration schedule for a file system (the time at which report output
files stored in the file system at <mountpoint>/.archiving/reports will be deleted from
12
StoreAll software commands
the file system each day). Use the form hh:mm (a valid hour between 0 and 23 inclusive, and a
2-digit minute between 00 and 59 inclusive) to specify the SCHEDULE. The following example sets
the time for reports cleanup to 2 am:
ibrix_audit_reports -f ibrixfs1 -y 02:00
Display the global audit report expiration schedule for a file system or all file systems:
ibrix_audit_reports -Y [-f FILESYSTEM]
Displays the global audit report expiration schedule for a file system or all file systems. This command
reports the time at which report output files stored in the <mountpoint>/.archiving/reports
directory are deleted from the file system daily.
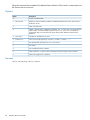
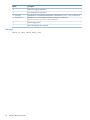
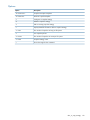
Options
Option
Description
-Y
Gets the global audit report expiration schedule for one or all file systems.
-b BEGIN_DATE
Specifies the start date for the audit report.
-e END_DATE
Specifies the end date for the audit report.
-f FILESYSTEM
Specifies the file system to be used for the report.
-g
Gets the audit report expiration policy for one or all file systems.
-o
class1[,class2,...]
Specifies classes of audit events or audit groups that should appear in the report.
-p PATH
Shows only the events that have a pathname containing the specified string.
-s POLICY
Sets the audit report expiration policy.
-t SORT_ORDER
Specifies the report is sorted, where SORT_ORDER is time (lists all events ordered by
timestamp) or path (lists all file events ordered by pathname).
-y SCHEDULE
Sets the audit report expiration schedule. Specify SCHEDULE as hh:mm (a valid hour
and minute).
?
Shows the usage for this command.
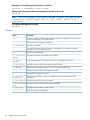
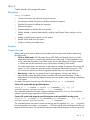
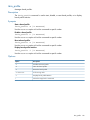
Audit events
Group
Class event
Description
Access
directory_deleted
A directory was removed from the file system by a client
file_deleted
A WORMed file was removed from the file system by a client
file_deleted_admin
A WORMed or retained file was removed from the file system by the
administrator
file_modified
A file's content or metadata was written
file_moved
A file was moved from one directory to another
file read
A file's content or metadata was read
file_renamed
A file name was changed
file_custom_md_added
Custom metadata was added for a file
file_custom_md_deleted
Custom metadata was removed from a file
Archive API
ibrix_audit_reports
13
Group
Class event
Description
Auditing
audit_event_deleted
Audited events were removed from the audit log, either by scheduled
expiration or explicitly by the system or the user
audit_event_disabled
Auditing of a particular category of audit event was disabled
audit_event_enabled
Auditing of a particular category of audit event was enabled
audit_log_keep_period_changed The audit log retention period was changed
Configuration
fs_mounted
The file system was mounted
fs_unmounted
The file system was unmounted
segment_added
A segment was added to a file system or tier
segment_assigned
A tier was assigned to one or more segments
segment_unassigned
One or more segments were unassigned from a tier
tier_added
A tier was added to the file system
tier_deleted
A tier was deleted from the file system
directory_created
A new directory was created
file_created
A new file was created
ndmp_backup_ended
A NDMP backup operation ended
ndmp_backup_started
A NDMP backup operation started
ndmp_recover_ended
A NDMP recovery operation ended
ndmp_recover_started
A NDMP recovery operation started
Report
report_ended
A report or file lookup ended (successfully or unsuccessfully)
Retention
autocommit_cooloff_changed
The autocommit period was changed
autocommit_disabled
Autocommit was disabled on the file system
autocommit_enabled
Autocommit was enabled on the file system
file_hold_applied
A file or set of files was placed under legal hold
file_hold_removed
A previously set legal hold was removed from a file or set of files
file_retained
A file was retained for the period of time defined by the user or the
default period assigned by the system
file_retention_period_expired
A file was made WORM by removing all write permissions
FileSystem
NDMP
file_retention_period_modified The retention period of a file was lengthened or shortened (Relaxed
mode only)
Validation
14
file_wormed
A file was made WORM by removing all write permissions
retention_default_changed
The default retention period was changed
retention_max_changed
The maximum retention period was changed
retention_min_changed
The minimum retention period was changed
rentention_mode_changed
The retention mode (Enterprise or Relaxed) was changed
val_scan_ended
A validation scan ended (successfully or unsuccessfully)
val_scan_started
A validation scan started
StoreAll software commands
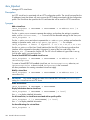
ibrix_auth
Configures Active Directory or Local Users and Groups authentication for SMB, FTP, and HTTP
shares.
Description
The ibrix_auth command configures Active Directory or local users and groups as the
authentication method for users accessing SMB, FTP, or HTTP shares.
Synopsis
Configure Local Users authentication:
ibrix_auth -N [-S SettingList][-h HOSTLIST]
Configure Active Directory authentication:
ibrix_auth -n DOMAIN_NAME -A AUTH_PROXY_USER_NAME@domain_name [-P
AUTH_PROXY_PASSWORD] [-S SETTINGLIST] [-h HOSTLIST]
In the command, DOMAIN_NAME is your Active Directory domain.
AUTH_PROXY_USER_NAME@domain_name is the name and domain for an AD domain user
(typically a Domain Administrator) having privileges to join the specified domain and
AUTH_PROXY_PASSWORD is the password for that account.
To configure Active Directory authentication on specific nodes, specify those nodes in HOSTLIST.
For the -S option, enter the settings as settingname=value. Use commas to separate the
settings, and enclose the list in quotation marks. If there are multiple values for a setting, enclose
the values in square brackets. The users you specify must already exist. For example:
ibrix_auth -t -S 'share admins=[domain\user1, domain\user2,
domain\user3]'
To remove a setting, enter settingname=.
All servers, or only the servers specified in HOSTLIST, will be joined to the specified Active
Directory domain.
Modify authentication settings and hosts:
ibrix_auth -t [-S SETTINGLIST] [-h HOSTLIST]
List default authentication settings:
ibrix_auth -L
The settings can be specified with the -S SETTINGLIST option.
Display current information about authentication:
ibrix_auth -i [-h HOSTLIST]
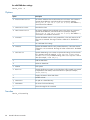
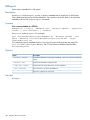
Options
Option
Description
-A
Specifies the username of an account having privileges to join the Active Directory domain.
AUTH_PROXY_USER_NAME This is typically a Domain Administrator. Be sure to specify the user's domain, such as -A
administrator@mydomain_mycompany.com.
@domain_name
-L
Displays default authentication settings.
-N
Configures Local Users authentication.
-P
Specifies the password for the proxy user account.
AUTH_PROXY_PASSWORD
-S SETTINGLIST
Specifies configuration parameters for Active Directory.
ibrix_auth
15
Option
Description
-h HOSTLIST
A list of file serving nodes.
-n DOMAIN_NAME
Specifies the domain name for Active Directory authentication.
-i
Displays current information about authentication.
-t
Modifies the authentication settings.
-?
Shows the usage for this command.
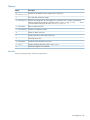
See Also
ibrix_ldap, ibrix_ldapipmapping, ibrix_localgroups, ibrix_localusers
16
StoreAll software commands
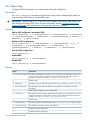
ibrix_av
Manages miscellaneous Antivirus operations.
Description
The ibrix_av command is used to start a cluster-wide update of Antivirus definitions and to
display or delete Antivirus statistics.
You can schedule periodic updates of the virus definitions. The cluster connects with external virus
scan engines, which have the current definitions, and the definitions are updated on the cluster
nodes as needed.
Synopsis
Schedule cluster-wide updates of virus definitions:
ibrix_av -t [-S CRON_EXPRESSION]
The CRON_EXPRESSION specifies the time for the virus definition update. For example, the
expression "0 0 12 * * ?" executes the command at noon every day. The following web page
provides additional information about writing a cron string:
http://wiki.opensymphony.com/display/QRTZ1/CronTriggers+Tutorial
List the schedule for updating virus definitions:
ibrix_av -l -T
Delete the schedule for updating virus definitions:
ibrix_av -d -T
List collective Antivirus statistics from all cluster nodes:
ibrix_av -l -s
Delete Antivirus statistics on all nodes in the cluster:
ibrix_av -d -s
This command deletes statistics for scanned files, detected infections, and quarantined files. Other
statistics such as the number of virus scan engines added or present in the cluster are maintained.
Options
Option
Description
-S CRON_EXPRESSION
Specifies a schedule for updating virus definitions on cluster nodes.
-T
Lists the schedule for updating virus definitions on cluster nodes.
-d
Deletes the update schedule or Antivirus statistics.
-l
Lists the update schedule or Antivirus statistics.
-s
Antivirus statistics.
-t
Starts cluster-wide updates of virus definitions.
-?
Shows the usage for this command.
See also
ibrix_avconfig
ibrix_av
17
ibrix_avconfig
Configures Antivirus operations on a StoreAll cluster.
Description
The ibrix_avconfig command can be used to enable or disable Antivirus operations on file
systems, to add the virus scan engines running the Antivirus software, to configure exclusions on
directories, and to configure other policies. To configure the Antivirus feature on a cluster, complete
these steps:
1. Add the external virus scan engines to be used for virus scanning. These systems run the
Antivirus software. Use the ibrix_av command to schedule updates of virus definitions from
the virus scan engines to the cluster nodes.
2. Enable Antivirus on file systems.
3. Update Antivirus settings as appropriate for your cluster.
For file sharing protocols other than SMB, when Antivirus is enabled on a file system, scans are
triggered when a file is first read. Subsequent reads to the file do not trigger a scan unless the file
has been modified or the virus definitions have changed. For SMB, you must specify the file
operations that trigger a scan (open, close, or both).
The scans are forwarded to an external scan engine, which blocks the operation until the scan is
complete. After a successful scan, if the file is found to be infected, the system reports a
permission denied error message as the result of the file operation. If the file is clean, the file
operation is allowed to go through.
You can define Antivirus exclusions on directories in a file system to exclude files from being
scanned. When you define an exclusion rule for a directory, all files/folders in that directory
hierarchy are excluded from Antivirus scans based on the rule.
IMPORTANT: The exclusion by file extension feature is not supported for files objects stored under
an HTTP StoreAll REST API share created in the object mode. If the share is created under the file
system on which you created the exclusion, the exclusion still does not apply to the file objects
present under that share in object mode. This situation occurs because the HTTP StoreAll REST API
object mode references file objects with hash names.
Synopsis
Add an external virus scan engine:
ibrix_avconfig -a -S -I IPADDR -p PORTNUM
The port number specified here must match the ICAP port number configured on the virus scan
engines. The recommended ICAP port on the virus scan engine is 1344.
Remove the external virus scan engine with the specified IP address:
ibrix_avconfig -r -S -I IPADDR
Enable Antivirus on specified file systems:
ibrix_avconfig -e -f FSLIST
If you specify more than one file system, use commas to separate the file systems.
Enable Antivirus on all file systems in the cluster:
ibrix_avconfig -e -F
Update the Antivirus unavailable policy:
ibrix_avconfig -u -g A|D
18
StoreAll software commands
This policy determines how targeted file operations are handled when an external virus scan engine
is not available. The policies are:
•
A — Allow. All operations triggering scans are allowed to run to completion.
•
D — Deny. All operations triggering scans are blocked and returned with an error.
Update the protocol-specific Antivirus scan setting:
ibrix_avconfig -u -k PROTOCOL -G O|C|B
The -G option specifies the policy that determines which file operations trigger AV scans. There
are three policies:
•
O — Scan on open.
•
C — Scan on close.
•
B — Scan on open and close.
The -k option specifies the file sharing protocol affected by the scan policy. Currently, only the
SMB protocol is supported.
Add exclusions on the specified directory:
ibrix_avconfig -a -E -f FSNAME -P DIR_PATH {-N | [-x FILE_EXTENSION]
[-s FILE_SIZE]}
Exclusions specify files to be skipped during Antivirus scans. There are three types of exclusions:
•
-x FILE_EXTENSION — Excludes all files having the specified extension, such as .jpg. If
you specify multiple extensions, use commas to separate the extensions.
•
-s FILE_SIZE — Excludes all files larger than the specified size (in MB).
•
-N — Does not exclude any files in the directory hierarchy.
Remove exclusions from the specified directory:
ibrix_avconfig -r -E -f FSNAME -P DIR_PATH
Disable Antivirus on all file systems in the cluster:
ibrix_avconfig -d -F
Disable Antivirus on the specified file systems:
ibrix_avconfig -d -f FSLIST
Use commas to separate the file systems.
List the anti-virus configuration:
ibrix_avconfig -l
Lists exclusions, if any, on the specified directory:
ibrix_avconfig -l -E -f FSNAME -P DIR_PATH
Options
Option
Description
-E
Configures Antivirus exclusions.
-F
Enables or disables Antivirus on all files systems.
-G
Specifies scan policies for a file sharing protocol.
-I IPADDRESS
Specifies the IP address of an external scan engine.
-N
Specifies that no files should be excluded from the scan.
-P DIRPATH
Specifies a directory path.
ibrix_avconfig
19
Option
Description
-S
Adds or removes an external Antivirus scan engine.
-a
Adds a new item to the Antivirus configuration.
-d
Disables Antivirus on specific file systems.
-e
Enables Antivirus on specific file systems.
-f FSLIST
Specifies file system names, separated by commas.
-g
Updates the Antivirus unavailable policy.
-k PROTOCOL
Specifies a file sharing protocol for scan policies.
-l
Lists the Antivirus configuration.
-p PORTNUMBER
Specifies the port number of an external scan engine.
-r
Removes an existing item from the Antivirus configuration.
-s FILE_SIZE
Specifies the file size limit (in MB) for exclusions.
-u
Updates an item in the Antivirus configuration.
-x FILE_EXTENSION
Specifies a list of file types to be excluded from scans (for example, jpeg,meg).
-?
Shows the usage for this command.
See also
ibrix_av, ibrix_avscan
ibrix_avquarantine
Manages infected files on a StoreAll file system.
Description
The ibrix_avquarantine command is used to manage infected files that were quarantined.
Synopsis
Manage quarantined files:
ibrix_avquarantine -L|-R|-D|-M -f <FSNAME > -p
<COMMA-SEPARATED_PATH_TO_FILES>
In this instance:
•
<FSNAME> is the name of the file system.
•
<COMMA-SEPARATED_PATH_TO_FILES> is a comma-separated list of paths to the
quarantined files.
List quarantined files:
ibrix_avquarantine -L -f <FSNAME >
Hash names are displayed for infected files stored on an HTTP StoreAll REST API share created in
object mode, as shown in the following example:
/fs1/dir1/2004/share1container/33b/32b/ce1be0ff4065a6e9415095c95f25f47a633cef2b
The getfattr command is used to obtain the corresponding filename. You must include the entire
absolute path in the command or go to the directory containing the file object. This requirement is
key because identical filenames in different containers will have the same object name and identical
container names can be created by different users.
20
StoreAll software commands
To obtain the corresponding filename for the hash name, enter the following command if you are
not in the directory containing the file object:
getfattr -n "user.bucket_mode_key"
/fs1/dir1/2004/share1container/33b/32b/ce1be0ff4065a6e9415095c95f25f47a633cef2b
In this instance
/fs1/dir1/2004/share1container/33b/32b/ce1be0ff4065a6e9415095c95f25f47a633cef2b
is the absolute path containing the hash name.
To obtain the corresponding filename for the hash name, enter the following command if you are
in the directory containing the file object:
getfattr -n "user.bucket_mode_key" portion_of_hash_name_after_last_slash
You would enter the portion of the hash name after the last slash returned by the
ibrix_avquarantine command.
In this instance, the portion of the hash name after the last slash is
ce1be0ff4065a6e9415095c95f25f47a633cef2b, and so the user would enter the following:
getfattr -n "user.bucket_mode_key"
ce1be0ff4065a6e9415095c95f25f47a633cef2b
The command displays the following:
#file: ce1be0ff4065a6e9415095c95f25f47a633cef2b
user.bucket_mode_key="file1.txt"
In this instance, file1.txt is the corresponding object/file that is infected.
Reset quarantined files:
ibrix_avquarantine -R -f <FSNAME > [-p <name1>, <name 2> ,...]
Resets the infected bits, so that you can rescan the file.
Delete quarantined files:
ibrix_avquarantine -D -f <FSNAME > [-p <name1>, <name 2> ,...]
Deletes all infected files or specified files from a file system.
Move quarantined files:
ibrix_avquarantine -M -f <FSNAME > [-p <name1>, <name 2>, …] -d
<Destination_Directory>
Moves files outside the AV-enabled file system, so that you can clean the infected files.
NOTE: You cannot copy or move an infected file outside an AV-enabled file system by using
basic Linux commands, such as mv and cp. You must use the move option in the quarantine utility
to do so.
Options
Option
Description
-D
Deletes quarantined files.
-L
Lists quarantined files on a particular file system.
-M
Moves quarantined files.
-R
Resets quarantined files.
See also
ibrix_av, ibrix_avscan
ibrix_avquarantine
21
ibrix_avscan
Manages Antivirus scans on a StoreAll file system. The Antivirus scan command lets you specify
a directory path under which all the files are subjected to an antivirus scan, unlike normal “antivirus
scan on read.”
Description
The ibrix_avscan command starts or stops an Antivirus scan task. It can also be used to display
information about Antivirus scan tasks.
Multiple scan tasks can run in the cluster; however, you can run only one scan task at a time on a
specific AV-enabled file system. When you start a scan task, you can specify the maximum duration,
in hours, that the scan can run. The maximum duration is 168 hours (7 days). If you do not specify
a maximum duration the antivirus scan task scans all files in a given path without any timeout.
At the end of maximum duration, the scan is stopped and it becomes an inactive task. You can
view the detailed scan statistics by selecting the task from the inactive list.
To pause or resume an Antivirus scan task, use ibrix_task.
Synopsis
Start an Antivirus scan:
ibrix_avscan -s -f FSNAME -p PATH [-d DURATION]
Provide a status summary of Antivirus scan tasks:
ibrix_avscan -l [-f FSLIST]
Provide detailed information about Antivirus scan tasks:
ibrix_avscan -i [-f FSLIST]
Stop the specified Antivirus scan task:
ibrix_avscan -k -t TASKID [-F]
Use ibrix_avscan -l to determine the task ID.
Options
Option
Description
-F
Forcibly stops an Antivirus scan task.
-d
Specifies the maximum duration, in hours, for a scan task. The task is stopped when this
limit is reached.
-f FSNAME or FSLIST
File system name. Use it with one of the following commands: ibrix_avscan -l or
ibrix_avscan -i
-i
Displays detailed information for Antivirus scan tasks.
-k
Stops an Antivirus scan task.
-l
Displays a status summary for Antivirus scan tasks.
-p PATH
Specifies the directory path to be scanned.
-s
Starts an Antivirus scan task.
-t TASKID
Specifies the task ID for an Antivirus scan task.
-?
Shows the usage for this command.
See also
ibrix_av, ibrix_avconfig, ibrix_task
22
StoreAll software commands
ibrix_caseinsensitive
Manages case insensitivity on a file system or directory.
Description
By default, StoreAll file systems and directories follow POSIX semantics and file names are
case-sensitive for Linux/NFS users. (File names are always case-insensitive for Windows clients.)
If you prefer to use Windows semantics for Linux/NFS users, you can make a file system or
subdirectory case-insensitive. Doing this prevents a Linux/NFS user from creating two files that
differ only in case (such as file1 and FILE1). If Windows users are accessing the directory, two
files with the same name but different case might be confusing, and the Windows users may be
able to access only one of the files.
CAUTION: Be careful when applying the case-insensitivity setting to an existing directory populated
with files. Make sure you do not have files with duplicate names but in different cases, for example
File1 and file1. If you edit one of the files (File1), the other file (file1) is changed to match
the contents of the edited file. Both files will contain the same data, resulting in the loss of data
from the other file.
CAUTION: This feature breaks POSIX semantics and can cause problems for Linux utilities and
applications.
Before enabling the case-insensitive feature, be sure the following requirements are met:
•
The agile Fusion Manager must be installed on all nodes in the cluster.
•
The file system or directory must be created under the StoreAll 6.0 or later release.
•
The file system must be mounted.
When case-insensitivity is in effect, a newly created directory retains the case-insensitive setting of
its parent directory. When you use commands and utilities that create a new directory, that directory
has the case-insensitive setting of its parent. See the HP StoreAll Storage File System User Guide
for more information.
Synopsis
Set case-insensitivity on the specified path and all of its descendent directories:
ibrix_caseinsensitive -s -f FSNAME -c [ON|OFF] -p PATH
The -c option turns case insensitivity on or off. The setting applies to all users (NFS/Linux/Windows).
View the current setting for case insensitivity:
ibrix_caseinsensitive -i -f FSNAME -p PATH [-r]
Options
Option
Description
-c
Turns case insensitivity on or off.
-f FSNAME
Specifies a file system.
-i
Reports current case-insensitive settings.
-p PATH
Specifies the path to a file system or directory.
-r
Specifies recursive information about subdirectories.
-s
Performs a case-insensitive setting operation on the PATH and its descendent directories for
all users.
-?
Shows the usage for this command.
ibrix_caseinsensitive
23
ibrix_certificate
Manages SSL certificates.
Description
Servers accepting FTPS and HTTPS connections typically provide an SSL certificate that verifies the
identity and owner of the web site being accessed. You can add your existing certificates to the
cluster, enabling file serving nodes to present the appropriate certificate to FTPS and HTTPS clients.
StoreAll software supports PEM certificates.
When you add an SSL certificate file to the cluster, the file must contain both the certificate contents
(the .crt file) and the private key (the .key file). The certificate file must use PEM encoding, must
include the headers and footers from the .crt and .key files, and cannot contain any extra
spaces. See the HP StoreAll Storage File System User Guide for details about creating certificate
files in the format required by StoreAll software.
When you configure the FTP share or the HTTP vhost, you can select the certificate to be used for
FTPS or HTTPS.
Synopsis
Add a certificate:
ibrix_certificate -a -c CERTNAME -p CERTPATH
For example:
# ibrix_certificate -a -c mycert -p
/usr/local/ibrix/httpd/conf/mycert.crt
Run the command from the active Fusion Manager. To add a certificate for a different node, copy
that certificate to the active Fusion Manager and then add it to the cluster. For example, if node
ib87 is hosting the active Fusion Manager and you have generated a certificate for node ib86,
copy the certificate to ib87:
scp server.pem ib87/tmp
Then, on node ib87, add the certificate to the cluster:
ibrix_certificate -a -c cert86 -p /tmp/server.pem
Modify a certificate:
ibrix_certificate -m -c CERTNAME
Delete a certificate:
ibrix_certificate -d -c CERTNAME
Display information about certificates:
ibrix_certificate -i [-c CERTNAME]
Export a certificate:
ibrix_certificate -e -c CERTNAME
This command displays the contents of the certificate. You can then copy and save the contents
for future use.
Options
24
Option
Description
-a
Adds a certificate.
-c CERTNAME
Specifies the name of a certificate.
-d
Deletes a certificate.
StoreAll software commands
Option
Description
-e
Exports a certificate.
-i
Shows information about a certificate.
-m
Modifies a certificate.
-p CERTPATH
Specifies the location of the certificate file.
-?
Shows the usage for this command.
NOTE: The -m and -S SETTINGLIST options shown in the command usage message are not
currently supported.
See also
ibrix_ftpshare, ibrix_httpvhost
ibrix_certificate
25
ibrix_chassis
Display information about the chassis in an X9720/9730 system, or unregister a chassis.
Description
The chassis in an X9720/9730 system is registered automatically for hardware monitoring. The
ibrix_chassis command displays information about registered chassis or about servers registered
in a chassis. You can also use the command to unregister a chassis.
Synopsis
List all registered chassis:
ibrix_chassis -l
List detailed information for the specified chassis:
ibrix_chassis -i [-nCHASSISNAME]
List all registered servers in one or all chassis:
ibrix_chassis -l -s [-n CHASSISNAMELIST]
This command lists the registered servers in the chassis provided in the command. In this instance,
CHASSISNAMELIST can be the name of a chassis or a comma-separated list of multiple chassis.
If [-n CHASSISNAMELIST] is not provided, the registered servers for all chassis are listed.
List detailed information for registered servers in one or all chassis:
ibrix_chassis -i -s [-n CHASSISNAMELIST]
This command lists detailed information for registered servers in the chassis provided in the
command. In this instance, CHASSISNAMELIST can be the name of a chassis or a comma-separated
list of multiple chassis. If [-n CHASSISNAMELIST] is not provided, detailed information for
registered servers for all chassis are displayed.
Lists detailed information for the named registered servers in the named chassis.
ibrix_chassis -i -s [-n CHASSISNAME -h HOSTNAMES]
In this instance:
•
CHASSISNAME is the name of the chassis.
•
HOSTNAMES is a comma-separated list of registered server names.
Unregister a chassis:
ibrix_chassis -d -n CHASSISNAME
Options
26
Option
Description
-d
Unregisters a chassis.
-h HOSTNAMES
Specifies hosts (host1,host2,..).
-i
Lists detailed information for chassis or servers registered to a chassis.
-l
Lists chassis.
-n CHASSISNAME
Specifies a chassis.
-n CHASSISLIST
Specifies multiple chassis (chassis1,chassis2,..).
-s
Displays information for registered servers in the specified chassis.
-?
Shows the usage for this command.
StoreAll software commands
ibrix_cifs
Manages SMB shares.
NOTE: Be sure to use the ibrix_cifs command located in <installdirectory>/bin.
The ibrix_cifs command located in /usr/local/bin/init is used internally by StoreAll
software and should not be run directly.
Description
SMB is the file-sharing protocol used in Windows-based networks. Use the ibrix_cifs command
to configure SMB shares.
You can configure the following options when creating a share:
•
Default modes for creating files and directories in the share.
•
Allow and deny lists for client IP addresses.
NOTE: This option cannot be used if your network includes packet filters, a NAT gateway,
or routers.
•
Access-based enumeration. When this feature is in effect, users can see only the files and
folders to which they have been allowed access on the SMB share.
Various other SMB settings such as read-only can also be applied. The ibrix_cifs -L command
lists the available settings.
Synopsis
Add an SMB share:
ibrix_cifs -a -f FSNAME -s SHARENAME -p SHAREPATH [-D SHAREDESCRIPTION]
[-S SETTINGLIST] [-A ALLOWCLIENTIPSLIST] [-E DENYCLIENTIPSLIST] [-F
FILEMODE] [-M DIRMODE] [-h HOSTLIST]
NOTE: You cannot create an SMB share with a name containing an exclamation point (!) or a
number sign (#) or both.
The share can be added at the specified path on all file serving nodes or only the nodes specified
in HOSTLIST. The option descriptions describe the required format for entering lists of values.
Modify settings on an SMB share:
ibrix_cifs -m -s SHARENAME [-D SHAREDESCRIPTION] [-S SETTINGLIST] [-A
ALLOWCLIENTIPSLIST] [-E DENYCLIENTIPSLIST] [-F FILEMODE] [-M DIRMODE]
[-h HOSTLIST]
The share can be modified on all file serving nodes or only the nodes specified in HOSTLIST. To
modify SMB settings, include the -S SETTINGLIST option and supply the new values. To delete
a setting, enter settingname= with no value (for example, read only=). To list the valid SMB
share settings, use ibrix_cifs -L.
Delete an SMB share:
ibrix_cifs -d -s SHARENAME [-h HOSTLIST]
The share can be deleted from either all file serving nodes or only the nodes specified in HOSTLIST.
Delete all SMB shares associated with the specified file system:
ibrix_cifs -d -f FSNAME
Display information about SMB shares:
ibrix_cifs -i [-h HOSTLIST]
You can list information for all file serving nodes or only the nodes specified in HOSTLIST.
ibrix_cifs
27
List valid SMB share settings:
ibrix_cifs -L
Options
Option
Description
-A ALLOWCLIENTIPSLIST
Lists client IP addresses that are allowed access to the share. Use commas to
separate the IP addresses, and enclose the list in quotes (for example,
ibrix_cifs -A "192.186.0.1,102.186.0.2/16"). The default is "",
which allows all IP addresses.
-D SHAREDESCRIPTION
Describes the share.
-E DENYCLIENTIPSLIST
Lists client IP addresses that are denied access to the share. Use commas to
separate the IP addresses, and enclose the list in quotes (for example,
ibrix_cifs -E "192.186.0.1,102.186.0.2/16"). The default is "",
which means no IP addresses are denied.
-F FILEMODE
Specifies the default mode for newly created files, in the same manner as the
Linux chmod command. The range of values is 0000–0777. The default is
0700.
-L
Lists valid SMB share settings.
-M DIRMODE
Specifies the default mode for newly created directories, in the same manner
as the Linux chmod command. The range of values is 0000–0777. The default
is 0700.
-S SETTINGLIST
Specifies SMB settings. Use commas to separate the settings, and enclose the
list in quotation marks (for example, "read only=yes,access based
enumeration=true"). To delete a setting, enter "settingname=" with no
value (for example, "read only=").
-a
Adds an SMB share.
-d
Deletes an SMB share.
-f FSNAME
A file system.
-h HOSTLIST
Specifies the file serving nodes on which the share will be created. Use commas
to separate the node names, and enclose the list in quotes (for example,
"host1,host2").
-i
Displays information about SMB shares.
-m
Modifies a share.
-p SHAREPATH
The path to a shared directory.
-s SHARENAME
The name of a shared directory.
-?
Shows the usage for this command.
See also
ibrix_cifsconfig
28
StoreAll software commands
ibrix_cifsconfig
Configures global settings for SMB.
Description
The ibrix_cifsconfig command configures global settings for SMB operations. The settings
apply to all SMB shares configured in the cluster.
Synopsis
Configure SMB settings:
ibrix_cifsconfig -t [-S SETTINGLIST] [-h HOSTLIST]
For the -S SETTINGLIST option, enclose the list of settings in quotation marks, and use commas
to separate the settings. For example, the following command sets SMB signing to enabled and
required:
ibrix_cifsconfig -t -S "smb signing enabled=1,smb signing required=1"
To disable SMB signing, use this command:
ibrix_cifsconfig -t -S "smb signing enabled=0,smb signing required=0"
The next example enables RFC2307, which is the protocol that enables Linux static user mapping
with Active Directory:
ibrix_cifsconfig -t -S "rfc2307_support=rfc2307"
To disable RFC2307, use this command:
ibrix_cifsconfig -t -S "rfc2307_support=unprovisioned"
To see other supported settings, use the ibrix_cifsconfig -L command.
IMPORTANT: After making configuration changes with the ibrix_cifsconfig -t -S
command, use the following command to restart the SMB services on all nodes affected by the
change.
ibrix_server -s -t cifs -c restart [-h SERVERLIST]
Clients will experience a temporary interruption in service during the restart.
Display current information about global SMB settings:
ibrix_cifsconfig -i [-h HOSTLIST]
List default global SMB configuration settings:
ibrix_cifsconfig -L
Options
Option
Description
-L
Lists default global SMB configuration settings.
-S SETTINGLIST
Specifies global SMB settings. Use commas to separate the settings, and enclose
the list in quotation marks (for example,
"smb_signing_enabled=1,smb_signing_required=0").
-h
Specifies one or more file serving nodes.
-i
Displays current information about global SMB settings.
-t
Configures global SMB settings.
-?
Shows the usage for this command.
ibrix_cifsconfig
29
See also
ibrix_cifs
30
StoreAll software commands
ibrix_cifsmonitor
Monitors SMB services on file serving nodes.
Description
The ibrix_cifsmonitor command configures monitoring for the following SMB services:
•
lwreg
•
dcerpc
•
eventlog
•
lsass
•
lwio
•
netlogin
•
srvsvc
If the monitor finds that a service is not running, it attempts to restart the service. If the service
cannot be restarted, that particular service is not monitored.
Synopsis
Start the SMB monitoring daemon and enable monitoring:
ibrix_cifsmonitor -m [-h HOSTLIST]
Disable monitoring and stop the SMB monitoring daemon:
ibrix_cifsmonitor -u [-h FMLIST]
Restart SMB service monitoring:
ibrix_cifsmonitor -c [-h HOSTLIST]
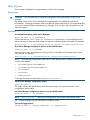
Display the health status of SMB services:
ibrix_cifsmonitor -l
The command output reports health status as follows:
Health Status
Condition
Up
All monitored SMB services are up and running
Degraded
The lwio service is running but one or more of the other services are down
Down
The lwio service is down and one or more of the other services are down
Not Monitored
Monitoring is disabled
N/A
The active Fusion Manager could not communicate with other file serving nodes in the cluster
Options
Option
Description
-c
Restarts SMB service monitoring.
-h FMLIST
Specifies file serving nodes (use commas to separate the node names).
-l
Displays the health status of SMB services.
-m
Enables monitoring of SMB services.
-u
Disables monitoring of SMB services.
-?
Shows the usage for this command.
ibrix_cifsmonitor
31
ibrix_cifsperms
Manages user and group permissions for SMB shares.
Description
The ibrix_cifsperms command adds a user or group to an SMB share and assigns share-level
permissions. You can also use the command to modify or delete existing share-level permissions,
or to display the current share-level permissions.
The share level permissions are fullcontrol, read, or change.
NOTE: Permissions on an SMB share managed by the MMC cannot be modified by the StoreAll
management console GUI or CLI.
Synopsis
Add a user or group to a share and assign share-level permissions:
ibrix_cifsperms -a -s SHARENAME -u USERNAME -t TYPE -p PERMISSION [-h
HOSTLIST]
For example, the following command gives everyone read permission on share1:
ibrix_cifsperms -a -s share1 -u Everyone -t ALLOW -p read
Modify share-level permissions for a user or group:
ibrix_cifsperms -m -s SHARENAME -u USERNAME -t TYPE -p PERMISSION [-h
HOSTLIST]
Delete share-level permissions for a user or group:
ibrix_cifsperms -d -s SHARENAME [-u USERNAME] [-t TYPE] [-h HOSTLIST]
Display share-level permissions:
ibrix_cifsperms -i -s SHARENAME [-t TYPE] [-h HOSTLIST]
Options
32
Option
Description
-a
Adds a user or group to a share and assigns share-level permissions.
-d
Deletes share-level permissions for a user or group.
-h HOSTLIST
Specifies file serving nodes (use commas to separate the node names).
-i
Displays share-level permissions.
-m
Modifies share-level permissions for a user or group.
-p PERMISSION
Specifies a permission setting (fullcontrol, read, or change).
-s SHARENAME
Specifies the name of a share.
[-t TYPE]
Specifies the type of permission (allow or deny).
-u USERNAME
Specifies a user or group name.
-?
Shows the usage for this command.
StoreAll software commands
ibrix_client
Performs management and control procedures for StoreAll clients.
Description
ibrix_client enables the following StoreAll client procedures:
•
Registers a StoreAll Linux client with a Fusion Manager. Clients that are to communicate with
multiple management consoles must be registered on each console. (To register a Windows
StoreAll client, use the Windows StoreAll client GUI.)
•
Sets a preferred user interface for a StoreAll client. To prefer a user interface for a host group,
use ibrix_hostgroup.
•
Unprefers a user interface for a StoreAll client. To unprefer an interface for a host group, use
ibrix_hostgroup.
•
Lists client information.
•
Deletes StoreAll clients from the configuration database.
The StoreAll clients use the cluster interface by default. It is not necessary to prefer a user interface
for NFS or SMB clients because they use client-side information to select a user interface when
they mount a file system.
The network interface preference for a StoreAll client is stored in the Fusion Manager. When
StoreAll software services start on the client, the client queries the Fusion Manager for its preferred
network interface and then starts using it. If StoreAll software services are already running on a
client, you can force the client to query the Fusion Manager. To do this, run ibrix_client or
ibrix_lwhost --a, or reboot the client.
Synopsis
Register a StoreAll Linux client at an IP address:
ibrix_client -a -h CLIENT -e IPADDRESS
Execute this command on every Fusion Manager with which the client will communicate.
Delete StoreAll clients from the configuration database:
ibrix_client -d -h CLIENTLIST
NOTE: This command only removes the client from the configuration database; it does not unmount
the file system locally. To unmount the file system, use the ibrix_lwumount command. HP
recommends that you unmount the file system first and then delete the client from the database.
Display operational and configuration information for StoreAll clients:
ibrix_client -i [-h CLIENTLIST]
To see all clients, omit the -h option.
List StoreAll client host names, IP addresses, and IDs:
ibrix_client -l [-h CLIENTLIST] [-v]
To see all clients, omit the -h option. To also list IAD, kernel, and filesystem version information,
include the -v option.
Set a preferred network interface for a StoreAll client:
ibrix_client -n -h SRCCLIENT -A DESTSERVER/IFNAME
The command sets interface IFNAME for traffic from source client SRCCLIENT to destination server
DESTSERVER. To prefer a network interface for a host group, use ibrix_hostgroup.
Delete the established network interface preference for a StoreAll client:
ibrix_client -n -h SRCHOST -D DESTSERVER
ibrix_client
33
When the command has completed, the default cluster interface will be used to communicate from
the client to the DESTSERVER.
Options
Option
Description
-A
Assigns a preferred NIC.
-D DESTSERVER
Deletes the network interface preference established between the source client and the
destination server.
-a
Adds a StoreAll client.
-d
Deletes a client from the configuration database. The -d option does not unmount the file
system locally. To unmount the file system, use the ibrix_lwumount command. HP
recommends that you unmount the file system first and then delete the client from the
database.
-e IPADDRESS
Specifies the IP address for a client.
-h CLIENTLIST
One or more clients (specify as CLIENT1,CLIENT2,CLIENT3,...).
-i
Provides detailed information for one or more clients.
-l
Lists clients.
-n
Sets a preferred network interface.
-v
When used with -l, reports version information for the file system, IAD, and kernel.
-?
Shows the usage for this command.
See also
ibrix_hostgroup, ibrix_lwhost
34
StoreAll software commands
ibrix_cluster
Registers a remote cluster for remote replication.
Description
The source and target clusters of a remote replication configuration must be registered with each
other before remote replication tasks can be created.
Use ibrix_cluster -r on the target cluster to register the source cluster before creating a
remote replication export with ibrix_crr_export. Use ibrix_cluster -r on the source
cluster to register the target cluster before starting a remote replication task with ibrix_crr. It is
necessary to run the command only once per source or target.
Synopsis
Register the remote cluster and its Fusion Manager with the local cluster:
ibrix_cluster -r -C CLUSTERNAME -H REMOTE_FM_HOST
For the -H option, enter the name or IP address of the host where the remote cluster's Fusion
Manager is running. For high availability, use the virtual IP address of the Fusion Manager.
Remove the registration of a remote cluster from this cluster:
ibrix_cluster -d -C CLUSTERNAME
List clusters registered with the local cluster:
ibrix_cluster -l
Options
Option
Description
-d
Removes the registration of a remote cluster from this cluster.
-l
Lists clusters registered with the local cluster.
-r
Registers the remote cluster and its Fusion Manager with the local cluster.
-C CLUSTER_NAME
Name of the target cluster being registered or having its registration removed.
-H REMOTE_FM_HOST
Name or IP address of the host where the Fusion Manager for the target cluster is running
is running. For high availability, use the virtual IP address of the Fusion Manager.
-?
Shows the usage for this command.
See also
ibrix_crr, ibrix_crr_export, ibrix_crr_nic
ibrix_cluster
35
ibrix_clusterconfig
Sets or displays cluster configuration parameters.
Description
Configures cluster configuration settings such as the default gateway and time zone. The settings
are used during cluster setup and can also be used to update the configuration of existing systems.
Synopsis
Show cluster-wide configuration parameters:
ibrix_clusterconfig -i -P
Set cluster configuration parameters:
ibrix_clusterconfig -c -P PARAM1=VALUE1[,...,PARAMn=VALUEn]
Show IP address to hostname mappings:
ibrix_clusterconfig -i -A
Assign the list of host names to the specified address:
ibrix_clusterconfig -c -A ADDRESS -h HOSTNAME1[,...,HOSTNAMEn]
Remove the specified address from the mapping table:
ibrix_clusterconfig -d -A ADDRESS
Show the list of configured NTP servers:
ibrix_clusterconfig -i -N
Set the list of NTP servers:
ibrix_clusterconfig -c -N SERVER1[,...,SERVERn]
Show cluster DNS settings:
ibrix_clusterconfig -i -S
Sets the DNS servers and domains:
ibrix_clusterconfig -c -S SERVER1[,...,SERVERn] -D DOMAIN1[,...,DOMAINn]
Show network configurations:
ibrix_clusterconfig -i -W
Create or update a network configuration:
ibrix_clusterconfig -c -W DEV -Y CATEGORY [-M NETMASK] [-T SETUP] [-R
RANGE] [-V SLAVES] [-o OPTIONS]
If SETUP is bond, slaves must be defined. RANGE is a comma-delimited list of ranges in the form
[nnn.nnn.nnn.nnn-nnn.nnn.nnn.nnn]. OPTIONS is a list of option=value pairs, delimited
by commas.
Remove a network configuration:
ibrix_clusterconfig -d -W DEV
Erase all addresses allocated for a network:
ibrix_clusterconfig -e -L DEV
Show allocated addresses for a network:
ibrix_clusterconfig -i -L DEV
Create or update an allocated address:
ibrix_clusterconfig -c -L DEV -I ADDRESS [-C MAC] [-h HOSTNAME]
36
StoreAll software commands
Remove an allocated address:
ibrix_clusterconfig -d -L DEV -I ADDRESS
Show OS parameters and tunings:
ibrix_clusterconfig -i -O
Create or update an OS parameter:
ibrix_clusterconfig -c -O KEY=VALUE,[...KEY=VALUE]
Delete/reset an OS parameter:
ibrix_clusterconfig -d -O KEY
List OS parameters and defaults:
ibrix_clusterconfig -Q
Synchronize parameters on file serving nodes:
ibrix_clusterconfig -s [-P] [-O] [-o keyword] [-h HOSTLIST]
Use -P to synchronize cluster parameters. Use -O to synchronize OS tunings.
Options
Option
Description
-A
Host address aliases.
-C
MAC address.
-D DOMAIN1[,...,DOMAINn]
Sets DNS domains.
-I ADDRESS
IP address [nnn.nnn.nnn.nnn].
-L DEV
Allocated addresses.
-M NETMASK
Netmask [nnn.nnn.nnn.nnn].
-N SERVER1[,...,SERVERn]
NTP servers.
-O KEY=VALUE,[...KEY=VALUE]
OS parameters and tunings, which are:
• sysct.kernel.maps_protect: Hides memory relocations from
other users. The default value is 1 (hidden). Zero (0) means memory
relocations are not hidden.
• sysctl.kernel.printk: Controls kernel messages logged to
the console. The default value is 3 4 1 7.
• config.cpuspeed.GOVERNOR: Sets the dynamic CPU governor.
The default value is performance.
• config.selinux.SELINUX: Sets the selinux status on segment
servers. The default value is disabled.
• config.ntpd.SYNC_HWCLOCK: Synchronizes the hardware clock
after a successful NTP update. The default value is no.
• sysctl.net.ipv4.tcp_mem: Bounds used by TCP to track its
memory usage (3 integers). The default value is 196608 262144
393216.
• sysctl.net.ipv4.tcp_wmem: Bounds used by TCP to regulate
the send buffer sizes (3 integers). The default value is 4096 13684
4194304.
• sysctl.net.ipv4.tcp_rmem: Bounds used by TCP to regulate
the receive buffer sizes (3 integers). The default value is 4096
87380 4194304.
• sysctl.net.core.wmem_max: The maximum socket (in bytes)
for the send buffer size in bytes. The default value is 131071.
ibrix_clusterconfig
37
Option
Description
• sysctl.net.core.rmem_max: The maximum socket (in bytes)
for the receive buffer size. The default value is 131071.
• sysctl.vm.min_free_kbytes: Forces the virtual machine to
keep a minimum number of KB free. The default value is 5742.
• sysctl.vm.dirty_ratio: The percentage of total memory
reached when a task will write dirty data. The default value is 40.
• sysctl.vm.dirty_background_ratio: The percentage of
total memory reached when the pdflush daemon will write dirty
data. The default value is 10.
• sysctl.kernel.panic_on_oops: Initiates a hard system reboot
when the system encounters errors on a kernel panic. The default
value is 1.
• sysctl.net.core.netdev_max_backlog: Sets the maximum
number of packets in the global input queue. The default value is
1000.
• ibrix.config.persona: The name of the active persona. The
default value is ibrix.
• ibrix.windows.unmask: The default unmask for Windows. The
default value is 022.
-P
Cluster configuration parameters, which are:
• gateway: The default cluster gateway/route IP address.
• timezone: The time zone in which the cluster resides. Example
formats include America/New_York, US/Eastern, UTC.
• regaddr: The IP address of the Primary Fusion Manager (virtual
interface).
• hostnametemplate: Enter in the format of hostname{number}
.domain (for example, virtual.local).
38
-Q
Queries OS parameters and tunings.
-R RANGE
Address range [nnn.nnn.nnn.nnn-nnn.nnn.nnn.nnn].
-S SERVER1[,...,SERVERn]
DNS servers.
-T SETUP
Network setup type.
-V SLAVES
Bonded slave devices (DEV1,DEV2,...).
-W DEV
Preconfigured networks.
-Y CATEGORY
Network category (cluster or user).
-c
Changes the stored configuration.
-d
Deletes the stored configuration.
-e
Erases address allocations.
-h
A list of one or more hosts (HOST1,HOST2,HOST3,...).
-i
Shows the stored configuration.
-o keyword
Option list.
-s
Synchronizes settings on file serving nodes.
-?
Shows the usage for this command.
StoreAll software commands
ibrix_collect
Collects information from StoreAll cluster nodes for diagnosis by HP Support.
Description
This command collects relevant information from StoreAll systems for diagnosis. You can invoke
the collection manually using ibrix_collect or the GUI, or it can be invoked automatically by
a system crash. When you invoke the collection manually, you can specify a name for the collection.
A collected data set includes logs and output from specific operating system and StoreAll commands.
When a collection is initiated by a system crash, the utility captures the output of the crash digester
in addition to the logs and command output. On each node, the collection is stored as a compressed
archive file (.tgz) under the /local/ibrixcollect directory.
At the end of the collection process, the utility uploads the collected data from each cluster node
to the Fusion Manager, where it is packaged in a single compressed archive file (.tgz). The
archive file is stored on the server hosting the Fusion Manager under the /local/ibrixcollect/
archive directory.
The collected data (the .tgz file) is retained locally on the nodes until either you delete it or the
retention threshold is reached.
At the end of each collection, an event is generated to notify the specified user that the collection
is complete. You can optionally configure an email or trap notification for the event. You can also
specify that an email containing the cluster configuration be sent to a user’s mailbox at the end of
collection.
You can configure ibrix_collect as appropriate for your site:
•
Enable or disable automatic collection on the event of a system crash.
•
Enable or disable sending the cluster configuration via email at the end of the collection.
•
Specify the number of data sets to be retained in the cluster.
Synopsis
Configure ibrix_collect:
ibrix_collect -C -a YES/NO
The -a option enables or disables automatic collection after a system crash.
ibrix_collect -C -r NUMBER
The -r option specifies the maximum number of data collection sets to be retained.
ibrix_collect -C -m YES/NO [-s SMTPSERVER][-f FROM] [-t TO]
The -m option enables or disables sending the cluster configuration at the end of a collection, -s
specifies the SMTP server to which the cluster configuration will be sent, -f specifies the FROM
email ID, and -t specifies the TO email ID for sending the cluster configuration.
NOTE: When using the -t option, more than one email ID can be specified by separating with
a semicolon.
NOTE: If YES is selected for -m, the options -t, -f and -s are mandatory. If NO is selected for
-m, you do not need to provide any other options.
Initiate collection of system and StoreAll logs and command output:
ibrix_collect -c -n NAME
The name is used for the .tgz file containing the logs and command results from all cluster nodes.
Delete the specified data collection set:
ibrix_collect -d -n NAME
ibrix_collect
39
Delete all data collection sets:
ibrix_collect -d -F
Show details for the specified data collection:
ibrix_collect -v -n NAME
The details include the description, state, initiator, and time of invocation.
List the details of all data collections:
ibrix_collect -l
For each collection, the output reports the collection name, description, state, time of invocation,
and initiator.
List the ibrix_collect configuration:
ibrix_collect -i
Options
Option
Description
-C options
Configures ibrix_collect.
-a YES/NO
Enables or disables automatic collection at the time of a system crash.
-c
Invokes the collection of logs and command output.
-d
Deletes a specific data collection set.
-F
Deletes all data collection sets.
-f FROM
Specifies the email ID from which the cluster configuration will be sent.
-i
Lists the ibrix_collect configuration information.
-l
Lists the details of all data collections.
-m YES/NO
Enables or disables sending the cluster configuration by email at the end of collection.
-n NAME
Specifies the name of a data collection.
-r NUMBER
Specifies the number of data sets to be retained on the cluster nodes.
-s SMTPSERVER
Specifies the SMTP server to which the cluster configuration will be sent.
-t TO
Specifies the email IDs to which the cluster configuration will be sent.
-v
Shows details about a data collection.
-?
Shows the usage for this command.
Obtaining custom logging from ibrix_collect add-on scripts
You can create add-on scripts that capture custom StoreAll and operating system commands and
logs. To activate an add-on script, place it in the specified location, and the add-on script will run
when the ibrix_collect command is executed. Output of these add-on scripts is packaged
into IbrixCollect tar files.
Table 1 ibrix_collect add-on scripts
40
Step Description
Where to find more information?
1
Create an add-on script.
“Creating an add-on script” (page 41)
2
Run the add-on script.
“Running an add-on script” (page 42)
3
View the output from the add-on script.
“Viewing the output from an add-on script”
(page 42)
StoreAll software commands
Creating an add-on script
To create an add-on script:
1. Add-on Scripts names should be in the defined format. This should be strictly followed as
<release Number>_<add-on_script_name>.sh.
When you provide the version number, remove the period between the first and second digit
of the version number.
[root@host2 /]# ibrix_version -l
Fusion Manager version: 6.3.33
==============================
Segment Servers
===============
HOST_NAME FILE_SYSTEM IAD/IAS IAD/FS OS KERNEL_VERSION ARCH
–------—- --------------------------------- ------- ------ ---------------------- ---host2 6.3.33(internal rev 132818 in SVN) 6.3.33 6.3.33 GNU/Linux
2.6.18-194.el5 x86_64
In this example, the version displayed is 6.3.33. Use the first two digit of the version number,
6.3 for example, as a prefix to “Add-on Script File Name” without “.” (Dot), so that the name
of an add-on script named AddOnTest.sh would be 63_AddOnTest.sh.
IMPORTANT: The version provided in the name must match the version of StoreAll on which
you plan to run the script. For example, any add-on script that you want to run on StoreAll
version 6.3, must have 63_ in its file name; otherwise, the script will not run. For example, if
you prefix the name with another version, such as 62_, and you attempt to run the add-on
script on StoreAll 6.3, the script will not run.
2.
Place the added-on script in the following directory:
/usr/local/ibrix/ibrixcollect/ibrix_collect_add_on_scripts/
The following example shows several add-on scripts stored in the
ibrix_collect_add_on_scripts directory:
root@host2 /]# ls -l
/usr/local/ibrix/ibrixcollect/ibrix_collect_add_on_scripts/
total 8
-rwxr-xr-x 1 root root 93 Dec 7 13:39 60_addOn.sh
-rwxrwxrwx 1 root root 48 Dec 20 09:22 63_AddOnTest.sh
3.
Write an add-on shell script that contains a custom command/log that needs to be collected
in the final StoreAll collection. Only StoreAll and operating system commands are supported
in the scripts. These scripts should have appropriate permission to be executed.
IMPORTANT: Make sure the scripts that you are creating do not collect information or logs
that are already collected as part of the ibrix_collect command.
4.
Make sure that add-on scripts that collect the custom logs redirects the collected custom logs
to the directory local/ibrixcollect/ibrix_collect_additional_data. Only files
copied to this location will be included in the generated IbrixCollect tar file. Output of the
add-on scripts is available only when the IbrixCollect process is completed and the tar files
containing the output are extracted. See “Running an add-on script” (page 42) and then
“Viewing the output from an add-on script” (page 42).
ibrix_collect
41
Running an add-on script
To run an add-on script:
1. Verify that the add-on script is saved under the following location:
/usr/local/ibrix/ibrixcollect/ibrix_collect_add_on_scripts/
The ibrix_collect command only runs add-on scripts saved in this location.
2.
Enter the ibrix_collect command:
ibrix_collect -c -n addOnCollection
In this instance addOnCollection is the collection name.
The output of the add-on scripts is included into the final tar collection along with other logs
and command outputs. In this instance, the output would be in the addOnCollection.tgz
file.
NOTE:
The add-on scripts timeout after 20 minutes.
Viewing the output from an add-on script
To view an output from an add-on script:
1. Go to the active Fusion Manager node in the /local/ibrixcollect/archive directory
by entering the following command:
[root@host2 /]#cd /local/ibrixcollect/archive/
2.
The output of the add-on scripts is available under the tar file of the individual node. To view
the contents of the directory, enter the following command:
[root@host2 /]#ls -l
The following is an example of the output displayed:
total 3520
-rw-r--r-- 1 root root 2021895 Dec 20 12:41 addOnCollection.tgz
3.
Extract the tar file, containing the output of the add-on script. The tar file containing the output
of the add-on script has the name of the collection by entering the following command:
[root@host2 archive]#tar -xvf addOnCollection.tgz
In this instance, addOnCollection.tgz is the tar file containing the output of the add-on
script.
The tar command displays the following:
./
./host2_addOnCollection_2012-12-20-12-38-36.tgz
4.
Individual node files in the tar format are provided as
<hostname>_<collection-name>_<time-date stamp>.tgz
Extract the <hostname>_<collection-name>_<time-date stamp>.tgz tar file by
entering the following command:
[root@host2 archive]#tar -xvf
host2_addOnCollection_2012-12-20-12-38-36.tgz
In this instance, host2_addOnCollection_2012-12-20-12-38-36.tgz is the individual
node file (<hostname>_<collection-name>_<time-date stamp>.tgz ).
42
StoreAll software commands
5.
A directory with the host name is extracted. The output of the add-on script is found in the
/<hostname>/logs/add_on_script/local/ibrixcollect/
ibrix_collect_additional_data
Find the directory containing the host name by entering the ls -l command, as shown in
the following example:
[root@host2 archive]# ls -l
The following is the output of the command:
total 5636
-rw-r--r-- 1 root root 2021895 Dec 20 12:41 addOnCollection.tgz
drwxr-xr-x 6 root root 4096 Dec 20 12:41 host2
-rw-r--r-- 1 root root 2156388 Dec 20 12:41
host2_addOnCollection_2012-12-20-12-38-36.tgz
In this example, host2 is the directory with the host name.
6.
Go to the /<hostname>/logs/add_on_script/local/ibrixcollect/
ibrix_collect_additional_data directory, which contains the output of the add-on
script.
[root@host2 archive]#cd
host2/logs/add_on_script/local/ibrixcollect/ibrix_collect_additional_data/
In this instance, host2 is the name of the host.
7.
View the contents of the /<hostname>/logs/add_on_script/local/ibrixcollect/
ibrix_collect_additional_data directory:
[root@host2 ibrix_collect_additional_data]#ls -l
The command displays the following output:
total 4
-rw-r--r-- 1 root root 2636 Dec 20 12:39 63_AddOnTest.out
In this instance, 63_AddOnTest.out displays the output of the add-on script.
ibrix_collect
43
ibrix_crr
Starts and stops the replication process and monitors the state of replication activity.
Description
The Continuous Remote Replication service (CRR) provides a transparent method to replicate
changes in a source file system on one cluster to a target file system on either the same cluster or
a second cluster. The remote replication service has two modes: continuous and run-once. For
detailed information about these modes, see the HP StoreAll Storage File System User Guide.
Replication tasks are started from the source cluster with ibrix_crr -s. When a replication task
is started for a file system, ibrix_crr dynamically generates a new task with a unique task id
for the replication instance.
Use ibrix_crr -s without the -o option to start a continuous replication task. A continuous
replication task does an initial full synchronization and then continues to replicate any new changes
made on the source. Continuous replication tasks continue to run until manually stopped by the
user.
Use the ibrix_crr -o option for the run-once mode to synchronize single directories or entire
file systems on the source and target in a single pass. The run-once tasks terminate on their own
when the synchronization is completed. Any task can be stopped manually if necessary.
Multiple replication tasks (run-once and/or continuous) can be started simultaneously.
Command options to get the status of replication can be executed from either the source cluster or
the remote target cluster.
NOTE: Remote replication must be configured (clusters registered with each other, and remote
replication exports configured) before replication tasks to remote clusters can be started. For detailed
information about configuring remote replication, see the HP StoreAll Storage File System User
Guide.
NOTE: While continuous replication tasks ensure that file systems remain synchronized, run-once
tasks replicate a single-pass state of the source, and therefore can experience variations if there
is I/O activity while the task is running. For example, if the source file foo.txt has already been
replicated by the active task and is then edited or deleted while the run-once task is still active, the
changes to foo.txt are not made on the target. The foo.txt file on the target remains as written
by the run-once task.
NOTE: If a source or target file system is unmounted and ibrix_fsck is run to check it, a full
resynchronization is recommended.
Synopsis
Start a continuous or run-once remote replication task to a remote cluster:
ibrix_crr -s -f SRC_FSNAME [-o [-S SRC_DIR] ] -C TGT_CLUSTERNAME -F
TGT_FSNAME [-X TGTEXPORT] [-P TGTDIR] [-R] [-e EXCLUDE_PATTERNS]
-f SRC_FSNAME
The source file system to be replicated.
-C TGT_CLUSTERNAME
The remote target cluster.
-F TGT_FSNAME
The remote target file system.
-X TGTEXPORT
The remote replication target (exported directory). The default is the root of the file
system.
NOTE:
This option is used only for replication to a remote cluster. The file system
specified with -F and the directory specified with -X must both be exported from the
target cluster (target export).
-P TGTDIR
44
StoreAll software commands
A directory under the remote replication target export (optional). This directory must
exist on the target, but does not need to be exported.
-R
Bypass retention compatibility checking.
-e
Use the -e option to provide a comma separated list of file and directory exclude
patterns, which should be excluded during replication. Enter up to 16 patterns per
task. Enclose the list of patterns in double-quotes. The syntax of the patterns should be
proper. To exclude a directory and all its contents, the exclude pattern to be provided
is the following: dir_name/***
To exclude any file starting with some pattern, the exclude pattern to be used is
pattern*. To exclude any file ending with a particular pattern, the exclude pattern
to be provided is *pattern. For example to exclude text files, the exclude pattern
will be *.txt.
Use the -o option for run-once replications. This option can be used to synchronize single directories
or entire file systems on the source and target in a single pass. If you do not specify a source
directory with the -S option, the replication starts at the root of the file system. The run-once task
terminates after the replication is complete; however, the task can be stopped manually, if necessary.
Omit the -o option to start a continuous replication task. A continuous replication task does an
initial full synchronization and then continues to replicate any new changes made on the source.
Continuous replication tasks continue to run until manually stopped by the user.
Start an intra-cluster remote replication task:
ibrix_crr -s -f SRC_FSNAME [-o [-S SRCDIR]] -F TGT_FSNAME [-P TGTDIR]
[-e EXCLUDE_PATTERNS]
The command starts a continuous or run-once intra-cluster replication task for file system
SRC_FSNAME. The -F option specifies the name of the target file system (the default is the same
as the source file system). The -P option specifies the target directory under the target file system
(the default is the root of the file system).
Use the -o option to start a run-once task. The -S option specifies a directory under the source
file system to synchronize with the target directory.
Start a run-once directory replication task:
ibrix_crr -s -f SRC_FSNAME -o -S SRCDIR -P TGTDIR [-e EXCLUDE_PATTERNS]
The -S option specifies the directory under the source file system to synchronize with the target
directory. The -P option specifies the target directory.
Stop a remote replication task:
ibrix_crr -k -n TASKID
Use ibrix_task -l to obtain the appropriate ID. The stopped replication task is moved to the
inactive task list. Useibrix_task -l -c to view this list.
Forcefully stop a replication task:
ibrix_crr -K -n TASKID
The stopped task is removed from the list of inactive tasks.
Pause a remote replication task:
ibrix_crr -p -n TASKID
Use ibrix_task -l to obtain the appropriate ID.
Resume a remote replication task:
ibrix_crr -r -n TASKID
Use ibrix_task -l to obtain the appropriate ID.
List all active replication tasks in the cluster:
ibrix_crr -l [-f SRC_FSNAME] [-h HOSTNAME] [-C SRC_CLUSTERNAME]
ibrix_crr
45
You can limit the output to a specific file system or host name. When the command is run from a
target, the -C argument identifies the source cluster and is required. It is optional when the command
is run from the source cluster itself.
Print detailed information about active replication tasks:
ibrix_crr -i [-f SRC_FSNAME] [-h HOSTNAME] [-C SRC_CLUSTERNAME]
You can limit the output to a specific file system or host name. The command can be run from the
source or target cluster. When the command is run from the target cluster, the -C argument identifies
the source cluster whose file system information is to be collected, and is required. Using -C is
optional when the command is run from the source cluster.
The display shows the status of asks on each node, as well as task summary statistics (number of
transactions in the queue, number of transactions processed). The query also indicates whether
initial full synchronization is in progress on a given file serving node and lists any error conditions.
Print detailed information about replication tasks that match the specified task IDs:
ibrix_crr -i -n TASKIDS [-h HOSTNAME] [-C SRC_CLUSTERNAME]
Use -h to limit the output to the specified host. When the command is run from a target, the -C
option identifies the source cluster and is required. It is optional when the command is run from
the source cluster.
Options
46
Option
Description
-C TGT_CLUSTERNAME
The remote cluster name.
-C SRC_CLUSTERNAME
The source cluster name. When a command is run from the target cluster, this argument
is required.
-F TGT_FSNAME
The target file system.
-K
Forcefully stop a replication task.
-P TGTDIR
An optional target directory.
-R
Bypasses retention compatibility checks.
-S SRC_DIR
Identifies the source directory where replication starts. This option is valid only when
used with the -o option, where SRC_DIR specifies a particular directory.
-X TGTEXPORT
The directory export on the target file system.
-f SRC_FSNAME
The local (source) file system.
-h HOSTNAME
The name of a file serving node.
-i
Displays detailed information about remote replication tasks.
-k
Stops the specified replication task.
-l
Lists active replication tasks.
-n TASKID
The ID of a replication task.
-o
Specifies that this replication is a run-once task. The default is continuous.
-p
Pauses the specified replication task.
-r
Resumes the specified replication task.
-s
Starts a replication task for the specified file system.
-?
Shows the usage for this command.
StoreAll software commands
See also
ibrix_crr_export, ibrix_crr_nic, ibrix_cluster
ibrix_crr
47
ibrix_crr_export
Configures a target export for continuous remote replication (CRR).
Description
This command exports a target file system and directory for remote replication. Before remote
replication can take place, you must create a mapping between the source cluster and the target
file system that receives the replicated data. This mapping ensures that only the specified source
cluster can write to the target export (exported file system and directory).
NOTE:
You do not need to export the file system when configuring intracluster replication.
Before using ibrix_crr_export, the source cluster must be registered with the target cluster
(use ibrix_cluster).
The server assignments for the export can be modified using the ibrix_crr_nic command.
Synopsis
Export a file system (or file system and directory) to the source cluster:
ibrix_crr_export -f FSNAME [-p DIRECTORY] -C REMOTE_CLUSTER[-P]
The FSNAME is the target file system to be exported. The -p option can be used to export a directory
located under the root of the specified file system. If the -p option is not used, the default target
export directory is the root of the specified file system. Include the -P option if you do not want
this command to set the default server assignments. You will need to set the assignments with
ibrix_crr_nic.
The following example exports file system ifs1 on the target cluster. Source cluster
dev3.company.com contains the file system that will be replicated to ifs1 on the target:
# ibrix_crr_export -f ifs1 -C dev3.company.com
Unexport a file system (or a directory in that file system) for remote replication:
ibrix_crr_export -U -f FSNAME [-p DIRECTORY]
Remote replication will fail if the target file system and/or directory are unexported. If replication
tasks are using the export, wait for them to finish or cancel them before unexporting the file system.
List remote replication exports on this cluster:
ibrix_crr_export -l
Options
Option
Description
-C REMOTE_CLUSTER
The name of the source cluster containing the file system to be replicated.
-P
Skips setting the default server assignments for the export.
-U
Unexports a file system and directory for remote replication.
-f TARGET_FSNAME
The file system to be exported as a target for remote replication.
-l
Lists remote replication exports on this cluster.
-p DIRECTORY
A directory to be exported, located under the exported file system. The default is
the root of the exported file system.
-?
Shows the usage for this command.
See also
ibrix_cluster, ibrix_crr, ibrix_crr_nic
48
StoreAll software commands
ibrix_crrhealth
Checks the health of active remote replication tasks and generates reports.
Description
The ibrix_crrhealth command checks the status of CRR activities on the source and target
cluster and provides detailed reports that include the following information:
•
Network connectivity between Fusion Managers and nodes on the source and target clusters
•
Node health checks
•
CRR task status
•
Analysis of CRR log files
If the health check finds an issue in the CRR operation, it generates a critical event.
Reports are generated on the source cluster. If the target cluster is running a version of StoreAll
software earlier than 6.2, only the network connectivity check is performed.
It takes approximately two minutes to generate a CRR health report. Reports are updated every
10 minutes. Only the latest five CRR health reports are preserved.
Synopsis
List all CRR health reports for active replication tasks:
ibrix_crrhealth -l
Show details for a report:
ibrix_crrhealth -i -n REPORTNAME
Use ibrix_crrhealth -l to obtain the name of the report.
Options
Option
Description
-l
Lists all reports for active replication tasks.
-i
Shows details for a health report.
-n REPORTNAME
Specifies the name of the health report to be displayed.
-?
Shows the usage for this command.
ibrix_crrhealth
49
ibrix_crr_nic
Identifies server assignments for the servers and corresponding NICs that handle replication requests.
Description
If you are replicating a file system to a remote cluster, you can use ibrix_crr_nic on the target
cluster to select or modify the servers that handle replication requests and the corresponding NICs
that carry replication traffic in the cluster. The default server assignments are:
•
Use all servers that have the file system mounted.
•
Use the cluster NIC on each host.
The replication servers and NICs are assigned per remote replication export. When you use
ibrix_crr_export to create remote replication exports, the default server assignments are
created (unless the ibrix_crr_export -P option is used). Use the ibrix_crr_nic command
to modify these assignments if desired.
Synopsis
Identify the designated hosts and, optionally, the corresponding NIC:
ibrix_crr_nic -a -f FSNAME [-p DIRECTORY] -h HOSTLIST [-n NETWORK
INTERFACE NAME]
The -p option specifies a directory under the root of file system FSNAME. The default is the root of
the file system.
When specifying resources, note the following:
•
Use the -h option to specify servers by their host name or IP address (use commas to separate
the host names or IP addresses). A host is any host on the target cluster that has the target file
system mounted.
•
Use the -n option to specify the network using the StoreAll network name (NIC). Enter a valid
user NIC or the cluster NIC. Setting the NIC assignment per server is optional. If an assignment
is not specified, the cluster NIC will be used.
The listed servers receive remote replication data via the specified NIC. To increase capacity, you
can expand the number of assigned servers by executing this command again with another list of
servers.
Restore the default server assignments for remote replication:
ibrix_crr_nic -D -f FSNAME [-p directory]
The -p option specifies a directory under the root of file system FSNAME.
Remove a replication server assignment:
ibrix_crr_nic -r -P ASSIGNMENT_ID1[,...,ASSIGNMENT_IDn]
To obtain the ID for a particular server assignment, list the remote replication server assignments
using the -l option.
View server assignments for remote replication:
ibrix_crr_nic -l
The output lists the exported file systems and associated server assignments on this cluster. All
assigned servers/NICs are listed with a corresponding ID number that can be used in commands
to remove server assignments.
50
StoreAll software commands
Options
Option
Description
-D
Restores the default server assignments (automatically use all servers and the cluster
network interface on each server).
-P ASSIGNMENT_ID1
[,...,ASSIGNMENT_IDn]
Server assignment ID.
-a
Creates a server assignment. A previous server assignment for the same export
must not exist, or must be removed before a new server assignment is created.
-f FSNAME
An exported file system.
-h HOSTLIST
The servers to use for remote replication.
-l
Lists the export file systems and corresponding server assignments (servers and
NICs) on this cluster.
-n NETWORK INTERFACE NAME Network interface assignments for the specified servers. Use the StoreAll network
interface name (NIC).
-p directory
The exported directory under the specified exported file system. The default is the
root of the file system.
-r
Removes a server assignment for remote replication.
-?
Shows the usage for this command.
See also
ibrix_crr, ibrix_crr_export, ibrix_cluster, ibrix_nic
ibrix_crr_nic
51
ibrix_datavalidation
Performs a data validation scan of a file system or subdirectory.
Description
To ensure that WORM and retained files remain unchanged, it is important to run a data validation
scan periodically. Circumstances such as the following can cause a file to change unexpectedly:
•
System hardware errors, such as write errors
•
Degrading of on-disk data over time, which can change the stored bit values, even if no data
is accessed
•
Malicious or accidental changes made by users
A data validation scan computes hash sum values for the WORM, WORM-retained, and
WORM-hold files in the scanned file system or subdirectory and compares them with the values
originally computed for the files. If the scan identifies changes in the values for a particular file,
an alert is generated on the GUI. You can then replace the bad file with an unchanged copy from
an earlier backup or from a remote replication.
NOTE: Validation can only be run on file systems that are enabled for data retention. Only
WORM and WORM-retained files, including files under legal hold, are validated. Normal files
are not validated.
A legal hold locks the file and the data retention policy in place on the file system will be ignored.
For example, the expiration time does not apply to the file. A file can only be set to legally held
by command line. The file is then held WORM-retained until the legal hold is removed and then
the normal retention settings take effect.
The time required for a data scan depends on the number of files in the file system or subdirectory.
If there are a large number of files, the scan could take up to a few weeks to verify all content on
storage. A scheduled scan will quit immediately if it detects that a scan of the same file system is
already running.
A unique validation summary report is generated for each scan. The reports are located in the root
directory of the file system at {filesystem root}/.archiving/validation/history.
The report files are named <ID-n>-sum, such as 1-0.sum, 2-0.sum, and so on. The ID is the
task ID assigned by StoreAll software when the scan was started. The second number is 0 unless
there is an existing summary report with the same task ID, in which case the second number
increments to make the filename unique.
NOTE: The StoreAll .archiving directory does not appear when you run the ls -a command
on the root directory of the file system; however, it is visible when you cd into the directory and
use the ls -a command. Also, Linux commands such as cp work correctly when .archiving
is in a path or filename used in the command.
Synopsis
Perform a validation scan on the specified file system or subdirectory:
ibrix_datavalidation -s -f FSNAME [-d PATH]
Options
52
Option
Description
-d PATH
Specifies a subdirectory.
-f FSNAME
Specifies a file system.
StoreAll software commands
Option
Description
-s
Performs a validation scan.
-?
Shows the usage for this command.
ibrix_datavalidation
53
ibrix_dbck
Ensures that information maps on hosts are consistent with the configuration database.
NOTE:
ibrix_dbck should be used only under the direction of HP Support.
Description
Hosts (file serving nodes and StoreAll clients) maintain information about a file system based on
information that they obtain from the configuration database. If a host’s information about a file
system becomes outdated, the host cannot access the file system or communicate with other hosts
about the file system.
Run ibrix_health regularly to keep this information up to date. If the information becomes
outdated on a host, execute ibrix_dbck -o to resynchronize the information on the hosts with
the configuration database.
Synopsis
Update file system information on hosts:
ibrix_dbck -o -f FSNAME [-h HOSTLIST]
To update all hosts, omit the -h HOSTLIST option.
Options
Option
Description
-f FSNAME
A file system.
-h HOSTLIST
A list of one or more file serving nodes or StoreAll clients.
-o
Synchronizes cluster information.
-?
Shows the usage for this command.
See also
ibrix_health
54
StoreAll software commands
ibrix_edquota
Sets and manages file system quotas for users, groups, and directory trees.
Description
The ibrix_edquota command sets, lists, and deletes storage quotas for users or groups on a
specific file system. It also sets directory tree quotas, which limit the amount of storage and the
number of files that can be created on a file system located at a specific directory tree. By default,
quotas are not set.
The recommended order for handling quotas is as follows:
1. Enable quotas when creating the file system. Quotas must be enabled before quota limits can
be set. You can also enable quotas on an existing file system with ibrix_fs -q -E -f
FSNAME.
2. Mount the file system.
3. Set quota limits with ibrix_edquota -s.
A quota is delimited by hard and soft storage limits defined either in megabytes of storage or as
a number of files. The hard limit is the maximum storage (in terms of file size and number of files)
allotted to a user or group. The soft limit specifies the number of megabytes or files that, when
reached, starts a countdown timer that runs until the hard storage limit is reached or the grace
period elapses, whichever happens first. (The default grace period is seven days.) When the timer
stops for either reason, the user or group cannot store any more data and the system issues quota
exceeded messages at each write attempt.
When setting quotas, no UID or GID can exceed 2,147,483,647. Setting user quotas to zero
removes the quotas.
Quotas information can be imported into the system from a file. The existing quotas information
can also be exported to a file. See the HP StoreAll Storage File System User Guide for information
about the quotas file.
Synopsis
Set a quota for a single user on the specified file system:
ibrix_edquota -s -u "USER" -f FSNAME [-M SOFT_MEGABYTES] [-m
HARD_MEGABYTES] [-I SOFT_FILES] [-i HARD_FILES]
Enclose the user name in single or double quotation marks.
Set a quota for a single group on the specified file system:
ibrix_edquota -s -g "GROUP" -f FSNAME [-M SOFT_MEGABYTES] [-m
HARD_MEGABYTES] [-I SOFT_FILES] [-i HARD_FILES]
Enclose the group name in single or double quotation marks.
Create a directory tree quota and assign quota limits:
ibrix_edquota -s -d NAME -p PATH -f FSNAME [-M SOFT_MEGABYTES] [-m
HARD_MEGABYTES] [-I SOFT_FILES] [-i HARD_FILES]
The -d NAME option specifies a unique name for the directory quota. The name cannot contain
a comma (,) or colon (:) character.
The -p PATH option specifies the pathname of the directory tree. If the pathname includes a space,
enclose the portion of the pathname that includes the space in single quotation marks, and enclose
the entire pathname in double quotation marks. For example:
-p "/fs48/data/'QUOTA 4'"
NOTE: When ibrix_edquota is used to create a directory tree, the system also runs
ibrix_onlinequotacheck command in DTREE_CREATE mode.
ibrix_edquota
55
If you are creating multiple directory tree quotas, you can import the quotas from a file. The system
then uses batch processing to create the quotas. If you add the quotas individually, you will need
to wait for ibrix_onlinequotacheck to finish after entering each ibrix_edquota command.
Set grace periods for quotas on a file system:
ibrix_edquota -c -k BLOCKS_GRACE_TIME -K INODES_GRACE_TIME -f FSNAME
Specify BLOCKS_GRACE_TIME and INODES_GRACE_TIME as the number of
Hours/Days/Weeks/Months to set as the grace period for the limit (for example,
10H/1D/2W/2M).
Import quotas information from a file:
ibrix_edquota -t -p PATH -f FSNAME
Export the existing quotas information to a file:
ibrix_edquota -e -p PATH -f FSNAME
Delete a user quota:
ibrix_edquota -D -u UID [-f FSNAME]
To delete the quota on a specific file system, include the -f option. Omit this option to delete the
quota on all file systems.
Delete a group quota:
ibrix_edquota -D -g GID [-f FSNAME]
To delete the quota on a specific file system, include the -f option. Omit this option to delete the
quota on all file systems.
Delete the entry and usage limits for a directory tree quota:
ibrix_edquota -D -d NAME -f FSNAME
To delete the entry and quota on a specific file system, include the -f option. Omit this option to
delete the entry and quota on all file systems.
NOTE: When ibrix_edquota is used to delete a directory tree, the system also runs
ibrix_onlinequotacheck command in DTREE_DELETE mode.
List quota limits and usage for a specific user:
ibrix_edquota -l -u UID [-f FSNAME]
List quota limits and usage for all users:
ibrix_edquota -l -U [-f FSNAME]
List quota limits and usage for a specific group:
ibrix_edquota -l -g GID [-f FSNAME]
List quota limits and usage for all groups:
ibrix_edquota -l -G [-f FSNAME]
List usage limits for a specific directory tree quota:
ibrix_edquota -l -d NAME [-f FSNAME]
List usage limits for all directory tree quotas or for quotas on a specific file system:
ibrix_edquota -l -T [-f FSNAME]
List grace limits for a specific file system:
ibrix_edquota -l -C -f FSNAME
56
StoreAll software commands
Options
Option
Description
-C
Sets the grace period for a file system. The default is seven days.
-D
Deletes user, group, or directory tree limits.
-G
Specifies all groups with quota settings.
-I SOFT_FILES
Sets the soft limit on the number of files.
-K INODES_GRACE_TIME Specifies the number of Hours/Days/Weeks/Months to set as the grace period for the
inode limit (for example, 10H/1D/2W/2M).
-M SOFT_MEGABYTES
Sets the soft limit on the megabyte allocation.
-T
All directory trees.
-U
Specifies all users with quota settings.
-d NAME
Specifies the name of a directory tree quota.
-e PATH
Exports the existing quotas information to a file.
-f FSNAME
A file system.
-g "GROUP" or GID
A group or group ID. Enclose the group name in single or double quotation marks. The
GID value cannot exceed 2,147,483,647.
-i HARD_FILES
Sets the hard limit on the number of files. The default value is 0.
-k BLOCKS_GRACE_TIME Specifies the number of Hours/Days/Weeks/Months to set as the grace period for the
block limit (for example, 10H/1D/2W/2M).
-l
Lists quota limits.
-m HARD_MEGABYTES
Sets the hard limit for megabyte allocation. The default value is 0.
-p PATH
Specifies the pathname of a directory tree.
-s
Sets quota limits.
-t PATH
Imports quotas information from a file.
-u "USER" or UID
A user name or user ID. Enclose the user name in single or double quotation marks. The
UID value cannot exceed 2,147,483,647.
-?
Shows the usage for this command.
See also
ibrix_fs, ibrix_onlinequotacheck
ibrix_edquota
57
ibrix_evacuate
Evacuates all files from the specified segments to other segments in the same file system.
Description
Before retiring storage, move, or evacuate, all files from the segments on that storage to other
segments in the same file system. If segments with adequate space are not available, use ibrix_fs
to extend the file system. The evacuation operation is transparent to users or applications accessing
the file system. The amount of IO activity on the segment affects the time required for the operation.
Synopsis
Evacuate files from the specified segments:
ibrix_evacuate -e -f FSNAME {-s SRCSEGNUMLIST | -S SRCLVLIST} [[-d
DESTSEGNUMLIST] [-D DESTLVLIST]] [-v]
Stop the specified evacuate task ID:
ibrix_evacuate -k -t TASKID [-F]
Display detailed evacuation task status:
ibrix_evacuate -i [-f FSLIST]
Display a status summary of evacuation tasks:
ibrix_evacuate -l [-f FSLIST]
Options
58
Option
Description
-D DESTLVLIST
Specifies a list of destination segments by logical volume name, such as
ilv1,ilv2,ilv3.
-F
Forces an evacuation task to stop.
-S SRCLVLIST
Specifies a list of source segments by logical volume name, such as ilv1,ilv2,ilv3.
-d DESTSEGMENTLIST
Specifies a list of destination segments by segment name or number, such as 1,2,3.
-f FSNAME or FSLIST
A file system or list of file systems.
-i
Lists status information for evacuation tasks.
-k
Stops evacuation tasks.
-l
Reports a status summary of evacuation tasks.
-s SRCSEGMENTLIST
Specifies a list of source segments by segment name or number, such as 1,2,3.
-t TASKID
A task ID.
-v
Verbose kernel logging.
-?
Shows the usage for this command.
StoreAll software commands
ibrix_event
Sets up email and SNMP notifications of cluster events, displays event messages, and removes
event messages from the events table.
Description
Use ibrix_event to set up two types of event notifications:
•
Email notification, which sends to one or more addresses an email containing the event, the
originating server, the severity level, a timestamp, an autogenerated number, and the Fusion
Manager name.
•
SNMP notification, which sends an SNMP trap to one or more trapsinks.
StoreAll software events fall into categories based on level of severity:
•
Alerts: Disruptive events that can result in loss of access to file system data. For example, a
segment is unavailable or a server is unreachable.
•
Warnings: Potentially disruptive conditions in which file system access is not lost, but if the
situation is not addressed it can escalate to an alert condition. For example, reaching a very
high server CPU utilization or nearing a quota limit.
•
Information: Events occurring under normal or non-threatening conditions that change the
cluster. For example, creating a segment or mounting a file system.
To set up email notifications, first associate events and email recipients with ibrix_event -c
and then configure settings and initiate the notification process with ibrix_event -m. Sender
and recipient email addresses must be known to the SMTP server.
To set up SNMP notifications, first associate events and trapsinks with ibrix_event -c and
then configure notification settings and initiate the notification process with ibrix_snmptrap
-c.
Synopsis
Configure email notification settings:
ibrix_event -m on|off -s SMTP -f from [-r reply-to] [-t Subject]
When -m on is specified, all options are required.
Associate events with email addresses:
ibrix_event -c [-e {ALERT|WARN|INFO|EVENTLIST}] -m EMAILLIST
The -e option associates events with event types. You can enter any combination of types or a list
of messages. Omit the -e option to associate all event types. For example, to associate all Alert
events and two Info events to [email protected]:
ibrix_event -c -e ALERT,server.registered,filesystem.created
-m [email protected]
Associate events with trapsinks:
ibrix_event -c -y SNMP [-e {ALERT|WARN|INFO|EVENTLIST}] -m TRAPSINKLIST
Specify the hostname or IP address of the trapsink. The -e option associates events with event
types. Omit the -e option to associate all event types. For example, to associate all Alert events
and two Info events with a trapsink at IP address 192.168.2.32, enter:
ibrix_event -c -y SNMP -e ALERT,server.registered,
filesystem.created -m 192.168.2.32
Test the supplied email address:
ibrix_event -u -n EMAILADDRESS
ibrix_event
59
Before sending a test message to the email address, notifications must be turned on. If the address
is valid, the command signals success and sends an email containing the settings to the recipient.
If the address is not valid, the command returns an address failed exception.
Remove events from the events table:
ibrix_event -p [-o DAYS_COUNT]
Events are removed starting with the oldest events. The default is to remove the oldest seven days
of messages. To change the number of days, include the -o DAYS_COUNT option.
List all events, or only events of the specified type:
ibrix_event -q [-e ALERT|WARN|INFO]
Lists email settings and all configured notifications:
ibrix_event -L [-y EMAIL|SNMP]
Include -y with either EMAIL or SNMP to list settings for only those types of events.
Lists posted events in short format:
ibrix_event -l [-f FILESYSTEM] [-h SERVER] [-v {ALERT|WARN|INFO}] [-s
STARTTIME] [-e ENDTIME] [-n EVENTS_COUNT] [-a]
In the output, the event descriptions are truncated to fit on one line and the most recent event is
listed first. To reverse the order, include the -a option. By default, the command displays the most
recent 100 messages. Use the -n COUNT option to change the number of events displayed. The
other options act as filters to return records associated with the specified file system, server, alert
level, and start or end time.
The following example shows the format of the output:
$ ibrix_event -l -n 3
EVENT ID TIMESTAMP
-------- --------------1983 Feb 14 15:08:15
1982 Feb 14 15:08:15
1981 Feb 14 15:08:15
LEVEL
----INFO
INFO
INFO
TEXT
---File system ifs1 created
Nic eth0[99.224.24.03] on host ix24-03.ad.hp.com up
Ibrix kernel file system is up on ix24-03.ad.hp.com
Lists posted events in long format:
ibrix_event -i [-f FILESYSTEM] [-h SERVER] [-v {ALERT|WARN|INFO}] [-s
STARTTIME] [-e ENDTIME] [-n EVENTS_COUNT] [-a]
The output includes complete event descriptions and the most recent event is listed first. To reverse
the order, use the -a option. By default, the command displays the most recent 100 messages.
Use the -n COUNT option to change the number of events displayed. The other options act as
filters to return records associated with the specified file system, server, alert level, and start or end
time.
The following example shows the format of the output:
$ ibrix_event -l -n 2
Event:
=======
EVENT ID
: 1981
TIMESTAMP
: Feb 14 15:08:15
LEVEL
: INFO
TEXT
: Ibrix kernel file system is up on ix24-03.ad.hp.com
FILESYSTEM
:
HOST
: ix24-03.ad.hp.com
USER NAME
:
OPERATION
:
SEGMENT NUMBER :
PV NUMBER
:
NIC
:
HBA
:
RELATED EVENT
: 0
Event:
=======
EVENT ID
60
:
StoreAll software commands
1980
TIMESTAMP
: Feb 14 15:08:14
LEVEL
: ALERT
TEXT
: category:CHASSIS, name: 9730_ch1, overallStatus:DEGRADED,
component:OAmodule, uuid:09USE038187WOAModule2, status:MISSING, Message: The Onboard
Administrator module is missing or has failed., Diagnostic message: Reseat the Onboard
Administrator module. If reseating the module does not resolve the issue, replace the Onboard
Administrator module., eventId:000D0004, location:OAmodule in chassis S/N:USE123456W,
level:ALERT
FILESYSTEM
:
HOST
: ix24-03.ad.hp.com
USER NAME
:
OPERATION
:
SEGMENT NUMBER :
PV NUMBER
:
NIC
:
HBA
:
RELATED EVENT
: 0
Options
Option
Description
-L
Lists event notifications and settings.
-a
Sorts in ascending order.
-c
Creates email notifications.
-d
Deletes email notifications.
--e ALERT | WARN | INFO |
EVENTLIST
The ALERT, WARN, or INFO event level or a list of specific notification types.
ALERT, WARN, and INFO are keywords.
-f FROM or FILENAME
An email “From” address or, if used with -v, the name of the file where a
real-time event stream is saved in CSV format.
-h SERVER
A file serving node.
-i
Lists event notifications in long format.
-l
Lists event notifications in short format.
-m on|off or EMAILLIST |
TRAPSINKLIST
Turns event notification on or off, or if used with -c or -d, specifies a list of
one or more emails or trapsinks to be created or deleted.
-n EMAILADDRESS or
EVENTS_COUNT
When used with -u, specifies a destination address for a test email message.
-o DAYS_COUNT
When removing messages from the events table with -p, sets the number of
days worth of messages to remove.
-p
Removes events from the events table, starting with the oldest message. The
default is to remove seven days of messages.
-q
Lists all events that can be configured.
-r REPLY-TO
Sets the email Reply-to address.
-s SMTPADDR
Sets the IP address of the SMTP server.
-t SUBJECT
Specifies an email subject string that is prefixed to the automatically generated
email Subject line.
-u
Sends a test email.
-v {ALERT|WARN|INFO}
An event level.
-y EMAIL | SNMP
Specifies an event notification type. The valid values are EMAIL (the default)
and SNMP.
-?
Shows the usage for this command.
When used with -l, specifies the number of event messages to include, in
reverse order, in the output.
ibrix_event
61
See also
ibrix_snmptrap
“Setting up email notification of cluster events” and “Setting up SNMP notifications” in the HP
StoreAll Storage Administrator Guide for your system.
62
StoreAll software commands
ibrix_exportfs
Maintains the list of NFS-exported file systems and specifies file system access for StoreAll clients.
Description
ibrix_exportfs makes local directories available for NFS clients to mount. The Fusion Manager
manages the table of exported file systems and distributes the information to local /etc/exports
files. All entries are automatically re-exported to NFS clients and, optionally, to the file serving
node standbys. A file system must be mounted before it can be exported. It must be unexported
before it can be unmounted.
The ibrix_exportfs command can also be used to control file-system access for StoreAll clients.
By default, all StoreAll clients can mount a file system after a mount point has been created. To
allow access for a file system (or a subdirectory of that file system) to a specific StoreAll client, use
the -c option to create an access entry containing that information. Then, when a StoreAll client
attempts to mount the file system, StoreAll software will allow access only to the clients in the access
entry.
Synopsis
Export a file system via NFS:
ibrix_exportfs -f FSNAME -h HOSTNAME -p
CLIENT1:PATHNAME1,CLIENT2:PATHNAME2,.. [-o "OPTIONS"] [-b]
File system FSNAME at mount point PATHNAME on file serving node HOSTNAME is exported to the
specified CLIENTS. The accessing CLIENT can be a single file serving node, file serving nodes
represented by a wildcard, or all hosts (:/PATHNAME), which is also known as world access.
World access omits the client specification but not the colon, for example, :/usr/src. By default,
the file system is exported to the NFS client’s standby. To exclude the standby, include the -b
option. The command uses the default Linux exportfs options unless specific options are provided.
NOTE: When configuring options for an NFS export, do not use the no_subtree_check
option. This option is not compatible with the StoreAll software.
Unexport the specified NFS exports:
ibrix_exportfs -U -h HOSTLIST -p CLIENT1:PATHNAME1,CLIENT2:PATHNAME2,..
[-b]
The -b option excludes the standby.
List NFS-exported directories:
ibrix_exportfs -l [-h HOSTLIST]
To specify a range of servers in the host list, enter the pattern to match, enclosed in square brackets.
Separate items in a list with commas.
Create an access entry for a file system:
ibrix_exportfs -c -f FSNAME -p CLIENT1:PATHNAME1,CLIENT2:PATHNAME2,..
By default, all StoreAll clients can mount a file system after a mount point has been created. This
command limits the clients that can mount the file system or a subdirectory of the file system. The
-p option specifies the clients and the file systems (or subdirectories) that they are allowed access.
CLIENT is the name of a StoreAll client or host group and /PATHNAME is the file system or
subdirectory the client will be allowed to mount.
For example, the following command gives client2 access to the subdirectory /ifs1/tests in
the ifs1 file system:
ibrix_exportfs -c -f ifs1 -p client2:/ifs1/tests
ibrix_exportfs
63
Remove the access entry for a client:
ibrix_exportfs -U -f FSNAME -p CLIENT1:PATHNAME1,CLIENT2:PATHNAME2,..
Options
Option
Description
-U
Unexports the named file system.
-b
Excludes the file serving node standby from the export.
-c
Specifies file-system access for a StoreAll client.
-f FSNAME
A file system.
-h HOSTNAME or
HOSTLIST
A file serving node or a list of file serving nodes exporting a file system.
-l
Lists all NFS export entries, or lists entries on a named host.
-o "OPTIONS "
Linux exportfs options. Standard NFS export options are supported. Options must be
enclosed in double quotation marks (for example, -o "ro"). Do not enter an FSID=
or sync option. They are automatically provided.
-p CLIENT:PATHNAME
The path to the exported file system and the NFS client that can access it. The NFS client
can be specified by the name or IP of a file serving node, a file serving node name with
a wildcard (for example, *.hp.com), or a netmask.
-?
Shows the usage for this command.
See also
Linux exportfs command
“Exporting a file system” in the HP StoreAll Storage File System User Guide
64
StoreAll software commands
ibrix_fm
Controls an agile Fusion Manager configuration.
Description
Typically, the Fusion Manager is installed on all file serving nodes when the cluster is installed.
The Fusion Manager is active on one node and passive on the other nodes. This is called an agile
Fusion Manager configuration.
An agile Fusion Manager can be in one of the following modes:
•
active. In this mode, the Fusion Manager controls console operations. All cluster administration
and configuration commands must be run from the active Fusion Manager.
•
passive. In this mode, the Fusion Manager monitors the health of the active Fusion Manager.
If the active Fusion Manager fails, StoreAll software selects one of the passive management
consoles to become the active console.
•
nofmfailover. In this mode, the Fusion Manager does not participate in console operations.
This mode is intended for operations such as manual failover of the Fusion Manager, StoreAll
software upgrades, and blade replacements.
Synopsis
Set the mode for a Fusion Manager:
ibrix_fm -m passive | nofmfailover [-P] [-A | -h <FMLIST>]
Sets the mode to passive or nofmfailover on a Fusion Manager instance running on the local host.
With the exception of the local node running the active Fusion Manager, the -A option sets all
instances of the Fusion Manager to the specified mode, and the -h option sets the Fusion Manager
instances mentioned in <FMLIST> to the specified mode.
The -P option is primarily used during a manual upgrade to prevent nonupgraded Fusion Managers
from taking information from a new Fusion Manager. It can be used three ways:
•
The nofmfailover mode is set on the current node:
ibrix_fm -m nofmfailover -P
•
The nofmfailover mode is set on a specific set of nodes:
ibrix_fm -m nofmfailover -h [comma_separated_host_list] -P
•
The nofmfailover mode is set to all nodes in the cluster, except on the current node, which is
usually the Active Fusion Manager:
ibrix_fm -m nofmfailover -P -A
Run an immediate backup of the Fusion Manager configuration:
ibrix_fm -B
By default, the command saves the backup archive at
<installdirectory>/tmp/fmbackup.zip. The existing fmbackup.zip file is overwritten.
Add virtual interface information to the Fusion Manager configuration:
ibrix_fm -c <VIF IP address> -d <VIF device> -n <VIF netmask> -v <VIF
type> [-I <local IP address>]
The <VIF type> is either cluster or user.
Register a Fusion Manager and its IP address/hostname with the active Fusion Manager:
ibrix_fm -R <management_console name> -I <IP address> -a <cluster VIF
address>
ibrix_fm
65
Unregister a Fusion Manager that has been uninstalled:
ibrix_fm -u <management_console_name>
Display mode information about the management consoles in the cluster:
ibrix_fm -i
NOTE: If the Fusion Manager was not installed in an agile configuration, the output will report
FusionServer: fusion manager name not set! (active, quorum is not
configured).
List registered management consoles:
ibrix_fm -l
Options
Option
Description
-A
With the exception of the local node running the active Fusion Manager, moves all instances
of the Fusion Manager to the specified mode.
-B
Backs up the Fusion Manager configuration.
-I <IP address>
Specifies an IP address.
-P
Used during a manual upgrade to prevent nonupgraded Fusion Managers from taking
information from a new Fusion Manager.
-R
Registers a Fusion Manager.
-a <cluster VIF
address>
Specifies the IP address of the cluster virtual interface.
-c <VIF IP
address>
Adds information about a virtual interface to the Fusion Manager configuration.
-d <VIF Device>
Specifies the name of the device used for the virtual interface.
-h <FMLIST>
Moves the Fusion Manager instances in <FMLIST> to the specified mode.
-i
Displays mode information for management consoles.
-l
Lists registered management consoles.
-m [ passive |
nofmfailover]
Moves a Fusion Manager to passive or nofmfailover mode. The change takes effect
immediately.
-n <VIF netmask>
Specifies the netmask for the virtual interface.
-u Fusion Manager Unregisters a Fusion Manager that has been uninstalled.
name
66
-v <VIF type>
Specifies the type of interface (cluster or user).
-?
Shows the usage for this command.
StoreAll software commands
ibrix_fm_tune
Sets or resets configuration tuning parameters on the Fusion Manager.
Description
CAUTION:
Manager.
This command sets or resets the configuration tuning parameters on the Fusion
The default values for the Fusion Manager tuning parameters are suitable for most cluster
environments. Changing parameter values can alter file-system performance. HP recommends that
you exercise caution before implementing any changes, or do so only under the guidance of HP
technical support.
Synopsis
Set configuration options on the Fusion Manager:
ibrix_fm_tune -S -o OPTIONLIST
Options are listed in Table 2 (page 68). OPTIONLIST is specified as a comma-delimited list of
option/value pairs. Enter the option name as it appears in the first column in the table. For example:
ibrix_fm_tune -S -o healthCheckInterval=45,usageStatisticsSaveInterval=1800
Reset Fusion Manager configuration options to their default values:
ibrix_fm_tune -U -n OPTIONS
Enter the option name as it appears in the first column in the table, and separate option names
with commas, for example:
ibrix_fm_tune -U -n healthCheckInterval,usageStatisticsSaveInterval
NOTE: The following configuration options do not have default values. Instead, the current value
is used as the default.
•
fusionManagerPrimaryAddress
•
fusionManagerSecondaryAddress
•
clusterName
•
serverPort
•
webServerPort
To change the values for these options, use ibrix_fm_tune -S.
List all Fusion Manager configuration options:
ibrix_fm_tune -L
The output includes the default values and valid value ranges. The options are listed in the
configuration options table.
List Fusion Manager configuration options set to non-default values:
ibrix_fm_tune -l [-n OPTIONS]
NOTE:
ibrix_fm_tune -l does not list configuration options set to their default values.
The -n option displays only the listed options and their values.
Turn up the logging levels:
ibrix_fm_tune -c logging component [-v logginglevel]
ibrix_fm_tune
67
Table 2 Fusion Manager configuration tuning options
Option name
Description
bufferOverflowMonitorInterval
The interval for the buffer overflow monitor, specified in seconds.
Value is an integer. Default: 60 sec.
clusterName
The name of the cluster.
clearSegmentUnavailableUponFailover
Sets how the Fusion Manager handles an unavailable segment after
failover. The following values are:
• true (default value). Makes segments available after failover.
For example, if unavailable segments are found and
enableSegmentUnavailableFailover is set to true, Fusion
Manager initiates failover. And, if
clearSegmentUnavailableUponFailover is also set to
true, those unavailable segments become available after a
failover.
• false. Keeps the segment as unavailable after failover. It works
with related segment unavailable configuration options. For
example, the Fusion Manager checks for unavailable segments
at the interval specified in
segmentUnavailableScanInterval.
cpuThresholdSensitivityInterval
Interval in seconds between samples when the CPU utilization
exceeds the cpuUsageEventThreshold. File serving nodes only.
Range: 0-65535. Default: 300 sec.
cpuUsageEventThreshold
File serving node CPU utilization threshold. When exceeded,
triggers an event. Value is a percentage. Default: 90 percent.
dumpingStatusTimeout
The maximum number of seconds before aborting a dumping status
change. Range: 150-300. Default: 200.
enableMigrationHealthCheck
Sets whether a host health check is performed during segment
migration. Value is true or false. Default: false.
enableSegmentUnavailableFailover
Sets how the Fusion Manager handles failover when a segment
becomes unavailable. The following values are:
• false (default value). Failover is not automatically initiated when
a segment becomes unavailable.
• true. Failover is automatically initiated when a segment becomes
unavailable.
The enableSegmentUnavailableFailover option works with
the following related segment unavailable configuration options:
• clearSegmentUnavailableUponFailover
• segmentUnavailableFailoverPolicy
• segmentUnavailableScanInterval
HP recommends that you keep the default value of false, unless
otherwise directed by HP Support.
68
filesystemSpaceUsedEventThreshold
Total file-system disk utilization threshold. When exceeded, triggers
an event. Value is a percentage. Default: 90 percent.
fusionManagerPrimaryAddress
IP address.
fusionManagerSecondaryAddress
IP address.
healthCheckInterval
Interval in seconds between health checks on managed hosts.
Range: 1-86400. Default: 30 sec.
maxMdDevices
The maximum number of multiple disk devices allowed. Range:
0-128. Default: 32.
maxNbdDevices
The maximum number of network block devices allowed. Range:
0-128. Default: 32 devices.
StoreAll software commands
Table 2 Fusion Manager configuration tuning options (continued)
Option name
Description
minFailbackInterval
The minimum number of seconds that must elapse before attempting
another failback. Value is an integer. Default: 60 sec.
nbdPortsLimit
The maximum number of network block device ports allowed.
Range: 0-128. Default: 32 ports.
nbdTimeout
The maximum network block device timeout. Range: 10-300.
Default: 60 sec.
quotaMonitorLoopInterval
Quota monitor loop interval. Value is an integer. Default: 300.
segmentSpaceUsedEventThreshold
Segment storage utilization threshold. When exceeded, generates
an event. Value is a percentage. Default: 90 percent.
segmentUnavailableFailoverPolicy
Sets the Fusion Manager failover policy based on how many
segments are unavailable. The following values are:
• 0 (default value). If one or more segments is unavailable, failover
is initiated.
• 1. If all segments are unavailable, failover is initiated.
The segmentUnavailableFailoverPolicy option works with
the following related segment unavailable configuration options:
• clearSegmentUnavailableUponFailover
• enableSegmentUnavailableFailover
• segmentUnavailableScanInterval
segmentUnavailableScanInterval
Sets the interval (in seconds) at which the Fusion Manager checks
for unavailable segments. The default is 30 seconds; the range is
0-100.
The segmentUnavailableScanInterval option works with
the following related segment unavailable configuration options:
• clearSegmentUnavailableUponFailover
• enableSegmentUnavailableFailover
• segmentUnavailableFailoverPolicy
serverDownTime
Specifies the number of seconds that must pass before a server is
marked down. Value is an integer. Default: 5 minutes (300
seconds).
serverPort
Port used for cluster network communication. Range: 0-65535.
skippedCyclesBeforeClientFailure
Sets the number of health reporting cycles that must fail before a
client is considered to have failed. Value is an integer. Default:
120.
snapUsageMonitorInterval
Interval in seconds between Snap usage checks. Value is an integer.
Default: 300 sec.
usageStatisticsSaveInterval
Interval in seconds between writes of usage statistics. Value is an
integer. Default: 3600 sec.
Options
Option
Description
-L
Lists default configuration tuning options.
-S
Sets configuration tuning options.
-U
Resets configuration tuning options.
ibrix_fm_tune
69
Option
Description
-c
Selects the logging component.
-l
Lists configuration tuning options.
-n OPTIONS
Specifies a list of comma-separated options in the format option1,option2 and so on.
-o OPTIONLIST
Specifies a list of comma-separated option/value pairs in the format
option1=value1,option2=value2 and so on.
-v
Sets the logging level.
-?
Shows the usage for this command.
See also
ibrix_fs_tune, ibrix_host_tune
70
StoreAll software commands
ibrix_fs
Creates, extends, and manages file systems.
Description
ibrix_fs is used to:
•
Create a file system from physical or logical volumes.
•
List information about file systems (including snapshot file systems).
•
Extend a file system by adding new segments.
•
Delete a file system.
•
Migrate segments to another file serving node.
•
Enable, disable, or display data retention, auditing, and Express Query settings on a file
system.
•
Enable or disable export control on a file system.
•
Disable 32-bit mode on a file system.
•
Assign or unassign a standby server.
Synopsis
Create a file system
Before creating a file system, determine the mode for the file system and whether data tiering
should be used:
•
32-bit or 64-bit mode. If all file-system clients (NFS, SMB, and StoreAll clients) run 64-bit
applications exclusively, create the file system to use 64-bit mode. If 32-bit applications are
in use, create the file system to use 32-bit mode, which is the default. (A file system created
in 32-bit mode can be converted to use 64-bit mode by disabling 32-bit mode.)
For 64-bit mode, there is no restriction on the maximum number of segments allowed per file
system. For 32-bit mode, the maximum number of segments allowed per file system is 255.
You can set the maximum number of segments allowed when you create the file system.
•
Data tiering. A data tier is a group of one or more segments. Tiering is the ability to
automatically migrate files from one tier to another within the same file system. Tiering is
optional and it is turned off by default; however, you can enable it when creating or extending
a file system.
To create a file system, execute one of the following ibrix_fs -c -f commands.
Create a file system with the specified segments:
ibrix_fs -c -f FSNAME -s LVLIST [-t TIERNAME] [-a] [-q] [-o
OPTION1=VALUE1,OPTION2=VALUE2,...] [-t TIERNAME] [
The command creates the file system using the segments specified in LVLIST. The round-robin
method is used to assign segments to file serving nodes.
Create a file system and assign the specified segments to the specified file serving nodes:
ibrix_fs -c -f FSNAME -S LV1:HOSTNAME1,LV2:HOSTNAME2,... [-a] [-q] [-o
OPTION1=VALUE1,OPTION2=VALUE2,...] [-t TIERNAME]
The command creates file system FSNAME and assigns specific segments (LV1, LV2, ...) to specific
file serving nodes (HOSTNAME1, HOSTNAME2, ...). The first logical volume listed becomes the root
segment for the file system. The round-robin method is used to assign segments to file serving nodes.
ibrix_fs
71
Create a file system from the specified physical volumes in one step:
ibrix_fs -c -f FSNAME -p PVLIST [-a] [-q] [-o
OPTION1=VALUE1,OPTION2=VALUE2,...] [-t TIERNAME]
The file system is created from the physical volumes in PVLIST. One volume group is created per
physical volume. Segments are then created from the volume groups and assigned to file serving
nodes in a round-robin manner.
Create a file system and enable data retention: Use an ibrix_fs -c command with the following
-o options:
-o "retenMode=<mode>,retenDefPeriod=<period>,retenMinPeriod=<period>,
retenMaxPeriod=<period>,retenAutoCommitPeriod=<period>"
The retenMode option is required and is either enterprise or relaxed. You can specify any,
all, or none of the period options. retenDefPeriod is the default retention period,
retenMinPeriod is the minimum retention period, and retenMaxPeriod is the maximum
retention period.
To manage both WORM (non-retained) and WORM-retained files, set the default retention period
to 0 (zero), meaning there is no default retention period. When you make a WORM file retained,
you will need to assign a retention period to the file.
If you define the default retention period or set a value for that period, then when such a file
becomes WORM, it will also become retained, and thus it cannot be deleted for the default retention
period. Such a file can be removed administratively using the ibrix_reten_adm CLI command.
If you choose to enable auto-commit, realize that after the auto-commit period of no file system
activity on the object, it will become WORM automatically. If a default retention period is also
defined, it will also become retained.
The retenAutoCommitPeriod option specifies that files will become WORM or WORM-retained
if they are not changed during the specified period. (If the default retention period is set to zero,
the files become WORM. If the default retention period is set to a value greater than zero, the files
become WORM-retained.) The minimum value for the autocommit period is five minutes, and the
maximum value is one year. When autocommit is used, you do not need to manually set a file to
read-only to make it a WORM file. If you plan to keep normal files on the file system, do not set
the autocommit period.
When using a period option, enter a decimal number, optionally followed by one of these
characters:
•
s (seconds)
•
m (minutes)
•
h (hours)
•
d (days)
•
w (weeks)
•
M (months)
•
y (years)
If you do not include a character specifier, the decimal number is interpreted as seconds.
When included in an ibrix_fs -c command, the following example creates a file system with
Enterprise mode retention, with a default retention period of 1 month, a minimum retention period
of 3 days, a maximum retention period of 5 years, and an autocommit period of 1 hour:
-o "retenMode=enterprise,retenDefPeriod=1M,retenMinPeriod=3d,
retenMaxPeriod=5y, retenAutoCommitPeriod=1h"
72
StoreAll software commands
You can also enable Express Query and auditing when you create a file system:
•
Express Query: use -T
•
Auditing: use -oa OPTION1=VALUE1[,OPTION2=VALUE2,...]
The -oa option specifies the file system events that are to be audited. See ibrix_audit_reports
for the supported events.
Create a file system without the data retention/WORM/auto-commit feature set:
If you do not want to use the retention/WORM/auto-commit feature set, create the file system
without adding any of the retention -o options (retenMode, retenDefPeriod,
retenMinPeriod, retenMaxPeriod, or retenAutoCommitPeriod).
Other options for creating a file system
The following options can be used with any of the create commands:
-a
Create a mount point with the same name as the file system and then mount the file system.
-q
Enable quotas on the file system.
-t TIERNAME
Assign the file-system segments to the specified tier.
-o compat=no
Enable 64-bit mode on the file system.
-o compat=yes,maxsegs=n
Create a 32-bit file system and specify the maximum number of segments to allow in the file
system. The valid values for maxsegs are 15, 31, 63, 127, and 255.
If none of these options are specified, the new file system is created with quotas disabled, with no
mount point, and with 32-bit mode compatibility enabled.
View information about file systems
Use the following commands to display details about the file systems configured on the cluster.
Display file system information:
ibrix_fs -i [-f FSLIST] [-x]
The output includes either all file systems or only the file systems in FSLIST, as well as their
component segments. Include -x to omit segment details.
List information about all file systems on all hosts:
ibrix_fs -l
For each file system, the command notes its name, number of segments, whether it is mounted, the
file-system generation, whether quotas and export control are enabled, and whether it is
backward-compatible with 32-bit systems.
Extend a file system
Use any of the following commands to extend a file system.
Extend a file system using the specified logical volumes:
ibrix_fs -e -f FSNAME -s LVLIST [-t TIERNAME]
The file system is extended using the logical volumes in LVLIST. For example, to add logical
volumes ilv1, ilv2, and ilv3 to file system ifs1:
ibrix_fs -e -f ifs1 -s ilv[1-3]
ibrix_fs
73
To extend the file system with LVLIST representing tiered segments, include the -t option. If tiering
rules are already defined for this file system, -t is required.
Extend a file system using the specified segment/owner pairs:
ibrix_fs -e -f FSNAME -S LV1:HOSTNAME1,LV2:HOSTNAME2,... [-t TIERNAME]
For example, to add logical volume ilv1 (owned by s1.mycompany.com) to file system ifs1:
ibrix_fs -e -f ifs1 -S ilv1:s1.mycompany.com
To extend the file system with tiered segments, include the -t option. If tiering rules are already
defined for this file system, -t is required.
Extend a file system using the specified physical volumes:
ibrix_fs -e -f FSNAME -p PVLIST [-t TIERNAME]
The file system is extended using the physical volumes in PVLIST. To extend the file system with
tiered segments, include the -t option. If tiering rules are already defined for this file system, -t
is required.
Audit log expiration policy
Use the following commands to manage the audit log expiration policy:
Display the audit log expiration policy for one or all file systems:
ibrix_fs -K [-f FSNAME]
Displays the audit log expiration policy for one or all file systems.
Modify an audit log expiration policy for a file system:
ibrix_fs -k TIME -f FSNAME
The command lets you modify the audit log expiration policy for a file system. In this instance, the
name of the file system is FSNAME. In this instance, the name of the file system is FSNAME. The
audit log events are kept by default for 45 days. You can change how long the audit log events
are kept by modifying the TIME value as follows:
•
xxD Audit log events are kept for the specified number of days (for example, 90D specifies
that events should be kept for 90 days).
•
xxM Audit log events are kept for the specified number of months.
•
xxY Audit log events are kept for the specified number of years.
Archiving/auditing synchronizer (Retention Expiration and Autocommit)
Use the following commands to manage archiving/auditing synchronizer (Retention Expiration
and Autocommit):
Display the archiving/auditing synchronizer scheduled time for one or all file systems:
ibrix_fs -Y [-f FSNAME]
The command displays the archiving/auditing synchronizer scheduled time for one or all file
systems. The archiving/auditing synchronizer time can also be viewed on the Data Retention tab
for the Modify Filesystem Properties window.
Modify archiving/auditing synchronizer scheduled time to the time value for a file system:
ibrix_fs -y TIME -f FSNAME
Lets you modify the daily time for the archiving/auditing synchronizer to run for a file system. In
this instance, the name of the file system is FSNAME. Use the form hh:mm (a valid hour between
0 and 23 inclusive, and a 2-digit minute between 00 and 59 inclusive) to specify the TIME. The
following example sets the starting time for the archiving/auditing synchronizer to 2 am:
ibrix_fs -y 02:00 -f ibrixfs1
74
StoreAll software commands
The archiving/auditing synchronizer functionality can also be set by modifying the time value for
Retention Expiration and Autocommit on the Data Retention tab for the Modify Filesystem Properties
window.
Delete a file system
Delete the specified file systems:
ibrix_fs -d -f FSLIST [-R]
If data retention is enabled on the file system, include the -R option in the command.
Migrate segment ownership
Use the following commands to migrate ownership of segments to another file serving node.
Migration does not move segments from one physical location to another. Instead, the ownership
is recorded on the physical segment itself.
Migrate ownership of segments to a new host and update the source host:
ibrix_fs -m -f FSNAME -s LVLIST -h HOSTNAME [-M] [-F] [-N]
The segments in LVLIST on file system FSNAME are migrated to the new host. To force the
migration, include -M. To skip the source host update during the migration, include -F. To skip
host health checks, include -N.
Migrate ownership of segments from one host to another and update the source host:
ibrix_fs -m -f FSNAME -h HOSTNAME1,HOSTNAME2 [-M] [-F] [-N]
The segments owned by HOSTNAME1 are migrated to HOSTNAME2. To force the migration, include
-M. To skip the source host update during the migration, include -F. To skip host health checks,
include -N.
Enable or disable quotas
Enable quotas on an existing file system:
ibrix_fs -q -E -f FSNAME
The file system can be mounted or unmounted. The command may take some time to finish, especially
if the file system is heavily populated.
Disable quotas on a file system:
ibrix_fs -q -D -f FSNAME
Quotas can be disabled on either mounted or unmounted file systems.
Enable, disable, or display Express Query and auditing settings
Enable Express Query settings on a file system:
ibrix_fs -T -E -f FSNAME
Disable Express Query settings on a file system:
ibrix_fs -T -D -f FSNAME
Display Express Query settings for one or all file systems:
ibrix_fs -T [-f FSNAME]
Enable or disable specific audit settings on one or all file systems:
ibrix_fs -A [-f FSNAME] -oa OPTION1=VALUE1[,OPTION2=VALUE2,...]
To enable auditing, Express Query must be enabled. The audit options specify the events or event
groups that can be audited. Specify <option>=on to enable auditing for an event or event group,
and specify <option>=off to disable auditing. All options are disabled by default. When
configuring audit settings, specify each event or event group you want to enable.
ibrix_fs
75
The audit_mode option enables or disables auditing as a whole, without affecting the on/off
state of the individual events or event groups. Setting this option to off turns off all auditing, and
setting it to on enables auditing for those events and event groups that are already set to on.
The all option sets the state of all events and event groups to on or off, but it does not change
the overall on/off state of auditing as defined by audit_mode. Therefore, if audit_mode is off,
setting the all option to on does not turn on auditing. Subsequently setting audit_mode to on
enables auditing, and all events are audited because the all option was set to on.
For example, to enable all events, use the following command:
ibrix_fs -A -f fsname -oa audit_mode=on,all=on
The same command without all=on enables auditing, but only for those events and event groups
that have already been set to on.
Display audit settings for one or all file systems:
ibrix_fs -A [-f FSNAME]
List all audit options (events and event groups):
ibrix_fs -A -h
Mark a bad segment
Mark segment number(s) bad in the specified file system:
ibrix_fs -B -f FSNAME {-n BADSEGNUMLIST | -s BADLVLIST}
The -n option uses segment numbers to indicate bad segments. The -s option uses lvm names to
indicate bad segments.
Enable or disable Export Control
When Export Control is enabled, by default StoreAll clients have no access to the file system. The
system administrator grants access to the clients by executing the ibrix_mount command.
Enabling Export Control does not affect file-system access by file serving nodes or any NFS/SMB
clients attached to the nodes. File serving nodes always have RW access.
Enable Export Control on a file system:
ibrix_fs -C -E -f FSNAME
Disable Export Control on a file system:
ibrix_fs -C -D -f FSNAME
Assign or delete a standby server for the specified segments
Identify a file serving node as the standby for the specified segments:
ibrix_fs -b -f FSNAME -s LVLIST -h HOSTNAME
The command assigns HOSTNAME as the standby for the segments in LVLIST on file system
FSNAME. To identify a standby server for all segments on a file serving node, use the following
command, where HOSTNAME2 is the standby for HOSTNAME1.
<installdirectory>/bin/ibrix_server -b -h HOSTNAME1,HOSTNAME2
Delete the standby assignment for the specified segments:
ibrix_fs -b -U -f FSNAME -s LVLIST
The command removes the standby assignment for the segments in LVLIST on file system FSNAME.
76
StoreAll software commands
Options
Option
Description
-A
Enables, disables, or displays audit settings, when applied to an existing file system.
-B
Marks bad segments.
-C
Enables export control.
-D
When used with -q, disables quotas on the named file system.
When used with -C, disables export control on a named file system.
When used with -T on an existing file system, disables Express Query on that file system.
-E
When used with -q, enables quotas on the named file system.
When used with -C, enables export control on a named file system.
When used with -T on an existing file system, enables Express Query on that file system.
-F
Skips source host updates during segment migration.
-H HOSTLIST
A list of one or more host names.
-i
Reports on one or more file systems, and optionally on their segments.
-K [-f FSNAME]
Displays the audit log expiration policy for one or all file systems.
-k TIME -f FSNAME The command lets you modify the audit log expiration policy for a file system. In this instance,
the name of the file system is FSNAME. In this instance, the name of the file system is FSNAME.
The audit log events are kept by default for 45 days. You can change how long the audit log
events are kept by modifying the TIME value as follows:
• xxD Audit log events are kept for the specified number of days (for example, 90D specifies
that events should be kept for 90 days).
• xxM Audit log events are kept for the specified number of months.
• xxY Audit log events are kept for the specified number of years.
-l
Lists file system details.
-M
Forces migration.
-N
Skips host health checks during segment migrations.
-R
Deletes a file system with data retention enabled.
-S LV:HOSTNAME
Identifies a paired logical volume (segment) name and host name. Multiple pairs are separated
by commas.
-T
Enables, disables, or displays Express Query settings.
Do not use -T with -D or -E when creating a file system.
-U
Unassigns backup hosts from a list of logical volumes.
-a
Creates a mountpoint with the same name as the file system and mounts the file system.
-b
Identifies a backup (standby) file serving node.
-c
Creates a new file system.
-d
Deletes the named file system or systems.
-e
Extends the named file system.
-f FSNAME or
FSLIST
A file system or a list of file systems.
-h HOSTNAME
A host name.
-i
Reports on one or more file systems, and optionally on their segments.
ibrix_fs
77
Option
Description
-l
Lists file-system details.
-m
Migrates a file system or file-system segments to a new host.
-o OPTION=VALUE
Specifies file-system parameters; written as option=value pairs. Pairs valid in the current
version of StoreAll software are:
compat=yes|no. Declares whether this file system is 32-bit compatible.
maxsegs=n. Defines the number of segments per file system in 32-bit file systems. n can be
set to 15, 31, 63, 127, or 255.
Data retention options are also set with -o.
-oaOPTION1=VALUE1 Specifies audit settings to be enabled or disabled.
[,OPTION2=VALUE2,...]
-p PVLIST
A list of one or more physical volume names, expressed as a comma-separated list (for
example, d1,d2,d3) or a range (for example, d[1-3]).
-q
Enables quotas on a file system.
-s LVLIST
A list of one or more logical volume (segment) names, expressed as a comma-separated list
(for example, ilv1,ilv2,ilv3) or a range list (for example, ilv[1-3]).
-t TIERNAME
Specifies the tier to which segments are assigned when creating or expanding a file system.
-w
Disables 32-bit mode.
-x
When used with -i, omits segment details from the output report.
-Y [-f FSNAME]
Displays the archiving/auditing synchronizer scheduled time for one or all file systems. The
archiving/auditing synchronizer functionality can also be set by modifying the time value for
Retention Expiration and Autocommit on the Data Retention tab for the Modify Filesystem
Properties window.
-y TIME -f FSNAME Lets you modify the daily time for the archiving/auditing synchronizer to run for a file system.
In this instance, the name of the file system is FSNAME. Use the form hh:mm (a valid hour
between 0 and 23 inclusive, and a 2-digit minute between 00 and 59 inclusive) to specify
the TIME. The following example sets the starting time for the archiving/auditing synchronizer
to 2 am:
ibrix_fs -y 02:00 -f ibrixfs1
The archiving/auditing synchronizer functionality can also be set by modifying the time value
for Retention Expiration and Autocommit on the Data Retention tab for the Modify Filesystem
Properties window.
-?
See also
ibrix_fs_tune
78
StoreAll software commands
Shows the usage for this command.
ibrix_fs_ops
Manages directory tree quota entries.
IMPORTANT: The ibrix_fs_ops command is deprecated in the StoreAll File Serving Software
6.0 release. Use the ibrix_edquota command to create, delete, or view directory tree quotas.
Description
Directory tree quotas apply to a file system located at a specific directory tree. Use the
ibrix_fs_ops command to create, delete, or view directory tree quotas. After creating a directory
tree quota, use ibrix_edquota to set limits for the quota, including the amount of storage and
the number of files that can be created.
Synopsis
Create a directory tree quota:
ibrix_fs_ops -D -c -f FSNAME -p PATH -n NAME
The -f FSNAME option specifies the name of the file system.
The -p PATH option specifies the pathname of the directory tree. If the pathname includes a space,
enclose the portion of the pathname that includes the space in single quotation marks, and enclose
the entire pathname in double quotation marks. For example:
ibrix_fs_ops -D -c -f fs48 -p "/fs48/data/'QUOTA 4'" -n QUOTA_4
The -n NAME option specifies a unique name for the directory quota. The name cannot contain
a comma (,) character.
Use ibrix_edquota to assign usage limits to the directory tree quota.
List the directory tree quota applied to a specific file system:
ibrix_fs_ops -D -l -f FSNAME
To see the usage limits assigned to directory tree quotas, use ibrix_edquota.
Delete the specified directory tree quota entry and limits:
ibrix_fs_ops -D -d -f FSNAME -n NAME
The -n NAME option specifies the name of the directory tree quota. When the ibrix_fs_ops
command has finished executing, issue the following command to remove the quota account for
the directory tree:
ibrix_online_quotacheck -t -T 0 {path}
Options
Option
Description
-D
Indicates that this is a directory tree quota operation.
-c
Creates a directory tree quota.
-d
Deletes a directory tree quota.
-f FSNAME
The name of the file system.
-l
Lists directory tree quotas.
-n NAME
The name of the directory tree quota.
-p PATH
The path to the directory tree.
-?
Shows the usage for this command.
ibrix_fs_ops
79
ibrix_fs_tune
Overrides the default file allocation behavior on file serving nodes and clients.
Description
File allocation policies are set per file system on each file serving node and on StoreAll clients.
The policies define the following:
•
Preferred segments. The segments where a file serving node or StoreAll client creates all new
files and directories.
•
Allocation policy. The policy that a file serving node or StoreAll client uses to choose segments
from its pool of preferred segments to create new files and directories.
The segment preferences and allocation policy are set locally for StoreAll clients. For NFS, SMB,
HTTP, and FTP clients (collectively referred to as NAS clients), the allocation policy and segment
preferences must be set on the file serving nodes from which the NAS clients access shares.
Segment preferences and allocation policies can be set and changed at any time, including when
the target file system is mounted and in use.
IMPORTANT: It is possible to set separate allocation policies for files and directories. However,
this feature is deprecated and should not be used unless you are directed to do so by HP support.
NOTE: StoreAll clients access segments directly through the owning file serving node and do not
honor the file allocation policy set on file serving nodes.
IMPORTANT:
behavior.
Changing segment preferences and allocation policy will alter file system storage
The following tables list standard and deprecated preference settings and allocation policies.
Standard segment preferences and allocation policies
Name
Description
Comment
ALL
Prefer all of the segments available in the file
system for new files and directories.
This is the default segment preference. It is suitable
for most use cases.
LOCAL
Prefer the file serving node’s local segments for
new files and directories.
No writes are routed between the file serving nodes
in the cluster. This preference is beneficial for
performance in some configurations and for some
workloads, but can cause some segments to be
overutilized.
RANDOM
Allocate files to a randomly chosen segment
among preferred segments.
This is the default allocation policy. It generally
spreads new files and directories evenly (by number
of files, not by capacity) across all of the preferred
segments; however, that is not guaranteed.
ROUNDROBIN Allocate files to preferred segments in segment
This policy guarantees that new files and folders
order, returning to the first segment (or the
are spread evenly across the preferred segments
designated starting segment) when a file or
(by number of files, not by capacity).
directory has been allocated to the last segment.
80
StoreAll software commands
Deprecated segment preferences and allocation policies
IMPORTANT: HP recommends that you do not use these options. They are currently supported
but will be removed in a future release.
Name
Description
Comment
AUTOMATIC
Lets the StoreAll software select the allocation policy. Should be used only on the advice
of HP support.
DIRECTORY
Allocates files to the segment where its parent
directory is located.
STICKY
Allocates files to one segment until the segment’s
Should be used only on the advice
storage limit is reached, and then moves to the next of HP support.
segment as determined by the AUTOMATIC file
allocation policy.
Should be used only on the advice
of HP support.
HOST_ROUNDROBIN_NB For clusters with more than 16 file serving nodes,
Should be used only on the advice
takes a subset of the servers to be used for file
of HP support.
creation and rotates this subset on a regular, periodic
basis.
NONE
Sets directory allocation policy only. Causes the
directory allocation policy to revert to its default,
which is the policy set for file allocation.
Use NONE only to set file and
directory allocation to the same
policy.
How file allocation settings are evaluated
By default, ALL segments are preferred and file systems use the RANDOM allocation policy. These
defaults are adequate for most StoreAll environments; but in some cases, it may be necessary to
change the defaults to optimize file storage for your system.
A StoreAll client or StoreAll file serving node (referred to as “the host”) uses the following precedence
rules to evaluate the file allocation settings that are in effect:
•
The host uses the default allocation policies and segment preferences: The RANDOM policy
is applied, and a segment is chosen from among ALL the available segments.
•
The host uses a non-default allocation policy (such as ROUNDROBIN) and the default segment
preference: Only the file or directory allocation policy is applied, and a segment is chosen
from among ALL available segments.
•
The host uses a non-default segment preference and a non-default allocation policy (such as
LOCAL/ROUNDROBIN): A segment is chosen according to the following rules:
◦
From the pool of preferred segments, select a segment according to the allocation policy
set for the host, and store the file in that segment if there is room. If all segments in the
pool are full, proceed to the next rule.
◦
Use the AUTOMATIC allocation policy to choose a segment with enough storage room
from among the available segments, and store the file.
Synopsis
Set an allocation policy:
ibrix_fs_tune -f FSNAME {-h HOSTLIST|-g GROUPLIST} -p POLICY [-S
STARTSEGNUM] [-R]
The policy is applied to the specified file serving nodes and StoreAll clients (HOSTLIST) or host
groups (GROUPLIST) for file system FSNAME, starting at the segment with the most available
storage.
To specify the starting segment for applying the policy, include the -S STARTSEGNUM option.
ibrix_fs_tune
81
To set the policy for files, omit the -R option. To set the policy for directories, include the -R option.
Reset the specified hosts or host groups to the default allocation policy for the file system:
ibrix_fs_tune -f FSNAME {-h HOSTLIST|-g GROUPLIST} -p -U
Prefer a pool of segments for the specified hosts or host groups:
ibrix_fs_tune -f FSNAME {-h HOSTLIST|-g GROUPLIST} -s LVNAMELIST
The segments to be included in the pool are specified by logical volume name (LVNAMELIST).
To prefer a pool of segments for NFS/SMB clients, specify only NFS/SMB servers in the HOSTLIST.
To prefer a pool of segments for StoreAll clients, either specify StoreAll clients in the HOSTLIST,
or specify a host group in the GROUPLIST. To prefer all StoreAll clients, specify the clients host
group.
Prefer a pool of segments on specified file serving nodes or host groups in accordance with the -S
option:
ibrix_fs_tune -f FSNAME {-h HOSTLIST|-g GROUPLIST} -S
{SEGNUMLIST|ALL|LOCAL}
•
SEGNUMLIST: Takes a list of segment names.
•
ALL: A keyword that allows clients to write to any segment on the listed file serving nodes.
This restores the default segment preferences for the clients.
•
LOCAL: A keyword that allows clients to write only to the local segments on the specified file
serving nodes.
To prefer a pool of segments for NFS/SMB clients, specify only NFS/SMB servers in the HOSTLIST.
To prefer a pool of segments for StoreAll clients, lists the StoreAll clients in HOSTLIST or specify
a host group in the GROUPLIST. To prefer all StoreAll clients, specify the clients host group.
Prefer a tier for the specified hosts or host groups:
ibrix_fs_tune -f FSNAME {-h HOSTLIST | -g GROUPLIST} -t TIERNAME
Tune allocation policy storage settings globally on the specified file system:
ibrix_fs_tune -f FSNAME -O [-p POLICY] [-S STARTSEGNUM] [-P prealloc
(KB)] [-r readahead (KB)] [-N NFS readahead (KB)]
The following settings can be tuned:
•
Default allocation policy for all hosts
•
Default starting segment number for applying settings
•
Number of KB to allocate for a file at one time (prealloc)
•
Number of KB that StoreAll software will pre-fetch (readahead)
•
Number of KB that StoreAll software will pre-fetch under NFS (NFS readahead)
The default for prealloc is 256 KB. The defaults for readahead and NFS readahead are
128 KB.
List preferred segments or allocation policy for the specified hosts, host groups, or file system:
ibrix_fs_tune -l [-h HOSTLIST | -g GROUPLIST] [-f FSNAME]
The -S option lists preferred segments. The -P option lists allocation policy. The command also
lists the state of the allocation policy storage settings.
List the preferred segments on the specified file serving nodes or host groups:
ibrix_fs_tune {-h HOSTLIST|-g GROUPLIST} -l -S
Enable 32-bit compatibility mode:
ibrix_fs_tune -c -e -f FSNAME
82
StoreAll software commands
Disable 32-bit compatibility mode:
ibrix_fs_tune -c -d -f FSNAME
Options
Option
Description
-N NFS readahead
Specifies the number of KB that StoreAll software pre-fetches under NFS. The default
value is 128 KB.
-O
Sets one or more allocation policy tuning options.
-P prealloc
Sets the number of KB a file system pre-allocates to a file. Default: 256 KB.
-R
Sets allocation policy for directory segments only.
-S SEGMENT_NUMBER
Specifies a segment.
-S SEGNUMLIST| ALL|LOCAL Specifies a list of segments to prefer, prefers all segments, or restricts clients to using
segments local to the file serving nodes listed in the command. ALL and LOCAL are
keywords.
-S STARTSEGNUM
Identifies the first segment to which an allocation policy is applied in a file system.
-U
Resets an allocation policy.
-d
Disables 32-bit compatibility mode.
-e
Enables 32-bit compatibility mode.
-f FSNAME
A file system.
-g GROUPLIST
A list of host groups.
-h HOSTLIST
A list of one or more file serving nodes or StoreAll clients
-l u|g|f
Lists allocation policies for users, groups, or file systems.
-p POLICY
Sets allocation policy on a file system and optionally on a list of hosts or groups.
Policy type names are case-sensitive and must be entered as shown: ROUNDROBIN,
STICKY, DIRECTORY, LOCAL, RANDOM, NONE, HOST_ROUNDROBIN_NB.
-r readahead
Specifies the number of KB that StoreAll software will pre-fetch. The default value is
128 KB.
-s LVNAME or LVNAMELIST
A list of one or more logical volume names (segments).
-t TIERNAME
A tier on a file system.
-?
Shows the usage for this command.
See also
ibrix_fs, ibrix_hostgroup
ibrix_fs_tune
83
ibrix_fsck
Analyzes inconsistencies in a file system.
Description
CAUTION: Do not run ibrix_fsck in corrective mode without the direct guidance of HP Support.
If run improperly, the command can cause data loss and file system damage.
CAUTION: Do not run e2fsck or any other off-the-shelf fsck program on any part of a file
system. Doing so will damage the file system.
The ibrix_fsck command can detect and repair file system inconsistencies. File system
inconsistencies can occur for many reasons, including hardware failure, power failure, switching
off the system without proper shutdown, and failed migration.
The command runs in four phases and has two running modes, analytical and corrective. You must
run the phases in order and you must run all of them:
•
Phase 0 checks host connectivity and the consistency of the segment byte blocks and repairs
them in corrective mode.
•
Phase 1 checks segments and repairs them in corrective mode. Results are stored locally.
•
Phase 2 checks the file system and repairs it in corrective mode. Results are stored locally.
•
Phase 3 moves files from lost+found on each segment to the global lost+found directory
on the root segment of the file system.
If a file system shows evidence of inconsistencies, contact HP Support. A representative will ask
you to run ibrix_fsck in analytical mode and, based on the output, will recommend a course
of action and assist in running the command in corrective mode. HP strongly recommends that you
use corrective mode only with the direct guidance of HP Support. Corrective mode is complex and
difficult to run safely. Using it improperly can damage both data and the file system. Analytical
mode is completely safe, by contrast.
NOTE: During an ibrix_fsck run, an INFSCK flag is set on the file system to protect it. If an
error occurs during the run, you must explicitly clear the INFSCK flag with ibrix_fsck -f
FSNAME -C or you will be unable to mount the file system.
Observe the following requirements when executing ibrix_fsck:
•
Unmount the file system for phases 0 and 1 and mount the file system for phases 2 and 3.
•
Turn off automated failover by executing ibrix_host -m -U -h SERVERNAME.
•
Unmount all NFS clients and stop NFS on the servers.
Synopsis
Clear the INFSCK flag for the specified file system:
ibrix_fsck -f FSNAME -C
Runs phase 0 in analytic mode:
ibrix_fsck -p 0 -f FSNAME [-s LVNAME] [-c]
The command can be run on the specified file system or optionally only on the specified segment
LVNAME.
Run phase 1 in analytic mode:
ibrix_fsck -p 1 -f FSNAME [-s LVNAME] [-c] [-B BLOCKSIZE] [-b
ALTSUPERBLOCK]
84
StoreAll software commands
The command can be run on file system FSNAME or optionally only on segment LVNAME. This
phase can be run with a specified block size and an alternate superblock number. For example:
ibrix_fsck -p 1 -f ifs1 -B 4096 -b 12250
NOTE:
If phase 1 is run in analytic mode on a mounted file system, false errors can be reported.
Run phase 2:
ibrix_fsck -p 2 -f FSNAME [-s LVNAME] [-c] [-o "options"]
The command can be run on the specified file system or optionally only on segment LVNAME. Use
-o to specify any options.
Run phase 3:
ibrix_fsck -p 3 -f FSNAME [-c]
Switch a segment from unavailable to read-only, or from read-only to unavailable:
ibrix_fsck -w -f FSNAME -s LVNAME {-r | -u}
Options
Option
Description
-B BLOCKSIZE
Specifies a block size in KB.
-C
Clears the INFSCK flag.
-b ALTSUPERBLOCK
Specifies the number of an alternate superblock, generally used only if the normal superblock
is corrupted.
-c
Runs ibrix_fsck in corrective mode (the default is analytical mode).
-f FSNAME
A file system.
-o "options"
Options for the command.
-p 0|1|2|3
Runs the specified phase (0, 1, 2, or 3).
-s LVNAME
Specifies a logical volume (segment) name.
-w
Switches a segment from unavailable to read-only, or from read-only to unavailable.
-?
Shows the usage for this command.
See also
ibrix_host, ibrix_umount
ibrix_fsck
85
ibrix_ftpconfig
Manages configuration profiles for the FTP service.
Description
A configuration profile specifies a set of global FTP parameters that are in effect on the file serving
nodes listed in the profile. The vsftpd service starts on these nodes when the cluster services are
started. Only one configuration profile can be in effect on a particular node.
When you create an FTP share, you will need to associate it with a configuration profile. The FTP
settings assigned to the share will be applied to the file serving nodes specified in the configuration
profile.
Synopsis
Add a configuration profile:
ibrix_ftpconfig -a PROFILENAME [-h HOSTLIST] [-S SETTINGLIST]
For the -S option, use a comma to separate the settings, and enclose the settings in quotation
marks, such as "passive_enable=true,maxclients=200,...". To see a list of available
settings for the share, use ibrix_ftpconfig -L.
Modify a configuration profile:
ibrix_ftpconfig -m PROFILENAME [-h HOSTLIST] [-S SETTINGLIST]
Delete a configuration profile:
ibrix_ftpconfig -d PROFILENAME
Display current information about a configuration profile:
ibrix_ftpconfig -i PROFILENAME [-v level]
Use -v 1 to display detailed information.
Display current information about configuration profiles on the specified hosts:
ibrix_ftpconfig -i -h HOSTLIST [-v level]
Use -v 1 to display detailed information.
List all configuration profiles:
ibrix_ftpconfig -l [-v level]
Use -v 1 to display detailed information.
List the default settings for a configuration profile:
ibrix_ftpconfig -L
Restore the FTP configuration on a node that has been recovered with the QR DVD:
ibrix_ftpconfig -R -h HOSTNAME
Before using this option, take one of the following steps:
86
•
If Active Directory authentication is used, join the restored node to the AD domain manually.
•
If Local user authentication is used, create a temporary local user on the GUI and apply the
settings to all servers. This step resynchronizes the local user database.
StoreAll software commands
Options
Option
Description
-L
Lists default profile settings.
-R
Restores the FTP configuration on a node that has been recovered with the QuickRestore DVD.
-S SETTINGLIST
Specifies the settings that are to be applied to a configuration profile. Use a comma to separate
the settings, and enclose the settings in quotation marks, such as
"passive_enable=true,maxclients=200,...". To see a list of available settings for
the share, use ibrix_ftpconfig -L.
-a
Adds a configuration profile.
-d
Deletes a configuration profile.
-h HOSTLIST
Specifies one or more file serving nodes.
-i
Displays current information for the specified configuration profile, or displays current profile
information for specified file serving nodes.
-l
Lists all configuration profiles.
-m
Modifies the specified configuration profile.
-v level
Displays detailed information. Enter 1 as the level.
-?
Shows the usage for this command.
See also
ibrix_ftpshare
ibrix_ftpconfig
87
ibrix_ftpshare
Manages FTP shares.
Description
An FTP share provides access to data on StoreAll file systems. FTP clients access the shares using
standard FTP and FTPS protocol services.
The ibrix_ftpshare command can be used to add a share to an existing file system. You can
create multiple shares having the same physical path, but with different sets of properties, and then
assign users to the share that is appropriate for their usage.
NOTE:
The file system must be mounted when you add the share.
Synopsis
Add an FTP share:
ibrix_ftpshare -a SHARENAME -c PROFILENAME -f FSNAME -p dirpath -I
IP-address:Port [-u USERLIST] [-S SETTINGLIST]
For the -S option, use a comma to separate the settings, and enclose the settings in quotation
marks, such as "browseable=true,readonly=true,...". The settings should include the
IP addresses or Virtual IP addresses that clients will use to access the share. Enter the addresses
as IP address:port pairs. To see a list of the allowable settings for the share, use
ibrix_ftpshare -L.
For the -I option, use a semicolon to separate the IP address:port settings and enclose the settings
in quotation marks, such a "ip1:port1;ip2:port2;...".
The -U option allows you to specify the allowed permissions and an optional custom directory
path for specific users. Use commas to separate the users (for example:
user1=access[;custom_user_path],USER2=access[;custom_user_path],...). In
the command, access can be r/w/rw.
Modify an FTP share:
ibrix_ftpshare -m SHARENAME -c PROFILENAME [-f FSNAME -p dirpath] -I
IP-address:Port [-u USERLIST] [-S SETTINGLIST]
If you need to allow NAT connections, specify the allow_nat=true parameter with the -S
option. For example:
ibrix_ftpshare -m ftp_share1 -c profile1 -I 10.9.60.61:21 -S
"allow_nat=true"
Delete an FTP share:
ibrix_ftpshare -d SHARENAME -c PROFILENAME
Delete all FTP shares associated with a file system:
ibrix_ftpshare -d -f FSNAME
Display information about an FTP share:
ibrix_ftpshare -i SHARENAME -c PROFILENAME [-v level]
Use -v 1 to display detailed information.
List all FTP shares, or shares associated with a specific profile:
ibrix_ftpshare -l -c PROFILENAME [-v level]
Use -v 1 to display detailed information.
88
StoreAll software commands
List FTP shares associated with a specific file system:
ibrix_ftpshare -l -f FSNAME [-v level]
Use -v 1 to display detailed information.
List the valid settings for a share:
ibrix_ftpshare -L
Options
Option
Description
-I IPaddrs:Port Specifies the IP addresses/ports assigned to this share.
-L
Lists valid FTP share settings.
-S SETTINGLIST
Specifies the settings to apply to an FTP share. Use a comma to separate the settings, and
enclose the settings in quotation marks, such as "browseable=true,readonly=true,...".
To see a list of available settings for the share, use ibrix_ftpshare -L.
-a SHARENAME
Adds an FTP share.
-c PROFILENAME
Specifies a configuration profile.
-d
Deletes an FTP share.
-f FSNAME
Specifies a file system.
-i
Displays information about FTP shares.
-l
Lists FTP shares.
-m SHARENAME
Modifies the specified FTP share.
-p dirpath
Specifies the path to the share.
-u USERLIST
Specifies users and their access permissions. Use commas to separate the users (for example:
user1=access[;custom_user_path],USER2=access[;custom_user_path],...).
The value of access can be r/w/rw.
-v level
Displays detailed information. Enter 1 as the level.
-?
Shows the usage for this command.
See also
ibrix_ftpconfig
ibrix_ftpshare
89
ibrix_haconfig
Reports whether StoreAll high availability features are configured for file serving nodes.
Description
ibrix_haconfig tests whether the following high availability features are configured for file
serving nodes and provides either a summary or a detailed report of the results:
•
Programmable power source
•
Standby server or standby segments
•
Cluster and user network interface monitors
•
Standby network interface for each user network interface
•
HBA port monitoring
•
Whether automated failover is turned on
The summary report returns a result status for each high availability feature, for each tested file
serving node, and optionally for their standbys:
•
Passed: The feature is configured.
•
Warned: The feature is not configured, but the result is ambiguous. For example, the
configuration checker cannot know whether the absence of discovered HBAs indicates that
the HBA monitoring feature was not set up or that HBAs are not physically present on the
tested servers.
•
Failed: The feature is not configured.
The report includes an overall result status for all tested file serving nodes and describes details
about the checks performed on each high availability feature. By default, the report includes details
only about checks that received a Failed or a Warned result. You can expand the report to
include details about checks that received a Passed result.
Synopsis
Determine whether StoreAll high availability is configured and report overall results:
ibrix_haconfig -l [-h HOSTLIST] [-f] [-b]
The command checks either all file serving nodes or only those nodes in HOSTLIST, and reports
the overall results for all tested hosts. To include standbys for file serving nodes in the check, include
the -b option. To list only the file serving nodes that failed a health test, include the -f option.
Determine whether StoreAll high availability is configured and report detailed failed/warned results:
ibrix_haconfig -i [-h HOSTLIST] [-f] [-b] [-v]
The command checks either all file serving nodes or only those nodes in HOSTLIST and reports
the overall results for all tested hosts. Detailed information is provided for configuration checks that
received a Failed or Warned result.
To include standbys for file serving nodes in the check, include the -b option. To include information
only about file serving nodes that failed a health test, include the -f option. To expand the report
to include detailed information about configuration checks that received a Passed result, include
the -v option.
90
StoreAll software commands
Options
Option
Description
-b
Includes standby servers in the configuration check.
-f
Reports only on failed file serving nodes.
-h HOSTLIST
A list of file serving nodes.
-i
Displays a detailed high availability configuration report.
-l
Displays a summary high availability configuration report.
-v
Displays details about the configuration checks that received a Passed result.
-?
Shows the usage for this command.
ibrix_haconfig
91
ibrix_hba
Discovers HBAs, identifies standby pairings of HBA ports, monitors HBA ports for failure, deletes
HBAs from the configuration database, and lists information about HBAs.
Description
ibrix_hba sets up HBA monitoring. When a monitored HBA port fails, the Fusion Manager fails
the host over to its standby if a standby has been declared and if automated failover is turned on.
The -b option identifies two multipath HBAs that have been set to operate as a failover pair. Built-in
standby switching is vendor-supplied and is not present in all HBA models. If the operating HBA
fails, the standby HBA is activated. If both HBAs fail and HBA monitoring is enabled, the Fusion
Manager fails over the host.
In some of these HBA commands, worldwide names (WWN) are assigned as parameter values.
These are either worldwide node names (WWNN) or worldwide port names (WWPN). The WWPN
is the name an HBA presents when logging into a SAN fabric. Worldwide names consist of 16
hexadecimal digits grouped in pairs. In StoreAll software, these are written as dot-separated pairs
such as 21.00.00.e0.8b.05.05.04.
Synopsis
Discover HBA ports and add them to the configuration database:
ibrix_hba -a [-h HOSTLIST]
Use the -h HOSTLIST option to limit the command to specific file serving nodes.
Enable HBA port monitoring on a file serving node:
ibrix_hba -m -h HOSTNAME -p <PORT>
Disable HBA port monitoring on a file serving node:
ibrix_hba -m -U -h HOSTNAME -p PORT
Add an HBA standby pair:
ibrix_hba -b -P WWPN1:WWPN2 -h HOSTNAME
The command identifies WWPN1 and WWPN2 as a standby pair on file serving node HOSTNAME.
Delete an HBA standby pair:
ibrix_hba -b -U -P WWPN1:WWPN2 -h HOSTNAME
The command deletes the standby pairing of ports WWPN1 and WWPN2 on file serving node
HOSTNAME from the configuration database.
Delete the HBA entries in WWNNLIST from the configuration database for a file serving node:
ibrix_hba -d -h HOSTNAME -w WWNNLIST
List information about HBA ports:
ibrix_hba -l [-h HOSTLIST]
Use the -h HOSTLIST option to limit the command to specific file serving nodes.
Options
92
Option
Description
-P WWPN
An HBA’s worldwide port name, specified as 16 hex digits grouped into eight pairs
separated by dots (for example, 20.00.12.34.56.78.9a.bc).
-U
Stops HBA monitoring or deletes a standby pairing from the configuration database.
-a
Adds an HBA port definition.
StoreAll software commands
Option
Description
-b
Identifies two ports as a standby pair.
-d
Deletes an HBA port definition.
-h HOSTNAME or HOSTLIST
One or more file serving nodes.
-l
For each host, displays its WWNN, WWPN, backup WWPN, and whether HBA
monitoring is turned on.
-m
Turns on HBA monitoring.
-p PORT
Specifies the port number used for HBA monitoring.
-w WWNN or WWNNLIST
An HBA’s worldwide node name or a list of such names, specified as 16 hex digits
grouped into eight dot-separated pairs (for example, 20.00.12.34.56.78.9a.bc). If
you specify multiple names, use commas to separate the names (for example,
50.01.43.80.02.51.bf.c7,50.01.43.80.02.51.bf.c5).
-?
Shows the usage for this command.
ibrix_hba
93
ibrix_health
Generates health reports for cluster components and StoreAll clients.
Description
The ibrix_health command includes options specific to X9720/9730 systems and other options
for file serving nodes and StoreAll clients.
For X9720/9730 systems, ibrix_health generates a detailed or summary health report for
storage, chassis, or servers registered to a chassis.
For file serving nodes and StoreAll clients, ibrix_health runs a set of health checks on all hosts
or the specified hosts and reports the results. To constrain the report to show only hosts that failed,
include the -f option.
On both file serving nodes and StoreAll clients, the check determines whether information maps
on the tested hosts are consistent with the configuration database.
Checks run on file serving nodes do the following:
•
Ping remote file serving nodes that share a network with the test hosts but only if the test hosts
do not have an open connection to the remote servers. Remote servers that can be pinged
might not be connected to a test host because of a Linux or StoreAll software problem. Remote
servers that cannot be pinged might be down or have a network problem.
•
If test hosts are assigned to be network interface monitors, ping their monitored interfaces to
assess the health of the connection.
•
Determine whether hosts can read their physical volumes.
Health checks are reported as Passed, Failed, or Warning:
•
Passed: All tested hosts and standbys passed every health check.
•
Failed: One or more tested hosts failed a health check. The health status of standbys for file
serving nodes is not included when this result is calculated.
•
Warning: A suboptimal condition that may require attention was found on one or more tested
hosts or standbys.
The terms have the same meaning for individual file serving nodes and StoreAll clients. A standby
for a file serving node is not considered when the result is determined for the node.
The basic (-l) report includes the following for each host: hostname, test result (passed/failed),
host type (server/client), state (up/down), and date of last update.
The detailed report consists of a summary report plus the following data: a summary of the test
results; host information such as operational state, performance data, and version data; non-default
host tunings; and the results of the health checks. By default, the “Result Information” field in a
detailed report provides data only for health checks that received a Failed or a Warned result.
You can expand a detailed report to also provide data about checks that received a Passed result,
as well as details about the file system and segments.
Synopsis
Perform health checks on file serving nodes or StoreAll clients and provide a summary report of
the results:
ibrix_health -l [-h HOSTLIST] [-f] [-u] [-b] [-t SCRIPTNAMELIST]
The command is run on the specified file serving nodes and StoreAll clients. The options are:
-h HOSTLIST: Runs health checks on the specified file serving nodes and StoreAll clients.
-f: Reports only hosts that failed a test.
-u: Reports only hosts known to be up.
-b: Includes standbys for file serving nodes.
94
StoreAll software commands
-t SCRIPTNAMELIST: Runs the specified scripts and include them in the health report.
Display a detailed health report for file serving nodes or StoreAll clients:
ibrix_health -i -h HOSTLIST [-f] [-b] [-s] [-v] [-t SCRIPTNAMELIST]
The options are:
-h HOSTLIST: Runs health checks on the specified file serving nodes and StoreAll clients.
-f: Reports only hosts that failed a test.
-b: Includes standbys for file serving nodes.
-s: Includes details about the file system and segments.
-v: Includes details about checks that received a Passed result.
-t SCRIPTNAMELIST: Includes details about the specified scripts.
Display a detailed health report for X9720/9730 vendor storage:
ibrix_health -V -i [-n VENDORSTORAGENAMES]
Display a summary health report for X9720/9730 vendor storage:
ibrix_health -V -l [-n VENDORSTORAGENAMES]
Display a detailed health report for X9720/9730 chassis:
ibrix_health -C -i [-n CHASSISNAMES]
Display a summary health report for X9720/9730 chassis:
ibrix_health -C -l [-n CHASSISNAMES]
Display a detailed health report for servers registered in an X9720/9730 chassis:
ibrix_health -S -i [-h HOSTNAMES]
Display a summary health report for servers registered in an X9720/9730 chassis:
ibrix_health -S -l [-h HOSTNAMES]
Options
Option
Description
-C
Displays a health report for X9720/9730 chassis.
-S
Displays a health report for servers registered to an X9720/9730 chassis.
-V
Displays a health report for X9720/9730 vendor storage.
-b
Includes standbys for file serving nodes in the check.
-f
Includes only failed hosts in the report.
-h HOSTLIST
A list of one or more hosts.
-i
Displays a detailed health report for file serving nodes or StoreAll clients.
-l
Displays a summary health report for file serving nodes or StoreAll clients.
-n CHASSIS or
VENDORSTORAGE
Specifies one or more chassis or vendor storage names.
-s
Includes file system and segment information in the health report.
-t
Runs the specified scripts and includes them in the health report.
SCRIPTNAMELIST
-u
Includes only hosts known to be up in the report.
-v
Lists details about the test that was performed.
-?
Shows the usage for this command.
ibrix_health
95
ibrix_healthconfig
Manages health check sets.
Description
Use this command to create or update sets of health checks. You can also delete health check sets
display existing health check sets.
Synopsis
Create a set of health checks:
ibrix_healthconfig -c -n SETNAME -t HEALTH_CHECKLIST
SETNAME is the name for the set being created and HEALTH_CHECKLIST lists the checks to be
added.
Add health checks to health check sets:
ibrix_healthconfig -u -A -n SETLIST -t HEALTH_CHECKLIST
Remove health checks from health check sets:
ibrix_healthconfig -u -D -n SETLIST -t HEALTH_CHECKLIST
Delete health sets:
ibrix_healthconfig -d -n SETLIST
Display detailed information about health check sets:
ibrix_healthconfig -i -n SETLIST
Lists the available health checks:
ibrix_healthconfig -L
Options
96
Option
Description
-A
Adds health checks to a set.
-D
Removes health checks from a set.
-L
Lists the names of available health checks.
-c
Creates a set of health checks.
-d
Deletes a set of health checks.
-i
Displays detailed information about health check sets.
-n SETLIST
The name of a health check set.
-t HEALTH_CHECKLIST
List of health checks.
-u
Updates a set of health checks.
?
Shows the usage for this command.
StoreAll software commands
ibrix_host_tune
Sets and lists tuning parameters for file serving nodes and StoreAll clients.
Description
CAUTION: The default values for the host tuning parameters are suitable for most cluster
environments. Because changing parameter values can alter file-system performance, HP
recommends that you exercise caution before implementing any changes, or do so only under the
guidance of HP technical support.
Host tunings are immediately executed for file serving nodes. For StoreAll clients a tuning intention
is stored in the Fusion Manager. When HP services start on a StoreAll client, the client obtains its
settings from the Fusion Manager and implements them. If HP services are already running on
StoreAll clients when new parameter values are set, you can force the clients to query the Fusion
Manager for the settings by running ibrix_client or ibrix_lwhost --a on the StoreAll
clients, or by rebooting them.
To locally override host tunings on a single StoreAll client, run ibrix_lwhost. All of the Fusion
Manager commands for tuning hosts include an -h HOSTLIST option that can take one or more
host groups. Setting host tunings on a host group is a convenient way to tune a set of StoreAll
clients all at once. To set the same host tunings on all StoreAll clients, specify the built-in clients
host group.
Synopsis
Set tunings on file serving nodes and StoreAll clients:
ibrix_host_tune -S {-h HOSTLIST|-g GROUPLIST} -o OPTIONLIST
The command sets host tunings (OPTIONLIST) on specified file serving nodes and StoreAll clients
(HOSTLIST), or on specified host groups (GROUPLIST). For example, to set host tunings on all
StoreAll clients, use -g clients.
Reset host tunings to their default values:
ibrix_host_tune -U {-h HOSTLIST|-g GROUPLIST} -n OPTIONS
The host tunings (OPTIONS) are reset on the specified file serving nodes and StoreAll clients
(HOSTLIST), or on specified host groups (GROUPLIST). For example, to set host tunings on all
StoreAll clients, use -g clients. The values that are restored depend on what is supplied to the
HOSTLIST option:
•
File serving nodes: The default host tunings are restored.
•
host groups: The host tunings that are in effect for the parent of the specified host groups are
restored.
•
StoreAll clients: The host tunings that are in effect for the default clients host group are
restored.
Lists host tunings for the specified file serving nodes, StoreAll clients, and host groups:
ibrix_host_tune -l [-h HOSTLIST] [-n OPTIONS]
Only settings that differ from the default values are listed. To list settings for specific parameters,
include the -n OPTIONS option.
To list settings for all file serving nodes and StoreAll clients, omit the -h HOSTLIST option.
List host tunings for the specified groups:
ibrix_host_tune -l {-g GROUPLIST | -G }[-n OPTIONS]
Only settings that differ from the default values are listed. To list settings for specific parameters,
include the -n OPTIONS option.
ibrix_host_tune
97
List default values and the range of values for host-tuning parameters:
ibrix_host_tune -L
Set host configuration options for the specified hosts:
ibrix_host_tune -C [-h HOSTLIST] -o OPTIONLIST
OPTIONS is a list of configuration options separated by commas.
Reset host configuration options to the default values:
ibrix_host_tune -R [-h HOSTLIST] -n OPTIONS
OPTIONS is a list of configuration options separated by commas.
List non-default configuration settings for the specified hosts:
ibrix_host_tune -q [-h HOSTLIST] [-n OPTIONS]
OPTIONS is a list of configuration options separated by commas.
List default configuration options:
ibrix_host_tune -Q
Set the communications protocol on file serving nodes, StoreAll clients, or host groups:
ibrix_host_tune -p {UDP|TCP} {-h HOSTLIST|-g GROUPLIST}
The default protocol is TCP. To set the protocol on all StoreAll clients, use -g clients.
Set server threads on file serving nodes, StoreAll clients, or host groups:
ibrix_host_tune -t THREADCOUNT {-h HOSTLIST|-g GROUPLIST}
To set server threads on all StoreAll clients, use -g clients.
Set admin threads on file serving nodes, StoreAll clients, or host groups:
ibrix_host_tune -a THREADCOUNT {-h HOSTLIST|-g GROUPLIST}
To set admin threads on all StoreAll clients, use -g clients.
Options
98
Option
Description
-C
Sets configuration tuning options.
-G
Includes all groups
-L
Lists default tuning options.
-Q
Lists default configuration tuning values.
-R
Resets configuration tuning options.
-S
Sets host tuning options.
-U
Resets host tuning options to default values.
-a THREADCOUNT
Sets the number of admin threads. The default value is 3.
-g GROUPLIST
Identifies one or more host groups.
-h HOSTLIST
Identifies one or more file serving nodes or StoreAll clients.
-l
Lists host tuning options.
-n OPTIONS
Specifies a list of host tuning options, separated by commas, and in the format
option1,option2...
-o OPTIONLIST
Specifies a list of comma-separated option/value pairs, separated by commas, and in the
format option1=value1,option2=value2...
StoreAll software commands
Option
Description
-p tcp|udp
Sets a communications protocol (UDP or TCP).
-q
Queries configuration tuning parameter values.
-t THREADCOUNT
Sets the number of server threads. The default value is 10.
-?
Shows the usage for this command.
See also
ibrix_hostgroup, ibrix_lwhost
ibrix_host_tune
99
ibrix_hostgroup
Creates and manages host groups.
Description
A host group is a named set of StoreAll clients. Host groups provide a convenient way to centrally
manage clients. Group-wide procedures include:
•
Mounting file systems.
•
Preferring or unpreferring a network interface for a host group. You can locally override the
preference on individual StoreAll clients with ibrix_lwhost.
•
Tuning host parameters.
•
Setting allocation policies.
When ibrix_mount, ibrix_host_tune, or ibrix_fs_tune is executed on a host group,
the command is stored on the Fusion Manager for each StoreAll client until the next time a StoreAll
client contacts it. This happens when the StoreAll client reboots, when StoreAll software services
start on the StoreAll client, or when it is forced to query the Fusion Manager. When contacted, the
Fusion Manager replies to the StoreAll clients with information about commands that have been
executed on host groups to which they belong. The StoreAll clients then use this information to
mount file systems or implement host tunings or allocation policy settings.
To force a query on a StoreAll client, execute ibrix_lwmount -a if you executed ibrix_mount
or ibrix_fs_tune on the host group, or run ibrix_lwhost --a if you executed
ibrix_host_tune.
All StoreAll clients belong to the default clients host group, which can be used to globally mount
file systems, tune hosts, or set allocation policy. To perform different actions on different sets of
StoreAll clients, create additional host groups and assign StoreAll clients to them. This involves
creating a host group tree whose root element is the clients host group. Each host group in a
tree can have exactly one parent, and a parent can have multiple children. To create the first level
of nodes beneath the root, execute ibrix_hostgroup -c -g GROUPNAME. To create subsequent
levels of nodes, execute ibrix_hostgroup -c -g GROUPNAME -p PARENT.
After creating a host group, assign StoreAll clients to it. You can do this manually or have the
Fusion Manager automatically assign the clients when they are registered. To set up automatic
host group assignments, define a domain rule for host groups. A domain rule restricts host group
membership to StoreAll clients on a particular cluster subnet. The Fusion Manager uses the IP
address that you specify for StoreAll clients when you register them to perform a subnet match and
sort the StoreAll clients into host groups based on domain rules. Setting domain rules on host groups
thus provides a convenient way to centrally manage mounting, tuning, and allocation policies on
different subnets of StoreAll clients.
In a host groups tree, operations performed on lower-level nodes take precedence over operations
performed on higher-level nodes. This means that you can effectively establish global StoreAll client
mounts, host tunings, and allocation policies and then override them for specific host groups.
Synopsis
Create a host group tree:
ibrix_hostgroup -c -g GROUPNAME [-D DOMAIN] [-p PARENT]
To create one level of host groups beneath the root clients host group, execute the command
once for every host group that you want to add, but omit the -p PARENT option.
To create additional levels of host groups, execute the command for each host group to be added
and include the -p PARENT option.
To set a domain rule on a host group, include the -D DOMAIN option.
100 StoreAll software commands
Add a domain rule to a host group:
ibrix_hostgroup -a -g GROUPNAME -D DOMAIN
Delete one or more host groups from a host group tree:
ibrix_hostgroup -d -g GROUPLIST
Prefer a network interface for communication from a host group to a destination host:
ibrix_hostgroup -n -g HOSTGROUP -A DESTHOST/IFNAME
To prefer a network interface for all StoreAll clients, use -g clients.
Use the cluster interface for communications from a host group to a destination host:
ibrix_hostgroup -n -g HOSTGROUP -D DESTHOST
To unprefer a network interface for all StoreAll clients, use -g clients.
Migrate a StoreAll client to a different host group:
ibrix_hostgroup -m -g GROUP -h MEMBER
Display detailed information for one or more host groups:
ibrix_hostgroup -i [-g GROUPLIST]
The information includes, as applicable, the host group name, parent, domain, protocol, number
of admin threads, and number of server threads.
List all host groups by name, parent, and domain:
ibrix_hostgroup -l [-g GROUPLIST]
To list specific host groups, include the -g GROUPLIST option.
Options
Option
Description
-A DESTHOST/ IFNAME
Adds a preferred NIC (IFNAME) to use when communicating with this destination
host.
-D DOMAIN or DESTHOST
Specifies a domain rule, an IP address that corresponds to a user interface, or a
destination host.
-a
Changes a domain attribute on a host group.
-c
Creates a host group.
-d
Deletes a host group from the host group tree.
-g GROUPNAME or GROUPLIST Identifies the host group or list of host groups that the command is acting on.
-h MEMBER
Specifies the name of a host to add to a host group.
-i
Displays detailed information on all host groups or a named host group.
-l
Lists parent and domain for all host groups.
-m
Moves a host to another host group.
-n
Prefers or unprefers a network interface.
-p PARENT
Specifies a parent node in a host group tree.
-?
Shows the usage for this command.
See also
ibrix_host, ibrix_host_tune, ibrix_fs_tune, ibrix_lwhost, ibrix_lwmount,
ibrix_mount
ibrix_hostgroup
101
ibrix_hostpower
Manages power sources.
Description
Use ibrix_hostpower to list power sources or disassociate a file serving node from a power
source.
Synopsis
List the power sources assigned to all file serving nodes or the specified nodes:
ibrix_hostpower -l [-h HOSTLIST]
Dissociate a file serving node from an integrated power source:
ibrix_hostpower -d [-s POWERSOURCE ] -h HOSTNAME
Options
Option
Description
-d
Dissociates a hostname from a power source.
-h HOSTNAME or HOSTLIST
A file serving node name or a list of file serving node names.
-l
Lists all associations between hosts and power sources.
-s POWERSOURCE
Specifies the name of the power source.
-?
Shows the usage for this command.
See also
ibrix_powersrc
102 StoreAll software commands
ibrix_httpconfig
Manages configuration profiles for the HTTP service.
Description
A configuration profile specifies a set of global HTTP parameters in effect on the file serving nodes
listed in the profile.
When you create an HTTP share, you will need to associate it with a configuration profile. One
or more HTTP virtual hosts are also associated with the profile and specify the IP addresses/ports
that clients will use to access the HTTP shares.
Synopsis
Add a configuration profile:
ibrix_httpconfig -a PROFILENAME [-h HOSTLIST] [-S SETTINGLIST]
For the -S option, use a comma to separate the settings, and enclose the settings in quotation
marks, such as "keepalive=true,maxclients=200,...". To see a list of available settings
for the share, use ibrix_httpconfig -L.
You can specify multiple values for the ports and sslports settings. Use semicolons to separate
the values, and use commas to separate the settings. For example:
ibrix_httpconfig -a profile1 -h node1 -S
"ports=80;81;82,sslports=443;444,keepalive=true"
You can also use the -S option to adjust the socket read block size (wblocksize) and file write
block size (rblocksize) used by Apache. The values must be between 8 KB and 2 GB, and the
defaults are 8192 bytes. For example:
IMPORTANT:
Each server can have only one HTTP profile.
ibrix_httpconfig -a profile1 -h node1,node2 -S
"wblocksize=20K,rblocksize=1M"
Modify a configuration profile:
ibrix_httpconfig -m PROFILENAME [-h HOSTLIST] [-S SETTINGLIST]
Delete a configuration profile:
ibrix_httpconfig -d PROFILENAME
Display current information about a configuration profile:
ibrix_httpconfig -i PROFILENAME [-v level]
Use -v 1 to display detailed information.
Display current information about configuration profiles on the specified hosts:
ibrix_httpconfig -i HOSTLIST [-v level]
Use -v 1 to display detailed information.
List all configuration profiles:
ibrix_httpconfig -l [-v level]
Use -v 1 to display detailed information.
List the default settings for a configuration profile:
ibrix_httpconfig -L
Restore the HTTP configuration on a node that has been recovered with the QR DVD:
ibrix_httpconfig -R -h HOSTNAME
ibrix_httpconfig 103
Before using this option, take one of the following steps:
•
If Active Directory authentication is used, join the restored node to the AD domain manually.
•
If Local user authentication is used, create a temporary local user on the GUI and apply the
settings to all servers. This step resynchronizes the local user database.
Options
Option
Description
-L
Lists default profile settings.
-R
Restores the HTTP configuration on a node that has been recovered with the QuickRestore DVD.
-S SETTINGLIST
Specifies the settings that are to be applied to a configuration profile. Use a comma to separate
the settings, and enclose the settings in quotation marks, such as
"keepalive=true,maxclients=200,...". To see a list of available settings for the share,
use ibrix_httpconfig -L.
-a
Adds a configuration profile.
-d
Deletes a configuration profile.
-h HOSTLIST
Specifies one or more file serving nodes.
-i
Displays current information for the specified configuration profile, or displays current profile
information for specified file serving nodes.
-l
Lists all configuration profiles.
-m
Modifies the specified configuration profile.
-v level
Displays detailed information. Enter 1 as the level.
-?
Shows the usage for this command.
See also
ibrix_httpshare, ibrix_httpvhost
104 StoreAll software commands
ibrix_httpshare
Manages HTTP shares.
Description
An HTTP share provides access to data on StoreAll file systems. HTTP clients access the shares
using standard HTTP and HTTPS protocol services.
The ibrix_httpshare command can be used to add a share to an existing file system. You
can create multiple shares having the same physical path, but with different sets of properties, and
then assign users to the share that is appropriate for their usage.
NOTE:
The file system must be mounted when you add the share.
Synopsis
Add an HTTP share:
See the section, “Process checklist for creating HTTP shares,” in the HP StoreAll Storage File System
User Guide for a list of prerequisites that must be completed before creating an HTTP share.
IMPORTANT:
Keep in mind the following when creating StoreAll REST API shares in object mode:
•
Do not create file-compatible mode and object mode REST API shares on the same file system.
Use separate file systems for each type of REST API share.
•
Do not enable Express Query on object mode REST API shares.
•
Do not create an object mode REST API share on any file system where Express Query is
enabled. Express Query does not support storing metadata from objects in object mode shares.
If Express Query is enabled on a file system with an object mode API share, metadata from
the object mode files are ingested incorrectly, causing unusable metadata to be added to the
Express Query database. This situation negatively impacts the performance of Express Query
for the files outside the object mode share on the same file system that it ingests correctly.
Table 3 Adding an HTTP share
Type of HTTP share to add
Enter the following command on one line
Standard HTTP Share
ibrix_httpshare -a SHARENAME -c PROFILENAME -t VHOSTNAME
-f FSNAME -p dirpath -P urlpath [-u USERLIST] [-S
SETTINGLIST]
HTTP-StoreAll REST API share in
file-compatible mode1
ibrix_httpshare -a SHARENAME -c PROFILENAME -t VHOSTNAME
-f FSNAME -p dirpath -P urlpath [-u USERLIST] -S
"ibrixRestApiMode=filecompatible"
The StoreAll REST API share in
file-compatible mode provides
programmatic access to user-stored files
and their metadata. The metadata is
stored on the HP StoreAll Express Query
database in the StoreAll cluster and
provides fast query access to metadata
without scanning the file system.
HTTP-StoreAll REST API share in object
mode1
The StoreAll REST API share in object
mode provides concepts similar to
OpenStack object Storage API to
support programmatic access to
user-stored files and their metadata.
Users allowed to use this share are
represented by an account on the file
system. Users can store an infinite
ibrix_httpshare -a SHARENAME -c PROFILENAME -t VHOSTNAME
-f FSNAME -p dirpath -P urlpath [-u USERLIST] -S
"ibrixRestApiMode=object,anonymous=false"
The anonymous setting must be set to false. If you do not provide the
anonymous setting ("ibrixRestApiMode=object"), the anonymous value
is false by default.
ibrix_httpshare 105
Table 3 Adding an HTTP share (continued)
Type of HTTP share to add
Enter the following command on one line
amount of objects in a container
created and each object is assigned
object key which is mapped to a
relative file system path name.
1
The parameter userlist is optional, and it is not necessarily needed for the StoreAll REST API.
All the other listed arguments are required for the StoreAll REST API.
For the -S option, use a comma to separate the settings, and enclose the settings in quotation
marks, such as "davmethods=true,browseable=true,readonly=true".
For example, to create a new HTTP share and enable the WebDAV property on that share:
# ibrix_httpshare -a share3 -c cprofile1 -t dav1vhost1 -f ifs1 -p
/ifs1/dir1 -P url3 -S "davmethods=true"
To see all of the valid settings for an HTTP share, use the following command:
ibrix_httpshare -L
Modify an HTTP share:
ibrix_httpshare -m SHARENAME -c PROFILENAME -t VHOSTNAME [-f FSNAME -p
dirpath] [-P urlpath] [-u USERLIST] [-S SETTINGLIST]
Delete an HTTP share:
ibrix_httpshare -d SHARENAME -c PROFILENAME -t VHOSTNAME
Delete all HTTP shares associated with a file system:
ibrix_httpshare -d -f FSNAME
Display information about an HTTP share:
ibrix_httpshare -i SHARENAME -c PROFILENAME -t VHOSTNAME [-v level]
Use -v 1 to display detailed information.
List all HTTP shares, or shares associated with a specific profile:
ibrix_httpshare -l [-c PROFILENAME] [-v level]
Use -v 1 to display detailed information.
List HTTP shares associated with a specific file system:
ibrix_httpshare -l -f FSNAME [-v level]
Use -v 1 to display detailed information.
List StoreAll REST API peer shares:
ibrix_httpshare -l -o
List the valid settings for a share:
ibrix_httpshare -L
Activate the WebDAV feature:
ibrix_httpshare -S "davmethods=true"
Options
Option
Description
-L
Lists valid HTTP share settings.
-P urlpath
Specifies the URL that clients will use to access the share.
106 StoreAll software commands
Option
Description
-S SETTINGLIST
Specifies the settings that are to be applied to an HTTP share. Use a comma to separate the
settings, and enclose the settings in quotation marks, such as
"browseable=true,readonly=true,...". If a value is not specified for a setting, the
default value will be used. To see a list of available settings for the share, use
ibrix_httpshare -L.
-a SHARENAME
Adds an HTTP share.
-c PROFILENAME
Specifies a configuration profile.
-d
Deletes an HTTP share.
-f FSNAME
Specifies a file system.
-i
Displays information about HTTP shares.
-l
Lists HTTP shares.
-l -o
Lists StoreAll REST API peer shares.
-l -f FSNAME
[-v level]
Lists HTTP shares associated with a specific file system. Use -v to display detailed information.
-m SHARENAME
Modifies the specified HTTP share.
-p dirpath
Specifies the path to the share.
-t vhost
Specifies the name of the virtual host for the share.
-u USERLIST
Specifies users and their access permissions. Use commas to separate the users (for example:
USER1=r,USER2=rw,...).
-v level
Displays detailed information. Enter 1 as the level.
-?
Shows the usage for this command.
See also
ibrix_httpconfig, ibrix_httpvhost
ibrix_httpshare 107
ibrix_httpvhost
Manages HTTP virtual hosts.
Description
An HTTP virtual host is associated with an HTTP configuration profile. The virtual host specifies the
IP addresses/ports that clients will use to access the HTTP shares associated with the configuration
profile. The virtual host also specifies the SSL certificate that will be used for HTTPS connections.
Synopsis
Add a virtual host:
ibrix_httpvhost -a VHOSTNAME -c PROFILENAME -I IP-Address:Port [-S
SETTINGLIST]
For the -S option, use a comma to separate the settings, and enclose the settings in quotation
marks, such as "sslcert=name,...". To see a list of the allowable settings for the vhost, use
ibrix_httpvhost -L.
For the -I option, use a semicolon to separate the IP-address:port settings and enclose the
settings in quotation marks, such a "ip1:port1;ip2:port2;...". For example:
ibrix_httpvhost -a vhost1 -c myprofile -I "99.1.26.1:80;99.1.26.1:81"
Use the IP-Address of the User Virtual Interface (the User VIF) of a file serving node as that
interface will be migrated to the node’s HA partner in event of the first node failing. Use
theibrix_nic -l command to find the VIF. The VIF is the IP address of type cluster in an up,
Link Up state, and it is not an Active FM.
Create a StoreAll REST API enabled virtual host set
ibrix_httpvhost -a VHOSTNAME -c PROFILENAME -I IP-Address:Port -S
ibrixrestapi=true
To create a StoreAll REST API enabled virtual host, set ibrixrestapi=true; otherwise, set
ibrixrestapi=false or do not include ibrixrestapi in the command.
All other parameters for creating a standard virtual host apply.
Modify a virtual host
ibrix_httpvhost -m VHOSTNAME -c PROFILENAME -I IP-Address:Port [-S
SETTINGLIST]
IMPORTANT: You cannot change the value of the StoreAll REST API mode (ibrixrestapi)
setting for a virtual host on an HTTP share.
Delete a virtual host
ibrix_httpvhost -d VHOSTNAME -c PROFILENAME
Display information about a virtual host:
ibrix_httpvhost -i VHOSTNAME -c PROFILENAME [-v level]
Use -v 1 to display detailed information.
List all virtual hosts, or virtual hosts associated with a specific profile:
ibrix_httpvhost -l [-c PROFILENAME] [-v level]
Use -v 1 to display detailed information.
List the valid settings for a virtual host:
ibrix_httpvhost -L
108 StoreAll software commands
Options
Option
Description
-I
Specifies the IP addresses/ports assigned to this virtual host.
IP-Address:Port
-L
Lists valid HTTP virtual host settings.
-S SETTINGLIST
Specifies the settings that are to be applied to a virtual host. Use a comma to separate the
settings, and enclose the settings in quotation marks, such as "sslcert=name,...". To see
a list of available settings for the vhost, use ibrix_httpvhost -L.
-a VHOSTNAME
Adds an HTTP virtual host.
-c PROFILENAME
Specifies a configuration profile.
-d
Deletes an HTTP virtual host.
-i
Displays information about HTTP virtual hosts.
-l
Lists HTTP virtual hosts.
-m VHOSTNAME
Modifies the specified HTTP virtual host.
-v level
Displays detailed information. Enter 1 as the level.
-?
Shows the usage for this command.
See also
ibrix_httpconfig, ibrix_httpshare
ibrix_httpvhost 109
ibrix_ldapconfig
Configures LDAP as the primary user authentication method for SMB shares.
Description
The ibrix_ldapconfig command configures LDAP as the primary authentication method for
users accessing SMB shares on a StoreAll file system.
IMPORTANT: Before using ibrix_ldapconfig to configure LDAP on the cluster nodes, you
must configure the remote LDAP server. For more information, see the HP StoreAll Storage File
System User Guide. LDAP authentication cannot be used with Active Directory.
Synopsis
Add an LDAP configuration and enable LDAP:
ibrix_ldapconfig -a -h LDAPSERVERHOST [-P LDAPSERVERPORT] -b LDAPBINDDN
-p LDAPBINDDNPASSWORD -w LDAPWRITEOU -B LDAPBASEOFSEARCH -n NETBIOS -E
ENABLESSL [-f CERTFILEPATH]
Modify an LDAP configuration:
ibrix_ldapconfig -m -h LDAPSERVERHOST [-P LDAPSERVERPORT] [e|D] [-b
LDAPBINDDN] [-p LDAPBINDDNPASSWORD] [-w LDAPWRITEOU] [-B
LDAPBASEOFSEARCH] [-n NETBIOS] [-E ENABLESSL] [-f CERTFILEPATH]
View the LDAP configuration:
ibrix_ldapconfig -i
Enable LDAP:
ibrix_ldapconfig -e LDAPSERVERHOST
Disable LDAP:
ibrix_ldapconfig -d LDAPSERVERHOST
Options
Option
Description
-B LDAPBASEOFSEARCH Specifies the LDAP base for searches. This is normally the root suffix of the directory, but
you can provide a base lower down the tree for business rules enforcement, ACLs, or
performance reasons. For example, ou=people,cd=enx,dc=net.
110
-d
Disables LDAP.
-E ENABLESSL
Specifies the type of certificate required. Enter 0 for no certificate, 1 for TLS, or 2 for SSL.
-P LDAPSERVERPORT
The LDAP server port (TCP port 389 for unencrypted or TLS encrypted; 636 for SSL
encrypted).
-a
Adds an LDAP configuration and enables LDAP.
-b LDAPBINDDN
The LDAP User Account used to authenticate to the LDAP server to read data. This account
must have privileges to read the entire directory. Write credentials are not required. For
example: cn=hp9000-readonly-user,dc=enxt,dc=net.
-e
Enables LDAP.
-f CERTFILEPATH
The path to the TLS or SSL certificate file, such as /usr/local/ibrix/ldap/key.pem.
-h LDAPSERVERHOST
The LDAP server host (server name or IP address).
-i
Displays the LDAP configuration.
-m
Modifies the LDAP configuration.
StoreAll software commands
Option
Description
-n NETBIOS
Specifies the NetBIOS name of the StoreAll server. This can be any string that identifies
the StoreAll host, such as StoreAll.
-p
LDAPBINDDNPASSWORD
The password associated with the LDAP Bind DN.
-v
The certificate CN value (for example, centralldap.it.enxt.net).
-w LDAPWRITEOU
The OU (organizational unit) on the LDAP server to which configuration entries can be
written. This OU must be pre-provisioned at the LDAP server end. The LDAPBindDN
credentials must be able to read (but not write) from the LDAPWriteOU. For example,
ou=9000Config,ou=configuration,dc=enxt,dc=net.
ibrix_ldapconfig
111
ibrix_ldapidmapping
Configures LDAP ID mapping as a secondary lookup source for Active Directory.
Description
When Active Directory is used to authenticate users accessing SMB shares, you can configure
LDAP ID mapping as a secondary lookup source. This method allows the system to read SMB client
UIDs and GIDs from LDAP if the needed ID cannot be located in an AD entry. The name in LDAP
must match the name in AD without respect for case or pre-appended domain.
Use the ibrix_ldapidmapping command to enable or disable an existing LDAP ID mapping,
to add an LDAP IP mapping, and to display the current LDAP ID mapping configuration.
You can tune the LDAP scope, maximum wait time, and maximum entries options to ensure that
search results are timely. Tuning can be especially useful in environments with extremely large
directories, especially when case insensitive searches can return many entries.
Synopsis
Add an LDAP ID mapping:
ibrix_ldapidmapping -a -h LDAPSERVERHOST -B LDAPBASEOFSEARCH [-P
LDAPSERVERPORT] [-b LDAPBINDDN] [-p LDAPBINDDNPASSWORD] [-m MAXWAITTIME]
[-M MAXENTRIES] [-n] [-s] [-o] [-u]
This command automatically enables LDAP RFC 2307 ID Mapping.
Display information for LDAP ID mapping:
ibrix_ldapidmapping -i
Enable an existing LDAP ID mapping:
ibrix_ldapidmapping -e -h LDAPSERVERHOST
Disable an existing LDAP ID mapping:
ibrix_ldapidmapping -d -h LDAPSERVERHOST
Options
112
Option
Description
-B LDAPBASEOFSEARCH
Specifies the LDAP base for searches (for example, ou=people,cd=enx,dc=net).
-M MAXENTRIES
Specifies the maximum number of entries to return from the search (the default is 10).
Enter 0 (zero) for no limit.
-P LDAPSERVERPORT
The LDAP server port (TCP port 389 for unencrypted or TLS encrypted; 636 for SSL
encrypted).
-a
Adds an LDAP ID mapping (automatically enables LDAP RFC 2307 ID Mapping).
-b LDAPBINDDN
Specifies the LDAP User Account used to authenticate to the LDAP server to read data.
This account must have privileges to read the entire directory. Write credentials are not
required. For example: cn=hp9000-readonly-user,dc=enxt,dc=net. The default
is anonymous.
-d
Disables an existing LDAP ID mapping.
-e
Enables an existing LDAP ID mapping.
-h LDAPSERVERHOST
The LDAP server host (server name or IP address).
-i
Displays LDAP ID mapping information.
StoreAll software commands
Option
Description
-m MAXWAITTIME
Specifies the local maximum search time-out value in seconds and the operation maximum
time limit that is sent to the server within the search request. This value determines how
long the client will wait for search results.
-p
LDAPBINDDNPASSWORD
Specifies the LDAP bind password.
-n
Specifies case sensitivity for name searches (the default is false, or case-insensitive).
-o
Searches using LDAP scope one (search all entries in the first level below the base entry
specified with -B, excluding the base entry).
-s
Searches the LDAP scope base (search the base level entry specified with -B only).
-u
Searches using LDAP scope sub (search the base level entry specified with -B and all
entries in all sub-levels below the base entry).
-?
Shows the usage for this command.
ibrix_ldapidmapping
113
ibrix_license
Displays the contents of the StoreAll software license.
Description
ibrix_license lists the contents of the license file, which controls the operation of a StoreAll
cluster.
Synopsis
Display the license contents:
ibrix_license -i
In the output, “Segment Server” refers to file serving nodes.
Options
114
Option
Description
-i
Lists license contents.
-?
Shows the usage for this command.
StoreAll software commands
ibrix_localgroups
Manages local group accounts for SMB or HTTP access.
Description
If Local User authentication is configured for SMB or HTTP shares, use the ibrix_localgroups
command to create and manage local group accounts.
When naming local groups, you should be aware of the following:
•
Group names must be unique. The new name cannot already be used by another user or
group.
•
The following names cannot be used: administrator, guest, root.
Synopsis
Add a local group account:
ibrix_localgroups -a -g GROUPNAME [-G GROUPID] [-S RID]
The GID and RID will be generated automatically if you do not specify values for them.
Modify a local group account:
ibrix_localgroups -m -g GROUPNAME [-G GROUPID] [-S RID]
If you are changing the GID or RID for the group, it cannot be the primary group for any local
users.
Delete a local group account:
ibrix_localgroups -d -g GROUPNAME
Display information about a specific local group account:
ibrix_localgroups -l -g GROUPNAME
Display information about all local group accounts:
ibrix_localgroups -L
Options
Option
Description
-G GROUPID
Specifies the group ID. The range of IDs is 2000-65535.
-L
Displays information about all local groups.
-S RID
Specifies the RID for the local group. The RID is the last n digits of the SID, ranging from
2000 to 40000000.
-a
Adds a local group.
-d
Deletes a local group.
-g GROUPNAME
Specifies the name of the local group.
-l
Displays information about a specific local group.
-m
Modifies a local group.
-?
Shows the usage for this command.
See also
ibrix_localusers, ibrix_auth
ibrix_localgroups
115
ibrix_localusers
Manages local user accounts for SMB or HTTP access.
Description
If Local User authentication is configured for SMB or HTTP shares, use the ibrix_localusers
command to create and manage local user accounts.
When naming local users, you should be aware of the following:
•
User names must be unique. The new name cannot already be used by another user or group.
•
The following names cannot be used: administrator, guest, root.
Synopsis
Add a local user account:
ibrix_localusers -a -u USERNAME -g DEFAULTGROUP -p PASSWORD [-n] [-h
HOMEDIR] [-s SHELL] [-i USERINFO] [-U USERID] [-S RID] [-G GROUPLIST]
The UID and RID will be generated automatically if you do not specify values for them.
Modify a local user account:
ibrix_localusers -m -u USERNAME [-g DEFAULTGROUP] [-p PASSWORD] [-n]
[-h HOMEDIR] [-s SHELL] [-i USERINFO] [-G GROUPLIST]
You cannot change the UID or RID for the account. If it is necessary to change a UID or RID, you
will need to delete the account and then recreate it with the new UID or RID.
Delete a local user account:
ibrix_localusers -d -u USERNAME
Display information about a specific local user account:
ibrix_localusers -l -u USERNAME
Display information about all local user accounts:
ibrix_localusers -L
Options
116
Option
Description
-G GROUPLIST
Specifies additional groups for the user.
-L
Displays information about all local users.
-S RID
Specifies the RID for the local user. The RID is the last n digits of the SID, ranging from
2000 to 40000000.
-U USERID
Specifies the UID for the local user.
-a
Adds a local user account.
-d
Deletes a local user account.
-g DEFAULTGROUP
Specifies the user's default local group.
-h HOMEDIR
Specifies the user's home directory. The default is /home/<username>.
-i USERINFO
Specifies user information (for example, Doe, John, tel: 555-324-1212, Manager
for services group).
-l
Displays information about a specific local user.
-m
Modifies a local user account.
StoreAll software commands
Option
Description
-n
Specifies that the password is in NT hashed format.
-p PASSWORD
Specifies the local user's password.
-s SHELL
Specifies the local user's shell program. The default is /bin/false.
-u USERNAME
Specifies the username for the account.
-?
Shows the usage for this command.
See also
ibrix_localgroups, ibrix_auth
ibrix_localusers
117
ibrix_lv
Manages logical volumes.
Description
ibrix_lv creates logical volumes (file-system segments) from a volume group. You can specify
logical volume names or allow the names to be assigned automatically. Optionally, you can specify
a logical volume size (the minimum size is 1 GB). Additional memory allocation is rounded to the
next higher 32 MB. If you do not specify a size, the Fusion Manager evenly divides the whole
volume group among the logical volumes.
Linux lvcreate creates a logical volume in an existing volume group. With some forms of
ibrix_lv, you can set values for Linux lvcreate options.
Synopsis
Create logical volumes from the specified volume group and name them with the string LVNAME
followed by an underscore and a numeric suffix:
ibrix_lv -c [-S SIZE] [-o "OPTIONS"] -n COUNT -g VGNAME -s LVNAME
Numeric suffixes are assigned in sequential order beginning with 1. The maximum value of the
series is set by the value of COUNT. To specify logical volume size, include the -S SIZE option.
For example, to create three 64-GB logical volumes named ilv_i1, ilv_2, and ilv_3 from volume
group ivg1:
ibrix_lv -c -S 64000 -n 3 -g ivg1 -s ilv
To specify Linux lvcreate options, include the -o "OPTIONS" option. For example to set a
readahead value of 60 sectors, enter -o "-r 60".
Create logical volumes from the specified volume group and assign them the names in LVLIST:
ibrix_lv -c [-S SIZE] [-o "OPTIONS"] -g VGNAME -s LVLIST
To specify logical volume size, include the -S SIZE option. The following example creates two
64-GB logical volumes named ilv1 and ilv2 from volume group ivg1:
ibrix_lv -c -S 64000 -g ivg1 -s ilv1,ilv2
To specify lvcreate options, include the -o "OPTIONS" option.
List segment information:
ibrix_lv -l [-s LVLIST]
The command reports information for all segments or the segments specified in LVLIST.
Delete the segments specified in LVLIST:
ibrix_lv -d -s LVLIST
Options
118
Options
Description
-S SIZE
Specifies the size in MB of a logical volume. The minimum size is 1 GB. For sizes larger than
1 GB, the value is adjusted to the next higher 32 MB increment.
-c
Creates a logical volume.
-d
Deletes a logical volume.
-g VGNAME
Specifies a volume group name.
-l
Lists logical volume information, including size in MB, name of file system, segment number,
volume group name, and any options.
StoreAll software commands
Options
Description
-n COUNT
Specifies the number of logical volumes to create. The value is an integer that specifies both
the number of logical volumes to create and the maximum value of the numeric postfix for each
logical volume name.
-o "OPTIONS"
A string of options for Linux lvcreate, enclosed in double quotation marks.
-s LVNAME or
LVLIST
A logical volume or a list of logical volumes. Lists can be either a comma-delimited list (for
example, ilv1,ilv2,ilv3) or a range list (for example, ilv[1-3]).
-?
Shows the usage for this command.
See also
ibrix_vs_snap, ibrix_vg, Linux lvcreate
ibrix_lv
119
ibrix_migrator
Defines migration rules and controls migrator operations.
Description
Tiering enables automatic migration of files from one tier to another within the same file system.
User-written rules based on file attributes (such as modification time, access time, file size, or file
type) define the migration policy, determining which files are moved and when. Tiers are defined
on segments, not individual files. Use ibrix_tier to assign segments to tiers. You can then use
ibrix_migrator to define the tiering policy for the file system.
When configuring the tiering policy, note the following:
•
The tiering policy (a set of rules) applies to individual files contained in a specific file system.
•
If a file meets the criteria of a rule, it will be moved from its current tier to the rule’s target tier.
•
Once configured, tiering policy is executed via command or as a cron job, and is performed
in the background.
•
Recently touched files (files that have been created or changed within the past five minutes)
are considered active and will not be moved.
Migrator command restrictions
When migration rules are defined, tiering operations can be started and stopped with the
ibrix_migrator command. Only one tiering operation can be running on a file system. Tiering
operations are treated as run-to-completion tasks that are not restarted on failure and cannot be
paused and later resumed. However, tiering can be started if a server is in the In-Failover state.
ibrix_migrator cannot be run at the same time as ibrix_rebalance.
Synopsis
Create a rule defining data migration from a source tier to a destination tier:
ibrix_migrator -A -f FSNAME -r RULE -S SOURCE_TIER -D DESTINATION_TIER
The rule is written to the configuration database.
Delete rules from the configuration database for the specified file system:
ibrix_migrator -d -f FSNAME -r RULELIST
Use the -f option to limit the command to a specific file system.
List information about active migrator tasks:
ibrix_migrator -i [-f FSNAME]
Use the -f option to limit the command to a specific file system.
List information about migrations:
ibrix_migrator -l [-f FSNAME] [-r]
The -r option lists rule information.
Start a migration operation on the specified file system:
ibrix_migrator -s -f FSNAME
[-v]
Stop the specified migration operation:
ibrix_migrator -k -t TASKID [-F force]
120 StoreAll software commands
Options
Option
Description
-A
Adds a data migration rule to a file system.
-D DESTINATION_TIER
Specifies the destination tier in a migration rule.
-F force
Forces migration.
-S SOURCE_TIER
Specifies the source tier in a migration rule.
-d
Deletes a migration rule for a file system.
-f FSNAME
Specifies a file system name.
-i
Lists detailed migration status information for one or more file systems, including
the state of any migration tasks.
-k
Stops a migrator operation on a file system.
-l
Lists migrator information.
-r RULE or RULELIST
A rule or list of rules.
-s
Starts a migrator operation on a file system.
-t TIERNAME
Identifies the tier in the current migrator operation.
-v
Provides verbose kernel logging.
-?
Shows the usage for this command.
Writing tiering rules
A tiering policy consists of one or more rules, each identifying a desired movement of files between
tiers. Rules are written using the GUI or directly to the configuration database with the
ibrix_migrator -A command.
This section provides definitions of rule components and examples of rules.
Operators and date/time qualifiers
The valid rules operators are: <, <=, =, !=, >, >=, plus boolean and and or.
Use the following qualifiers for fixed times and dates:
•
Time: Enter as three pairs of colon-separated integers specifying time on a 24-hour clock. The
format is hh:mm:ss (for example, 15:30:00).
•
Date: Enter as yyyy-mm-dd [hh:mm:ss], where time of day is optional (for example,
2008-06-04 or 2008-06-04 15:30:00). Note the space separating the date and time.
When specifying an absolute date, an absolute time, or both, the rule must use a compare type
operator (< | <= | = | != | > | >=). For example:
ibrix_migrator -A -f ifs2 -r "atime > '2010-09-23' " -S TIER1 -D TIER2
Use the following qualifiers for relative times and dates:
•
Relative time: Enter in rules as year or years, month or months,week or weeks, day or
days, hour or hours.
•
Relative date: Use older than or younger than. The rules engine uses the time the
ibrix_migrator command starts execution as the start time for the rule. It then computes
the required time for the rule based on this start time. For example, ctime older than 4
weeks refers to that time period more that 4 weeks before the start time.
ibrix_migrator
121
The following example uses a relative date:
ibrix_migrator -A -f ifs2 -r "atime older than 2 days " -S TIER1 -D
TIER2
Rule keywords
Rules consist of keywords, qualifiers, and operators.
Keyword
Definition
atime
Access time, used in a rule as a fixed or relative time.
ctime
Change time, used in a rule as a fixed or relative time.
mtime
Modification time, used in a rule as a fixed or relative time.
gid
An integer corresponding to a group ID.
gname
A string corresponding to a group name. Enclose the name string in double quotes.
uid
An integer corresponding to a user ID.
uname
Value is a string corresponding to a user name, where the user is the owner of the file. Enclose the
name string in double quotes.
NOTE:
LDAP and AD users cannot be used. Only local users are supported.
size
In size-based rules, the threshold value for determining migration. This is an integer specified in K
(KB), M (MB), G (GB), or T (TB). Do not separate the value from its unit (for example 24K).
type
The file-system entity the rule operates on. Only the file entity is supported in the current version of
the product.
name
A regular expression, typically used to match file names. Enclose a regular expression in double
quotes. The asterisk (*) wildcard is valid. For example:
name = "*.mpg"
A name cannot contain a “ / ” character; you cannot specify a path. Only a file name is allowed.
path
Path name that allows these wild cards: *, ?, /. For example, if the mountpoint for the file system
is /mnt, path=ibfs1/mydir/* matches the entire directory subtree under /mnt/ibfs1/mydir.
(A path cannot start with a /).
strict_path
Path name that rigidly conforms to UNIX shell file name expansion behavior. For example,
strict_path=/mnt/ibfs1/mydir/* matches only the files that are explicitly in the mydir
directory, but does not match any files in subdirectories of mydir.
Examples of migration rules
When writing a rule, identify the following:
•
File system (-f)
•
Source tier (-S)
•
Destination tier (-D)
The rule portion of the command must be enclosed in single quotes. The format for writing a rule
is:
ibrix_migrator -A -f FSNAME -r 'RULE' -S SOURCE_TIER -D DEST_TIER
Example 1: This example writes a rule based on the file’s last modification time, using a relative
time period. All files that were last modified more than one month ago will be moved. The rule
string is always enclosed in single quotes.
# ibrix_migrator -A -f ifs2 -r 'mtime older than 1 month' -S T1 -D T2
122
StoreAll software commands
Example 2: This example modifies this rule to limit the files being migrated to two types of graphic
files. The or expressions are enclosed in parentheses, and the * wildcard character is used to
match file name patterns.
# ibrix_migrator -A -f ifs2 -r 'mtime older than 1 month and ( name = "*.jpg"
or name = "*.gif" )' -S T1 -D T2
Example 3: This example uses and to impose three conditions on the migration. Note the use of
10M, with no space separating the integer and unit defining the size threshold.
# ibrix_migrator -A -f ifs2 -r 'ctime older than 1 month and type = file
and size >= 10M' -S T1 -D T2
Example 4: This example uses the path keyword. It moves files greater than or equal to 5M that
are under the directory /ifs2/tiering_test from TIER1 to TIER2:
ibrix_migrator -A -f ifs2 -r "path = tiering_test and size >= 5M" -S
TIER1 -D TIER2
Example 5: Rules can be group- or user-based as well as time- or data-based. This example migrates
files associated with two users to T2, with no consideration of time. The names are quoted strings.
# ibrix_migrator -A -f ifs2 -r 'type = file and ( uname = "9000user"
or uname = "nobody" )' -S T1 -D T2
Example 6: Conditions can be combined with and/or to create precise (even overly precise)
tiering rules.
# ibrix_migrator -A -f ifs2 -r ' (ctime older than 3 weeks and ctime younger
than 4 weeks) and type = file and ( name = "*.jpg" or name = "*.gif" )
and (size >= 10M and size <= 25M)' -S T1 -D T2
Example 7: Include the -r option in the ibrix_migrator -l command to view rule definitions
on this file system.
ibrix_migrator -l -f ifs2 -r
The output lists the file-system name, the rule ID (IDs are assigned in the order in which rules are
added to the configuration database), the rule definition, and the source and destination tiers. For
example, the rule in Example 2 displays as:
ifs2
2
mtime older than 1 month and ( name = "*.jpg" or name = "*.gif" ) T1 T2
Example 8: Specify the rule ID (2 in this example) in the delete command to remove the rule from
the database.
ibrix_migrator -d -f ifs2 -r 2
See also
ibrix_fs, ibrix_tier
ibrix_migrator
123
ibrix_mount
Mounts a file system on file serving nodes and StoreAll clients.
Description
When mounting a file system on specific file serving nodes, the first file serving node listed must
own the root segment (segment 1). StoreAll software automatically mounts on the root segment
first if you mount on all file serving nodes in the cluster.
Mounts are immediately executed for file serving nodes. For StoreAll clients the mount intention is
stored in the Fusion Manager. When StoreAll software services start on a StoreAll client, the client
queries the Fusion Manager for the file systems that it should mount and mounts them. If StoreAll
software services are already running on the StoreAll client when you set new mounts, you can
force the client to query the Fusion Manager by running ibrix_client or ibrix_lwmount
-a on the StoreAll client, or by rebooting it.
When mounting a file system where Export Control is enabled, you must specify that all clients
have either RO or RW access to the file system. The default is RW (Read Write). In addition, the
root user can be restricted to read-only access on export-controlled systems in a host group by
adding the root_ro parameter to the ibrix_mount command.
Mount points must be defined with ibrix_mountpoint before running ibrix_mount.
IMPORTANT:
Keep in mind:
•
Mount options do not persist, unless they are set at the mountpoint. Mount options that are
not set at the mountpoint are reset to match the mount options on the mount point when the
file system is rebooted or remounted.
•
The ibrix_fs —i and ibrix_mountpoint —l commands display only the mount options
for the mount point.
•
The mount command displays the noatime option. Ignore the noatime option. It is no longer
used. If you set the atime option, the atime option will display instead of the noatime option
when you run the mount command.
Synopsis
Mount a file system on file serving nodes and StoreAll clients:
ibrix_mount -f FSNAME [-o {RW|RO}] [-O MOUNTOPTIONS] [-h HOSTLIST] -m
MOUNTPOINT
The file system is mounted at the specified mountpoint on the file serving nodes and StoreAll clients
specified in HOSTLIST. The first file serving node listed must own the root segment in the file
system. To mount on all file serving nodes and StoreAll clients, omit the HOSTLIST option. If Export
Control is enabled, you must specify RW or RO file system access.
Mount a file system on host groups:
ibrix_mount -f FSNAME [-o {RW|RO}] [root_ro] [-O MOUNTOPTIONS] -g
GROUPLIST -m MOUNTPOINT
The file system is mounted at the specified mountpoint on the host groups specified in GROUPLIST.
If Export Control is enabled, you must specify RW or RO file-system access. The optional root_ro
parameter specifies that the root user be limited to read-only access on the systems in the host
group.
Export Control Examples
The following command mounts file system ifs1 on all file serving nodes and StoreAll clients at
mountpoint /ifs1 and gives the clients RW access:
<installdirectory>/bin/ibrix_mount -f ifs1 -o RW -m /ifs1
124
StoreAll software commands
The following command mounts file system ifs1 on host group finance at mountpoint /ifs1
and gives the clients RW access:
<installdirectory>/bin/ibrix_mount -f ifs1 -o RW -g finance -m /ifs1
To run the same command and grant clients in host group finance read-write access, but limit
the root user to RO access:
<installdirectory>/bin/ibrix_mount -f ifs1 -o RW root_ro -g finance -m /ifs1
Options
Option
Description
-O MOUNTOPTIONS
Client mount options.
The values for the -o option are:
• atime: Update the inode access time when the file is accessed.
NOTE: If you do not specifically set atime as an option, noatime is set instead (which
means the inode access time is not updated when the file is accessed). There is not an
option to specifically set noatime as an option.
• dirsync: Ensures that all directory updates within the file system are done synchronously.
This affects the following system calls: creat, link, unlink, symlink, mkdir, rmdir,
mknod and rename.
• nodiratime: Do not update the directory inode access time when the directory is
accessed.
• mountpath=xxx: For StoreAll clients only, mount on the specified subdirectory path of
the file system instead of the root.
• nodquotstatfs: Disables file system reporting based on directory tree quota limits.
• remount: Remounts a file system without taking it offline. Use this option to change the
current mount options on a file system.
NOTE: The new mount options then remain in effect until the file system is unmounted.
When the file system is next mounted or restarted, the default mount options are again
used.
If you specify multiple options, use commas to separate them, as shown in the following
example:
ibrix_mount -o atime,nodiratime -f ifs3 -m /ifs3
-f FSNAME
A file system.
-g GROUPLIST
Specifies a list of one or more host groups.
-h HOSTLIST
Specifies a list of file serving nodes or StoreAll clients.
-m MOUNTPOINT
Specifies a mountpoint.
-o RO|RW
Specifies the level of client access granted on the file system. Options are Read Only or
Read Write. Read is the default.
-?
Shows the usage for this command.
See also
ibrix_hostgroup, ibrix_lwmount, ibrix_mountpoint
ibrix_mount
125
ibrix_mountpoint
Creates and deletes mount points.
Description
The ibrix_mountpoint command immediately creates or deletes the specified mountpoint on
file serving nodes and StoreAll clients. The command fails if the mountpoint already exists.
When creating a mountpoint, use the -o option to specify default mount options that are applied
when a file system is mounted at that mountpoint. You can override the default mount options with
ibrix_mount -o remount new_options if necessary. The new mount options then remain
in effect until the file system is unmounted. When the file system is next mounted or restarted, the
default mount options are again used.
NOTE:
For StoreAll clients the intent to create or delete a mountpoint is stored in the Fusion
Manager. When StoreAll software services start on a StoreAll client, the client queries the Fusion
Manager to obtain its mount points. If the services are already running on the StoreAll client when
you create or delete a mountpoint, you can force the client to query the Fusion Manager by running
ibrix_client or ibrix_lwmount -a on the client, or by rebooting it.
Synopsis
Create a mountpoint on file serving nodes and StoreAll clients:
ibrix_mountpoint -c [-h HOSTLIST] -m MOUNTPOINT [-o MOUNTOPTIONS]
Specify the appropriate file serving nodes and StoreAll clients in HOSTLIST. To create a mountpoint
on all file serving nodes and StoreAll clients, omit the -h HOSTLIST option. The following example
creates mountpoint /ifs1 on nodes s1.mycompany.com and s2.mycompany.com:
<installdirectory>/bin/ibrix_mountpoint -c -h s1.mycompany.com,s2.mycompany.com
-m /ifs1
The -o option specifies default mount options for the mountpoint. The values for the -o option are
provided in the table found in “Options” (page 127).
Create a mountpoint on host groups:
ibrix_mountpoint -c -g GROUPLIST -m MOUNTPOINT [-o MOUNTOPTIONS]
Specify the appropriate host groups in GROUPLIST. The following command creates the mountpoint
/ifs1 on the clients host group:
<installdirectory>/bin/ibrix_mountpoint -c -g clients -m /ifs1
Modify mount options on the specified mountpoint:
ibrix_mountpoint -e -o MOUNTOPTIONS -m MOUNTPOINT
To set the options to none, enter " -o '' ".
Delete a mountpoint from file serving nodes and StoreAll clients:
ibrix_mountpoint -d [-h HOSTLIST] -m MOUNTPOINT
Specify the appropriate file serving nodes and StoreAll clients in HOSTLIST. To delete a mountpoint
from all file serving nodes and StoreAll clients, omit the -h HOSTLIST option.
Delete a mountpoint from host groups:
ibrix_mountpoint -d -g GROUPLIST -m MOUNTPOINT
Specify the appropriate host groups in GROUPLIST.
List mount points:
ibrix_mountpoint -l [-h HOSTLIST | -g GROUPLIST][-m MOUNTPOINTLIST]
To list all mount points on all file serving nodes, StoreAll clients, and host groups, omit all options.
126
StoreAll software commands
To list mount points for certain file serving nodes and StoreAll clients, include only the HOSTLIST
option. To list mount points for certain host groups, include only the GROUPLIST option.
To list all file serving nodes, StoreAll clients, and host groups for a specific mountpoint, include
only the -m MOUNTPOINTLIST option.
Options
Option
Description
-c
Creates a mountpoint.
-d
Deletes a mountpoint.
-e
Modifies mount options on the specified mountpoint.
-g GROUPLIST
Specifies a list of host groups.
-h HOSTLIST
Specifies a list of file serving nodes or StoreAll clients.
-l
Lists mount points on one or more hosts.
-m MOUNTPOINTLIST
Specifies a list of mount points.
-o MOUNTOPTIONS
Specifies default mount options that are applied when a file system is mounted at the
mountpoint. The options are:
Keep in mind:
• Mount options do not persist, unless they are set at the mountpoint. Mount options
that are not set at the mountpoint are reset to match the mount options on the mount
point when the file system is rebooted or remounted.
• The ibrix_fs —i and ibrix_mountpoint —l commands display only the mount
options for the mount point.
• The mount command displays the noatime option. Ignore the noatime option. It is
no longer used. If you set the atime option, the atime option will display instead of
the noatime option when you run the mount command.
Mount options. The values for the -o option are:
• atime: Update the inode access time when the file is accessed.
• dirsync: Ensures that all directory updates within the file system are done
synchronously. This affects the following system calls: creat, link, unlink,
symlink, mkdir, rmdir, mknod and rename.
• nodiratime: Do not update the directory inode access time when the directory is
accessed.
• mountpath=xxx: For StoreAll clients only, mount on the specified subdirectory path
of the file system instead of the root.
• nodquotstatfs: Disables file system reporting based on directory tree quota limits.
• remount: Remounts a file system without taking it offline. Use this option to change
the current mount options on a file system.
If you specify multiple options, use commas to separate them, as shown in the following
example:
ibrix_mount -o atime,nodiratime -f ifs3 -m /ifs3
To set the options to none, enter " -o '' ".
-?
Shows the usage for this command.
See also
ibrix_hostgroup, ibrix_mount
ibrix_mountpoint
127
ibrix_ndmpconfig
Configures NDMP parameters on the cluster.
Description
The ibrix_ndmpconfig command sets NDMP parameters on the cluster. These parameters
control communications between the DMA and the NDMP Servers hosted on the file serving nodes.
Synopsis
Set NDMP parameters:
ibrix_ndmpconfig -c [-d IP1,IP2,IP3,...] [-m MINPORT] [-x MAXPORT] [-n
LISTENPORT] [-u USERNAME] [-p PASSWORD] [-e {0=disable,1=enable}] [-v
{0-10}] [-w BYTES] [-z NUMSESSIONS]
Display the current value of all configurable parameters:
ibrix_ndmpconfig -i
Synchronize the current parameter values to all file serving nodes:
ibrix_ndmpconfig -s
Options
128
Option
Description
-c
Sets NDMP configuration parameters.
-d
Specifies IP addresses that can be used by a DMA to access the cluster.
-e
Enables or disables new NDMP sessions.
-i
Displays the current value of all NDMP configurable parameters.
-m MINPORT
Sets the minimum NDMP data transfer socket port. The default is 49,152, and the
minimum allowed value is 1,024.
-n LISTENPORT
Sets the NDMP listener socket port. The default port is 10,000, and the minimum allowed
value is 1,024.
-p PASSWORD
Sets the NDMP user password.
-s
Synchronizes the current parameter values to all file serving nodes.
-u USERNAME
Sets the NDMP user name.
-v
Sets the NDMP trace log level. This value should be set to 0, the default. The level should
be increased only under the direction of HP Support.
-w BYTES
Sets the TCP window size for NDMP data transfer. This value should be changed only
for performance reasons. The default value is 160,000.
-x MAXPORT
Sets the maximum NDMP data transfer socket port. The default value is 65,535. This is
also the maximum allowed value.
-z NUMSESSIONS
Sets the maximum number of concurrent sessions per NDMP server. The default value is
128.
-?
Shows the usage for this command.
StoreAll software commands
ibrix_ndmpsession
Manages NDMP sessions and reports session history.
Description
The ibrix_ndmpsession command lists the currently running NDMP sessions or only the
completed sessions (successful or not). You can also use the command to cancel a specific NDMP
session, to cancel all sessions on a specific file serving node, or to cancel all sessions on all nodes.
Canceling a session kills all spawned sessions processes and frees their resources if necessary.
Synopsis
Display currently running NDMP sessions on all file serving nodes:
ibrix_ndmpsession -l
Display completed NDMP sessions (successful or not):
ibrix_ndmpsession -l -s [-t YYYY-MM-DD]
The -t option restricts the history to sessions occurring on or before the specified date.
Cancel one or more sessions on the specified file serving node:
ibrix_ndmpsession -c SESSION1,SESSION2,SESSION3,... -h HOST
Options
Option
Description
-c
Cancels NDMP sessions.
-h HOST
Specifies a file serving node.
-l
Displays NDMP sessions.
-s
Displays NDMP session history.
-t YYYY-MM-DD
Specifies a date for an historical report.
-?
Shows the usage for this command.
ibrix_ndmpsession
129
ibrix_nic
Configures network interfaces.
Description
ibrix_nic is used to:
•
Set up automated failover for a user interface.
•
Identify or delete network interfaces. User interfaces that are intended for StoreAll client traffic
must be identified. HP recommends that you also identify user interfaces that are intended for
NFS traffic so that you can implement automated failover for them.
•
Identify or delete standbys for a user interface.
•
Set up network interface monitoring by configuring file serving nodes to monitor each other’s
health over the interface.
IMPORTANT: When configuring NIC monitoring, use the same backup pairs that you used
when configuring standby servers.
•
Change the routing table entry for a network interface (StoreAll software supports only one
route per interface).
•
Change Linux ifconfig options.
•
List information about network interfaces that StoreAll software is managing.
•
On an existing cluster, add a second NIC to enable two paths of communication. (The preferred
method is to use bonds.)
•
In a cluster configuration with two communication paths, switch the roles of the primary and
secondary NIC.
•
Configure link state monitoring for iSCSI network interfaces.
For comprehensive information on setting up automated failover for a user interface, see the
administration guide for your system.
Synopsis
Discover and add a physical or virtual network interface:
The command adds network interface IFNAME as the interface to the hosts in HOSTLIST. The
command also indicates a secondary cluster interface if -b is specified.
ibrix_nic -a -n IFNAME -h HOSTLIST [-b]
Delete a network interface:
ibrix_nic -d -n IFNAME -h HOSTLIST
The specified network interface is deleted from the hosts in HOSTLIST. If you delete an interface
from a file serving node, be sure to identify a new interface that the machine can use to contact
the Fusion Manager.
Assign a standby network interface:
ibrix_nic -b -H HOSTNAME1/IFNAME1,HOSTNAME2/IFNAME2
The command adds network interface IFNAME2 on server HOSTNAME2 as the standby for network
interface IFNAME1 on server HOSTNAME1.
Delete a standby network interface:
ibrix_nic -b -U HOSTNAME1/IFNAME1
The command removes standby interface IFNAME1 on server HOSTNAME1.
130 StoreAll software commands
Set up network interface monitoring:
ibrix_nic -m -h MONHOST -A DESTHOST/IFNAME
The command assigns server MONHOST to monitor server DESTHOST over network interface IFNAME.
When configuring NIC monitoring, use the same backup pairs that you used when configuring
standby servers. For example:
#
#
#
#
ibric_nic
ibric_nic
ibric_nic
ibric_nic
-m
-m
-m
-m
-h
-h
-h
-h
node1
node2
node3
node4
-A
-A
-A
-A
node2/bond1:1
node1/bond1:1
node4/bond1:1
node3/bond1:1
Stop network interface monitoring:
ibrix_nic -m -h MONHOST -D DESTHOST/IFNAME
The command deletes server MONHOST as the monitor for server DESTHOST over network interface
IFNAME.
Add a routing entry for a network interface:
ibrix_nic -r -n IFNAME -h HOSTNAME -A -R ROUTE
The command configures the specified route for network interface IFNAME on server HOSTNAME
into the routing table, overwriting any existing route entry for the interface.
Remove a routing entry for a network interface:
ibrix_nic -r -n IFNAME -h HOSTNAME -D
The command removes the specified traffic route for network interface IFNAME on host HOSTNAME.
Modify ifconfig options:
ibrix_nic -c -n IFNAME -h HOSTNAME [-I IPADDR] [-M NETMASK] [-B
BCASTADDR] [-T MTU]
The command modifies the specified options for network interface IFNAME on host HOSTNAME.
Switch the cluster interface on a server:
ibrix_nic -t -n IFNAME -h HOSTNAME [-b]
The command switches the cluster interface to interface IFNAME on server HOSTNAME. The command
also indicates a secondary cluster interface if -b is specified.
List detailed information about network interfaces on specific hosts:
ibrix_nic -i [-h HOSTLIST] [-n NAME]
List summary information about network interfaces on specific hosts:
ibrix_nic -l [-h HOSTLIST]
Fail back to using the primary cluster interface on the specified host:
ibrix_nic -p -h HOSTNAME
Migrate a NIC:
ibrix_nic -s -H HOSTNAME1/IFNAME1,HOSTNAME2/IFNAME2 [-F]
If -F is specified, the migration is forced, skipping deactivation on HOSTNAME1/IFNAME1.
Configure link state monitoring for iSCSI network interfaces:
ibrix_nic -N -h HOST -A IFNAME
Link state monitoring is supported only for use with iSCSI storage network interfaces, such as those
provided with 9300 Storage Gateway systems.
ibrix_nic
131
Options
Option
Description
-A DESTHOST/IFNAME
Identifies the file serving node to be monitored and the interface used for monitoring.
-B BCASTADDR
Specifies an IP address used for network broadcast.
-D DESTHOST/IFNAME
If used with -r, disables network routing. If used with -m, deletes the monitor from
the named host/interface.
-F
Forces NIC migration.
-H HOSTNAME/IFNAME
Identifies pairs of file serving nodes and interfaces in standby or monitoring
relationships.
-I IPADDR
Specifies an IP address.
-M NETMASK
Specifies a netmask address.
-N
Enables link state monitoring. Link state monitoring is supported only for use with
iSCSI storage network interfaces, such as those provided with 9300 Storage Gateway
systems.
-R ROUTE
Specifies an IP address used for routing network traffic over an interface.
-T MTU
Sets a MTU value in bytes, which defines the largest packet size a network can
transmit.
-U
Unassigns a standby interface.
-a
Discovers and adds an interface on the named hosts.
-b
Indicates a standby (backup) interface. If used with -a or -t, indicates a
secondary interface.
nl
-c
Configures an interface on a named host.
-d
Deletes an interface from the named hosts.
-h MONHOST or HOSTNAME or Identifies a monitoring host, a host associated with an interface, or a list of hosts
associated with an interface.
HOSTLIST
132
-i
Provides detailed information on interfaces.
-l
Lists summary information on interfaces.
-m
Sets up interface monitoring.
-n IFNAME
A network interface name. Can include a VIF suffix (:nnnnn).
-p
Fails back to the primary cluster interface.
-r
Configures a routing table entry.
-s
Migrates a NIC.
-t
Switches the cluster interface on a host.
-?
Shows the usage for this command.
StoreAll software commands
ibrix_onlinequotacheck
Rescans quota usage.
Description
The ibrix_onlinequotacheck command is used to rescan quota usage, initialize directory
tree quotas, and remove directory tree quotas. The command must be run from a file serving node
that has the file system mounted and has three modes:
•
FILESYSTEM_SCAN mode. Use this mode in the following scenarios:
◦
You turned quotas off for a user, the user continued to store data in a file system, and
you now want to turn quotas back on for this user.
◦
You are setting up quotas for the first time for a user who has previously stored data in
a file system.
◦
You renamed a directory on which quotas are set.
◦
You moved a subdirectory into another parent directory that is outside of the directory
having the directory tree quota.
•
DTREE_CREATE mode. After setting quotas on a directory tree, use this command to take into
account the data used under the directory tree.
•
DTREE_DELETE mode. When a directory tree quota is deleted, use this command to unset
quota IDs on all files and folders in that directory.
CAUTION: When ibrix_onlinequotacheck is started in DTREE_DELETE mode, it removes
quotas for the specified directory. Be sure that this command is not performed on directories
that should retain quota information.
Synopsis
Start an online quotacheck in DTREE_CREATE mode for the specified path:
ibrix_onlinequotacheck -s -c -f FSNAME -p PATH
Run this command after setting a directory tree quota.
Start an online quotacheck in DTREE_DELETE mode for the specified path:
ibrix_onlinequotacheck -s -d -f FSNAME -p PATH
Run this command after deleting a directory tree quota.
Start an online quotacheck in FILESYSTEM_SCAN mode for the specified file system:
ibrix_onlinequotacheck -s -S -f FSNAME
List status information about online quotacheck tasks on all file systems or only the specified file
systems:
ibrix_onlinequotacheck -i [-f FSLIST]
The report lists tasks by ID and file system, and indicates whether the task is running or stopped.
Stop the specified online quotacheck tasks:
ibrix_onlinequotacheck -k -t TASKID [-F]
To force the tasks to stop, include the -F argument. To obtain the task IDs, run
ibrix_onlinequotacheck -i.
Display a status summary of online quotacheck tasks:
ibrix_onlinequotacheck -l [-f FSNAME]
ibrix_onlinequotacheck
133
Options
134
Option
Description
-F
Forces an online quotacheck task to stop.
-S
Specifies that FILESYSTEM_SCAN mode be used.
-c
Specifies that DIRTREE_CREATE mode be used.
-d
Specifies that DIRTREE_DELETE mode be used.
-f FSNAME or FSLIST
Specifies a file system or list of file systems.
-i
Displays detailed status information for online quotacheck tasks.
-k
Stops online quotacheck tasks.
-l
Provides a status summary for online quotacheck tasks.
-p PATH
Specifies the path for an online quotacheck task.
-t TASKID
Specifies task IDs for online quotacheck tasks.
-h
Shows the usage for this command.
StoreAll software commands
ibrix_phonehome
Manages the Phone Home configuration.
Description
When Phone Home is enabled, you can get remote support for StoreAll hardware and software
alerts using standard HP Insight Remote Support protocols. Systems are monitored continuously for
hardware or software failures, and HP can take the necessary corrective measures.
To enable remote support for MSA (9320 systems), use the ibrix_vs command to register the
MSA.
The chassis in X9720/9730 systems are registered automatically. Use the ibrix_chassis
command to see the current registrations.
Synopsis
Configure and enable Phone Home:
ibrix_phonehome -c -i <IP Address of the Central Management Server> -P
Country Name [-z Software Entitlement ID] [-r Read Community] [-w Write
Community] [-t System Contact] [-n System Name] [-o System Location]
The command configures and enables Phone Home on all devices (servers, storage, and chassis)
present in the cluster. This command can also be used to modify the existing Phone Home
configuration.
For example:
ibrix_phonehome -c -i 99.2.4.75 -P US -r public -w private -t Admin -n
SYS01.US -o Colorado
Entitle a server:
ibrix_phonehome -e -h <Host Name> -b <Customer Entered Serial Number>
-g <Customer Entered Product Number>
The server must be present in the cluster. Enter the Host Name parameter exactly as it is listed by
the ibrix_fm -l command.
The customer-entered serial number and product number are used for warranty checks at the HP
Support queue. These numbers are on the information tag attached to the front panel of the
hardware.
Entitle storage (MSA):
ibrix_phonehome -e -i <Management IP Address of the Storage> -b <Customer
Entered Serial Number> -g <Customer Entered Product Number>
This command must be run for each MSA present in the cluster. The customer-entered serial number
and product number are used for warranty checks at the HP Support queue. These numbers are
on the information tag attached to the front panel of the hardware.
Entitle a chassis:
ibrix_phonehome -e -C <OA IP Address of the Chassis> -b <Customer Entered
Serial Number> -g <Customer Entered Product Number>
This command must be run for each chassis present in the cluster. The customer-entered serial
number and product number are used for warranty checks at the HP Support queue. These numbers
are on the information tag attached to the front panel of the hardware.
Unconfigure and disable Phone Home support:
ibrix_phonehome -d
ibrix_phonehome
135
Display the Phone Home configuration:
ibrix_phonehome -l [-p { server | storage | chassis | trapsink |
entitlement } ]
To obtain details about servers, storage, chassis, or trapsinks, use the -p option with the
corresponding keyword. Use the entitlement keyword to obtain statistics about the entitlement.
Synchronize the Phone Home configuration in the cluster:
ibrix_phonehome -s
The operation enables Phone Home on newly added devices (servers, storage, and chassis) and
removes details for devices that are no longer in the cluster.
Options
Option
Description
-C
Specifies the IP address of the On-Board Administrator for a chassis.
-b Customer Entered
Serial Number
Specifies a customer-entered serial number.
-c
Configures and enables Phone Home.
-d
Unconfigures and disables Phone Home.
-e
Entitles a device.
-g Customer Entered
Product Number
Specifies a customer-entered product number.
-h HOST NAME
Specifies the hostname of the server.
-i IP Address of Central Specifies the IP address of the central management server when used with the
configure Phone Home operation. Specifies the management IP address of the
Management Server or
Management IP Address of storage (MSA) when used with the entitlement operation.
Storage
-l
Displays the Phone Home configuration.
-n System Name
Specifies the system name.
-o System Location
Specifies the system location.
-p { server | storage |
chassis | trapsink |
entitlement }
Specifies the type of configuration to be displayed.
-P Country Name
Provide the name of your country, for example, US.
-r Read Community
Specifies the read-only community string.
-s
Synchronizes the Phone Home configuration.
-t System Contact
Specifies the system contact.
-w Write Community
Specifies the read-write community string.
-z Software Entitlement
Id
Specifies the software entitlement ID. This option is not currently used.
-?
Shows the usage for this command.
See Also
ibrix_chassis, ibrix_vs
136
StoreAll software commands
ibrix_powersrc
Adds or deletes power sources and modifies power source attributes in the configuration database.
Description
Programmable power sources are required for automated failover and forced manual failover.
The installed power sources must be identified and added to the configuration database before
they can be used. StoreAll software works with integrated power sources that are managed by
iLO, IPMI, or OpenIPMI.
To implement automated failover or to centrally manage power sources, the Fusion Manager must
have LAN access to all identified power sources.
Synopsis
Activate an IPMI or iLO power source:
ibrix_powersrc -a -t {openipmi|openipmi2|ilo} -h HOSTNAME -I IPADDR -u
USERNAME -p PASSWORD [-s]
The command activates the power source on the file serving node identified by name and IP
address. The -u and -p options are required. To have the Fusion Manager skip BMC, include the
-s option.
Activate a VM-based power source:
ibrix_powersrc -a -t {esx} -h HOSTNAME -I IPADDR [-u USERNAME -p
PASSWORD] -C CONFPATH
The command activates the power source on the file serving node identified by name and IP
address. To secure access to the power source, include the -u USERNAME and -p PASSWORD
arguments.
To have the Fusion Manager skip BMC, include the -s option.
Modify the IP address for IPMI or iLO power sources:
ibrix_powersrc -m [-I IPADDR] [-u USERNAME] [-p PASSWORD] [-s] -h
POWERSRCLIST
To modify the security settings for IPMI- or iLO-managed power sources, include the USERNAME
and PASSWORD arguments. To have the Fusion Manager skip BMC, include the -s option.
List information about power sources:
ibrix_powersrc -l [-h POWERSRCLIST]
The command lists the name, IP address, and number of slots for either all power sources or the
power sources in POWERSRCLIST.
Delete power sources from the configuration database:
ibrix_powersrc -d -h POWERSRCLIST
Options
Option
Description
-C CONFPATH
Configuration path.
-I IPADDR
A power source IP address.
-a
Activates a power source.
-d
Deletes a power source.
ibrix_powersrc
137
Option
Description
-h HOSTNAME or
POWERSRCNAME or
POWERSRCLIST
A file serving node name, the name of a power source, or a list of power source
names.
-l
Lists information about power sources.
-m
Modifies a power source definition.
-p
Password used for authentication.
-s
Skips BMC configuration.
-t POWERSRCTYPE
Identifies the power source type.
-u USERNAME
Username for authentication.
-?
Shows the usage for this command.
See also
ibrix_hostpower
138
StoreAll software commands
ibrix_profile
Manages kernel profiles.
Description
The ibrix_profile command is used to start, disable, or reset kernel profiles, or to display
kernel profile statistics.
Synopsis
Start a kernel profile:
ibrix_profile -E [-h HOSTLIST]
Use the HOSTLIST option to limit the command to specific nodes.
Disable a kernel profile:
ibrix_profile -D [-h HOSTLIST]
Use the HOSTLIST option to limit the command to specific nodes.
Reset a kernel profile:
ibrix_profile -R [-h HOSTLIST]
Use the HOSTLIST option to limit the command to specific nodes.
Display kernel profile statistics:
ibrix_profile -l [-h HOSTLIST]
Use the HOSTLIST option to limit the command to specific nodes.
Options
Option
Description
-D
Disables the kernel profile.
-E
Starts the kernel profile.
-R
Resets the kernel profile.
-h HOSTLIST
A file serving node.
-l
Displays kernel profile statistics.
?
Shows the usage for this command.
ibrix_profile
139
ibrix_pv
Discovers, lists, and deletes physical volumes.
Description
This command discovers physical volumes that have been added to file serving nodes since the
last time the command was executed. The command excludes partitions and volumes that belong
to volume groups created for use outside of the StoreAll cluster.
Synopsis
Discover physical volumes and add them to the configuration database:
ibrix_pv -a [-h HOSTLIST] [-o FILTERDEVLIST]
The command runs on all file serving nodes or only the nodes in HOSTLIST. Omit the -o
FILTERDEVLIST option to discover all SCSI devices. To discover other types of devices, include
the -o option with the applicable keywords:
•
allow_partitions: SCSI and IDE disk partitions
•
ata: ATA/IDE disks
•
loop: Loop devices
•
mpath: LVM2 multipath
•
powerpath: EMC PowerPath
The keywords for two of the multipath devices, mpath and powerpath, are mutually exclusive.
In the unlikely event that one set of hosts uses Mpath and another set uses PowerPath, an additional
run is necessary to discover all devices because the sets do not intersect:
<installdirectory>/bin/ibrix_pv -a -h HOSTLIST -o mpath
<installdirectory>/bin/ibrix_pv -a -h HOSTLIST -o powerpath
List detailed information about physical volumes:
ibrix_pv -i
For each physical volume, the output lists the following information:
# ibrix_pv -i
PV_NAME SIZE(MB)
------- -------d1
3,072
d2
3,072
VG_NAME LUN_GROUP LV_NAME FILESYSTEM SEGNUM USED% SEGOWNER DEVICE ON SEGOWNER
------- --------- ------- ---------- ------ ----- -------- --------- -------ivg1
ilv1
ifs1
1
99 vm3
/dev/sdb
ivg2
ilv2
ifs1
2
99 vm2
/dev/sdc
List discovered physical volumes:
ibrix_pv -l [-h HOSTLIST]
The command runs on all file serving nodes or only the nodes specified in HOSTLIST.
List free physical volumes:
ibrix_pv -l [-f]
Delete physical volumes:
ibrix_pv -d -p PVLIST [-h HOSTLIST]
The command runs on all file serving nodes or only the nodes specified in HOSTLIST.
Options
Option
Description
-a
Discovers and adds physical volumes to the configuration.
-d
Deletes physical volumes from the configuration.
140 StoreAll software commands
Option
Description
-f
Includes free physical volumes only.
-h HOSTLIST
A list of one or more hosts.
-i
Lists detailed information about physical volumes.
-l
Lists physical volume information on hosts.
-o FILTERDEVLIST
Storage device names or the keywords allow_partitions, ata, loop, mpath,
or powerpath.
-p PVLIST
Physical volumes. Enter either a comma-delimited list of physical volumes (for
example, d1,d2,d3) or a range list (for example, d[1-3]).
-?
Shows the usage for this command.
ibrix_pv
141
ibrix_rebalance
Redistributes files among segments to balance segment utilization and server workload.
Description
Rebalancing files
The StoreAll Rebalancer redistributes files among segments in a file system to balance segment
utilization and server workload. Normally all segments are rebalanced, possibly as a cron job,
but a rebalancing can be limited to specific segments. Only segments containing files can be
rebalanced.
During rebalancing, StoreAll software calculates the average aggregate utilization of all of the
source segments, and then moves files from sources to destinations to bring each source segment
as close as possible to the calculated utilization threshold. The final per-segment usage depends
on the average file size for the target file system.
If you do not specify sources or destinations, candidate segments are sorted into sources and
destinations and then rebalanced as evenly as possible.
If you specify sources, all other candidate segments in the file system are tagged as destinations,
and vice versa if you specify destinations. Following the general rule, StoreAll software calculates
the utilization threshold from the sources and then brings the sources as close as possible to this
value by evenly distributing excess files among all the destinations. If you specified sources, the
end result is that only those segments are rebalanced, and the overflow is distributed among all
remaining candidate segments. If you specified destinations, the end result is that all segments
except the specified destinations are rebalanced, and the overflow is distributed only to the
destinations.
If you specify both sources and destinations, only the specified sources are rebalanced and the
overflow is distributed among only the specified destinations.
If there is not enough aggregate room in destination segments to hold the files to be moved, StoreAll
software issues an error message and does not move any files. The more restricted the number of
destinations, the higher the likelihood of this error.
Synopsis
Rebalance segments:
ibrix_rebalance -r -f FSNAME [[-s SRCSEGMENTLIST] [-S SRCLVLIST]] [[-d
DESTSEGMENTLIST] [-D DESTLVLIST]] [-v]
The command rebalances all segments or selected segments in file system FSNAME. The file system
must be mounted before it can be rebalanced. If you do not enter source and destination segment
lists, all segments are rebalanced. If you enter source and destination segments, specified by either
segment name or logical volume name, rebalancing activity is restricted to those segments.
Display a summary of rebalancing and segment evacuation tasks:
ibrix_rebalance -l [-f FSLIST]
Use FSLIST to limit the command to specific file systems.
List status information about rebalancing tasks:
ibrix_rebalance -i [-f FSLIST]
The report lists jobs by task ID and file system and indicates whether each job is running or stopped.
Jobs that are in the analysis (“Coordinator”) phase are listed separately from those in the
implementation (“Worker”) phase. Use FSLIST to limit the command to specific file systems.
Stop a rebalancing task:
ibrix_rebalance -k -t TASKID [-F]
142
StoreAll software commands
The job is specified by TASKID. To force the job to stop, include the -F option. To obtain the
TASKID, run ibrix_rebalance -i.
You can stop a rebalance task at any time. Stopping a task poses no risks for the file system. The
Fusion Manager completes any file migrations that are in process when you issue the stop command.
Depending on when you stop a job, segments may contain more or fewer files than before the run
began.
Options
Option
Description
-D DESTLVLIST
Specifies a list of destination segments by logical volume name, such as
ilv1,ilv2,ilv3.
-F
Forces a rebalancing task to stop.
-S SRCLVLIST
Specifies a list of source segments by logical volume name, such as ilv1,ilv2,ilv3.
-d DESTSEGMENTLIST
Specifies a list of destination segments by segment name or number, such as 1,2,3.
-f FSNAME or FSLIST
A file system or list of file systems.
-i
Lists status information for rebalancing tasks.
-k
Stops rebalancing tasks.
-l
Reports summary or rebalance status.
-r
Rebalances the file system.
-s SRCSEGMENTLIST
Specifies a list of source segments by segment name or number, such as 1,2,3.
-t TASKID
Task ID.
-v
Verbose kernel logging.
-?
Shows the usage for this command.
ibrix_rebalance
143
ibrix_reports
Generates reports for data retention, utilization, and validation.
Description
The ibrix_reports command scans the file system and collects data for reports. There are three
types of reports:
•
Data retention. This report lists ranges of retention periods and specifies the number of files
in each range.
•
Utilization. This report summarizes how storage is utilized between retention states and free
space.
•
Data validation. This report shows when files were last validated and reports any mismatches.
A mismatch can be either content or metadata.
You can generate a report for the entire file system or for individual tiers. (To generate a tiered
report, the file system must include at least one tier.)
You can display reports as PDFs or in CSV format, which is suitable for importing into applications
such as spreadsheets. The latest PDF and CSV files are saved in
/usr/local/ibrix/reports/output/<report type>/. Older CSV files are stored in a
folder on the file system and are tagged with the date. The folder is located at /{fsname}/
.archiving/reporting/history/{report_name}.
NOTE: The StoreAll .archiving directory does not appear when you run the ls -a command
on the root directory of the file system; however, it is visible when you cd into the directory and
use the ls -a command. Also, Linux commands such as cp work correctly when .archiving
is in a path or filename used in the command.
Synopsis
Scan the file system and collect data for reports:
ibrix_reports -s -f FSNAME
Generate a report:
ibrix_reports -g -f FSNAME -n NAME -o OUTPUT FORMAT
The -n option specifies the type of report, where NAME is one of the following;
•
retention
•
retention_by_tier
•
validation
•
validation_by_tier
•
utilization
•
utilization_by_tier
The output format specified with -o is either csv or pdf.
Options
Option
Description
-f FSNAME
Specifies a file system.
-g
Generates a report.
-n
Specifies the type of report to generate.
144 StoreAll software commands
Option
Description
-o
Specifies the output format (CSV or PDF).
-s
Scans the file system and collects data for reports.
-?
Shows the usage for this command.
ibrix_reports
145
ibrix_reten_adm
The ibrix_reten_adm command does the following:
•
Manages retained and WORM files in a file system or directory enabled for data retention.
•
Enables data retention features for file systems created with StoreAll version 6.0 or earlier.
IMPORTANT: Do not use the ibrix_reten_adm command on a post-6.1.1 file system that is
not enabled for data retention, except in the case of upgrading a pre-6.1.1 file system as described
in Upgrade a pre–6.1.1 file system for data retention features: (page 147).
Description
Use the ibrix_reten_adm command to manipulate WORM and retained files. You can perform
the following tasks:
•
Add or remove a legal hold on a WORM or retained file. While the hold is in effect, the file
cannot be deleted, even if the expiration period has expired.
•
Reset the expiration time for a file, in effect increasing or decreasing the expiration period.
•
Remove the retention period for retained files.
•
Delete retained files administratively, regardless of whether the retention period has expired.
•
List the retention attributes for files in the file system.
•
Upgrade a file system created with StoreAll version 6.0 or earlier to enable data retention
features.
NOTE: A file system or directory enabled for data retention can contain normal files. These files
are created read-only or read-write, and can be modified or deleted at any time. A checksum is
not calculated for normal files and they are not managed by data retention.
Specifying path lists
In the commands, the -P PATHLIST option specifies the files that are to be affected by the
command. The following rules apply when specifying path lists:
•
A path list can contain one or more entries, separated by commas.
•
Each entry can be a fully-qualified path, such as /myfs1/here/a.txt. An entry can also
be relative to the file system mount point. For example, if myfs1 is mounted at /myfs1, the
path here/a.txt is a valid entry.
•
A relative path cannot begin with a slash (/). Relative paths are always relative to the mount
point; they cannot be relative to the user’s current directory, unlike other UNIX commands.
•
A directory cannot be specified in a path list. Directories themselves have no retention settings,
and the command returns an error message if a directory is entered.
To apply an action to all files in a directory, you need to specify the paths to the files. You can use
wildcards in the pathnames, such as /my/path/*,/my/path/.??*. The command does not
apply the action recursively; you need to enter subdirectories.
To apply a command to all files in all subdirectories of the tree, you can wrap the
ibrix_reten_adm command in a find script (or other similar script) that calls the command
for every directory in the tree. For example, the following command sets a legal hold on all files
in the specified directory:
find /ibrixFS/mydir -type d -exec ibrix_reten_adm -h -f ibrixFS -P {}/*
\;
146
StoreAll software commands
The following script includes files beginning with a dot, such as .this. (This includes file uploaded
to the file system, not file system files such as the .archiving tree.)
find /ibrixFS/mydir -type d -exec ibrix_reten_adm -h -f ibrixFS -P
{}/*,{}/.??* \;
Synopsis
Deleting files administratively removes them from the file system, regardless of the data retention
policy applied to the files.
Set a legal hold on retained or WORM files:
ibrix_reten_adm -h -f FSNAME -P PATHLIST
A legal hold locks the file and the data retention policy in place on the file system will be ignored.
For example, the expiration time does not apply to the file.
Remove a legal hold on retained or WORM files:
ibrix_reten_adm -r -f FSNAME -P PATHLIST
When a legal hold is removed, the original data retention policy applies to the file.
Reset the expiration time for retained files:
ibrix_reten_adm -e expire_time -f FSNAME -P PATHLIST
If you specify an interval such as 20m (20 minutes) for the expire_time, the retention expiration
time is set to that amount of time in the future starting from now, not that amount of time from the
original start of retention. If you specify an exact date/time such as 19:20:02 or 2/16/2012 for
the expire_time, the command sets the retention expiration time to that exact time. If the file
system is in Relaxed retention mode (not Enterprise), the exact date/time can be in the past, in
which case the file immediately expires from retention and becomes WORM but no longer retained.
See the Linux date(1) man page for a description of the valid date/time formats for the
expire_time parameter.
Remove the retention period for retained files:
ibrix_reten_adm -c -f FSNAME -P PATHLIST
Delete retained files:
ibrix_reten_adm -d -f FSNAME -P PATHLIST
List retention attributes for files in the specified file system:
ibrix_reten_adm -l FSNAME -P PATHLIST
Upgrade a pre–6.1.1 file system for data retention features:
ibrix_reten_adm -u -f FSNAME
To enable data retention:
1. If you have a pre-6.0 file system, run the upgrade60.sh utility, as described in
“upgrade60.sh” (page 182).
2. Run the following command on a node that has the file system mounted:
ibrix_reten_adm -u -f FSNAME
In this instance, FSNAME is the name of the file system you want to upgrade for data retention
features.
The command enables data retention and unmounts the file system on the node.
3.
4.
After the command finishes upgrading the file system, re-mount the file system.
Enter the ibrix_fs command to set the file system’s data retention and autocommit period
to the desired values. See “ibrix_fs” (page 71) for additional information about the ibrix_fs
command.
ibrix_reten_adm
147
Restrictions for rename options
For file systems that were created in a release earlier than 6.0 but have not been upgraded, StoreAll
software can preserve all name space data in snapshots but cannot preserve file data for objects
(files). To help prevent “hybrid snap trees,” in which a snap tree contains objects with the old
format, restrictions have been implemented on rename operations. The following restrictions apply
to hybrid file systems:
•
Only directories created in version 6.0 or later can become snap tree roots.
•
If the old directory is not in a snap tree and the new directory is in a snap tree, rename is
allowed only if the object being renamed is snapable (that is, it has the new inode format).
The following restrictions apply to both hybrid file systems and pure 6.x file systems:
•
A snap tree root cannot be renamed. Also, the path to a snap tree root cannot be changed.
•
Rename is allowed when neither the old directory or the new directory are in snap trees.
•
Rename is allowed when the old directory and the new directory are in the same snap tree.
Rename is not allowed when the directories are in different snap trees.
These restrictions are intended to prevent hybrid snap trees containing files with the old format.
However, hybrid snap trees can still occur when a directory having the new format is populated,
using rename, with old format objects and that directory is then made into a snap tree root or is
renamed into a snap tree. The StoreAll software does not prevent this situation because it could
take a prohibitively long amount of time to perform a complete scan for old objects in the sub tree
being moved if the new sub tree was sufficiently large.
Options
148
Option
Description
-P
Specifies a path to one or more files. The path can be either absolute or relative to the mountpoint
of the file system.
-c
Removes the retention time for one or more files.
-d
Deletes retained files.
-e expire_time
Resets the expiration time for retained files.
-fFSNAME
Specifies a file system.
-h
Sets a legal hold on retained or WORM files.
-l
Lists retention attributes for files.
-r
Removes a legal hold on retained or WORM files.
-u
Upgrades a mounted file system created with StoreAll version 6.0 or earlier to enable data
retention features.
-?
Shows the usage for this command.
StoreAll software commands
ibrix_server
Performs management and control procedures for file serving nodes.
Description
Use ibrix_server to:
•
Identify or delete a standby for a file serving node.
•
Manually fail over a file serving node.
•
Fail back a file serving node following either automated or manual failover.
•
Turn automated failover on or off.
•
Prefer or unprefer a user interface for a file serving node. By default, file serving nodes use
the cluster interface.
•
Power cycle a host.
•
Lists host information, including hostname, name of backup server, operational state, whether
automated failover is turned on, and host ID.
•
Delete file serving nodes from the configuration database.
Synopsis
Identify a standby for a file serving node:
ibrix_server -b -h SERVERNAME1,SERVERNAME2
The command assigns file serving node SERVERNAME2 as the standby for file serving node
SERVERNAME1.
Fail over a file serving node to its standby:
ibrix_server -f [-p] [-M] [-N] -h SERVERNAME
Use this command to perform a manual failover. Depending on whether you configured server-level
or segment-level standby for the file serving node, the command migrates either specific segments
or all segments to the standby server.
If the file serving node is connected to a power source that has been identified to the Fusion
Manager, include the -p option to make the file serving node power down before the failover.
The -M option forces segment migration. The -N option skips the health check otherwise performed
in segment migration.
Fail back a file serving node:
ibrix_server -f -U [-p] [-M] [-N] -h SERVERNAME
The -p option forces a power down on the backup server. The -M option forces segment migration.
The -N option skips the health check otherwise performed in segment migration.
Turn automated failover on or off:
ibrix_server -m [-U] [-h SERVERNAME]
The command applies to all file serving nodes or only to file serving node SERVERNAME. To turn
automated failover on, omit the -U option. To turn it off, include the -U option.
Delete the standby for a file serving node:
ibrix_server -b -U -h SERVERNAME
Delete one or more servers from the configuration database:
ibrix_server -d -h SERVERLIST
Prefer a network interface for server traffic:
ibrix_server -n -h SRCSERVER -A DESTHOST/IFNAME
ibrix_server
149
The command assigns network interface IFNAME for traffic from source server SRCSERVER to
destination host DESTHOST.
The network interface preference is executed immediately on the file serving nodes.
Use the default cluster interface for server traffic:
ibrix_server -n -h SRCSERVER -D DESTHOST
The cluster interface will be used for network traffic from source server SRCSERVER to destination
host DESTHOST.
Manipulate the power source for a file serving node:
ibrix_server -P {on|off|reset} -h SERVERNAME [-F]
You can turn the power source on or off, or you can reset it. The command does not trigger a
failover event. The -F option forces a power off or reset.
Recover file serving nodes:
ibrix_server -r [-h SERVERLIST] [-v]
Start, stop, or restart the SMB, NFS, or NDMP service:
ibrix_server -s -t { cifs | nfs | ndmp } -c { start | stop | restart }
[-h SERVERLIST]
Change the local hostname on a file serving node:
ibrix_server -R -h SERVERNAME -T HOSTNAME
Display server information:
ibrix_server -l [-h SERVERLIST] [-v]
The following information is displayed for all servers or the servers in SERVERLIST: hostname,
standby server name, operating state, server ID, and whether automated failover is turned on. To
also list IAD, kernel, and file-system version information, include the -v option.
Display operational and configuration information for file serving nodes:
ibrix_server -i [-h SERVERLIST] [-x]
Options
150
Option
Description
-A
Assigns a preferred NIC.
-D DESTHOST
Deletes the network interface preference established between the source host and this
destination file serving node.
-F
Forces a power off or reset.
-M
Forces segment migration.
-N
Skips health checks.
-P on|off|reset
Executes the selected power action on the specified file serving node.
-R
Changes the system hostname.
-T HOSTNAME
The new hostname.
-U
Unassigns the backup for a server or stops auto-failover monitoring on the specified file
serving node.
-b
Assigns a backup host.
-c
Controls services.
-d
Deletes a file serving node from the configuration database.
StoreAll software commands
Option
Description
-f
Fails over to or fails back from a file serving node.
-h SERVERNAME or
SERVERLIST
One or more file serving nodes.
-i
Provides detailed information about one or more file serving nodes.
-l
Lists file serving nodes and identifies any configured backups. Also specifies whether the
nodes are up or down and whether auto-failover is configured.
-m
Toggles auto-failover monitoring on a file serving node.
-n
Prefers a network interface for communication between a given server pair.
-p
Forces a power-down.
-r
Recovers a file serving node.
-s
Service control.
-t { cifs | nfs |
ndmp}
The name of the service.
-v
When used with -l, reports version information for the file system, IAD, and kernel.
-x
Displays additional server information.
-?
Shows the usage for this command.
See also
ibrix_lwhost
ibrix_server
151
ibrix_sh
Manages shell tasks.
Description
The ibrix_sh command can be used to run the Linux shell commands cp and find on file serving
nodes and save the output. You can also list shell tasks in the cluster, display information about
the tasks, or delete tasks.
Synopsis
Execute a command on all file serving nodes:
ibrix_sh -c COMMAND -o OUTPUT_DIR
The results from the command are saved in the directory OUTPUT_DIR. The supported shell
commands are cp and find. All paths associated with these shell commands, including
OUTPUT_DIR, must be specified as absolute paths.
List shell tasks:
ibrix_sh -l [-f FILESYSTEM] [-h HOSTNAME]
The command can report all shell tasks in the cluster, or it can be restricted to a specific file system
and file serving node.
Display detailed information about shell tasks:
ibrix_sh -i [-f FILESYSTEMS] [-h HOSTNAME]
The command can report all shell tasks in the cluster, or it can be restricted to a specific file system
and file serving node.
Display detailed information for certain tasks:
ibrix_sh -i -n TASKIDS [-h HOSTNAME]
The tasks are specified by task ID. Use the -h option to limit the output to tasks running on the
specified file serving node.
Stop the task with the specified task ID:
ibrix_sh -k -n TASKID
Options
152
Option
Description
-c COMMAND
The command to be executed on the file serving nodes.
-f FILESYSTEM or FILESYSTEMS
A file system.
-h HOSTNAME
A file serving node.
-i
Displays detailed information about shell tasks.
-k
Stops the task with the specified task ID.
-l
Lists shell tasks.
-n TASKID or TASKIDS
A task name.
-o OUTPUT_DIR
The output directory that will receive the results of the command.
-?
Shows the usage for this command.
StoreAll software commands
ibrix_snap
Manages file system snapshots.
Description
The StoreAll software snapshot feature captures a point-in-time copy of a file system or directory
for online backup purposes and simplifies recovery of files from accidental deletion. Software
snapshots can be taken of the entire file system or selected directories. Users can access the file
system or directory as it appeared at the instant of the snapshot.
Before taking snapshots of a file system or directory, you will need to enable the directory tree for
snapshots. This directory tree is also called a snap tree. You can then define a schedule for taking
periodic snapshots of the snap tree, and you can also take on-demand snapshots. (Snapshot
schedules can be defined only on the GUI.)
Scheduled snapshots are deleted automatically according to the retention schedule specified for
the snapshot tree; however you can delete a snapshot manually if necessary. You also need to
delete on-demand snapshots manually. Deleting a snapshot does not free the file system space that
was used by the snapshot; you will need to reclaim the space using the GUI or the
ibrix_snapreclamation command.
IMPORTANT:
Before deleting a directory that contains snapshots, take these steps:
•
Delete the snapshots (use ibrix_snap).
•
Reclaim the file system space used by the snapshots (use ibrix_snapreclamation).
•
Remove snapshot authorization for the snap tree (use ibrix_snap).
Synopsis
Enables or disables a snap tree (a file system or directory) for snapshots:
ibrix_snap -m [-U] -f FSNAME -P SNAPTREEPATH
The -U option disables the snap tree.
Create an on-demand snapshot:
ibrix_snap -c -f FSNAME -P SNAPTREEPATH -n NAMEPATTERN
Delete a snapshot:
ibrix_snap -d -f FSNAME -P SNAPTREEPATH -n SNAPSHOTNAME
List all snapshots or only the snapshots for a specific snap tree:
ibrix_snap -l -s [-f FSNAME [-P snaptree path]]
List all snap trees or only the trees for a specific file system:
ibrix_snap -l [-f FSNAME]
Options
Option
Description
-P SNAPTREEPATH
Specifies the path for a snapshot tree.
-U
Disables a file system or directory for snapshots.
-c
Creates a snapshot.
-d
Deletes a snapshot.
-f FSNAME
A file system.
-l
Lists snap trees.
ibrix_snap
153
Option
Description
-m
Enables a file system or directory for snapshots.
-n NAMEPATTERN
Specifies a pattern for snapshot names.
-s
Lists snapshots.
-?
Shows the usage for this command.
See also
ibrix_snapreclamation
154 StoreAll software commands
ibrix_snapreclamation
Reclaims file system space used by deleted snapshots.
Description
After deleting snapshots, you can use the ibrix_snapreclamation command to reclaim the
file system space previously used by the snapshots. The reclamation task runs on an entire file
system, not on a specific snap tree within that file system. If a file system includes two snap trees,
space is reclaimed for both snap trees.
Synopsis
Run snapshot reclamation on a file system:
ibrix_snapreclamation -r -f FSNAME [-s {maxspeed | maxspace}] [-v]
The -s option specifies the snapshot reclamation strategy. With maxspeed, the reclamation task
reclaims only the most easily recoverable snapped space. This strategy reduces the amount of
runtime required by the reclamation task, but leaves some space potentially unrecovered (that
space is still eligible for later reclamation). With maxspace, the reclamation task recovers all
snapped space eligible for recovery. It takes longer and uses more system resources than maxspeed.
The default is maxspace.
Display summary status information for snapshot reclamation tasks:
ibrix_snapreclamation -l [-f FSLIST]
Display detailed status information for a snapshot reclamation task:
ibrix_snapreclamation -i [-f FSLIST]
Stop the specified snapshot reclamation task:
ibrix_snapreclamation -k -t TASKID [-F]
Options
Option
Description
-F
Forcibly stops a snapshot reclamation task.
-f FSNAME or FSLIST
Specifies a file system.
-i
Displays detailed status information for a snapshot reclamation task.
-k TASKID
Stops a snapshot reclamation task.
-l
Displays summary status information for snapshot reclamation tasks.
-r
Runs a snapshot reclamation task.
-s {maxspeed | maxspace} Specifies the snapshot reclamation strategy. With maxspeed, the reclamation task
reclaims only the most easily recoverable snapped space. This strategy reduces the
amount of runtime required by the reclamation task, but leaves some space potentially
unrecovered (that space is still eligible for later reclamation). With maxspace, the
reclamation task recovers all snapped space eligible for recovery. It takes longer
and uses more system resources than maxspeed. The default is maxspace.
-t TASKID
Specifies a task ID.
-?
Shows the usage for this command.
See also
ibrix_snap
ibrix_snapreclamation
155
ibrix_snmpagent
Updates the configuration properties for the SNMP agent.
NOTE: When Phone Home is enabled, you cannot edit or change the configuration of the StoreAll
SNMP agent with ibrix_snmpagent. However, you can add trapsink IPs with ibrix_snmtrap
and can associate events to the trapsink IP with ibrix_event.
Description
The SNMP agent is created automatically. It is configured initially as an SNMPv2 agent and is off
by default.
Certain SNMP parameters and the SNMP default port are the same regardless of SNMP version.
The agent port is 161 by default. SYSCONTACT, SYSNAME, and SYSLOCATION are optional MIB-II
agent parameters that have no default values.
NOTE: The default SNMP agent port was changed from 5061 to 161 in the StoreAll 6.1 release.
This port number cannot be changed.
The -c and -s options are also common to all SNMP versions. The -c option turns the encryption
of community names and passwords on or off. (Encryption is off by default.) The -s option toggles
the agent on and off; it turns the agent on by starting a listener on the SNMP port, and turns it off
by shutting off the listener. The default is off.
Two agent parameters are set at creation and cannot be updated:
•
SysDescr (description of agent host system): Fusion Manager
•
SysObjectID (object id of the StoreAll software private MIB): .1.3.6.1.4.1.18997
Synopsis
Update SNMPv1 and v2:
ibrix_snmpagent -u -v {1|2} [-p PORT] [-r READCOMMUNITY] [-w
WRITECOMMUNITY] [-t SYSCONTACT] [-n SYSNAME] [-o SYSLOCATION] [-c
{yes|no}] [-s {on|off}]
The command takes optional community names. The default READCOMMUNITY name assigned to
the agent is public. No default WRITECOMMUNITY name is set (although the name private is
often used).
Update SNMPv3:
ibrix_snmpagent -u -v 3 [-e engineId] [-p PORT] [-r READCOMMUNITY] [-w
WRITECOMMUNITY] [-t SYSCONTACT] [-n SYSNAME] [-o SYSLOCATION] [-y
{yes|no}] [-z {yes|no}] [-c {yes|no}] [-s {on|off}]
The command includes an optional engine ID that overrides the default, which is the agent’s host
name. Because SNMPv3 employs different access methods from v1 and v2, the -y and -z options
are used to determine if a v3 agent can process non-v3 read and write requests from the NMS.
Processing is disabled by default. If processing will be enabled, the -r and -w options are required.
Lists SNMP agent properties:
ibrix_snmpagent -l
The information includes SNMP version in use; port in use; values for system contact, name and
location; system description (always Fusion Manager); SysObjectID (the StoreAll software vendor
MIB, 1.3.6.1.4.1.18997); whether encryption is in effect; the names of the read and write
communities; and whether the agent is turned on or off.
156
StoreAll software commands
Options
Option
Description
-c yes|no
Indicates whether community names or passwords are encrypted in the configuration file.
Default: no encryption. When this option is set to yes, unencrypted community strings and
passwords are encrypted and saved to a file when the agent starts. To make changes,
replace the entry in the file with a new, unencrypted value. This value will automatically
be encrypted when the agent restarts. If the option is set to “no”, the values will not be
changed even if they are in encrypted format; however, they will be decrypted by the
agent.
-e ENGINE_ID
Specifies the agent’s SNMPv3 engine ID.
-l
Lists summary information about the SNMP agent.
-n SYSNAME
Specifies the assigned system name (generally the fully-qualified domain name) of the this
agent.
-o SYSLOCATION
Specifies the physical location of the MIB-II system being managed (this agent).
-p PORT
Specifies the port on which the agent listens for SNMP requests from the NMS. The default
port is 5061.
-r READCOMMUNITY
In SNMPv1 and v2, identifies the community name (that is, the password) used for an
SNMP get request. The default read community name is public. Used in SNMPv3 if
non-v3 read requests are allowed.
-s on|off
Indicates whether the agent is listening for SNMP requests on the SNMP port. The default
value is off.
-t SYSCONTACT
Specifies the text id of a contact person responsible for the agent’s host system.
-u
Updates an SNMP agent.
-v 1|2|3
Indicates the version of the SNMP agent.
-w WRITECOMMUNITY
In SNMPv1 and v2, identifies the community name (that is, the password) used for an
SNMP set request. No default write community name is set.
-y yes|no
In SNMPv3, indicates whether a v3 agent can process v1 or v2 get requests. Default: no.
-z yes|no
In SNMPv3, indicates whether a v3 agent can process v1 or v2 set requests. Default: no.
-?
Shows the usage for this command.
See also
ibrix_snmptrap
ibrix_snmpagent
157
ibrix_snmpgroup
Manages SNMP groups.
Description
A group defines the access control policy on managed objects for one or more users. All users
must belong to a group. Users and groups exist only in SNMPv3. Groups are assigned a security
level, which enforces use of authentication and privacy, and reference views to define the set of
MIB data that group members can access.
The default view, used when a read or write view is not specified, is excludeAll.
Synopsis
Create a group:
ibrix_snmpgroup -c -g GROUPNAME -s {noAuthNoPriv|authNoPriv|authPriv}
[-r READVIEW] [-w WRITEVIEW]
The group can be assigned various SNMPv3 security parameters including the security level, read
view, and write view.
Update a group:
ibrix_snmpgroup -u -g GROUPNAME [-s {noAuthNoPriv|authNoPriv|authPriv}]
[-r READVIEW] [-w WRITEVIEW]
The command uses the same options as the create (-c) command.
Delete a group:
ibrix_snmpgroup -d -g GROUPNAME
List group settings:
ibrix_snmpgroup -l [-g GROUPNAME]
The information includes security level, read view, and write view.
Options
Option
Description
-c
Creates an SNMP group.
-d
Deletes an SNMP group.
-g GROUPNAME
Identifies an SNMP group.
-l
Lists SNMP group properties.
-r READVIEW
Identifies the v3 read view this group can access.
-s noAuthNoPriv |
authNoPriv |
authPriv
Indicates the v3 security level assigned to this group. There are three options:
• noAuthNoPriv (no user authorization or privacy encryption performed), which is
the default
• authNoPriv (user authorization performed but no privacy encryption)
• authPriv (user authorization and privacy encryption performed)
158
-u
Updates an SNMP group.
-w WRITEVIEW
Identifies the v3 write view this group can access.
-?
Shows the usage for this command.
StoreAll software commands
See also
ibrix_snmpuser, ibrix_snmpview
ibrix_snmpgroup
159
ibrix_snmptrap
Creates, updates, or deletes trapsinks for any SNMP version.
Description
A trapsink is the host destination where agents send traps, which are asynchronous notifications
sent by the agent to the management station. A trapsink is specified by its name or IP address.
StoreAll software supports multiple trapsinks; you can define any number of trapsinks of any SNMP
version, but you can define only one trapsink per host regardless of version.
At a minimum, a v1 or v2 trapsink configuration requires a destination host and SNMP version.
All other parameters are optional and many will pass a default value if not specified.
Synopsis
Create a v1 or v2 trapsink:
ibrix_snmptrap -c -h HOSTNAME -v {1|2} [-p PORT] [-m COMMUNITY] [-s
{on|off}]
HOSTNAME identifies the host where the agent sends traps. If a port is not specified, the command
defaults to port 162. If a community is not specified, the command defaults to the read-only
community, public. The -s option toggles agent trap transmission on and off. The default is on.
Update v1 or v2 trapsink settings and turn SNMP trap transmission on or off:
ibrix_snmptrap -u -h HOSTNAME -v {1|2} [-p PORT] [-m COMMUNITY] [-s
on|off]
Create a v3 trapsink:
ibrix_snmptrap -c -h HOSTNAME -v 3 [-p PORT] -n USERNAME[-j {MD5|SHA}]
[-k AUTHORIZATION_PASSWORD] [-y {DES|AES}] [-z PRIVACY_PASSWORD] [-x
CONTEXT_NAME] [-s {on|off}]
HOSTNAME identifies the host where the agent sends traps. If a port is not specified, the command
defaults to port 162. Other options define security settings. USERNAME is the v3 security name of
the trap sender. If unspecified, the command uses MD5 as the user authentication algorithm and
DES as the privacy algorithm, with no passwords. The CONTEXT_NAME, if used, specifies the
managed objects that can be accessed by the agent. The -s option toggles agent trap transmission
on and off. The default is on.
Update v3 trapsink settings and turn SNMP trap transmission on or off:
ibrix_snmptrap -u -h HOSTNAME -v 3 [-p PORT] -n USERNAME [-j {MD5|SHA}]
[-k AUTHORIZATION_PASSWORD] [-y {DES|AES}] [-z PRIVACY_PASSWORD] [-x
CONTEXT_NAME] [-s {on|off}]
Security settings are the same as those described for the create command.
Delete trapsinks on specific hosts:
ibrix_snmptrap -d -h HOSTLIST
Display information about trapsinks:
ibrix_snmptrap -l [-h HOSTLIST]
For all v1 or v2 trapsinks, or for all hosts in HOSTLIST, the command displays the trapsink address,
SNMP version, port, community and on/off state.
160 StoreAll software commands
Options
Option
Description
-c
Creates a trapsink.
-d
Deletes a trapsink.
-h HOSTNAME or HOSTLIST
Identifies a host, by name or IP address, where a trapsink is created or
updated. Trapsinks can be deleted or listed on multiple hosts by specifying a
HOSTLIST (use commas to separate the hosts).
-j MD5 | SHA
Specifies the user authentication algorithm to use. The default is MD5.
-k AUTHORIZATION_PASSWORD
Specifies the user authentication password. Passwords must contain at least
eight characters. By default, no password is set.
-l
Lists SNMP trapsink properties.
-m COMMUNITY
Associates a v1 or v2 community with a trapsink. The default community is
public.
-n USERNAME
Specifies a user name.
-p PORT
A trapsink destination port. The default port number is 162.
-s on|off
State of SNMP notifications. The default value is on.
-u
Updates a trapsink.
-v 1|2|3
Indicates the SNMP version of the trapsink.
-x CONTEXT_NAME
The context name.
-y DES|AES
Identifies the v3 privacy algorithm currently in use. The default is DES.
-z PRIVACY_PASSWORD
Specifies the privacy password for v3 encryption and decryption. Passwords
must contain at least eight characters. By default, no password is set.
-?
Shows the usage for this command.
See also
ibrix_event, ibrix_snmpagent
ibrix_snmptrap
161
ibrix_snmpuser
Creates, updates, or deletes SNMPv3 users.
Description
Names the user whose keys were used to authenticate and encrypt packets.
Synopsis
Create a v3 user in a group:
ibrix_snmpuser -c -n USERNAME -g GROUPNAME [-j {MD5|SHA}] [-k
AUTHORIZATION_PASSWORD] [-y {DES|AES}] [-z PRIVACY_PASSWORD]
Authentication and privacy settings are optional. An authentication password is required if the
group has a security level of either authNoPriv or authPriv. The privacy password is required
if the group has a security level of authPriv. If unspecified, MD5 is used as the authentication
algorithm and DES as the privacy algorithm, with no passwords assigned.
Update a v3 user:
ibrix_snmpuser -u -n USERNAME [-g GROUPNAME] [-j {MD5|SHA}] [-k
AUTHORIZATION_PASSWORD] [-y {DES|AES}] [-z PRIVACY_PASSWORD]
Delete a v3 user:
ibrix_snmpuser -d -n USERNAME
List user information:
ibrix_snmpuser -l [-n USERNAME]
The information includes the user’s name, group, authorization, and privacy algorithms, as well
as the passwords for each algorithm. The command can report on all users or on a single named
user.
Options
Option
Description
-c
Creates a SNMPv3 user.
-d
Deletes an SNMP user.
-g GROUPNAME
Specifies the SNMPv3 group to which this user is assigned.
-j MD5 | SHA
Specifies the user authentication algorithm used to authorize messages sent or
received on behalf of this user. The default is MD5.
-k AUTHORIZATION_PASSWORD Specifies the user authentication password. Passwords must contain at least eight
characters. By default, no password is set.
162
-l
Lists properties for one or more SNMP users.
-n USERNAME
Specifies an SNMP user name.
-u
Updates an SNMP user.
-y DES|AES
Identifies the v3 privacy algorithm used to encrypt messages sent or received on
behalf of this user. The default is DES.
-z PRIVACY_PASSWORD
Specifies the privacy password for v3 encryption and decryption. Passwords must
contain at least eight characters. By default, no password is set.
-?
Shows the usage for this command.
StoreAll software commands
See also
ibrix_snmpgroup, ibrix_snmpview
ibrix_snmpuser
163
ibrix_snmpview
Adds entries to or deletes entries from the SNMP MIB view.
Description
A MIB view consists of a collection of view subtrees that can be included or excluded from the
view. Each view subtree is defined by a combination of OID subtree and a bit string mask.
The management console automatically creates the excludeAll view, which blocks access to
all OIDs. This view cannot be deleted. It is the default read and write view if a view is not specified
for a group with the ibrix_snmpgroup command. Its catch-all OID and mask are:
OID = .1
Mask = .1
Synopsis
Add a subtree entry to a MIB view:
ibrix_snmpview -a -v VIEWNAME [-t {include|exclude}] -o OID_SUBTREE [-m
MASK_BITS]
The subtree is included in the named view by default.
Delete a MIB view:
ibrix_snmpview -d -v VIEWNAME
Display information about MIB views:
ibrix_snmpview -l [-v VIEWNAME]
For all views or the specified view, the output includes all entries by name, type, OID subtree value,
and mask bits value.
Options
Option
Description
-a
Adds an entry to a view.
-d
Deletes a view.
-l
Lists properties for SNMP views.
-m MASK_BITS
Specifies the mask bits paired with the OID subtree in a v3 MIB view. The mask bits identify
which of the OID subtree’s sub-identifiers are significant to the MIB view.
-o OID_SUBTREE
Identifies the root of the OID subtree to be included in or excluded from a MIB view.
-t include | exclude Indicates whether an OID subtree should be included in or excluded from a view. The
default is to include the subtree.
-v VIEWNAME
Specifies the name of a v3 MIB view.
-?
Shows the usage for this command.
See also
ibrix_snmpgroup, ibrix_snmpuser
164 StoreAll software commands
ibrix_stats
Lists statistics for file serving nodes.
Description
Approximately every 20 seconds, the file serving nodes report a range of operational statistics to
the Fusion Manager.
Synopsis
Display statistics for file serving nodes:
ibrix_stats -l [-s] [-c] [-m] [-i] [-n] [-f] [-C] [-h HOSTLIST]
The output includes all file serving nodes or only the nodes in HOSTLIST.
Options
Option
Description
-C
Prints CIFS statistics.
-c
Prints CPU statistics.
-f
Prints NFS statistics.
-h HOSTLIST
A list of one or more file serving nodes separated by commas.
-i
Prints I/O statistics.
-l
Lists statistics.
-m
Prints memory statistics.
-n
Prints network statistics.
-s
Prints summary statistics.
-?
Shows the usage for this command.
ibrix_stats
165
ibrix_tape
Lists or rescans tape devices
Description
The ibrix_tape command can be used to list tape and media changer devices available for
NDMP backups. The command can also rescan for devices.
Synopsis
List all tape and media changer devices:
ibrix_tape -l
Rescan for tape and media changer devices:
ibrix_tape -r
Options
Option
Description
-l
Lists tape devices and media changer devices.
-r
Rescans for devices
?
Shows the usage for this command.
166 StoreAll software commands
ibrix_task
Manages tasks running in the cluster.
Description
The ibrix_task command can be used to view information about active or inactive tasks in the
cluster. You can also pause, resume, or suspend tasks. Active tasks are typically starting, running,
or paused. Inactive tasks are typically stopped, either by running to completion or being stopped
in some way (for example, manually, by an error, or by failing to start).
Synopsis
List tasks in the cluster:
ibrix_task -l [-f FILESYSTEM] [-h HOSTNAME] [-s | -c]
The command can be restricted to a specific file system and/or file serving node. The -s option
lists only scheduled tasks. The -c option lists only inactive (stopped or completed) tasks.
Display detailed information about tasks:
ibrix_task -i [-f FILESYSTEMS] [-h HOSTNAME] [-c]
The -f option displays tasks for the specified file systems, and -h displays tasks running on the
specified file serving node.
Display detailed information for specific task IDs:
ibrix_task -i -n TASKIDS [-h HOSTNAME]
The -h option limits the output to tasks running on the specified file serving node.
Stop the task with the specified task ID:
ibrix_task -k -n TASKID [-F] [-s]
The -F option forcefully stops the task. When -s is used, the command stops scheduled operations
instead.
Pause the task with the specified task ID:
ibrix_task -p -n TASKID
Resume the task with the specified task ID:
ibrix_task -r -n TASKID
Delete an inactive task:
ibrix_task -d -n TASKID
Options
Option
Description
-F
Forces the task with the specified task ID to stop.
-c
Displays inactive tasks.
-d
Deletes an inactive task.
-f FILESYSTEM or FILESYSTEMS
One or more file systems.
-h HOSTNAME
A file serving node.
-i
Displays detailed information about tasks.
-k
Stops the task with the specified task ID.
-l
Lists tasks running in the cluster.
ibrix_task
167
Option
Description
-n TASKID or TASKIDS
A task name.
-p
Pauses the task with the specified task ID.
-r
Resumes the task with the specified task ID.
-s
Lists scheduled tasks.
?
Shows the usage for this command.
168 StoreAll software commands
ibrix_tier
Manages data tiers.
Description
A tier is a group of one or more segments. Tiering enables automatic migration of files from one
tier to another within the same file system. User-written rules based on file attributes (such as
modification time, access time, file size, or file type) define the migration policy, determining which
files are to be moved and when. Tiers are defined on segments, not individual files.
Use of the tiering structure on any file system is optional. Tiering is off by default, and there is no
“default tier.”
The ibrix_tier command assigns or unassigns segments to tiers, deletes segments from tiers,
and lists information about tiers.
Use ibrix_migrator to create or delete rules defining migration policies, to start or stop tier
operations, and to list information about rules and migrator operations.
Synopsis
Assign segments to a tier:
ibrix_tier -a -f FSNAME -t TIERNAME -S SEGLIST
Unassign segments from a tier:
ibrix_tier -u -f FSNAME [-S SEGLIST]
Delete a tier from a file system:
ibrix_tier -d -f FSNAME -t TIERNAME
List tiers for a file system:
ibrix_tier -l -f FSNAME [-t TIERNAME]
Include the -t option to see detailed information about the tiers.
List segments belonging to a tier:
ibrix_tier -i -f FSNAME [-t TIERNAME]
Options
Option
Description
-S SEGLIST
A list of segment numbers or a source tier, depending on the command.
-a
Assigns segments to a tier.
-d
Deletes a tier.
-f FSNAME
A file system.
-i
Lists segments belonging to a tier.
-l
Lists tiers.
-t TIERNAME
The name of a tier.
-u
Unassigns a segment.
-?
Shows the usage for this command.
See also
ibrix_migrator
ibrix_tier
169
ibrix_umount
Unmounts a file system.
Description
ibrix_umount unmounts a file system from file serving nodes, StoreAll clients, and host groups.
You can also locally unmount a file system from StoreAll Linux clients with ibrix_lwumount.
File serving nodes immediately unmount a file system. For StoreAll clients the intention to unmount
a file system is stored on the Fusion Manager. When StoreAll software services start on a StoreAll
client, the client queries the Fusion Manager for the file systems to be unmounted and then unmounts
them. If StoreAll software services are already running on a StoreAll client, you can force the client
to query the Fusion Manager by either executing ibrix_lwmount -a on the client or by rebooting
it.
The root segment must be the last segment unmounted. Attempting to unmount it while other segments
are still mounted will fail.
If the file system has been exported using NFS, you must unexport it with ibrix_exportfs before
you unmount it.
Synopsis
Unmount a file system:
ibrix_umount -f FSNAME [-h HOSTLIST |-g GROUPLIST] [-X]
To unmount the file system from all file serving nodes, StoreAll clients, and host groups, specify
only a file-system name. To unmount the file system from specific file serving nodes and StoreAll
clients, include the HOSTLIST option. To unmount the file system from specific host groups, include
the GROUPLIST option.
Unmount a file system mounted at a specific mountpoint:
ibrix_umount -m MOUNTPOINT [-h HOSTLIST |-g GROUPLIST] [-X]
To unmount the file system from all file serving nodes, StoreAll clients, and host groups, specify
only the mountpoint. To unmount the file system from specific file serving nodes and StoreAll clients,
include the HOSTLIST option. To unmount the file system from specific host groups, include the
GROUPLIST option.
Options
Option
Description
-X
Skips the StoreAll software IAD.
-f FSNAME
The file system to be unmounted.
-g GROUPLIST
A list of one or more host groups.
-h HOSTLIST
A list of one or more file serving nodes or StoreAll clients.
-m MOUNTPOINT
Identifies a mountpoint.
-?
Shows the usage for this command.
See also
ibrix_hostgroup, ibrix_lwumount, ibrix_mount, ibrix_mountpoint
170
StoreAll software commands
ibrix_version
Reports software version numbers for file serving nodes and StoreAll clients.
Description
This command reports the following information for each file serving node:
File system
Version number of the installed file system
IAD/IAS
StoreAll software IAD version number
IAD/FS
Version number of the IAD component that communicates with the file-system module
OS
The operating system
Kernel Version
Version number of the installed OS kernel
Arch
Processor architecture
The file system and IAD/FS output fields should show matching version numbers unless you have
installed special releases or patches. If the output reports mismatched version numbers and you
do not know of any reason for the mismatch, contact HP technical support. A mismatch might affect
the operation of your cluster.
Synopsis
List version information for file serving nodes:
ibrix_version -l [-h HOSTLIST]
Use the -h HOSTLIST option to limit the information to specific nodes.
List StoreAll software version information for all file serving nodes:
ibrix_version -l -S
List version information for all StoreAll clients:
ibrix_version -l -C
The information includes the client hostname, file system, IAD/IAS, IAD/FS, and operating system.
Options
Option
Description
-h HOSTLIST
A list of one or more hosts.
-l
Lists version information.
-C
All StoreAll clients.
-S
All file serving nodes.
-?
Shows the usage for this command.
ibrix_version
171
ibrix_vg
Creates, extends, reduces, or deletes volume groups.
Description
Use ibrix_vg to perform these tasks:
•
Create volume groups from discovered physical volumes. This is the second step in the manual
method of creating a file system.
•
Extend or reducing a volume group by adding or removing physical volumes.
•
Delete unneeded volume groups. Before deleting a volume group, first delete the logical
volumes (segments) created from it.
•
List information about volume groups.
Synopsis
Create a volume group:
ibrix_vg -c -g VGNAME -p PVLIST
The command creates volume group VGNAME from the physical volumes in PVLIST. For example,
the following command creates volume group ivg1 from physical volumes d1, d2, and d3:
<installdirectory>/bin/ibrix_vg -c -g ivg1 -p d[1-3]
Extend a volume group:
ibrix_vg -e -g VGNAME -p PVLIST
The command extends volume group VGNAME with the physical volumes in PVLIST.
Remove physical volumes from a volume group:
ibrix_vg -r -g VGNAME -p PVLIST
The command reduces volume group VGNAME by removing the physical volumes in PVLIST.
List volume groups for file serving nodes:
ibrix_vg -l [-h HOSTLIST]
Use the HOSTLIST option to limit the output to specific nodes.
List size and utilization information for volume groups:
ibrix_vg -l [-g VGLIST]
Use the VGLIST option to limit the output to specific volume groups.
List volume group information:
ibrix_vg -i [-g VGLIST]
For all volume groups or the groups specified in VGLIST, the command lists size and utilization
information, the physical volumes used to create the groups, the logical volumes (segments) built
on the groups, and the file serving nodes that can access the groups.
Delete volume groups:
ibrix_vg -d -g VGLIST
Back up the vgconfig maps on the Fusion Manager:
ibrix_vg -b -g VGLIST
172
StoreAll software commands
Options
Option
Description
-b
Backs up the vgconfig maps on the Fusion Manager.
-c
Creates a volume group.
-d
Deletes a volume group.
-e
Extends a volume group.
-g VGNAME or VGLIST
A volume group or list of volume groups. Takes either a list of volume groups separated
by commas (for example, ivg1,ivg2,ivg3) or a range of volume groups (for example,
ivg[1-3]).
-h HOSTLIST
A list of one or more host names.
-i
Displays information about volume groups and the file serving nodes accessing them.
-l
Lists volume groups.
-p PVLIST
A list of physical volumes. Takes either a list of physical volumes separated by commas (for
example, d1,d2,d3) or a range of physical volumes (for example, d[1-3]).
-r
Removes one or more physical volumes from a volume group.
-?
Shows the usage for this command.
ibrix_vg
173
ibrix_vs
Identifies storage resources, discovers them, and maps them to physical volumes.
Description
ibrix_vs identifies vendor storage resources, discovers LUNs identified in those resources, and
maps them to logical physical volumes in the configuration database.
On 9300/9320 systems, you will need to identify and discover vendor storage resources before
they can be used to create block snapshots.
On X9720/9730 systems, vendor storage resources are registered automatically for hardware
monitoring purposes.
Synopsis
Register a storage array:
ibrix_vs -r -n STORAGENAME -t { lefthand | msa | eqlogic | 3PAR } -I
IP(s) -U USERNAME [-P PASSWORD]
Register an EVA storage array:
ibrix_vs -r -n STORAGENAME -t {eva } -I IP(s) -U USERNAME [-P PASSWORD]
[-s suffix]
Remove the registration for the specified storage:
ibrix_vs -d -n STORAGENAME
Discover LUNs on the specified storage:
ibrix_vs -a [-n STORAGENAME]
List all storage that has been registered:
ibrix_vs -l
List detailed information for the specified storage:
ibrix_vs -i [-n STORAGENAMELIST]
Set the proxy IP address for the specified storage:
ibrix_vs -c -I PROXYIP -n STORAGENAME
List all registered servers in one or more vendor storage:
ibrix_vs -l -s [-n STORAGENAMELIST]
Options
174
Option
Description
-I
IP address.
-P PASSWORD
Password.
-U USERNAME
User name.
-a
Discovers LUNs.
-c
Sets the proxy IP address.
-d
Removes the storage registration.
-i
Lists detailed storage information.
-l
Lists storage that has been registered.
StoreAll software commands
Option
Description
-n STORAGENAME or
STORAGENAMELIST
Storage system name or a list of system names.
-r
Registers storage.
-s suffix
Suffix.
-t TYPE
Storage system type (EVA, Lefthand, MSA, 3PAR, or EqualLogic).
-?
Shows the usage for this command.
ibrix_vs
175
ibrix_vs_snap
Creates or deletes file-system snapshots and cleans up after an unsuccessful snapshot session.
Description
ibrix_vs_snap creates a file-system snapshot for clusters that implement supported storage
systems. The snapshot replicates file-system entities and is managed exactly like a standard file
system. A snapshot is active from the moment that it is created.
The first snapshot task is to define the snapshot allocation policy. To do this, run the
ibrix_vs_snap -p command to define the policy type and its parameters. Once set, a snapshot
allocation policy needs to change only if a parameter value changes. When the allocation policy
is in effect, create the snapshot with ibrix_vs_snap -c.
Synopsis
Set the snapshot policy for the specified file system:
ibrix_vs_snap -p -f ORIGINFSNAME [-h HOSTLIST]
By default, the snapshot policy is to mirror the segment ownership. For example, if the file system
has segments 1-6 owned by hosts a, b, c, d, e, and f respectively, the snapshot file system will
have segments 1-6 owned by hosts a, b, c, d, e, and f respectively. The -p option allows you to
override the default policy and specify segment owners according to a round robin pattern. The
segment owners are specified with the -h HOSTLIST option. Using the previous example, to
change the ownership of the segments 1-6 in the snapshot file system to hosts a, c, e, a, c, e
respectively, enter this command:
ibrix_vs_snap -p -f fs2 -h a,c,e
Create a file-system snapshot:
ibrix_vs_snap -c -n SNAPFSNAME -f ORIGINFSNAME [-M]
The command creates snapshot SNAPFSNAME from file system ORIGINFSNAME. The -M option
automatically mounts the snapshot file system.
Delete the specified file-system snapshots:
ibrix_vs_snap -d -f SNAPFSLIST
Clean up the specified invalid snapshot file systems:
ibrix_vs_snap -r -f SNAPFSLIST
List information about file-system snapshots:
ibrix_vs_snap -i [-f SNAPFSLIST]
The command reports information for all file systems or only for those specified in SNAPFSLIST.
List file-system snapshots for all file systems on all hosts:
ibrix_vs_snap -l
Enumerate snapshot file systems:
ibrix_vs_snap -l -f ORIGINFSNAME [-n STRATEGYNAME]
Run the automated snapshot procedure on a file system using the specified snapshot strategy:
ibrix_vs_snap -A -f ORIGINFSNAME -n STRATEGYNAME
Options
176
Option
Description
-A
Runs the automated snapshot procedure.
-M
Automatically mounts a snapshot.
StoreAll software commands
Option
Description
-c
Creates a file-system snapshot.
-d
Deletes a file-system snapshot.
-f ORIGINFSNAME
The file system for which a snapshot is being created.
-h HOSTLIST
A list of one or more hosts.
-i
Lists snapshot information.
-l
Lists file-system snapshots.
-n SNAPFSNAME or
SNAPFSLIST
The name of a file-system snapshot or list of snapshots.
-p
Sets snapshot policy for a snapshot file system.
-r
Cleans up an invalid snapshot.
-?
Shows the usage for this command.
See also
ibrix_vs_snap_strategy
ibrix_vs_snap 177
ibrix_vs_snap_strategy
Creates an automated snapshot strategy for hardware snapshots.
Description
If you will be taking a snapshot of a file system on a regular basis, you can create a snapshot
strategy for that file system. The strategy specifies the number of snapshots to keep and the number
of snapshots to mount on the system. You can also create naming templates for the snapshots and
the snapshot mount points.
After creating a snapshot strategy, use the GUI to create a schedule for taking the snapshots. See
the HP StoreAll Storage File System User Guide for more information.
Synopsis
Create an automated snapshot strategy:
ibrix_vs_snap_strategy -c -n NAME -k KEEP -m MOUNT [-N NAMESPEC] [-M
MOUNTSPEC]
The -c option creates an automated snapshot strategy. The other options are:
-n NAME
The name for the snapshot strategy.
-k KEEP
The number of snapshots to keep per file system, such as -k 6. For the HP 2000 Modular Smart
Array G2, the maximum is 32 snapshots per file system. For EqualLogic arrays, the maximum
is eight snapshots per file system.
-m MOUNT
The number of snapshots to mount per file system, such as -m 7. The maximum number of
snapshots is seven per file system.
-N NAMESPEC
Snapshot name template. The template specifies a scheme for creating unique names for the
snapshots. Use the variables shown below for the template.
-M MOUNTSPEC
Snapshot mountpoint template. The template specifies a scheme for creating unique mount points
to the snapshots. Use the variables shown below for the template.
Variables for snapshot name and mountpoint templates. The following variables can be used:
fulldate
yyyy_mm_dd_HHmmz + GMT
shortdate
yyyy_mm_dd
fsname
File system name
You can specify one of or more of these variables, enclosed in brackets ({ }) and separated by
underscores (_). The template can also include text strings. Following are some sample templates.
When a snapshot is created with one of these templates, the variables will be replaced with the
values shown above.
{fsname}_snap_{fulldate}
snap_{shortdate}_{fsname}
Modify an automated snapshot strategy:
ibrix_vs_snap_strategy -e -n NAME -k KEEP -m MOUNT [-N NAMESPEC] [-M
MOUNTSPEC]
Delete an automated snapshot strategy:
ibrix_vs_snap_strategy -d -n NAME
List automated snapshot strategies:
ibrix_vs_snap_strategy -l
Display information about an automated snapshot strategy:
ibrix_vs_snap_strategy -i -n NAME
178
StoreAll software commands
Options
Option
Description
-M MOUNTSPEC
Snapshot mountpoint template.
-N NAMESPEC
Name of snapshot template.
-c
Configures a snapshot strategy.
-d
Deletes a snapshot strategy.
-e
Edits an existing snapshot strategy.
-i
Displays detailed information about a snapshot strategy.
-k KEEP
The number of snapshots to keep per file system.
-l
Lists snapshot policies.
-m MOUNT
The number of snapshots to mount per file system.
-n NAME
Snapshot strategy name.
-?
Shows the usage for this command.
ibrix_vs_snap_strategy
179
MDexport
Saves custom metadata for a file system.
Description
Use the perl script MDExport to save, or export, metadata that is stored only in the Express
Query data base and not in the files themselves. You can then use the file later on to import the
metadata with the GUI or the MDimport command.
Synopsis
Save custom metadata to a CSV file:
MDExport.pl [--help|?] --dbconfig <xml> --database <dbname> --outputfile
<fname> [--user <username>] [--verbose]
Use perl to invoke MDexport. For example:
perl /usr/bin/Metabox/scripts/MDExport.pl --database ibrixFS --user
ibrix --dbconfig /usr/local/Metabox/scripts/startup.xml --output
/home/mydir/save.csv
This command exports metadata from the ibrixFS file system and generates the output file
save.csv in the /home/mydir directory. The CSV file contains attributes from the table
AttributeKeyValue.
Options
Option
Description
--database <dbname>
Specifies the database containing the metadata. <dbname> is the name of the file
system.
--dbconfig <xml>
Specifies the metadata configuration file.
--outputfile <fname>
Specifies the CSV output file used to save the metadata.
--user <username>
The username for accessing the database.
-?
Shows the usage for this command.
See also
MDimport
180 StoreAll software commands
MDimport
Imports custom metadata to an Express Query database.
Description
The MDImport tool imports a CSV file containing custom or audit metadata into a new Express
Query database.
Synopsis
Import metadata to a file system:
MDImport -f <FSname> -n <Fname> -t <Ftype>
The following command imports custom file system metadata:
MDimport -f newIbrixFs -t custom -n /home/mydir/save.csv
The next command imports audit metadata:
MDimport -f target -t audit -n
simple_report_for_source_at_1341513594723.csv
The ibrix_audit_reports command automatically generates the file name
simple_report_for_source_at_1341513594723.csv.
Options
Option
Description
-f <FSname>
The file system to receive the import.
-n<Fname>
The name of the CSV file.
-t<TYPE>
The type of metadata being imported (either audit or custom).
-?
Shows the usage for this command.
See also
ibrix_audit_reports, MDexport
MDimport
181
upgrade60.sh
Upgrades pre-6.0 file systems for software snapshots.
Description
To support software snapshots, the inode format was changed in the StoreAll 6.0 release. The
upgrade60.sh utility upgrades a file system created on a pre-6.0 release, enabling software
snapshots to be taken on the file system.
The utility can also determine the needed conversions without actually performing the upgrade.
When using the utility, you should be aware of the following:
•
The file system must be unmounted.
•
Segments marked as BAD are not upgraded.
•
The upgrade takes place in parallel across all file serving nodes owning segments in the file
system, with at least one thread running on each node. For a system with multiple controllers,
the utility will run a thread for each controller if possible.
•
Files up to 3.8 TB in size can be upgraded. To enable snapshots on larger files, they must be
migrated after the upgrade is complete (see “Migrating large files” (page 183).
•
In general, the upgrade takes approximately three hours per TB of data. The configuration of
the system can affect this number.
Running the utility
Typically, the utility is run as follows to upgrade a file system:
upgrade60.sh file system
For example, the following command performs a full upgrade on file system fs1:
upgrade60.sh fs1
Progress and status reports
The utility writes log files to the directory /usr/local/ibrix/log/upgrade60 on each node
containing segments from the file system being upgraded. Each node contains the log files for its
segments.
Log files are named <host>_<segment>_<date>_upgrade.log. For example, the following
log file is for segment ilv2 on host ib4-2:
ib4-2_ilv2_2012-03-27_11:01_upgrade.log
Restarting the utility
If the upgrade is stopped or the system shuts down, you can restart the upgrade utility and it will
continue the operation. (To stop an upgrade, press Ctrl-C on the command line or send an interrupt
signal to the process.)
There should be no adverse effects to the file system; however, certain blocks that were newly
allocated by the file system at the time of the interruption will be lost. Running ibrix_fsck in
corrective mode will recover the blocks.
NOTE: The upgrade60.sh utility cannot upgrade segments in an INACTIVE state. If a node is
rebooted or shuts down with an unmounted file system, the file system segments owned by that
node will be in an INACTIVE state. To move the segments to ACTIVE states, mount the file system
with ibrix_mount. Then unmount the file system with ibrix_umount and resume running
upgrade60.sh. You can verify segment states with the Linux lvscan command.
182
StoreAll software commands
Migrating large files
The upgrade60.sh utility does not upgrade files larger than 3.8 TB. After the upgrade is complete
and the file system is mounted, migrate the file to another segment in the file system using the
following command:
ibmigrate -f filesystem -m 1 -d destination_segment file
The following example migrates file.9 from its current segment to destination segment 2:
ibmigrate -f ibfs -m 1 -d 2 /mnt/ibrix/test_dir/dir1/file.9
After the file is migrated, you can snap the file.
Enabling the file system for data retention
Data retention can also be enabled on file systems created before the 6.0 release. Additional steps
are required before and after running the ibrix_reten_adm -u -f FSNAME command. See
Upgrade a pre–6.1.1 file system for data retention features: (page 147) for the detailed steps.
Synopsis
Run the upgrade utility:
upgrade60.sh [-v -n] file system
Options
Option
Description
-n
Lists needed conversions but does not attempt them.
-v
Verbose. Specify this option multiple times for more verbosity.
-?
Shows the usage for this command.
upgrade60.sh 183
3 Commands for StoreAll Linux clients and file serving nodes
The commands in this chapter are run directly on StoreAll Linux clients and/or file serving nodes.
The commands can be executed by any user. In a typical installation, the commands are run from
the working directory /usr/local/ibrix/bin.
ibrix_df
Reports disk space utilization information for a file system. This command can be run on file serving
nodes or StoreAll clients.
Description
ibrix_df reports disk space utilization for the specified file system.
Synopsis
Report disk space utilization for a file system:
ibrix_df -f [fmname]:fsname
The file system name is always required. If this StoreAll client is registered with multiple management
consoles, the Fusion Manager name must also be entered. Specify the Fusion Manager and file
system as a colon-separated pair: fmname:fsname. For example:
ibrix_df -f FM01:ifs1 -F
Options
Option
Description
-f fsname or
fmname:fsname
Specifies either a file system name or a paired Fusion Manager name and file system name.
-?
Shows the usage for this command.
Output
The ibrix_df report includes the following fields:
Field
Definition
Name
File-system name.
CAPACITY
Number of blocks in the file system.
FREE
Number of unused blocks of storage.
AVAIL
Number of blocks available for user files.
USED PERCENT
Percentage of total storage occupied by user files.
FILES
Number of files that can be created in the file system.
FFREE
Number of unused file inodes in the file system.
184 Commands for StoreAll Linux clients and file serving nodes
ibrix_lwhost
Tunes StoreAll Linux clients. This command can be run on StoreAll clients only.
Description
Use ibrix_lwhost to set StoreAll Linux client parameters:
•
Server settings
•
Preferred network interface for communication with a file serving node
•
Communications protocol
•
Number of server threads
Changes take effect immediately and are persistent. This command also initiates a Fusion Manager
query that allows the StoreAll client to pick up new host tunings.
Use ibrix_lwhost --list to list local server settings that have been changed. The output does
not list default settings that are still in effect.
CAUTION: Changing tuning parameters will alter file system performance. Contact HP technical
support before changing any tuning parameters.
Synopsis
Tune server settings:
ibrix_lwhost --tune -p param -v value
Contact HP technical support for information about the values to use for param and value.
Prefer a network interface for communicating with a file serving node:
ibrix_lwhost --nic -h host -n server_ifname
Specify a communications protocol:
ibrix_lwhost --protocol -p {tcp|udp}
The default protocol is UDP.
Set the number of server threads:
ibrix_lwhost --threads -v value
Initiate a Fusion Manager query to allow the StoreAll client to pick up new host tunings:
ibrix_lwhost --a
For example, you could use this option if file allocation policies have been changed since the
StoreAll client started and you want the 9000 client to acquire the new settings immediately.
List StoreAll client parameters that have been changed from their defaults:
ibrix_lwhost --list
Options
Option
Description
--a
Initiates a Fusion Manager query.
-h host
Specifies the name of the file serving node to which the client will connect.
-n server_ifname
Name of a preferred network interface.
-p param
A tuning or protocol parameter.
-v value
Specifies a tuning parameter value or, in the case of threads, the number of server threads
to set.
ibrix_lwhost 185
Option
Description
--list
Lists parameter settings that have been changed from the defaults.
-?
Shows the usage for this command.
See also
ibrix_hostgroup, ibrix_host_tune
186 Commands for StoreAll Linux clients and file serving nodes
ibrix_lwmount
Mounts a file system on a StoreAll Linux client. This command can be run on StoreAll clients only.
Description
A file system must be mounted on the file serving node that owns the root segment (that is, segment
1) before it can be mounted on a StoreAll client.
If the Export Control feature is not enabled, use this command to mount a file system on a StoreAll
client. If the Export Control feature is enabled, you cannot use this command on a StoreAll client
until you have first mounted the file system using ibrix_mount. (For more information about
Export Control, see the HP StoreAll Storage File System User Guide.)
ibrix_lwmount also initiates the Fusion Manager query that the StoreAll client uses to obtain
new mountpoint and file allocation policy settings.
Synopsis
Query the Fusion Manager for new file system mount points and allocation policy settings:
ibrix_lwmount -a
Mount a file system at the specified mountpoint:
ibrix_lwmount -f [fmname:]fsname -m mountpoint [-o options]
To specify Linux mount options, include the -o options option. The file system name is always
required. A Fusion Manager name is required only if this StoreAll client is registered with multiple
management consoles. Specify the Fusion Manager and file system as a colon-separated pair:
fmname:fsname. For example:
ibrix_lwmount -f FM01:ifs1 -m /ifs1
Options
Option
Description
-a
Initiates a Fusion Manager query.
-f fsname or
fmname:fsname
Specifies a file system name or a paired Fusion Manager name and file system name. A
Fusion Manager name is required only when a StoreAll client is registered with multiple
management consoles.
-m mountpoint
A specified mountpoint.
-o options
One or more Linux mount options.
-?
Shows the usage for this command.
See also
ibrix_hostgroup, ibrix_lwumount, ibrix_mount
ibrix_lwmount
187
ibrix_lwumount
Detaches a file system from a StoreAll Linux client. This command can be run on StoreAll clients
only.
Synopsis
Detach a file system from a client:
ibrix_lwumount -f [fmname:]fsname
The file system name is always required. A Fusion Manager name is required only if this StoreAll
client is registered with multiple management consoles. Specify the Fusion Manager and file system
as a pair separated by a colon: fmname:fsname.
Detach the file system mounted at the specified mountpoint:
ibrix_lwumount -m mountpoint
Options
Option
Description
-f fsname or
fmname:fsname
A file system name, or a paired Fusion Manager name and file system name. A Fusion
Manager name is required only when the StoreAll client is registered with multiple
management consoles.
-m mountpoint
A specified mountpoint.
-?
Shows the usage for this command.
See also
ibrix_lwmount
188 Commands for StoreAll Linux clients and file serving nodes
ibrix_top
Collects and presents live views of file system, host, and segment activity. The command can be
run on either file serving nodes or StoreAll clients.
Description
ibrix_top collects performance metrics for file systems, hosts and segments; and displays the
results to the standard output in a form similar to that of the UNIX top(1) command. When the
command is first run, some fields are empty or read zero (0). These fields are populated when the
command is first refreshed.
The command collects data using snapshots. Specifying -s saves the snapshots when the session
ends. By default, ibrix_top creates a temporary directory and writes the snapshots to it. The
directory and snapshots are deleted when the ibrix_top session ends. Specifying -d and a
directory name creates the snapshots in that directory, and that directory is not deleted when the
session ends.
If using the temporary directory, the directory is saved with the snapshot files, and the directory
name is posted so the snapshots can be accessed later.
The following table shows the statistics displayed in each view. Any data reported on a per-second
basis is derived by dividing the cumulative total by the number of seconds in the collection interval.
The default interval is five seconds. It can be changed by specifying a new value with -t. The
larger the cluster, the longer it takes to collect all of the data and the longer the interval should be.
View
Statistics Displayed
Default/File system
Per file system: number of segments, percentage of blocks free, percentage of files free
(where files equals inodes), KB/sec read, KB/sec written, number of new files created/sec,
number of files deleted/sec, and number of file system errors/sec.
Default/Tasks
Indicates the four busiest StoreAll software tasks; reports on user and system threads.
Default/Network device
Per NIC: KB/sec sent, KB/sec received, bytes/packet sent, bytes/packet received.
Host
Per host: IP address, KB/sec read, KB/sec written, number of new files created/sec, number
of files deleted/sec, and number of file system errors/sec. All metrics also reported as an
aggregate over the interval.
Segment
Per local segment: volume group, logical volume, KB/sec read, KB/sec written, number of
new files created/sec, number of files deleted/sec, and number of file system errors/sec.
Help
Identifies the keys to press to change the view and to scroll within a view.
Synopsis
Collect and present live views of file system, host, and segment activity:
ibrix_top [-d DIRECTORY] [-s] [-r {host|segment|help}] [-t SEC]
Use the -d option to specify a directory for the collected data. Use the -s option to save the data
collection snapshots when the ibrix_top session ends.
To change the initial view, specify -r and a view name. If you change from the default view and
later want to go back to it, enter -r default.
To set the collection interval, specify -t and a number of seconds.
ibrix_top 189
Options
Option
Description
-d DIRECTORY
Specifies the directory where data captures are written. HP recommends that you name
this directory with an absolute path.
-r default|host
segment|help
Specifies the initial view for an ibrix_top session.
-s
Creates persistent data snapshots.
-t SEC
Sets the number of seconds in the refresh interval between data collections. The default
is 5 seconds.
-?
Shows the usage for this command.
190 Commands for StoreAll Linux clients and file serving nodes
verify_client_update
Determines whether a minor kernel update is compatible with the StoreAll client software.
Description
If you are planning to install a minor kernel update, run the verify_client_update command
first to verify that the update is compatible with the StoreAll client software.
If the minor kernel update is compatible, install the update with the vendor RPM and reboot the
system. The StoreAll client software is then automatically updated with the new kernel, and StoreAll
client services start automatically. Use the ibrix_version -l -C command to verify the kernel
version on the client.
Synopsis
Verify compatibility of a minor kernel update:
verify_client_update <kernel_update_version>
The following example is for a RHEL 4.8 client with kernel version 2.6.9-89.ELsmp:
# verify_client_update 2.6.9-89.35.1.ELsmp
Kernel update 2.6.9-89.35.1.ELsmp is compatible.
nl
The next example shows an incompatible minor kernel update:
# verify_client_update 2.6.9-78.ELsmp
Kernel update 2.6.9-78.ELsmp is not compatible. Please verify support
for this kernel with HP
nl
verify_client_update
191
4 Support and other resources
Contacting HP
For worldwide technical support information, see the HP support website:
http://www.hp.com/support
Before contacting HP, collect the following information:
•
Product model names and numbers
•
Technical support registration number (if applicable)
•
Product serial numbers
•
Error messages
•
Operating system type and revision level
•
Detailed questions
Related information
The following documents provide related information:
•
HP StoreAll Storage Release Notes
•
HP StoreAll Storage File System User Guide
•
HP StoreAll 9300/9320 System Administrator Guide
•
HP IBRIX X9720/StoreAll 9730 System Administrator Guide
•
HP StoreAll Storage Installation Guide
•
HP StoreAll Storage Network Best Practices Guide
To access these documents, go to the StoreAll Manuals page:http://www.hp.com/support/
StoreAllManuals
HP websites
For additional information, see the following HP websites:
•
http://www.hp.com
•
http://www.hp.com/go/StoreAll
•
http://www.hp.com/go/storage
•
http://www.hp.com/support/manuals
Subscription service
HP recommends that you register your product at the Subscriber's Choice for Business website:
http://www.hp.com/go/e-updates
After registering, you will receive e-mail notification of product enhancements, new driver versions,
firmware updates, and other product resources.
192 Support and other resources
5 Documentation feedback
HP is committed to providing documentation that meets your needs. To help us improve the
documentation, send any errors, suggestions, or comments to Documentation Feedback
([email protected]). Include the document title and part number, version number, or the URL
when submitting your feedback.
193
Glossary
ACE
Access control entry.
ACL
Access control list.
ADS
Active Directory Service.
ALB
Advanced load balancing.
BMC
Baseboard Management Configuration.
CIFS
Common Internet File System. The protocol used in Windows environments for shared folders.
CLI
Command-line interface. An interface comprised of various commands which are used to control
operating system responses.
CSR
Customer self repair.
DAS
Direct attach storage. A dedicated storage device that connects directly to one or more servers.
DNS
Domain Name System.
FTP
File Transfer Protocol.
GSI
Global service indicator.
HA
High availability.
HBA
Host bus adapter.
HCA
Host channel adapter.
HDD
Hard disk drive.
IAD
HP 9000 Software Administrative Daemon.
iLO
Integrated Lights-Out.
IML
Initial microcode load.
IOPS
I/Os per second.
IPMI
Intelligent Platform Management Interface.
JBOD
Just a bunch of disks.
KVM
Keyboard, video, and mouse.
LUN
Logical unit number. A LUN results from mapping a logical unit number, port ID, and LDEV ID to
a RAID group. The size of the LUN is determined by the emulation mode of the LDEV and the
number of LDEVs associated with the LUN.
MTU
Maximum Transmission Unit.
NAS
Network attached storage.
NFS
Network file system. The protocol used in most UNIX environments to share folders or mounts.
NIC
Network interface card. A device that handles communication between a device and other devices
on a network.
NTP
Network Time Protocol. A protocol that enables the storage system’s time and date to be obtained
from a network-attached server, keeping multiple hosts and storage devices synchronized.
OA
Onboard Administrator.
OFED
OpenFabrics Enterprise Distribution.
OSD
On-screen display.
OU
Active Directory Organizational Units.
RO
Read-only access.
RPC
Remote Procedure Call.
RW
Read-write access.
SAN
Storage area network. A network of storage devices available to one or more servers.
SAS
Serial Attached SCSI.
194
Glossary
SELinux
Security-Enhanced Linux.
SFU
Microsoft Services for UNIX.
SID
Secondary controller identifier number.
SMB
Server Message Block. The protocol used in Windows environments for shared folders.
SNMP
Simple Network Management Protocol.
TCP/IP
Transmission Control Protocol/Internet Protocol.
UDP
User Datagram Protocol.
UID
Unit identification.
VACM
SNMP View Access Control Model.
VC
HP Virtual Connect.
VIF
Virtual interface.
WINS
Windows Internet Name Service.
WWN
World Wide Name. A unique identifier assigned to a Fibre Channel device.
WWNN
World wide node name. A globally unique 64-bit identifier assigned to each Fibre Channel node
process.
WWPN
World wide port name. A unique 64-bit address used in a FC storage network to identify each
device in a FC network.
195
Index
A
Active Directory
configure for SMB, FTP, or HTTP, 15
configure on Windows StoreAll clients, 7
LDAP ID mapping as secondary lookup source, 112
add-on scripts
ibrix_collect, 40
agile Fusion Manager, 65
allocation policy, 80
Antivirus support
configure, 18
enable or disable, 18
getfattr, 20
quarantine, 20
scans, start, stop, or view, 22
schedule updates of definitions, 17
statistics, 17
audit reports, 12
authentication
Active Directory, 15
LDAP , 110
LDAP ID mapping, 112
Local Users and Groups, 15
automated snapshots, hardware, 178
C
case-insensitive file names, 23
certificates, SSL, 24
chassis, X9720 or 9730, 26
CLI
command syntax, 6
working directory, 6
cluster
configure event notifications, 59
event messages, 59
manage tasks, 167
set configuration parameters, 36
view configuration, 36
cluster virtual interface, 65
command syntax, 6
contacting HP, 192
D
data retention
audit reports, 12
export custom metadata, 180
generate reports, 144
import metadata, 181
manage files, 146
validation, 52
data tiering
manage, 120, 169
tiering rules, 121
directory tree quotas, 79
disk space utilization, 184
196
Index
document
related documentation, 192
documentation
providing feedback on, 193
E
email event notification, 59
evacuate, files to other segments, 58
events, configure notifications, 59
Express Query
export metadata, 180
import metadata, 181
F
file allocation, 80
file compatible mode shares, 105
file serving nodes
health checks, 94
high availability, 90
manage, 149
physical devices, discover, 140
power sources, 102
statistics, 165
tuning parameters, 97
version numbers, 171
file systems
activity snapshots, 189
add or delete SMB shares, 27
analyze with ibrix_fsck, 84
audit settings, 75
automated hardware snapshots, 178
control access for StoreAll clients, 63
create, 71
data tiering, 120, 169
delete, 75
disk space utilization, 184
enable or disable Export Control, 76
enable or disable quotas, 75
export replication target, 48
export via NFS, 63
extend, 73
file allocation, 80
identify standby node, 76
manage, 71
manage quotas, 55
metadata store settings, 75
migrate segments, 75
mount, 124
mount on StoreAll clients, 187
mount points, 126
rebalance files, 142
resynchronize configuration on hosts, 54
unexport replication target, 48
unmount, 170
unmount on StoreAll clients, 188
upgrade for snapshots, 182
upgrade to allow autocommit, 146
view information, 73
FTP service
configuration profile, 86
manage authentication, 15
shares, 88
SSL certificates, 24
Fusion Manager
tuning parameters, 67
H
hardware
registered chassis and server information, 26
HBAs
manage, 92
port monitoring, 92
health check sets, 96
health checks, 94
help
obtaining, 192
high availability, configure, 90
host groups, manage, 100
hosts, activity snapshots, 189
HP
technical support, 192
HP websites, 192
HTTP service
configuration profile, 103
manage authentication, 15
shares, 105
SSL certificates, 24
virtual host, 108
I
Ibrix Collect
add-on scripts, 40
Ibrix_collect, 39
K
kernel profiling, 139
L
LDAP authentication, 110
LDAP ID mapping, 112
license file, display, 114
Linux StoreAll client
minor kernel updates, 191
Local Groups, authentication, 115
Local User authentication
configure, 15
local groups, 115
local users, 116
logical volumes, manage, 118
M
management console
control, 65
set mode, 65
media changer devices for NDMP backups, 166
migration, files, 120
mount points, create or delete, 126
mounting file systems, 124
N
NDMP backups
parameters, set, 128
sessions, 129
tape and media changer devices, 166
network interfaces, configure, 130
NFS
case insensitivity for filenames, 23
export file systems, 63
O
object mode shares, 105
P
permissions, SMB, 32
Phone Home, configure, 135
physical volumes, discover or delete, 140
power sources, 102
manage in configuration database, 137
Q
quotas
directory tree, 79
manage, 55
rescan quota usage, 133
R
rebalancing, files, 142
related documentation, 192
remote cluster
register for remote replication, 35
remote replication
export target file system, 48
health reports, 49
manage host and NIC designations, 50
monitor activity, 44
register a remote cluster, 35
start or stop, 44
unexport target file system, 48
reports
data retention, 144
REST API enabled vhost, 108
REST API shares, 105
retention, data
audit reports, 12
export custom metadata, 180
import metadata, 181
manage retained and WORM files, 146
reports, 144
validation scan, 52
S
scripting
ibrix_collect, 40
segments
197
activity snapshots, 189
evacuate data to other segments, 58
preferred, 80
rebalance files, 142
servers, manage, 149
shell tasks, 152
SMB
add or delete shares, 27
global settings, 29
manage authentication, 15
monitor services, 31
user and group permissions, 32
SMB signing, SMB, 29
snapshots, hardware
allocation policy, 176
automated, 178
configure, 176
create or delete, 176
snapshots, software
create or delete, 153
enable snap tree, 153
reclaim file system space, 155
upgrade file systems, 182
SNMP
agent, 156
groups, 158
MIB view, 164
SNMPv3 users, 162
trapsinks, 160
SNMP event notification, 59
SSL certificates, 24
Static user mapping , SMB, 29
statistics, file serving nodes, 165
storage resources
evacuate files, 58
manage, 174
StoreAll clients
configure Active Directory, 7
delete, 33
display information, 33
health checks, 94
host groups, 100
prefer or unprefer user interface, 33
tuning parameters, 97
view information, 33
StoreAll clients, Linux
mount file system, 187
register, 33
register on Fusion Manager, 33
tune, 185
unmount file system, 188
StoreAll Linux client
register, 33
StoreAll software, version numbers, 171
Subscriber's Choice, HP, 192
system data
collect for diagnosis, 39
198 Index
T
tape devices for NDMP backups, 166
tasks, manage, 167
technical support
HP, 192
tuning parameters
file serving nodes, 97
management console, 67
StoreAll clients, 97
U
user network interface, prefer or unprefer, 33
V
validation, scan, 52
virtual host, 108
volume groups, manage, 172
W
websites
HP Subscriber's Choice for Business, 192