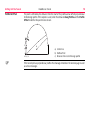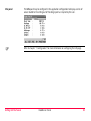
1
Leica TPS1200
RoadRunner Tunnel
Technical Reference Manual
Version 3.1
English
Introduction
RoadRunner Tunnel
2
Introduction
Purchase
Congratulations on the purchase of a RoadRunner Tunnel application.
)
To use the product in a permitted manner, please refer to the detailed safety directions in
the User Manual.
Product identification
Symbols
The type and serial number of your product are indicated on the type plate. Enter the type
and serial number in your manual and always refer to this information when you need to
contact your agency or Leica Geosystems authorized service workshop.
Type:
_________________________
Serial No.:
_________________________
The symbols used in this manual have the following meanings:
Type
)
Trademarks
•
•
•
All
Description
Important paragraphs which must be adhered to in practice as they enable
the product to be used in a technically correct and efficient manner.
Windows and Windows CE are a registered trademark of Microsoft Corporation
CompactFlash and CF are trademarks of SanDisk Corporation
Bluetooth is a registered trademark of Bluetooth SIG, Inc
other trademarks are the property of their respective owners.
Table of Contents
In this manual
Chapter
1
Introduction
1.1
1.2
1.3
1.4
2
Table of Contents
6
Overview
Basic Terms
Elements for Tunnel Stake Out and Check Measurements
1.3.1
Tunnel Face
1.3.2
Tunnel Profiles
Shifts
1.4.1
Centre Line Shifts
1.4.2
Design Profile Shifts
6
8
11
11
13
17
18
20
Getting Started
22
2.1
22
23
24
27
28
29
30
32
2.2
3
Page
Preparing Design Data
2.1.1
Tunnel Centreline
2.1.2
Design Profiles
2.1.3
Data transfer to sensor
Using the On-Board Application
2.2.1
Selecting the Application
2.2.2
RoadRunner Begin
2.2.3
RoadRunner Setup
Checking and Measuring the Tunnel
34
3.1
3.2
34
35
35
37
Overview
Checking Profiles
3.2.1
Working in Standard mode
3.2.2
Working in Advanced mode
RoadRunner Tunnel
3
Table of Contents
RoadRunner Tunnel
3.3
4
Checking the Profile
Profiles
Working in Standard mode
Working in Advanced mode
Defining Profiles to Scan
Scan Limits
Defining Discrete Points to Measure
Making a Scan
38
42
42
44
45
48
52
53
Setting Out the Tunnel
58
4.1
4.2
58
59
63
65
66
72
73
75
76
4.3
5
3.2.3
Scanning
3.3.1
3.3.2
3.3.3
3.3.4
3.3.5
3.3.6
4
Overview
Setting Out the Tunnel Face
4.2.1
Working in Standard mode
4.2.2
Working in Advanced mode
4.2.3
Setting Out the Point
Setting Out a Tunnel Profile
4.3.1
Working in Standard mode
4.3.2
Working in Advanced mode
4.3.3
Setting Out the Point
Project and Job Management
84
5.1
5.2
84
87
87
88
89
90
92
94
5.3
5.4
5.5
Overview
Selecting a Project
5.2.1
Overview
5.2.2
Browse for Existing Project
5.2.3
Resuming the Last Task
Creating a New Project
Deleting a Project
Editing a Project
6
Tunnel Job
6.1
6.2
6.3
6.4
7
96
Overview
Design Data
6.2.1
Horizontal and Vertical Alignments
6.2.2
Design Profiles
6.2.3
Layers
Tasks
6.3.1
Creating a New Task
6.3.2
Working with Shifts
Viewing and Editing the Design Data
6.4.1
Overview
6.4.2
Viewing the Design Data
6.4.3
Editing the Design Data
Configuration
116
7.1
7.2
7.3
7.4
7.5
116
118
123
125
127
130
134
7.6
Overview
Tunnel Configuration General Page
Tunnel Configuration Check Page
Tunnel Configuration Scan Page
Tunnel Configuration Info and Plot Page
7.5.1
Defining the Info Page Display
Tunnel Configuration Logfile Page
Index
Table of Contents
96
97
97
98
99
100
101
104
107
107
109
114
136
RoadRunner Tunnel
5
Introduction
RoadRunner Tunnel
6
1
Introduction
1.1
Overview
Description
The RoadRunner Tunnel application is an "add-on" component to the System 1200 RoadRunner application. The tunnel application allows the user to perform tunnel specific survey
tasks.
Functionality
The application consists of two main functions:
• Check Tunnel for checking a built or excavated tunnel with a tunnel design;
• Stake Tunnel for setting out tunnel features during construction.
Check Tunnel
Each function consists of two main tasks, in the case of Check Tunnel, these tasks are:
• Check Profile for measuring any point in the tunnel and comparing the measured point
with the theoretical design point.
• Scan Profile for measuring profiles of the tunnel.
Stake Tunnel
The Stake Tunnel function consists of:
• Stake Face, a task that allows setting out at the point of excavation.
• Stake Profile for setting out any point of the tunnel at a given chainage.
LandXML data format
The centre line of the tunnel may be imported for use on-board the sensor using the
industry standard LandXML data format or in formats exported from a number of other
tunnel design packages using the Design to Field component of the Leica Geo Office application.
Refer to chapter "2.1.1 Tunnel Centreline" for more information regarding the import of
centre line data.
Tunnel design profiles
Tunnel design profiles may be created using the tunnel profile editor PC application. This
application is integrated into the Design to Field component.
Keys
Introduction
The ALL (F1), DIST (F2), REC (F3), <PAGE (F5) and PAGE> (F6) keys have the same functionality as throughout the rest of System 1200.
RoadRunner Tunnel
7
Introduction
8
RoadRunner Tunnel
1.2
Basic Terms
Basics introduced
In order to make the following chapters on staking and checking tunnels easier to understand, the basics are introduced in this chapter.
Please be aware that the terminology or workflow used on different construction sites may
vary from the one used in this manual, however, basic principles remain the same.
Technical terms
e
g
f
h
a
d
b
c
RRT12_001
a)
b)
c)
d)
e)
f)
g)
h)
Centre line
Centre line offset
Point on design profile
Centre line height offset
Design profile
Excavated profile
Underbreak
Overbreak
3D View
RRT12_002
a
b
a) Centre line or axis
b) Tunnel portal
c) Tunnel face
c
Superelevation
a
c
d
b
RRT12_003
)
Introduction
e
a)
b)
c)
d)
e)
Centre line or axis
Rotation point
Centre line offset
Centre line height offset
Superelevation (Rotation)
Refer to Chapter 3, RoadRunner Technical Reference manual for additional terms.
RoadRunner Tunnel
9
Introduction
Technical Terms
RoadRunner Tunnel
10
Technical Term
Description
Centre line
Geometric alignment in two or three dimensions to which all
design elements of the project are referenced.
Chainage or station
The cumulative distance along the centre line, frequently but
not always starting at zero.
Design Profile
Geometric description of the designed shape of the crosssection of the tunnel. The design profile may contain straight
or curve elements.
Excavated Profile
Shape of the cross-section of the tunnel that has been excavated.
Underbreak
When the excavated profile is inside the design profile, the
underbreak is the perpendicular distance between the design
profile and the excavated profile.
Overbreak
When the excavated profile is outside of the design profile, the
overbreak is the perpendicular distance between the design
profile and the excavated profile.
Tunnel Portal
The open end of a tunnel.
Tunnel Face
The point where the excavated tunnel meets existing terrain.
Superelevation (Rotation)
Angle of rotation of a design profile, used to take into account
the velocity of a moving vehicle through a curve.
Rotation Point
The point about which the design profile is rotated. This point
may or may not coincide with the centre line.
1.3
Elements for Tunnel Stake Out and Check Measurements
Basic stake out and
check elements
In general there are two different basic stake out and check elements within a tunnel:
• Tunnel Face
• Tunnel Profile
1.3.1
Tunnel Face
Staking Tunnel Faces
It is usually required to stake out the tunnel face to indicate the postion to excavate when
certain tunnelling methods are used (e.g. Drill and Blast or excavation using a roadheader).
The points to stake on the tunnel face may be defined in various ways:
Horizontal and vertical
offsets
By horizontal and vertical offsets with respect to the centre line:
a
d
RRT12_004
Introduction
b
c
RoadRunner Tunnel
a)
b)
c)
d)
Centre line
Point on tunnel face to stake
Centre line offset
Centre line height offset
11
Introduction
Distance along profile
12
RoadRunner Tunnel
By the distance from the start of the design profile and an offset from the design profile.
e b
d
a
c
RRT12_005
Distance along a particular element
a)
b)
c)
d)
e)
Centre line
Point on tunnel face to stake
Point defining start of design profile
Distance from start of design profile
Offset perpendicular to design profile
By the distance along a particular element of the design profile and an offset from the
element.
b
d e
c
RRT12_006
a
a)
b)
c)
d)
e)
Centre line
Point on tunnel face to stake
Element of design profile to stake
Distance from start of design profile element
Offset perpendicular to design profile
1.3.2
Tunnel Profiles
Staking tunnel profiles
Tunnel Profiles are normally staked after excavation to indicate the position of tunnel design
elements or services such as lighting or ventilation.
Basic terms
Usually a tunnel under construction is designed and built in various stages such that a given
chainage can have various design profiles (e.g. shotcrete, final lining... ). Each design profile
is called a layer.
b
c
a
a) Centre line or axis
b) Final lining
c) Shotcrete
RRT12_007
Working arears
Introduction
A tunnel profile is defined by its chainage and the design profile assigned to that chainage.
Points to stake on any layer of the design profile may be defined using the same methods
as those used to stake the tunnel face.
When staking out in a tunnel, it is normally the case that the excavated profile does not coincide exactly with the design profile. In these cases, the irregular form of the excavated
profile may mean that it is not possible to stake a particular point at a particular chainage
from a given instrument position (e.g. in a tight curve).
RoadRunner Tunnel
13
Introduction
14
RoadRunner Tunnel
For this reason, a tight tolerance may be used to determine whether a staked point be
accepted or not, the stake out process will stop once a measured point is within the tight
tolerance limits.
In extreme cases where the instrument positions itself very far away from the point to stake,
it may not be worth trying to stake the point. In this case a bailout tolerance may be introduced. If a measured point is outside of the bailout tolerance during the stake out iteration
process, the stake out of the point is abandoned.
The bailout tolerance may also be exceeded if an obstruction such as plant machinery is situated between the measurement sensor and the point being measured.
Plan view
e
d
a
b
RRT12_008
c
a)
b)
c)
d)
e)
Centre line
Profile to stake
Tunnel face
Tight tolerance
Bailout tolerance
Measuring tunnel
profiles
Tunnel Profiles are normally measured after excavation to compare the excavated profile
with the design profile during the excavation phase of the project or for quality control
checks of the built tunnel.
When measuring tunnel profiles, it is possible to scan various profile from one instrument
position. The profiles to scan are defined with respect to a defined chainage. Profiles may
be scanned at a given forward and back interval within a given forward and back distance
from the defined profile.
Plan view
d
h
i
e
a
b
RRT12_009
Introduction
f
c
g
RoadRunner Tunnel
a)
b)
c)
d)
e)
f)
g)
h)
i)
Centre line
Instrument position
Tunnel face
Defined profile to scan
Instrument profile
Back distance
Forward distance
Back interval
Forward interval
15
Introduction
16
RoadRunner Tunnel
Profile view
Tunnel profiles may be measured vertically, horizontally or perpendicular to the tunnel
centre line.
c
d
e
b
a
RRT12_010
a)
b)
c)
d)
Centre line
Tunnel face
Horizontal profile
Profile perpendicular to centre
line
e) Vertical profile
1.4
Shifts
General
When working on site, it is often the case that design data does not match the measured
data. For example, an existing road surface that should intersect with the design surface
may be 15 cm higher than the plans indicate. To guarantee a smooth intersection, this
difference has to be distributed over the remaining 100 m of paving. To handle these situations, Road-Runner allows the possibility of adding shifts to the existing design data. A
shift is applied when selecting the element to stake out/check.
)
Introduction
Shifts do not change the stored design. They are applied temporarily for stake out purposes.
RoadRunner Tunnel
17
Introduction
18
RoadRunner Tunnel
1.4.1
Centre Line Shifts
Horizontal and vertical
shifts
Horizontal shifts are always perpendicular to the centre line whereas vertical shifts are
applied along the plumb line.
a
b
a) Horizontal alignment with
constant shift (Plan View)
b) Vertical alignment with
constant shift (Profile View)
RR12_013
Constant and linear
shifts are supported
For both horizontal and vertical shifts two different types are available (can be applied):
Constant:
The shift remain the same from its start chainage or station to the end
chainage or station.
Linear:
The shift is linearly interpolated along the chainage or station.
a
RRT12_025
b
a) Constant shift
b) Linear shift
Sign convention
The sign convention for design shifts is identical to that used for centre line offset and
height shifts difference.
d (-)
a
b (+)
c (+)
e (-)
RRT12_011
Introduction
RoadRunner Tunnel
a)
b)
c)
d)
e)
Centre line
Positive horizontal shift
Positive vertical shift
Negative horizontal shift
Negative vertical shift
19
Introduction
20
RoadRunner Tunnel
1.4.2
Design Profile Shifts
Profile shift
A shift may be applied to the design profile. The shift is applied perpendicularly to the design
profile at any point along the design profile.
A positive shift will increase the size of the profile, a negative shift will decrease the size of
the profile.
a (-)
b c (+)
d (-)
RRT12_012
e (+)
a)
b)
c)
d)
e)
Design profile with negative shift
Original design profile
Design profile with positive shift
Negative shift
Positive shift
Introduction
RoadRunner Tunnel
21
Getting Started
RoadRunner Tunnel
22
2
Getting Started
2.1
Preparing Design Data
Downloads section
The tunnel design data may be imported for use on-board the sensor using the industry
standard LandXML data format or in formats exported from a number of other design packages using the Design to Field component of the Leica Geo Office PC application. Converters
are available for more than 15 different design packages.
)
The latest version of the Design to Field importers may be found in the Downloads section
of the Leica Geosystems web site at
http://www.leica-geosystems.com/s-e/en/downloads/lgs_page_catalog.htm?cid=4948
2.1.1
Tunnel Centreline
Basics
The tunnel centre line may be defined in two or three dimensions. A 3-dimensional centre
line is required if design profiles are to be used.
Design to field
To import a centre line using the Design to Field
component select the Tools/Design to Field option
of the Leica Geo Office PC application.
)
Getting Started
For general information about Design to Field please refer to the Leica Geo Office Manual
or Online Help.
RoadRunner Tunnel
23
Getting Started
RoadRunner Tunnel
24
2.1.2
Design Profiles
Tunnel design profiles
If tunnel design profiles are available, they may be created using the Tunnel Profile Editor PC
application. This application is integrated in the Design to Field viewer. It allows to import or
create tunnel data like profiles, layers and rotations. Refer to the Tunnel Profile Editor online
help for more information.
Tunnel Profile Editor,
Profile details view
Getting Started
RoadRunner Tunnel
25
Getting Started
Tunnel Profile Editor,
Layer details view
RoadRunner Tunnel
26
2.1.3
Data transfer to sensor
Getting data onboard
Once the design data have been converted, copy the database files to the DBX folder of the
CompactFlash card that will be used on the sensor. The file names are "jobname.x??".
These files are:
Fixpoint job
Meas job
Tunnel job
Getting Started
RoadRunner Tunnel
27
Getting Started
RoadRunner Tunnel
28
2.2
Using the On-Board Application
Installation and
licencing
The RoadRunner Tunnel application is an "add-on" component of the RoadRunner TPS1200
program. It is necessary that both the RoadRunner and RoadRunner Tunnel applications are
loaded on the sensor before starting.
Both the RoadRunner and RoadRunner Tunnel applications are protected. They may be activated through a specific licence key. This licence key may be typed-in either through the
Main Menu: Tools...\Licence Keys or, alternatively, the first time the application program is
started.
2.2.1
Selecting the Application
Starting RoadRunner
Tunnel
1. Select Main Menu: Programs....
OR
Press PROG.
2. TPS1200 Programs
Select RoadRunner in the menu.
3. CONT (F1) to access RoadRunner Begin panel.
Getting Started
RoadRunner Tunnel
29
Getting Started
RoadRunner Tunnel
2.2.2
RoadRunner Begin
Positioning the TPS
This screen shows the following:
To select the coordinate system, codelist, configuration set and reflector for the survey.
30
CONT (F1)
To continue to the next screen.
CONF (F2)
To access the configuration settings.
Refer to "7 Configuration".
SETUP (F3)
To set up an instrument station by determining the
station coordinates and orienting the horizontal
circle.
RESUM (F4)
To resume the last used and stored task. This is a
recommended feature when using Advanced mode.
CSYS (F6)
To change the current coordinate system.
Field
Description of Field
Coord System
Output. The active coordinate system. Use CSYS (F6) to change the
coordinate system.
Tunnel jobs are defined in local grid coordinates. The right coordinate
system must be chosen for the tunnel job.
Codelist
Choicelist. The active codelist. All codelists from Main Menu:
Manage...\Codelists can be selected.
Config Set
Choicelist. The active configuration set. All configuration sets from Main
Menu: Manage...\Configuration Sets can be selected.
Getting Started
Field
Description of Field
Reflector
Choicelist. The reflector currently set in the selected configuration set.
All reflectors from ’Main Menu: Manage...\Reflectors’ may be selected.
Add. Constant
Output. The additive constant stored with the chosen reflector.
RoadRunner Tunnel
31
Getting Started
RoadRunner Tunnel
2.2.3
RoadRunner Setup
RoadRunner Setup
This screen shows the following:
An overview of the setup information selected for the survey.
32
CONT (F1)
To continue to the next screen.
CONF (F2)
To access the configuration settings.
Refer to "7 Configuration".
PROJ (F4)
To edit the currently selected project.
Refer to "5 Project and Job Management".
DATA (F5)
To view/edit the data in the tunnel job.
Refer to "6.4 Viewing and Editing the Design Data".
Field
Description of Field
Application
To select the relevant program. This field lists all of
the programs that have been loaded into the RoadRunner group. Ensure that RR Tunnel is selected.
Stake/Check
To select either Stake or Check for the survey.
Getting Started
Field
Description of Field
Method
To select the relevant method for the survey. All
stake/check methods are listed.
Mode
To select either Standard mode or Advanced mode.
Project
To select the relevant project for the survey.
Fixpoint Job
The fixpoint job, as defined by the project.
Meas Job
The measure job, as defined by the project.
Tunnel Job
The tunnel job, as defined by the project.
DTM (Digital Terrain Model) Job
The DTM job, as defined by the project.
RoadRunner Tunnel
33
Checking and Measuring the Tunnel
RoadRunner Tunnel
34
3
Checking and Measuring the Tunnel
3.1
Overview
Check and measure
The Check Profile and Scan Profile options can be accessed from the RoadRunner Tunnel
Setup panel, when Stake/Check=Check.
The Check Profile option allows any point, anywhere in the tunnel to be checked against
the design values. If no design profile has been defined in the Tunnel Job, the measured
point is analysed with respect to the horizontal and vertical alignment.
The Scan Profile option allows profiles of the tunnel, perpendicular to the centre line to be
measured. Various profiles may be measured from one instrument position.
3.2
Checking Profiles
3.2.1
Working in Standard mode
Standard mode
1.
Selecting Mode=Standard.
For standard mode and using the Define Page,
ensure that Mode=Standard is set.
Press ’CONT (F1)’ to continue to the next screen.
1.
Working with the Define Page.
Layers contained in the active tunnel job can be
selected from this page. These elements, combined
with other settings on the page can easily be
changed during the survey.
CONT (F1)
To continue to the next screen.
SHIFT CONF (F2)
To access the configuration settings.
Refer to "7 Configuration".
Press ’CONT (F1)’ to continue to the next screen.
Field
Description of Field
Layer
Choicelist. To select a layer in the active tunnel job.
Checking and Measuring the Tunnel
RoadRunner Tunnel
35
Checking and Measuring the Tunnel
36
RoadRunner Tunnel
Field
Description of Field
Centre line
Output. The name of the layer centre line.
Shift X-Sec
User Input. The tunnel profile can be shifted horizontally to define another tunnel with a constant
offset from the Centre line. The shape and the size
of the tunnel profile will not be changed.
3.2.2
Working in Advanced mode
Advanced mode
1.
Selecting Mode=Advanced.
For advanced mode and using Tasks, ensure that
Mode=Advanced is set.
Press ’CONT (F1)’ to continue to the next screen.
2.
Working with Task management.
In order to check a profile, a task needs to be
created to define the shifts to be used during the
check.
CONT (F1)
Selects the highlighted task and proceeds to the
next screen.
NEW (F2)
Starts the task wizard.
TEMP (F3)
Creates a temporary task.
)
)
More information on shifts can be found in chapter "1.4 Shifts".
More information on creating tasks can be found in chapter "6.3 Tasks".
Checking and Measuring the Tunnel
RoadRunner Tunnel
37
Checking and Measuring the Tunnel
RoadRunner Tunnel
38
3.2.3
Checking the Profile
Settings
The Check Profile dialogue allows any point of the tunnel to be checked against the design
values. If no design profile has been defined in the Tunnel Job, the measured point is
analysed with respect to the horizontal and vertical alignment.
Enter Information regarding the measured point in the General panel of the Check Profile
dialogue.
Point ID
The measured point will be recorded with the point ID displayed on the screen.
Reflector Ht
If a reflector is used, the vertical difference between the point to be measured and the
point of the reflector pole should be entered.
Check Offset
Applies a horizontal shift perpendicular to the centre line used for comparing to the
measured point.
Check Ht Diff
Applies a vertical shift to the centre line used for comparing to the measured point.
)
Results
The ALL (F1), DIST (F2), REC (F3), <PAGE (F5) and PAGE> (F6) keys have the same functionality as throughout the rest of System 1200.
The differences between the measured and design data may be viewed in the Info panel of
the Check Profile dialogue.
The parameters viewed in the Info panel may be configured by the user in the Info&Plot
page of the application configuration.
The configuration may be accessed using the CONF (SHIFT-(F2)) key. Refer to chapter "7
Configuration" for more details regarding the application configuration.
Checking and Measuring the Tunnel
RoadRunner Tunnel
39
Checking and Measuring the Tunnel
RoadRunner Tunnel
40
In this screen the most important values for checking the measured point against the design
are:
CL Offset
The plan distance from the measured point to the horizontal alignment.
CL Ht Diff
The vertical distance between the vertical alignment and the measured point.
Prof.Offset
The perpendicular distance between the measured point and the design profile. A measured point that is located inside of the design profile will always have a negative profile
offset.
Radial offset
When using a reflector to check a design profile it is important to take into account the
reflector radius parameter in the General page of the application configuration.
If this parameter is set to Yes, the measured point will be projected by a distance equivalent
to the radius of the reflector in a direction perpendicular to the tangent of the design
profile. If this parameter is set to No, the design profile will be compared to the coordinates
of the centre of the reflector at the measured position.
If reflectorless measurements are used or no design profile is has been defined, the reflector
radius parameter will not be used in the calculation.
The Plot panel of the Check Profile dialogue displays a plot of the measured point with
respect to the design profile.
a
d
b
>4m
~2m
c
RRT12_013
Checking and Measuring the Tunnel
RoadRunner Tunnel
a)
b)
c)
d)
Tangent to design profile
Reflector radius
Reflector
Design profile
41
Checking and Measuring the Tunnel
3.3
Scanning Profiles
3.3.1
Working in Standard mode
Standard mode
42
RoadRunner Tunnel
1.
Selecting Mode=Standard.
For standard mode and using the Define Page,
ensure that Mode=Standard is set.
Press ’CONT (F1)’ to continue to the next screen.
2.
Working with the Define Page.
Layers contained in the active tunnel job can be
selected from this page. These elements, combined
with other settings on the page can easily be
changed during the survey.
CONT (F1)
To continue to the next screen.
SHIFT CONF (F2)
To access the configuration settings.
Refer to "7 Configuration".
Press ’CONT (F1)’ to continue to the next screen.
Field
Description of Field
Layer
Choicelist. To select a layer in the active tunnel job.
Field
Description of Field
Centre line
Output. The name of the layer centre line.
Shift X-Sec
User Input. The tunnel profile can be shifted horizontally to define another tunnel with a constant
offset from the Centre line. The shape and the size
of the tunnel profile will not be changed.
Checking and Measuring the Tunnel
RoadRunner Tunnel
43
Checking and Measuring the Tunnel
3.3.2
Advanced mode
RoadRunner Tunnel
44
Working in Advanced mode
1.
Selecting Mode=Advanced.
For advanced mode and using Tasks, ensure that
Mode=Advanced is set.
Press ’CONT (F1)’ to continue to the next screen.
2.
Working with Task management.
In order to scan profiles, a task must be created and
the instrument must be stationed and oriented.
Once the task has been selected and the instrument
stationed, the parameters for the scan have to be
entered.
CONT (F1)
Selects the highlighted task and proceeds to the
next screen.
NEW (F2)
Starts the task wizard.
TEMP (F3)
Creates a temporary task.
)
)
More information on shifts can be found in chapter "1.4 Shifts".
More information on creating tasks can be found in chapter "6.3 Tasks".
3.3.3
Defining Profiles to Scan
Profile settings
When measuring tunnel profiles, it is possible to scan various profiles from one instrument
position. Note that the instrument will always measure the profile in the chainage where the
instrument is stationed before measuring additional profiles.
If it is required to measure more than one profile from an instrument position, the profiles
to scan are defined with respect to a defined chainage. This defined chainage, Profile
Chain, may or may not coincide with the chainage at which the instrument is stationed.
Profiles may be scanned at a given forward (Fwd Interval) and back interval (Back Interval)
within a given forward (Fwd Distance) and back distance (Back Distance) from the defined
profile.
Checking and Measuring the Tunnel
RoadRunner Tunnel
45
Checking and Measuring the Tunnel
46
RoadRunner Tunnel
Planview
A graphical representation of the parameters may be seen below.
d
h
i
e
a
b
RRT12_009
f
c
g
a)
b)
c)
d)
e)
f)
g)
h)
i)
Centre line
Instrument position
Tunnel face
Defined profile to scan
Instrument profile
Back distance
Forward distance
Back interval
Forward interval
Defining the Interval
The limits for the profile measurements, forward distance and back distance, may be
entered manually in the General panel of the Scan Profile dialogue or may be measured
using the GET B and GET F keys:
GET B (F2)
Measures a distance from the instrument position and calculates the difference in
chainage between the measured point and the chainage of the instrument position. The
calculated difference is then set as the Back Distance.
GET F (F3)
Measures a distance from the instrument position and calculates the difference in
chainage between the measured point and the chainage of the instrument position. The
calculated difference is then set as the Forward Distance.
Note that the measured point for a back distance must always be at a chainage less than
the chainage of the instrument poition. The measured point for a forward distance must
always be at a chainage greater than the chainage of the instrument poition. If these conditions are not met, an error message will be displayed and it will be necessary to redefine the
distance.
Checking and Measuring the Tunnel
RoadRunner Tunnel
47
Checking and Measuring the Tunnel
RoadRunner Tunnel
48
3.3.4
Scan Limits
Inclusive and exclusive
sections
Once the chainages of the profiles to scan have been defined, and before starting the measurement, it is necessary to define the limits of the scan.
The scan limits are used to define the angular limits to be scanned in a plane perpendicular
to the centreline. These limits normally define the starting point and end point of the profile
to scan as well as any zone that should not be measured.
The scan limits can be defined using the LIMIT (SHIFT-(F5)) key in the Scan Profile
dialogue.
Limits are defined with respect to the instrument axis. In the following example a limit is
defined that includes the entire area to be scanned (Limit 1) and an overlapping area
(Limit 2) that should not be scanned because a ventilation shaft is obstructing a clear view
of the tunnel surface.
Any number of limits may be defined. In addition each limit needs to be defined as an include
limit (ie. measure within the defined zone) or an exclude limit (ie. do not measure within the
defined zone. If overlapping zones are defined, an exclude limit has priority over an include
limit.
c
d
b
a
RRT12_014
)
a)
b)
c)
d)
Instrument axis
Ventilation shaft
Include limit
Exclude limit
New limits can be defined by pressing the NEW (F2) button in the Angular Limits dialogue.
Checking and Measuring the Tunnel
RoadRunner Tunnel
49
Checking and Measuring the Tunnel
RoadRunner Tunnel
50
To define a limit
1. Enter the Limit Name and place the cursor on the Angle Start line.
2. Turn the instrument to point at the starting angle of the limit.
3. Press the DIST (F2) key to measure the distance.
4. Move the cursor to the Angle End line.
5. Turn the instrument to point at the end angle of the limit.
6. Press the DIST (F2) key to measure the distance.
7. Decide on whether the limit is an include limit within which points should be measured
(Meas.Status = Yes) or an exclude limit which should not be measured (Meas.Status
= No)
8. If the measurement status is set to Yes, enter the approximate distance between points
to be measured on the line Increment.
)
Store a limit
The position of the limit can be reviewed once it has been defined by placing the cursor on
the Angle Start or Angle End line and pressing the POSIT (F4) key. The instrument will turn
to the corresponding angle.
Once the limit has been defined, it can be stored using the CONT (F1) key. The application
will then return to the Angular Limits dialogue.
Once the limits have been defined they may be edited
from the Angular Limits dialogue by pressing the
EDIT (F3) key or deleted by pressing the DEL (F4)
key.
To return to the Scan Profile dialogue after defining
the angular limits, press the CONT (F1) key.
Checking and Measuring the Tunnel
RoadRunner Tunnel
51
Checking and Measuring the Tunnel
52
RoadRunner Tunnel
3.3.5
Defining Discrete Points to Measure
Measure additional
points
In addition to defining the chainage and the angular limits of the profiles to scan, it is also
possible to define discrete points in the profile that should be measured at each chainage.
These points could represent a breakpoint in the section, for example, or a point that is
required for positioning services such as electricity cables.
To define a manual point:
1. Press the MANU (F4) button in the Scan
Profile dialogue.
2. Aim at the point to measure.
3. Use the ALL (F1), DIST (F2) and REC (F3) keys
to measure the point in the usual manner.
4. Repeat the process for all of the manual points
that are required to be added to the profile.
3.3.6
Making a Scan
Starting the scan
Once all manual points have been defined, the scanning of the profiles may commence by
pressing the AUTO (F4). If no manual points are required, scanning of the profiles may be
started by pressing the START (F1) key.
Once scanning has started, the values of the measured point may be viewed in the Info panel of
the Scan Profile dialogue. The values shown in this panel may be configured in the application
configuration. Refer to chapter "7 Configuration" for more information on modifying the Info
panel.
It is possible to abort the scan once started using the STOP (F1) key. Should it be necessary to
pause the scan, for example to allow passing site traffic through, this can be done using the
PAUSE (F2) key.
Checking and Measuring the Tunnel
RoadRunner Tunnel
53
Checking and Measuring the Tunnel
Pause and options
before continuing
54
RoadRunner Tunnel
Once the scan has been paused, the user has several options available before continuing:
STOP (F1))
Aborts the scan
RESUM (F2)
Continue the scan at the next position. Turn the
instrument to skip a section of the profile if
needed.
PROF+ (F3)
Skips the remaining points in the profile being
measured and moves onto the next profile.
MANU (F4)
Allows a point measured manually to be added to
the measured profile. The automatic scan may be
resumed by pressing the AUTO (F4) key if this
key has been pressed.
Scan settings
Whilst scanning, the application makes a series of checks based on the values entered in
Scan page of the application configuration. These checks ensure that the measurements are
within the required tolerance values.
CONF (SHIFT-(F2))
To open the Scan page of the configuration within
the application.
Scan Mode
The Scan Mode indicates the type of profile to be scanned. Vertical and perpendicular
(tilted) profiles are supported.
Rotn.Method
The Rotn.Method defines how the distance between points is defined. At the present
time, the only available method is by distance.
Chain.Limit
The Chain.Limit defines the maximum difference in chainage with which a point will be
recorded. It is also related to the Max.Iterations parameter. When measuring parallel
profiles it is necessary to check the measured chainage of a point against the nominal
chainage. Since no information is avaialable regarding the tunnel surface before scanning, the theoretical position of the point is measured.
If the difference between the measured values and the nominal values are greater than the
chainage limit, the instrument iterates to a new position where its calculated point is likely
to be.
Checking and Measuring the Tunnel
RoadRunner Tunnel
55
Checking and Measuring the Tunnel
RoadRunner Tunnel
56
Invalid measurements
This process is repeated until the measured point is within the chainage limit or the
maximum number of iterations has been reached.
Should this happen, the user is advised that it has been unable to measure the point. This
situation could occur, for example, in irregular tunnel surfaces, where the horizontal alignment is formed by a curve with a small radius or if the back distance or forward distance
defined in the General page of the Scan Profile dialogue were too large.
Tolerance values
The tight behaviour (Tight Behav.), tolerance (Tight Toleran) and Tight Ignore refer to
the distance of the measured point from the design profile. If the distance between the
measured point and the design profile is greater than the tight tolerance and less than the
tight ignore value, the application will perform the action defined as the tight behaviour. This
may be Store all the values, Store only those values within the defiend tolerances, Pause the
application with a warning message and store the values or pause the application with a
warning message.
)
It is possible to return to the Scan Profile dialogue from the configuration by pressing the
CONT (F1) key.
Checking and Measuring the Tunnel
RoadRunner Tunnel
57
Setting Out the Tunnel
RoadRunner Tunnel
58
4
Setting Out the Tunnel
4.1
Overview
Stake Face and Profile
The Stake Face and Stake Profile options can be accessed from the RoadRunner Setup Panel.
CONT (F1)
Select the required option and press the CONT
(F1) key to proceed.
The Stake Face option allows any point on the excavation face of the tunnel to be set out.
The points to set out may be defined with respect to the horizontal and vertical alignment
or to the design profile.
The Stake Profile option allows any point at a given chainage in the tunnel to be staked.
The points to set out may be defined with respect to the horizontal and vertical alignment
or to the design profile.
4.2
Setting Out the Tunnel Face
Overview
When excavating a tunnel, it is usually required to set out the tunnel portal before excavation can begin. In addition, for excavation methods other than those involving tunnel boring
machines (TBM's), it is then usually required to set out the tunnel face at given intervals
during the excavation.
The tunnel face can be set out at any time within the System 1200 RoadRunner Tunnel application using the Stake Face function.
This function allows the setting out of a series of points perpendicular to the horizontal
alignment that indicate the position of the design profile at the chainage of the tunnel face.
Cross-Section View
a
a
RRT12_015
Points to set out
Given that it is likely that a degree of rock debris is present at the tunnel face or that inexact
excavation techniques such as blasting are used, it cannot be assumed that the tunnel face
at any stage of the excavation is perpendicular to the horizontal alignment.
Setting Out the Tunnel
RoadRunner Tunnel
59
Setting Out the Tunnel
RoadRunner Tunnel
60
This in turn implies that we cannot set out a point on the tunnel face at a given chainage as
the chainage of the tunnel face at any particular point is unknown. Iterative techniques are
necessary to enable any defined point on the tunnel face to be set out accurately.
The Stake Face function involves setting out a point on the tunnel face at this unknown
chainage. First of all the point to set out on the tunnel face is set out at an approximate
chainage (e).
The point may be defined by offsets with respect to the centre line or by its position along
the design profile and its offset from the profile. Given that the excavated tunnel face does
not intersect the defined chainage, another point (e') is measured.
1st iteration
e e'
a
e'
c
d
e
a)
b)
c)
d)
e)
Centre line
Instrument position
Tunnel face
Approximate chainage to set out
Point to set out at approximate chainage
e' Point set out on tunnel face
b
a
RRT12_016
The true chainage of the measured point of the first iteration (e') is then calculated and the
defined point (e) is set out at the calculated chainage (d).
Setting Out the Tunnel
RoadRunner Tunnel
61
Setting Out the Tunnel
2nd iteration
62
RoadRunner Tunnel
This process is repeated until the differences between set out point and the defined point
are within a tolerance set by the user.
e
a
e
c
b
a
RRT12_017
d
a)
b)
c)
d)
e)
Centre line
Instrument position
Tunnel face
Calculated chainage from 1st iteration
Point to set out at calculated chainage
4.2.1
Working in Standard mode
Standard mode
1.
Selecting Mode=Standard.
For standard mode and using the Define Page,
ensure that Mode=Standard is set.
Press ’CONT (F1)’ to continue to the next screen.
2.
Working with the Define Page.
Layers contained in the active tunnel job can be
selected from this page. These elements, combined
with other settings on the page can easily be
changed during the survey.
CONT (F1)
To continue to the next screen.
SHIFT CONF (F2)
To access the configuration settings.
Refer to "7 Configuration".
Press ’CONT (F1)’ to continue to the next screen.
Setting Out the Tunnel
Field
Description of Field
Layer
Choicelist. To select a layer in the active tunnel job.
Centre line
Output. The name of the layer centre line.
RoadRunner Tunnel
63
Setting Out the Tunnel
64
RoadRunner Tunnel
Field
Description of Field
Shift X-Sec
User Input. The tunnel profile can be shifted horizontally to define another tunnel with a constant
offset from the Centre line. The shape and the size
of the tunnel profile will not be changed.
4.2.2
Advanced mode
Working in Advanced mode
1.
Selecting Mode=Advanced.
For advanced mode and using Tasks, ensure that
Mode=Advanced is set.
Press ’CONT (F1)’ to continue to the next screen.
2.
Working with Task management.
Before staking the tunnel face, a task needs to be
created to define the shifts to be used during
setting out.
CONT (F1)
Selects the highlighted task and proceeds to the
next screen.
NEW (F2)
Starts the task wizard.
TEMP (F3)
Creates a temporary task.
)
)
Setting Out the Tunnel
More information on shifts can be found in chapter "1.4 Shifts".
More information on creating tasks can be found in chapter "6.3 Tasks".
RoadRunner Tunnel
65
Setting Out the Tunnel
RoadRunner Tunnel
66
4.2.3
Setting Out the Point
General Panel
The approximate chainage of the point to stake and the offsets from the centre line can be
defined in the General panel of the Stake Face dialogue.
Point ID
The point identifier of the point that will be set out.
def Chainage
The defined or approximate chainage of the point to be set out.
Input Method
Three methods are available to define the position of the point to be set out:
Offset & Height
•
•
•
Offset & Height
ProfDist & Offset
Element & Offset
•
Offset&Height: The point is set out with a known perpendicular and vertical offset from
the horizontal and vertical alignments respectively.
If the Offset&Height method is used, the offsets of the point may be stored as coordinates in the fixpoint job.
•
•
•
The Stake Offset may be stored as the X coordinate and the Stake Height Difference
may be stored as the Y coordinate.
To select a point stored in the fixpoint job, place the cursor on the Stake Pt ID and press
the ENTER key.
c
b
a) Centre line
b) Centre line height difference
c) Centre line Offset
a
RRT12_018
)
Setting Out the Tunnel
For more information on working with points in the fixpoint job, refer to the TPS User
manual.
RoadRunner Tunnel
67
Setting Out the Tunnel
ProfDist&Offset
68
RoadRunner Tunnel
The point is defined by the distance from the start of the profile and an offset perpendicular
to the design profile.
If this option is used, enter the distance Along Profile and the Profile Offset to define the
point to be set out.
b
c
RRT12_019
a
a) Centre line
b) Profile offset
c) Distance from start of design profile
Element&Offset
The point to set out is defined by the number of the element on which the point lies, the
percentage of the distance along the element of the point to set out and the offset perpendicular to the design profile.
Element number 1 is the first element of the design profile. If the configuration parameter
Geometry is set to Clockwise the number of each element increments in a clockwise direction. If this parameter is set to CounterClockwise the number of each element increments
in a counter-clockwise direction.
c
d
a)
b)
c)
d)
Centre line
Point defining start of design profile
Offset perpendicular to profile segment
Distance from start of Start point of
segment
e) Start point of segment
e
a
b
RRT12_020
)
Auto positioning
Setting Out the Tunnel
Once the point to set out has been defined, the sensor may be positioned manually and the
ALL (F1), DIST (F2) and REC (F3) keys may be used to measure a point manually.
The POSIT (SHIFT-(F5)) key may be pressed to stake the point automatically and start the
iterative setting out process. The sensor will set out the point according to the process
described in chapter "4.2 Setting Out the Tunnel Face" until:
• the number of iterations set as the configuration parameter Max Iteration is reached, or
• the difference between the measured point and the design point is less than the value
set as the configuration parameter Position Tol.
RoadRunner Tunnel
69
Setting Out the Tunnel
RoadRunner Tunnel
70
Stake Face Panel
During stake out the differences between the measured point and the design point may be
seen in the Stake Face panel.
The layout of this panel may appear with or without graphics depending upon the values set
in the application configuration.
)
Refer chapter "7 Configuration" for more information on the configuration.
Info Panel
The Info panel may be configured in the application configuration to display a series of values
related to the setting out of the design point as required by the user.
)
Setting Out the Tunnel
Refer to chapter "7 Configuration" for more information on configuring the Info page.
RoadRunner Tunnel
71
Setting Out the Tunnel
RoadRunner Tunnel
72
4.3
Setting Out a Tunnel Profile
Overview
The Stake Profile option allows any point at a given chainage in the tunnel to be set out.
The points to set out may be defined with respect to the horizontal and vertical alignment
or to the design profile.
4.3.1
Working in Standard mode
Standard mode
1.
Selecting Mode=Standard.
For standard mode and using the Define Page,
ensure that Mode=Standard is set.
Press ’CONT (F1)’ to continue to the next screen.
2.
Working with the Define Page.
Layers contained in the active tunnel job can be
selected from this page. These elements, combined
with other settings on the page can easily be
changed during the survey.
CONT (F1)
To continue to the next screen.
SHIFT CONF (F2)
To access the configuration settings.
Refer to "7 Configuration".
Press ’CONT (F1)’ to continue to the next screen.
Setting Out the Tunnel
Field
Description of Field
Layer
Choicelist. To select a layer in the active tunnel job.
Centre line
Output. The name of the layer centre line.
RoadRunner Tunnel
73
Setting Out the Tunnel
74
RoadRunner Tunnel
Field
Description of Field
Shift X-Sec
User Input. The tunnel profile can be shifted horizontally to define another tunnel with a constant
offset from the Centre line. The shape and the size
of the tunnel profile will not be changed.
4.3.2
Advanced mode
Working in Advanced mode
1.
Selecting Mode=Advanced.
For advanced mode and using Tasks, ensure that
Mode=Advanced is set.
Press ’CONT (F1)’ to continue to the next screen.
2.
Working with Task management.
Before staking the tunnel profile, a task needs to be
created to define the shifts to be used during
setting out.
CONT (F1)
Selects the highlighted task and proceeds to the
next screen.
NEW (F2)
Starts the task wizard.
TEMP (F3)
Creates a temporary task.
)
)
Setting Out the Tunnel
More information on shifts can be found in chapter "1.4 Shifts".
More information on creating tasks can be found in chapter "6.3 Tasks".
RoadRunner Tunnel
75
Setting Out the Tunnel
RoadRunner Tunnel
76
4.3.3
Setting Out the Point
General panel
The chainage of the point to stake and the offsets from the centre line can be defined in
the General panel of the Stake Profile dialogue.
Point ID
The point identifier of the point that will be set out.
def Chainage
The defined or approximate chainage of the point to be set out.
Ch.Increment
If a point is to be staked at more than one chainage, a chainage increment may be
defined. Once a point is set out at the current defined chainage and the CH+1 (F4) key
is pressed, the defined chainage will be incremented by the chainage increment value to
define a new point to set out with the same offsets at the incremented chainage.
Input Method
Three methods are available to define the position of the point to be set out:
Offset&Height
The point is set out with a known perpendicular and vertical offset from the horizontal and
vertical alignments respectively.
If the Offset&Height method is used, the offsets of the point may be stored as coordinates in the fixpoint job. The Stake Offset may be stored as the X coordinate and the
Stake Height Difference may be stored as the Y coordinate.
To select a point stored in the fixpoint job, place the cursor on the Stake Pt ID and press
the ENTER key. For more information on working with points in the fixpoint job, refer to the
TPS1200 User manual.
c
b
a) Centre line
b) Centre line height difference
c) Centre line offset
a
RRT12_018
)
Setting Out the Tunnel
The chainage entered on the General page is used as horizontal chainage even if the tunnel
job has perpendicular profiles.
RoadRunner Tunnel
77
Setting Out the Tunnel
ProfDist&Offset
78
RoadRunner Tunnel
The point is defined by the distance from the start of the profile and an offset perpendicular
to the design profile. If this option is used, enter the distance Along Profile and the Profile
Offset to define the point to be set out.
b
c
RRT12_019
)
a
a) Centre line
b) Profile offset
c) Distance from start of design profile
If the tunnel job has perpendicular profiles the chainage entered on the General page is used
as vertical chainage.
Element&Offset
The point to set out is defined by the number of the element on which the point lies, the
percentage of the distance along the element of the point to set out and the offset perpendicular to the design profile. Element number 1 is the first element of the design profile. If
the configuration parameter Geometry is set to Clockwise the number of each element
increments in a clockwise direction. If this parameter is set to CounterClockwise the
number of each element increments in a counter-clockwise direction.
c
d
a)
b)
c)
d)
Centre line
Point defining start of design profile
Offset perpendicular to profile segment
Distance from start of Start point of
segment
e) Start point of segment
e
a
b
RRT12_020
)
)
Setting Out the Tunnel
If the tunnel job has perpendicular profiles the chainage entered on the General page is used
as vertical chainage.
Once the point to set out has been defined, the sensor may be positioned manually and the
ALL (F1), DIST (F2) and REC (F3) keys may be used to measure a point manually.
RoadRunner Tunnel
79
Setting Out the Tunnel
Auto positioning
80
RoadRunner Tunnel
The POSIT (SHIFT-(F5)) key may be pressed to stake the point automatically. The sensor
will aim towards the point at the given chainage and offsets and measure a distance. If this
distance is not within the required tolerance an iterative process is started until:
• the number of iterations set as the configuration parameter Max Iteration is reached, or
• the difference between the measured point and the design point is less than the value
set as the configuration parameter Position Tol.
Stake point on surface
c d
b
e
f
a
RRT12_021
a)
b)
c)
d)
e)
f)
Centre line
Design point to set out
Excavated profile
Design profile
Centre line offset
Centre line height difference
If it is not possible to set out the defined point, as seen in the diagram, between successive
iterations, the sensor will maintain the chainage and height difference from the vertical
alignment fixed and modify the horizontal offset from the centre line to calculate the new
position of the point. The point that will be set out will thus maintain the defined chainage
and height difference but will have a modified offset value from the centreline.
c d
b
a)
b)
c)
d)
e)
f)
e
f
a
RRT12_022
Setting Out the Tunnel
RoadRunner Tunnel
Centre line
Design point to set out
Excavated profile
Design profile
Centre line offset
Centre line height difference
81
Setting Out the Tunnel
Stake Profile panel
)
RoadRunner Tunnel
82
During stake out the differences between the measured point and the design point may be
seen in the Stake Profile panel.
The layout of this panel may appear with or without graphics depending upon the values set
in the application configuration.
Refer to chapter "7 Configuration" for more information on the configuration.
Info panel
)
Setting Out the Tunnel
The Info panel may be configured in the application configuration to display a series of
values related to the setting out of the design point as required by the user.
Refer to chapter "7 Configuration" for more information on configuring the Info page.
RoadRunner Tunnel
83
Project and Job Management
RoadRunner Tunnel
5
Project and Job Management
5.1
Overview
Project data
Working on a tunnel construction site implies working with various data such as:
• Control points
• Horizontal and vertical alignments
• Measurement data
• Tunnel Profile design
• Digital Terrain Models
84
To avoid having to select individual data sets each time the application is used, data can be
grouped into projects. This makes the selection much easier and reduces the risk of selecting
wrong data set.
Project
A project consists of different kinds of jobs that are grouped together to form a project. By
selecting a project automatically all referenced jobs are selected as well. A project can reference:
• one fixpoint job
• one measurement job
• one road job
• one tunnel job
• one DTM job.
Since jobs are only referenced by a project, they may be used in more than one RoadRunner
project, as well as in other applications. For example the same collection of control points
may be used in two different projects.
Project A
Tunnel-Job
Meas-Job A
Project B
Fixpoint-Job A
Road-Job MY
Meas-Job B
RRT12_027
Project A and Project B reference the same fixpoint job (Fixpoint Job A) and road job (RoadJob MY), however, their results are stored into different measurement jobs (Meas-Job A;
Meas-Job B). In addition, Project A references the tunnel design data through a Tunnel Job
(Tunnel Job A).
Fixpoint job
The Fixpoint job holds all control point information needed in the field. For
example, control points, points with known coordinates used for a TPS setup.
Measurement The measurement job is where information generated in the field is
Job
recorded. All measurements, points and other values stored in the field are
added to this job.
Road Job
All road design information for road data outside of the tunnel, either typed
in manually or exported from a design package is stored in the road job. Like
the fixpoint job, it is a source of information. Refer to the RoadRunner Technical Reference Manual, chapter "6 Tunnel Job" for more information on
road jobs.
Project and Job Management
RoadRunner Tunnel
85
Project and Job Management
Tunnel Job
DTM Job
RoadRunner Tunnel
86
Contains information relating to the design of the tunnel. The centre line of
the tunnel and the tunnel design profiles are stored in the tunnel job. As
with a road job, the tunnel job is a read-only source of information. Refer
to chapter "6 Tunnel Job" of this manual for more information on tunnel
jobs.
Holds DTM or TIN data (Digital Terrain Model; Triangular Irregular Network).
Like a fixpoint job or road job, the DTM job is a source of information. Refer
to the RoadRunner Technical Reference Manual, chapter 7 "DTM Job" for
more information on DTM jobs.
The same job can be used as a data and measurement job.
Road jobs, Tunnel jobs and DTM jobs cannot be selected as a data or a measurement job.
When selecting a job, a filter is applied to show only the relevant jobs in the selection list.
5.2
Selecting a Project
5.2.1
Overview
Overview
Upon starting the RoadRunner application, there are two different ways of selecting a
project:
• Select from list:
Enter a list of projects stored on the CF Card or in the internal memory from the RoadRunner Setup panel.
• Resume:
To resume the last task the project to which the task belongs to is selected automatically.
Project and Job Management
RoadRunner Tunnel
87
Project and Job Management
RoadRunner Tunnel
5.2.2
Browse for Existing Project
Browse for project
A list of all available projects in the internal memory or on the CompactFlash card will be
opened when pressing ENTER on the Projects line of the RoadRunner Setup panel.
88
CONT (F1)
To select the highlighted project.
NEW (F2)
To create a new project. Refer to "5.3 Creating a
New Project".
EDIT (F3)
To edit the highlighted project. This project also
becomes the active project. Refer to "5.5 Editing
a Project".
DEL (F4)
To delete the highlighted project. Refer to "5.4
Deleting a Project".
MORE (F5)
To toggle between Date and Time info.
CFCRD (F6) or INTL (F6)
To switch between the CompactFlash card and
internal memory as the active device.
5.2.3
Resuming the Last Task
Resume task
RoadRunner retains the last active task used on any project. When the application is resumed,
the last active task may be accessed again using the RESUM (F4) key. This avoids the selection
of project, method and task to be staked out or checked every time the application is started.
Project and Job Management
RoadRunner Tunnel
89
Project and Job Management
RoadRunner Tunnel
5.3
Creating a New Project
Create a project stepby-step
Step Description
90
1.
Define the <Name:>, <Description:>, <Creator:> and <Device:> for the project.
The <Name:> is mandatory.
2.
PAGE (F6) changes to the Jobs page.
3.
Select the <Fixpoint Job:>, <Meas Job:>, <Road Job:>, <Tunnel Job:> and <DTM
Job:> to be used in the new project. It is possible to add or remove jobs to the project
at a later stage.
Step Description
4.
Project and Job Management
STORE (F1) to accept the changes and select the newly created project as the new
active project.
RoadRunner Tunnel
91
Project and Job Management
RoadRunner Tunnel
92
5.4
Deleting a Project
General
Deleting a project will not delete the measurement job, fixpoint job, road job, tunnel job and
DTM job that it references.
If two projects use the same control points by referencing the same fixpoint job, deleting
one project will not delete the control points for the other project.
Deleting project stepby-step
Step Description
Project and Job Management
1.
Highlight the project to delete in the Projects panel.
2.
DEL (F4) to delete the project.
3.
YES (F6) to confirm deletion,
NO (F4) to return to the previous screen.
4.
CONT (F4) to return to the RoadRunner Start panel.
RoadRunner Tunnel
93
Project and Job Management
RoadRunner Tunnel
94
5.5
Editing a Project
General page
The project details contain general information about the project as well as the list of jobs
referenced by the project. Project details may be edited using the EDIT (F4) key in the
Projects panel.
CONT (F1)
To accept changes and return to the screen from
where this screen was accessed.
PAGE (F6)
changes to the Jobs page. All jobs referenced by
the project are listed.
<Name:>
Project name, must be unique. This field is mandatory.
<Description:>
User input. Two line description of the project.
<Creator:>
User input. Name of the creator of the project.
<Device:>
CompactFlash Card or Internal Memory. The device on which the job is stored.
Job page
STORE (F1)
To accept the changes and return to the screen
from where this screen was accessed.
<Fixpoint Job:>
The job that contains the point data to be used.
<Meas Job:>
The active job which also determines the coordinate system.
Points which are recorded during staking out or check are stored in this job.
<Road Job:>
The active road job.
<Tunnel Job:>
The active tunnel job.
<DTM Job:>
The active DTM job.
Project and Job Management
RoadRunner Tunnel
95
Tunnel Job
RoadRunner Tunnel
96
6
Tunnel Job
6.1
Overview
General
Each tunnel job consists of two major parts:
• Design data: Contains all the information about the tunnel design including the geometry of the centre line and the tunnel cross-section.
• Working tasks: Tasks define how the design elements of the tunnel are staked out or
checked in the field, they also define any offsets that should be applied to the design
data. Refer to "6.3 Tasks" for more information on tasks.
6.2
Design Data
6.2.1
Horizontal and Vertical Alignments
Alignments
All tunnel jobs must consist of at least a horizontal and a vertical alignment. These data may
be converted from a road design package using the Design To Field component within the
Leica Geo Office application.
Tunnel Job
RoadRunner Tunnel
97
Tunnel Job
RoadRunner Tunnel
98
6.2.2
Design Profiles
Profiles
Depending on the complexity of the tunnel job, the design data may vary from being a single
horizontal and vertical alignment to a design containing many different design profiles with
dozens of defined vertices.
Design profiles may be defined and edited in the Profile Editor application that is integrated
into the LEICA Geo Office (LGO) application.
6.2.3
Layers
Layers
Tunnels generally consist of layers made of different materials, for example a shotcrete
surface or a lining. At different times throughout a project it may be required to work with
different layers of the tunnel.
RoadRunner allows the possibility of creating such layers by grouping together design
profiles that will be used at the same chainage.
ab
B4
A4
B3
B5
A3
B2
B1
A5
A2
A6
A1
A7
B6
B7
RRT12_023
a) The vertices A1-A7 could be grouped
together in a layer (a) and represent the
final lining of the tunnel.
b) The vertices B1-B7 could be grouped
together in a layer (b) and represent the
inner shotcrete layer of the tunnel.
Design Profile Layers may be assigned to chainages along the centre line using the Profile
Editor within LGO.
The layer of the tunnel to set out or check may be defined when creating a task.
Tunnel Job
RoadRunner Tunnel
99
Tunnel Job
RoadRunner Tunnel
100
6.3
Tasks
Overview
When staking out or checking a tunnel, it is often the case that it is not possible to finish a
particular task in one go. RoadRunner Tunnel allows the possibility of storing the element
to be staked out or checked together with all defined settings as a work task. Tasks are
stored as a part of the project.
A task defines the offsets required for setting out and checking as well as the layer of the
design profile to use and the chainage limits within which the task applies.
When pressing CONT (F1) on the RoadRunner Setup panel a list of available tasks will be
shown.
CONT (F1)
Select the highlighted task and continue.
NEW (F2)
Create a new task.
EDIT (F3)
Modify selected task.
DEL (F4)
Delete selected task.
MORE (F5)
Toggle between Date and Time info.
TEMP (F6)
Create a new temporary task. The task is created
in the same way as an ordinary task but the task
is not saved.
6.3.1
Creating a New Task
Overview
The Selection Wizard-Start page defines the name of the task and whether shifts should be
applied to the design data.
)
Creating a task stepby-step
Shifts are applied temporarily to the design data for the defined task, the original design
data is not modified when a shift is applied.
Refer to chapter "6.3.2 Working with Shifts" for more information on applying shifts.
The same selection wizard is used for all tasks within the application.
NEXT (F1)
Move on to the next page of the selection wizard.
The second page of the selection wizard defines the layer of the design profile to be used
for the task.
Tunnel Job
RoadRunner Tunnel
101
Tunnel Job
RoadRunner Tunnel
102
NEXT (F1)
Move on to the next page of the selection wizard.
BACK (F6)
Go back to the previous page of the selection
wizard.
The next page of the wizard displays the horizontal alignment. Given that this is the only
stringline available in a tunnel job, this page is purely informative.
NEXT (F1)
Move on to the next page of the selection wizard.
BACK (F6)
Go back to the previous page of the selection
wizard.
This page of the selection wizard defines whether the task should only be applied to a
limited section of the alignment. If the defined chainage range is exceeded during stake
out/check a warning appears.
FINSH (F1)
Finish the selection wizard and return to the task
selection page.
DEFLT (F5)
Set the chainage limits to the maximum and
minimum chainage available in the tunnel job.
BACK (F6)
Go back to the previous page of the selection
wizard.
Tunnel Job
RoadRunner Tunnel
103
Tunnel Job
RoadRunner Tunnel
104
6.3.2
Working with Shifts
Overview
If a shift is defined on the first page of the selection wizard, the parameters associated with
the shift must be entered after defining the chainage limits.
Two types of shifts may be applied:
• Constant or
• linear.
The application of the shift is dependent upon to which entity it should be applied:
• Horizontal alignment,
• Vertical alignment or
• Design Profile.
)
Refer to chapter "1.4 Shifts" for more information on the type of shift for each entity.
For linear shifts
The parameters required for applying the shift are identical for all entities.
Beg Chainage
Chainage from which the shift should be applied.
Beg Shift
Magnitude of the shift to apply at the begin chainage.
End Chainage
Chainage at which the shift should end.
End Shift
Magnitude of the shift to apply at the end chainage.
For constant shifts
Tunnel Job
RoadRunner Tunnel
105
Tunnel Job
RoadRunner Tunnel
Beg Chainage
Chainage from which the shift should be applied.
Beg Shift
Magnitude of the shift to apply.
End Chainage
Chainage at which the shift should end.
106
6.4
Viewing and Editing the Design Data
6.4.1
Overview
Viewing and Editing
The design data stored within the tunnel job contains all of the information about the tunnel
design. This includes the stringlines and layers (for example, the geometry of the centre line
or the layers of the different materials/surfaces which form the tunnel). The design data can
be viewed and partially edited in these View and Edit screens.
CONT (F1)
To return to the RoadRunner Tunnel Setup screen.
EDIT (F3)
To edit the following design data:
1) to edit the general job details,
2) to change the start chainage of the centre line
of the selected layer.
VIEW (F4)
To view the following design data in a selected
layer:
1) to view specific details of the layer centre line,
2) to view cross-section plots.
Tunnel Job
Field
Description of field
Job Name
The name of the active tunnel job, as defined in the project.
Layer
To select a layer from the active tunnel job. All of the layers within the
active tunnel job can be selected.
#Profiles
The number of profiles from the selected layer.
Centre line
The name of the layer centre line.
Chainage
To enter a start chainage to use when viewing the data. The default
value is the start chainage of the layer centre line.
RoadRunner Tunnel
107
Tunnel Job
RoadRunner Tunnel
Field
Description of field
Ch Increment
)
108
To enter a chainage increment to use when stepping through the data
If a centre line has not been defined, a start chainage cannot be entered and the
field will be shown as "----". If a centre line has not been defined, a chainage increment cannot be entered and the field will be shown as "----".
6.4.2
Viewing the Design Data
Viewing details of the
layer centre line
This page shows the following:
Geometrical details of the selected stringline at the selected chainage.
CONT (F1)
To return to the View&Edit Data screen.
CH+ (F2)
To increase the chainage by the chainage increment, as defined in the View&Edit Data screen.
CH-1 (F3)
To decrease the chainage by the chainage increment, as defined in the View&Edit Data screen.
SEG (F4)
To enter the Segment Info screen.
HZ/VT (F5)
To toggle between the vertical alignment data and
the horizontal alignment data.
PAGE (F6)
To move to the next page.
Field
Description of field
Line name
To select a stringline from the layer.
Easting
The East coordinate of the stringline.
Northing
The North coordinate of the stringline..
Height
The height of the stringline.
The following fields/values can be toggled, by using the HZ/VT (F5) softkey:
Tunnel Job
Hz Tangent/Grade
The tangent direction or grade of the stringline.
Hz/Vt Radius
The horizontal/vertical radius of the stringline segment.
RoadRunner Tunnel
109
Tunnel Job
RoadRunner Tunnel
Field
Description of field
Hz/Vt Type
The horizontal/vertical segment type.
Hz/Vt Offset
The horizontal/vertical offset to the layer centre line.
)
If a value has not been defined, the field will be shown as "----".
110
Viewing profiles
This page shows the following:
A cross section view of the design data at the selected chainage. No selection or zoom/pan
functionality is available.
CONT (F1)
To return to the View&Edit Data screen.
CH+ (F2)
To increase the chainage by the chainage increment, as defined in the View&Edit Data screen.
CH-1 (F3)
To decrease the chainage by the chainage increment, as defined in the View&Edit Data screen.
SEG (F4)
To enter the Segment Info screen.
PAGE (F6)
To move to the next page.
Tunnel Job
RoadRunner Tunnel
111
Tunnel Job
Viewing the segment:
the Hz Alignment page
RoadRunner Tunnel
112
This page shows the following:
Detailed horizonal alignment information about the current stringline segment.
CONT (F1)
To return to the View screens.
SEG+ (F2)
To move to the next segment.
SEG- (F3)
To move to the previous segment.
ENDP/STRTP (F4)
To toggle between the start point and the end
point of the segment.
PAGE (F6)
To move to the next page.
Field
Description of field
Line Name
The name of the selected stringline.
The following fields/values can be toggled, by using the ENDP/STRTP (F4) softkey:
Chainage
The chainage of start/end point of the segment.
Easting
The East coordinate of the start/end point of the segment.
Northing
The North coordinate of the start/end point of the segment.
Height
The height of the start/end point of the segment.
Hz Tangent
The tangent direction at the start/end point of the segment.
Hz Radius
The radius at the start/end point of the segment (is not toggled).
Hz Type
The current segment type (is not toggled).
)
If a value has not been defined, the field will be shown as "----".
Viewing the segment:
the Vz Alignment page
This page shows the following:
Detailed vertical alignment information about the current stringline segment.
CONT (F1)
To return to the View screens.
SEG+ (F2)
To move to the next segment.
SEG- (F3)
To move to the previous segment.
ENDP/STRTP (F4)
To toggle between the start point and the end
point of the segment.
PAGE (F6)
To move to the next page.
Field
Description of field
Line Name
The name of the selected stringline.
The following fields/values can be toggled, by using the ENDP/STRTP (F4) softkey:
Chainage
The chainage of start/end point of the segment.
Easting
The East coordinate of the start/end point of the segment.
Northing
The North coordinate of the start/end point of the segment.
Height
The height of the start/end point of the segment.
Grade
The grade at the start/end poin of the segment (is not toggled).
Vt Radius
The radius at the start/end point of the segment (is not toggled).
Vt Type
The current segment type (is not toggled).
)
Tunnel Job
If a value has not been defined, the field will be shown as "----".
RoadRunner Tunnel
113
Tunnel Job
6.4.3
RoadRunner Tunnel
114
Editing the Design Data
Editing the job details
STORE (F1)
To return to the View&Edit Data screen.
PAGE (F6)
To move to the next page.
Changing the start
chainage of the centre
line of the selected
layer
Field
Description of field
Name
The unique name of the tunnel job. The name may be up to 16 characters
long and may include spaces. This field is mandatory.
Description
A detailed description of the tunnel job (two lines are available). This field
is optional.
Creator
The name of the person who created the tunnel job. This field is optional.
Device
CF Card or Internal Memory. The device on which the tunnel job is stored.
STORE (F1)
To store data and return to the View&Edit Data
screen.
RESET (F4)
To clear all changes made to the start chainage
reset to the original start chainage.
PAGE (F6)
To move to the next page.
Tunnel Job
Field
Description of field
Centreline
The name of the centre line.
StartChainage
To enter a start chainage for the layer centre line. By using the centre
line length, the end chainage is automatically calculated.
End Chainage
The end chainage of the layer centre line, as calculated from the start
chainage.
RoadRunner Tunnel
115
Configuration
RoadRunner Tunnel
7
Configuration
7.1
Overview
Three parts of configuration
The configuration of the RoadRunner application is divided into three parts:
•
•
•
•
Project Configuration
Road Configuration
Tunnel Configuration
Rail Configuration
116
Project and Road
Configuration
)
Tunnel Configuration
Configuration
The values in the Project Configuration are general parameters that apply to both Road
and Tunnel projects. The values set in the Road Configuration apply only to Road projects
and the values set in the Tunnel Configuration apply only to Tunnel projects.
For more information on the Project and Road Configuration, refer to the RoadRunner Technical Reference Manual.
The Tunnel Configuration consists of five pages where parameters relating to the configuration of the application may be modified. Refer to chapter "7.2 Tunnel Configuration
General Page".
RoadRunner Tunnel
117
Configuration
RoadRunner Tunnel
118
7.2
Tunnel Configuration General Page
General Settings
The General page allows parameters that will be used throughout the application to be set.
CONT (F1)
To confirm the changes and move to the previous
screen.
PAGE (F6)
To go to the next page of the configuration.
Orientation
The reference direction used to stake out points. The stake out elements and the graphics
displayed are based on this selection:
To Alignment:
The position of the measured point and the calculated differences are
displayed relative to the alignment.
To Station:
The position of the measured point and the calculated differences are
displayed relative to the position of somebody located at the measured point looking towards the sensor.
From Station:
The position of the measured point and the calculated differences are
displayed relative to the position of somebody located at the sensor
looking towards the measured point.
Stake Mode
If the option To Station or From Station is used, the displayed differences between the
measured point and the design point may be configured:
Orthogonal:
The differences are displayed as two orthogonal distances left/right
and forward/back with respect to the line of sight.
Polar:
The differences are displayed as polar coordinates, angle and
distance, with respect to the line of sight.
Guidance
Indication of direction and distance from measured point to point to set out:
Off:
No graphical guidance is used, only numerical values are available on
the screen.
Polar:
Forward/Back and Left/Right arrows are shown on the screen.
Graphics:
A bulls-eye is shown on the screen.
Arrows&Graphics: Forward/Back and Left/Right arrows and a bulls-eye are shown on the
screen.
Configuration
RoadRunner Tunnel
119
Configuration
RoadRunner Tunnel
120
Work Corridor
Working corridor of tunnel job. If a measured point is further away from the working corridor
distance, an error message is displayed.
Update Angle
Update of vertical angle after a distance measurement.
Yes:
The measured point will be projected by a distance equivalent to the
radius of the reflector in a direction perpendicular to the tangent of
the design profile.
No:
Angles and stake out values are updated only after a distance measurement. All values are then frozen until the next distance is taken.
Refl. Radius
When using a reflector to check a design profile it is important to take into account the
reflector radius parameter in the General page of the application configuration.
Yes:
The measured point will be projected by a distance equivalent to the
radius of the reflector in a direction perpendicular to the tangent of
the design profile.
No:
The design profile will be compared to the coordinates of the centre
of the reflector at the measured position.
a
d
b
a)
b)
c)
d)
c
RRT12_024
Tangent to design profile
Reflector radius
Reflector
Design profile
If reflectorless measurements are used or no design profile has been defined, the reflector
radius parameter will not be used in the calculation.
Configuration
RoadRunner Tunnel
121
Configuration
Geometry
RoadRunner Tunnel
122
Defines the sense in which the design profile is considered.
Clockwise:
The design profile is defined in a clockwise direction. The number of
each element also increments in a clockwise direction.
CounterClockwise: The design profile is defined in a counter-clockwise direction. The
number of each element also increments in a counter-clockwise
direction.
.
7.3
Tunnel Configuration Check Page
Check configuration
The Check page allows parameters that will be used during Tunnel Check to be set.
CONT (F1)
To confirm the changes and move to the previous
screen.
PAGE (F6)
To go to the next page of the configuration.
Configuration
RoadRunner Tunnel
123
Configuration
RoadRunner Tunnel
Quality Check
Chainage Tol
Offset Tol
Height Tol
Profile Tol
Position Tol
Beep near Pt
Dist from Pt
124
Activates a position check when storing a staked or checked point.
When the defined tolerance is exceeded, the stake out/check can be
repeated, skipped or stored. Depending on this selection the lines
below are enabled/disabled.
NONE
No quality check during stake out/check of points.
Ch&Off&Ht
Check for chainage, horizontal offset and height.
Ch&Off
Check for chainage and horizontal offset.
Pos&Ht
Check for 2D position and height.
Position
Check for 2D position.
Height
Check for height.
Profile
Check for distance from design profile.
From 0.001 to 100 maximum permitted difference in chainage.
From 0.001 to 100 maximum permitted horizontal offset from defined
position.
From 0.001 to 100 maximum permitted height difference.
From 0.001 to 100 maximum permitted distance from design profile.
From 0.001 to 100 maximum permitted radial horizontal distance.
On or Off activates an acoustic warning signal when the horizontal
radial distance from the current position to the point to stake out is
equal or less than defined in Dist from Pt
Available when Beep near Pt: On is selected. Defines the horizontal
radial distance from the current position to the point to stake out
within which the acoustic warning signal is active.
7.4
Tunnel Configuration Scan Page
Scan configuration
The Scan page allows parameters that will be used when scanning profiles to be set.
CONT (F1)
To confirm the changes and move to the previous
screen.
PAGE (F6)
To go to the next page of the configuration.
Configuration
RoadRunner Tunnel
125
Configuration
RoadRunner Tunnel
Scan Mode
126
Indicates the type of profile to be scanned. At the present time the
available modes are the measurement of vertical and tilted profiles.
Rotation method Defines how the distance between points is defined. At the present
time, the only available method is By distance.
Chain.Limit
Defines the maximum difference between the measured and defined
chainage within which a point will be recorded.
Max.Iterations
The maximum number of attempts that should be made in measuring a
point when measuring parallel profiles.
Tight Behav.
Defines the behaviour of the application when a measured point is
outside of the defined Tight Tolerance.
StoreAll:
Store all measurements independent of whether
they are within tolerance.
Store OnlyValid:
Store only the points that are within tolerance.
Pause & Store:
Store all measurements but if the point is out of
tolerance, pause the scan.
Pause:
Pause the application if a point is out of tolerance.
Tight Toleran
Refers to the maximum permitted distance between the measured
point from the design profile. If the distance between the measured
point and the design profile is greater than the tight tolerance and less
than the tight ignore value, the application will perform the action
defined as the tight behaviour
Tight Ignore
If the distance between the measured point and the design profile is
greater than the Tight Ignore value, the measurement will be ignored
and the values will not be stored.
)
For more information about Thight Tolerance refer to chapter "1.3.2 Tunnel Profiles".
7.5
Tunnel Configuration Info and Plot Page
Overview
The Info & Plot page allows the definition of the parameters to be seen on the Info page
whilst working with the application. It also allows the parameters to be used for plotting
functions to be defined.
CONT (F1)
To confirm the changes and move to the previous
screen.
EDIT (F3)
Edit parameters of current info page type. Refer
to "7.5.1 Defining the Info Page Display" for more
details.
PAGE (F6)
To go to the next page of the configuration.
Info Type
Defines the parameters to view on the Info page of the application. Different combinations of the parameters to view may be stored for the four main functions of the application: Stake Face, Stake Profile, Check Profile, Scan Profile.
)
Configuration
For more information on the parameters that may be selected, refer to chapter "7.5.1
Defining the Info Page Display"
RoadRunner Tunnel
127
Configuration
Plot configuration
RoadRunner Tunnel
Plot Type:
Pole Graphic:
Update X-Sec:
128
Defines the type of plot to be viewed on the Plot page.
Cross Plot:
View measured point with respect to design profile.
Plan View:
View position of measured point with respect to horizontal alignment.
Profile View:
View position of measured point with respect to
vertical alignment.
Defines the graphical representation of the measured point on the plot
page.
Std Bitmap:
Standard bitmap image of a reflector and pole.
Actual Height: Reflector pole is not shown and position of reflector
denotes the actual measured postion.
Update frequency of the cross section view on the Plot page when
working in tracking mode.
0.5m or 2s:
Update the plot every 2 seconds or when the measured point is more than 0.5 m from the previous
plotted point.
0.5m or 10s:
Update the plot every 10 seconds or when the measured point is more than 0.5 m from the previous
plotted point.
1.0m or 30s:
Update the plot every 30 seconds or when the measured point is more than 1 metre from the previous
plotted point.
5.0m or 1m:
Update the plot every 60 seconds or when the measured point is more than 5 metres from the previous
plotted point.
Vertical Exg.:
Configuration
Vertical exaggeration for cross section plots.
(Vertical plot scale relative to horizontal.)
0.5:
Ratio of vertical to horizontal
1:
Ratio of vertical to horizontal
2:
Ratio of vertical to horizontal
5:
Ratio of vertical to horizontal
10:
Ratio of vertical to horizontal
RoadRunner Tunnel
scale
scale
scale
scale
scale
1:2
1:1
2:1
5:1
10:1
129
Configuration
RoadRunner Tunnel
130
7.5.1
Defining the Info Page Display
Overview
The Define Info Display page allows the parameters to view on the Info page of the application to be defined. Different combinations of the parameters to view may be stored for
the four main functions of the application:
Stake Face, Stake Profile, Check Profile, Scan Profile.
The process for defining each of these combinations is identical. The user defines which
parameter should be viewed on each line. Up to 16 lines of parameters may defined
although a maximum of 9 lines may be viewed at any one time.
)
It is necessary to scroll with the arrow keys to view additional lines.
Selecting the parameters
CONT (F1)
Confirm the changes and move to the previous
screen.
CLEAR (F4)
Clear all parameters from all lines.
DEFLT (F5)
Set the default value for all lines.
To modify the selection on any particular line, place the cursor on the line to modify using
the arrow keys and press the ENTER key.
Use the arrow keys to select the required parameter and press the ENTER key to confirm
the choice. It is also possible to search for a parameter by entering the first character of the
parameter name.
Configuration
RoadRunner Tunnel
131
Configuration
Avaible parameters
RoadRunner Tunnel
132
The following parameters are available in the Define Info Display:
Strgl Task:
ΔOffset:
ΔHeight:
ΔChainage:
Chainage:
Strgl Offset:
Strgl Ht Diff:
Strgl Name:
CL Ht Diff:
CL Height:
CL Radius:
CL Type:
CL Offset:
CL Tangent:
Near Tang Pt:
CL Grade:
Name of the current task.
Distance from the measured point to the point to set out in a direction
perpendicular to the horizontal alignment.
Height difference between the measured point and the point to set
out.
Chainage difference between the measured point and the point to set
out.
Chainage of the measured point.
Distance between the measured point and the shifted horizontal alignment when a shift is used.
Height difference between the measured point and the shifted vertical
alignment when a shift is used.
Name of the centreline.
Height difference between the measured point and the height of the
vertical alignment at the same chainage.
Height of the vertical alignment at the chainage of the measured point.
Radius of the horizontal alignment at the at the chainage of the measured point.
Curve type of the horizontal alignment at the chainage of the measured
point.
Distance between the measured point and the horizontal alignment in
a direction perpendicular to the horizontal alignment.
Direction of the tangent to the horizontal alignment at the at the
chainage of the measured point.
Distance along the horizontal alignment from the measured point to
the nearest tangent point.
Grade of the vertical alignment at the chainage of the measured point.
Dirc to Point:
Dist to Point:
Def Easting:
Def Northing:
Def Height:
Act Easting:
Act Northing:
Act Height:
Quality 3D:
Line Space
Half/Full
Prof.Offset:
Prof.NºElement:
Direction from the point to the point to set out.
Distance from the point to the point to set out.
Easting of the point to set out.
Northing of the point to set out.
Height of the point to set out.
Easting of the measured point.
Northing of the measured point.
Height of the measured point.
Standard deviation of the point measurement.
Empty line.
Distance from the design profile to the measured point.
Element number of the closest design profile element to the measured
point.
Prof.Element(%): Distance in percentage terms of the measured point along the design
profile element.
DistAlongProf:
Distance of the measured point along the design profile.
Vert Chainage:
Chainage of the measurend point projected perpendicular to the
vertical component of the centreline.
Vert Sqr Off:
Offset perpendicular to the vertical component of the centreline.
Configuration
RoadRunner Tunnel
133
Configuration
RoadRunner Tunnel
134
7.6
Tunnel Configuration Logfile Page
Logfile settings
The Logfile page allows the user to define the name and format of any logfile that should
be written. Data is recorded to the logfile each time a data is recorded to the database. The
format of the logfile is determined by the selected format file. Format files may be defined
in the Format Manager component of the Leica Geo Office application.
CONT (F1)
To confirm the changes and move to the previous
screen.
PAGE (F6)
To go to the next page of the configuration.
Write Logfile:
Defines whether a logfile should be written or not.
File Name:
Name of logfile to be written. Logfiles are stored in the folder named DATA on the
CompactFlash card.
Format File:
Format file to use when writing the logfile.
Configuration
RoadRunner Tunnel
135
Index
RoadRunner Tunnel
136
Index
A
Act Easting ................................................................ 133
Act Height ................................................................. 133
Act Northing ............................................................. 133
Alignment ................................................................... 58
ALL ......................................................................... 7, 39
Angular ....................................................................... 48
Arrows&Graphics ...................................................... 119
B
Back Interval ............................................................... 45
Back interval ............................................................... 45
Bailout ........................................................................ 14
Beep near Pt ............................................................. 124
Begin panel ................................................................. 29
Breakpoint .................................................................. 52
C
Centre Line ................................................................. 10
CL Grade .............................................................. 132
CL Height ............................................................. 132
CL Ht Diff ............................................................. 132
CL Offset ............................................................. 132
CL Radius ............................................................. 132
CL Tangent ........................................................... 132
CL Type ................................................................ 132
CH+1 .......................................................................... 76
Ch.Increment .............................................................. 76
Chain.Limit ..........................................................55, 126
Chainage ...............................................................6, 132
Chainage Tol ..............................................................124
Check ............................................................................6
Check Ht Diff ...............................................................38
Check Offset ...............................................................38
Check Profile ...............................................................34
Clockwise ....................................................................69
CompactFlash card ......................................................27
Constant .....................................................................18
CONT ...........................................................................88
Control points .............................................................84
Converters ...................................................................22
CounterClockwise ........................................................69
CProf.NºElement ........................................................133
Create
Create ....................................................................90
Creating a New Project ...........................................90
Creating a new task ..............................................101
Cross Plot ..................................................................128
D
DBX ............................................................................ 27
Define
DChainage ............................................................ 132
Def Chainage ......................................................... 76
Def Easting .......................................................... 133
Def Height ........................................................... 133
Def Northing ........................................................ 133
Define .................................................................... 65
DEL ............................................................................. 88
Deleting a Project ........................................................ 92
DHeight .................................................................... 132
Digital Terrain Model ................................................... 86
Digital Terrain Models ................................................. 84
Dirc to Point ............................................................. 133
Discrete points ............................................................ 52
Distance
DIST ................................................................... 7, 39
Dist from Pt ......................................................... 124
Dist to Point ........................................................ 133
DistAlongProf ....................................................... 133
Distance ........................................................... 12, 45
DOffset ..................................................................... 132
Downloads .................................................................. 22
DTM job ...................................................................... 84
Index
E
EDIT ............................................................................88
Editing a project ..........................................................94
Element .......................................................................69
Element&Offset ....................................................69, 79
End point ....................................................................48
Error message .............................................................47
Exclude limit ................................................................49
Existing .......................................................................88
F
Face ..............................................................................6
Fixpoint job .................................................................84
Format ......................................................................134
Format file ................................................................134
Format Manager ........................................................134
Forward .......................................................................45
From Station .............................................................119
Fwd Distance ...............................................................45
Fwd Interval ................................................................45
G
General panel ........................................................47, 66
GET B ..........................................................................47
GET F ...........................................................................47
Graphics ....................................................................119
Guidance ...................................................................119
RoadRunner Tunnel
137
Index
RoadRunner Tunnel
138
H
Height Tol ................................................................. 124
Horizontal ................................................................... 58
N
Near Tang Pt .............................................................132
NEW ............................................................................88
I
Include limit ................................................................ 49
Info Panel ................................................................... 71
Info Type .................................................................. 127
Info&Plot .................................................................... 39
Input Method .............................................................. 76
Iteration ...................................................................... 61
O
Off ............................................................................119
Offset Tol ..................................................................124
Offset&Height .......................................................66, 77
Offsets ........................................................................11
Option .........................................................................58
Orientation ................................................................119
Orthogonal ................................................................119
Overbreak ...................................................................10
Overlapping zones .......................................................49
J
Job .............................................................................. 67
Jobs ............................................................................ 84
L
LandXML ....................................................................... 6
Layers ......................................................................... 99
Licence key ................................................................. 28
Limits .......................................................................... 48
Linear ......................................................................... 18
Logfile ...................................................................... 134
M
Main menu .................................................................... 6
Max.Iterations ..................................................... 55, 126
Measurement job ........................................................ 84
MORE .......................................................................... 88
P
PAGE .......................................................................7, 39
PAUSE .........................................................................53
Perpendicular ..............................................................18
Plan View ..................................................................128
Plane ...........................................................................48
Plot .............................................................................41
Plot Type ...................................................................128
Plumb line ...................................................................18
Point ID .................................................................38, 76
Polar .........................................................................119
Pole Graphic ..............................................................128
Portal ..........................................................................10
POSIT ..........................................................................69
Position Tol ...............................................................124
Profile
Prof.Element(%) ................................................... 133
Prof.Offset ........................................................... 133
ProfDist&Offset ............................................... 68, 78
Profile ........................................................ 6, 45, 124
Profile Chain ........................................................... 45
Profile Tol ............................................................ 124
Profile View .......................................................... 128
Project Configuration ................................................ 116
Q
Quality 3D ................................................................. 133
Quality Check ............................................................ 124
R
Rail Configuration ..................................................... 116
REC ......................................................................... 7, 39
Reflector
Refl Radius ........................................................... 121
Reflector Ht ........................................................... 38
reflector radius ...................................................... 41
Reflectorless .......................................................... 41
RESUM ........................................................................ 89
Road Configuration ................................................... 116
Road job ..................................................................... 84
RoadRunner Tunnel Setup panel. ................................ 34
Rotation method ................................................. 55, 126
Rotation Point ............................................................. 10
Index
S
Scan ......................................................................15, 46
Scan Mode ..........................................................55, 126
Scan Profile .................................................................34
Selection ...................................................................102
Set out ........................................................................58
Shifts ..........................................................................17
Sign convention ...........................................................19
Stake
Stake ........................................................................6
Stake Height ...........................................................77
Stake Height Difference .........................................67
Stake Mode ..........................................................119
Stake Offset ...........................................................67
Stake Pt ID .......................................................67, 77
Starting point ..............................................................48
STOP ...........................................................................53
Strgl Ht Diff ...............................................................132
Strgl Name ................................................................132
Strgl Offset ...............................................................132
Strgl Task ..................................................................132
Stringline ...................................................................102
Superelevation ............................................................10
RoadRunner Tunnel
139
Index
RoadRunner Tunnel
T
Tangent ...................................................................... 41
Tight Behav. .............................................................. 126
Tight Ignore .............................................................. 126
Tight Toleran ............................................................. 126
Tight tolerance ............................................................ 14
To Alignment ............................................................ 119
To Station ................................................................. 119
Triangular Irregular Network ........................................ 86
Tunnel
Tunnel Centreline ................................................... 23
Tunnel Configuration ............................................ 116
Tunnel Job ........................................................ 34, 84
Tunnel Profile Editor .................................................... 24
Layer details view .................................................. 26
Profile details view ................................................. 25
U
Underbreak ................................................................. 10
Update Angle ............................................................ 120
Update X-Sec ............................................................ 128
V
Vertical ....................................................................... 58
Vertical exaggeration ................................................. 129
W
Work Corridor ........................................................... 120
Working with shifts ................................................... 104
140
Z
Zone ...........................................................................48
Index
RoadRunner Tunnel
141
Ask your local Leica Geosystems dealer for more information about our TQM
program.
Leica Geosystems AG
Heinrich-Wild-Strasse
CH-9435 Heerbrugg
Switzerland
Phone +41 71 727 31 31
www.leica-geosystems.com
Original text
754030-3.1.0en
Leica Geosystems AG, Heerbrugg, Switzerland, has been
certified as being equipped with a quality system which meets
the International Standards of Quality Management and Quality
Systems (ISO standard 9001) and Environmental Management
Systems (ISO standard 14001).
Printed in Switzerland © 2007 Leica Geosystems AG, Heerbrugg, Switzerland
Total Quality Management: Our commitment to total customer satisfaction.