1
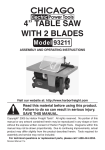
14” CUT OFF SAW
Model 44829
(Blade Sold Separately)
ASSEMBLY AND OPERATING INSTRUCTIONS
3491 Mission Oaks Blvd., Camarillo, CA 93011
Visit our Web site at http://www.harborfreight.com
Copyright © 2001 by Harbor Freight Tools. All rights reserved. No portion of this
manual or any artwork contained herein may be reproduced in any shape or form
without the express written consent of Harbor Freight Tools.
For technical questions and replacement parts, please call 1-800-444-3353
Specifications
Motor
120V Single Phase 60HZ 2HP
Watts (input)
1500 Approx.
Rpms
3400
Blade Size
14” (Not Included) 1” Arbor
Miter Angle
0-45 Degrees Rt. 0-30 Left
Weight
35.6 Lbs.
Base Dimensions 18-1/2” x 10-1/2”
Cutting Capacity Up to 4”
Table Size
9-3/4” x 10-1/4”
Vise Assembly and Spanner Wrench Included.
Recommend using #525 Cut-off Wheel (not included), 14” Diameter, 1/8” Thickness, 30 Grit. This is an aluminum oxide wheel designed for general purpose
usage. For cutting masonry, recommend #44815 Cut-off Wheel (not included),
14”, 1/8” Thickness.
Save This Manual
You will need the manual for the safety warnings and precautions, assembly
instructions, operating and maintenance procedures, parts list and diagram. Keep
your invoice with this manual. Write the invoice number on the inside of the front
cover. Keep the manual and invoice in a safe and dry place for future reference.
Safety Warnings and Precautions
WARNING: When using tool, basic safety precautions should always be followed to reduce the risk of personal injury and damage to equipment.
Read all instructions before using this product!
1.
Avoid working alone. If an accident happens, an assistant can bring help.
2.
Keep work area clean. Cluttered areas invite injuries.
3.
Observe work area conditions. Don’t expose to rain. Keep work area well
lighted.
4.
Keep children away. Children must never be allowed in the work area. Do
not let them handle machines, tools, or extension cords.
5.
Store idle equipment. When not in use, tools must be stored in a dry
location to inhibit rust. Always lock up tools and keep out of reach of
children.
6. Dress properly. Do not wear loose clothing or jewelry as they can be caught
in moving parts. Protective, electrically nonconductive clothes and nonskid
footwear are recommended when working. Wear restrictive hair covering to
contain long hair.
SKU 44829
Page 2
REV 09/01
REV 11/01
7.
Use eye and ear protection. Always wear ANSI approved impact safety
goggles. Wear an ANSI approved face shield when producing metal filings.
8.
Do not overreach. Keep proper footing and balance at all times. Do not
reach over or across electrical cables or frames.
9.
Maintain tools with care. Inspect tool cords periodically and, if damaged,
have them repaired by an authorized technician.
10. Use the right tool for the job. Do not attempt to force a small tool or
attachment to do the work of a larger industrial tool. There are certain
applications for which this tool was designed. Do not modify this tool and do
not use this tool for a purpose for which it was not intended.
11. Stay alert. Watch what you are doing, use common sense. Do not operate
any tool when you are tired.
12. Check for damaged parts. Before using any tool, any part that appears
damaged should be carefully checked to determine that it will operate
properly and perform its intended function. Check for alignment and binding
of moving parts; any broken parts or mounting fixtures; and any other
condition that may affect proper operation. Any part that is damaged should
be properly repaired or replaced by a qualified technician. Do not use the tool
if any switch does not turn On and Off properly.
13. Replacement parts and accessories. When servicing, use only identical
replacement parts. Use of any other parts will void the warranty. Only use
accessories intended for use with this tool. Approved accessories are
available from Harbor Freight Tools.
14. Do not operate tool if under the influence of alcohol or drugs. Read
warning labels on prescriptions to determine if your judgment or reflexes are
impaired while taking drugs. If there is any doubt, do not operate the tool.
15. Use proper size and type extension cord. If an extension cord is required,
it must be of the proper size and type to supply the correct current to the
tool. Otherwise, the extension cord could melt and catch fire, or cause
electrical damage to the tool. This tool requires use of an extension cord of 0
to 12 amps capability (up to 50 feet), with wire size rated at 14 AWG. Longer
extension cords require larger size wire. If you are using the tool outdoors,
use an extension cord rated for outdoor use. (signified by “WA” on the jacket).
16. Maintenance. For your safety, maintenance should be performed regularly
by a qualified technician.
Note: Performance of this tool (if powered by line voltage) may vary depending on
variations in local line voltage. Extension cord usage may also affect tool performance.
SKU 44829
Page 3
Warning: The warnings, cautions, and instructions discussed in this instruction manual cannot cover all possible conditions and situations that may occur. It must be understood by the operator that common sense and caution
are factors which cannot be built into this product, but must be supplied by
the operator.
Unpacking
When unpacking, check to make sure the parts listed on page 6 are included.
If any parts are missing or broken, please call Harbor Freight Tools at the number on the cover of this manual.
Operation
Warning! Unplug the power cord while setting up the saw and workpiece. Do not
plug in until ready to cut.
Note: Steel Capacity Cutting Chart found on page 5 of this manual.
Warning: This Cut-Off Saw is designed to cut iron metal. Do not cut wood, brick,
aluminum, or magnesium; tool damage and/or personal injury could occur.
Before using the saw always check the following:
A. Make sure the blade (not included) is securely attached.
Loosen Screw (#110) and lift Small Cover (#109) out of the way.
Using the Wrench (#91), remove the Hex Screw (#23) - reverse thread, Stop
Washer (#22), Flat Washer #21), and the Flange (#20). Set the blade on the
arbor and replace the hardware. Do not overtighten. Move Small Cover (#109)
back in place and tighten Screw (#110).
B. Check that the Upper Shield (#12) and Lower Shield (#30) are in place.
C. The Cut Off Saw must be located on a level, flat, workbench that is solid and
able to support the weight of the tool and workpieces. The workpiece must be
secured in a vise or with clamps (vise assembly included).
D. Always wear ANSI approved impact safety goggles.
1. Disconnect the Chain (#72), allowing the blade assembly to lift. The chain is
only used for transporting the tool. Make sure the saw has cooled for 3-5 minutes
before latching or unlatching the Chain (#72), to avoid burning yourself on the hot
blade.
2. Loosen the Vise (#82) on the vise assembly and position workpiece. Tighten
the Vise (#82).
3. Make sure the blade is clear to rotate freely.
4. Press the power Switch (#33). Allow blade to reach full speed.
5. Lower the Handle (#35) slowly and contact the workpiece with very little
pressure. Let the blade do the work. If the blade begins to slow, back off as you
are exerting too much pressure.
Caution: The Lower Shield (#30) and Small Cover (#109) must always be in
place. Both of these blade guards must be in place when the tool is being used.
6. Turn off the power and unplug the tool before removing workpiece. Never leave
the tool running unattended.
SKU 44829
Page 4
REV 04/02
Miter Cuts
For Miter Cuts, you must use the Vise (#82). The Vise Stop has a
Fixed Splint (#100) for this purpose. Loosen the Vise Stop by slightly loosening
each bolt and align the scale to your desired angle. Tighten the bolts. Carefully
set the workpiece into the Vise (#82) without disturbing the setting.
Steel Cutting Capacities
Steel Pipe - 4” Dia. x 1/4” Wall Thickness
Angle Iron - 4” x 4” x 1/2” Thickness
Solid Steel - 1-1/2” Dia.
Note: Use an aluminum oxide wheel for
cutting ferrous material, i.e. angle iron,
conduit pipe, etc. Use masonry wheels to
cut masonry, stone, brick, aggregate, etc.
Maintenance
Warning! Remove the electrical plug from the outlet before maintaining the Saw.
1. Wearing gloves, carefully clean any excess metal filings that accumulate on
the saw, vise assembly, or motor housing.
2. To keep looking like new, use an automotive wax to polish the metal
Base (#87).
3. Check blade for wear, replace at the first sign of any tears or cracks.
4. Periodically check power cord for wear or tears. If necessary, have a qualified
technician replace it.
5. Never use chemicals or solvents to clean the Saw.
Lubrication
1. The motor bearings are permanently lubricated at the factory. Do not attempt to
work on the motor; the tool should be serviced by a qualified technician.
2. Any mechanical part including a pivot or threaded rod may be lightly sprayed
with a silicone or graphite lubricant, which will not hold or collect the metal filings
left from a job.
3. Every 500 Hrs. replace the Carbon Brush (#67). Remove the
Brush Cap (#68) and take out the Carbon Brush (#67). Replace and tighten the
Brush Cap (#68).
PLEASE READ THE FOLLOWING CAREFULLY
THE MANUFACTURER AND/OR DISTRIBUTOR HAS PROVIDED THE PARTS DIAGRAM
IN THIS MANUAL AS A REFERENCE TOOL ONLY. NEITHER THE MANUFACTURER
NOR DISTRIBUTOR MAKES ANY REPRESENTATION OR WARRANTY OF ANY KIND TO
THE BUYER THAT HE OR SHE IS QUALIFIED TO MAKE ANY REPAIRS TO THE
PRODUCT OR THAT HE OR SHE IS QUALIFIED TO REPLACE ANY PARTS OF THE
PRODUCT. IN FACT, THE MANUFACTURER AND/OR DISTRIBUTOR EXPRESSLY
STATES THAT ALL REPAIRS AND PARTS REPLACEMENTS SHOULD BE UNDERTAKEN
BY CERTIFIED AND LICENSED TECHNICIANS AND NOT BY THE BUYER. THE BUYER
ASSUMES ALL RISK AND LIABILITY ARISING OUT OF HIS OR HER REPAIRS TO THE
ORIGINAL PRODUCT OR REPLACEMENT PARTS THERETO, OR ARISING OUT OF HIS
OR HER INSTALLATION OF REPLACEMENT PARTS THERETO.
SKU 44829
Page 5
REV 04/02
Parts List
SKU 44829
Page 6
REV 04/02
Assembly Drawing
NOTE: Some parts are listed and shown for illustration purposes only and are not
available individually as replacement parts.
SKU 44829
Page 7
REV 04/02