1
Owner's
Manual
27" and 30"
Convection
Wall Oven
ZEK938 - 27" Single _:all Oven
ZEK958 - 27" Double Wall Oven
ZET938 - 30" Single Wall Oven
ZET958 - 30" Double Wall Oven
Monogram:
Consumer
Inff)rmation
l:l%l[ Oven
Introduction
Yore" new Monogram
wall oven makes all eloquent
statement
of style, convenience
and kitchen
i)lanning
flexibility. Whether
you chose it fl_r its pm'ity of design, assiduous
attention
to detail-or fin" both of these reasons--you'll
find that yore" Monogram
wall oven's superior
blend of fin'm
and ftmction
will delight you fl)r years to come.
Your Monogram
wall oven was designed
to provide the flexibility to blend
cabinetry.
Its sleek design can be beautihflly
integrated
into the kitchen.
The infi)rmation
properly.
Contents
on the following
pages will hel I) you operate
37
39
Heating
Lift-Off
Elements
.....................
O',en Door ....................
39
38
Light Bulb
..........................
(-)yen Door
..........................
Probe
..............................
Racks ...............................
P.emowlble
Oven Floor
. ................
Stainless Steel and Metal Parts
...........
40
39
40
37
39
37
Befl)re
Services
You Call For Service
Important
Phone
Model and Serial
Numbe_
Nmnbers
..........
.............
...............
Product
Registration
..............
Satbty Instructions
...................
_%u'ranty .....................
protective
shitsOing f!lm
and
p(M' ag&g
t(@e
41, 42
47
3
3, 45, 46
4, 5
Back Cover
Carehflly grasp a corner (ff the protective
shipl:fing
film with your fingers and slowly peel it fl'om the
appliance
sm'fime. Do not use any shaq) items to
remove the film. Remove all ot the film befiwe
using the appliance
fiw the fil_t time.
To assm'e no damage is done to the finish o_
tile product, tile sa_bst way to remo_v the adhesive
from packaging
tape on new appliances
is an
application
of a household
liquid dish_;Mfing
detergent.
Apply with a sott cloth and allow
to soak.
N07_: The adhesive must be removedjhmz
It cat, not be removad !/it is bah(,(I o_z.
maintain
yore" wall oven
Oven
Care and Cleaning
Broiler Pan and Grid
..................
Control
Panel
........................
Consumer
and
in with your kitchen
all parts.
Aluminum
Foil
..................
4, 17, 35
Baking or Roasting
.................
Broiling/Broiling
Guide
.............
Controls
.............................
16, 17
18-20
7
Clock and Timer .....................
Convection
.......................
Features
.............................
Probe ............................
8, 9
26-31
6
23-25
Proofing
Sabbath
33
13-15
............................
Featm'e
....................
Sell:Cleaning
Oven .................
Special Features
...................
Thermostat
..........................
35, 36
10-12
34
Timed Baking & Roasting
_%u'ming
............................
21, 22
32
............
Be[bre
using your
wall oven
Read
this
manual
carefully.
operate
and
help
)ou
o``en
i)roperlx,
It is intended
maintain
``our
new
to
If you
don't
wall
more
service
help,
there
nmnbers
(sf this
Kee I) it hand)
for
ans``_ers
to )our
understand
something
is a list
included
or
need
of toll-fl'ee
consumer
in tile back section
manual
questi(ms.
OR
Visit our \'\Tebsite at: ge.com
-Write
down the
model &
serial
numbers
You'll
find
or (m tile
the s),,'esl
them
on
front
a label
(>f tile
on
(lower)
tile
side
o``en
trim
behind
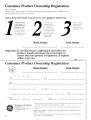
Before sending in this card, please write these
numbers here:
dssot2
Fill out and return
tile Consmner
Product
Model
P.egistration
Card that is packed with this
product.
If you cannot find it, please send
in tile duplicate
card printed
in the back
of this manual.
Number
Serial
Number
Use
{/you
received
Immediately
a
that
sold
contact
)ou
tile
the
wall
dealer
(or
these
llttl/lbeFs
service
calls
It lists
causes
ill all}
concerning
COITeSl)(sndellCe
}our
(st"
``<all o`` en,
btulder)
o`` en,
damaged
wall oven
Save time
& money
Before )ssu request serx4ce, check
Solver in the back of this manual.
/./you
To obtain
need
page
service
service,
tile Problem
}S)tt
see tile (;onsumer
Services
in the back of this manual.
We're
})roud
pleased.
If %r
with
service
the
to %llow
FIRST,
appliance.
In most
service
and
want
some
reason
you
are
vou
contact
tile
Explain
cases,
this
receive,
here
you
not
are
to be
happy
tile
steps
help.
peoI)le
``_ll} )(m
who
are
vAll s(s]`` e tile
NEXT,
serviced
not
``our
pleased.
problem.
of minor
if vsm
ol)erating,
problems
that
}ourself.
c(st't'ect
details--including
of our
%)" further
casl
are
still
not
}(mr
pleased,
ph(me
Managex;
Customer
Relations
GE Api)liances
Appliance
Park
Louisville,/<.Y
40225
write
ram)bet--to:
all tile
IMPORTANT
SAFETY INSTRUCTIONS
WARNING!
For xour saiety, tile infornmtion
in this manual
explosion,
electric shock, or to prexent
propert)
IMPOR
7ANT
SA[i 'TY
" The
California
Toxic
NO TICE
Safe
Enforcement
Drinking
Act
Water
requires
tile
and
Governor
of CaliJ_m'nia
to publish
a list of substances
known
to tile state to cause
cancer,
birth
de_bcts
or
must be followed
to mininlize
tile risk of fire or
damage
personal
ii_jury or loss of life.
other
harm, and
reproductive
requires
businesses
to warll
potential
exposure
to such
CtlStOl/lers
o_
" The fiberglass
insulation
in self-cleaning
ovens gives off a very small amount of carbon
monoxide
during the cleaning cycle. Exposm'e
can be minimized
by venting with an open
window or using a ventilation
lira or hood.
lru-rlD
g--_ -i-_ v-p A -_ Trlp
"l[±VJ[r_.Jl[_
J[a_Jk_
][ : Tile
substances.
is extremelx
sensitixe
health
of
to the
fumes
some
birds
gixen
oven.
off during
the sel_Lcleaulng
c) cle of an}
Move birds
to another
well-ventilated
roon/.
SAf >;TY PRECA U770NS
When using your appliance, follow basic safety
precautions, including the following:
, Use this appliance only for its intended
as described in this manual.
use
, Be sure the oven is securely installed in a
cabinet that is firmly attached
to the house
structure.
Never allow anyone to climb, sit,
stasld
or hang
oil tile
ovesl
door.
show you the location
of
or fuse. Mark it for eas}
, Do not attempt
to repair or replace any part
of your wall oven unless it is specifically
recommended
in this manual.
All other
servicing should be re_brred to a qualified
technician.
" Teach children not to play with the controls
or any ()tiles" part of the oven.
"Never
leave the oven door open when
are not watching
the oven.
, Always
holders
yonr
keep dish towels,
and other linens
dish cloths, pot
a safe distance
from
safety, never use your
or heating the room.
, Always keep wooden and plastic
and canned food a safe distance
yOUF
4
you
oven.
" For your
warming
oven.
appliance
, Always keep combustible wall coverings, curtains
or drapes a safe distance from your oven.
, DO NOT STORE OR USE COMBUSTIBLE
MATERIALS, GASOLINE OR OTHER
FLAMMABLE VAPORS AND LIQUIDS IN
THE VICINITY OF THIS OR ANY OTHER
APPLIANCE,
" Be sure your appliance
is properly
installed
and grounded
b) a qualified
technician
in
accordance
with tile provided
installation
instrslctiosls.
" Have the installer
the circuit breaker
re_erellce.
" Keep the oven free from grease buildup.
for
utensils
away from
, Do not let cooking grease or other flammable
materials accumulate in or near the wall oven.
* Do not use water on grease fires. Smother
fire
or flame or use a multi-purpose
dry chemical
or loam-type
fire extinguisher.
Flame
in tile oven
can be smothered
completely
by closing the oven door
and turning the oven off or by using a
multi-pro'pose
dry chemical
or fl)am-type
fire extinguisher.
, Do not use aluminum
foil to line oven
bottoms,
except as suggested
in this manual.
hnproper
installation
of altll_linum
foil ma)
result in a risk of electric shock or fire.
, Cook meat and poultry thoroughly--meat
to
at least an INTERNAL
temperature
of 160°F
and poultry to at least an INTERNAL
temperature
of 180°1)'. Cooking
to these
temperatures
usually protects against
fl)odborne
illness.
"Before performing any service, DISCONNECT
THE OVEN POWER SUPPLY AT THE
HOUSEHOLD
DISTRIBUTION
PANEL BY
REMOVING THE FUSE OR SWITCHING
OFF THE CIR(R)IT BREAKER.
, Do not store flammable
materials
in the oven.
SAP 2 TY PRE CA U7 70NS
" Do not leave children
alone--children
shoukl
not be leit alone or unattended
in an area
where all appliance
is ill use. They should
never be allowed to sit or stand on ally part
of the appliance.
, Do not touch the heating elements
interior
surface of the oven. These
or the
sm'Ihces
may be hot enough
to burn even though they
are dark in color. During and after use, do not
touch, or let clothing
or other flammable
materials
contact,
any interior
area of the
oven; allow sufficient
time fl)r cooling first.
Potentially
hot surfhces
include
the oven vent
openings
and sur_hces near the openings,
crevices around
the oven doox; the edges of
the door window and metal trim parts above
the door.
Remember:
Tile inside
may be hot when
surfitce
tile door
. CAUTION:
" Place the oven rack in the desired position
while the oven is cool. If racks must be handled
when hot, do not let pot holder
heating elements.
contact
the
"Never leave jars or cans of fat drippings in or
near your oven.
, Pulling out the rack to the rack stop is a
convenience
in lifting heavy foods. It is also
a precaution
against blu'ns fl'om touching
hot surti_ces of the door or oven walls.
, When using cooking or roasting bags in the
oven, fi_lh)w the manufiictm'er's directions.
" Do not use your oven to dry newspapers.
If o\ erheated,
they can catch on fire.
, Do not use oven for a storage
ill all oven can ignite.
area.
Items
stored
of the oven
" Do not leave paper products,
cooldng
or food in the oven when not in use,
is opened.
ITEMS
OFINTEr:ST
TO CHILDREN
SHOULD
NOT BE STORED
IN CABINETS
ABOVE A WALL OVEN-CHILDREN
CLIMBING ON THE OVEN
TO REACH ITEMS COULD BE SERIOUSLY
INJURED.
* Never wear loose-fitting
or hanging
garments
while using the appliance.
Be careful when
reaching
fl)r items stored over the oven.
Flammable
material
could be ignited if
brought
in contact with oven heating
elements
and may cause severe burns.
* Do not heat unopened
food containers.
Pressure could build up and the container
could bm_t, causing all i@n'y.
utensils
, Do not allow anyone to climb, stand or hang
on the door, They could damage
the oven or
cause severe personal
il_jur)';
, Use only dry pot holders--moist
or damp pot
holders on hot sllrfi_ces ulav restllt ill bt/rlls
fl'om steam. Do not let pot holders touch
heating elements.
Do not use a towel
or other bulky cloth.
oven
, After broiling, always taJ_e the broiler pan out
of the oven and dean it. Leftover grease ill the
broiler pan can catch fire the next time you use
the pan.
, Stand away from the oven when opening the
oven door. Hot air or steam which escapes call
cause burns to hands, fi_ce and/or
eves.
* Keep the oven vent unobstructed.
, Large scratches or impacts
lead to broken or shattered
SEI_ r -CLEANING
to glass doors
glass.
cam
OVEN
" Do not clean the door gasket. The door gasket
is essential %r a good seal. Care should be
taken not to rub, damage or move the gasket.
* Do not use oven cleaners.
No
COl/lulerrial
, Before
broiler
listed in tiffs Owner's
self-clea_aing the oven, remove
pan, grid and other cookware.
Manual.
the
ovell
cleaner or oven liner protective
coating of ally
kind should be used in or around ally paI_ of
the oven. Residue from o\ ell cleaners will
damage the inside of the oven when the
selIklean
cycle is used.
, CleaJa only parts
" Be sure to wipe up excess spillage before
staxting the self-clemffng operation.
" If the sdf-deaxiing
mode maJfunctions,
turn
tlle oven off and disconnect
the power supply.
Have it seIMced by a qualified technidan.
SAVE THESE INSTRUCTIONS
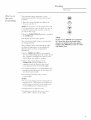
Features
of Your Wall Oven
I.l_lll Ove*_
®
Design
inJbrmation
(NO1 all [bal*_r_<s
are o_ all modeL_.
®
®
41_peam_ce_ay vaU. )
J
@
@
Feature
Index
Page
1
Oven Racks with Stop-I,ocks
Two additio_al
mcl_s m_O' be o_Uered. Pub ,\'o. 3-A014
5, 16, 19, 20,
26, 27, 35, 37
2
Roasting
3
Broiler
4
Probe
Depe_tdi_tg on your overt, the probe outlet will be Ioc_lted
i_t the oven wall or ceili_g'.
5
()ttset
6
Oven I Aght Pad (s) Lel._ you tur_ the overt ligDt o_t _l_td qD_;
D_'pe_di_g >on your ove_, the ove_ [_,_'htwill be located i_ the ove_ w_UI or ceili_g'.
7
Oven
ConU:ol,
8
Oven
Veni Grille
9
Amomatic
Rack
27, 35, 37
Pan and
(;rid
5, 17, 18, 24, 27, 35, 37
(o_t some mode£)
Rack
Clo(k
Oven
26, 27, 29, 37
7-12
5
15ght
Switch
(on some models)
I
Oven Rack Supports
thick position,s are sugg','_t{>Ui_ the Convectio_
Baking or Ro:_sti_g" a_d B_ili_g sections.
11
Removable
12
15fl-()ff
13
Oven
14
Convection
Fan and tIeating
15
Oven
Elemeni
16
Automatic
17
Oven
()yen
Oven
Broil
_'nt
Cooki_g,
Floor
Door
16-20,
26, 27, 37
39
witt_ Broil
Slop
Position
18, 38
Gasket
Oven
13, 40
and Timer
10
Door
23, 24, 25, 29, 35, 40
5, 38
Door
Elemenl
()/)emt_
during
co_roectio_ cooki_g'.
26-31
18, 39
I,atch
35, 36
5
Oven
Control,
(;lock
& Timer
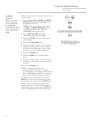
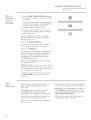
14%II Oven
ooo 2oo
Doubleovencontrolshown.(Appearancemayvary.)
k atures
yO_llT
of
07}C72
control,
clock and
1
BAKE. Press to select
the bake flmction.
2
BROIL HIGH/LOW.
broil flmction.
Press to select
3
CONV BAI_]/MULTI.
Press to select baking
with convection
on multiple
racks.
4
CONV
baking
tim
9
the
Roast
BAld]/1
RACK. Press to select
with convection
on one rack.
5
CONV ROAST.
convection.
6
WARM/PROOE
Press once tk_I"warming
or
twice ff)r proofing.
See the How to Set the
Oven for Warming section and the How to
Set the Oven for Proofing
section.
Press to select
roasting
START.
cooking
8
DISPLAY. Shows the operations
you have
selected,
the time of day and the cooking
or cleaning
status.
If "F - mad a number
display
indicates
flash
horn'.
If flmction
power
pad.
Put
the
error
to the
Allow
oven
code
oven
oven
back
into
and
11
SELF CLEAN STD/LOW.
Press to select
the sellecleaning
flmction.
See the Lrsing
the SeltZCleaning
Oven section.
12
PROBE. Press when
cook food.
13
OVEN LIGHT
ON/OFE
oven lights on or off.
14
CLEAR/OFE
Press to cancel any oven
operation
except the clock and timer.
15
TIMER ON/OFE
Press to select the
timer flmction.
The timer does not control
The
control
has
NUMBER
times.
These
operation.
disconnect
you
set
control
for
the
end
alert
the
of the
oven
VO/l whell
temperature
tones
an
fimction.
has
is a problem
When
vou
press
beep.
This
beep
pressure
been
They
tillle
a touch
the
on
the
sound
while
or at
will
also
know
pad
oven
vou
An
you
to activate
hear
have
a
placed
it.
set
an
temperatm'e
to
Press to mrn
can time
the
up to
Use to set any flmction
inside
a tone
attention
the
tood
tone
will
flmction
by watching
The
the
the time
temperatm'e,
starts
to place
flmction.
to enter
oven
temperature,
invalid
will
Press
automatically
know
or if
you
PADS.
CLOCK.
When
set
or
oven.
pad,
will let w)u
will
sotmd
function
entered
with
that
may
oven
}lil illcorrect
there
enough
of tones
the probe
requiring
numbers--fi)r
example,
the time
of dav on the clock, the timer, the oven
temperatm'e,
the internal food temperatm'e,
the starting
and length
of cooking
time for
Timed Bake and the starting
and length of
cleaning time for Sell:Clean.
for
call for service.
a series
at dilterent
using
oven operations.
The timer
9 horn's and 59 minutes.
17
7bnes
operatiollS.
DELAY START. Use along with the
COOK TIME or SELF CLEAN STD/LOW
pads to set the oven to start and stop
automatically
at a time you select.
16
this
the
to cool
repeats,
Bake, Timed
Convection
in the
and the oven control
signals,
hmction
error
code.
Press
CLFAR/OFF
one
or letter"
any
Use fi)r Timed
Bake and Timed
10
with
7
Must be pressed
to start
or cleaning flmction.
COOKTIME.
Convection
to heat.
oven
will sotmd
sotmd
the
can
display
be
the
your
to let
oven.
if vou
or try to set
tone
the
When
reaches
in the
of day.
set an
an additional
quickly
messages.
identified
you
Oven
Control,
Clock
& Timer
l;Va 11 Ove_
Clock
The c[od_ must be set f>r the automatic
,]'Unctions to work prop_,rly,
oven timir_g"
The time of day clock cammt be changed
during Delay Start. (It can be changed
during
a regular bake or broil operation.)
7b set
the clock
1
Press
the
CLOCK
2
Press
the
number
read
them.
the
pads
aiier
display
reverts
3
check
within
CLOCK
pad.
another
pad
CLOCK
original
time
pad
This
The
time
the
If this
reenter
enters
the
the
time
display
simply
of day
press
shows
is
the
tmtil
is pressed.
time
of day is ha the
a power
To reset the clock, press the CLOCK pad.
Enter the correct time of day by pressing
the ai)i)ropriate
number
pads. Press the
START pad.
display,
thilure.
NOTE: The timer is independe_zt (?]all the oth(<r
,]')_n_tions and it doe,s not _ontrol the oven, The
CLEAR/OFF
pad doe,_ not (qf, ct the time_:
You
may
program
the
or other
household
and 59 minutes.
The
timer
counts
at a time,
until
Then
control
seconds
minute
the
@@@®®®@®®®
order.
one
and
of day when
infi)rmation,
press
pad,
setting.
CLOCK
you have expe_ienced
Reset the clock.
7 mer
pressed
START
pad.
the clock.
other
If a flashing
not
the
@
way you
] 2:34,
4 in that
to the
the
showing
same
to set
1, 2, 3 and
press
press
the
of day.
Press the
and starts
To
are
you
the
example,
pads
minute
hal)pens,
the time
pads
For
number
If number
pad.
timer
activities
to time
fl)r
cooking
up
to 9 horn's
When the timer reaches
" :00," the control
will beep 3 times fi)llowed by one beep eveI'v
6 seconds
tmtil the TIMER ON/OFF
pad is
pressed.
The
6-second
tone
can
fi)llowing
the steps in
of Your Control
under
down
the
last
in minutes,
60 seconds
will beep
will not be
is reached.
displayed
one
1 minute
are
time.
tmtil
the
reached.
The
last
a Timed
Cw'le.
be canceled
bv
the Special
Features
Tones
at the End
of
Using
the timer
1 Press tile TIMER
ON/OFF
2
pads
Press
tile
nmnber
to set
tile
example,
to enter
2 hours
and
touch
2, 4 and 5 in that order.
(/you
pad
3
make
a_d
Press
a mislake,
@
pad.
time.
For
®®®®®®®®®@
45 minutes,
press lhe 77MER
@
ON/OFF
b_q'it_ ag'aim
tile
START
pad.
After pressing
tile START pad, "SET"
disappears;
this tells you the time is cotmting
down, although
the display does not change
until one minute
has passed. Seconds will not
be shown in the display until the last minute
is
counting
down.
4 _'_lien time is up, tile oven control signals
until )ou press the TIMER ON/Ol_"
pad.
Display then shows the time of da_.
NOTE: 77w mbmte timer is i_depet_de_l (?/all lhe
olher /)t_clio_,s at_d il does _ol co_lrol lhe ove_.
The CLEAR/OFF
pad does t_ol qff_¢cl ttte time*:
To reset
Your
control
will allow vou to lock
touch pads so they cannot
pressed.
out tile
be activated
when
N07_:
Or_ doable ovea model,s, this aUival¢,s this
./_,ature /br both oveas.
To lock/mflock
the controls:
1 Press the 9 and 0 pads at the same time tot 3
seconds,
until the display shows "I,OC ON."
2 To tmlock tile control,
press tile 9 and 0 pads
(on double
oven Inodels, use tile upper oven
controls)
at tile san/e time tot 3 seconds,
tmtil the display shows "I,OC OFK"
"_,_hen this featm'e is on and tile touch pads are
pressed,
tile control will beep and tile displa)
will show "I,OC ON."
NOTES:
• 77w cor_lrol bchoul mode @cls all ioudz pads. 5)_
lolu
h pad_willworkwlu:r_
l/fi,s
f,alutvh aaivab,d.
• 77_,¢ac(]u,slme¢_lrvifi be rdabwd it_ memor) after a
power fifihm,
timer:
If tile display is still showing tile time remaining,
you may change it by pressing the TIMER
ON/OFF
pad, then press the nun/bet
pads until
the time you want appea_5 in the display.
If tile remaining
time is not in tile display (clock,
delay start or cooking time are in the display),
recall the remaining
time by pressing the TIMER
ON/OFF
pad and then pressing tile number pads
to
enter
tile
To cancel
Press
Control
lockout
the
tile
new
the
tiule
vo/i
iV_lilt,
timer:
TIMF, R ON/OFF
pad
fi)®
LOCK
twice.
Special Features
5 ecial
.[eatures q[
.yOUr
OUgTI
control
7bnes
at
the end q/ a
timed ucle
}bur new touch pad cot_trol has additiot_al fi_atu**,s
that you may choose to use.
fifilure,
except
fiw tile
have to be reset.
They remain
the steps are
your choice,
features
will
Tile special tbatm'e modes can only be activated
while tile displa} is showing tile time of da_ clock,
ill tile control's
memory
until
repeated.
When the display shows
press the START pad. The special
remain in memory
Mter a power
At the end g_]a timed o'ch; 3 short beeps will
sound Jblh_wed by one be@ every 6 secon& until
the CLI_2AR/OFF pad is pre._.s,¢d.This _ontinuous
6-s_ond beep m(O' be (an_e#d. 7b cancel the
6-s*¢cond ba'/):
BAKE
and
tile
pads
oven
(on double
oven models,
use tile upper
controls)
at the same
time tin" 3 seconds
tmtil
the
shows
follo,_ing
ma)
actixate
are
tile
features
them.
0
Press
display
BROIL
Tile
Sabbath
HIGH/LOW
"SF,"
Press tile TIMER ON/OFF
pad. Tile display
shows "CON BEEP" (continuous
beep). Press
the TIMER ON/OFF
pad again. The display
shows "BEER" (This cancels the one beep
every 6 seconds.)
3
Press tile START
NOTE:
On double
pad.
oven
models,
this cancels
the
end-(*/:O_ le tone fin" both oven,s.
7bne
volume
77_i,s
fiCatureallows you to ac(iu,st#w tone volumes to a
mo*eacceptablevoh,,me. 77te_ea*,_threepo,s,sihl_
voh,,me
l_,veL*.
1
Press
tile
BAKE
and
BROIL
HIGH/LOW
(on double
oven models,
use tile upper
controls)
at the same time fi)r 3 seconds,
the
display
sho_vs
pads
oven
tmtil
"SE"
2 Press tile oven fight on/off pad. Tile displa) will
show "2 BEER" This is the middle xohune lexel.
Press tile oven fight on/off pad again. Tile
displa) will show "3 BEER" This is the loudest
_,ohllne lex el.
Press tile oven fight on/off pad again. Tile
display will show "1 BEER" This is the quietest
•_ohlule lex el.
For each time tile lexel is changed, a tone will
so/md to proxide an indication
of tile xolume
lexel.
3
Press tile START
shown.
pad to actixate
tile lexel
NO_I_Z: On double oven too(Iris, this activates this
Special fi,,attovfin" both _roen,s.
10
G
ibature,
and
which
ho*_ }ou
*_ill
12-hour,
24-hour
or clock
blackout
_bur
control
would
bla_k
is ,set to use a 12-hour
pr@_r lo have
out the dock
Press
pads
oven
until
a 24-hour
di@la3,
clock.
mililary
fidlow
(/you
lime dock
or
the steps below.
the BAKE and BROIL HIGH/LOW
(on double
oven models, use the upper
controls)
at the same time for 3 seconds
the display shows "SIL"
@+@
@
2 Press the CLOCK pad once. The display will
show "12 hr." If this is the choice you want
press the START pad.
Press the CLOCK pad again to change to the
24-horn" military time clock. The display will
show "24 hr." l( this is the choice you want,
press
the START
Press
the
clock
display.
The
If this
is the
choice
START
pad.
N07_:
pad.
CLOCK
[/lhe
pad
again
display
you
want,
shut o1/
press
clock is i_ lhe blaek-oul
r_ol be able lo use lhe Del( O' Slarl
12-hour
to black
will show
out
the
"O[_[L ''
the
mode,
you will
/itr_clior_.
With this fi, atare, shouhl you fi,]qr, t and leave the
oven on, the control will atttomatical(_' turr_ (_/ the
oven q]?er 12 hom:s durir_g" baki_g'J)mctions
or q//¢r
3 hou_:s duri_g" a b_vil/)metion.
(/you wish to turr_
(_[/ lhis fl,atu_¢, fidlow the steps below.
Press
the
pads
oven
(on double
oven models,
use the upper
controls)
at the same
time fi>r 3 seconds
BAI_]
tmtil
the
display
and
BROIL
shows
HIGH/LOW
@+@
@
"SF."
2 Press the DELAY START pad tmtil "no shdn"
(no shut-off)
appears
in the display.
3
Press the START pad to activate the no
shut-off and lea_e the control
set in this
special
NOTF:
ti_attu'es
0_
Spe_ial f,alto,_
double
mode.
ove_
models,
lhis aclivalas
lhis
i_ both ovet_,s.
11
Special Features
Wall
t' threnheit
or Celsius
temperature
selection
_bur
oven
conlrol
1 Press
pads
oven
until
lkis
the BAKE and BROIL HIGH/LOW
(on double
oven models,
use the upper
controls)
at the same time ti)r 3 seconds
the display shows "SK"
2 Press the BROIL HIGH/LOW
TIME pads at the same time.
show "F" ([_ahrenheit).
Press the BROIL HIGH/LOW
TIME pads again at the same
show "(7' (Celsius).
3
@.@
i,s sel lo use lhe Fakre_keil
lemperalure
seleclions,
bul you may eha_ge
to use the Cel,siu,s ,se#clio_,s.
Press the START pad. The
displayed
tot both ovens.
Oven
and COOK
The display will
@
and COOK
time. This will
new setting
will be
NOTF: On double over_ mode& the uew setti*_e,"will
be disJdayed Jbr both ove_,s.
A "llt o
conversion
1,17zenusir_g"eonve( tion bake, the Auto I_ecipe'"
Couver, siou /kature will automatically
_onvert entered
r_q'ular bakir_g"lempe*r_tu*_¢,_to _onvection baki_g"
tem/:e*rcture,_.
Once lhe fi_alu_, is activaled, the displa)' will show lhe
actual couve*'ted (*_,duced) tempe*vltu*_. For example,
!Jyou er_te*"a _z'g'ular rec@e tempe*rltare (_/ 350°F and
pre,_s the START pad, the display will show "CON"
and the converted tempe*rlture ({/"325°t{"
NO_I_2: This J;¢alure doe,s not co*n_erlconveclio*_bake
eooki_g"lime,s, o_dy r(_q'ularbaki_g lem/)eralures.
To Activate the Feature:
1 Press the BAKE and BROIL HIGH/LOW
pads (on double
oven Inodels,
use the upper
oven controls)
at the same time fl)r 3
seconds,
until the display shows "SE"
2 Press the CONV
display will show
CONV BAKE/1
display will show
3
Press the START
BAKE/1 RACK pad. The
"CON OFE" Press the
RACK pad again. The
"CON ON."
pad.
To deactivate
the feature,
repeat steps
abme but press the START pad when
OFF" is in the display.
12
1-3
"CON
@+@
@
Using the Sabbath
Feature
I.l?lll Oven
Desig_,ed for use on theJewish
Sabbath
and Holidays.
77w Sabbath fieatlm, can be used for bahin@roastit_g',
,
only. It cannot be usedfi,' convection, b_dling;
self=cbat_ing', or Delay Start cool¢i_g:
Sabbath
I')ature:
How
Make sure the clock shows the corwct time (j day and
the over_ is OFI'7
to set
Press
and hold
HIGH/LOW
the displa)
./br regular
baking or
both
the BAKE
pads, at the same
shows "SF."
and BROIL
time,
until
NOTE: .(]bake or broil appea_:s in the displ_o;
the BAKE a,d BROIL HIGH/LOW
pa& were
not touched at the same time. 7btuh the
roasting
CLEAR/ObT
2
pad at_d beg'it_ ag'ain.
Tap the DELAY START pad until
"SAb bAtH" appears in the displa}.
3
Touch the START
in the displa}.
4
Touch
the BAKE
pad and
pad.
D will appear
No signal
NO'I_2: The ovcr_/{@t comeson automatically (on so*tw
modds) whe_ the door is opem,d aml goes q/]w/m, the
door is clo,sed.The btdh m(O,be *mno'ued.See the ()ver_
L{qg_tI{@/accmc+_zt
sectiot_.()n modek with a I{@tswi>h
on th,_co_lml pa,e/, the o'uc_z/iqT_tm,O,be tur, d on
a_zd1¢i on.
@+@
@
@@@(9@@@@@@
@
When the display shows D the oven is
set in Sabbath, When the display shows
D C the oven is baking/roasting.
will be
glVell.
5
Using the number
pads, enter the desired
temperature
betx_een 170 ° and 550 °.
No signal or temperature
will be given.
6 Touch
the START
pad.
7 After a random
delay period
of
approximately
30 seconds
to 1 minute,
D c will appear in the display indicating
that the oven is baking/roasting.
If D C
doesn't appear
in the display, start again
at Step 4.
To ac!}ust the oxen temperature,
touch the
BAKE pad, enter the new temperature
using
the number
pads, and touch the START pad.
NOTE: 77u_ CLEAR/Ob\F and COOK TIME
a*v active dto'i_g" the Sabbath ficatur<
pads
13
Using the Sabbath
Feature
14?HI Oven
Sabbath
f_ature:
HOw to set fbr
timed baking
or roasting immediate start
and automatic
stop
Make ,surt_the clod_ sho'ws the correct time of day and
the oven i,s OFI'7
1 Press
and
hold both
the BAKE and
HIGH/LOW
pads, at the same
the displa} shows "SF2'
BROIL
time,
until
NOTE: .!]bake or broil appea_s in the display,
the BAI_2 and BROIL HIGH/LOW
pads were
not touched at the same time. 7buH_ the
CLEAR/OFF_
/)ad and beffin, a_'ain,
Tap the DELAY START pad until
"SAb bAtH" appears in the displa}.
3
Touch the START
in the display.
4
Touch the COOK TIME pad.
5
Touch the number
pads to set tile desired
length of cooking
time between
] minute
and 9 horn's and 99 minutes_ The cooking
time that you entered
will be displayed.
the START
7
the
Touch
BAKE
pad and D will appear
When the display shows > the oven is
set in Sabbath, When the display shows
D C the oven is baking/roasting.
pad.
pad.
No signal
xdll
be
glVell.
Using
the
temperature.
be
9
mm_ber
pads,
enter
the desired
No signal
or temperature
xdll
given_
Touch
10After
the START
a random
approximately
D C will
the oven
appear
To ac{iust
BAKE
the
pad,
number
pad.
delay
period
30 seconds
of
to ] minute,
appear
in the display
indicating
that
is baking/roasting.
If D C doesn't
in the
the
oxen
enter
pads,
display,
start
again
temperature,
the
and
new
at Step
touch
teml)erature
touch
the
START
7.
the
using
pad.
When cooking
is finished,
tile display will
change fl'om D C to D and "0:00" will appear,
indicating
that the oven has turned
OFF but is
still set in Sabbath.
Remove the cooked tLod.
14
®®@®@®®®®@
@
2
6 Touch
%
How to exit
the Sabbath
1 Touch
2
Jeature
the CLEAR/OFF
pad.
If the oven is cookino
wait for a random
dela} period of approximatel}
30 seconds
to 1 minute,
until onl} D is in the displa}.
3 Press and hold both the BAKE and BROIL
HIGH/LOW
pads, at the same time, until
the displa} sho,_s "SF2'
Tap the DELAY START pad until
"12 shdn" or "no shdn" appea*3 in the
display. "12 shdn" indicates
that the o\ en
will automatically
turn oft after 12 hours.
"no shdn" indicates
that the oven will not
automatically
5
Touch
NOTE:
turn
the START
[j a __ower outaq'e
_
wa,s i_ Sabbath,
®
+6_3
%
@
off.
pad.
o_curred
while
the o'ue_ will automatically
az_(I ,stay q/]]evez_ whez_ the power
co_tm[ mu,st be re,set.
the o'ue_
turt_
qff
returns,s, The ovet_
15
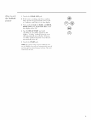
Baking or Roasting
Be/oreyou
begin...
To avoid possible bur*_s, place ltze racks in
lhe de,sbvd posilion b{,fiav you llo'n lke oven on.
The racks haxe stop-locks,
so that when
placed correctlx on the sui)ports,
the) will stop
befi)re coming
completely
out, and will not tilt.
®
®
®
@
®
®
X4hen placing and removing
cookware,
pull the rack out to the bran I) on the
rack sui)port.
To remove a rack, pull it toward you
tilt the front end up and pull it out.
To replace,
place
(stop-locks)
on
front
and
push
the
end
of the
the
sui)i)ort,
the
rack
tilt
rack
up
the
in.
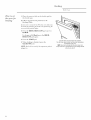
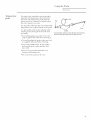
30" ovens (shown) have 7 rack positions.
27" ovens have 4 rack positions.
How
to set
the oven jbr
baking or
roasting
1 Press
the BAKI _]pad.
2 Press the nmnber
tern pera ture.
3 Press
the START
4 Check
pads
to set the desired
pad.
tk)o(1 for doneness
on recipe.
Cook
hmger
at minimmn
time
if necessary:
5 Press the CLEAR/OFF
is complete.
pad when
cooking
NOTE: A cooli_g" fitn may aulomalicall), turn on
and (ffj to cool internal parts. Tkis is normal and
the tim mr9' continue to run ev_m ({tier the oven is
turboed q]]_
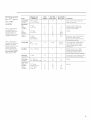
Rack Position
Type of Food
27" Oven
30" Oven
Frozen pies
(on (ookie sheet)
B or C
C or D
Angel food cake
A
B
Bundt or pound cakes
B
B
B or C
C or D
B or C
C or D
Biscuits, muffins,
brownies, cookies,
cupcakes, layer
cakes, pies
Casser_les
16
®
@
®
®
P heating
and pan
placement
Preheat
the oven if the recipe calls flw it. To
preheat,
set the o\ en at the correct temperature.
Preheating
is necessary for good results when
baking cakes, cookies, pastry and breads.
For oven,s
pn_heat
without
You
can
use
bil
pan
aim
broiler
the
toil
tightly
like
the
grid.
A htmimon
Never
b_dicator
lig'ht or to_e,
l O mb_ute,s.
Aluminum
This
a pwheat
Baking results will be better if baking pans are
centered
in the oven as much as possible.
Pans
should not touch each other or the walls of the
ahmfilmln
in poor
A slnaller
disturb
to line
Howevei;
to the
fi>il may
entirely
will
foil
grid.
grid
aim
al,_o be used
cover
the
a rack
heat
the
you
cut
broilei"
inust
slits
inold
in it just
to _at_ l_ a s/:illove*:
with
ahmfilmln
circulation
aim
fifil.
result
baking.
sheet
oven. If you need to use two racks, stagger the
pans so one is not directly abo\ e the other, and
leave approximately
1½" between
pans, fl'om
the front, back and sides of the wall
Cut slits in the foil just like the grid.
of foil
inav
spillover
by placing
it on
inches
below
the tood.
be
used
a lower
to catch
rack
a
several
17
Broiling
I,I_lll
How
to set
the oven jbr
broiling
1
Place
the
the
broiler
meat
or fish
oven
be broiled
oven
3
4
rack
is connected
by prehealing
rack one po,sition
Press the BROIL
HI Broil,
To change
HIGH/LOW
broiler
positions
to 208
grid
in
and
raw steaks
may
posilioning"
lhe
h_ffhe_:
HIGH/LOW
to LO Broil, press
pad again.
Press the START
in the
volts,
lhe broi&r
pad
once for
the BROIL
pad.
5 When broiling
is finished,
CLI_R/OFF
pa d.
N07_:
Broil will not work !/the
phlg_q_,din.
18
the
pan.
2 Follow suggested
Broiling Guide.
(/your
on
Oven
press
the
lemperatu_
probe is
Leave the door open to the broil stop position.
The door stays open by itself, yet the proper temperature
is maintained in the oven.
NOTE:Food can be broiled with the door closed, but
it may not brown as well because the oven heating element
will cycle on and off.
Broiling
./br 27"
(OTg
guide
ovens
SOllte
modds)
Food
Quantity and/
or Thickness
Ground Beef
X\kql I)one
1 lb. (4 patties)
1/2 to 3/4" thick
Beef Steaks
Rarc *€
Rack
Position
First Side
Time
(rain.)
Second
Time
Side
(rain.)
]0
7
Space
about
evenly. L 1) to 8 patties
the same time.
5
6
11
Steaks
less than
1" thick
1 to 1½ lbs.
C
C
C
6
8
12
Rar(*!
Medium
Well I)olle
1½" thick
2 to 2½ lbs.
C
C
C
l0
15
25
14-16
20-25
Chicken
1 whole
A
!35
10-15
Medium
Well I)one
7-_
2 to 2½ lbs.,
split lelagtllwise
The { LS. lhparhmnzt
o/
Agricuflm_, _q> "!_m_, bee/i_
p@uk,, but you dmuM
kmm_ lhal cooki_lg il lo onl)'
14(1°1``m_(nt,_ wm_,/ood
poAo_zi_ oW.zisms ma_
_to_,i_m. "(5;om_,,: S@ l'bod
Book. _bm Kitdte_ (;ui(h,.
Lobster
Tails
Fish Fillets
1" thick
B
1/4
C
thick
13-16
5
take
cook
through
bel_)re l)rowning.
tkying is vccomnmnde(l.
Pan
Slash tht.
Re(luce
time
about
5 to 1(} lnintaes
per side t))l cut-up chicken.
BrtBh each side with inched
t)_l-oil skin-q(le-down
first.
2-4
6 to 8 oz. each
to 1/2"
Contllnents
I)uttel.
Do llOt
tt/lll ovel;
Gilt through
back ol shell. Splcad
open. t:ilt/sh with nmlted butter
I)eli_l-C broiling and after half ot
I)roiling time.
5
tlandle
alld t//l-ll "_eP, calcfhllv.
Blalsh with lemon
butter 1)etbl-e
and dul-ing cooking,
if desired.
Preheat
broiler to incl-case 1)l-(_aning.
157)A tb_v.,]Um_ 1985.)
Ham Slices
(precooked)
1" thick
Pork Chops
Well Done
2 (1/2" thick)
2 (1" thick) about
Lamb Chops
Medium
Well I)one
Medium
Well I)olle
2 (1" thick)
about 10 to 12 oz.
2 (1½" thick)
about 1 lb.
1 lb.
B
8
8
C
g
lO
13
lO
13
C
C
C
B
1o
12
14
17
9
1(}
12
12-14
Illcl-(,a,_e tillle 5 to 10 minutes
tol- 1½" thick Ol- holne-<ured
per side
ham.
Slash tht.
Slash tht.
19
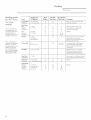
Broiling
l,V(dl Ovt,_
Broiling
guide
.[br 30" over s
(07t
SO_Zg
models)
77msi:< w_,ig]d;thhkm<_s,
stmlMg lonpo_llm_ and
will a//uctIm)ilh_gthm,s.
Tkis guid_, A l;asM o_zm_,als
al _@'@,raor lumperalm_'.
First Side
Time (rain.)
Second Side
Time (mlu.)
10
10
7
9
Space m enly. Lp to 8 patties take
about the same time.
E
E
E
8
10
12
6
8
10
Steal<.,, less than
1½" thick
2 to 2% lbs.
E
E
E
10
15
25
8
14_ 16
2O-25
1 whole
2 to 2½ lbs.,
split lengthwise
C
25
Food
Quantity axld/
or 33fickness
Gromld
Beef
Well I)one
1 lb. (4 patties)
1/2 to 3/4" thick
Beef Steaks
Ral-e_
Medium
Well I)one
1" thick
1 to 1_ lhs.
Rare
Me(limn
Well I)one
C|ficken
Rack
Position
1(}
Conmmnts
15l)A
2O
cook
Pan
Sl_sl_ tilt.
Reduce tilne about 5 to l0 minutes
per side f_)r cut-u 19chicken.
Brush each side with mehe(1 butteL
Broil
*Tke { ]S. l)_jmrlmunt v/
Agricuflm_, sq> '7"m_, bee/is
po[mlm, but you q_ouht
km)w lhal cookitlg il lo onl)'
140°F murals _mm,/ood
poAmzit_goWnzi,_ms
m* 9'
_to_,i_v. "(3;om_,,: ,';@ l'bod
]'ook. Yom K;Mmn (;ui4_.
1" thick
thlough
befk)le blowning.
hyiHg is lecomlnen(led.
skin-side-down
_]I'M.
Lobster Tails
2=t
6 to 8 oz. each
C
1,'I-16
I)o not
mrn oxel:
Fish Fillets
1/4 to l/2" thick
E
5
5
t]andle all(/turH very calefifll>
Brush with lemon hutter belbre
and during cooking, if desiwd.
Pl eheat hroiler to increase bl_wning.
Ham Slices
(plecooked)
l" thick
I)
8
8
Iilclease tilne 5 to 10 lninutes per side
t()1"1½" thick or home-cured ham.
Pork Chops
Well I)one
2 (1/2" tlfick)
2 (1" tlfick) about 1 lb.
E
D
10
15
ltl
15
Slash ti_t.
Lamb Chops
Medium
Well I)one
Medium
Well I)one
2 (1" thick)
about 10 to 12 oz.
2 (1½" tlfick)
about 1 lb.
E
E
E
E
10
12
14
17
9
1o
12
12-14
Slash tM.
tCev..]Um_ 1985.)
Cut through bark of shell. Spwad
open. Brash with melted butter
before bit filing and ailer half ol
broiling time.
Timed
Baking
Wall
Using the
timed baking
and roasting
./eatures
How
to set
an immediate
start and
automatic
stop
N07_:
l_)o(I.s thai spoil easily, sueh as mill:, <g:g:s,
.fish, stq]jh_s,
poldt* 3' at_d pork, shouh[ t_ot be
alb'wed to sit fbr more tha_ l hour b(f)re o*' ((tier
eookb_g: Room lemperatui'e p*vmoles the ,¢rowtho/
har*@d baete*'ia. Be sure thai the oven I{g'htis off
beeause heat fi*)m the bulb will sped ha*'_/)ll baeteria
g_)wth.
The oven
seh, lted
will tum_ on immediately
ler_Klh o/time.
the oven
will turn
Make
sure
time
of day.
the
and
A t the end o/the
eooh fi*r a
iookb_ K lime
(:/,/automatically.
oven
clock
shows
the
3
Press the COOK
Using
the
baking
pads,
TIME
the
number
time,
cooking
The
enter
the desired
pad.
time
pads,
oven
that
@
@
NOTE"_"J.
I your *;,gil)e *e_ui*w
l
I)rekealir_g;
.... , to. me)
m,ed to add additior:al lime to lit:, ler_gtk (:flit::
( ookb_K lime.
4
On double
oven models, you can use timed
baking in one o\ en while using sell:clean
in the
other; you can also use timed baking in both
()veils at tile same time.
@@@(9@@@@@@
correct
1 Press the BAKE pad.
2 Using the number
temperature.
Ovet_
enter
the
entered
@
desired
temperature
you
@@@(9@@@@@@
and
will
be
displayed.
5
Press
the
START
pad.
The display shows the oven temperature
that you set and the cooking
time countdown.
(The display starts changing
once the
temperature
reaches
100°El
N07_:
On double oven model,s, wken asir_g" both
oveas at the same tim6 the limes showir_g" ia the
disph O' will be /br the last ovea set. 7b disJda)' the
time set./or the fi*:d oven set; press the COOK 77ME
pad /br that oven.
The
oven will continue
to cook fi)r the
programmed
alllO/lllt of time, then shut oft
automatically,
unless the _%_tRM feature was set.
See the How to set tke ovea fin' rvarmi_:{" section.
6
Press the CLEAR/OFF
display.
pad
to clear
the
21
Timed
Baking
Wall
How to set
a delayed
start and
automatic
stop
}bu ca_ sel lhe ovet_ conlrol lo delay-slarl lhe oven,
cook .fin' a sJ)edfi_c le_g'lh, o/lime at_d lher_ lm't_ (_/,,
aulomalically.
Make sure tile oxen clock
time of day.
1 Press tile BAI_
3
Press
tile
COOK
@
pads,
TIME
enter
tile desired
pad.
NOTE: lf.your r_,_i_)e r_,_7
uires /)rehealb_g;, you mar.
r_eed to add addiliot_al lime lo the ler_g'lh (_t lhe
cookb_g" lime.
4
Using tile number
bakino time
5
Press
6
Using
(la}
tile
}o/I
DELAY
pads,
enter
START
pad.
tile number
1V_IIIt
tile
pads,
o_en
enter
to
ttlI'n
tile desired
tile time
on
and
of
st_lI't
cooking
7 Press tile START
pad.
NOTE: Ar_ altet_lior_ torte will ,soured !/you are usir_g
limed bahi_g" at_d do t_ol pr_,,ssltte START Dad ((tier"
et_lerb_g" lhe bakb_g" lemperalutv
If wm would
like to check
tile times vou have
set, press the DELAY START pad to check the
start time w)u have set or press tile COOK
TIME pad to check the length of cooking
time
vou have set.
When
tile oven turns
on at tile time
of (lay wm
have set, the display will show the changing
temperatm'e
(starting
at IO0°F) and the
cooking time countdown.
N07_:
On double oven model,s, when usir_g"both
ove_zs at the same tinu, lhe linu,,s showir_g" i_z the
disph O' will beJbr the last oven set. 7b disph O' the
time set Jbr the fir, st oven set; press the DELAY
START pad to (h(uk the start time you have set or
Dress the COOK TIME pad to che(k the #r_g'lh o/
_ookir_g"lime you have set.
Tile
oven will continue
to cook fin" tile
programmed
amo/mt
of time, then shut ott
automaticall
5 unless tile X4%kRMfeature was set.
See tile How to set the oven /br warmi_g" section.
8
22
Press tile CL]?_atR/OFF
displa),
@
®®@®@@®®®@
shows tile correct
pad.
2 Using the number
temperature.
Ove*_
pad
to clear
tile
®®@®®@®®®@
@
®®®®®®®®®@
@
Using the Probe
I.l?dl Oven
7Emperature
probe
For many fi)ods, especially
roasts and poultry,
internal
food temperature
is the best test fi)r
aloneness.
The temperature
probe takes the
guesswork
out of roasting
by cooking fi)ods to
the exact aloneness vou want,
Use
of probes
this
product
Use
the
other
max
handles
inserting
and
and outlet.
than
result
of the
remoxing
the
one
provided
to the
probe
plug
when
the
meat
and
from
_-,_
1[
Cable
11
with
in damage
them
Plug
probe.
Handles
The temperature probe has a skewer-like probe at one end and a
plug at the other end that goes into the outlet in the oven.
• To axoid damaging your probe, do not use
ton(*s_,to pull on the cable when remoxing, it.
• To axoid
breaking
is completely
• To pre',ent
the
has
probe
cooled.
the
probe,
defrosted
possible
from
the
make
befi)re
burns,
do
outlet
until
sure
not
the
unI)lu,*
oxen
• Nexer leaxe your probe inside
during a self cleaning
c) cle.
the oxen
• Do
oxen.
not
store
the
probe
in the
fl)od
inserting.
23
Using the Probe
Wall Oven
I)l'OpgT
placement
of the probe
After preparing
the meat and placing it on
a trixet or on the broiler pan grid, tollow these
directions
for proper
probe placement.
1
I,ay
probe
the
finger
where
on
2
the
along
the
of the
Insert
the
to the
bone,
tat
the
or
side
the
edge
probe.
center
up
on
top
The
of the
should
meaty
yore"
comes
rest
part
not
to
in the
of the
into
It should
meat
with
meat
completel)
handle.
or
of the
mark
point
thickest
probe
outside
and
the
roast.
meat,
touch
the
gristle.
For roasts with no bone, insert the probe into
the meatiest
part of the roast. For bone-in ham
or lamb, insert the probe into the center of the
lowest large m uscle or joint.
Insert
the
as meat
insert
the
Insert
probe
loaf
the
meatiest
the
probe
area,
probe
inner
thioh,_ from
of a whole
tm'kex.
24
into
the
center
or casseroles.
fl'om
just
of dishes
such
When
cooking
fish,
above
the
to the
backbone.
parallel
into
below
the
meatiest
and
parallel
gill
part
into
of the
to the
leo
How
to set
the oven Jot
roasting
when using
the probe
1
Insert
the
probe
into
the
n/eat.
2 Pluo_ the probe
into the outlet in the o_ei1.
Make sure it is pushed
all the way in.
Close the oxen door.
3
4
Press
tile
Press
the
PROBE
pad.
nunlber
pads
fi)od
or nleat
nlaxinlunl
that you
internal
teini)erature
can set is 200°F.
5
Press
the
BAKE
6
Press
the
nunlber
o_,en
teillperat
Press
tile
7
the 0uiM
and
pads
and
the
reaches
you have
internal
tile
internal
To stop
CLEAR/OFF
To
pads
• If tile
the
probe
final
and
l)I'obe
is
cannot
can
n/ight
BAKE
tile
is renloved
I'elllOVed
use
tile
rise tin/ed
ti'Oill
tinier
oxen
®
of tile
new
press
tile
pads
to ren/ove
Do not
use
dan/age
it.
tile
even
tongs
durino_
pad
and
tile
then
the
ten/l)erature.
fl'oin
will
nleat
set, tile probe
()veil control
tile
fi)od
is reached,
display
"I,O"
display.
teinl)erature
the
to set
tile
hot
ti)od.
teini)erature
sound
• You
signal,
tile
oven
press
@
into
internal
in tile
Use
it--they
tile
c_cle
nunlber
tile
fl'oin
chanoe_
Roast
@@@@@(9@@@@
of the
you have
off and tile
pad.
on
desired
the word
teinl)erature
signals.
to pull
the
changino
shown
®®@®@®®®®@
@
set
to heat,
be
tile nun/her
()veil turn
probe
food
not ,set a probe temperature
the
reaches
and tile
tile
to
teinl)erature
will
When
tile
Dad.
100°K
tenlperature
fl)r
!/tt_,¢ probe is inserted
When the o_en starts
will be in the displa).
n/eat
The
pad.
the START
AIter
@
desired
life.
START
Dressed
the
teinl)erature.
pad.
77_,¢ displr 9' will flash
8
to set
internal
flash
1)etk)I'e
a tone
until
will
tile
()veil.
thou,*h
xou
ol)erations.
25
Using
the
Convection
Oven
I,l?ll[ Ov_n
Convection
.fitn
In
a
con_,ection
under
o_,en,
and around
a tilil
circulates
hot
air
()_,ei;
the food.
This circulating
hot air is evenly distributed
throughout
the oven cavity. As a result, toods are
evenly cooked and browned--_)flen
in less time
with convection
heat.
NOTE: TIw conva:tion fim will O'c[_on arm (?I/while,
cookint_"to lu<,_t
di,_lribule hot air in the oven,
T/w amvection /im shuts (?ff wlu<n tlw oven door i,s
opem<d. DO NOT leave tlw door open f>r lo_N"lm_7o& (>/
tinw while u,_ing"a>nvection _ooki_N"or you m(9' shorten
flu:
l!fi"
::lilt(:
<onve<:tion
lu:aling"
dotu:nL
1-Rach
convection
Tile comection
tim circulates tile heated air exenlx
oxer and arotmd tile fi)od usino
tile bake and broil
'
O
elements.
o',en. Cook dines nlav decrease, so fi)od shouM be
checked earlier than i)ackage directions to make
S/lI'e
that
it does not oxercook.
_4hen
comecfion
CONVECTION
Ideal fi)r cooking
good results.
bahing
place
Multi-rack
convection
bahing
CAUTION:
Whenyou areusingthe
offsetrack (on27" models)
inthe lowestposition(A),
youwill needto use
cautionwhen pullingthe
rackout. Werecommend
thatyou pullthe rackout
severalinchesandthen,
usingtwo pot holders,pull
the rack out by holdingthe
sidesof it. Theoffsetrack
is low andyou could be
burnedif you placeyour
handinthe middleof the
rackandpull all the way
out. Bevery carefulnot to
burnyour handon the door
whenusing a rackinthe
lowestposition(A).
Adapting
H?€ipeS
tile
rack
on
shelt
C or D at tile center
large casseroles
and lasagna
®
Tile al/IO/Int
of tillle
required
for multi-rack
baking may increase slightly for soine foods, but
overall time is saved because two to three times as
much fi)od is cooked at once. (',()()!des, muffins,
biscuits, and other quick breads give good results
with multi-rack baking.
27" Ovens
Offsetrack
®
Multi-rackposition27" oven
When baking on 3 racks, divide tile oven into
thirds by placing the offset rack in the third (C)
rack position and the straight racks in fi_t (A) and
fimrth (O) rack positions.
For two-rack baking, place the offset rack in the
bottom (A) rack position. Place the straight rack in
the third (C) rack position.
30" Ovens
®
When baking on 3 racks, place one rack in tile
second (B) position, one in the fimrth (D)
position and one in the 6th (F) position. For
cookies, place one rack in the third (C) position,
one in the 5th (E) position and one in the 6th (F)
position.
You
can
use your
convection
redpes
in tile
convection
(_onve_ion
pan
fl_atm'e.
size
baking,
reduce
baking
or activate
the Auto
by 25°F
See
recommended.
tile S/:e(ial
Multi-rack position 30" oven
Some package
instructions
fi)r fl'ozen
casseroles
or main dishes have been develol)ed
using
coi//illercial
convection
ovens. For best results
oven.
temperature
Use
fi_vorite
with
of tile
Because heated air is drculated
evenly throughout
tile oven, fi)ods can be baked with excellent results
using multiple racks.
When
26
baking
with only 1 rack, use
BAKE 1 IL_CK m{d tot best results
Redpe
Feallo'es section.
''_
in this
oven,
temperature
preheat
on tile
tile
oven
package.
and
use
tile
Co&warejar
convection
cooking
Befi)re using your convection
if your cookware leaves morn
oven, check to see
fiw air circulation in
the ()veil. If you are baking with several pans, leave
space between them. Mso, be sure tile pans do not
touch each other or tile walls of tile oven.
Paper
mad Plastic
Heat-resistant
paper and plastic contnine_
that
are recommended
fi)r use in _egular ovens can be
used in convection
ovens. Plastic cookware that is
heat-resistant
be used.
to temperatm'es
ot 400°F can also
Metal
mad Glass
Any t)pe of cookware will work in your convection
oxen. Howexe_; metal pans heat the ti_stest and are
recommended
fi)r convection baking.
Darkened
or matte-finished
than shiny pans.
Glass
or
ceI'alllic
cook
pans
pans will bake tipster
II/OI'e
sh)wlv,
When baking cookies, you will get the best
results if vou use a fiat coo!<de sheet instead
a pan with low sides.
of
For recipes like oven-baked
chicken, use a pan
with low sides. Hot air cmmot drculate well
around fi)od in a pan with high sides.
Convection
• Good
roasting
Tile convection
fiw lmge
tender
cuts of meat,
tim circulates
uncovered.
tile heated
air e\'enlv
over and around tile fi)od. Meat and poult_ T are
browned
on all sides as if they were cooked on a
rotisserie. Using the roasting rack provided, heated
air will be circulated
ove_; under and around tile
t0od being roasted. The heated air seals in juices
quickly fi)r a moist and tender product while, at
tile same time, creating a rich golden brown
exterior:
When you are convection roasting, it is important
that you use tile broiler pan and grid and tile
special roasting rack tot best convection
roasting
results. Tile pan is used to catch grease spills and
the grid is used to prevent grease spatters, while
the roasting rack allows the heated air to circulate
trader tile meat and increase browning
on tile
tmde_ide
of tile meat or poult_T:
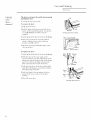
• Place tile rack (on 27" models use tile offset
rack) in the lowest rack p()sifi(m (A).
• Place tile grid on tile broiler pan and put tile
roasting rack over them, making sm'e the posts
on the roasting rack fit into the holes in the
broiler pan.
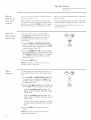
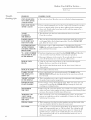
• Place meat on tile special roasting
Roasting rack
Post
Grid
_i /1 q/l'iil/i
1 li/i't\'l\_X\\_
Broilerpan
CAUTION:
Whenyou areusingthe offsetrack(on 27" models)inthe lowest
position(A), you will needto usecautionwhenpullingthe rack
out.Werecommendthatyou pullthe rackout severalinchesand
then, usingtwo pot holders,pullthe rackout byholdingthe sides
of it. Theoffsetrack is low andyou could be burnedif you place
your handinthe middleof the rack andpullall the wayout. Be
very carefulnotto burnyour handon the door whenusing a rack
in the lowestposition(A).
rack.
27
Using the Convection
Oven
I,l?lll Oven
How to set
the oven./br
convection
baking or
roasting
7b avoid possibh, bl_rns, plaee the raehs @ the
eor?_,etpositiot_ bqfim,you turn on the ovem
@o°@o°@
Press the CONY BAKE/1 RACK pad
(Convection
Bake 1-P, ack mode) for 1-rack
convection
baking. This mode is used for
cooking fl)od items tm truly 1 rack in
ctmvection
bake.
Press the CONV BAKE/MULTI
pad
(Convection
Bake Muhi mode) fl)r muhi-rack
convection
baking. This mode is ttsed _k)i"
cooking
tood items on more than one rack
(i.e. 2, 3 or more racks) at the same time
in C,tmvectitm
Bake. See the Multi-rael_
eonveetio_ baki_L," section
inlbrm a tit) n.
fin" m ore
(9@@@@@@@@@
@
®
When
When
set,
4
Press
the
CONV
ROAST
pad
tot
convection
rt)asting.
2
Press
t)veil
tl_e nmnber
pads
to set the
the
the
the
Press
the
START
t)r CONV
Convection
roasting
guide
ROAST
to set
the
temperature,
CONV
pad
new
and
press
BAKE/1
then
the
the
RACK
CLEAR/OFF
hear a,filn
will
Rib, Boneless
Top Sirloin
(3 to 5 lbs.)
Chops
Rib,
Boneless
(1/2
to 1" thick)
Calnled, Butt, Shank
(Ihll} cooke(l)
Lamb
Bonedn,
Seafood
Fish, whole (3 to 5 lbs.)
Lobster
Boneless
Tails
(6 to
Whole Chitkel_
when
finished.
whih,
stop
when
turn
o/]_
(ookb_p" with
(ot_ve(tiom
the door is opened
but
the
clicking" durit_L," bahit<g:
will (Te/e ot_ and
(3 to F)lbs.)
each)
(2½ to 3V2ll)s.)
(4 to 5 lbs.)
Oven
o.ff_vhi#
the hot air i_ the oven.
Temp.
Internal
Temp.
325<F
325°F
325°F
14@F t
160'F
17@F
Rare
Medium
10-14
14-18
325°F
325°F
140°Ft
160'F
23-27
325/F
170°F
325<>F
325°F
325'F
170°F
17(YT
170°F
14-18
325_F
140°F
17-20
20-24
325"F
325'F
16@F
170°F
30-40 total
40tI°F
20-25
350(F
(3 to 5 lbs.)
8 oz.
the oven
20-94
24-28
28-32
2 chops
4 chops
6 chops
Cornish Hens k l_StUfii'(1(1 to 1½ lb_.)
Stuft;,*d (1 to 1½ lbs.)
I)ucklil_g
you
Rare
Medium
Well
(3 to 5 lbs.)
H,-ml
Poultry
, You m( O' hear
Tkis is normal
Minutes/Lb.
Bone-il<
pad
eookb<q" to best distribute
Beef Tunderloin
Pork
be displayed.
temperature
sotmd.
* Tke eotH)eetion./)ln
nmnber
temperature.
Meats
Beef
the
changing
will
pad.
To change
the ovell
CONY
BAKE/MULTI,
pads
the
at 100°K
reaches
will
heat will not
3
to heat,
N07_:
Thej_ln
tel//perattlre.
oven
3 beeps
Press
starts
starting
* }},uwill
desired
oven
temperature,
Meditun
X\k,II
30-35 total
35-40 total
40-45 total
total
24-26
350"F
180'-ISF/F
50-55 total
55-60 total
35t1_F
'350°F
180°-185°F
18@-185(F
24-26
325°F
18@-185_F
Turkey, whole*
[ nstutlbd (1t} to 16 ll)s.)
[ nstuflbd (18 to 24 lbs.)
8-11
7-10
325<F
325°F
180°-1&5°F
180<-185<F
Turkey Breast
16-111
325<F
170°F
(4 to 6 lbs.)
* Sm//ud bkztx gvnc_a//y wquiw 31_45 minumr addition*at _*a_tMg time. Shh.ld hgs a_tlt bwa_t with/oii to p_,,-,,_.tztovc>h_,twnMg and
do, i_,g o/_kin.
28
} 77_e{'.5'. D@a_¢)ne_*toj A gricuh*t_v _a3s l_a#*,be,e/i,s]w[ndat: h_tt you sho*thl know that coohMg it to o_*/y140"1,"tneatzv some/ood
/)oiso_*i_*go_ga)listtlv tna)' su_vh_e." (5;ounce:5aJ_,]'bolt Book. Yo_trKkchen (;uigh'. {"S]).l IM_../um' 1985.)
How
to set
CAUTION:To prevent possible burns, do
not unplug the probe from the oven outlet
until the oven has cooled. Do not store the
the oven jor
convection
roasting
when using
the probe
probe in the oven.
For be,sl re,sull,s wh, en roasling
masl,s,
we recommend
lh, t" _ o_H_t_(lio_l
using
large
@
h_rkey,s and
lh,e probe
included
in
o_tqL
@@@@@@@@@@
2 / n/odels use tile offset
Place the rack (on .....
rack) in the h)west rack position (A). hlsert the
probe into the nieat.
@
Phig the probe into the outlet in the (i_,en.
Make sure it is pushed
all the wm in.
Ch)se the o',en door.
3
Press the CONV
4
Press
the
o_en
tei/lpeYat
ROAST
nunlber
pads
@@@@@@@@@@
@
pad.
to set
the
desired
@
life.
To change the oven tenlperature
during
tile
Convection
Roast cycle, press the CONY ROAST
pad and then press the nunlber
pads to set the
new desired tenlperature.
NOTES:
• }rbu will hear
5
Press
the
PROBE
6
Press the nuniber
pads to set the desired
internal
nleat teniperature.
7 Press the START
pad.
f, aho'es.
bul
the o_en starts
to heat,
the word
the heal will
while
cooking
will ,slOp when
not turn
wilh
lh, ese
lhe door is Opened
(3[/2
• }bu can use lh,e limer even lhoug'h you cannol
limed oven operations.
pad.
The di,qd( 9' will flash "PROBE" and the oven conlml
will sig'nal !/the probe is inserted into the out#t, and
you have not set a probe tempcmtmY¢ and p,vssed lhe
START pad.
When
a/an
The /hn
• On double
oven
u,s_, the probe
operations.
models;
you will
in the upper
Thi,s is because
cookb_g" @ temperature
not be able to
oven during"
wilh
rather
use
timed
oven
the probe you an_
than
lime.
"i,0"
will be in the displa}.
_ftei" the internal
tenlperature
reaches
l ()()°F, the chanoing
tenlperature
will
be
shown
of the
internal
in the
nleat
displa).
8 When the internal
tenlperature
of the nleat
reaches the nunlber
you have set, the probe
and
tile ()veil ttlYn ()l_ and
tile ()veil control
signals. To stop the signal, press the
CLI_R/OFF
pad. Use hot pads to renlove
the probe fl'oni the ti)od. Do not use tongs
to pull oil it--they
niight daniage
it.
(/lh,_p,.ol,_i.s,_,,,,,o_,,,4/}o,,,
lh,,Ji,o_Z
&/i,r,,#_,_
Ji,,,,l
lvmperalur,_
is *,_ach,ed, a lone will sound
displ( O' will/lash
lhe oven.
until
lhe probe
is removed
and
lh,e
/?om
2(.)
Timed
(;onvection
Baking
1.19111O'uet_
Using
timed
the
./batures jbr
convection
coohing
How
to set
N07_:
lq)o& that spoil easily, sueh as milh, <glg:s,
.fish, stq]jh_s,
poldt* 3' arid pork, should r_ot be
allowed to sit jbr more than l hour b_fm_ or qfier
eoohb_g: Room temperature promotes the ,¢rowth _/
har*@d baeteria. Be sure that the o'oe_ I{g'ht is _1]]_
beeause heat jmm the bulb will speed ha*'_/hl
bacteria g'rowth.
77_e ovet_ will tm't_ o_ immediately
an immediate
sdeued
start and
automatic
the ove_
st@
let_'th, o,/time.
will turt_
Make sure
@o°@o°@
arid eooh /br a
At the et_d (?/ the. _oohb_q, time,
(_ff automatieall3'.
the oxen clock
(9@@(9@@@@@@
shows the correct
time of da}.
@
Press the CONV BAKE/1 RACK pad
(Convection
Bake 1-Rack mode)
for 1-rack
convection
baking. Tiffs mode is used for
cooking food items on only 1 rack in
convection
bake.
Press the CONV BAKE/MULTI
pad
(Convection
Bake Multi mode) flw multi-rack
convection
baking. Tiffs mode is used fl_
cooking
food items on I/lore
than ()lie rack
{i.e. 9, 3 or more racks) at the same time in
Convection
Bake. See the Multi-raeh
eon'oeetio_ habit,g" section
inioHnation.
Press the CONV
roasting.
2
3
Press
the
ovell
teI//perat
ROAST
number
pads
fl)r m()re
pad for convection
to set the
desired
tire,
Press the COOK
TIME
4
pad.
Press the number
pads to set the desired
length
of cookinom time. The minimum
cooking time xou can set is 1 minute.
The oven temperature
that }ou set and the
cooking time that }ou entered
will be in the
displa}.
5
Press the START
(9@@@@@@@@@
@
@
The
oven will continue
to cook fl_r the
programmed
amount
of time, then shut off
automatically;
mfless the WARM featm'e was set.
See the How to set the 0ve_zjbr warming" section.
N07N: l/your _ee!per_.qldms prd_eatit_g; you may m_ed
to add additiot_al time to tl_e &r_g,
lh, o.,/the _ool:ir_q',time.
pad.
The display shows the oven temperature
you set and the cooking
time countdown.
(The display starts changing
once the
temperature
reaches
100°F.)
that
N07N:
On double ove_z models, "whe_zusb_g,"both
ove_s at the same time, the times sho'wi_g" i_ the
di@la 3' will be /br the last o'oe_zset. 7b displa)' the
time set jbr thejMst oven set, press the COOK TIME
pad /br that ove_.
3O
On double
oven models, you can use timed
baking or roasting
in one oven while using
selfZclean in the other; you can also use
timed baking or roasting in both ovens
at the same time.
6 Press the CLEAR/OFF
pad to clear the
display if necessary.
Rein ove the fl)od fl'om
the oven. Remember;
even though the oven
shuts off automatically,
food leit in the oven
will continue
cooking atter the oven turns
off.
N()7N: _bu will hear afire while eoohi_g" with this
.ficatm_,. The/?tn will _7(# on a_zd o[/'whi# _oohb_g" to
best distribute the hot ab; and will stop wh(m the door
is opened but the heat will not turn ojf
How
to set
a delayed
start and
automatic
stop
}_)u( a_ set the (rvt_?z_o_h'ol to &da.>sta*t the ovt_??,
.,oh
f,,..
s#.@ /,',,,ab
q ti,,_,_
.,,,l
tb,_,,
t,lr,,
4/
a utomati(_dl3,.
Make sure tile o\vn
time (4 dm.
(9@@@@@@@@@
clock shows tile correct
@
Press tile CONV BAKE/1 RACK pad
(Convection
Bake 1-Rack mode) fl)r 1-rack
convection
baking. This mode is used for
cooking food items on only 1 rack in
convection
bake.
®®@®®®®®®@
@
Press tile CONV BAKE/MULTI
pad
(Convection
Bake Multi mode) for multi-rack
convection
baking. This mode is used fin"
cooking
food items on more than one rack
(i.e. 2, 3 or more racks) at tile same time in
Convection
Bake. See the Midti-mch
convection bahb_g" section
information.
Press
®®®®®®®®®®
@
@
fi)r more
the CONV
ROAST
tile
pads
pad for convection
Tile
oven will continue
to cook for tile
ro'_still(r
2 Press
();ell
number
to set tile
programmed
amount
of time, then shut off
automatically,
unless tile \\;_RM tbature was set.
See tile How to set the 0verc/br warmir_g" section.
desired
tel//pera[tlre.
3 Press tile COOKTIME
pad.
N07_:
ljyour _ecipe r(,clui_:s, Im@:atiz_q;,you may m:ed
to add additiomd time to tile #_q_h, o.,/tile (oohi_q, time.
4 Press the number
cooking time.
pads to set tile desired
5 Press tile DELAY START pad.
6 Press tile number
_OH
_#allt
tile
();ell
pads to set tile time of da}
to
tHrll
Oll
slid
stal'_
8 Press tile CLEAR/OFF
pad to clear tile
if necessary. Remove tile fi)od fl'om the
Remember;
even though tile oven shuts
automatically,
fi)od left in the oven will
cooking after tile o\en turns ofl_
displa)
oven.
off
continue
NOLO: }_m wig h(_ara /an whib (ool;iK_"with this
.fi,atme. The tim "willO'c& or_ am! oj[]whi[_ (oohir_g"to
best disOibl&_ the hot (fit; a_(I wig st()/) wlwn the door is
o/)(,n_d but the Iwat wig trot tu*vz q/f
cooldng
If you would like to check the times you have set,
p*ess tile DELAY START pad to check the start
time you haw set or p*ess tile COOK TIME pad
to check tile length (ff cooldng time you have set.
7 Press tile START pad,
NO_I_: Ar_ atte_tio_ to_e will solmd !/you me usi_q
timed bakk_g"or roastk_g" a*_d do _wt pres;stile START
pad a.fiterer_teriz_q,tile bahir_q,or mastb_q, temperatme.
When tile oven turns on at tile time of clay you
have set, tile displa_ will show the changing
temperature
(starting at 100°F) and tile cooldng
time cotllltdowll.
(Tile display starts changing
once tile temperature
reaches 100°E)
N07_:
(hz doubb o'vt_z models; rvhe_zusb_g"both o'vt_s
at the same tim_, the times sh(ra_@g"i_ flu" disp[O' will be
fi)r the last ove_ set. 7b di@/_O' tlw time sdjbr tbe /h:st
ov_z set,/)n,s:s the DEIAY START pad to (Tbt_gTlg
tb_(¢start
time you have set or pres:stim COOK 77ME pad to check
tim/englh (?/_ookb_ff time you have set,
31
Warming
Wall
How to set
the oven
jbr warming
D,arm keeps cooked foods warm tor up to
3 horn's atter tile cooking flmction
is finished,
or it can be activated
independently
to kee I)
ah'eady cooked tbods warm.
This feature
tood.
is not designed
To use this teature
tile WARM/PROOF
START pad.
To activate
to reheat
cold
independently,
press
pad once and then
this teature
for use atter
tile
Timed
Baking or Roasting,
press the WARM/PROOF
pad once while programming
tile oven and
before pressing
START.
To Crisp
Stale Items
* Place tood
• For
best
in low-sided
results,
place
tile
single
layer;
do
* Leave
them
tlllCovered,
• Check crispness
time as needed.
IMPORTANT
not
dishes
or pans.
fi)od
items
in a
minutes.
Add
stack.
after
20-30
NOTES:
• Food should be h(J)t hot in its eoohb_g" container
tran,!fi_rred to a heat-s@_ servb_g" dish,
• For moist./bo(5,
aluminum jbig
_ov('r them with an ore>s@
or
lid or
• Fried or erispjbods do not need to be eove*_,d but
_an become too d*y !/ warmed jbr too hmg• Repeated openit_g" of the door alhrws the hot air to
escape and the/hod to _ool.
" AIIow extra timejbr the temperatlm,
to stabilize qfier addling" items.
b_side the oven
• With Imi_e loads it may be neees_sa*3' to cover some
o/the eoohed,/bod items.
• Remove servb_g" spoo_s, et<, b@m, pl(.i_g"
_ontaine_:s in the ovt,_.
• Do not use plasti( eontaine*:s, li& or plastie wrap,
CAUTION:
Plasti_ eontainez:s; li& or plastic wrap
will melt !/ pla_ ed in the oven. Melted plasti_ may
not be removab# and is not _overed under your
_{I)(Irr(l
32
?_l y,
Ovet_
Proofing
_,l?lll
How to set
the oven
Jot proofing
The
pi oohng
feature
environment
maintains
useful
for
rising
®
a *_arm
}east-leavened
products.
1 Place
oven
the coxered
dough
on rack B or C.
NOTE:
For best _,sldts,
in a dish
.fi_n will
zmt blow
@
in the
( o'uer tke doug'b
@
®
"witk a clotk
or witk ,_'reased,
/)lastk,
"wra/) (tke /)lastk,
be az_cko_,d uz_derneatk
tke coz_tah_er,so
may. _eed to
tke oven
it qff).
2 Press the WARM/PROOF
the START pad.
Oven
pad twice and
then
NOTE:
The displa?
The oven
on dm'ing
Tile
the
will read
interior
light
proofing.
proofing
teature
desired
thereti_re
not
(proof).
tm'ns
Set
on and
automatically
remains
have
the
may
and
oven
to PROOF
for
a maximum
of 1 hour,
then leave the bread
in the
closed
oven until it reaches
the desired
height.
provides
tiw proofing
temperature
does
a(!j ustm
"PrF"
Using
kill
the
PROOF
in excess
of
1 hour
yeast.
a temperature
en t.
3 Set the TIMER ON/OFF
fl:,r a maximmn
of 1 horn _. Depending
upon the recipe, bread
may complete
proofing
in less than 1 horn'.
Check bread as needed tin" progress.
4 After 1 horn" of proofing,
press the
CLEAR/OFF
pad. If proofing
is not
complete,
leave the bread in the closed
oven tmtil it reaches
the desired height.
* To axoid
lowering
the
len-thening_
, ln'°°fing,
ovell
Hllllecess_trily.
door
* Check
bread
oxen
temperature
and
time,
do
the
products
earl?
not
open
to axoid
O_ el_proo_illg.
NOTES:
* Do not use the/)mqfing" mo(h_fn' warmi_g'fbod
or
ke@i_g,'f)od hot. The p_vqfing" ove_z #mpe_mm, is
not hot e_zouglz to hold foods at s(¢;_ #mperature,s.
('se the l,lf41_Mf_atm_, to kee])fbod warm.
* Proo,flb_q',,fieature o_
* Pmqfing
will
.pper
not operate
12 5 o7,.• "HO _1""wall" show
oven only.
wken
oven
is above
zn" tke dislplay.
33
Adjust the Oven Thermostat
1.19111Ov¢_
_O/l
l/lay
till(1
differently
IleW
o\
that
VOilE
than
en
_k)r
a
new
cooks
();'ell
the one it replaced,
weeks
f_w
to
Do
lJse your
becoI/le
Illore
Press
tile
BAI_]
want
pad
to a(!just
A two-digit
to check
These
stlch
the
as those
fOtllld
temperature
thermometers
ma}
NOTE: ThLs agljltstment will only c{/./bctbahb_g"
temDefatlt**,.V it does not ({[/i_ct bmilb@ co_v¢ction or
se(/icleanit_g • tempemtu*_,s. The ag_iustment will be
fetaind in memo* 3' ((/io' a /)o'o_er/_dlu**,.
of tile
tile
number
oxen
oxen
shows
on
which
therlnostat.
in tile
displa}.
Press BAKE once to decrease
(-) tile oxen
telnperature,
or twice to increase
(+).
Tile oven telnperature
to (+) 35°F hotter
or
tile
imlnber
theln.
For
telnperature
display.
Th,e tSl)eof
margarine
will ({[/bct
baking
nce. t
pads
Use
haxe
pad
your
can be at!lusted
up
(-) 35°F cooler.
Press
tile
exalnple,
15°F,
X_hen xou
the START
.4
stores,
Press tile BAI_7, and BROIL HIGH/LOW
pads at tile salne tilne for 3 seconds
tmtil tile
displa} shows "SF."
you
pe /brma
rise therI/lOllleters,
setting
of _our o'_ell.
var\ 90-41i
degrees.
fhmiliar with it. If you still think your new
oven is too hot or too cold, you can a@ust
tile thermostat
yourself.
7b adjust
the oven
thermostat
llOt
in grocer}
salne
way you
to change
press
inade
to go
oxen
1 and
tile
@
read
oven
5.
tile a(!justn/ent,
back to the tilne
as you
@@@(9@@@@@@
would
press
of dax
normallx.
Most recipes %r baking have been developed
using high-iht products
such as butter or
margarine
(80% tht). If you decrease
tile tht,
tile recipe may not give the same results as
with a highePtht
product.
Recipe thilure can result if cakes, pies,
pastries,
cookies or candies are made with
low-tht spreads.
Tile lower tile Iht content
of a spread product,
the more noticeable
these ditterences
become.
Federal standards
require
products
labeled
"margarine"
to contain
at least 80% tht bv
weight. Low-fat spreads,
on tile othe_ hand,
contain
less K_t and more water. Tile high
moisture
content
of these spreads aflbct tile
texture and flavor of baked goods. For best
results with wmr old thw)rite recipes,
use
margarine,
l'_utter or stick spreads
containing
at least 70% vegetable
oil.
Using
the Self Cleaning
Oven
I,l?/// Oven
Be/'OT(?
(I
dean cycle
77w oven door must be closed and all conm, Ls
®
mu,sl be ,set _or*_clly fin" the _ycle to wod; properly.
X,_erecmmnend
venting your kitchen with an
open window or using a xentilation
tim or hood
dm'ing the first sell:clean
cxcle.
Remoxe
tile
all cookware
the
broiler
pan, broiler
and am almninmn
grid, probe,
foil from
ox, en,
Gray
porcelain-coated
offset
rack)
selt:cleaning
convection
racks
oven
may
remain
cycle
without
roasting
rack
(including
the
the oven dm'ing
will darken
and
racks
in tile
(including
oven
being
and
offset
damaged.
rack)
or oxen
the top, sides and outside
with soap and water.
tile
The
nickel-plated
may
remain
in
but
they
cleaners.
On double
bolh oven,s
(]lean
extremely
during
Move
How
to set
the oven jot
cleaning
Tile
health
sensitive
tile
birds
of SOlne
to the
sell'cleaning
to another
tirades
given
On double
time
use
cleaning
small,
when
self:clean
time
recommended
contained
spills.
of 4 hours
or longer
for a dirtier
oven.
A
tile
clean
time
3 Press
tile START
door
will show
the
clean
to
drops
I,OCIZED
to am
time
dei)ending,
time
open
below
light
remaining.
tile
goes
use timed
I,OCKED
the
oven
lock
off.
baking
in
li,*ht
goes
off
you
display
It will
door
tmtil
temperatm'e
tile
will
be
door.
"I,OCK"
will flash and tile oven
control will signal if xou set the clean
_lll(1
forget to close tile oxen door.
Tile
tile
tile
to open
• The word
on
pad.
automatically.
possible
temperatm'e
the
locks
can
@
is
You
cham*e
)ou
lhe olher al lhe ,same lime,
@@@(9@@@@@@
fl_r
able
and
models,
,self:dean
®
_'_ hen
can
lhe end c_/ lhe fi*:sl
()veil.
room.
is recommended
between
3 hours
and 5 hours,
how dirt_ _(mr oxen is.
unlil
is
2 If a time other than 4 horns or 3 horn's is
needed,
use the nmnber
pads and enter the
desired clean time.
be
oven
one oven and
time.
sell:clean
not
ils slarl
cycle,
STD/LOW
pad once
or twice fin" a 3-horn
A 3-hour
The
delay
oven is clean
off
c)'cle of any
well-ventilated
1 Press tile SELF CLEAN
for a 4-horn" clean
time
clean
birds
oven models, you can sel a clean eycle in
al lhe ,same lime. The la,sl oven ,sel ruill
aulomali_ally
of the oxen door
Make sure tile oxen light bulb coxer (on some
models)
is in place and the oxen light is off.
IMPORTANT:
Wipeup heavysoil on the ovenbottom.
(Appearance
may vary.)
oven
the seltXcleaning
cycle,
become
hard
to slide.
Do not rise abrasixes
tile
during
cycle
• To stop a clean cycle, press tile CLEAR/OFF
pad. When the I,OCKED light goes off
indicating
the oven has cooled below the
locking temperatm'e,
you will be able to
open tile door.
• D
Using
the
SeliXCleaning
I,l?ll[
How
to
1
delay the
start of
c#aning
Press the SELF
CLILkN
fin" a 4-hour
clean
time
clean
STD/LOW
or twice for
sell=clean
time
use when
cleaning
small,
spills.
If a time
than
other
needed,
desired
4 horn's
use tile number
clean time.
C[lI1
tile
€ll[lIl(re
between
3 hours
how dirty _ O//I"
cleaIl
and
ox, eIl
and
tiIlle
5 hours,
dei)ending,
on
Using
tile number
day you want tile
pads, enter
tile time
clean
cxcle to start.
5
Press
pad.
START
door
tile
start
locks
open
tile
oven
drops
below
I,OCKED
X_ lien
able
tile
not
until
tile
lock
goes
of
display
will
be possible
to
temperature
temperature
and
tile
you
will
off.
I,O(:KED
tile
Tile
It will
door
tile
to open
pad.
automatically.
time.
light
@
is.
4
show
tile
to [lIIV tiIlle
Press tile DELAY START
Tile
(9@@@@@@@@@
is
enter
3
tile
A
is
or 3 horns
pads
(9@@@@@@@@@
for
contained
of 4 hom_
or hmger
for a dirtier
oven.
YO/I
®
pad once
a 3-hour
is recommended
self=clean
time
recommended
2
Ov_n
time.
A 3-hour
Oven
light
goes
off
be
door.
NOTE:
On double oven modeh,
you can ,set a delay
_lean in both oven,s al lhe same lime. 77re second oven
sel will
aulomalically
delay
lke end o/ lhe fi_:sl oven's
7b recall
lke slarl
(lean
a
You
(ycle
_ipe
max
0_, eil
notice
it up
spots
a soal>filled
thoroughlx,
• (l
some
with
oven
on lke _onlroh
white
a damp
unlil
sel, pre,s,s
fin" lke
ash in tile
cloth
atter
remoxe
them
oxen.
tile
• You
o_,eil
cannot
is cool
set
tile
eIlo//gh
oxen
tor
fi)r
cooking
tile
door
tmtil
to
tile
unlock.
cools.
If white
These
cannot
pad
o/cleaning
cycle.
lime q/ lke second
lke DEIAY
START
se( ond oven.
per
lke slarl
clean
remain,
steel wool pad and rinse
with a xineoar
and water
deposits
are
be remoxed
If tile
oxen
repeat
the
with
is not
c_cle.
usually
bx tile
clean
a salt
clean
after
one
mixture.
residue
cxcle.
that
clean
c_cle
• While tile oven is selt:cleaning,
you can press
the CLOCK pad to display the time of day.
To return to tile clean countdown,
press tile
SELF CLEA_N STD/LOW
pad.
• If tile racks become
hard to slide,
rack suI_ports with cooking
oil.
wipe tile
re and (;leaning
IUal!
t-logo
to r(qlzoue
protective
.fibl_
shi[q_ing
and
pack tging tape
Oven
Yac]_s
and
convection
BE SURE ELECTRJCAL
PART OF TIlE OVEN.
POWER
Caiefllll)
of the protecfixe
grasp a corner
IS OFF AND ALl. SURFACES
shipping
lure with your tinge,_ and slowl)peel
it ti'om the
appliance
surti_ce. Do not use any shaq) items to
remo',e the fihn. Remo',e all of the fihn befiwe
using the appliance
fl,r the tii_t time. To assm'e no
dama_*e_ is done to the finish of the product, the
All oven racks and the convection
roasting
mav be cleaned by hand with an abrasive
ARE
steel
& metal parts
Do
the
To
not use
surface.
clean
sudsy
wipe
grain.
stainless
the
pad;
steel
or a stainless
the
Follow
cleaning
Broiler pan
and grid
the
water
Always
a steel-wool
the
sm'fi_ce
rack
steel
steel
scratch
surlhce,
in the
cleaner
stainless
it will
use warm
cleaner
Roastingrack
Oven rack
Offset rack (27" models only)
To inquire
about
applicance
cleaner
location
toll-Kee
purchasing
stainless
or polish,
of a dealer
number:
nearest
steel
or to find
you,
please
the
call
our
or polish.
direction
instructions
ANY
NOTE: 77w adhe.sive mu.d be removed fi'om all parts.
]i (:annol be removed {f il is baked on.
grease all oven rack side edges with a light
coating of vegetable
oil atier cleaning
theln bv
hand or in the oven. This will help mailmfin
the
ease of sliding the racks in aim out of the oven.
(Ij ]ncl*_ded)
CLEANING
satest way to remove the adhesive fl'om packaging
tape on new appliances
is an application
of a
household
liquid dishwashing demlgent.
Apply
with a soft cloth and allow to soak.
cloth. Gray porcelain-coated
oven racks
(inchMiI_g the ottset rack) Inay remaii_ in the
oven during
the sell=cleaning
cycle without
being dalnaged.
The convection
roasting
rack
aim nickel-plated
oven racks (ii_chMing
the
offset rack) inav renmin in the oven during
the
sell=cleaning
cycle, but they will lose their luster
and become
hard to slide. It will be necessary
to
rach
Stainless
COO1. BEFORE
cleaner or steel wool. Atter cleaning,
rinse the
racks with clean water and dry with a clean
roasting
Oven
of the
fl_r
smtace.
National
Parts
Center
800.626.2002
ge.com
Afier broiling,
remove the broiler pan flx>m the
oxen. Remoxe the grid froln the pail Careflfllv
pour out the grease from the pan into a proper
/I/1"111111il/l/X//\'{\'i\
\_)
coiltaiiler.
X._ash and rinse the broiler pan and grid in hot
water with a soap-filled
or I)lastic scom'ing, pad.
If fl>od has bm'ned on, sprinkle
the grid with
detergent
while hot and cover with wet paper
towels or a dish cloth. Soaking the pan will
relnove
Both
with
b/lrlled-oil
the broiler
a commercial
toods.
pan and grid may
oxen cleaner,
be
cleaned
Both the broiler pan and grid
cleaned
in a dishwasher,
Do not dean
can also be
the broiler pan 0r g'rid in a se(/:deaning"
O?_(¢H,
Do not store a soiled broiler pan and g'rid anywhere
in the oven.
./
re and (;leaning
1471ll Oven
Lo'i-o ff
07)e7l
The door is very heavy. Be cmeful when removh_g
mid lifting the door.
([OOY_
Do not l!fi th_ door by th_ handh,.
re ffl OTJ(l [
To remove
the door:
1 Fully open
the door.
2 Pull the hinge locks down toward the door
fram e, to the tmlocked
position.
A tool, such
as a small fiat-blade screwdriver; may be
required.
3 Firmly
Slot
grasp
both
sides
of the door
Hingelock
Pull hinge locks down to unlock
at the top.
4 Close door to the door remowd position,
which is haltwav between
the broil stop
position
and flfllv closed.
5 I.iti door up and out tmtil the hinge
clear of the slot.
arm is
Removal position
To replace
1 Firmly
the door:
grasp
both
sides
of the
door
at the to[9.
Bottom
'e a_rm
edgeof
X_ith the door at the same angle as the
remowd position,
seat the indentation
of the
hinge am_ into the bottom
edge of the hinge
slot. The notch in the hinge arm must be
flfllv seated into the bottom
of the slot.
Fully
open,
the
open
the
door.
the indentation
bottom
edge
If the
door
is not
seated
will not
Indentation
fldlv
correctly
in
1
of the slot.
Push the hinge locks up against the fl'ont
frame of the oven cavity, to the locked
position.
5 Close
the
oven
door.
Pushhingelocksupto lock
38
Oven
door
To clema the inside
of the door:
• Because tile area inside tile gasket is cleaned
during tile sel6clean cycle, you (1(7not need to
clean this by hand.
• Tile area outside tile gasket and tile door liner
can be cleaned with a soap-tilled or plastic
scorning pad, hot water and detergent.
Rinse well
with a vinegar and water solution.
To dem_
the
outside
of the
door:
• Use soap and water t(7 thoroughly
clean the top,
sides and fi'ont oI the oven dora: Rinse well. Ybu
may also use a glass cleaner to clean the glass
on the outside of the dora: Do not let water drip
into tile vent openings.
Do not rub or cleanthedoor gasket-it has an extremelylow resistanceto abrasion.
If you noticethe gasketbecomingworn, frayedor damagedin anyway or
if it has becomedisplacedon the door,you should haveit replaced.
• If anv stain on tile door vent trim is persistent,
use a soft abrasive cleaner and a si)onge-scrubber
tiTr best results.
• Spillage of marinades,
fl'uitjuices,
tomato sauces
and basting materials containing
adds may cause
discoloration
and should be wiped
up immediatel>
When s/wlhce is cool, clean and
IJIISe.
• Do not use oven cleanei_, cleaning powde_
hm_h abrasives on tile outside of tile (lo(7_:
or
Pu?movable
To remove
oven
1 Remove the oven door using the instructions
in the I,ifl-Off Oven Door section of this
.flOOr
I//illl
the oven
Oven heating
elements
3 Clean
and pull
soapy
water.
4 When re-installing
the oven floor be sm'e to
slide it all the way to the back (Tf the oven.
the remo;_d)le
floor
f] oo1\
Tile bake element
is not exposed
and is raider
the removable
17;en floor. If spillovers,
residue
(71" ;Ish
with warm
CAUTION:
_Mways replace
betiTre the next use.
out the removable
Do not clean the broil element.
Any soil will
burn off when the element
is heated.
wipe
the oven floor
tlill,
2 Press down
oVell
floor:
;iCC/lllltllate
up be%re
Oll
tile
ieI//o;;ible
ovell
To clean the bake element
area, take out the
removable
floor (see the l?_,movab& Oven FhTor
section)
and gently lift the bake element.
(:lean
with warm soapy water. Always replace the
remo;_lble
floor beiiTre next use.
f](7(71",
self-cleaning.
It's a good idea to wipe the control
panel alter
each use. Clean with mild soap and water or
vinegar and water, rinse with clean water and
polish (h y with a sott cloth.
Do not use abrasive cleansers,
strong liquid
cleaners,
plastic scouring
pads or oven cleaners
(711the control panel--they
will damage
the
finish. A 50/50 sohltion
of vinegar
and hot
water works well.
39
re and (;leaning
I,l?lll Oven
07) g;vZ
light bulbs
N07_:
The glass eover sholdd be removed mdy when
eold. _4_,ari_g" latex gloves may. _f/i_r a better ,g'ri_.)
Receptacle
Socket
CAUTION: Before
repla..g
bulb, disconnect
electrical
at the main fuse or circuit
Be sure to let the light
completely.
pox_er to the oven
breaker
panel.
coxer
For }our safety do not touch
bare hands or a damp cloth.
and bulb
cool
_'_"
a hot bulb with
To remove:
Bulb
Tab
1 Turn the glass cover counterch)ckwise
1/4 turn until the tabs of the glass cover
dear the grooves of the socket.
2 Using gloves or a (Ir'_ cloth
b) I)ullin°_ it straight
out.
remove
/
Glasscover
the bulb
To replace:
1 Use a new 130-volt Halogen,
exceed 50 watts.
bulb,
not to
Using gloves or a dr', cloth
remove the bulb
from its Ix_(kaging',, Do not touch the bulb
*dth bare fingel_.
3 Push the bulb straight
all the wa).
into
the receptacle
4 Place the tabs of the glass coxer into the
grooves of the socket. Turn the o-lass coxer
clock_dse
1/4 turn.
For improved ligT_ting"inside the oven, dean the ,glass
eoverj}_quently using" a wet cloth. This should be
done when the oven is _omp#tely cool
5 Reconnect
PTvbe
The
soap
Cool
Scorn"
pad,
electrical
temperature
and water
the
rinse
probe
may
or a soap-filled
temperatm'e
stubborn
and
power
spots
probe
with
to the oven.
be
cleaned
scom'ing
befi)re
with
pad.
cleaning,
a soap-tilled
scom'ing
dry.
l)o not imme*:selt_elemperahm, probe in wale*:
l)o nol slore lhe lemperalure
40
Receptacle
probe in
lhe ovem
Usegloves
or cloth
getbre
You
(;all
I,l?d/
Save time
& money/
lvoubh, shooliTtg
POSSIBLE
CLOCK AND TIMER
DO NOT WORK
* A fuse ill w)ur home may be bh)wn or the circuit
Replace the fuse or reset the circuit breaker.
may
aTtd you
tzot 1wed to
call fbv sevvic<
CAUSE
• (-)yen controls
section.
lips
OVEN
NOT
LIGHT
DOES
WORK
. Light
bulb
improperly
is loose
* Pad operating
set. See the
or defective.
light
is broken.
Tighten
or replace
ac!jusm/ent.
OVEN WILL
NOT WORK
* A fuse in your home may be bh)wn or the circuit
Replace the fuse or reset the circuit breaker.
controls
improperly
set.
* Oven
controls
improperly
set.
* Rack
position
is incorrect
or
* Incorrect
* Oven
cookware
them_ostat
the bulb.
See the A_(just the Oven Tlwrmostat
See
the
or cookware
needs
tripped.
Call fl)r service.
* (-)yen themlostat
needs
Do it you*:se(/! section.
•(-)ven
breaker
Oven Control, Clock a_d Timer
OVEN
TEMPERATURE,
TOO HOT OR
TOO COLD
FOOD DOES NOT
BAKE OR ROAST
PROPERLY
Service...
Oven
PROBLEM
oTt d_@d/owhtg
pa_>_ first
For
the
Baking"
rack
is not
of improper
a(!justment.
See the
breaker
Hipped.
or Roasting"
section.
level.
size
A@_st
being
used.
the Ove_z The*'mostat
Do it yol_*:se(/] section.
FOOD DOES NOT
BROIL PROPERLY
'_ Oven controls
HIGH/LOW
* Improper
* Food
came
position
set. Make
being
used.
sure you press
with
not suited
yotlr
fl)r broiling.
the BROIL
See tile Bmilb_g'guide.
being cooked in a hot pan. Llse the broiling
with your oven. Make sure that it is cool.
* Cookware
cal/le
rack
improperly
pad.
Use the broiling
pan
and grid
pan and
that
grid that
oven.
*Tlle probe is plugged
f]'om tlle ()veil.
into
the outlet
* Aluminum
fl/il used on tile broiling
properly
and slit as recommended.
in the
pan
oven,
and grid
Remove
the probe
has nor been
fitted
* Ill some areas the power (voltage)
may be low. Preheat
the broil
element
fl)r 10 minutes.
Broil fl)r the longest period of time
recommended
ill the Bmili_g" t_uid<
OVEN WILL NOT
SELF CLEAN
* The oven temperature
is too high to set a sellZc]ean
A]h)w the oven to cool and reset the controls.
* O'_en controls
section.
* Tlle probe
fron/
"CRACKING"
"POPPING"
OR
SOUND
FXCESSIVE
SMOKING
DURING CLEAN
CYCLE
tlle
improperl)
is l)lugged,,
into
set. See the
the outlet
operation.
Uising" the Se(FCleaning"
in the
oxen.
Remove
Oven
the probe
();ell.
* This is normal.
It is the sotmd of the metal heating
dm'ing both cooking and cleaning hmctions.
and cooling
* Excessive soil. Press the CLEAR/OFF
pad. Open the windows
tile roon_ of smoke. _%fit until the I,OCKED light goes off.
Wipe up the excess soil and reset the clean cycle.
to rid
4/
Before
You Call For Service...
I,l?lll Oven
Troubleshooting tips
PROBLEM
POSSIBLE
OVEN DOORWILL
NOT OPFAN AI_TER
A CLFAN CYCLE
* The oven is too hot. _Mlow the oven to cool below loddng
OVEaN NOT CLEAN
* (-_ en controls
AI)TER A CLEAN
* (-X en was heavily soiled. Clean up heax T spillo\ ex5 befi)re starting the
clean cycle. Heaslv soiled ovens may need to self-clean again or fl)r a
longer period ot time.
"LOCK"
FLASHES IN
THE DISPLAY
* The self-clean cycle has been selected
Close the oven doox:
LOCKED LIGHT
IS ON WHEN YOU
WANT TO COOK
* The oven dora is locked because the temperilture
inside the oven has
not dropped
below tile locldng temperature.
Press the CLEAR/OH?
pad, _Mlow the o\vn to cool
CONTROL
SIGNALS
AkTER ENTERING
COOKING
TIME OR
DELAY START
* You fi)rgot to enter a bake temperature
or cleaning time. Press the
BAKE, pad and desired temperatm'e
or the SELF CLEAN STD/LOW
pad and desired clean time.
"F
AND A NUMBER
OR LF,TFER" FLASH
* You ha\v a flmction error code. Press the CLF=kR/OFF
pad. _Mlow the
o\en to cool for one horn: Put the oxvn back into operation.
IN THE DISPLAY
* Disconnect
all power to the oven fbr 30 seconds and then
powel: If the flmction error code repeats, call flw service.
DISPLAY
BLANK
* A fllse in your home may be blown or the drcuit
Replace tJ_e fuse or reset tile drcuit breake*;
GOES
CAUSE
improperly
set. See the {._int{"t/w S_(/=Ch_a_int{"()v_
• The clock is in the black-out
7_mer section.
mode.
but the door
section.
is not closed.
breaker
recom_ect
tripped.
See the O'ue;_Control, C[oc/¢and
DISPLAY I)IASHF£
* Power fidlure.
UNABLE TO GET
THE DISPLAY TO
SHOW "SF"
* ()yen control pads were not pressed properly. The BAKE and the
BROIL HIGH/LOW
pads must be pressed at the same time and heM
fiw 3 seconds.
"PROBF2' APPFARS
IN THE DISPLAY
* This is reminding
the probe. Enter
POWER OUTAGE,
CLOCK FLASHES
* Power outage 05"sm'ge. Reset the the clock. If the oven was in use, you
must reset it by pressing the CLEAR/OFF
pad, setting the clock and
resetting any cooldng iimction.
STEAM kNOM
THE VENT
* \\]_en using the convection teature, it is n(mnal to see steam coming out
(ff tile o\vn vent. _&stile n[ll/lber (ff rilcks or alllOtlllt
of tk)od being cooked
increases, the amount
ot visible steam will increase.
"BURNING"
OR
"OILY" ODOR
F2MITTING FROM
THE VENT
* This is normal in a new oven and will disappear in time. To speed the
p*ocess, set a seli:clean cycle fiwa minimum
of 3 hom_. See the { isint_"the
S¢(/_C&ming" O'u(_zsection.
STRONG
* This is teml)orm)'. An odor fl'om the insulation around
_wen is nomml for the fil_t tbw times the _wen is tlsed.
ODOR
I)SkN NOISE
42
temperature.
Reset the clock.
you to enter a })robe tempelature
a probe teFapesature.
atier plugging
the inside
in
of the
* A cooling tim or a con\ ection iim (depending
on the flmction you are
using) may automatically
turn on. This is nomml. The cooling tim will
turn on to cool internal parts. It may run fiw up to 1-1/2 hom_ in 30"
models and up to 2 hom_ in 27" models a/ter the oven is turned ofl_
The convection Km will cycle on and off 5mtil the flmcti(m is o\er or
the door is opened.
Notes
43
Notes
GE Service
Protection
Plus 'M
GE, a name recognized
_xorldwide
for quality and dependability,
Service Protection
Plus '"--comprehensive
protection
on all your
No Matter What Brand!
Benefits
Include:
We TI Cover Any Appliance.
Anywhere. Anytime.*
• Backed by GE
• All brands covered
• Unlimited
service calls
•
•
•
•
offers you
appliances--
All parts and labor costs included
No out-of-pocket
expenses
No hidden
deductibles
One 800 nmnber to call
You
on
_ill
the
be completel_
remaining
value
satisfied
of your
_dth
our
contract.
service
No
protection
questions
or you
asked.
ma_
It's that
request
)our
monex
back
simple.
Protect your refl'igerator,
dishwasher,
washer and chTer, range, TV, VCR and much more--any
brand!
Plus there's no extra charge _()r emergency
service and low monthly
financing
is available.
Even icemaker
coverage
and _bod spoilage
protection
is o_tbred. You call rest easy, knowing that all your valuable household
prodtlcts
are
protected
against expensive
repairs.
e_._e>o.r ron*idenrein GEa.d r:,n._i. the t!.S.t,,H-*ree
at 800.626.2224
for
I/lore
:_-M1 br;mds
infolmation.
o_<led,
up
Io 20 y<;u'_ _dd,
in Ihe
continental
[.S.
(]111
Please place in envelope and mail to:
General Electric Company
Warranty Registration
P.O. Box 32150
Louisville,
Department
KY 40232-2150
llel'{t
Consumer
Deal
Product
Ownership
Registration
Customer:
Thank
you tbr purchasing
V_'e are proud
Follow
our product
and
thank
you for placing
your confidence
in us.
to haxe you as a customer'.
these
three
Complete
your
steps
to protect
your
new
alld mail
Ownership
Registration
store
today:
ot' knowing
Call contact
the llnlik(_l_
Read
this
we
yol/ in
event of a
VOI]
dOClllnellt
sat}.*tv lnoditication.
Q)Wller"4
service.
re(ltliYe
Our
VOllr
Manual careftllly.
It will help yotl
operate VOllr lleW
appliallce properl);
in a sat;_'place. It
contaills il_torlnatiOll
voll will need should
IIa_,'_' tll_' l_'ac_ ' ot
milld
investment:
After mailing the
registratioll
bellow,
Consumer
Product
appliance
serxice
mllnber
is
800 (;E CAI_.ES
(800.432.97!17).
Model
Number
Serial
I
Important:
I
Number
I
, I
If you did not get a registration
card with your
product, detach and return the form below to
ensure that your product is registered,
or register
online at ge.com.
_ (_llt
Consumer
Product
Ownership
Model
M*:
Ms.
Mls.
Registration
Number
Serial
Number
Miss
First I
Nam(
I
I
I
I
I
I
I
I
I
I
I
I
I
I
I
I
I
I
I
I
I
Ap,.
#I
I
I
I
I
I
I
I
I
(iitT,' [
I
I
I
I
I
I
I
I
I
I
I
I
Dayl ,
I
xv,_ltl ,
I
St l-C(:t
Address
ll(_re
L'stl
N_ml(
E-lnail
I
I
I
I
I
I
I
I
I
I
I
I
I
I
I
I
I
I
I
I
I
I
I
I
I
I
I
I
I
Zip
A <:od<
I I
I
I
I
I
Addr(ss'
, i I S,a,,,
I
[)ll_ Pl I<:(d
hi tis_
.X]onth
I
GE Consumer
& Industrial
Appli(]nces
Generol Electric Compong
Louisville, KY 40225
ge.com
Pholle
Nt/lllb(_r
I
'_' Please pr_vide your e-mail address to receive, via e-mail, discoums,
importam
communicatiolls
from GE Appliances
(GEA).
Check
here if vou do not warn to receive commllllications
special ottk.rs alld <)tiler
t_-oln (;EA's careftllly selected
partners.
FAILI RE TO (?()MPI EWE AND RETI RN "FillS CARD DOES NOT DIMINIStt
"_,:\RI_ \N'I"," RIGttTS.
YOI R
For more inti)rmatioll
agora (',EA's pri_acy a_l(l data /isage polio); go to ge_.com a_l(l cli(k on
'Privacy Policy" or call 800.6'26.'22'24
Consumer
Services
With the purchase
of your new Monogram
appliance,
receive the
assurance
that if you ever need information
or assistance from GE,
we'll be there. All you have to do is call----toll-free!
G E Answer
Center _
800.626. 2000
Whatever
your question
about any Monogram
major appliance,
GE Answer Center e:
infl_rmation
service is a_filable
to hell). Yore" call--and
your question--will
be answered
promptly
and courteously.
And you can call any time. GE Answer Center <_se_Mce is open
24 hours a day, 7 clays a week.
OR
Visit our \'\Tebsite at: ge.com
In-Home
Service
Repair
In the U.S.A.:
800.444.1845
A GE consumer
service protessional
will provide
expert repair service, scheduled
at a time
that's convenient
flxr you. Many GE (_onsumer
Service company-operated
locations
otter
you service todav or tomorrox<
or at your convenience
(7:00 a.m. to 7:00 pan. weekdays,
9:00 a.m. to 2:00 pan. Saturdays).
Our fhctorDtrained
technicians
know your appliance
inside and out--so
most repairs can be handled
in just one visit.
In Canada:
888. 880.3030
For Customers
GE oflbrs, fl'ee of charge, a brochure to assist in planning
a barrie>ti'ee kitchen tbr persons with limited mobility.
With Special
Needs...
Consumers with impaired hearing or speech who have access to
a TDD or a conventional teletypewriter may call 800.TDD.GEAC
(800.833.4322)
to request
inflwmation or se_Mce.
800.626. 2000
S_gXION
Service
Contracts
800.626.
2224
Parts and
Accessories
800.626. 2002
YOu can have the secure teeling
that GE (_(msumer
Service will still be there after your
warranty
expires. Purchase
a GE contract
while your warranty
is still in ettect and you'll
receive a substantial
discount.
With a multiple-year
contract,
you're assured
of future
service at today's prices.
Individuals
qualified
to their
home.
Renewal
Parts
The
are
to service
(;E
fully
p;u'ts
their
s}stem
warranted.
o*_n appliances
can
provides
to oxer
47,000
and
Discoxer
VISA
access
MasterCard
have
parts
or accessories
parts...and
cards
sent
directlx
all GE (;enuine
are
accepted.
User maintenance
instructions
contained in this manual cover procedures
intended
to be
performed
by any user. Other servicing generally
should be referred
to qualified
service
personnel.
Caution must be exercised,
since improper servicing may cause unsafe operation.
47
Warranty
(onveclion
YOUR
MONOGRAM
Staple
sales
date
WHAT IS
COVERED
slip
is needed
WALL
OVEN
or cancelled
to obtain
chech
service
I,l_all Oven
WARRANTY
here.
under
Proof
of original
purchase
warranty.
LIMITED
ONE-YEAR
WARRANTY
For one xear from date of original purchase,
we will provide,
free of charge,, I)arts and
service labor in xour home to repair or replace any part of the oven that tails because
of a mantdhcttu'ing
defect.
P)vm the Date
of the O'_ginal
Puwhase
This warranty is extended
to the original purchaser
and any succeeding
owner ff)r products
purchased
for ordinar\
home use in the 48 mainland
states, Hawaii, %_lshington, D.C. or Canada.
If the product is located in an area where service by a GE Authorized
Servicer is not available, you
ma\ be responsible fin" a trip charge or \_)u ma) be required to bring the product to an Authorized
GE
Setwice location lbr service. In Alaska the warranty is the same e×cept that it is I,[MITED because \_)u must
pa) to ship the product to the service shop or fi)r the set\ice technician's travel costs to \_)ur home.
All warranty service will be provided bv our Factor\
Care ,_servicers during normal working hours.
Service
Centers
or bv our atnhorized
Customer
Should your appliance need service, during warranty period or beyond, in the USA call
800.444.1845.
In Canada: 888.880.3030.
Please hm e wmr serial num ber and model num ber
available when calling fl)r service.
WHAT
IS NOT
Service
trips to your
to use the product.
COVERED
Replacement
of house
circuit breakers.
home
to teach
fuses
you
or resetting
Damage
to the product
caused
fire, floods
or acts of God.
of
by accident,
Failure of the product
if it is used for other
its intended
purpose
or used commercially.
I
how
• Improper
installation,
• Incidental
or consequential
by possible
defects
• Damage
caused
• Product
service.
not
after
accessible
delivery
with
or maintenance.
damage
this
caused
appliance.
delivery.
to provide
required
than
repair as provided in this Limited Warranty. Any impfied warranties, including the implied
warranties of merchantability or fitness for a particular purpose, are limited to one year or
XCLUSION
OFIMPLIED
WARRANTIES--Your
sole and exclusive remedy is product
the
shortest period
allowed
by law.
Some states/provinces
do not allow the exclusion or limitation of incidental
or consequential
damages, so the above limitation or exclusion ma} not apply to you. This warranty gives you specific
legal rights, and you ma_ also hme other rights which vary fi'on_ state to state/province
to province.
To know what your legal rights are in your state/province,
consult your local or state/provincial
consmner
ailairs office or your state's Attorney General.
Warrantor in USA: General Electric Company,
Louisville, KY 40225
Warrantor
in Canada:
Camco
Inc.
GE Consumer
164D4290P093-2
49-80336
11-o5 JR
Printed in the United States
& Industrial
Applionces
General Electric Compon U
Louisville, KY/40225
ge.com