1
Sur les modèles avec une commande photoélectrique Astrodôme, il
est nécessaire d’orienter la commande vers le Nord. Pour que
l’allumage soit déclanché plus tôt, tournez la commande en l’écartant
de la fenêtre. Pour retarder l’allumage tournez la commande vers le
centre de la fenêtre. Une prise débranchable et un réceptacle séparés
sont fournis pour ce module de commande. Ces connexions sont
polarisées pour éliminer la possibilité d’un branchement à l’envers.
Quand une commande photoélectrique extérieure est utilisée, le
module PE doit être orienté de façon que son marquage avec le mot
“North” soit dirigé vers le Nord vrai. Pour ce faire, enfichez le module
PE dans son réceptacle, puis soulevez-le en même temps que son
réceptacle et faites tourner l’ensemble dans le sens du vissage jusqu’à
ce que le mot “North” soit dirigé vers le Nord vrai. Baissez alors
l’ensemble en le remettant fermement en position. Il n’y a pas besoin
d’outillage pour effectuer ce réglage.
La tension est présente dans le luminaire même lorsque le caisson
inférieur est ouvert ou enlevé.
Si des schémas de câblage sont nécessaire il peuvent être demandés
chez le concessionnaire ou agent General Electric le plus proche en
spécifiant le numéro de référence au catalogue du luminaire.
N’utilisez que des types de lampes spécifiés sur la plaque
d’identification. Toutes les commandes Astrodôme installées en usine
dans les luminaires Powr/Bracket ont été réglées pour un niveau
d’éclairage (lumen par pied carré) adéquat. Si pour une raison
quelconque il était nécessaire de remplacer la commande, alignez les
marquages de calibration comme indiqué sur le schéma 3.
Une variante consiste à orienter le réceptacle PE avant l’enfichage
du module de commande PE. Pour le faire, levez la prise PE en la
prenant sur son bord et tournez-la en vissant jusqu’à ce que le mot
“North” soit dirigé vers le Nord vrai. Baissez alors la prise en la
remettant fermement en position. Puis installez le module de
commande PE.
CÂBLAGE
Vérifiez que la tension secteur d’alimentation est correcte en la
comparant avec la valeur préconisée sur la plaque d’identification.
Tous les raccordements électriques doivent être réalisés en conformité
avec les normes nationales et les réglements locaux éventuels
applicables. Des fils Vulkene isolés AWG #14 en toron sont
normalement fournis, il suffit de les raccorder à la tension d’arrivée de
valeur appropriée. Si le luminaire n’a pas été commandé avec les fils
de connexion, les bornes sont commodément situées et facilement
accessibles au bornier, acceptant des fils d’alimentation de taille AWG
#14 à #6. Amenez les raccordements aux points montrés sur la plaque
d’identification du luminaire. Les bornes à étrier permettent une
liaison facile.
NOTE : Chaque commande Astrodôme a été calibrée
individuellement et une marque de réglage apposée dessus de
sorte que le paramétrage en lumen par pied sera adéquat
quand le module sera installé dans n’importe quel luminaire
Powr/Bracket.
AT TENTION
Risque de brûlure
Laissez le bloc d’ampoule refroidir
avant d'y toucher
g
GEH-5851
GE
Lighting Solutions
INSTRUCTIONS
POWR/BRACKET® Luminaire
READ THOROUGHLY BEFORE INSTALLING
WARNING
Risk of electric shock
• Turn power off before servicing
– see instructions
GENERAL
This luminaire is designed for outdoor lighting service,
and should not be used in areas of limited ventilation, or in
high ambient temperature enclosures. Best results will be
obtained if installed and maintained according to the
following recommendations.
UNPACKING
This luminaire has been properly packed so that no part
should have been damaged during transit. Inspect to
confirm.
Contour the pole strap to the pole. Insert lag screws in
the slots provided at ends of the strap (Figure 2). Slots
instead of round holes permit a small range of adjustment
with respect to the pole. Tighten lag screws in the usual
manner.
INSTALLATION
CAUTION
Unit will fall if not installed properly
• Follow installation instructions
Marquage à l’encre
d’alignement sur la
commamnde
COMMANDE
After the luminaire is unpacked and inspected, it may be
mounted directly on the wood pole thru-bolt. The steel
mounting plate inside the die-cast top housing (Figure 1)
prevents the head of the bolt from revolving when tightened by means of the nut on the opposite side of the pole.
COMMANDE
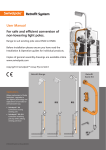
Figure 2
A pad is provided on the top of the hood portion of the
luminaire for convenient application of a hand level. Some
leveling may be accomplished by using shims as needed.
Prise
Support
Pointeur et marquage
COMMANDE
INSTALLÉE
Schéma 3
MONTAGE ET INSTRUCTIONS D’ORIENTATION DE LA COMMANDE ASTRODÔME
g
Figure 1
If desired, the lower housing of door assembly may be
opened by loosening the screw, holding it in place, and
lowering carefully until it hangs beneath the rear portion of
the bracket. Only ordinary care is required to assure that the
hinge pins are not distorted in the process. A disconnect
plug and receptacle connects the upper housing and socket
wiring with the lower housing-door assembly so that the
latter unit may be readily removed and replaced in the
Powr/Bracket luminiare.
GE Lighting Solutions • 1-888-MY-GE-LED • www.gelightingsolutions.com
1-88 8 - 6 9 - 4 3-5 3 3
GE Lighting Solutions is a subsidiary of the General Electric Company. Evolve and other trademarks belong to GE Lighting Solutions. The GE brand and logo are trademarks of the General Electric Company.
© 2011 GE Lighting Solutions. Information provided is subject to change without notice. All values are design or typical values when measured under laboratory conditions.
35-201578-7N (1/01)
These instructions do not purport to cover all details or variations in equipment nor to provide for every possible contingency to be met in connection with installation, operation or
maintenance. Should further information be desired or should particular problems arise which are not covered sufficiently for the purchaser’s purposes, the matter should be referred
to GE Lighting Solutions.
For units with the internal Astrodome photoelectric
control there is no need to orient the control northward.
To make the control turn on earlier, rotate the control away
from the window. To make the control turn on later, rotate
the control unit toward the window. A separate disconnect
plug and receptacle is provided for this control unit. All
disconnects are polarized to eliminate chance of improper
connection.
When an external photoelectric control is used, the (PE)
receptacle should be oriented so that the word “”North’’ is
directed toward true north. This is done by seating a PE
control into receptacle, lifting upward on PE control
(which will lift PE receptacle also), and rotating them
clockwise until word “North” is directed toward true north.
Then lower PE control and receptacle to firmly seat them
into position. No tools are required to make this adjustment.
Alternatively, PE receptacle can be oriented before PE
control is installed. This is done by lifting up on rim of the
PE receptacle and rotating it until the word “”North’’ is
directed toward true north. Lower PE receptacle to firmly
seat it in this position. Then install PE control.
WIRING
Verify that supply voltage is correct by comparing it to
nameplate. All wiring connections should be made in
accordance with National Electrical Code and any applicable local codes. AWG #14 stranded Vulkene insulated
leads are normal-ly provided which only require connection
to power at proper voltage. If luminaire has not been
ordered with lead wires, terminals are conveniently located
and readily accessible on the terminal boardwhich will
acept service leads ranging in size from AWG #14 through
#6. Bring in the service leads to the points shown on the
luminaire nameplate. Clamp-type ter-minals are provided
for positive connections.
Power is present in the luminaire even with the lower
housing open or removed.
If wiring diagrams are desired they can be ordered from
nearest General Electric apparatus sales office or agent by
luminaire catalog number.
Use only lamps specified on nameplate. All Astrodome
controls installed in Powr/Bracket luminaires at the factory
have been aligned for proper footcandle setting. If for any
reason, it becomes necessary to replace the control, align
the calibration marks as shown in the following diagrams.
NOTE: Each Astrodome control is individually
calibrated and the alignment mark is placed on the
control so that the proper footcandle setting will
result when the unit is installed in any Powr/Bracket
luminaire.
CAUTION
Risk of burn
• Allow lamp/fixture to cool before
handling
g
GEH-5851
GE
Lighting Solutions
INSTRUCTIONS
Luminaire POWR/BRACKET®
À LIRE AVEC SOIN AVANT D’INSTALLER
DA N G E R
Risque d’électrocution
• Mettre hors tension avant d’intervenir
– Suivez les instructions
PRÉSENTATION
Ces luminaires sont conçus pour fournir un éclairage à l’extérieur,
et ne doivent pas être utilisé dans des zones à ventilation limitée ou
sous des températures ambiantes élevées. Les meilleurs résultats sont
obtenus avec une installation et un entretien conformes aux
recommandations qui suivent.
DÉBALLAGE
Le luminaire a été emballé correctement de façon à ce qu’aucune
de ses pièces ne soit endommagée pendant son transport. Veuillez
procéder à une vérification pour le confirmer.
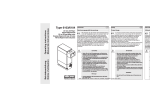
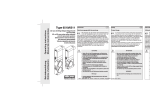
Mettez la bande de cerclage autour du poteau. Insérez les tire-fonds
dans les encoches prévues aux extrémités de la bande (voir schéma 2).
Ces encoches, plutôt que des trous ronds, permettent une petite marge
de réglage par rapport au poteau. Serrez les tire-fonds de façon
normale.
INSTALLATION
AT TENTION
Risque de chute en cas de mauvais
montage • Suivez les instructions
Après déballage et inspection du luminaire, il peut être monté sur
le boulon de traversée du poteau en bois. La plaque de montage en
acier à l’intérieur du caisson moulé supérieur (voir schéma 1)
empêche la tête de boulon de tourner quand il est serré au moyen
d’un écrou du côté opposé du poteau.
Schéma 1
Schéma 2
Un coussinet est prévu sur la partie supérieure de la partie capot du
luminaire pour l’application commode d’une mise à niveau à la main.
Si nécessaire des cales peuvent être utilisées pour la mise à niveau.
Si on le souhaite le caisson inférieur de l’assemblage de porte peut
être ouvert en desserrant la vis, en le maintenant en place et en le
descendant doucement jusqu’à ce qu’il bute contre la portion arrière
du support. Il suffit de faire attention à ce que les axes de charnière ne
soient pas tordus dans la manœvre. Une prise débranchable et un
réceptacle relient le caisson supérieur et le câblage de douille avec
l’assemblage inférieur et la porte, de sorte que cette dernière partie
peut être rapidement enlevée et remplacée sur le luminaire Powr/
Bracket.
Figure 3
ASTRODOME CONTROL MOUNTING AND ORIENTING INSTRUCTIONS
Ces instructions n'ont pas pour destination de couvrir tous les détails ou variantes de l'équipement, ni de répondre à toutes les éventualités que vous pourriez rencontrer pendant l'installation,
le fonctionnement ou l'entretien. Si vous souhaitez des informations complémentaires, ou si vous rencontrez un problème particulier qui ne soit pas adressé de votre point de vue d'acheteur,
le sujet doit être remonté jusqu'à la société GE Lighting Solutions
For units with the internal Astrodome photoelectric
control there is no need to orient the control northward.
To make the control turn on earlier, rotate the control away
from the window. To make the control turn on later, rotate
the control unit toward the window. A separate disconnect
plug and receptacle is provided for this control unit. All
disconnects are polarized to eliminate chance of improper
connection.
When an external photoelectric control is used, the (PE)
receptacle should be oriented so that the word “”North’’ is
directed toward true north. This is done by seating a PE
control into receptacle, lifting upward on PE control
(which will lift PE receptacle also), and rotating them
clockwise until word “North” is directed toward true north.
Then lower PE control and receptacle to firmly seat them
into position. No tools are required to make this adjustment.
Alternatively, PE receptacle can be oriented before PE
control is installed. This is done by lifting up on rim of the
PE receptacle and rotating it until the word “”North’’ is
directed toward true north. Lower PE receptacle to firmly
seat it in this position. Then install PE control.
WIRING
Verify that supply voltage is correct by comparing it to
nameplate. All wiring connections should be made in
accordance with National Electrical Code and any applicable local codes. AWG #14 stranded Vulkene insulated
leads are normal-ly provided which only require connection
to power at proper voltage. If luminaire has not been
ordered with lead wires, terminals are conveniently located
and readily accessible on the terminal boardwhich will
acept service leads ranging in size from AWG #14 through
#6. Bring in the service leads to the points shown on the
luminaire nameplate. Clamp-type ter-minals are provided
for positive connections.
Power is present in the luminaire even with the lower
housing open or removed.
If wiring diagrams are desired they can be ordered from
nearest General Electric apparatus sales office or agent by
luminaire catalog number.
Use only lamps specified on nameplate. All Astrodome
controls installed in Powr/Bracket luminaires at the factory
have been aligned for proper footcandle setting. If for any
reason, it becomes necessary to replace the control, align
the calibration marks as shown in the following diagrams.
NOTE: Each Astrodome control is individually
calibrated and the alignment mark is placed on the
control so that the proper footcandle setting will
result when the unit is installed in any Powr/Bracket
luminaire.
CAUTION
Risk of burn
• Allow lamp/fixture to cool before
handling
g
GEH-5851
GE
Lighting Solutions
INSTRUCTIONS
Luminaire POWR/BRACKET®
À LIRE AVEC SOIN AVANT D’INSTALLER
DA N G E R
Risque d’électrocution
• Mettre hors tension avant d’intervenir
– Suivez les instructions
PRÉSENTATION
Ces luminaires sont conçus pour fournir un éclairage à l’extérieur,
et ne doivent pas être utilisé dans des zones à ventilation limitée ou
sous des températures ambiantes élevées. Les meilleurs résultats sont
obtenus avec une installation et un entretien conformes aux
recommandations qui suivent.
DÉBALLAGE
Le luminaire a été emballé correctement de façon à ce qu’aucune
de ses pièces ne soit endommagée pendant son transport. Veuillez
procéder à une vérification pour le confirmer.
Mettez la bande de cerclage autour du poteau. Insérez les tire-fonds
dans les encoches prévues aux extrémités de la bande (voir schéma 2).
Ces encoches, plutôt que des trous ronds, permettent une petite marge
de réglage par rapport au poteau. Serrez les tire-fonds de façon
normale.
INSTALLATION
AT TENTION
Risque de chute en cas de mauvais
montage • Suivez les instructions
Après déballage et inspection du luminaire, il peut être monté sur
le boulon de traversée du poteau en bois. La plaque de montage en
acier à l’intérieur du caisson moulé supérieur (voir schéma 1)
empêche la tête de boulon de tourner quand il est serré au moyen
d’un écrou du côté opposé du poteau.
Schéma 1
Schéma 2
Un coussinet est prévu sur la partie supérieure de la partie capot du
luminaire pour l’application commode d’une mise à niveau à la main.
Si nécessaire des cales peuvent être utilisées pour la mise à niveau.
Si on le souhaite le caisson inférieur de l’assemblage de porte peut
être ouvert en desserrant la vis, en le maintenant en place et en le
descendant doucement jusqu’à ce qu’il bute contre la portion arrière
du support. Il suffit de faire attention à ce que les axes de charnière ne
soient pas tordus dans la manœvre. Une prise débranchable et un
réceptacle relient le caisson supérieur et le câblage de douille avec
l’assemblage inférieur et la porte, de sorte que cette dernière partie
peut être rapidement enlevée et remplacée sur le luminaire Powr/
Bracket.
Figure 3
ASTRODOME CONTROL MOUNTING AND ORIENTING INSTRUCTIONS
Ces instructions n'ont pas pour destination de couvrir tous les détails ou variantes de l'équipement, ni de répondre à toutes les éventualités que vous pourriez rencontrer pendant l'installation,
le fonctionnement ou l'entretien. Si vous souhaitez des informations complémentaires, ou si vous rencontrez un problème particulier qui ne soit pas adressé de votre point de vue d'acheteur,
le sujet doit être remonté jusqu'à la société GE Lighting Solutions
Sur les modèles avec une commande photoélectrique Astrodôme, il
est nécessaire d’orienter la commande vers le Nord. Pour que
l’allumage soit déclanché plus tôt, tournez la commande en l’écartant
de la fenêtre. Pour retarder l’allumage tournez la commande vers le
centre de la fenêtre. Une prise débranchable et un réceptacle séparés
sont fournis pour ce module de commande. Ces connexions sont
polarisées pour éliminer la possibilité d’un branchement à l’envers.
Quand une commande photoélectrique extérieure est utilisée, le
module PE doit être orienté de façon que son marquage avec le mot
“North” soit dirigé vers le Nord vrai. Pour ce faire, enfichez le module
PE dans son réceptacle, puis soulevez-le en même temps que son
réceptacle et faites tourner l’ensemble dans le sens du vissage jusqu’à
ce que le mot “North” soit dirigé vers le Nord vrai. Baissez alors
l’ensemble en le remettant fermement en position. Il n’y a pas besoin
d’outillage pour effectuer ce réglage.
La tension est présente dans le luminaire même lorsque le caisson
inférieur est ouvert ou enlevé.
Si des schémas de câblage sont nécessaire il peuvent être demandés
chez le concessionnaire ou agent General Electric le plus proche en
spécifiant le numéro de référence au catalogue du luminaire.
N’utilisez que des types de lampes spécifiés sur la plaque
d’identification. Toutes les commandes Astrodôme installées en usine
dans les luminaires Powr/Bracket ont été réglées pour un niveau
d’éclairage (lumen par pied carré) adéquat. Si pour une raison
quelconque il était nécessaire de remplacer la commande, alignez les
marquages de calibration comme indiqué sur le schéma 3.
Une variante consiste à orienter le réceptacle PE avant l’enfichage
du module de commande PE. Pour le faire, levez la prise PE en la
prenant sur son bord et tournez-la en vissant jusqu’à ce que le mot
“North” soit dirigé vers le Nord vrai. Baissez alors la prise en la
remettant fermement en position. Puis installez le module de
commande PE.
CÂBLAGE
Vérifiez que la tension secteur d’alimentation est correcte en la
comparant avec la valeur préconisée sur la plaque d’identification.
Tous les raccordements électriques doivent être réalisés en conformité
avec les normes nationales et les réglements locaux éventuels
applicables. Des fils Vulkene isolés AWG #14 en toron sont
normalement fournis, il suffit de les raccorder à la tension d’arrivée de
valeur appropriée. Si le luminaire n’a pas été commandé avec les fils
de connexion, les bornes sont commodément situées et facilement
accessibles au bornier, acceptant des fils d’alimentation de taille AWG
#14 à #6. Amenez les raccordements aux points montrés sur la plaque
d’identification du luminaire. Les bornes à étrier permettent une
liaison facile.
NOTE : Chaque commande Astrodôme a été calibrée
individuellement et une marque de réglage apposée dessus de
sorte que le paramétrage en lumen par pied sera adéquat
quand le module sera installé dans n’importe quel luminaire
Powr/Bracket.
AT TENTION
Risque de brûlure
Laissez le bloc d’ampoule refroidir
avant d'y toucher
g
GEH-5851
GE
Lighting Solutions
INSTRUCTIONS
POWR/BRACKET® Luminaire
READ THOROUGHLY BEFORE INSTALLING
WARNING
Risk of electric shock
• Turn power off before servicing
– see instructions
GENERAL
This luminaire is designed for outdoor lighting service,
and should not be used in areas of limited ventilation, or in
high ambient temperature enclosures. Best results will be
obtained if installed and maintained according to the
following recommendations.
UNPACKING
This luminaire has been properly packed so that no part
should have been damaged during transit. Inspect to
confirm.
Contour the pole strap to the pole. Insert lag screws in
the slots provided at ends of the strap (Figure 2). Slots
instead of round holes permit a small range of adjustment
with respect to the pole. Tighten lag screws in the usual
manner.
INSTALLATION
CAUTION
Unit will fall if not installed properly
• Follow installation instructions
Marquage à l’encre
d’alignement sur la
commamnde
COMMANDE
After the luminaire is unpacked and inspected, it may be
mounted directly on the wood pole thru-bolt. The steel
mounting plate inside the die-cast top housing (Figure 1)
prevents the head of the bolt from revolving when tightened by means of the nut on the opposite side of the pole.
COMMANDE
Figure 2
A pad is provided on the top of the hood portion of the
luminaire for convenient application of a hand level. Some
leveling may be accomplished by using shims as needed.
Prise
Support
Pointeur et marquage
COMMANDE
INSTALLÉE
Schéma 3
MONTAGE ET INSTRUCTIONS D’ORIENTATION DE LA COMMANDE ASTRODÔME
g
Figure 1
If desired, the lower housing of door assembly may be
opened by loosening the screw, holding it in place, and
lowering carefully until it hangs beneath the rear portion of
the bracket. Only ordinary care is required to assure that the
hinge pins are not distorted in the process. A disconnect
plug and receptacle connects the upper housing and socket
wiring with the lower housing-door assembly so that the
latter unit may be readily removed and replaced in the
Powr/Bracket luminiare.
GE Lighting Solutions • 1-888-MY-GE-LED • www.gelightingsolutions.com
1-88 8 - 6 9 - 4 3-5 3 3
GE Lighting Solutions is a subsidiary of the General Electric Company. Evolve and other trademarks belong to GE Lighting Solutions. The GE brand and logo are trademarks of the General Electric Company.
© 2011 GE Lighting Solutions. Information provided is subject to change without notice. All values are design or typical values when measured under laboratory conditions.
35-201578-7N (1/01)
These instructions do not purport to cover all details or variations in equipment nor to provide for every possible contingency to be met in connection with installation, operation or
maintenance. Should further information be desired or should particular problems arise which are not covered sufficiently for the purchaser’s purposes, the matter should be referred
to GE Lighting Solutions.