1
INSTALLATION
THREADED
BOSS
WARNING
WIRE BOX SLIDE
MOUNTING
BRACKET
WIRING BOX
Risk of fire
• Keep combustible materials away
from lens
• Use lamps specified on the
“luminaire fitting” nameplate
• Maintain a minimum of 3 feet
clearance below the luminaire
CAUTION
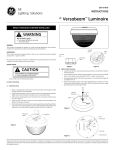
Figure 3
Unit will fall if not installed properly
• Follow installation instructions
• Attach ONLY by threaded Boss
• Do not use Knockout Holes for
mounting.
CONDUIT MOUNTING
1. Remove the Wire Box End Cover by removing the two (2)
screws as shown in Figure 1.
CONDUIT (NOT SUPPLIED)
SET
THREADED
BOSS
WIRING BOX
END COVER
WIRING BOX
Figure 1
COVER SCREWS
1.A. For Nuvation™ with Dimming Option, remove both wiring box
doors (Figure 2) for electrical connections and box removal.
3.
Slide the Wiring Box onto the Mounting Bracket, which is
preassembled on to the Upper Housing as shown in
Figure 3.
NOTE: The Ballast Housing is not fully secure until the wire box
End Covers are reattached!
4.
5.
Connect the supply wires from mains to the Black and White
supply leads. Connect the Green Earth Ground Lead. Adhere
to the requirements defined the WIRING section below.
Replace the Wire Box End Covers. Insert and securely
retighten the End Cover Screws as shown in Figure 2.
The Ballast Housing is now secure.
FLEXIBLE MOUNTING
If flexible mounting accessories (hook or loop) are supplied
separately, thread the shaft into hanger hub/locking nut
assembly and follow the instructions above for conduit mounting.
CAUTION: If this instruction is not followed damage to the
mounting parts can occur causing the fixture to fall. When
using hook or loop fixture mounting, do not apply luminaire
weight when the mating parts are as shown in Figure 4. Do not
apply any twisting action to the hook and loop assembly. When
properly installed the hook and loop assembly is as shown in
Figure 5.
Figure 4
Figure 2
2.
Thread the Wiring Box onto the conduit. Secure the conduit
with the set screw provided. Ensure that the Wire Box cannot
turn on the conduit once Set Screw has been tightened.
Figure 5
WET LOCATION OPTION
When installing in a wet location, it is important to properly install
the Conduit with an appropriate water sealing material. The GE
Lighting Systems wet location wiring box and a GE Lighting
Systems wet location optical must be used.
WIRING
Make all electrical connections in accordance with the -National
Electrical Code and any applicable local code requirements.
Verify that the supply voltage is correct by comparing it to the
ballast’s “luminaire fitting” nameplate.