1
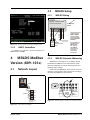
3.3 Refrigerant Jumper
Settings
5.
Select the board/point input.
6.
Press F1 Setup.
7.
Select Analog Sensor.
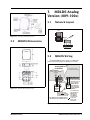
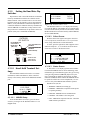
The jumper settings for refrigerant types are located on
the label inside the MRLDS sensor cover (shown in Figure 1-1). Set the jumpers according to how they are indicated on the label.
8.
On the Analog Input screen, select MRLDS
Refr. as the Sensor Type. The parameters are
then automatically configured for you.
9.
Press the J (Back) button to save changes.
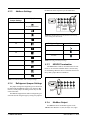
The MRLDS supports three different refrigerant types.
Select the desired refrigerant type by setting one jumper to
the J2 or J1 sockets (Figure 2-1) respective per the inside
label.
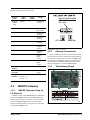
Analog Jumpers
J2
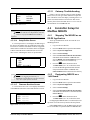
If the device is configured and powered correctly, a
value will be visible under the Value column on the Input
Status screen.
3.4.2
Einstein/E2 Controllers
Prior to Version 2.5
For Einstein and E2 controllers prior to version 2.5,
follow the steps below, set the sensor type to Linear, and
manually enter the parameters:
J1
J2 J1
refrigerant
type
jumpers
Figure 3-3 - Analog Jumper Layout (Inside Lower Portion of
Cover) Enlarged To Show Detail
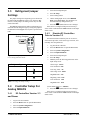
Refrigerant Type
1.
Log into the E2 controller.
2.
Press the Menu button to open the Main Menu.
3.
Select 7. System Configuration.
4.
Select 1. Input Definitions.
5.
Select the board/point input.
6.
Press F1 Setup.
7.
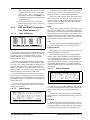
Manually enter the following parameters on the
Input Setup screen:
•Sensor Type: Linear
J2|J1
•Low End Point: 0.8V
R-22
•Low Eng. Units: -50
R-404A
•Select Eng. Units: PPM
•HighEnd Point: 5.5V
R-134A
•High Eng. Units: 1125
•Low End Limit: -100
Table 3-1 - Refrigerant Jumper Settings
3.4 Controller Setup For
Analog MRLDS
3.4.1
E2 Controllers Version 2.5
and Newer
1.
Log in to the E2 controller.
2.
Press the Menu button to open the Main Menu.
3.
Select 7. System Configuration.
4.
Select 1. Input Definitions.
4 • MRLDS I&O Manual
•HighEnd Limit: 1150
(Set the alarm failure to < -10PPM.)
8.
Press the J (Back) button to save changes.
If the device is configured and powered correctly, a
value will be visible under the Value column on the Input
Status screen.
026-1307 Rev 1 11-30-07