1
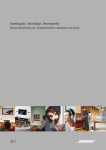
Table of Contents
1 Getting Started....................................................................................................... - 1 Package Contents................................................................................................... - 1 System Requirements............................................................................................. - 2 Safety Tips............................................................................................................... - 2 FCC Compliance and Advisory ............................................................................... - 3 Camera Components .............................................................................................. - 4 Front .................................................................................................................... - 4 Rear..................................................................................................................... - 4 Side ..................................................................................................................... - 4 Using the Accessories............................................................................................. - 5 Attaching the Wrist Strap..................................................................................... - 5 Using the Soft Case............................................................................................. - 5 2 Preparing to Take Pictures ................................................................................... - 6 Installing the Batteries............................................................................................. - 6 Low Battery Indicator .............................................................................................. - 7 Turning the Power On ............................................................................................. - 7 Setting the Date and Time ...................................................................................... - 8 Language Settings .................................................................................................. - 8 TV Out Settings....................................................................................................... - 9 Setting the Beep Sound .......................................................................................... - 9 Setting the Power Save Function.......................................................................... - 10 SD Memory Cards ................................................................................................ - 11 Inserting............................................................................................................. - 11 Removing .......................................................................................................... - 11 Camera Mode Setting ........................................................................................... - 12 Photo Mode ....................................................................................................... - 12 Playback Mode.................................................................................................. - 12 Video Mode ....................................................................................................... - 12 3 Taking Pictures.................................................................................................... - 13 Previewing a Picture ............................................................................................. - 13 Taking a Picture .................................................................................................... - 13 Setting the LCD Display Mode .............................................................................. - 13 Setting Image Quality and Resolution ................................................................... - 14 Using the Zoom Function ...................................................................................... - 15 Using the Flash ..................................................................................................... - 16 Adjusting the Exposure ......................................................................................... - 16 Using Different Metering Options .......................................................................... - 17 Setting the White Balance..................................................................................... - 17 White Balance Settings Explained..................................................................... - 18 -
–i–
Using Macro Mode................................................................................................ - 19 Using the Self-Timer ............................................................................................. - 19 Using the Date Stamp Function ............................................................................ - 20 Using Long Shutter Speeds .................................................................................. - 20 Recording Video Clips .......................................................................................... - 21 Setting Quick View ................................................................................................ - 21 4 Reviewing Photos and Videos............................................................................ - 22 Viewing Pictures ................................................................................................... - 22 Viewing Pictures in Thumbnail Mode .................................................................... - 23 Protecting Stored Images...................................................................................... - 23 Erasing a Stored Image ........................................................................................ - 24 Erasing all Images ............................................................................................. - 24 Slide Show ............................................................................................................ - 25 Copy to Card......................................................................................................... - 25 Formatting the Camera Memory or SD Card ........................................................ - 25 5 File Names & Printing.......................................................................................... - 26 Folder Names ....................................................................................................... - 26 File Names............................................................................................................ - 27 DPOF Print Settings.............................................................................................. - 27 Print Order Setting............................................................................................. - 27 6 Making Connections............................................................................................ - 28 Viewing Images on the TV .................................................................................... - 28 Selecting the Video Out Signal Mode ................................................................... - 28 Downloading Images to a Computer..................................................................... - 29 Using a Flash Card Memory Reader ................................................................. - 29 Connecting to a Computer Using USB .............................................................. - 30 Understanding Camera Memory ........................................................................... - 31 Internal Memory ................................................................................................ - 31 Optional SD Memory Card ................................................................................ - 31 DCF Protocol..................................................................................................... - 31 7 Software Installation............................................................................................ - 32 Software Driver ..................................................................................................... - 32 Roxio PhotoSuite 5 / Roxio VideoWave Movie Creator......................................... - 32 8 Appendix .............................................................................................................. - 33 Troubleshooting .................................................................................................... - 33 Specifications........................................................................................................ - 34 -
– ii –
1 Getting Started
Package Contents
Contact your dealer immediately if any of the items listed below is missing or damaged.
Camera
USB Cable
TV Out Cable
Soft Case
Strap
2 x AA Batteries
Installation CD
Quick Start Booklet
–-1-–
Getting Started
System Requirements*
Windows:
• Intel® Pentium® II 266 MHz or better
• Windows® XP/2000/ME/98SE
• Minimum 64 MB RAM
• USB port
• CD-ROM/DVD-ROM drive
• 16-bit color display compatible monitor (800x600 pixels)
Macintosh**:
• Power Mac® G3 or later
• Mac® OS 9.0, 9.1, 9.2 and OS X
• Minimum 64 MB RAM
• USB port
• CD-ROM/DVD-ROM drive
• 16-bit color display compatible monitor (800x600 pixels)
* Specifications are subject to change without prior notice.
** Only file transfers are supported on Macinitosh systems.
Safety Tips
• Do not try to open the case of the camera or attempt to modify this camera
in any way. High-voltage internal components create the risk of electric
shock when exposed. Maintenance and repairs should be carried out by
authorized service providers.
• Do not fire the flash too close to animals or people's eyes, especially
young children. Eye damage may be caused.
• Keep the camera away from water and other liquids. Do not use the
camera with wet hands. Never use the camera in the rain or snow.
Moisture creates the danger of fire and electric shock.
• Keep the camera and its accessories out of the reach of children and
animals to prevent accidents or damage to the camera.
–-2-–
Getting Started
FCC Compliance and Advisory
This device complies with Part 15 of the FCC Rules. Operation is subject to the
following two conditions: 1.) this device may not cause harmful interference, and 2.) this
device must accept any interference received, including interference that may cause
undesired operation.
This equipment has been tested and found to comply with the limits for a Class B
peripheral, pursuant to Part 15 of the FCC Rules. These limits are designed to provide
reasonable protection against harmful interference in a residential installation. This
equipment generates, uses, and can radiate radio frequency energy and, if not installed
and used in accordance with the instructions, may cause harmful interference to radio
communication. However, there is no guarantee that interference will not occur in a
particular installation. If this equipment does cause a harmful interference to radio or
television reception, which can be determined by turning the equipment off and on, the
user is encouraged to try to correct the interference by one or more of the following
measures.
• Reorient or relocate the receiving antenna.
• Increase the separation between the equipment and receiver.
• Connect the equipment to an outlet on a circuit different from that to which
the receiver is connected.
• Consult the dealer or an experienced radio/TV technician for help.
Any changes or modifications not expressly approved by the party responsible for
compliance could void the user’s authority to operate the equipment. Where shielded
interface cables have been provided with the product or specified additional
components or accessories elsewhere defined to be used with the installation of the
product, they must be used in order to ensure compliance with FCC regulation.
–-3-–
Getting Started
Camera Components
Front
Shutter
button
Self-timer
indicator
Viewfinder
Flash
Microphone
Battery
cover
Lens
Rear
Mode
switch
LED indicator
Power
button
Zoom
buttons
Viewfinder
4-Way, Multifunction buttons
(LEFT, RIGHT, UP, DOWN)
LCD
SET, MENU and
DISP buttons
Side
USB port
TV Out port
DC In port
–-4-–
Getting Started
Using the Accessories
Attaching the Wrist Strap
Attach the wrist strap to your camera as shown in
the illustration to the right.
NOTE:
Do not swing the camera when carrying it
by the wrist strap.
Using the Soft Case
• Store the camera in the soft case
provided when not in use.
• Slide the camera into the case,
making sure there are no sharp
objects inside that may damage the
camera.
–-5-–
2 Preparing to Take Pictures
Installing the Batteries
The camera is powered by two AA-size alkaline batteries or rechargeable NiMH (min.
550 mAh / 1.2V) batteries (available separately).
Follow these instructions to insert batteries into the camera.
1. Slide the battery cover in the
direction of the arrow.
2. Swing the battery cover open.
3. Insert two AA-size alkaline batteries
with the positive (+) and negative
(–) poles matching the directions
indicated inside the battery cover.
4. Slide the battery cover back into the
closed position.
–-6-–
Preparing to Take Pictures
Low Battery Indicator
The low battery indicator
on the LCD screen means that the batteries are nearly
exhausted. Batteries should be replaced when you see the low battery indicator.
NOTES:
•
Do not use manganese batteries. Manganese batteries
cannot supply sufficient power to support camera operation.
•
Replace all batteries at the same time. Never mix old and
new batteries.
•
Remove batteries from the camera if you do not plan on
using it for more than two weeks.
•
The camera body may feel warm after extended use. This is
normal.
Turning the Power On
Press the Power button. The LED
indicator begins flashing green.
It takes about 3 seconds to power on
the camera.
LED
Indicator
NOTE:
Set the date and time after turning the camera on for the first
time. See the next section for details.
–-7-–
Power
button
Preparing to Take Pictures
Setting the Date and Time
1. Turn on the camera.
2. Press the MENU button.
3. Press the RIGHT button to select the SETUP
menu.
4. Press the UP or DOWN buttons to select the
Date & Time option.
5. Press the RIGHT button to enter the Date &
Time submenu.
6. Press the UP or DOWN buttons to change
the values.
7. Press the LEFT or RIGHT buttons to
advance to the next field.
8. Change the date style setting if desired.
9. Press the UP or DOWN buttons to select the
desired date format: YY/MM/DD, MM/DD/YY,
or DD/MM/YY.
10. Press SET to exit the Date & Time submenu or press MENU to cancel.
Language Settings
The camera can display menus and other information in a number of different
languages.
1. Turn the camera on.
2. Press the MENU button.
3. Press the RIGHT button to select the SETUP
menu.
4. Press the UP or DOWN buttons to select
Language.
5. Press the RIGHT button to enter the
Language submenu.
6. Press the UP or DOWN buttons to select the
desired language.
7. Press the SET button to save your choice.
8. Press the MENU button to leave the
Language submenu.
NOTE:
The default language setting is English.
–-8-–
Preparing to Take Pictures
TV Out Settings
Your camera can be connected to a TV as described in Chapter 6 Making Connections.
Connecting to a TV allows you to preview photos and video clips on the television
screen. TV Out should be set to either NTSC or PAL depending on your region. The
default setting varies according to the country of
purchase.
1. Turn the camera on.
2. Press the MENU button.
3. Press the RIGHT button to select the SETUP
menu.
4. Press the UP or DOWN buttons to select TV
Out.
5. Press the RIGHT button to enter the TV Out
submenu.
6. Press the UP or DOWN buttons to select
NTSC or PAL.
7. Press the SET button to save your choice or
the MENU button to cancel.
NOTE:
NTSC: Japan, Korea, Taiwan, USA
PAL: Australia, China, EU, Kuwait, Singapore
Setting the Beep Sound
The camera beep sound can be turned on (default) or
off as required.
1. Turn the camera on.
2. Press the MENU button.
3. Press the RIGHT button to select the
SETUP menu.
4. Press the UP or DOWN keys to select the
Beep option.
5. Press the RIGHT key to enter the Beep
submenu.
6. Press the UP or DOWN buttons to choose
on or off.
7. Press the SET button to save your option.
8. Press the MENU button to leave the Beep
submenu.
–-9-–
Preparing to Take Pictures
Setting the Power Save Function
To save battery power, your camera can be set to turn itself off after 1, 3 (default), or 5
minutes of inactivity. The period can be set in the SETUP menu.
1. Turn the camera on.
2. Press the MENU button.
3. Press the RIGHT button to select the SETUP
menu.
4. Press the UP or DOWN buttons to select the
Power Save option.
5. Press the RIGHT button to enter the Power
Save submenu
6. Press the UP or DOWN buttons to select 1, 2
or 3 mins. The camera will turn itself off
automatically if not used for the specified
period. You can also turn the function off
completely.
7. Press SET button to save your option
8. Press the MENU button to leave the Power
Save submenu.
Note:
The Power Save function will work only when the camera is powered by
batteries. If a DC power supply is used, the camera will not turn off
automatically.
– - 10 - –
Preparing to Take Pictures
SD Memory Cards
The SD memory card slot is located beneath the battery cover, adjacent to the battery
compartment.
Inserting
1. Slide the battery cover open.
2. Slide the SD card into the slot as shown.
3. Close the battery compartment.
Removing
1. Slide the battery cover open.
2. Push and release the SD card. It will eject part
way from the slot.
3. Pull the SD card from the slot.
4. Close the battery cover.
When a memory card is inserted, an icon appears in the
LCD.
Memory
Card icon
Images and video files are automatically saved to
the SD memory card whenever it is inserted in the
camera.
– - 11 - –
Preparing to Take Pictures
Camera Mode Setting
Your camera can be set in various modes for different situations.
Photo Mode
In Photo mode, the camera automatically adjusts exposure and white balance to suit the
shooting environment.
Playback Mode
In Playback mode you can review, erase, and protect photos and video clips.
Video Mode
Your camera can record video clips with audio in Video mode. White balance and
exposure can be set before recording a video clip.
NOTE:
When the camera is connected to a computer with the included
USB cable, the camera acts as a mass storage device,
regardless of the mode setting.
– - 12 - –
3 Taking Pictures
Previewing a Picture
Preview photos on the LCD screen before pressing the shutter button.
1. Turn on the camera.
2. The LED indicator next to the viewfinder flashes green.
3. Select Photo mode.
4. The image automatically appears on the LCD screen together with information
about current camera settings.
Taking a Picture
1. Turn the camera on and make sure it is in Photo mode.
2. Capture the photo by pressing the shutter button down until the camera beeps.
3. The photo is captured and stored on the camera’s internal memory, or on the
SD card if inserted.
The green LED Flashes while the image is being stored.
NOTES:
•
When the shutter button is pressed halfway down, check the
exposure value that appears on the LCD screen to make
sure that it is appropriate for the lighting conditions.
•
The beep does not sound if the beep setting is turned off in
the Set menu.
Setting the LCD Display Mode
Turn the LCD screen display on or off by pressing DISP. There are 2 LCD screen
display in Playback and Video modes. There are 3 LCD screen display in Photo mode.
1. In Playback mode and Video modes,
press DISP once to turn the on-screen
information display (OSD) off and press
again to restore OSD.
2. In Photo mode, press DISP once to turn
the OSD off, press again to turn the LCD
off, and press a third time to turn the
LCD and OSD back on.
– 13 –
OSD mode: The image and on-screen
information OSD are shown on the LCD screen.
Taking Pictures
Setting Image Quality and Resolution
1. Turn on the camera and press the MENU
button.
2. Use the UP or DOWN keys to select
Resolution from the REC Menu.
3. Press the RIGHT key to enter the Resolution
submenu.
4. Use the UP or DOWN keys to select a
resolution from the list.
2048 x 1536 (Large)
1600 x 1200 (Medium 1)
1024 x 768 (Medium 2)
640 x 480 (Small)
5. Press SET to save your setting. The camera
returns to Photo mode.
6. Press Menu again to return to REC Menu.
7. Use the UP or DOWN keys to select Quality
from the REC Menu.
8. Press the RIGHT key to enter the Quality
submenu.
9. Select Fine or Normal quality from the
submenu.
10. Press SET to save your selection.
Size
Quality
The image size and quality are displayed on the LCD.
– - 14 - –
Taking Pictures
Using the Zoom Function
Your camera has a combination of optical and digital zoom functions that allow you to
zoom in on far away subjects or zoom out for a wide angle shot.
The optical zoom is achieved by mechanically adjusting the lens of the camera. The
digital zoom enlarges or shrinks the image using a software process.
Press W to zoom out
for a wide angle shot
(subject appears
further away).
Digital zoom works by enlarging
the center portion of an image
through a software interpolation
process. The digital zoom is used
to achieve magnification levels
up to 4X.
In Photo mode, press T to zoom
in. Continue pressing T until the
digital zoom indicator is displayed.
Press T to digitally zoom in on a
subject in increments of 0.2X.
Press T to zoom in
for a telephoto shot
(subject appears
closer).
NOTES:
•
The digital zoom does not work in Video
mode.
•
In Photo mode, you can zoom in and out in
steps of 0.2X.
•
In Playback mode, you can zoom in and out
in steps of 0.1X.
Digital zoom
ratio
– - 15 - –
Taking Pictures
Using the Flash
Pressing the flash button cycles your camera
through the various flash modes.
A symbol appears on the LCD screen to indicate
the flash mode. The flash cannot be used in
Video mode.
Flash
Button
The following list describes each flash mode.
Automatic – Flash fires when conditions
require extra lighting.
Always on – Flash fires every time you take a photo, regardless of lighting conditions.
RedEye – Flash strobes to let the subject’s eyes adjust to the flash, then fires again
when the photo is taken.
Always off – The flash never fires.
Adjusting the Exposure
Set the exposure value (EV value)
manually to
compensate for unusual lighting conditions such as
indirect indoor lighting, dark backgrounds, and strong
backlighting.
1. Turn on the camera and press the MENU
button.
2. Use the UP or DOWN buttons to select the
Exposure option.
3. Press the RIGHT button to enter the Exposure
submenu.
4. Use the LEFT and RIGHT buttons to set the
desired exposure compensation value.
5. Press the SET button to save your selection or
MENU button to cancel.
The flash mode and exposure value are displayed in
the OSD screen.
Exposure
value
Flash mode
– - 16 - –
Taking Pictures
Using Different Metering Options
There are 3 different light metering options available on your camera. Auto Metering
automatically selects the best exposure for you, Multi Metering selects an exposure
based on readings from multiple points in the subject area and Spot Metering selects an
exposure based on a single reading taken from the center of your picture.
1. Turn the camera on, select Photo mode and
press the MENU button.
2. Use the UP or DOWN buttons to select the
Metering option.
3. Press the RIGHT button to enter the Metering
submenu.
4. Use the UP or DOWN buttons to select a
metering option from the list.
5. Press the SET button to confirm your choice or
press the MENU button to leave the menu.
Setting the White Balance
Adjust the white balance to match different light sources such as sunlight, incandescent
(tungsten) lighting or, fluorescent lighting.
1. Turn the camera on and press MENU.
2. Use the UP or DOWN keys to select the
White Balance option.
3. Press the RIGHT key to enter the White
Balance submenu.
4. Use the LEFT or RIGHT keys to select an
option from the list.
5. Press the SET button to save your selection
or MENU button to cancel.
– - 17 - –
Taking Pictures
White Balance Settings Explained
Auto: Automatically corrects white balance. Ideal for general
photography.
Daylight: Adjusts for bright sun conditions, or natural light conditions.
Shade: Adjusts for cloudy days or twilight conditions.
Tungsten: Adjusts for normal indoor lighting conditions. Corrects the orange
hue of household light bulbs. Ideal for indoor photos under tungsten or halogen
lighting without a flash.
Fluorescent: Adjusts for fluorescent lighting. Corrects the green hue of
fluorescent lighting. Ideal for indoor photos under fluorescent lighting without a
flash.
Black & White: Sets the white balance for black and white photography.
The white balance icon is displayed on the LCD screen.
White
balance
NOTE:
The flash can be used with any of the white
balance settings.
– - 18 - –
Taking Pictures
Using Macro Mode
Your camera is equipped with a macro function that allows you to focus on very close
subjects. In macro mode you can focus on subjects 10 cm from the lens when in the
maximum wide angle (zoomed out) setting and 50 cm in the maximum telephoto
(zoomed in) setting.
Macro
When in Photo mode, press the MACRO
Button
button
on the back of the camera to enter
Macro mode. The macro mode icon appears
on the LCD screen when in Macro mode.
Macro mode
icon
To leave Macro Mode, press the MACRO button again.
NOTES:
•
Distances referred to measure the distance between the
camera lens surface and the subject.
•
Auto and Red-Eye Reduction flash modes cannot be used in
Macro mode.
Using the Self-Timer
Your camera has a self-timer that allows you to take pictures of yourself. When the selftimer function is enabled, there is a 10 second delay between the shutter being pressed
and the picture being taken.
1. To enable the self-timer function, press the
self-timer button until the self-timer symbol
Self-timer
appears on the LCD display.
icon
2. Place the camera in a stable position,
preferably on a tripod.
3. Compose your shot as normal.
4. When you are happy with the picture, press
the shutter button.
5. The camera takes a picture 10 seconds after
you press the shutter button. You will hear
some beeps, indicating that the self-timer is
active.
– - 19 - –
Taking Pictures
Using the Date Stamp Function
The Date Stamp function can be used to add a date to your pictures as you take them.
1. To enable the Date Stamp, turn the camera
on and press the MENU key.
2. Use the UP or DOWN keys to select the Date
Stamp option.
3. Press the RIGHT key to enter the Date Stamp
submenu.
4. Use the UP or DOWN keys to select Off or
On.
5. Press the SET button to save your setting or
MENU button to cancel.
Using Long Shutter Speeds
Under certain conditions, you may want to use long shutter speeds either for special
effects or when working in low light conditions. Your camera is equipped with a set of
long shutter speeds which can be set from the REC menu.
1. To set a long shutter speed, turn on the
camera and press the MENU button.
2. Use the UP or DOWN buttons to select the
Long Shutter Speed option
3. Press the RIGHT button to enter the Long
Shutter Speed submenu.
4. Use the UP or DOWN buttons to select the
speed you require.
5. Press the SET button to save your selection
or the MENU button to cancel.
Long shutter speeds of 1, 2, 4 or 8 seconds are
available.
If the shutter speed is slower than 1/32 second (due to low light conditions), the camera
shake icon
appears. This means that any movement when taking a picture will result in
a blur image. To prevent this, make sure you turn on the flash, use an extra light source
and/or use a tripod. Note that any movement by the subject will also result in a blur image.
– - 20 - –
Taking Pictures
Recording Video Clips
Your camera can record short video clips with audio.
1. Make sure that the camera is in Photo mode.
2. Press the Video Button on the rear of the camera.
3. The video icon appears on the LCD screen.
Mode
switch
Video
button
Video icon
4. Press the shutter to start recording.
5. Press the shutter again to end recording.
Setting Quick View
When Quick View is enabled, you can view an image for a few seconds after you have
taken it.
1. To set Quick View, turn on the camera and
press the MENU button.
2. Press the RIGHT button to select the
SETUP menu.
3. Press the UP or DOWN button to select
Quick View.
4. Press the RIGHT button to enter the Quick
View submenu.
5. Press the UP or DOWN buttons to select On
to enable Quick View, or Off to disable it.
6. Press the SET button to save your selection
or the MENU button to cancel.
– - 21 - –
4 Reviewing Photos and Videos
Viewing Pictures
Pictures can be reviewed using the built in LCD screen.
1. Turn on the camera and
move the sliding switch next
Sequence
Total
to the power button to
number
number
, to enable
Playback
Playback mode.
2. Use the RIGHT and LEFT
keys to step through the
images stored in the internal
Image
memory or on an SD card.
type
3. Still images can be magnified
using the T (zoom in) button.
4. Return the image to original
size using the W (zoom out)
button.
File
5. When an image is magnified,
number
it can be moved around the
screen using the UP, DOWN,
LEFT and RIGHT buttons.
When cycling through images stored in the camera, some images may be marked with
the Video symbol in the top left hand corner of the LCD display. These are stored video
clips.
1. Press the SET (play) button to
start the video.
2. The video will play on the LCD
screen.
3. Playback can be stopped using the
MENU (stop) button , or paused
using the SET (pause) button .
– - 22 - –
Reviewing Photos & Videos
Viewing Pictures in Thumbnail Mode
When in Playback mode, you can view all your stored images in thumbnail format.
1. Turn on the camera and use the sliding
switch next to the power button to enable
Zoom
Playback mode.
out
2. Press and hold the W (zoom out) button.
3. Images stored in the camera are
displayed in thumbnail format.
4. Use the UP, DOWN, LEFT or RIGHT
buttons to select an image to be
displayed.
5. Press the SET button to display the image.
6. Return to thumbnail format by pressing the
W (zoom out) button again.
Protecting Stored Images
Images stored on your camera or on an SD card can be protected to prevent accidental
deletion.
1. Turn the camera on.
2. Press the MENU button.
3. Press the RIGHT button to select SETUP
menu.
4. Press the UP or DOWN buttons to select
the Protect option.
5. Press the RIGHT button and select Single
to protect the currently selected image, or
select All to protect all files in memory.
6. Press the SET button.
7. Use the UP or DOWN buttons to select Yes to confirm the action or No to
cancel.
8. Press the SET button to complete the operation.
– - 23 - –
Reviewing Photos and Videos
Erasing a Stored Image
Single images can be erased from the camera in Playback
mode.
1. Turn on the camera and use the sliding switch
next to the power button to enable Playback
mode.
2. Use the LEFT or RIGHT buttons to cycle through
the images to select the one you want to delete.
3. Press the UP (delete) button.
4. Use the UP or DOWN buttons to confirm that you
want to delete the image or press the MENU
button to cancel.
Delete
button
Confirm
Deletion
5. Press the SET button to complete the action.
Erasing all Images
You can delete all images from the SETUP menu.
1. Turn the camera on.
2. Press the MENU button.
3. Press the RIGHT button to select the SETUP
menu.
4. Press the UP or DOWN buttons to select the
Delete All option.
5. Press the RIGHT button to enter the Delete
All submenu.
6. Use the Up or DOWN buttons to choose Yes to delete all images in memory, or
select No to cancel.
7. Press the SET button to confirm the action or the MENU button to cancel.
– - 24 - –
Reviewing Photos & Videos
Slide Show
You can set the camera to display images in a slide show.
1. Turn the camera on.
2. Press the MENU button.
3. Press the RIGHT button to select the SETUP
menu.
4. Press the UP or DOWN buttons to select the Slide
Show option.
5. Press the RIGHT button and select 5 or 10
seconds to set the time between images or select
Off to disable the slide show.
Copy to Card
You may want to copy the data from the camera’s internal memory to the flash card for
convenience.
1. Turn the camera on.
2. Press the MENU button.
3. Press the RIGHT button to select SETUP menu.
4. Press the UP or DOWN buttons to select the Copy
To Card option.
5. Press the RIGHT button to enter the Copy To
Card submenu.
6. Use the UP or DOWN buttons to select Yes to
copy to card or No to cancel.
7. Press the SET button to confirm.
Formatting the Camera Memory or SD Card
Formatting the memory in your camera will permanently
erase all images.
1. Turn on the camera on and press the MENU
button.
2. Press the RIGHT button to enter Setup menu.
3. Use the UP or DOWN buttons to select the
Format option from the Setup Menu.
4. Press the RIGHT button to enter the Format
submenu.
5. Use the UP or DOWN buttons to select Yes to
format memory or No to cancel.
6. Press the SET button to confirm your selection.
– - 25 - –
5 File Names & Printing
Folder Names
The digital camera automatically creates a directory of folders in the internal memory or
SD card that it uses to organize photos, video clips, and other information.
Folder Example:
i.
ii.
iii.
iv.
v.
Folder numbers start from 100.
Each folder holds up to 9999 files. If a photo is taken when the folder with
the highest folder number contains a picture file number equal to or greater
than 9999, the camera creates a new folder by adding one to the current
folder number. For example, if the current folder is “10030101”, the new
folder is named “10130101”).
The maximum folder number is 999.
If the highest folder number is 999 and highest file number exceeds 9999, the
camera will display the warning message “Folder Cannot Be Created”.
If “Folder Cannot Be Created” appears, try formatting the memory or plug in a
new memory card. Set the function "File No. Reset" to "On", otherwise the
next time the camera is powered on, it will take only one picture because
folder number = 999 and file number = 9999.
– - 26 - –
File Names & Printing
File Names
The camera automatically assigns a file name to each photo and video clip captured.
File names start with “DSCI_” and are followed by a four-digit number that increases in
sequence.
File Example:
i.
ii.
Each folder holds up to 9999 pictures. If a photo is taken when the current
folder contains a file numbered 9999, the DSC creates a new folder and
stores the new image in the new folder.
File numbering starts from 0001 when a new folder is created.
DPOF Print Settings
The Digital Print Order Format
(DPOF) settings allow you to select
photos stored on an SD card that you
want to print. You can also set the
number of copies to print. This
function is convenient when used
with a printer or commercial printing
service that supports DPOF printing.
Print Order Setting
1.
2.
3.
4.
5.
Set the camera to Playback mode.
Press the LEFT or RIGHT buttons to select the file you want to print.
Press the MENU button to display the toolbar.
Press the DOWN button to select DPOF printing.
Press the SET button to print the file. You are prompted to select the number of
prints.
6. Press the up and down buttons to select the number of prints and then press
SET to print the images.
– - 27 - –
6 Making Connections
Viewing Images on the TV
Images displayed on the camera’s LCD screen can also be displayed on a television
screen.
A
B
1. Plug the included audio/video cable into the camera TV Out port (B). Plug the
other end into the TV set Video port (A).
2. Set the TV input signal to Video In. Refer to the documentation included with
your TV for more information.
3. Everything that would normally appear on the camera’s LCD screen, such as
photo and video clip playback, slide shows, and image or video capture,
appears on the TV.
Selecting the Video Out Signal Mode
The digital camera supports both NTSC and PALvideo signal systems. See TV Out
Settings section for information on setting the camera’s video system to match your
region.
– - 28 - –
Making Connections
Downloading Images to a Computer
There are two ways to download files from the camera’s internal memory or SD card to
a computer:
• by inserting the SD card into a flash memory card reader
• by connecting the camera to a computer using the included USB cable
Using a Flash Card Memory Reader
1. Eject the SD card from the camera and insert it into an SD card reader that is
connected to a computer.
NOTE:
If you are using a PC card reader with a notebook computer, first
insert the SD card into a PC card adapter (optional), and then
insert the PC card adapter into the computer’s PC card slot.
Using an SD card reader connected to a notebook computer.
2. Open My Computer or Windows Explorer and double-click the removable drive
icon that represents the SD card.
3. Copy images from the card into a directory of your choice on the computer’s
hard disk.
– - 29 - –
Making Connections
Connecting to a Computer Using USB
1. Install the software driver included with the bundled CD-ROM.
2. Connect the supplied USB cable to the computer’s USB port (A). Connect the
other end of the cable to the USB port on the camera (B).
A
B
NOTES:
•
You don't have to switch off the camera or the computer when
the USB connection is made.
•
Refer to your computer’s manual for information regarding the
USB port location.
3. Make sure the camera is turned on.
4. The LCD screen turns off when the connection to the computer has been
successfully completed.
NOTES:
•
The camera will remain on if the USB cable is disconnected.
•
Windows 98SE: If this is the first time the camera has
been connected to the computer, Windows detects the
camera as an “Unknown device” and automatically completes
the required software installation.
5. Open My Computer or Windows Explorer. A “Removable Disk” appears in the
drive list.
6. Double-click the “Removable Disk” icon to view its contents.
7. Files stored on camera are located in the folder named “DCIM”.
– - 30 - –
Making Connections
Understanding Camera Memory
Internal Memory
The digital camera is equipped with internal memory. If an SD card is not installed
in the camera, all photos and video clips recorded by the camera will be stored in
the internal memory. If an SD card is installed, photos and video clips are stored
on the SD card.
Optional SD Memory Card
Photos, video clips, and other information recorded by the camera is stored on the
SD card using the Design rule for Camera File system (DCF) protocol. The DCF
protocol is designed to accommodate file and data exchange between digital
cameras and other devices.
DCF Protocol
The DCF protocol defines the format for image file data as well as the directory
structure for the memory card. Photos that are taken by a DCF camera can be
viewed on DCF-compatible cameras from other manufacturers.
– - 31 - –
7 Software Installation
To install the software:
1. Insert the Installation CD into your CD-ROM/DVD-ROM drive.
The disc supports Windows Autoplay mode and starts running automatically.
2. Select the driver and the applications you want to install on your computer, and
then click the OK button.
3. Follow the instructions on the screen.
You may choose to restart your computer only after installing the driver and
the selected applications.
NOTES:
•
If the installation program does not start automatically, click
Start > Run, In the Open box, type d:\startup\setup.exe
(replace d:\ with the drive letter of your CD-ROM/DVD-ROM
drive) and then click the OK button.
Software Driver
The camera can be used as a mass storage device and can be connected to a TV to
view pictures. If you are using Windows 98 SE, you must install the software driver so
that your computer can recognize the camera as a mass storage device.
Roxio PhotoSuite 5
Roxio PhotoSuite 5 lets you edit, crop and print the photos you download to your
computer from the digital camera. Refer to the application help documentation for
information on using the software. To launch this application:
Click Start > Programs or All Programs > Roxio PhotoSuite .5
Roxio VideoWave Movie Creator
Roxio VideoWave Movie Creator lets you to edit the videos that you download to your
computer from the digital camera. Refer to the application help documentation for
information on using the software. To launch this application:
Click Start > Programs or All Programs > Roxio VideoWave Movie Creator
– - 32 - –
8 Appendix
Troubleshooting
Symptom
Cause
Solution
Camera does not turn on.
- The batteries are inserted
incorrectly.
- The batteries are dead.
- The battery compartment
door is open.
- The camera is set to
Playback mode.
- The flash is charging
- The memory is full.
- The SD card is not
formatted correctly.
- The camera is set to
Playback mode.
- The flash is charging
- Memory is full.
- Reload the batteries.
- Replace with new batteries.
- Make sure the battery
compartment door is properly
closed.
- Set the camera to Photo mode.
- Wait for the flash to charge.
- Reformat the SD card.
- The card may be defective, use
a new card.
The camera does not take
pictures.
Image is not recorded
when the shutter button is
pressed.
The flash doesn't fire.
The Flash mode is set to OFF.
Images are blurry or out of
focus
- The camera was moving
when the image was
captured.
- The subject was beyond the
focal range of the camera.
A memory card with non-EXIF
images (recorded with another
camera) is loaded.
The camera was turned off
before the image was stored in
memory.
The USB driver is not installed.
Images are not displayed
on the LCD screen.
Images are not saved in
memory.
Cannot transfer images to
a computer after
connecting the USB cable.
Images do not appear on
the television.
- The cable is not connected
securely.
- The TV Out setting is
incorrect.
– - 33 - –
- Set camera to Photo mode.
- Wait for flash to charge.
- Make space in memory by
deleting unwanted images or
downloading files to a
computer.
Set the flash to any mode except
OFF.
- Hold the camera steady.
- Turn the Macro mode on if the
subject is very close.
- Turn Macro mode off when
shooting distant subjects.
This camera cannot display nonEXIF images.
If the battery low indicator
appears on the LCD screen,
replace the batteries immediately.
- Install the USB driver before
you connect the camera to a
computer.
- Turn the camera on.
- Use the included video cable to
connect the camera to a TV.
- Set the video system to the
correct setting, NTSC or PAL.
Appendix
Specifications
Sensor
3.2 megapixels CCD
Lens
Focal length: 5.69 - 16.29mm, 3X zoom, F2.66 - 4.92
Viewfinder
Optical, Real Image
Focus Range
50cm - infinity (10 - 50 cm in Macro Mode)
Still image resolution
2048x1536, 1600x1200, 1024x768, 640x480
Video Resolution
320x240
Still Image Quality
Fine: 4x compression rate
Normal: 8x compression rate
Exposure Meter
Center-weighted average, multi-pattern TTL AE
Exposure Control
Auto and Manual
Exposure
Compensation
-2EV to +2EV in 1/3 step
Shutter Control
Mechanical shutter 1/2000 sec - 8 sec
Digital/Optical Zoom
3X optical zoom, 4X digital zoom
Image File format
EXIF 2.2 compatible format (JPEG compression)
White Balance
Auto and manual (5 selectable modes)
Picture Storage
Internal 16 MB Nandgate Flash Memory
SD memory card expansion slot
Microphone
Integrated
Sound Feedback
Speaker
Communication
Interface
USB 1.1
Self-Timer
10-second delay
TV Out
NTSC/PAL selectable
Power Supply
Battery (AA x 2)
DC– in (3.3V, 2A DC adapter)
Weight
(without battery)
147 g (5.19 oz)
Dimensions
92 x 62.2 x 31.5 mm (3.6 x 2.45 x 1.24 inches)
– - 34 - –