1
Cisco NAC Guest Server Installation and
Configuration Guide
Release 1.1.0
March 2008
Americas Headquarters
Cisco Systems, Inc.
170 West Tasman Drive
San Jose, CA 95134-1706
USA
http://www.cisco.com
Tel: 408 526-4000
800 553-NETS (6387)
Fax: 408 527-0883
Text Part Number: OL-15986-01
THE SPECIFICATIONS AND INFORMATION REGARDING THE PRODUCTS IN THIS MANUAL ARE SUBJECT TO CHANGE WITHOUT NOTICE. ALL
STATEMENTS, INFORMATION, AND RECOMMENDATIONS IN THIS MANUAL ARE BELIEVED TO BE ACCURATE BUT ARE PRESENTED WITHOUT
WARRANTY OF ANY KIND, EXPRESS OR IMPLIED. USERS MUST TAKE FULL RESPONSIBILITY FOR THEIR APPLICATION OF ANY PRODUCTS.
THE SOFTWARE LICENSE AND LIMITED WARRANTY FOR THE ACCOMPANYING PRODUCT ARE SET FORTH IN THE INFORMATION PACKET THAT
SHIPPED WITH THE PRODUCT AND ARE INCORPORATED HEREIN BY THIS REFERENCE. IF YOU ARE UNABLE TO LOCATE THE SOFTWARE LICENSE
OR LIMITED WARRANTY, CONTACT YOUR CISCO REPRESENTATIVE FOR A COPY.
The Cisco implementation of TCP header compression is an adaptation of a program developed by the University of California, Berkeley (UCB) as part of UCB’s public
domain version of the UNIX operating system. All rights reserved. Copyright © 1981, Regents of the University of California.
NOTWITHSTANDING ANY OTHER WARRANTY HEREIN, ALL DOCUMENT FILES AND SOFTWARE OF THESE SUPPLIERS ARE PROVIDED “AS IS” WITH
ALL FAULTS. CISCO AND THE ABOVE-NAMED SUPPLIERS DISCLAIM ALL WARRANTIES, EXPRESSED OR IMPLIED, INCLUDING, WITHOUT
LIMITATION, THOSE OF MERCHANTABILITY, FITNESS FOR A PARTICULAR PURPOSE AND NONINFRINGEMENT OR ARISING FROM A COURSE OF
DEALING, USAGE, OR TRADE PRACTICE.
IN NO EVENT SHALL CISCO OR ITS SUPPLIERS BE LIABLE FOR ANY INDIRECT, SPECIAL, CONSEQUENTIAL, OR INCIDENTAL DAMAGES, INCLUDING,
WITHOUT LIMITATION, LOST PROFITS OR LOSS OR DAMAGE TO DATA ARISING OUT OF THE USE OR INABILITY TO USE THIS MANUAL, EVEN IF CISCO
OR ITS SUPPLIERS HAVE BEEN ADVISED OF THE POSSIBILITY OF SUCH DAMAGES.
CCDE, CCVP, Cisco Eos, Cisco StadiumVision, the Cisco logo, DCE, and Welcome to the Human Network are trademarks; Changing the Way We Work, Live, Play, and
Learn is a service mark; and Access Registrar, Aironet, AsyncOS, Bringing the Meeting To You, Catalyst, CCDA, CCDP, CCIE, CCIP, CCNA, CCNP, CCSP, Cisco, the
Cisco Certified Internetwork Expert logo, Cisco IOS, Cisco Press, Cisco Systems, Cisco Systems Capital, the Cisco Systems logo, Cisco Unity, Collaboration Without
Limitation, Enterprise/Solver, EtherChannel, EtherFast, EtherSwitch, Event Center, Fast Step, Follow Me Browsing, FormShare, GigaDrive, HomeLink, Internet Quotient,
IOS, iPhone, IP/TV, iQ Expertise, the iQ logo, iQ Net Readiness Scorecard, iQuick Study, IronPort, the IronPort logo, LightStream, Linksys, MediaTone, MeetingPlace,
MGX, Networkers, Networking Academy, Network Registrar, PCNow, PIX, PowerPanels, ProConnect, ScriptShare, SenderBase, SMARTnet, Spectrum Expert, StackWise,
The Fastest Way to Increase Your Internet Quotient, TransPath, WebEx, and the WebEx logo are registered trademarks of Cisco Systems, Inc. and/or its affiliates in the
United States and certain other countries.
All other trademarks mentioned in this document or Website are the property of their respective owners. The use of the word partner does not imply a partnership relationship
between Cisco and any other company. (0801R)
Any Internet Protocol (IP) addresses used in this document are not intended to be actual addresses. Any examples, command display output, and figures included in the
document are shown for illustrative purposes only. Any use of actual IP addresses in illustrative content is unintentional and coincidental.
Cisco NAC Guest Server Installation and Configuration Guide
© 2008 Cisco Systems, Inc. All rights reserved.
C O N T E N T S
About This Guide
CHAPTER
1
ix
Welcome to Cisco NAC Guest Server
Introduction 1-1
Guest Access Concepts
1-1
1-1
Before You Start 1-2
Package Contents 1-2
Rack Mounting 1-3
Cisco NAC Guest Server Licensing
Upgrading Firmware 1-3
Additional Information 1-4
CHAPTER
2
Installing Cisco NAC Guest Server
1-3
2-1
Connecting the Cisco NAC Guest Server
2-1
Command Line Configuration 2-3
Configure IP Address and Default Gateway
Change Root Password 2-5
Re-Imaging the Appliance
CHAPTER
3
System Setup
2-3
2-6
3-1
Accessing the Administration Interface 3-1
Obtain and Install Cisco NAC Guest Server License 3-2
Access Cisco NAC Guest Server Administration Interface
Configuring Network Settings
Date and Time Settings
3-3
3-4
3-5
SSL Certificate 3-7
Accessing the Guest Server using HTTP or HTTPS 3-7
Generating Temporary Certificates/ CSRs/ Private Key 3-8
Downloading Certificate Files 3-9
Downloading the CSR and Certificate 3-9
Downloading the Private Key 3-9
Upload Certificate Files 3-10
Configuring Administrator Authentication
Add New Admin Account 3-10
3-10
Cisco NAC Guest Server Installation and Configuration Guide
OL-15986-01
iii
Contents
Edit Existing Admin Account 3-11
Delete Existing Admin Account 3-13
CHAPTER
4
Configuring Sponsor Authentication
4-1
Configuring Local Sponsor Authentication
Add New Local User Account 4-1
Edit Existing User Account 4-3
Delete Existing User Account 4-4
4-1
Configuring Active Directory (AD) Authentication 4-5
Add Active Directory Domain Controller 4-6
Edit Existing Domain Controller 4-7
Delete Existing Domain Controller Entry 4-9
Configuring LDAP Authentication 4-9
Add an LDAP Server 4-11
Edit an Existing LDAP Server 4-12
Delete an Existing LDAP Server Entry
Configuring RADIUS Authentication 4-15
Add a RADIUS Server 4-16
Edit an Existing RADIUS Server 4-17
Delete an Existing RADIUS Server Entry
4-14
4-18
Configuring Sponsor Authentication Settings 4-18
Changing the Order of Authentication Servers 4-18
Sponsor Timeouts 4-19
CHAPTER
5
Configuring User Group Permissions
Adding User Groups
5-1
Editing User Groups
5-4
Deleting User Groups
5-6
Specifying the Order of User Groups
5-7
Mapping to Active Directory Groups
5-8
Mapping to LDAP Groups
5-8
Mapping to RADIUS Groups
CHAPTER
6
5-1
Configuring Guest Policies
5-10
6-1
Setting the Username Policy
6-1
Setting the Password Policy
6-2
Setting the Guest Details Policy
6-3
Cisco NAC Guest Server Installation and Configuration Guide
iv
OL-15986-01
Contents
CHAPTER
7
Integrating with Cisco NAC Appliance
7-1
Adding Clean Access Manager Entries
7-1
Editing Clean Access Manager Entries
7-3
Deleting Clean Access Manager Entries
7-4
Configuring the CAM for Reporting 7-4
Adding a RADIUS Accounting Server 7-5
Configure the CAM to Format RADIUS Accounting Data
CHAPTER
8
Configuring RADIUS Clients
Overview
CHAPTER
9
10
8-1
8-1
Adding RADIUS Clients
8-2
Editing RADIUS Clients
8-3
Deleting RADIUS Clients
CHAPTER
7-6
Guest Account Notification
8-4
9-1
Configuring Email Notification
9-2
Configuring SMS Notification
9-3
Customizing the Application
User Interface Templates
10-1
10-1
Adding a User Interface Template
10-2
Editing a User Interface Template 10-2
Editing the Print Template 10-4
Editing the Email Template 10-5
Editing the SMS Template 10-6
Using Account Durations 10-7
Deleting a Template
10-8
Setting the Default Interface Mapping
Setting User Default Redirection
CHAPTER
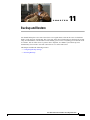
11
Backup and Restore
10-8
10-9
11-1
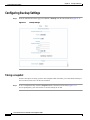
Configuring Backup Settings 11-2
Taking a snapshot 11-2
Scheduling a Backup 11-3
Restoring Backups
11-3
Cisco NAC Guest Server Installation and Configuration Guide
OL-15986-01
v
Contents
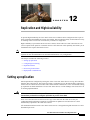
CHAPTER
12
Replication and High Availability
Setting up replication
12-1
Configuring Provisioning
Replication Status
12-1
12-3
12-4
Recovering from Failures 12-4
Network Connectivity 12-4
Device Failure 12-5
Deployment Considerations 12-5
Connectivity 12-5
Load Balancing 12-6
Web Interface 12-6
RADIUS Interface 12-6
12-7
CHAPTER
13
Logging and Troubleshooting
System Logging
13-1
13-1
Log Files 13-2
Downloading the log files 13-2
Application Logging 13-2
Email Logging 13-2
RADIUS Logging 13-2
CAM Update Logging 13-3
Web Server Logging 13-3
CHAPTER
14
Licensing
Licensing
CHAPTER
15
14-1
14-1
Sponsor Documentation
15-1
Introduction to Cisco NAC Guest Server
Connecting to the Guest Server
15-1
15-1
Creating Guest User Accounts 15-4
Print Account Details 15-6
Email Account Details 15-6
Text Message Account Details (SMS)
15-6
Multiple Guest Accounts 15-7
Creating Multiple Accounts from Text Entry 15-7
Creating Multiple Accounts from CSV File 15-8
Creating Multiple Random Accounts 15-8
Cisco NAC Guest Server Installation and Configuration Guide
vi
OL-15986-01
Contents
Printing/Email/SMS Multiple Accounts 15-9
Viewing Multiple Account Groups 15-10
Viewing Multiple Account Groups 15-10
Finding Multiple Account Groups by username 15-11
Finding Multiple Account Groups on the Active Accounts Report.
Editing Guest Accounts
15-12
Suspending Guest Accounts
15-12
Viewing Active Accounts and Resending Details
Reporting on Guest Users
APPENDIX
A
15-11
15-13
15-13
Open Source License Acknowledgements
Notices A-1
OpenSSL/Open SSL Project
License Issues A-1
A-1
A-1
Cisco NAC Guest Server Installation and Configuration Guide
OL-15986-01
vii
Contents
Cisco NAC Guest Server Installation and Configuration Guide
viii
OL-15986-01
About This Guide
March 5, 2008, OL-15986-01
This preface includes the following sections:
•
Audience
•
Purpose
•
Document Conventions
•
Product Documentation
•
Obtaining Documentation and Submitting a Service Request
Audience
This guide is for network administrators who are implementing Cisco NAC Guest Server to provision
guest access on their networks. Cisco NAC Guest Server works alongside Cisco NAC Appliance, Cisco
Unified Wireless Networks and other Cisco Network Enforcement devices to provide the captive portal
and enforcement point for guest access.
Purpose
The Cisco NAC Guest Server Installation and Configuration Guide describes how to install and
configure the Cisco NAC Guest Server appliance. It describes the simple initial installation of the
appliance via CLI and the configuration and administration of the Guest Access Portal through the
web-based interface.
Document Conventions
Item
Convention
Indicates command line output.
Screen
Indicates information you enter.
Boldface screen
Indicates variables for which you supply values.
Italic screen
font
font
font
Cisco NAC Guest Server Installation and Configuration Guide
OL-15986-01
ix
About This Guide
Item
Convention
Indicates web admin console modules, menus, tabs, links and
submenu links.
Boldface font
Indicates a menu item to be selected.
Administration > User Pages
Product Documentation
Table 1 lists documents are available for Cisco NAC Guest Server on Cisco.com at the following URL:
http://www.cisco.com/en/US/products/ps6128/tsd_products_support_series_home.html
Tip
To access external URLs referenced in this document, right-click the link in Adobe Acrobat and select
“Open in Weblink in Browser.”
Table 1
Cisco NAC Appliance Document Set
Document Title
Refer to This Document For Information On:
Release Notes for Cisco NAC Guest Server,
Release 1.1.0
Details on the latest Cisco NAC Guest Server
release.
Cisco NAC Guest Server Installation and
Configuration Guide (this document)
Hardware information, initial installation, setup and
configuration instructions for Cisco NAC Guest
Server.
Cisco NAC Appliance Service Contract /
Licensing Support
Information on service contract support, licensing
support and RMA support for Cisco NAC
Appliance, Cisco NAC Profiler and Cisco NAC
Guest Server.
Cisco NAC Appliance Product Literature
Online inks to Ordering Guide Bulletins, Data
Sheets, Q&A and Chalk Talk presentations
Cisco NAC Appliance - Clean Access Manager
Installation and Configuration Guide
Configuration guides for NAC Appliance Manager
and Server
Cisco NAC Appliance - Clean Access Server
Installation and Configuration Guide
Cisco Wireless LAN Controller Configuration
Guide, Release 4.0
Configuration information for Cisco Wireless LAN
Controllers
Obtaining Documentation and Submitting a Service Request
For information on obtaining documentation, submitting a service request, and gathering additional
information, see the monthly What’s New in Cisco Product Documentation, which also lists all new and
revised Cisco technical documentation, at:
http://www.cisco.com/en/US/docs/general/whatsnew/whatsnew.html
Subscribe to the What’s New in Cisco Product Documentation as a Really Simple Syndication (RSS) feed
and set content to be delivered directly to your desktop using a reader application. The RSS feeds are a free
service and Cisco currently supports RSS version 2.0.
Cisco NAC Guest Server Installation and Configuration Guide
x
OL-15986-01
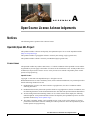
CH A P T E R
1
Welcome to Cisco NAC Guest Server
Introduction
The Cisco NAC Guest Server is a complete provisioning and reporting system that provides temporary
network access for guests, visitors, contractors, consultants or customers. The Guest Server works
alongside Cisco NAC Appliance or Cisco Wireless LAN Controller which provide the captive portal and
enforcement point for guest access.
Cisco NAC Guest Server allows any user with privileges to easily create temporary guest accounts and
sponsor guests. Cisco NAC Guest Server performs full authentication of sponsors, the users who create
guest accounts, and allows sponsors to provide account details to the guest by printout, email or SMS.
The entire experience, from user account creation to guest network access, is stored for audit and
reporting.
When guest accounts are created, they are either provisioned within the Cisco NAC Appliance Manager
(Clean Access Manager) or stored within the built-in database on the Cisco NAC Guest Server. When
using the Guest Server’s built-in database, external network access devices, such as the Cisco Wireless
LAN Controller, can authenticate users against the Guest Server using the RADIUS (Remote
Authentication Dial In User Service) protocol.
The Cisco NAC Guest Server provisions the guest account for the amount of time specified when the
account is created. Upon expiry of the account, the Guest Server either deletes the account directly from
the Cisco NAC Appliance Manager or sends a RADIUS message which notifies the network access
device (NAD) of the amount of valid time remaining for the account before the NAD should remove the
user.
Cisco NAC Guest Server provides vital guest network access accounting by consolidating the entire
audit trail from guest account creation to guest use of the account so that reports can be performed
through a central management interface.
Guest Access Concepts
Cisco NAC Guest Server makes use of a number of terms to explain the components needed to provide
guest access.
Guest User
The Guest User is the person who needs a user account to access the network.
Cisco NAC Guest Server Installation and Configuration Guide
OL-15986-01
1-1
Chapter 1
Welcome to Cisco NAC Guest Server
Before You Start
Sponsor
The Sponsor is the person who creates the guest user account. This person is often an employee of the
organization that provides the network access. Sponsors can be specific individuals with certain job
roles, or can be any employee who can authenticate against a corporate directory such as Microsoft
Active Directory (AD).
Network Enforcement Device
These devices are the network infrastructure components that provide the network access. Additionally,
network enforcement device are responsible for pushing guest users to a captive portal where they can
enter their guest account details. When a guest enters his or her temporary user name and password, the
network enforcement device checks those credentials against the guest accounts created by the Guest
Server.
Guest Server
This is the Cisco NAC Guest Server, which ties together all the pieces of guest access. The Guest Server
links the sponsor creating the guest account, the account details passed to the guest, the guest
authentication against the network enforcement device, and the network enforcement device’s
verification of the guest with the Guest Server. Additionally, the Cisco NAC Guest Server consolidates
accounting information from network enforcement devices to provide a single point of guest access
reporting.
Before You Start
This section describes the following:
•
Package Contents
•
Rack Mounting
•
Cisco NAC Guest Server Licensing
•
Upgrading Firmware
•
Additional Information
Package Contents
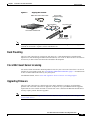
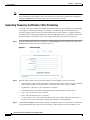
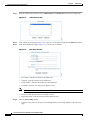
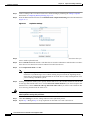
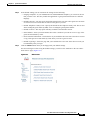
Verify the contents of the packing box (Figure 1-1) to ensure that you have received all items necessary
to install your Cisco NAC Guest Server. Save the packing material in case you need to repack the unit.
If any item is missing or damaged, contact your Cisco representative or reseller for instructions.
Cisco NAC Guest Server Installation and Configuration Guide
1-2
OL-15986-01
Chapter 1
Welcome to Cisco NAC Guest Server
Before You Start
Figure 1-1
Shipping Box Contents
DB-9 serial null modem cable
RJ-45 cable
(straight-through)
AC power cord
Documentation
Info Cis
Pa rma co
ck tio
et n
C
Ge Ap isco
ttin pli N
Gu g S anceAC
ide tarte
d
Im
Info Sa porta
rm fety nt
ati
on
Rack mounting kit
Note
185434
Cisco NAC Guest Server
Because product software is preloaded onto the Cisco NAC Guest Server appliance, the shipping
contents do not include a separate software installation CD.
Rack Mounting
The Cisco NAC Guest Server occupies one rack unit (1U). A rack-mounting kit is included in the
shipment. For rack-mounting information and instructions, refer to the 1U Rack Hardware Installation
Instructions for HP Products document also included in the shipment.
Cisco NAC Guest Server Licensing
You need to obtain and install a FlexLM product license for your Cisco NAC Guest Server via its web
interface for your system to work. See Accessing the Administration Interface, page 3-1 for instructions
on how to obtain and install license(s) for your system.
For additional details, refer to Cisco NAC Appliance Service Contract / Licensing Support.
Upgrading Firmware
The Cisco NAC Guest Server is based on the Cisco NAC Appliance 3310 (NAC-3310) hardware
platform. The Cisco NAC Guest Server appliance is subject to any system BIOS/Firmware upgrades
required for the server model on which it is based. NAC-3310 is based on the HP ProLiant DL140 G3
and may require periodic firmware upgrades.
Note
For further details refer to Supported Hardware and System Requirements for Cisco NAC Appliance
(Cisco Clean Access).
Cisco NAC Guest Server Installation and Configuration Guide
OL-15986-01
1-3
Chapter 1
Welcome to Cisco NAC Guest Server
Before You Start
Additional Information
For late-breaking or additional details for this release, refer to the Release Notes for Cisco NAC Guest
Server, Release 1.0.0.
For the latest online updates to this guide, visit
http://www.cisco.com/en/US/products/ps6128/products_installation_and_configuration_guides_list.ht
ml
See Product Documentation for a list of related documentation for Cisco NAC Guest Server.
For details on how to obtain technical support, refer to section Obtaining Documentation and Submitting
a Service Request.
Cisco NAC Guest Server Installation and Configuration Guide
1-4
OL-15986-01
CH A P T E R
2
Installing Cisco NAC Guest Server
This chapter contains the following sections:
•
Connecting the Cisco NAC Guest Server
•
Command Line Configuration
•
Re-Imaging the Appliance
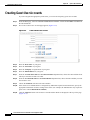
Connecting the Cisco NAC Guest Server
The Cisco NAC Guest Server is based on the Cisco NAC Appliance 3310 (NAC-3310) hardware
platform and comes preloaded with a default system image. When you receive the Guest Server, perform
the initial configuration described in Command Line Configuration, page 2-3. If you need to perform
CD installation to re-image the appliance, refer to Re-Imaging the Appliance for instructions.
To perform initial configuration, you will need to connect to your appliance and access its command line,
as described below.
Step 1
You can access the Cisco NAC Guest Server command line in one of two ways:
a.
Connect a monitor and keyboard directly to the machine via the keyboard/video monitor connectors
on the back panel of the machine (Figure 2-2)(preferred method).
b.
Connect a null modem serial cable from a workstation (PC/laptop) to the serial port on the appliance.
Open a serial connection on the workstation using terminal emulation software (such as
HyperTerminal or SecureCRT) with settings set to 9600 baud, 8 data bits, no parity, 1 stop bit, no
flow control.
Step 2
Connect a straight-through Category 5 Ethernet cable to the eth0 (NIC1) 10/100/1000 Ethernet port on
the back panel of the appliance and to your local area network.
Step 3
Connect the AC power cord to the back panel of the appliance and to a grounded AC outlet, and power
on the appliance(Figure 2-1).
Step 4
Proceed to the instructions in Command Line Configuration, page 2-3.
Cisco NAC Guest Server Installation and Configuration Guide
OL-15986-01
2-1
Chapter 2
Installing Cisco NAC Guest Server
Connecting the Cisco NAC Guest Server
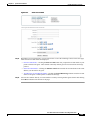
Figure 2-1
Cisco NAC Guest Server Front Panel
4 6
2
3 5 7
180955
1
8
1
9
Hard disk drive (HDD) bay
6
HDD activity LED indicator (green)
7
Power button with LED indicator (bicolor:
green/amber)
CD-ROM/DVD drive
2
3
UID (Unit identification) button with LED
indicator (blue)
8
4
System health LED indicator (amber)
9
5
Activity/link status LED indicators for NIC 1
(eth0) and NIC2 (eth1) (green)
Figure 2-2
2
Thumbscrews for the front bezel
Front USB ports
Cisco NAC Guest Server Rear Panel
3
4
5
8
9 10
6
3
7
180957
1
8
11
12 13 15
14
1
Ventilation holes
9
2
Thumbscrew for the top cover
10 Rear USB ports (black)
3
Thumbscrews for the PCI riser board
assembly
11
4
5
NIC 3 (eth2) and NIC 4 (eth3) PCI Express
GbE LAN (RJ-45) ports (Intel)
6
Standard height/full-length PCI Express
x16/PCI-X riser board slot cover
Power supply cable socket
7
8
UID button with LED indicator (blue)
Video port (blue)
12 Serial port
13 PS/2 keyboard port (purple)
PS/2 mouse port (green)
14
10/100 Mbps iLO LAN port for IPMI
15 management (RJ-45)
NIC 1 (eth0) and NIC 2 (eth1) integrated GbE
LAN (RJ-45) ports (Broadcom)
Cisco NAC Guest Server Installation and Configuration Guide
2-2
OL-15986-01
Chapter 2
Installing Cisco NAC Guest Server
Command Line Configuration
Note
The three LAN ports each have their own LED indicators for activity/link status and network speed.
Command Line Configuration
A very minimal amount of command line configuration is needed on the Cisco NAC Guest Server
appliance. This is to perform two tasks.
•
Configure IP Address and Default Gateway, page 2-3 so that the appliance can be accessed on the
network
•
Change Root Password, page 2-5 on the appliance from the default
Configure IP Address and Default Gateway
To allow the appliance to be accessed on the network you need to configure the IP address and default
gateway for the first interface on the appliance (eth0 or NIC1). To configure these details perform the
following steps.
Step 1
Using either keyboard and monitor connection to the appliance, or serial console connection,
authenticate to the command line interface. The user name for the console is root and the default
password is cisco (Figure 2-3).
Figure 2-3
Step 2
Authenticate to the Console
To configure the network settings, type the command system-config-network and press <Enter>. The
Select A Device menu appears (Figure 2-4).
Cisco NAC Guest Server Installation and Configuration Guide
OL-15986-01
2-3
Chapter 2
Installing Cisco NAC Guest Server
Command Line Configuration
Figure 2-4
Choose eth0 Interface
Step 3
Select the eth0 interface from the list using the up and down arrow keys and press <Enter>.
Step 4
You can now enter all the correct network settings for the appliance (Figure 2-5).
Figure 2-5
Change Network Configuration Details
Enter the following information:
•
Static IP—The IP Address that you want to assign to the Cisco NAC Guest Server
•
Netmask—The corresponding subnet mask
•
Default gateway IP—The default gateway for the network
You can use the Tab key, Arrow keys or <Enter> to move between fields,. When finished, tab to the OK
button and press <Enter>.
Step 5
Exit the system-config-network by selecting Quit from the network selection screen (Figure 2-6).
Cisco NAC Guest Server Installation and Configuration Guide
2-4
OL-15986-01
Chapter 2
Installing Cisco NAC Guest Server
Command Line Configuration
Figure 2-6
Step 6
Quit the Utility
At the command line either reboot the appliance by typing reboot and pressing <Enter> or follow the
instructions to Change Root Password, page 2-5 before entering reboot.
Change Root Password
Note
You should change the root password from the default of cisco, it is advised to use a complex password
for enhanced security.
Step 1
From the command line enter the command passwd and press <Enter>.
Step 2
Enter the new password and press <Enter>.
Step 3
Repeat the password and press <Enter>.
Continue to System Setup, page 3-1 to access and configure the admin console.
Cisco NAC Guest Server Installation and Configuration Guide
OL-15986-01
2-5
Chapter 2
Installing Cisco NAC Guest Server
Re-Imaging the Appliance
Re-Imaging the Appliance
When the Cisco NAC Guest Server is shipped, the system image already preloaded on the unit, so
imaging is unnecessary. If you need to re-image the appliance to factory defaults, you can download the
system image ISO from Cisco Secure Software Downloads on Cisco.Com and burn this ISO file to a
blank CD-ROM.Once you have the system image on a bootable CD, you can perform the following steps
to install the system image onto the appliance. Refer to the Release Notes for Cisco NAC Guest Server,
Release 1.1.0 for additional details.
Caution
Imaging the appliance will delete all data on the appliance, there will be no method of recovery of data
from the Guest Server after imaging has been started. Make sure to backup any data that you need before
starting this process.
Step 1
Insert the bootable CD into the CD-ROM drive of the Cisco NAC Guest Server appliance.
Step 2
Decide whether to perform the installation using a connected keyboard and monitor or over a serial
console. Connect either a keyboard and monitor to the back of the unit, or attach a null modem cable to
the serial port on the back of the appliance. From the computer the serial cable is attached you will need
to run a terminal emulation program with settings set to 9600 baud, 8 data bits, no parity, 1 stop bit, no
flow control.
Step 3
Once you have connected to the appliance and inserted the CD containing the image, power on the
appliance. Switch the appliance on, or if already started switch it off and then back on again.
Step 4
The appliance should now boot from the CD-ROM drive and the initial install screen displays
(Figure 2-7).
Figure 2-7
Step 5
Initial Install Screen
At the Initial Install Screen, choose how to run the installation according to how you are connected to
the appliance.
•
If directly connected using a keyboard and monitor, type install and press <Enter>.
•
If you using a serial connection, type
serial
at the boot prompt, then press <Enter>.
Cisco NAC Guest Server Installation and Configuration Guide
2-6
OL-15986-01
Chapter 2
Installing Cisco NAC Guest Server
Re-Imaging the Appliance
Note
Step 6
If you press <Enter> by mistake on a serial connection, the imaging process will still run, but
there is no display until the appliance reboots at the end of the process.
The system image automatically installs on the hard disk (Figure 2-8).
Figure 2-8
Step 7
When the install image is successfully, transferred the system reboots automatically (Figure 2-9).
Figure 2-9
Step 8
Transferring Install Image
Appliance Reboots
The CD-ROM automatically ejects from the appliance.
Note
Remove the CD and store it safely so that the appliance does not accidentally reboot from it at
a later time.
Cisco NAC Guest Server Installation and Configuration Guide
OL-15986-01
2-7
Chapter 2
Installing Cisco NAC Guest Server
Re-Imaging the Appliance
Step 9
The appliance boots and runs the final setup of the image automatically. The imaging process is complete
when the login screen displays (Figure 2-10).
Figure 2-10
Step 10
Imaging Complete
Login as user root, and continue to the instructions in Command Line Configuration, page 2-3 to
complete the installation.
Cisco NAC Guest Server Installation and Configuration Guide
2-8
OL-15986-01
CH A P T E R
3
System Setup
The system can be configured through the web interface to provide the networking configuration for the
appliance and other system settings that are important such as time and SSL certificate. The Cisco NAC
Guest Server is administered entirely using a web interface over either HTTP or HTTPS.
This chapter includes the following sections:
•
Accessing the Administration Interface
•
Configuring Network Settings
•
Date and Time Settings
•
SSL Certificate
•
Configuring Administrator Authentication
Accessing the Administration Interface
Upon first accessing the web administration interface of the Cisco NAC Guest Server, you will need to
install a product license. You can obtain a license using the instructions in the PAK shipped with the
appliance or by registering for a evaluation license at
https://tools.cisco.com/SWIFT/Licensing/PrivateRegistrationServlet?FormId=146.
Note
For additional details on evaluation licenses refer to Cisco NAC Appliance Service Contract / Licensing
Support.
This section describes the following:
•
Obtain and Install Cisco NAC Guest Server License
•
Access Cisco NAC Guest Server Administration Interface
Cisco NAC Guest Server Installation and Configuration Guide
OL-15986-01
3-1
Chapter 3
System Setup
Accessing the Administration Interface
Obtain and Install Cisco NAC Guest Server License
Use the following steps to obtain and install your FlexLM product license files for Cisco NAC Guest
Server.
Step 1
With FlexLM licensing, you will receive a Product Authorization Key (PAK) for each Guest Server that
you purchase. The PAK is affixed as a sticky label on the Software License Claim Certificate card that
is included in your package.
Warning
The PAK is NOT the Cisco NAC Guest Server license. The PAK is used to obtain the Cisco NAC Guest
Server license, as described below.
Step 2
Warning
Log in as a registered CCO user and fill out the Customer Registration form found at the PAK Cisco
Technical Support site: http://www.cisco.com/go/license. During customer registration, submit each
PAK you receive and the eth0 MAC address of your Cisco NAC Guest Server.
The eth0 MAC address entered for the Guest Server must be in UPPER CASE (i.e. hexadecimal letters
must be capitalized). Do not enter colons (“:”) in between characters.
Please follow the instructions on the license web pages carefully to ensure that the correct MAC
addresses are entered.
Step 3
For each PAK that you submit, a license file is generated and sent to you via email.
Step 4
Save each license file you receive to disk.
Step 5
Open a web browser to the Cisco NAC Guest Server admin interface by entering the IP address that you
configured through the command line as the URL.
Step 6
•
For HTTP access, open http://<guest_server_ip_address>/admin
•
For HTTPS access, open https://<guest_server_ip_address>/admin
In the Guest Server License Form(Figure 3-1), click the Browse button and locate the license file.
Cisco NAC Guest Server Installation and Configuration Guide
3-2
OL-15986-01
Chapter 3
System Setup
Accessing the Administration Interface
Figure 3-1
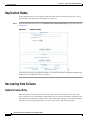
Step 7
Guest Server License Form (example)
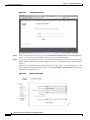
Click Submit to install the license.
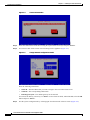
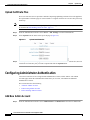
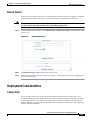
Access Cisco NAC Guest Server Administration Interface
Step 8
The Cisco NAC Guest Server Administration interface (Figure 3-2) displays. This is the administrator
interface to the appliance.
Step 9
Login as the admin user. The default user name/password is admin/admin.
Figure 3-2
Note
Admin Login
Cisco recommends setting up SSL access and change the default admin user password for security. Refer
to SSL Certificate, page 3-7 and Edit Existing Admin Account, page 3-11 for details.
Cisco NAC Guest Server Installation and Configuration Guide
OL-15986-01
3-3
Chapter 3
System Setup
Configuring Network Settings
Step 10
Note
After the license is installed, the administrator interface is brought up in web browser as follows:
•
For HTTP access, open http://<guest_server_ip_address>/admin
•
For HTTPS access, open https://<guest_server_ip_address>/admin
Entering the Guest Server IP address without the” /admin” as the URL brings up the sponsor interface.
See Chapter 4, “Configuring Sponsor Authentication” for details.
Configuring Network Settings
Configure remaining network settings before performing any other operation. This minimizes the need
to restart the appliance later on.
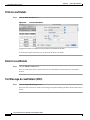
Step 1
From the administration home page select Server > Network Settings from the left hand menu
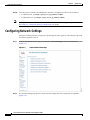
(Figure 3-3).
Figure 3-3
Step 2
Administration Home Page
The Network Settings page provides all the network settings that can be changed on the appliance
(Figure 3-4).
Cisco NAC Guest Server Installation and Configuration Guide
3-4
OL-15986-01
Chapter 3
System Setup
Date and Time Settings
Figure 3-4
Network Settings
You can change the following Network Settings:
•
Domain Name—Enter the domain name for your organization (e.g. cisco.com)
•
Hostname—Enter the name of the appliance as defined in DNS (without DNS suffix)
•
IP Address—Enter the IP address of the eth0 interface on the appliance
•
Subnet Mask—Enter the corresponding subnet mask
•
Default Gateway—The default gateway for the network to which the appliance is connected
•
Nameserver 1—IP address of the primary DNS server
•
Nameserver 2—IP address of the secondary DNS server
Step 3
Click the Save Settings button to save the changes that you made.
Step 4
Once changes are saved, you need to restart the Guest Server to ensure all processes use the correct IP
address. Click the Restart button, and the restart process will begin on the Guest Server within 60
seconds.
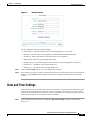
Date and Time Settings
Correct date and time are critical to the Cisco NAC Guest Server. The Guest Server authenticates guest
users based upon the time their accounts are valid. It is important for the time to be correct so guest
accounts are created and removed at the correct time. If possible, Cisco recommends using a Network
Time Protocol (NTP) server to synchronize the time and date.
Step 1
From the administration interface select Server > Date/Time Settings from the left hand menu
(Figure 3-5).
Cisco NAC Guest Server Installation and Configuration Guide
OL-15986-01
3-5
Chapter 3
System Setup
Date and Time Settings
Figure 3-5
Date/Time Settings
Step 2
Select the correct Date and Time for the location of the Guest Server.
Step 3
Click the Set System Date and Time button to apply the time and date.
Step 4
Select the correct Timezone for the location of the Guest Server.
Step 5
Apply the settings by clicking the Set System Timezone button.
Note
If you change the time zone, this action automatically adjusts the date and time on the server.
Step 6
If you have an NTP server available on the network, enter the address of the NTP server.
Step 7
Click the Set NTP Server button. This saves the settings and restarts the NTP process so the new settings
take effect.
Note
When setting the NTP server it may take some time for synchronization to occur. Synchronization occurs
much faster if the time is set to be close to the NTP server (and saved with the Set button) before clicking
the Set NTP Server button.
Cisco NAC Guest Server Installation and Configuration Guide
3-6
OL-15986-01
Chapter 3
System Setup
SSL Certificate
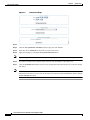
SSL Certificate
Both sponsors and administrators can access the Cisco NAC Guest Server using either HTTP or HTTPS.
For more secure access Cisco recommends using HTTPS access.
This section describes the following
•
Accessing the Guest Server using HTTP or HTTPS
•
Generating Temporary Certificates/ CSRs/ Private Key
•
Downloading Certificate Files
•
Upload Certificate Files
Accessing the Guest Server using HTTP or HTTPS
You can configure whether sponsors and administrators access the portal using HTTP, both HTTP and
HTTPS, or HTTPS only.
Step 1
From the administration interface, select Server > SSL Settings from the left hand menu (Figure 3-6).
Figure 3-6
Step 2
Step 3
SSL Settings Main Page
The Main SSL Settings page provides the following options:
•
Redirect http to https—When enabled, any sponsor or administrator accessing the Guest Server
using HTTP is automatically redirected to the HTTPS interface. If this setting is not enabled, then
no redirection occurs.
•
Allow http access—When enabled, allows sponsors and administrators to access the portal with
standard HTTP. If this is not enabled, sponsors and administrators are redirected if the first option
is set, or if not set, are shown a web page explaining that HTTP access is not available.
When you have made your changes, click the Save Settings button.
Cisco NAC Guest Server Installation and Configuration Guide
OL-15986-01
3-7
Chapter 3
System Setup
SSL Certificate
Note
The Main SSL Settings page also provides the Restart Web Server button. You need to restart the Web
Server component of the appliance when new certificates are generated or uploaded to the appliance.
Clicking the Restart button makes the Guest Server use the new certificates.
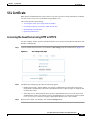
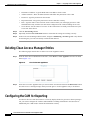
Generating Temporary Certificates/ CSRs/ Private Key
Cisco NAC Guest Server ships with a default certificate installed. If you are planning on using HTTPS,
Cisco highly recommends generating a new temporary certificate/private key. When doing this, a
certificate signing request (CSR) is also generated that can be used to obtain a CA signed certificate.
The whole process of generating a temporary certificate, CSR and private key is performed on the Create
page. Entering the correct details on the Create page automatically generates the required files.
Step 1
From the administration interface, select Server > SSL Settings from the left hand menu, then select
Create from the menu at the top of the page (Figure 3-7).
Figure 3-7
Step 2
Step 3
Create SSL Page
Enter the details on the screen to provide the details for the temporary certificate and CSR.
•
Common Name—This is either the IP address of the Cisco NAC Guest Server, or the fully qualified
domain name (FQDN) for the Guest Server. The FQDN must resolve correctly in DNS.
•
Organization—The name of your organization or company.
•
Organizational Unit—The name of the department or business unit that owns the device.
•
City—The city where the server is located.
•
State—The state where the server is located.
•
2 Letter Country Code—The 2 letter ISO abbreviation for the country where the Guest Server is
located, such as US for United States, GB for Great Britain or United Kingdom.
Click Create Certificate. This creates a temporary self-signed certificate, a new private key and also the
corresponding CSR which can be used for obtaining a certificate from a Certificate Authority (CA).
Cisco NAC Guest Server Installation and Configuration Guide
3-8
OL-15986-01
Chapter 3
System Setup
SSL Certificate
Step 4
Note
To use the new temporary certificate you must restart the web server process. Click the Main tab from
the top of the screen, then click the Restart Web Server button (Figure 3-6).
If you want the CSR, you can download it from the download page as described in Downloading
Certificate Files, page 3-9.
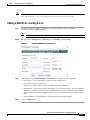
Downloading Certificate Files
Downloading the CSR and Certificate
You will need to download the CSR from the appliance so that it can be sent to a Certificate Authority
to obtain a certificate. Cisco strongly recommends backing up the certificate and private key.
Step 1
From the administration interface select Server > SSL Settings from the left hand menu.
Step 2
Select Download from the menu at the top of the page (Figure 3-8).
Figure 3-8
Download Certificate Files
Step 3
Click the relevant link to download the CSR or SSL Certificate.
Step 4
Save the SSL Certificate to a secure backup location.
Downloading the Private Key
The private key can only be obtained through an SFTP connection to the Guest Server. For windows
platforms, you can get a free SFTP client from http://winscp.net.
Step 1
Open an SFTP connection to the Cisco NAC Guest Server, the authentication credentials are the same
as for the command line. This is the username of root and the password you have assigned for this
account. The default password is cisco, Cisco recommends you change this as detailed in Command Line
Configuration, page 2-3.
Step 2
Download the /etc/pki/tls/private/localhost.key file and store it in a secure backup location.
Cisco NAC Guest Server Installation and Configuration Guide
OL-15986-01
3-9
Chapter 3
System Setup
Configuring Administrator Authentication
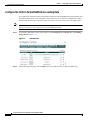
Upload Certificate Files
The Cisco NAC Guest Server provides a method of importing/uploading certificate files to the appliance.
The Upload SSL Certificate pages is used to install a CA-signed certificate or to restore files previously
backed up.
Note
The certificate files are not backed up as part of any backup process. You must manually back them up
as described in Downloading Certificate Files, page 3-9.
Step 1
From the administration interface select Server > SSL Settings from the left hand menu.
Step 2
Select Upload from the menu at the top of the page (Figure 3-9).
Figure 3-9
Step 3
Upload Certificate Files
In the Upload SSL Certificate page, click the Browse button to locate the SSL Certificate file, Root CA
Certificate or Private Key file you want to upload and click the Upload button.
Configuring Administrator Authentication
Cisco NAC Guest Server has a single default administrator account, called “admin.” The Admin
Accounts pages under the Authentication menu allow you to create, edit and delete additional
administrator accounts.
This section describes the following
•
Add New Admin Account
•
Edit Existing Admin Account
•
Delete Existing Admin Account
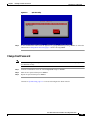
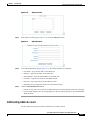
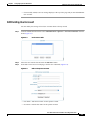
Add New Admin Account
Step 1
From the administration interface select Authentication > Administrators from the left hand menu.
Cisco NAC Guest Server Installation and Configuration Guide
3-10
OL-15986-01
Chapter 3
System Setup
Configuring Administrator Authentication
Figure 3-10
Step 2
In the Admin Accounts page (Figure 3-10), click the Add User button.
Figure 3-11
Step 3
Step 4
Admin Accounts
Add Admin User
In the Add Administrator page (Figure 3-11), enter all the admin user credentials.
•
First Name—Type the first name of the admin user
•
Surname—Type the last name of the admin user.
•
Email Address—Type the email address of the admin user
•
Username—Type the user name for the admin account.
•
Password—Type the password for the admin account.
•
Repeat Password—Retype the password for the admin account
Click the Add Administrator button.
•
If there are any errors, the account is not added and an error message displays at the top of the page.
•
If successfully added, a success message displays at the top of the page and you can add additional
admin accounts.
Edit Existing Admin Account
You can modify the settings of admin accounts that are already created.
Cisco NAC Guest Server Installation and Configuration Guide
OL-15986-01
3-11
Chapter 3
System Setup
Configuring Administrator Authentication
Step 1
From the administration interface select Authentication > Administrators from the left hand menu.
Figure 3-12
Admin Users to Edit
Step 2
In the Admin Accounts page(Figure 3-12), select the user from the list and click the Edit User button.
Step 3
In the Edit Administrator page (Figure 3-13), edit the user credentials.
Figure 3-13
•
First Name—Edit the first name of the admin user
•
Surname—Edit the last name of the admin user.
•
Email Address—Edit the email address of the admin user
•
Username—Edit the user name for the admin account.
Note
Step 4
Edit Admin Account
Leaving the Password and Repeat Password fields empty keeps the existing password.
•
Password—Edit the password for the admin account.
•
Repeat Password—Edit the password for the admin account.
Click the Save Settings button.
•
If there are any errors, the account is not changed and an error message displays at the top of the
page.
Cisco NAC Guest Server Installation and Configuration Guide
3-12
OL-15986-01
Chapter 3
System Setup
Configuring Administrator Authentication
•
If successfully changed, a success message displays at the top of the page and you can make
additional changes to the same admin account.
Delete Existing Admin Account
You can remove existing admin accounts from the administration interface.
Step 1
From the administration interface select Authentication > Administrators from the left hand menu.
Figure 3-14
Select Admin Account to Delete
Step 2
In the Admin Accounts page(Figure 3-14), select the user from the list and click the Delete User button.
Step 3
At the prompt “Are you sure you want to delete the user”, click OK to delete the user or Cancel to cancel
the deletion.
If successfully deleted, a success message displays at the top of the page and you can perform additional
admin account operations.
Cisco NAC Guest Server Installation and Configuration Guide
OL-15986-01
3-13
Chapter 3
System Setup
Configuring Administrator Authentication
Cisco NAC Guest Server Installation and Configuration Guide
3-14
OL-15986-01
CH A P T E R
4
Configuring Sponsor Authentication
Sponsors are the people who use Cisco NAC Guest Server to create guest accounts. Sponsor
authentication is the method used to authenticate sponsor users on the Guest Server. There are four
options available:
•
Local User Authentication—Create sponsor accounts directly on the Cisco NAC Guest Server.
See Configuring Local Sponsor Authentication
•
Active Directory Authentication—Authenticate sponsors against an existing Active Directory (AD)
implementation. See Configuring Active Directory (AD) Authentication.
•
LDAP Authentication—Authenticate sponsors against a Lightweight Directory Access Protocol
(LDAP) server. See Configuring LDAP Authentication.
•
RADIUS Authentication—Authenticate sponsors against a RADIUS server. See Configuring
RADIUS Authentication.
You may specify multiple authentication services for authenticating sponsors to the Cisco NAC Guest
Server and then specify the order in which you want to authenticate sponsors. For details see Configuring
Sponsor Authentication Settings.
Configuring Local Sponsor Authentication
Local authentication allows you to set up sponsor user accounts directly on the Cisco NAC Guest Server.
Local authentication allows you to do the following:
•
Add New Local User Account
•
Edit Existing User Account
•
Delete Existing User Account
Add New Local User Account
Step 1
From the administration interface select Authentication > Sponsors > Local User Database from the
menu (Figure 4-1).
Cisco NAC Guest Server Installation and Configuration Guide
OL-15986-01
4-1
Chapter 4
Configuring Sponsor Authentication
Configuring Local Sponsor Authentication
Figure 4-1
Step 2
Click the Add User button to bring up the local sponsor configuration page (Figure 4-2).
Figure 4-2
Step 3
Step 4
Local Users
Add Local User
In the Add a Local User Account page, enter all the sponsor user credentials:
•
First Name—Type the first name of the sponsor.
•
Last Name—Type the last name of the sponsor.
•
Username—Type the user name for the sponsor account.
•
Password—Type the password for the sponsor account.
•
Repeat Password—Retype the password for the sponsor account
•
Groups—Select the group for the sponsor account from the dropdown. Chapter 5, “Configuring
User Group Permissions” provides further details on groups.
•
Email Address—Type email address of the sponsor.
Click the Add User button.
•
If there are any errors, the account is not added and an error message displays at the top of the page.
Cisco NAC Guest Server Installation and Configuration Guide
4-2
OL-15986-01
Chapter 4
Configuring Sponsor Authentication
Configuring Local Sponsor Authentication
•
If successfully added, a success message displays at the top of the page and you can add additional
user accounts.
Edit Existing User Account
You can modify the settings of local user accounts that are already created.
Step 1
From the administration interface select Authentication > Sponsors > Local User Database from the
menu (Figure 4-3).
Figure 4-3
Local Users to Edit
Step 2
Select the user from the list and click the Edit User button.
Step 3
In the Edit a Local User Account page, edit the user credentials (Figure 4-4).
Figure 4-4
Edit Local Sponsor Account
•
First Name—Edit the first name for the sponsor account.
•
Last Name—Edit the last name for the sponsor account.
Cisco NAC Guest Server Installation and Configuration Guide
OL-15986-01
4-3
Chapter 4
Configuring Sponsor Authentication
Configuring Local Sponsor Authentication
Note
Step 4
Leaving the Password and Repeat Password fields empty keeps the existing password.
•
Password—Change the password for the sponsor account.
•
Repeat Password—Retype the changed password for the sponsor account.
•
Groups—Select the group for the sponsor account from the dropdown. Chapter 5, “Configuring
User Group Permissions” provides further details on groups.
•
Email Address—Edit the email address of the sponsor.
Click the Save Settings button.
•
If there are any errors, the account is not changed and an error message displays at the top of the
page.
•
If successfully changed, a success message displays at the top of the page and you can make
additional changes to the same user account.
Delete Existing User Account
You can delete existing sponsor user accounts from the administration interface.
Step 1
From the administration interface select Authentication > Sponsors > Local User Database from the
menu(Figure 4-5).
Figure 4-5
Select User to Delete
Step 2
Select the user from the list and click the Delete User button.
Step 3
Confirm deletion of the user at the prompt.
•
If successfully deleted, a success message displays at the top of the page and you can perform
additional local user account operations.
Cisco NAC Guest Server Installation and Configuration Guide
4-4
OL-15986-01
Chapter 4
Configuring Sponsor Authentication
Configuring Active Directory (AD) Authentication
Configuring Active Directory (AD) Authentication
Active Directory Authentication authenticates sponsor users to the Guest Server using their existing AD
user accounts. This keeps sponsors from having to remember another set of user names and passwords
just to authenticate to the Guest Server. It also enables the administrator to quickly roll out Guest Access
because there is no need to create and manage additional sponsor accounts. Active Directory
authentication allows you to do the following:
•
Add Active Directory Domain Controller
•
Edit Existing Domain Controller
•
Delete Existing Domain Controller Entry
AD authentication supports authentication against multiple domain controllers. The domain controllers
can be part of the same Active Directory to provide resilience, or they can be in different Active
Directories so that the Guest Server can authenticate sponsor users from separate domains, even where
no trust relationship is configured.
All Active Directory Authentication is performed against individual domain controller entries. A domain
controller entry consists of 6 items:
•
Server Name—A text description to identify the domain controller. As a best practice, Cisco
recommends identifying the domain controller and the account suffix in this field (although it can
be set to anything that you choose.)
•
User Account Suffix—Every user in Active Directory has a full user logon name which appears as
“username@domain.” Typing the @domain suffix (including the @ symbol) in this field allows
sponsor users not to have to enter their full user logon name.
•
Domain Controller IP Address—The IP address of the domain controller that the sponsor user
authenticates against.
•
Base DN—The root of the Active Directory. This allows an LDAP search to be performed to find
the user group of the sponsor.
•
AD Username— The user account that has permissions to search the AD. This allows an LDAP
search for the user group of the sponsor.
•
AD Password—The password for the user account that has permissions to search the AD.
To allow you to authenticate different user account suffixes against the same domain controller, you can
create multiple domain controller entries with the same IP address and different user Account suffixes.
All that needs to be different in each entry is the Server Name, User Account Suffix and Base DN.
To provide resilience in the event of a domain controller failure, you can enter multiple entries for the
same User Account Suffix with different Domain Controller IP Addresses. All that needs to be different
in each entry is the Server Name.
The Guest Server attempts to authenticate sponsors against each Domain Controller entry according to
the Authentication Order specified in Configuring Sponsor Authentication Settings, page 4-18.
Cisco NAC Guest Server Installation and Configuration Guide
OL-15986-01
4-5
Chapter 4
Configuring Sponsor Authentication
Configuring Active Directory (AD) Authentication
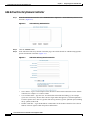
Add Active Directory Domain Controller
Step 1
From the administration interface select Authentication > Sponsors > Active Directory Servers from
the menu. (Figure 4-6).
Figure 4-6
Active Directory Authentication
Step 2
Click the Add DC button.
Step 3
In the Add Active Directory Domain Controller page, enter all the details for authenticating against a
specific AD Domain Controller (Figure 4-7).
Figure 4-7
Add Active Directory Domain Controller
•
Server Name—Type a text description of the AD Server Name and account suffix for the domain
controller, for example: CCA.CISCO.COM.
•
User Account Suffix—Type the User Account Suffix and include the leading @, for example:
@cca.cisco.com. Every AD user has a full user logon name that appears as “username@domain.”
To allow sponsors not to have to type their full user logon name, type the @domain part (including
the @ symbol) in this field.
•
Domain Controller —Type the IP address or DNS name for the domain controller. This is the IP
address of the DC against which the sponsor authenticates.
Cisco NAC Guest Server Installation and Configuration Guide
4-6
OL-15986-01
Chapter 4
Configuring Sponsor Authentication
Configuring Active Directory (AD) Authentication
•
Base DN—Type the Base Distinguished Name (DN) of the domain controller. This is the name of
the root of the directory tree. It is used so that when group searches are performed, the Guest Server
knows from where to start. An example of the base DN for the domain cca. cisco.com is
DC=cca,DC=cisco,DC=com.
•
AD Username—Type a username that has permissions to search the Active Directory using LDAP.
This allows the Guest Server find out details about users such as the list of groups to which they
belong.
•
AD Password—In addition to the AD Username, type the password for that account.
•
Confirm AD Password— Retype the password to make sure it is correct.
•
Status—Select the status of the Domain Controller. If it is set to Active, the Guest Server will use
it for authenticating sponsors. If it is set to Disabled, it will not be used.
Step 4
Optionally click the Test Connection button to verify the settings are correct for the domain controller.
The Test Connection will authenticate with the specified AD Username and Password to verify the
settings.
Step 5
Click the Add Domain Controller button.
Edit Existing Domain Controller
Step 1
From the administration interface select Authentication > Sponsor > Active Directory Servers from
the menu.
Step 2
Select the Active Directory Domain Controller from the list and click the Edit DC button (Figure 4-8).
Figure 4-8
Step 3
Select Domain Controller to Edit
In the Active Directory Domain Controller page (Figure 4-9), edit the details for authenticating against
this AD domain controller.
Cisco NAC Guest Server Installation and Configuration Guide
OL-15986-01
4-7
Chapter 4
Configuring Sponsor Authentication
Configuring Active Directory (AD) Authentication
Figure 4-9
Step 4
Edit DC Settings
Modify settings as needed:
•
User Account Suffix—Edit the User Account Suffix and include the leading @, for example:
@cca.cisco.com. Every AD user has a full user logon name that appears as “username@domain.”
To allow sponsors not to have to type their full user logon name, type the @domain part (including
the @ symbol) in this field.
•
Domain Controller IP Address—Edit the IP address for the domain controller. This is the IP address
of the DC against which the sponsor authenticates.
•
Base DN—Edit the Base Distinguished Name (DN) of the domain controller. This is the name of
the root of the directory tree. It is used so that when group searches are performed, the Guest Server
knows from where to start. An example of the base DN for the domain cca. cisco.com is
DC=cca,DC=cisco,DC=com.
•
AD Username—Edit the username that has permissions to search the Active Directory using LDAP.
This allows the Guest Server find out details about users such as the list of groups to which they
belong.
Note
If you do not want to change the password, leaving both password entries empty preserves the
existing password.
•
AD Password—Edit the password for that AD user account that has search permissions.
•
Confirm AD Password—Retype the password to make sure it is correct.
•
Status—Select the status of the Domain Controller. If it is set to Active, the Guest Server will use
it for authenticating sponsors. If it is set to Disabled, it will not be used.
Step 5
Optionally click the Test Connection button to verify the settings are correct for the domain controller.
The Test Connection will authenticate with the specified AD Username and Password to verify the
settings.
Step 6
Click the Save Settings button.
Cisco NAC Guest Server Installation and Configuration Guide
4-8
OL-15986-01
Chapter 4
Configuring Sponsor Authentication
Configuring LDAP Authentication
Delete Existing Domain Controller Entry
Step 1
From the administration interface, select Authentication > Sponsor > Active Directory Servers from
the menu.
Step 2
Select the domain controller from the list (Figure 4-10).
Figure 4-10
Delete Domain Controller entries
Step 3
Click the Delete DC button.
Step 4
Confirm deletion of the Domain Controller at the prompt.
If there are any errors, the DC is not changed and an error message displays at the top of the page. If
successfully deleted, a success message displays at the top of the page and you can perform additional
Domain Controller operations.
Configuring LDAP Authentication
LDAP Authentication authenticates sponsor users to the Guest Server using their existing LDAP user
accounts. This keeps sponsors from having to remember another set of user names and passwords just
to authenticate to the Guest Server. It also enables the administrator to quickly roll out Guest Access
because there is no need to create and manage additional sponsor accounts. LDAP authentication allows
you to do the following:
•
Add an LDAP Server
•
Edit an Existing LDAP Server
•
Delete an Existing LDAP Server Entry
LDAP authentication supports authentication against multiple LDAP Servers.
An LDAP server entry consists of multiple items:
•
LDAP Server Name—A text description to identify the LDAP Server.
•
LDAP Server URL—This is the URL to access the LDAP server such as ldap://ldap.cisco.com.
•
Port—The TCP port used to contact the LDAP server, such as port 389.
•
Version—The LDAP version to use (version 1, 2 or 3).
Cisco NAC Guest Server Installation and Configuration Guide
OL-15986-01
4-9
Chapter 4
Configuring Sponsor Authentication
Configuring LDAP Authentication
•
Base DN—This is the Distinguished Name of the container object where an LDAP search to find
the user begins, such as OU=Engineering,O=Cisco.
•
User Search Filter—The User Search Filter defines how user entries are named in the LDAP server.
For example, you can define them as uid (uid=%USERNAME%) or cn (cn=%USERNAME%).
•
Group Mapping—There are two main methods that LDAP servers use for assigning users to groups:
1.
Storing the group membership in an attribute of the user object. With this method the user object
has one or more attributes that list the groups that the user is a member of. If your LDAP server
uses this method of storing group membership, you need to enter the name of the attribute which
holds the groups the user is a member of.
2.
Storing the user membership in an attribute of the group object. With this method there is a
group object that contains a list of the users who are members of the group. If your LDAP server
uses this method, you need to specify the group to check under the LDAP mapping section of a
User Group you want to match the user to.
To determine which method to use, Cisco recommends checking the LDAP documentation for your
server or using an LDAP browser like the one available at http://www.ldapbrowser.com/ to check
the attributes of the server.
•
Username—The user account that has permissions to search the LDAP server. This is needed so that
the Cisco NAC Guest Server can search for the user account and group mapping information.
•
Password—The password for the user account that has permissions to search the LDAP server.
To provide resilience in the event of an LDAP server failure, you can enter multiple entries for high
availability LDAP servers pointing to the same database. All that needs to be different in each entry is
the Server name and URL.
The Guest Server attempts to authenticate sponsors against each LDAP server entry in the order specified
by Authentication Order detailed in the Configuring Sponsor Authentication Settings section.
To verify that you have the correct LDAP credentials for connecting to your LDAP server, Cisco
recommends testing an LDAP browser like the one available at http://www.ldapbrowser.com/.
Cisco NAC Guest Server Installation and Configuration Guide
4-10
OL-15986-01
Chapter 4
Configuring Sponsor Authentication
Configuring LDAP Authentication
Add an LDAP Server
Step 1
From the administration interface select Authentication > Sponsors > LDAP Servers from the menu
(Figure 4-11).
Figure 4-11
LDAP Authentication
Step 2
Click the Add LDAP button.
Step 3
In the Add LDAP Server page, enter all the details for authenticating against a specific LDAP server
(Figure 4-12).
Figure 4-12
Add LDAP Server
Cisco NAC Guest Server Installation and Configuration Guide
OL-15986-01
4-11
Chapter 4
Configuring Sponsor Authentication
Configuring LDAP Authentication
•
LDAP Server Name—Type a text description of the LDAP Server Name. For example:
Cisco LDAP - ldap.cisco.com.
•
LDAP Server URL—Enter the URL for accessing the LDAP server, such as ldap://ldap.cisco.com
or ldaps://ldap.cisco.com.
•
Port—Enter the TCP port used to connect to the LDAP server. The common port for LDAP is 389.
•
Version—The version of LDAP that the server supports (version 1, 2 or 3).
•
Base DN—This is the Distinguished Name of the container object where an LDAP search to find
the user will be started from, such as OU=Users,O=Cisco.com or OU=Engineering,O=Cisco.
•
User Search Filter—The User Search Filter defines how user entries are named in the LDAP server.
For example you can define them to be uid (uid=%USERNAME%) or cn (cn=%USERNAME%).
The %USERNAME% should be placed where the username will be inserted in a search.
•
Group Mapping—There are two main methods that LDAP servers use for assigning users to groups:
1.
Storing the group membership in an attribute of the user object. With this method the user object
has one or more attributes that list the groups that the user is a member of. If your LDAP server
uses this method of storing group membership, you need to enter the name of the attribute which
holds the groups the user is a member of. This attribute may be called something like
groupMembership, memberOf, or group.
2.
Storing the user membership in an attribute of the group object. With this method there is a
group object that contains a list of the users who are members of the group. If your LDAP server
uses this method, you need to specify the group to check under the LDAP mapping section of a
User Group you want to match the user to.
To determine which method to use, Cisco recommends checking the LDAP documentation for your
server or using an LDAP browser like the one available at http://www.ldapbrowser.com/ to check
the attributes of the server.
•
Username—The user account that has permissions to search the LDAP server. This is needed so that
the Cisco NAC Guest Server can search for the user account and group mapping information.
•
Password—The password for the user account that has permissions to search the LDAP server.
•
Confirm Password—Repeat the password to make sure it matches.
•
Status—Select the status of the LDAP server. If it is set to Active the Guest Server will use it for
authenticating sponsors. If it is set to Disabled it will not be used.
Step 4
Optionally click the Test Connection button to verify the settings are correct for the LDAP server. The
Test Connection will bind with the username and password specified to the LDAP server to verify that
it can bind successfully.
Step 5
Click the Add LDAP Server button.
Edit an Existing LDAP Server
Step 1
From the administration interface select Authentication > Sponsor > LDAP Servers from the menu.
Step 2
Select the Active Directory Domain Controller from the list and click the Edit DC button (Figure 4-13).
Cisco NAC Guest Server Installation and Configuration Guide
4-12
OL-15986-01
Chapter 4
Configuring Sponsor Authentication
Configuring LDAP Authentication
Figure 4-13
Step 3
In the LDAP Server page (Figure 4-14), edit the details for authenticating against this LDAP server.
Figure 4-14
Step 4
Select LDAP Server to Edit
Edit LDAP Server Settings
Modify settings as needed:
•
LDAP Server URL—Enter the URL for accessing the LDAP server, such as ldap://ldap.cisco.com
or ldaps://ldap.cisco.com.
•
Port—Enter the TCP port used to connect to the LDAP server. The common port for LDAP is 389.
•
Version—The version of LDAP that the server supports (version 1, 2 or 3).
•
Base DN—This is the Distinguished Name of the container object where an LDAP search to find
the user will be started from, such as OU=Users,O=Cisco.com or OU=Engineering,O=Cisco.
Cisco NAC Guest Server Installation and Configuration Guide
OL-15986-01
4-13
Chapter 4
Configuring Sponsor Authentication
Configuring LDAP Authentication
•
User Search Filter—The User Search Filter defines how user entries are named in the LDAP server.
For example you can define them to be uid (uid=%USERNAME%) or cn (cn=%USERNAME%).
The %USERNAME% should be placed where the username will be inserted in a search.
•
Group Mapping—There are two main methods that LDAP servers use for assigning users to groups:
1.
Storing the group membership in an attribute of the user object. With this method the user object
has one or more attributes that list the groups that the user is a member of. If your LDAP server
uses this method of storing group membership, you need to enter the name of the attribute which
holds the groups the user is a member of. This attribute may be called something like
groupMembership, memberOf, or group.
2.
Storing the user membership in an attribute of the group object. With this method there is a
group object that contains a list of the users who are members of the group. If your LDAP server
uses this method, you need to specify the group to check under the LDAP mapping section of a
User Group you want to match the user to.
To determine which method to use, Cisco recommends checking the LDAP documentation for your
server or using an LDAP browser like the one available at http://www.ldapbrowser.com/ to check
the attributes of the server.
•
Username—The user account that has permissions to search the LDAP server. This is needed so that
the Cisco NAC Guest Server can search for the user account and group mapping information.
•
Password—The password for the user account that has permissions to search the LDAP server.
•
Confirm Password—Repeat the password to make sure it matches.
Note
•
If you do not want to change the password, leaving both password entries empty preserves the
existing password.
Status—Select the status of the LDAP Server. If it is set to Active the Guest Server will use it for
authenticating sponsors. If it is set to Disabled it will not be used.
Step 5
Optionally click the Test Connection button to verify the settings are correct for the LDAP server. The
Test Connection will bind with the username and password specified to the LDAP server to verify that
it can bind successfully.
Step 6
Click the Save Settings button.
Delete an Existing LDAP Server Entry
Step 1
From the administration interface select Authentication > Sponsor > LDAP Servers from the menu.
Step 2
Select the LDAP Server from the list (Figure 4-15).
Cisco NAC Guest Server Installation and Configuration Guide
4-14
OL-15986-01
Chapter 4
Configuring Sponsor Authentication
Configuring RADIUS Authentication
Figure 4-15
Delete LDAP Server entries
Step 3
Click the Delete LDAP button.
Step 4
Confirm deletion of the LDAP Server at the prompt.
If there are any errors, the LDAP Server is not changed and an error message displays at the top of the
page. If successfully deleted, a success message displays at the top of the page and you can perform
additional LDAP Server operations.
Configuring RADIUS Authentication
RADIUS Authentication authenticates sponsor users to the Guest Server using their existing RADIUS
user accounts. This keeps sponsors from having to remember another set of user names and passwords
just to authenticate to the Guest Server. It also enables the administrator to quickly roll out Guest Access
because there is no need to create and manage additional sponsor accounts. RADIUS authentication
allows you to do the following:
•
Add a RADIUS Server
•
Edit an Existing RADIUS Server
•
Delete an Existing RADIUS Server Entry
RADIUS authentication supports authentication against multiple RADIUS servers, you can
A RADIUS server entry consists of multiple items:
•
RADIUS Server Name—A text description to identify the LDAP Server.
•
Server IP Address—This is the IP Address of the RADIUS Server.
•
Port—The UDP port to contact the ldap server, commonly either 1645 or 1812.
•
Secret—The shared secret used to secure communications between the RADIUS server and the
Cisco NAC Guest Server.
Cisco NAC Guest Server Installation and Configuration Guide
OL-15986-01
4-15
Chapter 4
Configuring Sponsor Authentication
Configuring RADIUS Authentication
Add a RADIUS Server
Step 1
From the administration interface select Authentication > Sponsors > RADIUS Servers from the menu
(Figure 4-16).
Figure 4-16
RADIUS Authentication
Step 2
Click the Add Radius button.
Step 3
In the Add RADIUS Server page, enter all the details for authenticating against a specific RADIUS
server (Figure 4-17).
Figure 4-17
Step 4
Add RADIUS Server
•
Server Name—Type a text description of the RADIUS Server Name, for example:
Cisco RADIUS - radius.cisco.com.
•
Server IP Address—Enter the IP address or domain name of the RADIUS server.
•
Port—Enter the UDP port used to connect to the RADIUS server. The common ports for RADIUS
authentication are ports 1645 or 1812.
•
Radius Secret—The shared secret used to secure the communications between the Cisco NAC Guest
Server and the RADIUS server.
•
Status—Select the status of the RADIUS Server. If it is set to Active, the Guest Server will use it
for authenticating sponsors. If it is set to Disabled, it will not be used.
Click the Add Radius Server button.
Cisco NAC Guest Server Installation and Configuration Guide
4-16
OL-15986-01
Chapter 4
Configuring Sponsor Authentication
Configuring RADIUS Authentication
Edit an Existing RADIUS Server
Step 1
From the administration interface select Authentication > Sponsor > Radius Servers from the menu.
Step 2
Select the RADIUS server from the list and click the Edit Radius button (Figure 4-18).
Figure 4-18
Step 3
In the RADIUS Server Details page (Figure 4-19), edit the details for authenticating against this
RADIUS server.
Figure 4-19
Step 4
Select RADIUS Server to Edit
Edit RADIUS Server Settings
Modify settings as needed:
•
Server IP Address—Enter the IP address or domain name of the RADIUS server.
•
Port—Enter the UDP port used to connect to the RADIUS server. The common ports for RADIUS
authentication are ports 1645 or 1812.
•
Radius Secret—The shared secret used to secure the communications between the Cisco NAC Guest
Server and the RADIUS server.
Note
•
If you do not want to change the shared secret, leaving both secret entries empty preserves the
existing shared secret.
Status —Select the status of the RADIUS Server. If it is set to Active, the Guest Server will use it
for authenticating sponsors. If it is set to Disabled, it will not be used.
Cisco NAC Guest Server Installation and Configuration Guide
OL-15986-01
4-17
Chapter 4
Configuring Sponsor Authentication
Configuring Sponsor Authentication Settings
Step 5
Click the Save Settings button.
Delete an Existing RADIUS Server Entry
Step 1
From the administration interface select Authentication > Sponsor > Radius Servers from the menu.
Step 2
Select the RADIUS server from the list (Figure 4-20).
Figure 4-20
Delete RADIUS Server Entries
Step 3
Click the Delete Radius button.
Step 4
Confirm deletion of the RADIUS server at the prompt.
If there are any errors, the RADIUS server is not changed and an error message displays at the top of the
page.If successfully deleted, a success message displays at the top of the page and you can perform
additional RADIUS operations.
Configuring Sponsor Authentication Settings
Changing the Order of Authentication Servers
When a sponsor authenticates against the Cisco NAC Guest Server it tries each authentication server that
has been defined in order until it successfully authenticates a sponsor. If none of the authentication
servers can authenticate the sponsor an error message is returned.
As you can define many different authentication servers of different kinds you can order them in any way
that you want on a server-by-server basis.
Step 1
From the administration interface select Authentication > Sponsor > Authentication Order from the
menu (Figure 4-21).
Cisco NAC Guest Server Installation and Configuration Guide
4-18
OL-15986-01
Chapter 4
Configuring Sponsor Authentication
Configuring Sponsor Authentication Settings
Figure 4-21
Authentication Order.
The first server to be authenticated against is at the top of the list and the last at the bottom.
Step 2
Select the server that you want to re-order from the list and click either the move up or move down
button. Perform this action with all the servers until they are in the correct order.
Step 3
To save the authentication order click the Change Order button.
Sponsor Timeouts
When a sponsor is logged in to the Cisco NAC Guest Server they should be logged out after a period of
inactivity. You can set the inactivity period through the sponsor settings page.
Step 1
From the administration interface select Authentication > Sponsor > Settings from the menu
(Figure 4-22).
Figure 4-22
Session Timeouts.
Step 2
Enter the session timeout value (in minutes). When a sponsor has been inactive for this amount of time,
their session expire and the next action they perform takes them to the login page.
Step 3
Click the Save Settings button to save the session timeout.
Cisco NAC Guest Server Installation and Configuration Guide
OL-15986-01
4-19
Chapter 4
Configuring Sponsor Authentication
Configuring Sponsor Authentication Settings
Cisco NAC Guest Server Installation and Configuration Guide
4-20
OL-15986-01
CH A P T E R
5
Configuring User Group Permissions
User groups are the method by which to assign permissions to the sponsors. You can set role-based
permissions for sponsors to allow or restrict access to different functions, such as creating accounts,
modifying accounts, generating reports, and sending account details to guests by email or SMS.
Once you have created a user group you should then create mapping rules to map the sponsor to a group
based upon information returned from the authentication server such as Active Directory Group, LDAP
Group membership, or RADIUS Class attribute.
Tip
By default all users are assigned to the DEFAULT group. I f you only want to have a single classification
of sponsors, you can edit the DEFAULT group.
This chapter describes the following:
•
Adding User Groups
•
Editing User Groups
•
Deleting User Groups
•
Specifying the Order of User Groups
•
Mapping to Active Directory Groups
•
Mapping to LDAP Groups
•
Mapping to RADIUS Groups
Adding User Groups
You can create a new sponsor user group using the following steps.
Step 1
From the administration interface select Authentication > User Groups from the left hand menu
(Figure 5-1).
Cisco NAC Guest Server Installation and Configuration Guide
OL-15986-01
5-1
Chapter 5
Configuring User Group Permissions
Adding User Groups
Figure 5-1
User Groups
Step 2
Click the Add Group button to add a new user group.
Step 3
From the Add a New User Group page (Figure 5-2), enter the name for a new user group.
Figure 5-2
Step 4
Click the Add Group button to add a user group. You can now edit the settings for the new user group.
(Figure 5-3).
Figure 5-3
Step 5
Add New User Group
Edit New User Group
Set Permissions for the new User Group as follows:
Cisco NAC Guest Server Installation and Configuration Guide
5-2
OL-15986-01
Chapter 5
Configuring User Group Permissions
Adding User Groups
•
Allow Login—Select Yes to allow sponsors in this group to access the Cisco NAC Guest Server.
Otherwise, select No.
•
Create Account—Select Yes to allow sponsors to create guest accounts. Select No otherwise.
•
Create Bulk Accounts—Select Yes to allow sponsors to be able to create multiple accounts at a time
by pasting in the details. Otherwise, select No.
•
Create Random Accounts—Select Yes to allow sponsors to be able to create multiple random
accounts without initially capturing guests details. Otherwise, select No.
•
Import CSV— Select Yes to allow sponsors to be able to create multiple accounts at a time by
importing the details from a CSV file. Otherwise, select No.
•
Send Email—Select Yes to allow sponsors to send account details via email from the Guest Server
to the guest user. Otherwise, select No.
•
Send SMS—Select Yes to allow sponsors to send account details via SMS from the Guest Server to
the guest user. Otherwise, select No.
•
Edit Account—Choose one of the following permissions for editing the end date/time on guest
accounts:
– No—Sponsors are not allowed to edit any accounts.
– Own Account—Sponsors are allowed to edit only the accounts they created.
– All Accounts—Sponsors are allowed to edit any guest accounts.
•
Suspend Account—Choose one of the following options for suspending accounts:
– No—Sponsors are not allowed to suspend any accounts.
– Own Account—Sponsors are allowed to suspend only the accounts they created.
– All Accounts—Sponsors are allowed to suspend any guest accounts.
•
Active Accounts—Choose one of the following permissions for viewing reporting details for active
accounts
– No—Sponsors are not allowed to view reporting details on any accounts.
– Own Account—Sponsors are allowed to view reporting details for only the accounts they
created.
– All Accounts—Sponsors are allowed to view reporting details on any active guest accounts.
•
Full Reporting—Choose one of the following permissions for running full reporting:
– No—Sponsors are not allowed to run full reporting on any accounts.
– Own Account—Sponsors are allowed to run full reporting for only the accounts they created.
– All Accounts—Sponsors are allowed to run full reporting on any active guest accounts.
•
Number of days in the future—This specifies how long in the future that guests can create accounts.
Specify the maximum number of days that they are allowed to create accounts in the future.
•
Maximum duration of account—This specifies the maximum length (in days) that the sponsor can
configure for an account.
•
Show account dates as—This defines the method a sponsor can use to specify when an account is
valid. There are two options:
– Start Date/End Date—The sponsor is shown a calendar they can use to specify the time and date
an account starts and ends.
Cisco NAC Guest Server Installation and Configuration Guide
OL-15986-01
5-3
Chapter 5
Configuring User Group Permissions
Editing User Groups
– Template Options—You can specify a list of preset durations that the sponsor can use when
creating accounts, such as 1 hour, 1 day, or 3 days. If this is selected the template options are
shown on the Create Guest page. The maximum template option cannot be greater than the value
specified in the maximum duration.
Step 6
Note
Step 7
Click the Save Group button to add the group with the permissions specified.
Until you click the Save Group button on this screen, the group will not be created.
Follow the instructions in Mapping to Active Directory Groups, page 5-8, Mapping to LDAP Groups,
page 5-8 or Mapping to RADIUS Groups, page 5-10 so that you can correctly map users to your group
based upon group information from the authentication server.
Editing User Groups
The following steps describe how to edit sponsor user groups.
Step 1
From the administration interface select Authentication > User Groups from the left hand menu.
Step 2
Select the group you wish to edit and click the Edit Group button (Figure 5-4).
Figure 5-4
Step 3
Select the User group to Edit
In the Edit an existing User Group page (Figure 5-5), change the settings for the group.
Cisco NAC Guest Server Installation and Configuration Guide
5-4
OL-15986-01
Chapter 5
Configuring User Group Permissions
Editing User Groups
Figure 5-5
Step 4
Edit User Group
Edit Permissions for the User Group as follows:
•
Allow Login—Select Yes to allow sponsors in this group to access the Cisco NAC Guest Server.
Otherwise, select No.
•
Create Account—Select Yes to allow sponsors to create guest accounts. Otherwise, select No.
•
Create Bulk Accounts—Select Yes to allow sponsors to be able to create multiple accounts at a time
by pasting in the details. Otherwise, select No.
•
Create Random Accounts—Select Yes to allow sponsors to be able to create multiple random
accounts without initially capturing guests details. Otherwise, select No.
•
Import CSV— Select Yes to allow sponsors to be able to create multiple accounts at a time by
importing the details from a CSV file. Otherwise, select No.
•
Send Email—Select Yes to allow sponsors to send account details via email from the Guest Server
to the guest user. Otherwise, select No.
•
Send SMS—Select Yes to allow sponsors to send account details via SMS from the Guest Server to
the guest user. Otherwise, select No.
•
Edit Account—Choose one of the following permissions for editing the end date/time on guest
accounts:
– No—Sponsors are not allowed to edit any accounts.
– Own Account—Sponsors are allowed to edit only the accounts they created.
– All Accounts—Sponsors are allowed to edit any guest accounts.
•
Suspend Account—Choose one of the following options for suspending accounts:
– No—Sponsors are not allowed to suspend any accounts.
– Own Account—Sponsors are allowed to suspend only the accounts they created.
– All Accounts—Sponsors are allowed to suspend any guest accounts.
Cisco NAC Guest Server Installation and Configuration Guide
OL-15986-01
5-5
Chapter 5
Configuring User Group Permissions
Deleting User Groups
•
Active Accounts—Choose one of the following permissions for viewing reporting details for active
accounts
– No—Sponsors are not allowed to view reporting details on any accounts.
– Own Account—Sponsors are allowed to view reporting details for only the accounts they
created.
– All Accounts—Sponsors are allowed to view reporting details on any active guest accounts.
•
Full Reporting—Choose one of the following permissions for running full reporting:
– No—Sponsors are not allowed to run full reporting on any accounts.
– Own Account—Sponsors are allowed to run full reporting for only the accounts they created.
– All Accounts—Sponsors are allowed to run full reporting on any active guest accounts.
•
Number of days in the future—This specifies how long in the future that guests can create accounts.
Specify the maximum number of days that they are allowed to create accounts in the future.
•
Maximum duration of account—This specifies the maximum length (in days) that the sponsor can
configure for an account.
•
Show account dates as—This defines the method a sponsor can use to specify when an account is
valid. There are two options:
– Start Date/End Date—The sponsor is shown a calendar they can use to specify the time and date
an account starts and ends.
– Template Options—You can specify a list of preset durations that the sponsor can use when
creating accounts, such as 1 hour, 1 day, or 3 days. If this is selected the template options are
shown on the Create Guest page. The maximum template option cannot be greater than the value
specified in the maximum duration.
Step 5
Click the Save Group button to save the changes to the group.
Step 6
Follow the instruction in Mapping to Active Directory Groups, page 5-8, Mapping to LDAP Groups,
page 5-8 or Mapping to RADIUS Groups, page 5-10 so that you can correctly map users to your group
based upon group information from the authentication server.
Deleting User Groups
Step 1
From the administration interface select Authentication > User Groups from the left hand menu.
Cisco NAC Guest Server Installation and Configuration Guide
5-6
OL-15986-01
Chapter 5
Configuring User Group Permissions
Specifying the Order of User Groups
Figure 5-6
List Groups to Delete
Step 2
Select the group you wish to delete and click the Delete Group button (Figure 5-6).
Step 3
Confirm deletion at the prompt.
Note
If any Local Users are part of this group, you must delete the user before deleting the user group.
Alternatively, you can move Local Users to another group to “empty” it before deleting the user group.
Specifying the Order of User Groups
When a sponsor logs in to the Cisco NAC Guest Server, the system checks each group in turn to see if
the sponsor should be given the privileges of that group. The groups are processed in the order in which
they appear in the User Groups list box (Figure 5-7). If a user does not match a user group, they are given
the privileges of the DEFAULT group.
Step 1
From the administration interface select Authentication > User Groups from the left hand menu.
Figure 5-7
Order User Groups
Step 2
Select the group you wish to order and click the up or down button until the group is in position
(Figure 5-7).
Step 3
Repeat for all groups until they appear in the order you require.
Step 4
Click the Change Order button to save the order.
Cisco NAC Guest Server Installation and Configuration Guide
OL-15986-01
5-7
Chapter 5
Configuring User Group Permissions
Mapping to Active Directory Groups
Mapping to Active Directory Groups
If a sponsor authenticates to the Cisco NAC Guest Server using Active Directory authentication then the
Cisco NAC Guest Server can map them into a user group by their membership in Active Directory
groups.
If you have configured AD authentication (as described in Configuring Active Directory (AD)
Authentication, page 4-5), then the Guest Server automatically retrieves a list of all the groups
configured within all the AD servers configured.
Selecting an Active Directory Group from the dropdown provides all sponsor users who are in this AD
group the permissions of this group.
Step 1
Select Active Directory Mapping from the top menu when in the add user group or edit user group
screen.
Figure 5-8
Step 2
Note
Active Directory Group Mapping
Select the group you wish to match against and click the Assign Group button.
By default, Active Directory only returns a maximum of 1000 groups in response to a Cisco NAC Guest
Server search. If you have more than 1000 groups and have not increased the LDAP search size, it is
possible that the group you want to match will not appear. In this situation, you can manually enter the
group name in the Active Directory Group combo box.
Mapping to LDAP Groups
If a sponsor authenticates to the Cisco NAC Guest Server using LDAP authentication then the Cisco
NAC Guest Server can map them into a user group by their membership of LDAP groups.
Based on the settings of the LDAP server that you authenticate against the Cisco NAC Guest Server will
use one of two methods for mapping the sponsor using group information.
There are two main methods that LDAP servers use for assigning users to groups.
Cisco NAC Guest Server Installation and Configuration Guide
5-8
OL-15986-01
Chapter 5
Configuring User Group Permissions
Mapping to LDAP Groups
1.
Storing the group membership in an attribute of the user object. With this method the user object
has one or more attributes that list the groups that the user is a member of. If your LDAP server
uses this method of storing group membership then you need to enter the name of the attribute
which holds the groups the user is a member of.
2.
Storing the user membership in an attribute of the group object. With this method there is a
group object that contains a list of the users who are members of the group. If your LDAP server
uses this method then you need to specify the group to check under the LDAP mapping section
of a User Group you want to match the user to.
When you define the LDAP server you will have specified one of these options.
If the LDAP server supports the first option then you will have to specify to check the user attribute for
a certain string.
If the LDAP server supports the second option then you will need to enter the full DN of the group you
want to check membership of. The Cisco NAC Guest Server will then look in the attribute to make sure
that it contains the name of the user who has logged in.
Step 1
Select LDAP Mapping from the top menu when in the add user group or edit user group screen
(Figure 5-9).
Figure 5-9
LDAP Group Mapping
Step 2
If your LDAP server uses user attributes to store group membership then enter the group name to check
is either contained or equals the specified string.
Step 3
If your LDAP server stores group membership in the group object then specify the full DN of the group
you want to check and the name of the attribute that will be checked for the sponsors username.
Step 4
Click the Assign Attributes button to save the LDAP group mapping.
Note
You can specify both options for the same group. The option that you check depends on the setting on
the LDAP server with which the sponsor successfully authenticates.
Cisco NAC Guest Server Installation and Configuration Guide
OL-15986-01
5-9
Chapter 5
Configuring User Group Permissions
Mapping to RADIUS Groups
Mapping to RADIUS Groups
If a sponsor authenticates to the Cisco NAC Guest Server using RADIUS authentication then the Cisco
NAC Guest Server can map them into a user group by using information returned to the Cisco NAC Guest
Server in the authentication request.
The information must be placed into the class attribute on the RADIUS server.
Step 1
Select Radius Mapping from the top menu when in the add user group or edit user group page
(Figure 5-10).
Figure 5-10
RADIUS Group Mapping
Step 2
Enter the string you want to match against the class attribute that is returned in the RADIUS
authentication reply. You can specify from the drop-down if you want to exactly match the string (equals
the string) or match a substring (contains the string).
Step 3
Click the Assign Group button.
Cisco NAC Guest Server Installation and Configuration Guide
5-10
OL-15986-01
CH A P T E R
6
Configuring Guest Policies
Organizations commonly have policies in place for creating accounts for their internal users and
systems, such as the format or length of the username and/or complexity of password. The Cisco NAC
Guest Server allows you to configure guest username and password creation policies to match your
organization’s policy or to create a policy specific to guest accounts.
You can also use the guest details policy to define specific guest user information on the Cisco NAC
Guest Server.
Setting the Username Policy
The Username Policy determines how to create user names for all guest accounts.
Step 1
From the administration interface, select Guest Policy > Username Policy from the left hand menu
(Figure 6-1).
Figure 6-1
Guest Username Policy
Cisco NAC Guest Server Installation and Configuration Guide
OL-15986-01
6-1
Chapter 6
Configuring Guest Policies
Setting the Password Policy
Step 2
Choose one of three options for creating the user name for the guest account.
•
Username Policy 1 (email)
Use the guest’s email address as the username. If an overlapping account with the same email
address exists, a random number is added to the end of the email address to make the username
unique. Overlapping accounts are accounts that have the same email address and are valid for an
overlapping period of time.
•
Username Policy 2 (FirstLast)
Create a username based on combining the first name and last name of the guest. You can set a
Minimum Username Length for this username from 1 to 20 characters (default is 10). User names
shorter than the minimum length are padded up to the minimum specified length with a random
number.
•
Username Policy 3 (Random)
Create a username based upon a random mixture of Alphabetic, Numeric or Other characters. Type
the characters to include to generate the random characters and the number to use from each set of
characters.
Note
Step 3
The total length of the username is determined by the total number of characters included.
When done, click Set Policy to have the username policy take effect.
Setting the Password Policy
The password policy determines how to create the password for all guest accounts.
Step 1
From the administration interface, select Guest Policy > Password Policy from the left hand menu
(Figure 6-2).
Cisco NAC Guest Server Installation and Configuration Guide
6-2
OL-15986-01
Chapter 6
Configuring Guest Policies
Setting the Guest Details Policy
Figure 6-2
Password Policy
Step 2
In the Alphabetic Characters section, enter the characters to use in the password and the amount to
include.
Step 3
In the Numeric Characters section, enter the numerals to use in the password and the amount to include.
Step 4
In the Other Characters section, enter the special characters to use in the password and the amount to
include.
Caution
For passwords, use only the following characters for the “Other Characters” field: ! $ ^ & * ( ) - _ = +
[ ] { } ; : @ # ~ , > ?.
Do not use the following characters in the “Other Characters” field, as they are not supported by the
Clean Access Manager API: £ % < ¬ ` ' \ |.
Step 5
Note
Click Set Policy to save the settings.
The total length of the password is determined by the total number of characters included. You can
choose between 0 and 20 characters per type (alphabetic, numeric, or other).
Setting the Guest Details Policy
The guest details policy determines what data the sponsor needs to enter to create a guest account.
Step 1
From the administration interface, select Guest Policy > Guest Details from the left hand menu
(Figure 6-3).
Cisco NAC Guest Server Installation and Configuration Guide
OL-15986-01
6-3
Chapter 6
Configuring Guest Policies
Setting the Guest Details Policy
Figure 6-3
Step 2
Step 3
Note
Guest Details Policy
You can specify one of three settings for each requirement:
•
Required—If a field is set to required it is displayed on the create guest page and it is mandatory for
the sponsor to complete.
•
Optional—If a field is set to optional it is displayed on the create guest page however the sponsor
can choose not to complete the field.
•
Unused—If a field is set to unused then it is not displayed on the create guest page and no value is
required.
Click the Save Settings button to save the guest details policy.
There are five additional fields that can have any information that you require entered into them. These
are described on the screen as Option 1 through Option 5. If you want to use these fields, Cisco
recommends customizing the text that is shown to the sponsor by editing the templates as described in
User Interface Templates, page 10-1.
Cisco NAC Guest Server Installation and Configuration Guide
6-4
OL-15986-01
CH A P T E R
7
Integrating with Cisco NAC Appliance
This chapter describes the following:
•
Adding Clean Access Manager Entries
•
Editing Clean Access Manager Entries
•
Deleting Clean Access Manager Entries
•
Configuring the CAM for Reporting
Guest users commonly authenticate to networks via a captive portal through which they provide their
authentication details using a web browser. Cisco NAC Appliance provides a secure guest user access
portal which administrators can customize.
The Cisco NAC Guest Server integrates with the Clean Access Manager through the use of the Cisco
NAC Appliance API. This is an HTTPS-based API that requires the Guest Server to communicate with
the Clean Access Manager, also known as the Clean Access Manager (CAM).
Note
Refer to the “API Support” section of the applicable Cisco NAC Appliance - Clean Access Manager
Installation and Configuration Guide for details on the Cisco NAC Appliance API.
The Cisco NAC Guest Server creates the guest user accounts on the CAM as Local User accounts
assigned to a specific role that you define for guest users. The Guest Server creates new accounts that
are valid every minute. Every minute it also removes accounts that have expired. When accounts are
suspended, the Guest Server removes both the accounts from the CAM and the guest users from the
network if they are logged in.
The Clean Access Manager can also send accounting information to the Cisco NAC Guest Server via
RADIUS accounting. This information is used for reporting and tracking of guests by access time and
IP address.
You may add multiple Clean Access Managers to the Cisco NAC Guest Server. When accounts are
provisioned they are created on all active Clean Access Managers that are defined.
Adding Clean Access Manager Entries
The following steps describe how to configure the Cisco NAC Guest Server and Cisco NAC Appliance
Manager so that they can communicate with one another. You must add API information to the Cisco
NAC Guest Server for each Clean Access Manager on which you want the Guest Server to create
accounts.
Cisco NAC Guest Server Installation and Configuration Guide
OL-15986-01
7-1
Chapter 7
Integrating with Cisco NAC Appliance
Adding Clean Access Manager Entries
Step 1
From the Guest Server administration interface, select Devices > NAC Appliance from the left hand
menu (Figure 7-1).
Figure 7-1
Step 2
Click the Add NAC button (Figure 7-2).
Figure 7-2
Step 3
Cisco NAC Appliances
Add Clean Access Manager
Enter the following settings in the NAC Appliance Details page (Figure 7-2):
•
Name—Type a descriptive name for the Clean Access Manager.
•
Hostname of Address—Type the DNS name or IP address for the CAM.
•
Admin Username—Enter an admin username which has API permission to the CAM.
•
Password—Type the password for the account.
•
Repeat Password—Retype the password to ensure it matches correctly.
•
Role—Type the name of the User Role on the CAM to which you will assign guest users. This
should match exactly with the User Role name configured on the CAM, including correct case.
•
Server Status—Set the status to be Active for the CAM to have accounts provisioned on it by the
Cisco NAC Guest Server.
Step 4
Click the Add NAC Manager button.
Step 5
Optionally click the Test Connection button to ensure that the settings are working correctly.
Cisco NAC Guest Server Installation and Configuration Guide
7-2
OL-15986-01
Chapter 7
Integrating with Cisco NAC Appliance
Editing Clean Access Manager Entries
Step 6
In the Clean Access Manager admin console, navigate to Monitoring > Event Logs and verify that the
account nacguest_test was successfully created and then deleted.
Editing Clean Access Manager Entries
The following steps describe how to edit an existing entry for a Clean Access Manager.
Step 1
From the Guest Server administration interface, select Devices > NAC Appliance from the left hand
menu (Figure 7-3).
Figure 7-3
Step 2
Select the Cisco NAC Appliance that you want to edit from the list and click the Edit NAC button
(Figure 7-4).
Figure 7-4
Step 3
List of Cisco NAC Appliances
Edit a Clean Access Manager
In the NAC Appliance Settings page (Figure 7-4), enter the following settings:
Cisco NAC Guest Server Installation and Configuration Guide
OL-15986-01
7-3
Chapter 7
Integrating with Cisco NAC Appliance
Deleting Clean Access Manager Entries
•
Hostname of Address—Type the DNS name or IP address for the CAM.
•
Admin Username—Enter an admin username which has API permission to the CAM.
•
Password—Type the password for the account.
•
Repeat Password—Retype the password to ensure it matches correctly.
•
Role—Type the name of the User Role on the CAM to which you will assign guest users. This
should match exactly with the User Role name configured on the CAM, including correct case.
•
Server Status—Set the status to be Active for the CAM to have accounts provisioned on it by the
Cisco NAC Guest Server.
Step 4
Click the Save Settings button.
Step 5
Optionally click the Test Connection button to ensure that the settings are working correctly.
Step 6
In the Clean Access Manager admin console, navigate to Monitoring > Event Logs and verify that the
account nacguest_test was successfully created and then deleted.
Deleting Clean Access Manager Entries
The following steps describe how to delete Cisco NAC Appliance entries.
Step 1
From the Guest Server administration interface, select Devices > NAC Appliance from the left hand
menu (Figure 7-5).
Figure 7-5
Step 2
List of Cisco NAC Appliances
Select the Cisco NAC Appliance that you want to delete from the list and click the Delete NAC button.
You will receive a warning message which you must agree to for the appliance entry to be deleted.
Configuring the CAM for Reporting
In order for the Cisco NAC Guest Server to correctly display details for guest users when reporting is
run, you need to configure the CAM to send RADIUS accounting information to the Guest Server.
Additionally, the CAM needs to format the information correctly.
Cisco NAC Guest Server Installation and Configuration Guide
7-4
OL-15986-01
Chapter 7
Integrating with Cisco NAC Appliance
Configuring the CAM for Reporting
Note
For detailed instructions on how to access and configure settings on the CAM, refer to the applicable
Cisco NAC Appliance - Clean Access Manager Installation and Configuration Guide.
Adding a RADIUS Accounting Server
Step 1
Log into the CAM web console as an admin user with an appropriate password (default
username/password is admin/cisco123).
Note
Step 2
Any CAM admin user with Edit privileges can perform this configuration.
Navigate to User Management > Auth Servers > Accounting > Server Config
Figure 7-6
Step 3
Step 4
Configure RADIUS Accounting Server
Click the checkbox for Enable RADIUS Accounting and configure the following fields:
•
Server Name— Type the IP address of the Cisco NAC Guest Server
•
Server Port —Type 1813 as the port
•
Timeout (sec)—Type a timeout value; 10 seconds is typically sufficient.
•
Shared Secret—Type the shared secret used with the Cisco NAC Guest Server. This must match the
shared secret configured on the Guest Server when adding the CAM as a RADIUS client to the Guest
Server, as described in Adding RADIUS Clients, page 8-2. Make sure both shared secrets are the
same.
•
NAS-IP-Address—Type the address of the CAM itself as the NAS-IP-Address.
Click the Update button.
Cisco NAC Guest Server Installation and Configuration Guide
OL-15986-01
7-5
Chapter 7
Integrating with Cisco NAC Appliance
Configuring the CAM for Reporting
Configure the CAM to Format RADIUS Accounting Data
The CAM can be configured to place many different attributes into the RADIUS accounting packets and
the attributes themselves can be formatted in many different ways. You need to configure the CAM to
send attribute information in a specific format so that the Cisco NAC Guest Server can understand it.
Note
Step 1
Refer to the “RADIUS Accounting” section of the applicable Cisco NAC Appliance - Clean Access
Manager Installation and Configuration Guide for additional details.
Log into the CAM admin console, and navigate to User Management > Auth Servers > Accounting >
Shared Events (Figure 7-7).
Figure 7-7
Step 2
Shared Events
On the Shared Events page, click the Edit button to the right of the User_Name attributes entry
Cisco NAC Guest Server Installation and Configuration Guide
7-6
OL-15986-01
Chapter 7
Integrating with Cisco NAC Appliance
Configuring the CAM for Reporting
Figure 7-8
Edit User Name Attribute
Step 3
In the Edit User_Name attribute page (Figure 7-8), click the Reset Element button to remove the
existing sample data format.
Step 4
Select User Name from the Add Data dropdown menu.
Step 5
Click the Add Data button.
Step 6
Click the Commit Changes button.
Step 7
The main Shared Events lists page reappears (Figure 7-9). Verify that the Data column lists
“[User_Name]”.
Figure 7-9
Step 8
Shared Events with Username Changed
Click the New Entry... link to the right of the page (Figure 7-9) to add additional attributes.
Cisco NAC Guest Server Installation and Configuration Guide
OL-15986-01
7-7
Chapter 7
Integrating with Cisco NAC Appliance
Configuring the CAM for Reporting
Figure 7-10
Add Calling Station Id Attribute
Step 9
In the New Shared Events attribute form (Figure 7-10), select Calling_Station_Id from the Send
RADIUS Attributes dropdown menu.
Step 10
Click the Change Attribute button.
Step 11
Select User IP from the Add Data dropdown menu.
Step 12
Click the Add Data button.
Step 13
Click Commit Changes.
Note
Remember to add the CAM as a RADIUS client using the instructions in Chapter 8, “Configuring
RADIUS Clients.”
Cisco NAC Guest Server Installation and Configuration Guide
7-8
OL-15986-01
CH A P T E R
8
Configuring RADIUS Clients
This chapter describes the following
•
Overview
•
Adding RADIUS Clients
•
Editing RADIUS Clients
•
Deleting RADIUS Clients
Overview
Remote Authentication Dial In User Service (RADIUS) is an AAA (authentication, authorization and
accounting) protocol. Cisco NAC Guest Server uses the RADIUS protocol to authenticate and audit
guests who login through RADIUS-capable network enforcement devices, such as Cisco Wireless LAN
Controllers.
Although the Cisco NAC Appliance uses its own API and a different method for creating accounts and
authenticating users, as described in Chapter 7, “Integrating with Cisco NAC Appliance,”it still uses
RADIUS Accounting to record user activity and therefore still needs to be configured as a RADIUS
client.
When a guest authenticates against a RADIUS client, such as the Wireless LAN Controller, the RADIUS
client uses RADIUS authentication to ask the Cisco NAC Guest Server whether the user authentication
is valid. If the guest authentication is valid, the Cisco NAC Guest Server returns a message stating that
the user is valid and the amount of time remaining before the user session expires. The RADIUS client
must honor the session-timeout attribute to remove the guest when the guest account time expires.
Note
The Cisco Wireless LAN Controller needs to be specifically configured to Allow AAA Override. This
enables it to honor the session-timeout attribute returned to it by the Cisco NAC Guest Server.
In addition to authentication, the RADIUS client device reports details to the Cisco NAC Guest Server,
such as the time the session started, time session ended, user IP address, and so on. This information is
transported over the RADIUS Accounting protocol.
Tip
If there is a Firewall between the Cisco NAC Guest Server and the RADIUS client, you will need to allow
traffic from UDP Port 1812 (RADIUS authentication) and UDP Port 1813 (RADIUS accounting) to pass.
Cisco NAC Guest Server Installation and Configuration Guide
OL-15986-01
8-1
Chapter 8
Configuring RADIUS Clients
Adding RADIUS Clients
Note
Any time you make a change to a RADIUS component on the Cisco NAC Guest Server, you will need
to Restart the RADIUS service for the changes to become active.
Adding RADIUS Clients
Step 1
From the administration interface select Devices > Radius Clients from the left hand menu.
Figure 8-1
Step 2
RADIUS Clients
In the Radius Clients page (Figure 8-1), click the Add Radius button to add a RADIUS client.
Figure 8-2
Add RADIUS Client
Step 3
In the Add Radius Client page (Figure 8-2), type a descriptive Name for the RADIUS client.
Step 4
Type the IP Address of the RADIUS client. This needs to match the IP address from which the RADIUS
request originates.
Cisco NAC Guest Server Installation and Configuration Guide
8-2
OL-15986-01
Chapter 8
Configuring RADIUS Clients
Editing RADIUS Clients
Step 5
Type a shared Secret for the RADIUS client. This must match the shared secret specified in the
configuration of the RADIUS client.
Step 6
Retype the shared secret in the Confirm Secret field.
Step 7
Type a Description of the client and any other information needed.
Step 8
If you want the RADIUS client to send any additional attributes upon successful authentication enter the
attribute name and value and click the Add button. You can enter as many attributes as you need. If you
want to remove an attribute select the attribute from the table and click the Delete button.
Step 9
Click the Add Radius Client button.
Step 10
From the administration interface select Devices > Radius Clients (Figure 8-1)from the left hand menu.
Step 11
Click the Restart button to restart the RADIUS service to make the changes take effect.
Editing RADIUS Clients
Step 1
From the administration interface select Devices > Radius Clients from the left hand menu.
Figure 8-3
Step 2
RADIUS Clients List
In the Radius Clients page (Figure 8-3), select the RADIUS client from the list and click the Edit Radius
button.
Cisco NAC Guest Server Installation and Configuration Guide
OL-15986-01
8-3
Chapter 8
Configuring RADIUS Clients
Deleting RADIUS Clients
Figure 8-4
Edit RADIUS Client
Step 3
In the Edit Radius Client page (Figure 8-4), edit the IP Address of the RADIUS client.
Step 4
Edit the shared secret used between the client and the Cisco NAC Guest Server in the Secret and
Confirm Secret fields.
Step 5
Make any desired changes to the Description.
Step 6
If you want the RADIUS client to send any additional attributes upon successful authentication enter the
attribute name and value and click the Add button. You can enter as many attributes as you need. If you
want to remove an attribute select the attribute from the table and click the Delete button.
Step 7
Click Save Settings.
Step 8
From the administration interface select Devices > Radius Clients (Figure 8-1)from the left hand menu.
Step 9
Click the Restart button to restart the RADIUS service to make the changes take effect.
Deleting RADIUS Clients
Step 1
From the administration interface select Devices > Radius Clients from the left hand menu.
Cisco NAC Guest Server Installation and Configuration Guide
8-4
OL-15986-01
Chapter 8
Configuring RADIUS Clients
Deleting RADIUS Clients
Figure 8-5
List RADIUS Clients
Step 2
In the Radius Clients page (Figure 8-5), select the RADIUS client from the list.
Step 3
Click the Delete Radius button and confirm the action.
Step 4
From the administration interface select Devices > Radius Clients (Figure 8-1)from the left hand menu.
Step 5
Click the Restart button to restart the RADIUS service to make the changes take effect.
Note
Any time you make a change to a RADIUS component, you will need to restart the RADIUS service for
the changes to become active.
Cisco NAC Guest Server Installation and Configuration Guide
OL-15986-01
8-5
Chapter 8
Configuring RADIUS Clients
Deleting RADIUS Clients
Cisco NAC Guest Server Installation and Configuration Guide
8-6
OL-15986-01
CH A P T E R
9
Guest Account Notification
When a guest account is created, the details of the account need to be passed from the sponsor to the
guest. The Cisco NAC Guest Server provides a number of ways to do this:
•
Manually reading the details to the guest from the screen
•
Printing the details out on paper
•
Sending the details in an email
•
Sending the details as an SMS text message
Sponsors always have the option of reading and printing out guest account details to guests.
Email and SMS text message notification require email servers to be configured, but can be configured
based upon policy.
Note
Email and SMS guest account notification policies need to be configured globally, then enabled per user
group for individual sponsor permissions.
This chapter describes the following
•
Configuring Email Notification
•
Configuring SMS Notification
Cisco NAC Guest Server Installation and Configuration Guide
OL-15986-01
9-1
Chapter 9
Guest Account Notification
Configuring Email Notification
Configuring Email Notification
The following steps describe how to configure email settings for the Cisco NAC Guest Server to
correctly deliver guest account details via email.
Step 1
From the administration interface, select Devices > Email Settings from the left hand menu.
Figure 9-1
Email Settings
Step 2
In the Email Settings page (Figure 9-1), click Yes for the Enable Email option to enable email
functionality globally for the Cisco NAC Guest Server.
Step 3
For SMTP Server, type the IP address of the outbound SMTP server to which you need to deliver email.
If you enter localhost, or leave this field empty, the Cisco NAC Guest Server attempts to deliver the email
directly to the guest’s SMTP server.
Step 4
In the Sent From Email Address field, type the email address from which you want guest notification
emails to be sent (for example, [email protected]).
Step 5
Click the Save Settings button.
Step 6
Click the Restart button. After any change to email settings, you need to Restart the Sendmail service
by clicking the Restart button so that the settings take effect.
Cisco NAC Guest Server Installation and Configuration Guide
9-2
OL-15986-01
Chapter 9
Guest Account Notification
Configuring SMS Notification
Configuring SMS Notification
Short Message Service (SMS) is delivered through an SMS gateway service that supports SMTP (Simple
Mail Transport Protocol) delivery. You need to have an internal SMS gateway service or subscribe to an
external service to be able to deliver guest details via SMS.
Step 1
From the administration interface select Devices > SMS Settings from the left hand menu.
Figure 9-2
SMS Settings
Step 2
In the SMS Settings page (Figure 9-2), change the Enable SMS option to Yes to globally enable SMS on
the Cisco NAC Guest Server.
Step 3
SMS requires an SMTP server to deliver the email to the SMS gateway. Click the Email Settings link
to configure the SMTP Server as described Configuring Email Notification.
Step 4
In the Sent From field, type the sending email address for the email to be sent to the SMS gateway.
Step 5
Click Save Settings.
Note
Depending on how details are routed to the SMS provider, you will need to customize the SMS portion
of the User Interface template to include the guest’s mobile phone number in the correct format for your
SMS gateway. See Editing the SMS Template, page 10-6 for details.
Cisco NAC Guest Server Installation and Configuration Guide
OL-15986-01
9-3
Chapter 9
Guest Account Notification
Configuring SMS Notification
Cisco NAC Guest Server Installation and Configuration Guide
9-4
OL-15986-01
CH A P T E R
10
Customizing the Application
This chapter describes the following
•
User Interface Templates
•
Adding a User Interface Template
•
Editing a User Interface Template
•
Deleting a Template
•
Setting the Default Interface Mapping
•
Setting User Default Redirection
User Interface Templates
Cisco NAC Guest Server allows you to customize the sponsor user interface text and guest notification
text using User Interface Templates. You can change the labels for the sponsor interface, provide
different instructions for guest users, or create a translated template to provide the sponsor interface and
guest instructions in another language altogether.
Cisco NAC Guest Server provides a default template (in English) that can be used as is without any
further modification. If you want to change the default presentation for sponsors and guests, you can add
one or multiple templates that you can store separately on the Guest Server and modify as desired.
Once your user interface template is configured, you will need to set the default template mapping so
that the Guest Server starts using the correct template. Once a sponsor has authenticated they can choose
a different template to use and save it in the preferences. This enables each sponsor to have the
application displayed in a different template or language.
If you are customizing the interface for another language, create a new template for the language and
edit all pages with the translated text.
Typically, you create a customized template when you need to modify the account details and
instructions that are provided to the guest, such as the Acceptable Use Policy. Cisco NAC Guest Server
provides Print, Email, and SMS templates that allow you to customize the information that is printed,
emailed, or text messaged to guests.
Note
When customizing, it is a good idea to open the sponsor interface in a second browser for reference. This
allows you to view how the configuration tabs map to the actual sponsor interface pages. You can bring
up the sponsor interface by entering the Guest Server IP address without the “/admin” as the URL, for
example, http://<guest_server_ip_address> or https://<guest_server_ip_address>.
Cisco NAC Guest Server Installation and Configuration Guide
OL-15986-01
10-1
Chapter 10
Customizing the Application
Adding a User Interface Template
Adding a User Interface Template
When you add a new template, it is automatically based on the default template to facilitate editing.
Step 1
From the administration interface select User Interface > Templates from the left hand menu.
Figure 10-1
Step 2
User Interface Templates
On the User Interface Templates page (Figure 10-1), click the Add Template button
Figure 10-2
Add Template Page
Step 3
In the Add New Template page (Figure 10-2), type a Template Name. This can be any descriptive text
to identify the template later from the Current Templates list (Figure 10-1).
Step 4
Click the Add Template button.
The Edit User Interface Template page for the new template displays, initially with all details copied
from the default template. If you only need to make small changes, this allows you not to have to retype
all the entries.
Step 5
Modify these settings as desired, as described in Editing a User Interface Template, page 10-2 next.
Editing a User Interface Template
Tip
When customizing, it is a good idea to open the sponsor interface in a second browser for reference. This
allows you to view how the configuration tabs map to the actual sponsor interface pages. You can bring
up the sponsor interface by entering the Guest Server IP address without the “/admin” as the URL, for
example, http://<guest_server_ip_address> or https://<guest_server_ip_address>.
Cisco NAC Guest Server Installation and Configuration Guide
10-2
OL-15986-01
Chapter 10
Customizing the Application
Editing a User Interface Template
Step 1
From the administration interface select User Interface > Templates from the left hand menu.
Figure 10-3
User Interface Templates
Step 2
From the Current Templates list (Figure 10-3), select the template that you want to edit.
Step 3
Click the Edit Template button. The Edit User Interface page for the template displays (Figure 10-4).
Figure 10-4
Edit Template
Step 4
Click the menu at the top of the page to select any of the sponsor pages that you want to edit.
Step 5
Make any changes to the fields and click the Save Template button. Some example edits are described
in the following sections:
•
Editing the Print Template
•
Editing the Email Template
•
Editing the SMS Template
Cisco NAC Guest Server Installation and Configuration Guide
OL-15986-01
10-3
Chapter 10
Customizing the Application
Editing a User Interface Template
Editing the Print Template
The Print Template page contains the guest account details that the sponsor can bring up in a browser to
print out for handing to the guest after the account is created. The page is configured in HTML and can
be fully customized.
Tip
Navigating to Reporting > Active Accounts on the sponsor interface and clicking the Print button next
to the guest account entry brings up the output of the Print Template for printing.
Step 1
Go to User Interface > Templates and click the Edit Template button for the template you want to edit
in the Current Templates list.
Step 2
In the Edit User Interface page, click the Print Template tab at the top of the page to bring up the Print
Template configuration page (Figure 10-5).
Figure 10-5
Print Template Page
Step 3
Change the Page Title as desired (default is “Guest User Details”).
Step 4
In the Page Body text field, edit the default HTML code for the web page. The Page Body contains all
the HTML that sits between the BODY tags on a HTML page. All HTML outside these tags is used by
the application.
Step 5
In the HTML code you can use the following special variables to replace them with the details from the
created guest account.
•
%USERNAME% = The Username created for the guest
•
%PASSWORD% = The Password created for the guest
•
%STARTTIME% = The time from which the guest account will be valid
•
%ENDTIME% = The time the guest account will expire
•
%FIRSTNAME% = The first name of the guest
•
%LASTNAME% = The last name of the guest
Cisco NAC Guest Server Installation and Configuration Guide
10-4
OL-15986-01
Chapter 10
Customizing the Application
Editing a User Interface Template
Step 6
Click the Save Template button to save your changes.
Editing the Email Template
The Email Template page contains the guest account details that the sponsor can email to the guest after
creating the account. The page is configured in HTML and can be fully customized.
Tip
Navigating to Reporting > Active Accounts on the sponsor interface and clicking the Email button next
to the guest account entry brings up the output of the Email Template and also emails the guest.
Step 1
Go to User Interface > Templates and click the Edit Template button for the template you want to edit
in the Current Templates list.
Step 2
In the Edit User Interface page, click the Email Template tab at the top of the page to bring up the Email
Template configuration page (Figure 10-6).
Figure 10-6
Email Template Page
Step 3
Change the Page Title as desired (default is “Guest User Account Details”).
Step 4
Change the Email Subject as desired.
Step 5
In the Email Body text field, edit the default email text to be sent to the guest page.
Step 6
In the Email Body you can use the following special variables to replace them with the details from the
created guest account.
•
%USERNAME% = The Username created for the guest
•
%PASSWORD% = The Password created for the guest
•
%STARTTIME% = The time from which the guest account will be valid
•
%ENDTIME% = The time the guest account will expire
•
%FIRSTNAME% = The first name of the guest
•
%LASTNAME% = The last name of the guest
Cisco NAC Guest Server Installation and Configuration Guide
OL-15986-01
10-5
Chapter 10
Customizing the Application
Editing a User Interface Template
Step 7
Click the Save Template button to save your changes.
Editing the SMS Template
The SMS Template page contains the guest account details that the sponsor can text message to the guest
after creating the account. The contents of the text message can be fully customized.
Tip
Navigating to Reporting > Active Accounts on the sponsor interface and clicking the SMS button next
to the guest account entry brings up the output of the SMS Template and also text messages the guest.
Step 1
Go to User Interface > Templates and click the Edit Template button for the template you want to edit
in the Current Templates list.
Step 2
In the Edit User Interface page, click the SMS Template tab at the top of the page to bring up the SMS
Template configuration page (Figure 10-7).
Figure 10-7
SMS Template Page
Step 3
Change the SMS Subject as desired.
Step 4
Change the SMS Destination to be the email address of the SMS gateway that you use.
To send the text message to mobile phone number of the guest, use the variable %MOBILENUMBER%.
The %MOBILENUMBER% variable is replaced by the mobile phone number, including country code
of the guest as entered by the sponsor. For example, if the country code selected is the UK (+44) and the
guest’s phone number is 055 555-5555, then %MOBILENUMBER% will contain 44555555555.
Note
The initial plus symbol (“+”) is not inserted and the initial 0, any spaces, or hyphens (“-”) are
removed from the phone number. If you need “+” to be inserted, then enter
+%MOBILENUMBER%.
Cisco NAC Guest Server Installation and Configuration Guide
10-6
OL-15986-01
Chapter 10
Customizing the Application
Editing a User Interface Template
Step 5
Step 6
The SMS Body contains be the SMS text to be sent to the guest. In the SMS Body you can use the
following special variables to replace them with the details from the created guest account.
•
%USERNAME% = The Username created for the guest
•
%PASSWORD% = The Password created for the guest
•
%STARTTIME% = The time from which the guest account will be valid
•
%ENDTIME% = The time the guest account will expire
•
%FIRSTNAME% = The first name of the guest
•
%LASTNAME% = The last name of the guest
•
%MOBILENUMBER% = The mobile number of the guest
Click the Save Template button to save your changes.
Using Account Durations
Account durations are another way the sponsor can specify how long they want the guest account to
remain valid. By default, the sponsor must specify start and end dates and times from a drop down box
and popup calendar. By defining preset account durations you provide the sponsor with the ability to
simply select the length of time starting from when they click the button to create the account.
Step 1
Select User Interface > Templates and click the Edit Template button for the template you want to edit
in the Current Templates list.
Step 2
From the menu at the top of the page select Accounts > Account Duration. The Account Durations
screen appears (Figure 10-8).
Figure 10-8
Step 3
Account Duration
Click the Add Duration button to add a new account duration (Figure 10-9).
Cisco NAC Guest Server Installation and Configuration Guide
OL-15986-01
10-7
Chapter 10
Customizing the Application
Deleting a Template
Figure 10-9
Add Account Duration
Step 4
Enter a description that you want to appear in the sponsor interface, such as “1 Hour.”
Step 5
Select the desired duration from the drop down menu.
Step 6
Click the Add Duration Option button. You are taken back to the account durations list (Figure 10-8).
Step 7
If you want to edit or delete an account option, select the entry from the list and click the appropriate
button.
Note
The Account Durations options only appear on the sponsor’s screen if the user group for the sponsor is
set to Create Account By: Template Options. See Adding User Groups, page 5-1 for more details. The
only account duration options that appear are the durations within the maximum duration set on the
sponsors user group.
Deleting a Template
Step 1
From the administration interface select User Interface > Templates from the left hand menu.
Step 2
Select the template you want to delete from the Current Templates list and click the Delete Template
button.
Step 3
Confirm deletion of the template.
Setting the Default Interface Mapping
Once you have created your template you need to make the template active. This is a global operation
for the Cisco NAC Guest Server.
Step 1
From the administration interface select User Interface > Mapping from the left hand menu.
Cisco NAC Guest Server Installation and Configuration Guide
10-8
OL-15986-01
Chapter 10
Customizing the Application
Setting User Default Redirection
Figure 10-10
Default User Interface Mapping
Step 2
Select the Template from the dropdown list. This will become the template used for the sponsor and guest
user interface.
Step 3
Click the Set Template button.
Setting User Default Redirection
There are a number of options that each sponsor may want to customize for their environment so that
they don’t need to make changes every time they log in to the sponsor interface. The items you can
change are the template (for another language), the time zone, and the telephone country code.
Sponsors can change these settings from their Preferences page once they are logged in. However, to ease
the situation for first time users of the application you can choose to direct sponsors to their preference
page on their first login to the system.
Step 1
From the administration interface select User Interface > User Defaults from the left hand menu.
Figure 10-11
User Defaults
Step 2
Check the check box if you want the sponsors to be redirected to the preferences pages upon their first
login to the system. If you don’t then make sure it is unchecked.
Step 3
Click the Save Settings button.
Cisco NAC Guest Server Installation and Configuration Guide
OL-15986-01
10-9
Chapter 10
Customizing the Application
Setting User Default Redirection
Cisco NAC Guest Server Installation and Configuration Guide
10-10
OL-15986-01
CH A P T E R
11
Backup and Restore
You should backup the Cisco NAC Guest Server on a regular basis so that in the event of a hardware
failure you do not loose critical data. The Cisco NAC Guest Server backup process backs up the system
setup, account database, and all audit records enabling you to recover everything you need in the event
of a failure. You can either create a “point in time” snapshot, or schedule system back-ups to be
automatically saved on the Cisco NAC Guest Server or a remote FTP server.
This chapter includes the following sections:
•
Configuring Backup Settings
•
Restoring Backups
Cisco NAC Guest Server Installation and Configuration Guide
OL-15986-01
11-1
Chapter 11
Backup and Restore
Configuring Backup Settings
Configuring Backup Settings
Step 1
From the administration home page select Server > Backup from the left hand menu (Figure 11-1).
Figure 11-1
Backup Settings
Taking a snapshot
You have the option of saving a point in time snapshot which will allow you to download a backup of
the Cisco NAC Guest Server at this exact moment.
Step 1
To save a snapshot backup, click the Snapshot button at the bottom of the form (Figure 11-1).
You are prompted by your web browser to save the backup file to disk.
Cisco NAC Guest Server Installation and Configuration Guide
11-2
OL-15986-01
Chapter 11
Backup and Restore
Restoring Backups
Scheduling a Backup
You can schedule backups to occur every day, week, or month at 1:00 AM. Scheduled backups are stored
in either the /guest/backups directory of the Cisco NAC Guest Server or on a remote FTP server.
Step 1
From the administration home page, select Server > Backup from the left hand menu (Figure 11-1).
Step 2
To perform local backups:
•
Enter the Maximum number of backups that you want to keep. The Cisco NAC Guest Server will
remove old backups that exceed this amount by discarding the oldest backup(s) when new ones are
created.
Note
•
Specify the Frequency (how often you want the Cisco NAC Guest Server to perform backups) of
when you want to perform the backup. You can specify Daily, Weekly, or Monthly. If you select
Weekly you must also specify which day of the week. If you select Monthly you must also specify
which day of the month.
Note
Step 3
Step 4
Note
If you do not want to limit the number of files, you can specify a number less than 1 like 0
or -1, for example.
Cisco recommends specifying a date between the 1st and 28th day of the month to ensure
you automatically back up your system every month of the year.
To perform the backup to a remote FTP server:
•
Enter the Remote Server Address for the FTP server.
•
Enter the TCP Port to use (usually port 21).
•
Enter a Username and Password that allows access to the FTP server.
•
Select either active or passive for the FTP Mode.
•
Enter the Maximum number of backups that you want to keep. The Cisco NAC Guest Server will
remove old backups that exceed this amount by discarding the oldest backup(s) when new ones are
created.
Click the Save Settings button to save the backup settings.
If you choose to only store backups locally on the Cisco NAC Guest Server then they will be placed in
the /guest/backups directory. Cisco recommends backing this directory up remotely using SFTP logging
in with the root username and password. This will make sure you have an external copy if there is a
hardware failure to the disk in the appliance.
Restoring Backups
If you need to restore a backup to the Cisco NAC Guest Server then you can do so from the
administration interface.
Cisco NAC Guest Server Installation and Configuration Guide
OL-15986-01
11-3
Chapter 11
Backup and Restore
Restoring Backups
Note
You can only restore a backup to the same version of Cisco NAC Guest Server software with which the
backup was taken. If you want need to determine which version was used to perform the backup, open
the backup archive file directory and view the version.html in the backup archive.
Warning
If you are running a resilient pair of Cisco NAC Guest Servers and want to restore a backup you must
turn off replication on both servers and only restore the backup to one of the servers. Then you must
re-synchronize the other server. Failure to follow this process may result in data loss on one of the
servers.
Step 1
From the administration home page select Server > Backup > Restore from the menu (Figure 11-2).
Figure 11-2
Restore Backup
Step 2
Click the Choose File or Browse button (depending on your particular web browser) and select the
backup archive you want to restore.
Step 3
Click the Restore button.
The backup is uploaded to the Cisco NAC Guest Server and the data is restored.
Cisco NAC Guest Server Installation and Configuration Guide
11-4
OL-15986-01
CH A P T E R
12
Replication and High Availability
To provide high availability, the Cisco NAC Guest Server solution can be configured so that a pair of
units synchronize their databases between one another. This provides the ability for the solution to carry
on working in the event of loss of connectivity or failure to a single unit.
High availability is provided in an active/active scenario, where both Cisco NAC Guest Servers can
service requests from sponsors or network devices at the same time. This capability also allows you to
load balance the requests between the boxes.
Note
For load balancing external load balancers must be used to load balance the web interface. RADIUS
requests can also be load balanced via external load balancers or by configuration.
This chapter includes the following sections:
•
Setting up replication
•
Configuring Provisioning
•
Replication Status
•
Recovering from Failures
•
Deployment Considerations
Setting up replication
Initial replication is configured by setting one of the Cisco NAC Guest Servers to copy all of the data
from the other Guest Server. The Guest Server that is configured to copy the data from the other device
will be first set to delete all its own data. This ensures that no conflicts exist. Cisco recommends setting
up replication at initial install time of Cisco NAC Guest Server, or when adding a new Guest Server to
an existing implementation.
Warning
All Data on one of the Guest Servers will be overwritten. If you have data that is needed on both Guest
Servers then you should not configure replication as you will loose data.
Once one of the Guest Servers has received a copy of the data from the other device they are
synchronized and replication is turned on. Any data that is updated on one Guest Server is then
automatically replicated to the other Guest Server.
All communication between the Cisco NAC Guest Servers is encrypted using SSL and runs over TCP
destination port 5432.
Cisco NAC Guest Server Installation and Configuration Guide
OL-15986-01
12-1
Chapter 12
Replication and High Availability
Setting up replication
Step 1
Create a backup of the Cisco NAC Guest Server before starting by following the Taking a snapshot
instructions in Configuring Backup Settings, page 11-2.
Step 2
From the administration interface select Authentication > Replication Settings from the left hand menu
(Figure 12-1).
Figure 12-1
Replication Settings
Step 3
Enter the Remote Guest Server address. This is the address of the Cisco NAC Guest Server that you
want to enable replication with.
Step 4
Enter a Shared Secret and confirm it. The shared secret is used to authenticate with the other Cisco NAC
Guest Server. The shared secret must be identical on both Guest Servers.
Step 5
Set the Replication Mode to be On.
NoteSetting a servers Replication Mode to be Off removes it from the replication process. There is no
method of re-synchronizing a Server without starting the process from the beginning and by
doing this you will loose non-replicated data on one of the Servers. Only turn Replication off if
you are making a standalone system.
Step 6
Turning on replication enables you to specify whether this server is the one that contains the current data
or will copy data from the other server. Choose This node contains the data if you want to keep the data
from this server. Choose This node will copy data from other node if you want to erase all data on this
server and copy the data from the other server.
Warning
Make sure you set these correctly on each server otherwise you will loose data. It is advised to take
a backup before running this procedure.
Step 7
Click Save Settings to save the settings and turn on the replication process.
Step 8
Repeat Step 1 through Step 7 to set up replication on the other Cisco NAC Guest Server.
Cisco NAC Guest Server Installation and Configuration Guide
12-2
OL-15986-01
Chapter 12
Replication and High Availability
Configuring Provisioning
Configuring Provisioning
When the Cisco NAC Guest Server provisions accounts in other systems, such as the Clean Access
Manager, only one of the Guest Servers should be performing the provisioning at any one time.
One Cisco NAC Guest Server should be defined as the primary and the other as the secondary. The server
set to primary will perform the provisioning by default. If a server is set to secondary it will check the
status of the primary server, if it fails to contact the primary server three times then it will perform the
provisioning. This process happens every minute when the provisioning service runs.
Step 1
From the administration interface select Authentication > Replication Settings from the left hand menu
(Figure 12-2).
Figure 12-2
Configuring Provisioning Order
Step 2
Select the Provisioning to be Primary if you want this server to perform the provisioning under normal
conditions. Select Secondary if you want this server to only perform provisioning if the Primary cannot
be contacted.
Step 3
Click the Save Settings button.
Note
Only one of the servers should be set to Primary otherwise you may get errors when creating or deleting
accounts twice.
Cisco NAC Guest Server Installation and Configuration Guide
OL-15986-01
12-3
Chapter 12
Replication and High Availability
Replication Status
Replication Status
At any moment in time you can check the replication status of the Cisco NAC Guest Servers. This is
useful to make sure replication is happening as you want it to.
Step 1
From the administration interface select Authentication > Replication Settings from the left hand menu
(Figure 12-3).
Figure 12-3
Replication Status
At the bottom of the page is the Replication Status. You can check the status of replication and how many
changes need to be replicated between each device.
Recovering from Failures
Network Connectivity
When the network connectivity between two Cisco NAC Guest Servers fails the Cisco NAC Guest
Servers will store up to 1GB of changes. When connectivity is restored if the amount of changes is less
than 1GB they will synchronize with each other. If more than 1GB of changes are stored the Cisco NAC
Guest Server will stop the replication process and you will need to setup replication again.
Cisco NAC Guest Server Installation and Configuration Guide
12-4
OL-15986-01
Chapter 12
Replication and High Availability
Deployment Considerations
Device Failure
If one of the Cisco NAC Guest Servers in a replication pair fails and needs to be replaced, you should
set up replication with the working server and the data will be re-synchronized to the device.
Warning
Step 1
Do not restore the failed unit from a backup. Restoring from a backup onto one unit in a replication
pair will result in not having an exact replica of the data on both servers.
From the administration interface select Authentication > Replication Settings from the left hand menu
(Figure 12-4).
Figure 12-4
Resetting Replication
Step 2
Set Replication Mode to Off on both of the Guest Servers.
Step 3
Follow the instructions in Setting up replication, page 12-1 and ensure that you set the working server
as the one with the data.
Deployment Considerations
Connectivity
The Cisco NAC Guest Servers need to be provided with IP connectivity between the units. Cisco
recommends making the network path between the devices resilient so that synchronization can always
be performed. However if the devices become disconnected they will continue to function and store
changes until they are connected back together and can re-establish communication. At that point they
will re-synchronize databases.
Cisco NAC Guest Server Installation and Configuration Guide
OL-15986-01
12-5
Chapter 12
Replication and High Availability
Deployment Considerations
Depending on the amount of activity that your Cisco NAC Guest Server performs you need to make sure
that there is enough bandwidth between the server to enable synchronization to occur as rapidly as
possible.
You can test connectivity by creating a large amount of accounts and watching how quickly the
appliances synchronize by watching the status on the replication screen (Figure 12-3).
Load Balancing
Web Interface
Sponsor and Administration sessions can be services by both Cisco NAC Guest Servers when configured
for replication. The Cisco NAC Guest Server however does not perform any redirection or automatic
load balancing of requests.
To enable requests to both Cisco NAC Guest Servers concurrently, you must implement an external load
balancing mechanism. Options include:
•
Network based Load Balancing—such as the Cisco CSS, GSS, CSM or ACE platforms. The only
requirement for the load balancing is that clients are services by the same Cisco NAC Guest Server
for their entire session. Individual requests cannot be load balanced between servers as the Cisco
NAC Guest Server doesn’t replicate sponsor/admin session information to reduce bandwidth
requirements. The most common method of achieving this is sticking connections to the same Cisco
NAC Guest Server based upon source IP address.
•
DNS Round robin—Using your DNS server, configure the domain name of the Cisco NAC Guest
Server to return both IP addresses for the Cisco NAC Guest Server in a round-robin configuration.
This method does not provide failover between appliances in the event of a failure.
•
Publishing multiple URLs—This allows each user to choose which server they would like to use.
RADIUS Interface
The RADIUS interface on either Cisco NAC Guest Server can take requests at the same time.
Cisco recommends configuring one Cisco NAC Guest Server to be the primary for some RADIUS clients
and the other Cisco NAC Guest Server to be the primary for the other RADIUS clients. For failover the
RADIUS clients can have secondary RADIUS servers defined as the other Cisco NAC Guest Server if
they support configuration of two servers.
Cisco NAC Guest Server Installation and Configuration Guide
12-6
OL-15986-01
Chapter 12
Replication and High Availability
Deployment Considerations
Cisco NAC Guest Server Installation and Configuration Guide
OL-15986-01
12-7
Chapter 12
Replication and High Availability
Deployment Considerations
Cisco NAC Guest Server Installation and Configuration Guide
12-8
OL-15986-01
CH A P T E R
13
Logging and Troubleshooting
This chapter describes the following:
•
System Logging
•
Log Files
System Logging
All actions within the Cisco NAC Guest Server are logged into the database. This enables you to see any
action that occurred as part of the normal operating process of the application.
To access the system log from the administration interface select Server > System Log from the left
hand menu (Figure 13-1).
Figure 13-1
System Log
Cisco NAC Guest Server Installation and Configuration Guide
OL-15986-01
13-1
Chapter 13
Logging and Troubleshooting
Log Files
Log Files
The system records information in different log files depending on the application function:
•
Downloading the log files
•
Application Logging
•
Email Logging
•
RADIUS Logging
•
CAM Update Logging
•
Web Server Logging
Downloading the log files
Step 1
To download the files from the administration interface select Server > Support Logs from the left hand
menu (Figure 13-2).
Figure 13-2
Step 2
Download the log files
Click the download button and save the log file on your computer. The support logs are contained within
the tar file.
Application Logging
All the application error and warning messages are stored in the application.log file. You may need to
view this file to see errors with the main application.
Email Logging
Email is processed by the sendmail daemon on the Guest Server. To troubleshoot issues, you need to
view the email log file called maillog.
RADIUS Logging
RADIUS is processed by the radiusd daemon on the Guest Server. To troubleshoot issues, you need to
view the radius.log file.
Cisco NAC Guest Server Installation and Configuration Guide
13-2
OL-15986-01
Chapter 13
Logging and Troubleshooting
Log Files
CAM Update Logging
The accounts on the Cisco NAC Appliance Clean Access Manager are created by a process that runs
every minute on the Cisco NAC Guest Server. To troubleshoot issues, you need to view the camlog file.
Web Server Logging
The httpd daemon on the appliance runs the application web server. To troubleshoot issues, you need to
view the error_log file.
Cisco NAC Guest Server Installation and Configuration Guide
OL-15986-01
13-3
Chapter 13
Logging and Troubleshooting
Log Files
Cisco NAC Guest Server Installation and Configuration Guide
13-4
OL-15986-01
CH A P T E R
14
Licensing
The Cisco NAC Guest is licensed via a file associated with the MAC address of the appliance. The file
can be obtained from cisco.com and instructions are included in the licensing pack. The Cisco NAC
Guest Server only supports one license at a time, so any “additional” licenses you import automatically
overwrite the previous license on the Guest Server.
Note
For detailed information on Cisco NAC Guest Server licenses, refer to Cisco NAC Appliance Service
Contract/Licensing Support.
Licensing
To view or upload a license from the administration interface:
Step 1
Select Server > User Groups from the left hand menu (Figure 14-1).
Figure 14-1
Licensing
Step 2
Click the Choose File or Browse button (depending on which browser you are using) and select the
license file.
Step 3
Click the Submit button to upload a new license file.
Cisco NAC Guest Server Installation and Configuration Guide
OL-15986-01
14-1
Chapter 14
Licensing
Licensing
Cisco NAC Guest Server Installation and Configuration Guide
14-2
OL-15986-01
CH A P T E R
15
Sponsor Documentation
This chapter provides example user documentation for sponsor users who create guest accounts. It
contains the following sections:
•
Introduction to Cisco NAC Guest Server
•
Connecting to the Guest Server
•
Creating Guest User Accounts
•
Multiple Guest Accounts
•
Editing Guest Accounts
•
Suspending Guest Accounts
•
Viewing Active Accounts and Resending Details
•
Reporting on Guest Users
Introduction to Cisco NAC Guest Server
Cisco NAC Guest Server allows you to create temporary network access accounts for your guests,
visitors, contractors or anyone who needs temporary network access. You can easily create guest
accounts by browsing to the Cisco Guest Server web interface, logging in with your corporate
credentials, and entering the guest’s details. Cisco NAC Guest Server creates the temporary account and
allows you to provide the account details to the guest via printout, email or SMS text message.
In addition to being able to create guest accounts, you can also view and amend the accounts to which
you have access, or run reporting on accounts for auditing purposes.
Connecting to the Guest Server
All connections to the Cisco NAC Guest Server are through a web interface. To connect to the Cisco
NAC Guest Server, open a web browser and enter its address into the URL or address field as provided
by your network administrator.
Step 1
Enter the address of the Cisco NAC Guest Server into the URL fields of a web browser, for example,
http://nac-guest-server (Figure 15-1).
Cisco NAC Guest Server Installation and Configuration Guide
OL-15986-01
15-1
Chapter 15
Sponsor Documentation
Connecting to the Guest Server
Figure 15-1
Authentication Screen
Step 2
In the Cisco Guest Server login page, enter your Username and Password and click the Login button
(Figure 15-1). Use the login credentials specified by your network administrator.
Step 3
On your first successful login you may see the User Default Setting page (Figure 15-2) where you can
change default settings like the language template, time zone, and telephone country code as described
in Step 4.
Otherwise, the “Welcome to the Cisco NAC Guest Server” page (Figure 15-3) likely appears. If so, and
you would like to change the default settings, select the My Settings > Preferences link using the left
hand menu and proceed to Step 4.
Figure 15-2
Default Settings Page
Cisco NAC Guest Server Installation and Configuration Guide
15-2
OL-15986-01
Chapter 15
Sponsor Documentation
Connecting to the Guest Server
Step 4
Step 5
In the default settings you can customize the settings for the following:
•
Language Template—If your administrator has added additional templates, you can select the one
that you want to use. This may include the application or guest printout/email/sms in a different
language.
•
Default Timezone—You can specify the default setting for the time zone where guests user accounts
are created. You can override this at creation of the guest if you like.
•
Default Telephone Country Code—Specify the default for the telephone country code. This is used
when sending the guest details by SMS, or for recording the guests phone number.
•
Default Location—The only option currently available is the Default Location.
•
Email Address—Enter your email address here. This is needed if you want to receive a copy of the
guests account details by email.
•
Receive Email Confirmation—Check this box if you would like the Cisco NAC Guest Server to send
a copy of the guests account details by email when you create a guest account.
•
Default Login Page—Select the page that you would like the Cisco NAC Guest Server to take you
to immediately after you login.
Click the Submit button when you are happy with your default settings.
On successful login or after saving the default settings, you will see the “Welcome to the Cisco NAC
Guest Server” page (Figure 15-3).
Figure 15-3
Main Screen
Cisco NAC Guest Server Installation and Configuration Guide
OL-15986-01
15-3
Chapter 15
Sponsor Documentation
Creating Guest User Accounts
Creating Guest User Accounts
If you are assigned the appropriate permissions, you can create temporary guest user accounts.
Step 1
From the Main page, either click Create a Guest User Account or select User Accounts > Create from
the left hand menu.
Step 2
The Create a Guest User Account page appears (Figure 15-4).
Figure 15-4
Create a Guest User Account
Step 3
Enter the First Name of your guest
Step 4
Enter the Last Name of your guest
Step 5
Enter the Company or organization of your guest.
Step 6
Enter the Email Address of your guest.
Step 7
From the Account Start Time and Account Start Date dropdown lists, choose the time and date from
which you want the account to be valid.
Step 8
From the Account End Time and Account End Date dropdown lists, choose the time and date you want
the account to end.
Step 9
Choose the Timezone relevant to the time and date.
Step 10
If the Guest Server administrator as configured any additional required account attributes, specify the
appropriate information for those settings in this form. (For example, the administrator may require the
guest user’s contact Mobile Phone Number.)
Step 11
Click the Add User button. The account is created and the details are displayed at the top of the page
(Figure 15-5).
Cisco NAC Guest Server Installation and Configuration Guide
15-4
OL-15986-01
Chapter 15
Sponsor Documentation
Creating Guest User Accounts
Figure 15-5
Step 12
Step 13
Guest User Created
Depending on your permissions, you can perform one or all of the following actions on the same page
where the new account details are displayed:
•
Print Account Details—Clicking the Print Account button lets you print the account details to your
printer to hand to the guest. These details commonly include guest access instructions and usage
policies.
•
Email Account Details—Clicking the Email Account button emails the account details to the email
address you entered for the guest.
•
Text Message Account Details (SMS)—Clicking the Send SMS Message button sends the account
details to the guest’s mobile phone via SMS text message.
You can also continue directly to create another account by entering another guests details and clicking
the Add User button at the bottom of the page.
Cisco NAC Guest Server Installation and Configuration Guide
OL-15986-01
15-5
Chapter 15
Sponsor Documentation
Creating Guest User Accounts
Print Account Details
Step 1
Click the Print Account button.
Figure 15-6
Print Account Details
A new Printer window opens and you can print out the guest user details.
Email Account Details
Step 1
Click the Email Account button.
The Cisco NAC Guest Server sends an email to the email address specified when you created the
account.
Text Message Account Details (SMS)
Step 1
Click the Send SMS Message button.
The Cisco NAC Guest Server sends a text message to the phone number specified in the account creation
screen.
Cisco NAC Guest Server Installation and Configuration Guide
15-6
OL-15986-01
Chapter 15
Sponsor Documentation
Multiple Guest Accounts
Multiple Guest Accounts
The Cisco NAC Guest Server allows you to create multiple accounts at the same time. You can create
multiple accounts by pasting the details into the interface, importing a Comma Separated Values (CSV)
file, or by creating random accounts to be assigned to guest users (with the details recorded on paper)
for input at a later time. The options that will be available to you are configured by your administrator.
Figure 15-7
Multiple Accounts
Creating Multiple Accounts from Text Entry
Step 1
Select User Accounts > Multiple Accounts from the left hand menu (Figure 15-7).
Step 2
Select Create Multiple Accounts (Figure 15-8).
Figure 15-8
Multiple Accounts from text entry
Cisco NAC Guest Server Installation and Configuration Guide
OL-15986-01
15-7
Chapter 15
Sponsor Documentation
Multiple Guest Accounts
Step 3
Enter the details in the text field as requested with a comma separating the values.
Step 4
Select the Account Start time, Account End time, and Timezone for the account.
Step 5
Click the Create Bulk Accounts button.
Creating Multiple Accounts from CSV File
Step 1
Select User Accounts > Multiple Accounts from the left hand menu (Figure 15-7).
Step 2
Select Import Accounts from File (Figure 15-9).
Figure 15-9
Multiple Accounts from CSV File
Step 3
Download the CSV Template file.
Step 4
Fill out the CSV Template file using a program such as Microsoft Excel.
Step 5
Save the CSV Template file in CSV format.
Step 6
Click Choose File or Browse and select the CSV file.
Step 7
Select the Account Start time, Account End time, and Timezone for the account.
Step 8
Click the Upload CSV button.
Creating Multiple Random Accounts
You can create random accounts when you want to hand out details to visitors and then record the details
on paper for recording in the system, or storing for correlation at a later date. This is useful when you
don’t have access to a computer to create accounts when you need to provide guest accounts.
Step 1
Select User Accounts > Multiple Accounts from the left hand menu (Figure 15-7).
Step 2
Select Create Accounts with Random Username/Password (Figure 15-10).
Cisco NAC Guest Server Installation and Configuration Guide
15-8
OL-15986-01
Chapter 15
Sponsor Documentation
Multiple Guest Accounts
Figure 15-10
Create Random Accounts
Step 3
Enter the amount of accounts that you want to generate.
Step 4
Specify the Account Start time, Account End time, and Timezone.
Step 5
Click the Submit button.
Printing/Email/SMS Multiple Accounts
When you have created accounts using one of the multiple account creation methods the screen for the
users details is slightly different to the single user.
Figure 15-11
Print/Email/SMS for text/csv creation methods
Cisco NAC Guest Server Installation and Configuration Guide
OL-15986-01
15-9
Chapter 15
Sponsor Documentation
Multiple Guest Accounts
Figure 15-12
Print for random account creation
When creating accounts with preset details (by either importing text or creating a CSV file), you can
print, email, or transmit via SMS the guest account details (Figure 15-11). When you create random
accounts, however, you can only use the print option (Figure 15-12).
The additional options to both of these is the ability to perform the required action for all accounts at the
same time by clicking the <action> All button at the top right of the table.
For the random accounts it is also useful to print the table out so that you can write down the
corresponding guests details for later input in to the Cisco NAC Guest Server.
Viewing Multiple Account Groups
When you create multiple accounts you may want to find the batch of accounts that were created at the
same time. You can accomplish this using one of the following three methods:
•
Viewing Multiple Account Groups
•
Finding Multiple Account Groups by username
•
Finding Multiple Account Groups on the Active Accounts Report.
Viewing Multiple Account Groups
This option allows you to select the batch of accounts that you created.
Step 1
Select User Accounts > Multiple Accounts from the left hand menu (Figure 15-7).
Step 2
Select Show Multiple Account Groups.
Cisco NAC Guest Server Installation and Configuration Guide
15-10
OL-15986-01
Chapter 15
Sponsor Documentation
Multiple Guest Accounts
Figure 15-13
Step 3
Multiple Account Groups
Click the Edit button to edit the bulk accounts.
Finding Multiple Account Groups by username
This option allows you to find the batch of accounts by entering one username of the batch.
Step 1
Select User Accounts > Multiple Accounts from the left hand menu (Figure 15-7 on page 15-7).
Step 2
Enter a username that belongs to a batch of accounts in the username field and click the Submit button.
The batch of accounts that were created in the same operation as the username submitted will be shown,
if found.
Finding Multiple Account Groups on the Active Accounts Report.
This option allows you to jump to the batch of accounts from the Active Accounts Report.
Step 1
Select Reports > Active Accounts from the left hand menu.
Step 2
Any user account that is part of a multiple account creation operation will have a Bulk Account link next
to the username. Click this link to jump to the rest of the accounts for editing.
Figure 15-14
Bulk Accounts on the Active Accounts Report.
Cisco NAC Guest Server Installation and Configuration Guide
OL-15986-01
15-11
Chapter 15
Sponsor Documentation
Editing Guest Accounts
Editing Guest Accounts
If you create an account for a guest and you need to extend their account access, you can change the
expiry date and time of the account.
Step 1
From the Main page, either click the link for Edit Guest User Account end time or select User
Accounts > Edit from the left hand menu.
Step 2
In the Edit User Accounts page or any of the multiple account reports (Figure 15-15), you can view a list
of the accounts that you are able to edit.
Figure 15-15
Step 3
Edit Guest User Accounts List
Click the Edit button next to the account you want to change.
Figure 15-16
Edit Guest Account
Step 4
Change the Account details as desired.
Step 5
Click the Submit button to update the account with the new details.
Suspending Guest Accounts
You can terminate an account so that a guest can no longer login. To do this, you will also need to contact
your network administrator to make sure that the user has been removed from the network. Depending
on the access method this may happen automatically.
Step 1
From the Main page, either click Suspend Guest User Accounts or select User Accounts > Suspend
from the left hand menu.
Cisco NAC Guest Server Installation and Configuration Guide
15-12
OL-15986-01
Chapter 15
Sponsor Documentation
Viewing Active Accounts and Resending Details
Figure 15-17
Suspend Accounts
Step 2
In the Suspend User Accounts page (Figure 15-17), you can view a list of the accounts that you are able
to suspend.
Step 3
Click the Suspend button for the account you want to terminate. The account is removed from the list
and the guest will not be able to login anymore.
Viewing Active Accounts and Resending Details
Cisco NAC Guest Server provides an Active Accounts page that lets you view the active accounts you
created or have permissions to see. This page allows you to view, print, email or text message (SMS) the
account access details to guests if they have lost or forgotten them.
Step 1
From the Main page, either click Report on Guest User Accounts or select Reporting > Active
Accounts from the left hand menu.
Figure 15-18
Step 2
Active Accounts
In the Cisco NAC Guest Server Reporting page (Figure 15-18), click the Print, Email, or SMS button
next to the account to bring up the details for that account. Clicking the Email button will email the
account details to the guest. Clicking SMS will send a text message with the account details to the guest.
Reporting on Guest Users
If you have the appropriate permissions, you can generate full reporting on guest user accounts. You can
run reports to view who created guest accounts, when they were created, and access details for the guests
themselves, such login time, logout time, and IP address used.
Step 1
From the Main page, select Reporting > Full Reporting from the left hand menu.
Cisco NAC Guest Server Installation and Configuration Guide
OL-15986-01
15-13
Chapter 15
Sponsor Documentation
Reporting on Guest Users
Figure 15-19
Full Reporting
Step 2
The Cisco NAC Guest Server Reporting page (Figure 15-19) initially displays the complete report for
your user permissions. To shorten or filter the report, modify the dropdown menus at the top of the screen
then click the Submit button. If you want to search for a specific First Name, Last Name, Company,
Email address or by IP Address of the guest then by typing the full or partial text in the corresponding
text field and clicking the Submit button you will be able to get a more focuses report.
Step 3
If you want to export the full report for the new query, click the Download CSV button to download the
report in CSV format.
Step 4
Click the Submit button. The report displays the bottom of the screen (Figure 15-20).
Figure 15-20
Step 5
Example Details for Guest Account
To see usage details for a particular account, click the Details button next to the account. The Detailed
Login report opens in the same screen and lists the following details:
•
User IP Address for the guest
•
Logged In time (date, time, and timezone)
•
Logged Out time (date, time, and timezone)
•
Duration of session (in hh:mm:ss format)
•
Details of all modifications to the guest account and by which sponsor.
This information can be useful for auditing purposes.
Cisco NAC Guest Server Installation and Configuration Guide
15-14
OL-15986-01
A P P E N D I X
A
Open Source License Acknowledgements
Notices
The following notices pertain to this software license.
OpenSSL/Open SSL Project
This product includes software developed by the OpenSSL Project for use in the OpenSSL Toolkit
(http://www.openssl.org/).
This product includes cryptographic software written by Eric Young ([email protected]).
This product includes software written by Tim Hudson ([email protected]).
License Issues
The OpenSSL toolkit stays under a dual license, i.e. both the conditions of the OpenSSL License and the
original SSLeay license apply to the toolkit. See below for the actual license texts. Actually both licenses
are BSD-style Open Source licenses. In case of any license issues related to OpenSSL please contact
[email protected].
OpenSSL License:
Copyright © 1998-2007 The OpenSSL Project. All rights reserved.
Redistribution and use in source and binary forms, with or without modification, are permitted provided
that the following conditions are met:
1.
Redistributions of source code must retain the copyright notice, this list of conditions and the
following disclaimer.
2.
Redistributions in binary form must reproduce the above copyright notice, this list of conditions, and
the following disclaimer in the documentation and/or other materials provided with the distribution.
3.
All advertising materials mentioning features or use of this software must display the following
acknowledgment: “This product includes software developed by the OpenSSL Project for use in the
OpenSSL Toolkit (http://www.openssl.org/)”.
4.
The names “OpenSSL Toolkit” and “OpenSSL Project” must not be used to endorse or promote
products derived from this software without prior written permission. For written permission, please
contact [email protected].
Cisco NAC Guest Server Installation and Configuration Guide
OL-15986-01
A-1
Appendix A
Open Source License Acknowledgements
Notices
5.
Products derived from this software may not be called “OpenSSL” nor may “OpenSSL” appear in
their names without prior written permission of the OpenSSL Project.
6.
Redistributions of any form whatsoever must retain the following acknowledgment:
“This product includes software developed by the OpenSSL Project for use in the OpenSSL Toolkit
(http://www.openssl.org/)”.
THIS SOFTWARE IS PROVIDED BY THE OpenSSL PROJECT “AS IS”' AND ANY EXPRESSED OR
IMPLIED WARRANTIES, INCLUDING, BUT NOT LIMITED TO, THE IMPLIED WARRANTIES
OF MERCHANTABILITY AND FITNESS FOR A PARTICULAR PURPOSE ARE DISCLAIMED. IN
NO EVENT SHALL THE OpenSSL PROJECT OR ITS CONTRIBUTORS BE LIABLE FOR ANY
DIRECT, INDIRECT, INCIDENTAL, SPECIAL, EXEMPLARY, OR CONSEQUENTIAL DAMAGES
(INCLUDING, BUT NOT LIMITED TO, PROCUREMENT OF SUBSTITUTE GOODS OR
SERVICES; LOSS OF USE, DATA, OR PROFITS; OR BUSINESS INTERRUPTION) HOWEVER
CAUSED AND ON ANY THEORY OF LIABILITY, WHETHER IN CONTRACT, STRICT
LIABILITY, OR TORT (INCLUDING NEGLIGENCE OR OTHERWISE) ARISING IN ANY WAY
OUT OF THE USE OF THIS SOFTWARE, EVEN IF ADVISED OF THE POSSIBILITY OF SUCH
DAMAGE.
This product includes cryptographic software written by Eric Young ([email protected]). This product
includes software written by Tim Hudson ([email protected]).
Original SSLeay License:
Copyright © 1995-1998 Eric Young ([email protected]). All rights reserved.
This package is an SSL implementation written by Eric Young ([email protected]).
The implementation was written so as to conform with Netscapes SSL.
This library is free for commercial and non-commercial use as long as the following conditions are
adhered to. The following conditions apply to all code found in this distribution, be it the RC4, RSA,
lhash, DES, etc., code; not just the SSL code. The SSL documentation included with this distribution is
covered by the same copyright terms except that the holder is Tim Hudson ([email protected]).
Copyright remains Eric Young’s, and as such any Copyright notices in the code are not to be removed.
If this package is used in a product, Eric Young should be given attribution as the author of the parts of
the library used. This can be in the form of a textual message at program startup or in documentation
(online or textual) provided with the package.
Redistribution and use in source and binary forms, with or without modification, are permitted provided
that the following conditions are met:
1.
Redistributions of source code must retain the copyright notice, this list of conditions and the
following disclaimer.
2.
Redistributions in binary form must reproduce the above copyright notice, this list of conditions and
the following disclaimer in the documentation and/or other materials provided with the distribution.
3.
All advertising materials mentioning features or use of this software must display the following
acknowledgement:
“This product includes cryptographic software written by Eric Young ([email protected])”.
The word ‘cryptographic’ can be left out if the routines from the library being used are not
cryptography-related.
4.
If you include any Windows specific code (or a derivative thereof) from the apps directory
(application code) you must include an acknowledgement: “This product includes software written
by Tim Hudson ([email protected])”.
Cisco NAC Guest Server Installation and Configuration Guide
A-2
OL-15986-01
Appendix A
Open Source License Acknowledgements
Notices
THIS SOFTWARE IS PROVIDED BY ERIC YOUNG “AS IS” AND ANY EXPRESS OR IMPLIED
WARRANTIES, INCLUDING, BUT NOT LIMITED TO, THE IMPLIED WARRANTIES OF
MERCHANTABILITY AND FITNESS FOR A PARTICULAR PURPOSE ARE DISCLAIMED. IN NO
EVENT SHALL THE AUTHOR OR CONTRIBUTORS BE LIABLE FOR ANY DIRECT, INDIRECT,
INCIDENTAL, SPECIAL, EXEMPLARY, OR CONSEQUENTIAL DAMAGES (INCLUDING, BUT
NOT LIMITED TO, PROCUREMENT OF SUBSTITUTE GOODS OR SERVICES; LOSS OF USE,
DATA, OR PROFITS; OR BUSINESS INTERRUPTION) HOWEVER CAUSED AND ON ANY
THEORY OF LIABILITY, WHETHER IN CONTRACT, STRICT LIABILITY, OR TORT
(INCLUDING NEGLIGENCE OR OTHERWISE) ARISING IN ANY WAY OUT OF THE USE OF
THIS SOFTWARE, EVEN IF ADVISED OF THE POSSIBILITY OF SUCH DAMAGE.
The license and distribution terms for any publicly available version or derivative of this code cannot be
changed. i.e. this code cannot simply be copied and put under another distribution license [including the
GNU Public License].
Cisco NAC Guest Server Installation and Configuration Guide
OL-15986-01
A-3
Appendix A
Open Source License Acknowledgements
Notices
Cisco NAC Guest Server Installation and Configuration Guide
A-4
OL-15986-01