1
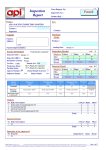
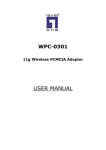
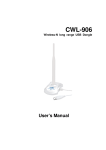
1 Important Concepts
QUICK START
Cisco Digital Media Player 4300G (DMP) is a
compact, addressable network appliance that
delivers digital signage content to a display that
you attach. The display can be analog or digital
and can be standard-definition or high-definition.
DMP is one part of the Cisco Digital Media System
(DMS), which combines many Cisco products.
Note
Quick Start Guide for Cisco
Digital Media Player 4300G
1
Important Concepts
2
Package Contents
3
Connect to DHCP Server
4
Connect to DMP Display
5
Connect to 120V AC Socket
6
Check DMP LEDs
7
Log In to DMPDM
8
Configure Video Output
9
Identify Trusted DMM-DS
The physical location where you set up a
DMP must be within 6 feet of a 120V AC
electrical outlet (socket) and within 6 feet
of the DMP display.
Cisco Digital Media Player Device Manager
(DMPDM) is a web-based graphical user interface
to configure one DMP device during its initial
setup or to manage one DMP device in isolation.
DMPDM is served from the DMP that it manages.
A DMP display is any analog or digital television
screen or other kind of monitor that is attached
directly to a DMP and that shows digital signage
content to an audience.
Digital signage consists of any combination of
messages or other kinds of information that people
can see or hear, and that a DMP delivers to people.
The content might relate to commerce, popular
entertainment, staff training, emergency
awareness, combinations of those things, or nearly
anything. The people who manage a DMP (or who
manage multiple DMPs in a digital signage
network) decide what to show or say, and when,
and to whom.
To learn more about DMS products and features,
go to http://www.cisco.com/go/dms.
2 Package Contents
The product package for one DMP 4300G device
should contain all of the following:
• This quick start guide and other printed
product documentation.
Step 1
Plug one end of an ordinary Ethernet cable
into the Ethernet 10/100 port on the back
of the DMP chassis.
Step 2
Plug the other end of the Ethernet cable
into a network hub, network switch, or
router that participates in a DHCP
network.
4 Connect to DMP Display
You can use an analog or a digital display, but must
use the provided composite/RCA cable. (You must
always use the composite/RCA cable for audio,
even if you later use HDMI for video.)
Step 1
On the back of the DMP chassis: (a) plug
the yellow jack into the CVBS connector;
(b) plug the red jack into the
AUDIO/RIGHT connector; and (c) plug
the white jack into the AUDIO/LEFT
connector.
Step 2
Connect the other end of the
composite/RCA cable to your
DMP display.
Step 3
If the DMP display is not already turned
on, turn it on now.
• The DMP 4300G.
• Two video cables (HDMI & composite/RCA).
Other important concepts
Cisco Application and Content Networking
System (ACNS) interoperates with DMM-DS to
greatly reduce redundant digital media traffic over
satellite and terrestrial networks. ACNS offers a
comprehensive set of streaming media features to
deliver high-quality and long-playing digital videos
live and simultaneously to thousands of users and
DMPs, or on demand at a later time.
Cisco Digital Media Manager Administration
Interface (DMM-Admin) is a web-based graphical
user interface to install or upgrade the software
licenses that enable you to use DMM-DS.
DMM-Admin is served from a Cisco Media
Convergence Server.
Cisco Digital Media Manager for Digital Signage
(DMM-DS) is a web-based graphical user interface;
it is the scalable alternative to DMPDM. DMM-DS
helps you to centrally manage a network of DMPs,
develop digital signage content for them, organize
Contains Macromedia® Flash™ technology by Adobe Systems, Inc. Copyright
1995-2003 Adobe Systems, Inc. All Rights reserved. Macromedia, Flash,
Macromedia Flash, and Macromedia Flash Lite are trademarks or registered
trademarks of Adobe Systems, Inc. in the United States and other countries.
to the bottom of your DMP chassis, then
provide your security policy administrator
with the MAC address.
the content, develop playlists, and much more.
DMM-DS is served from a Cisco Media
Convergence Server.
• One AC adapter and four plugs.
If anything is missing from the package or appears
to be defective, contact the technical support team
trained to support DMS products at:
[email protected].
3 Connect to DHCP Server
The factory default for a DMP 4300G is to obtain
its IP address automatically from a DHCP server.
If you will deploy your DMP at a physical location
that does not have a DHCP server, see Appliance
Administration Guide for Cisco Digital Media
System 4.0 on Cisco.com to learn how to configure
your DMP to use a static IP address.
Tip
If a network security policy restricts
DHCP address assignments to network
interface cards with known MAC
addresses, read the sticker that is affixed
Americas Headquarters
Cisco Systems, Inc.
170 West Tasman Drive
San Jose, CA 95134-1706
USA
http://www.cisco.com
Tel: 408 526-4000
800 553-NETS (6387)
Fax: 408 527-0883
Cisco, Cisco Systems, and the Cisco Systems logo are registered trademarks or trademarks of Cisco
Systems, Inc. and/or its affiliates in the United States and certain other countries. All other trademarks
mentioned in this document or Website are the property of their respective owners. The use of the word
partner does not imply a partnership relationship between Cisco and any other company. (0610R)
© 2007 Cisco Systems, Inc. All rights reserved.
DOC-7818031=
78-18031-01
5 Connect to 120V AC Socket
Warning
Use only the supplied power adapter
and plugs.
Step 1
Identify the correct plug type for your
region (U.S., E.U., U.K., or Australia),
then snap that plug into the AC adapter.
Step 2
Connect the DC barrel connector to the
5V DC power supply on the DMP chassis.
Step 3
Connect to a 120V AC electrical outlet
that you know is grounded.
We recommend that you use a surge protector or an
uninterruptable power supply from a reputable
manufacturer.
We recommend that you change the username and
password as soon as possible.
Step 4
Step 5
6 Check DMP LEDs
The DMP chassis contains a green LED and a red
LED. After you attach your DMP to its AC power
source, you should see light from both LEDs
through the front of your DMP. The lights tell you
if your DMP has power and if it has an IP address.
8 Configure Video Output
Step 1
In the Settings area, click Display. You see:
Step 6
• A solid green LED indicates that a power
source is available.
• A solid red LED indicates that your DMP is
trying to obtain an IP address. (After your
DMP has an IP address, it turns off the
red LED.)
Step 1
When your DMP display shows the Cisco
logo and shows an IP address for your
DMP, write down the IP address.
Step 2
To log in to DMPDM, point your browser
to the IP address that you wrote down.
Step 3
At the login prompt, enter the username
admin and the password default.
If you selected RGB as the color space,
select an option from the Color
Component Order list to define the order
in which to store red, green, and blue data.
This definition is sometimes called the
left-to-right additive color model.
(Optional) Move any or all of the sliders to
compensate for DMP display deficiencies
in video (brightness, contrast, or
saturation) or audio (channel volume).
Step 7
To confirm your selections and to
implement them until you change them or
until you restart your DMP, click Apply.
Step 8
To test if your selections are suitable ones
for your DMP display, click Show IP in the
DMP Mode area.
The LEDs do not blink.
7 Log In to DMPDM
From the Color Space list, select the
absolute color space that your DMP
display uses.
Your DMP display shows a Cisco logo and
shows the IP address for your DMP.
Step 2
From the Display Standard list, select the
option that shows the name of the
standard that your DMP display uses.
Step 3
From the Display Output Interface list,
select the type of video cable that connects
to your DMP display. (The default option
supports composite/RCA.)
Step 9
To make your configuration changes
permanent, even after you reboot your
DMP, do the following:
a. In the Administration area, click Save
Configuration.
b. On the Save Configuration page,
click Save.
9 Identify Trusted DMM-DS
If your DMP will be part of a digital signage
network that includes multiple DMPs and will be
managed centrally, you can specify in DMPDM
which one DMM-DS server appliance to trust.
Step 1
In the Settings area, click DMM.
Step 2
In the DMM Host field, enter the IP
address of the one DMM-DS server
appliance that you trust.
Step 3
In the Timeout (Seconds) field, enter the
maximum number of seconds that your
DMP should wait for a response from the
trusted DMM-DS server appliance.
Step 4
To confirm your selections and to
implement them until you change them or
until you restart your DMP, click Apply.
Step 5
To make your configuration changes
permanent even after you reboot your
DMP, do the following:
a. In the Administration area, click Save
Configuration.
b. On the Save Configuration page,
click Save.