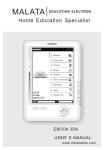
1
KH 8097
Operating Manual
Blood pressure meter
0197
Time / Date Display
Systolic Blood Pressure
Diastolic Blood Pressure
Pulse per Minute
Start / stop measuring process
Sequential memory recall
Time / Date: Adjust the setting;
Select memory block; Enter limit values
Time / Date: Select position; Confirm entered values
Number of saved measured values
Battery compartment
KH 8097
Blood pressure meter
1.
2.
3.
4.
5.
6.
7.
8.
9.
10.
11.
12.
13.
14.
Intended Use . . . . . . . . . . . . . . . . . . . . . . . . . . 4
Package contents . . . . . . . . . . . . . . . . . . . . . . 4
Important information for your
health and safety: . . . . . . . . . . . . . . . . . . . . . . 5
Insert / exchange batteries . . . . . . . . . . . . . . 7
Adjust date / time . . . . . . . . . . . . . . . . . . . . . . 8
Enter limit values . . . . . . . . . . . . . . . . . . . . . . . 9
Fitting the appliance . . . . . . . . . . . . . . . . . . . 10
Measuring blood pressure. . . . . . . . . . . . . . . 12
Saving measured values . . . . . . . . . . . . . . . . 14
Cleaning and Care . . . . . . . . . . . . . . . . . . . . . 16
Storage and Disposal. . . . . . . . . . . . . . . . . . . 17
Troubleshooting . . . . . . . . . . . . . . . . . . . . . . 18
Technical Data . . . . . . . . . . . . . . . . . . . . . . . . 20
Warranty and service. . . . . . . . . . . . . . . . . . . 21
This manual is a product component. Please keep it in a
safe place for later reference and, if the appliance is
sold, pass it on to the new owner.
3
1. Intended Use
With the blood pressure meter KH 8097 you can quickly
and easily measure your blood pressure, save the measured values, enter in limit values as well as display the
progress and average of the last 3 measurements.
The appliance is intended for...
- checking your own blood pressure
- people over 18 years of age
- private use in the home.
The appliance is not intended for:
- measuring the blood pressure of children,
- for usage in professional or commercial care.
2. Package contents
-
Blood pressure meter
Storage box
2 Batteries (1,5 V, Typ AAA)
Operating manual
Warranty card
4
3. Important information for your
health and safety:
The information contained in this handbook and that
obtained from measurements with the appliance should
not encourage you to make any forms of diagnosis, to
treat health problems or to make any decisions about
medications.
• The measurements taken by yourself can only
be used for your information - they cannot be
a substitute for examination by a doctor!
• Blood pressure is heavily influenced by time of day,
physical exertion and other factors. Do not rely on
individual measurements.
Diseases of the cardio-vascular system can result
in erroneous measurements, as can very low blood
pressure, circulatory disorder, arrhythmia, and other
pre-existing conditions (for example, diabetes mellitus).
• Especially in such cases you should not rely on the
measurement values determined by yourself!
• Under no circumstances should you abstain from
having your blood pressure measured by a doctor in
cases of known ailment, although the values shown
by this appliance are without defect!
5
This blood pressure meter contains precision components and electronics. Measurement accuracy and
the usable life of the appliance both depend on careful
handling:
You must ...
- protect the appliance from knocks and from being
dropped.
- use the appliance only in normal interior ambient
conditions; protect it from humidity, dirt, exposure to
excess heat or cold, and temperature fluctuations.
- keep it well away from electromagnetic fields such
as mobile telephones, sound amplification systems
or switched-on electrical appliances.
Do not inflate the pressure sleeve..
- if the appliance has not been fitted
- if the sleeve is twisted.
Important!
Do not press the button START / STOP , unless the appliance has been fitted. Otherwise, inflation of the pressure sleeve might be set off inadvertently.
6
4. Insert / exchange batteries
Replace the batteries when the appliance functions
become faint, at the latest after 1 year. In this way you
will prevent discharged batteries from leaking into the
appliance.
Open the battery compartment, as illustrated.
• Insert the batteries exactly as marked in the
battery compartment. Lay the strip underneath
the batteries. Battery type: 1.5 V size "AAA“.
Notice: Empty batteries must not be disposed of
in the ordinary household garbage (poisonous heavy
metals). Dispose of them at a collection point for old
batteries or with your dealer.
7
5. Adjust date / time
This is necessary should you wish to save and evaluate your measurements. Press the button MODE .
The month and day as well as the time
appear at the top of the display. You can move from
one position to the next by pressing the button
again. The currently selected position flashes.
Press the button SET , to change the value of
the flashing position. In the time display, the second
part of the day is indicated by a small letter “P”
(for PM) under the colon character.
Then press the button MODE , to save the programmed details and change over to programming the
systolic and diastolic value limits.
DATE
TIME
SYS.
mmHg
DIA.
mmHg
PULSE
/MIN.
M
MODE
SET
MEM
8
START
/STOP
6. Enter limit values
After you have entered in the time and date, the first
programmable limit value for systolic blood pressure
blinks in the display.
Press the button SET , to raise the value in
5 mmHg steps. The adjustment range for systolic
blood pressure lies between 70-250 mmHg.
Press the button MODE , to save this setting and
move to programming the diastolic limit values.
Press the button SET , to raise the value in
5 mmHg steps. The adjusment range for diastolic
blood pressure lies between 40-245 mmHg.
Press the button MODE , to save the setting.
Repeat the last five instructions to enter the
value limits for further users (2 + 3).
Press the button START / STOP , to discontinue
the programming of limit values.
The programming of limit values into each of the
3 memory slots ("no. 1" to "no. 3") can also be
carried out at a later time.
9
7. Fitting the appliance
Use the appliance only on persons whose wrist 'fits'
the pressure sleeve. The sleeve must be attached
lightly and closed firmly with the Velcro fastener.
The sleeve is appropriate to a wrist perimeter
of 135m-195mm.
If ...
- the wrist is too thin, it may not be possible to pump
up the pressure sleeve sufficiently, and in this case
an exact measurement is not possible.
- the wrist is too thick, it may not be possible to fasten
the pressure sleeve firmly enough and, in this case
also, it is not possible to obtain an exact
measurement.
Caution: Do not use the appliance if you have any
injuries or lesions to the wrist. These could be aggravated by pressure when the sleeve is pumped up.
A measurement of blood pressure can only be meaningful if the blood circulation has settled. You should take a
seat and relax for 3 - 5 minutes before taking a
measurement.
10
Notice: Before taking the first measurement, remove
the protective foil from the display.
Place the appliance on the inside of the left wrist, as
illustrated.
Close the Velcro fastener firmly - but only sufficiently
to ensure the sleeve is lying evenly.
11
8. Measuring blood pressure
DATE
TIME
SYS.
mmHg
DIA.
mmHg
PULSE
/MIN.
M
MODE
SET
MEM
START
/STOP
It is important to avoid moving the appliance in any way
while a measurement is being taken. The arm should
be supported on a firm surface and held still. As far as
possible, do not talk!
Position the arm such that the appliance is at the
same level as the heart. This is roughly a hand's
breadth above the bottom of the rib cage.
Now press the button START / STOP .
Press the button SET , to programme the desired
memory block (no.1 to no.3).
Press the button START / STOP again. All elements in
the display appear shortly, then the desired memory
block.
12
The measurement process starts with the pumping up of the sleeve.
To break off the measurement process press the
button START / STOP again.
During measurement, air is gradually released from the
sleeve. If the measurement fails at this point, the appliance may pump some more air into the sleeve. If a
measurement is taken successfully, the remaining air is
released and the display shows ...
the „systolic“ blood pressure at the top, in healthy
adults it lies between about 105-140 mmHg,
the “diastolic” blood pressure in the middle, in
healthy adults it lies between about 60-90 mmHg,
the pulse measurement at the bottom.
The m easured blood pressure as well as the programmed limit values are displayed alternatively. Should a
limit value be exceeded (SYS or DIA) the appropriate
value flashes in the display. Press the button
START / STOP to change over to the Start display and
possibly alter the programmed values.
The appliance is equipped with an automatic switch-off.
Should a button not be activated within one minute,
the appliance switches itself off. Press the button
START / STOP , to switch the appliance back on.
13
9. Saving measured values
DATE
TIME
SYS.
mmHg
DIA.
mmHg
PULSE
/MIN.
M
MODE
SET
MEM
START
/STOP
The appliance has three memory blocks (numbered 1 to 3),
each with 30 memory locations. It can therefore save
up to 30 measurements for 3 persons, or up to 90 measurements for one person. Additionally, the average of
the last three measurements can also be displayed.
a) How to save a measurement
First of all, select "your" memory block. For this,
repeatedly press the button SET until "your"
memory block, „no.1“ to „no.3“, appears in the
display.
When you now carry out the measurement process,
as detailed in chapters 5 & 8, the results are saved
into the selected memory block.
14
b) Recalling a previous measurement
First of all, select "your" memory block. For this, repeatedly press the button SET , until "your"
memory block, „no.1“ to „no.3“, appears in the
display.
Press the button MEM to call up the indicated
memory block. There then appears on the lower display line an A (= average) and, in alternating display,
the average values of the last three measurements
as well as the programmed limit values for the
appropriate individual are shown.
Press the button MEM again. In the lower display
screen the number of saved measurement values
for the individual memory block are shown. Pressing
again on the button MEM allows you to browse
through all saved measurement results. The date
and time of measurement for each is indicated.
15
c) Erasing stored measurements
When all memory spaces are occupied, the appliance
automatically overwrites the oldest measurement.
Should you however wish to erase all measured
values, select first of all „ your" memory block.
For this, repeatedly press the button SET until "your"
memory block, „no.1“ to „no.3“, appears in the display.
Press the button MEM to call up the indicated
memory block.
+ Now press the buttons SET and MODE
at the same time. CLA appears in the display. All
measured values in „your" memory block are
now erased.
10. Cleaning and Care
• Carefully clean the equipment and pressure
sleeve using a slightly damp cloth only.
• Do not use chemical agents or solvents for
cleaning.
• Do not, under any circumstances, immerse the
appliance in water, as fluids will penetrate through
to the inside. This would cause irreparable damage
to the appliance.
16
11. Storage and Disposal
Should you not use the appliance for a longer period of
time remove the batteries to prevent possible damage
by battery leakage. Keep the appliance only in the box
supplied. Store it at a location that is both dry and
protected from large temperature variations.
Do not dispose of the appliance in your normal domestic waste. If you wish to dispose of
the appliance at a later time, take it to a recycling
centre for electronic equipment.
Notice: Empty batteries must not be disposed of
in the ordinary household garbage (poisonous heavy
metals). Dispose of these at a battery collection point or
at your dealer.
17
12. Troubleshooting
Never open the casing – you will not be able to close it
again correctly without a special tool. Do not carry out
repairs by yourself! In case of problems, approach the
Customer Service department. (see Warranty Card).
- If no display appears, although a button has been
pressed: Remove the batteries and insert them again
after a few seconds.
- If the sleeve pumps itself up continuously, press the
button START / STOP to interrupt it. If you cannot stop
the inflation process in this way, remove the sleeve
immediately and take out the batteries.
18
What do the symbols on the display mean?
Symbol
Meaning
What is to be done?
Appears as soon as a pul- Keep the arm still se is detected. If it does
do not move or
not appear, or unregularly, speak.
the identification is
disrupted.
Appears when the batte- Replace the batteries
ries are almost completely as soon as the symflat.
bol appears.
(see Chapter 4)
Appears if the measure- Check the correct
ment could not be succes- positioning of the
sfully completed.
sleeve (Chapter 7).
Keep the arm still do not move or talk.
Measurement being taken nothing - all ok.
19
13. Technical Data
Measurement range:
0-300 mmHg Pressure
Pulse 40-200 beats / minute
Measurement accuracy: +/- 3 mmHg Pressure
Pulse +/- 5%
Inflation / deflation:
automatic
Pressure sleeve size:
for wrist circumference
135-195 mm
Operating temperature: +10...40°C at 30...85%
relative humidity
Storage temperature:
-20°C...+50°C at 10...95%
relative humidity.
Power supply:
2 x Batteries 1,5 V Typ “AAA”
for ca. 250 Measurements
(Only Alkali batteries)
Memory:
3 blocks with 30 memory
cells each
Dimensions:
70 x 72 x 29 mm (L x B x H)
Weight:
approx. 110 g
The CE trademark of the measuring appliance fulfills the
EC Guideline 93/42/EEC. The blood pressure measuring
device fulfills the European Regulations EN 1060 Part 1,
EN 1060 Part 3 and IEC 60601-1-2.
20
14. Warranty and service
The warranty conditions and the service address can
be found on the warranty card.
21
UK
Kompernaß GmbH · Burgstraße 21
D-44867 Bochum · www.kompernass.com
Producer: Health & Life Co., Ltd.
9F. No. 186, Jian Yi Road, Chung Ho City, Taipei, Taiwan.
ID No.: KH 8097-0106_V4