1
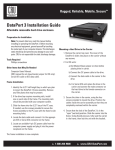
1. Installation Steps
3. Safe Cartridge Removal from a Computer
1.1 Frame Installation
a. Mount the DataPort 20 frame into the computer chassis. The DataPort
20 frame is interchangeable with most slimline optical drives as well as
a variety of slimline mounting brackets and bezels. Please consult the
chassis manufacturer’s user manual for specific mounting instructions.
b. Connect the DataPort 20 frame to the motherboard with a SATA data cable
and to power with a 6-pin SATA slimline connector (sold separately).
a. Turn off the computer or properly dismount the drive from the system. To
dismount the drive, ensure there are no file transfers in progress and the amber
Drive Activity LED is off before turning the DataPort 20 off.
b. If the drive carrier is locked into the DataPort 20 frame, insert the plastic key
into the ejection button and turn it 90 degrees counterclockwise.
c. Press in on the ejection button to eject the carrier.
1.2 Drive Installation
a. Carrier side caps are packaged within the carrier and are marked “left”
and “right” as viewed from the logo end of the carrier. The “back” mark
indicates the connector end of the hard drive. Using two of the supplied
screws, mount one side cap to a 2.5” SATA HDD. Slide the 2.5” SATA hard
drive into the DataPort 20 carrier, ensuring that the pins of the unified
SATA power and data connector on the rear of the drive are visible through
the slot on the rear of the carrier.
b. Mount the other black plastic side cap to the HDD, capturing the outer
carrier metal and securing both the side cap and the drive to the carrier.
•
NOTE: Do not over-tighten the screws on the side caps, or the carrier may
fail to eject properly from the frame.
4. Warnings and Notices
•
•
•
•
1.3 Operating Your DataPort 20
c. Slide the carrier into the DataPort 20 frame and push firmly until the carrier
clicks into place. The drive will power on automatically if the computer is
turned on.
d. You may optionally lock the drive carrier into the frame. Insert the plastic
key into the ejection button and turn the key 90 degrees clockwise.
The main circuit board of the HDD carrier is susceptible to static electricity.
Proper grounding is strongly recommended to prevent electrical damage to the
enclosure or other connected devices, including the computer host. Avoid all
dramatic movement, tapping on the unit, and vibration.
Avoid placing the HDD carrier close to magnetic devices, high voltage devices,
or near a heat source. This includes any place where the product will be subject
to direct sunlight. Do NOT allow water to make contact with the carrier or
receiving frame.
Before starting any type of hardware installation, please ensure that all power
switches have been turned off and all power cords have been disconnected to
prevent personal injury and damage to the hardware.
To avoid overheating, the DataPort 20 should be operated in a well-ventilated
area.
Remove the drives before transporting the DataPort 20 to prevent damage to
the drive interfaces.
Your DataPort 20 is now ready to use! If the hard drive is already formatted, it can
be used right away. If the hard drive is brand new, or its format is not compatible
with your computer, the drive will need to be formatted before being used.
2. LED Behavior
#
LED Name
Color
State
Description
1
Drive Activity
Amber
Intermittent
Flashes when the drive is being accessed.
2
Power
Green
Solid
Unit is powered on.
CRU Mark
10.25.12
PMS 711
2 cyan
85 magenta
76 yellow