1
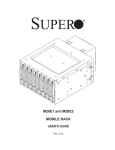
M28E1 and M28E2
MOBILE RACK
USER'S GUIDE
Rev. 2.0
M28E1 and E2 Mobile Rack User's Guide
The information in this User’s Manual has been carefully reviewed and is believed to be accurate.
The vendor assumes no responsibility for any inaccuracies that may be contained in this document,
makes no commitment to update or to keep current the information in this manual, or to notify any
person or organization of the updates. Please Note: For the most up-to-date version of
this manual, please see our web site at www.supermicro.com.
SUPERMICRO COMPUTER reserves the right to make changes to the product described in this
manual at any time and without notice. This product, including software, if any, and documentation
may not, in whole or in part, be copied, photocopied, reproduced, translated or reduced to any
medium or machine without prior written consent.
IN NO EVENT WILL SUPERMICRO COMPUTER BE LIABLE FOR DIRECT, INDIRECT, SPECIAL,
INCIDENTAL, SPECULATIVE OR CONSEQUENTIAL DAMAGES ARISING FROM THE USE
OR INABILITY TO USE THIS PRODUCT OR DOCUMENTATION, EVEN IF ADVISED OF THE
POSSIBILITY OF SUCH DAMAGES. IN PARTICULAR, THE VENDOR SHALL NOT HAVE LIABILITY
FOR ANY HARDWARE, SOFTWARE, OR DATA STORED OR USED WITH THE PRODUCT,
INCLUDING THE COSTS OF REPAIRING, REPLACING, INTEGRATING, INSTALLING OR
RECOVERING SUCH HARDWARE, SOFTWARE, OR DATA.
Any disputes arising between manufacturer and customer shall be governed by the laws of Santa
Clara County in the State of California, USA. The State of California, County of Santa Clara shall be
the exclusive venue for the resolution of any such disputes. Supermicro's total liability for all claims
will not exceed the price paid for the hardware product.
Manual Revision 2.0
Release Date: August 22, 2007
Unless you request and receive written permission from SUPER MICRO COMPUTER, you may not
copy or otherwise reproduce/distribute any part of this document.
Information in this document is subject to change without notice. Other products and companies
referred to herein are trademarks or registered trademarks of their respective companies or mark
holders.
Copyright © 2007 by SUPER MICRO COMPUTER INC.
All rights reserved.
Printed in the United States of America
ii
Safety Information and Technical Specifications
Table of Contents
M28E1 and M28E2
MOBILE RACK
Contacting Super Micro .................................................................................................iv
Chapter 1 Safety Guidelines
1-1
ESD Safety Guidelines ................................................................................... 1-1
1-2
General Safety Guidelines .............................................................................. 1-1
1-3
An Important Note to Users ............................................................................ 1-1
Chapter 2 Introduction
2-1
Overview ......................................................................................................... 2-1
2-2
Product Features ........................................................................................... 2-1
Additional Information................................................................................. 2-2
Chapter 3 Jumper Setting and Pin Definitions
3-1 Front Connectors and Jumpers ........................................................................... 3-1
Front Connectors and Jumpers ...................................................................... 3-1
Explanation of Jumpers .............................................................................. 3-2
3-2
Rear Connectors and LED Indicators ............................................................. 3-3
3-3
Expander Card ................................................................................................ 3-4
Front Connectors ............................................................................................ 3-4
Front Connectors........................................................................................ 3-4
Front Connector and Pin Definitions ............................................................... 3-5
Jumper Settings .............................................................................................. 3-6
Explanation of Jumpers .............................................................................. 3-6
Chapter 4 Installation Instructions
4-1
Shipping List.................................................................................................... 4-1
4-2
Tools Required ................................................................................................ 4-1
4-3
Other Parts ...................................................................................................... 4-1
4-4
Setup and Installation Steps ........................................................................... 4-2
4-5
General Safety Guidelines .............................................................................. 4-2
4-6
Before Accessing the Mobile Rack ................................................................. 4-2
4-7
Cooling Fan Installation .................................................................................. 4-3
4-8
Hard Drive Installation..................................................................................... 4-4
Fan Removal .............................................................................................. 4-4
4-9
Connect Data and Power Cables ................................................................... 4-6
4-10
Advanced Configuration .................................................................................. 4-6
iii
M28E1 and E2 Mobile Rack User's Guide
Contacting Super Micro
Headquarters
Address:
SuperMicro Computer, Inc.
980 Rock Ave.
San Jose, CA 95131 U.S.A.
Tel:
+1 (408) 503-8000
Fax:
+1 (408) 503-8008
Email:
[email protected] (General Information)
[email protected] (Technical Support)
Web Site:
www.supermicro.com
Europe
Address:
SuperMicro Computer B.V.
Het Sterrenbeeld 28, 5215 ML
's-Hertogenbosch, The Netherlands
Tel:
+31 (0) 73-6400390
Fax:
+31 (0) 73-6416525
Email:
[email protected] (General Information)
[email protected] (Technical Support)
[email protected] (Customer Support)
Asia-Pacific
Address:
SuperMicro, Taiwan
4F, No. 232-1, Liancheng Rd.
Chung-Ho 235, Taipei County
Taiwan, R.O.C.
Tel:
+886-(2) 8226-3990
Fax:
+886-(2) 8226-3991
Web Site:
www.supermicro.com.tw
Technical Support:
Email:
[email protected]
Tel:
886-2-8228-1366, ext.132 or 139
iv
Safety Information and Technical Specifications
Chapter 1
Safety Guidelines
To avoid personal injury and property damage, carefully follow all the safety steps
listed below when accessing your system or handling the components.
1-1
ESD Safety Guidelines
Electric Static Discharge (ESD) can damage electronic components. To prevent damage to your system, it is important to handle it very carefully. The following measures
are generally sufficient to protect your equipment from ESD.
• Use a grounded wrist strap designed to prevent static discharge.
• Touch a grounded metal object before removing a component from the
antistatic bag.
• Handle the RAID card by its edges only; do not touch its components,
peripheral chips, memory modules or gold contacts.
• When handling chips or modules, avoid touching their pins.
• Put the card and peripherals back into their antistatic bags when not in
use.
1-2
General Safety Guidelines
• Always disconnect power cables before installing or removing any
components from the computer, including the backplane.
• Disconnect the power cable before installing or removing any cables
from the backplane.
• Make sure that the backplane is securely and properly installed on
the motherboard to prevent damage to the system due to power
shortage.
1-3
An Important Note to Users
• All images and layouts shown in this user's guide are based upon the
latest PCB Revision available at the time of publishing. The card you
have received may or may not look exactly the same as the graphics
shown in this manual.
1-1
M28E1 and E2 Mobile Rack User's Guide
Notes
1-2
Safety Information and Technical Specifications
Chapter 2
Introduction
2-1
Overview
T his manual is w r it ten for system integrator s, PC tec hnic ians and
knowledgeable PC users. It provides detailed information for the installation and
use of the M28E1/M28E2 Mobile Rack.
The Supermicro M28E1/M28E2 Mobile Rack showcases advanced technology
innovations in modular connectivity and data transferability and supplies reliable,
effective, and scalable solutions for tomorrow’s data communications industry.
2-2
Product Features
The M28E1/M28E2 Mobile Rack provides the following:
•
•
Slim design: pocket-size (5.5” W x 2.5” H)
Two LSI SAS X12 Expanders built-in for the M28E2 and One LSI SAS X12
Expander for the M28E1
•
Supports 8 x 2.5” SFF HDD
•
Supports up to 5V/10A (Average) and 12V/10A (Average)
•
Provides up to 3 Gbps transfer speed
•
Supports SAS, SATA II with potential support of up to 144 SAS devices
Operating Systems
This mobile rack supports the following Operating Systems:
•
Windows 2000, Windows XP, and Windows 2003
•
Linux: Red Hat and SuSE
2-1
M28E1 and E2 Mobile Rack User's Guide
Additional Information
The M28E1/M28E2 Mobile Rack was designed for use in certain chassis and
servers or as a stand alone unit. Use the chassis or server manual for installation instructions. Use the instructions listed in this manual to use the mobile rack
independent of a chassis.
The pictures or graphics shown in this User’s Guide were based upon the latest
PCB revision available at the time of the publishing of this manual. The M28E1/
M28E2 Mobile Rack may or may not look exactly the same as the graphics shown
in this manual.
The availability of SAS-devices supported depends on the readiness of firmware
and hardware support.
2-2
Safety Information and Technical Specifications
Chapter 3
Jumper Setting and Pin Definitions
3-1 Front Connectors and Jumpers
3
1
Signal Receptacle
84
2
S2
++
J6
1
+
1
+
+
PWR/Signal Receptacle
2
+
+
+
+
+
+
2
Figure 3-1. Mobile Rack Backplane (Front)
Front Connectors and Jumpers
1. Signal Receptacle
2. Power/Signal Receptacle
3. Jumper - JP25
3-1
+
+
+
40
+
+
J5
39
P2
+
+
83
+
1
JP25
OH Temperature
M28E1 and E2 Mobile Rack User's Guide
Explanation of Jumpers
To modify the operation of the backplane,
jumpers can be used to choose between
optional settings. Jumpers create shorts
between two pins to change the function
of the connector. Pin 1 is identified with
a square solder pad on the printed circuit
board. Note: On two pin jumpers, "Closed"
means the jumper is on and "Open" means
the jumper is off the pins.
JP25
Jumper Settings
Setting
Note
Open: 45º C
1-2: 50º C
2-3: 55º C
Overheat Temperature.
Backplane Connectors
Connector
Description
J5 (P2)
Power/Signal Receptacle
J6 (S2)
Power Receptacle
3-2
2
1
3
2
1
Jumper
Jumper Settings
Jumper
3
Connector
Pins
Safety Information and Technical Specifications
Rear Connectors and LED Indicators
D1
+
D5
ACT0
+ D2
FAIL1
+ D6
+ D3
ACT1
FAIL2
D2 D6
+ D7
#6
D9 D18
FAIL3
D8
ACT3
D13
+ D9 +
FAIL4
ACT4
#7
J9
+ D10
FAIL5
D14
+ D11
ACT5
FAIL6
+
+
D15
ACT6
+ D12
FAIL7
Rear SAS/SATA Connectors
SAS #0
SAS Drive
Number
SAS/SATA HDD #0
SAS #1
SAS/SATA HDD #1
SAS #2
SAS/SATA HDD #2
SAS #3
SAS/SATA HDD #3
SAS #4
SAS/SATA HDD #4
SAS #5
SAS/SATA HDD #5
SAS #6
SAS/SATA HDD #6
SAS #7
SAS/SATA HDD #7
Rear LED Indicators
Rear LED
SAS #0
Hard Drive Activity
Failure LED
D5
D1
SAS #1
D6
D2
SAS #2
D7
D3
SAS #3
D8
D4
SAS #4
D18
D9
SAS #5
D14
D10
SAS #6
D15
D11
SAS #7
D16
D12
3-3
+ D16
ACT7
D12 D16
Figure 3-2. Mobile Rack Backplane (Rear)
Rear
Connector
D18
+
D17
FAN FAIL OH/DRIVE FAIL
D11 D15
D10 D14
D4 D8
J10
SAS Slot 7
J8
PWR/Signal Receptale
+ D4
ACT2
#5
J7
+
#4
J4
D3 D7
D1 D5
+
#3
J3
SAS Slot 2
SAS Slot 1
SAS Slot 0
#2
J2
SAS #5 SAS #6 SAS #7
J8
J9
J10
SAS Slot 6
#1
J1
FAIL0
REV 1.01
SAS Slot 5
#0
SASM28
SAS #2 SAS #3 SAS #4
J3
J4
J7
SAS Slot 4
SAS #0 SAS #1
J1
J2
SAS Slot 3
3-2
M28E1 and E2 Mobile Rack User's Guide
3-3
Expander Card
Front Connectors
1
4
#4
REV 1.01A
J2
3
4
#1
#0 J1
#3
#2
J11
In
#5
SASEXP-M28
In
J12
8+ 7
In
+
+
1
4-pin PWR Connector
In
JP1
+
In/Out
1
6
J4
In/ Out
J3
J13
In/Out
#6
#7
4-pin PWR Connector
In/Out
J14
5
JP4
4
10
2
FAN
+
JP2
9
1
JP3
Fan Enable
1
JP5
Buzzer Reset
+
+
Figure 3-3. Expander Card E2 Model (Rear)
Front Connectors
1. Power Connectors (4-pin): J1 and
J2
2. Fan Connector: JP4
3. SAS Port #0 J1
4. SAS Port #1 J2
5. SAS Port #2 J4
6. SAS Port #3 J3
7. SAS Port #4 J11
8. SAS Port #5 J12
9. SAS Port #6 J13
10. SAS Port #7 J14
1
4
SASEXP-M28
REV 1.01A
J2
3
4
#1
#0 J1
#3
#2
In
+
In
+
+
1
4-pin PWR Connector
JP1
+
J3
J4
In/ Out
In/Out
6
5
JP4
1
JP3
Fan Enable
+
4
FAN
+
1
4-pin PWR Connector
JP2
1
Buzzer Reset
JP5
Figure 3-4. Expander Card E1 Model (Rear)
3-4
2
+
Safety Information and Technical Specifications
Front Connector and Pin Definitions
1. Backplane Main Power Connectors
The 4-pin connectors, designated JP1 and
JP2 provide power to the backplane. See
the table on the right for pin definitions.
Backplane
Main Power
4-Pin Connector
(JP1 and JP2)
Pin#
Definition
1
+12V
2 and 3
4
2. Fan Connectors
The 3-pin connector, designated JP4, provides power to the fan. See the table on the
right for pin definitions.
Ground
+5V
Fan Connector
(JP4)
Pin#
Definition
1
Ground
2
+12V
3
Tachometer
SAS Ports
3-10. SAS Ports
The SAS ports are used to connect the SAS
drive cables. The 8 ports are designated
#0 - #7.
NOTE: Ports #4, #5, #6, and #7 are available on the E2 Models only.
3-5
Port#
Information
0
IN
1
IN
2
IN and OUT
3
IN and OUT
4
IN
5
IN
6
IN and OUT
7
IN and OUT
M28E1 and E2 Mobile Rack User's Guide
Jumper Settings
+
SASEXP-M28
REV 1.01A
J2
4
#1
#0 J1
#3
#2
J11
In
#4
In
#5
In
+
J12
+
1
4-pin PWR Connector
In
JP1
+
Fan Enable
4
1
J4
In/ Out
J3
J13
In/Out
#6
#7
In/Out
1
4-pin PWR Connector
In/Out
J14
+
JP2
JP4
FAN
JP3
Fan Enable
+
+
1
Buzzer Reset
JP5
Buzzer Reset
Figure 3-5. Expander Card E2 Model (Rear)
Explanation of Jumpers
To modify the operation of the backplane,
jumpers can be used to choose between
optional settings. Jumpers create shorts
between two pins to change the function
of the connector. Pin 1 is identified with
a square solder pad on the printed circuit
board. Note: On two pin jumpers, "Closed"
means the jumper is on and "Open" means
the jumper is off the pins.
Jumper Settings
Setting
Note
J3
Closed: With Fan
Open: No Fan
Fan Enable
J5
Open: Enabled
Closed: Disabled
Buzzer Reset
3-6
2
1
3
2
1
Jumper
Jumper Settings
Jumper
3
Connector
Pins
Safety Information and Technical Specifications
Chapter 4
Installation Instructions
4-1
Shipping List
Examine the your order for the following parts:
•
•
•
•
•
4-2
M28E1/M28E2 Mobile Rack
One 80mm Cooling Fan (Fan 0084)
32 - M3 screws
Four Round head screws
SATA 4-lane cable
Tools Required
M28E series Mobile Rack assembly requires the following:
•
•
4-3
Phillips head screwdriver
Industry standard anti-static strap (recommended)
Other Parts
When using this mobile rack independent of a chassis, you may need the following parts.
•
•
4-pin Power cord extension (to connect the mobile rack to a power supply)
SAS iPass cable (part number CBL-0116; used to connect the SAS ports
to the motherboard or add-on card)
4-1
M28E1 and E2 Mobile Rack User's Guide
4-4
Setup and Installation Steps
Use the following list as a guide to setup and install the mobile rack. If this mobile
rack is to be installed in a chassis, use the instructions in the chassis manual.
1. Unpack and examine system parts.
2. Review all system and safety guidelines.
3. Install the system fan.
4. Install the hard drives.
5. Connect data and power cables.
4-5
General Safety Guidelines
•
•
•
4-6
Always disconnect power cables before installing or removing any components from the computer, including the backplane.
Disconnect the power cable before installing or removing any cables from
the mobile rack or backplane.
Make sure that the backplane is securely and properly installed on the
motherboard to prevent damage to the system due to power shortage.
Before Accessing the Mobile Rack
1. Power down and power supply connected to the chassis or server. In addition, unplug all power cords from the wall outlet.
2. Disconnect all necessary cables and label the cables for easy identification.
3. Use a grounded wrist strap designed to prevent static discharge when handling components.
4. Save all screws and fasteners for later use.
5. Familiarize yourself with and follow the instructions in this section.
4-2
Safety Information and Technical Specifications
4-7
Cooling Fan Installation
When using the M28E1 or M28E2 without installing the mobile rack in a larger unit
(such as a chassis), you must install a cooling fan.
For more information on installing the mobile rack into a chassis or server, see
the documentation for your mobile rack or server. You can also visit our website at
http://www.supermicro.com.
Release Tabs
Fan Connector
Tab Openings
Figure 4-1. Mobile Rack with Fan
Use the following instructions to install the cooling fan
1. Press the release tabs on both sides of the cooling fans, as shown.
2. Attach the fans to the mobile rack by sliding the release tabs into the openings until the fan clicks into place.
3. Attach the cooling fan cable to the Fan Connector.
4-3
M28E1 and E2 Mobile Rack User's Guide
Fan Removal
Use the following instructions to remove the cooling fan from the mobile
rack:
1. Remove the fan cable from the mobile rack by gently, but firmly pulling the
cable from the backplane.
2. Press both release tabs and pull the fan from the mobile rack.
4-8
Hard Drive Installation
Each M28 Mobile Rack includes dummy trays that act as place holders for hard
drives. Before using the mobile rack, you must install hard drives to the trays. Hard
drives are sold separately.
Hard Drive Tray Latch
Release Tab
Figure 4-2. Mobile Rack with Hard Drive Trays
To install hard drives into the mobile rack
1. Press the release tabs to open the hard drive tray latch.
2. Using the latch as a handle, pull the tray from the hard drive.
4-4
Safety Information and Technical Specifications
Hard Drive
M3 Screws
Figure 4-3. Hard Drive and Hard Drive Tray
3. Place a 2.5" hard drive in the hard drive tray.
4. Align the hard drives to the rear of the hard drive tray.
5. Secure the hard drive to the tray using four M3 screws (as illustrated).
6. Using the hard drive tray latch as a handle, slide the hard drive into the
mobile rack.
7. Close the hard drive tray handle to lock the hard drive into place.
8. Repeat steps 1-8 for each hard drive that you will install into the mobile rack.
4-5
M28E1 and E2 Mobile Rack User's Guide
4-9
Connect Data and Power Cables
Use the following instructions to complete setup of your mobile rack.
1. Connect the SAS cables to the mobile rack. A longer SAS cable may be
required (see the recommended cables listed earlier in this manual).
2. Connect the power cables from the chassis power supply. A power cable
extension may be required.
4-10 Advanced Configuration
Use the following instructions in the unlikely event that you must access the jumpers, buzzer, or other backplane components.
Mobile Rack Casing
Remove these screws
Figure 4-4. Mobile Rack and Rear Casing
To access the mobile rack backplane (optional)
1. Remove the two screws that secure the casing to the mobile rack.
2. Slide the casing downward and remove it from the mobile rack.
4-6