1
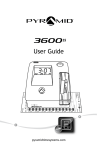
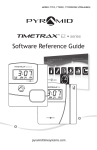
Auto Aligning Time Clock
User Guide
pyramidtimesystems.com
AUTO ALIGNING TIME CLOCK INSTRUCTIONS
Model 2650
Copyright Information
© 2013 Pyramid Time Systems, LLC. All rights reserved.
Reproduction, adaptation or translation without prior written permission is prohibited,
except as allowed under the copyright laws.
The information contained herein is subject to change without notice.
The only warranties for Pyramid Time Systems products are set forth in the express
warranty statements accompanying such products. Nothing herein should be construed
as constituting an additional warranty. Pyramid Time Systems shall not be liable for
technical or editorial errors or omissions contained herein.
AUTO ALIGNING TIME CLOCK INSTRUCTIONS
Model 2650
TABLE OF CONTENTS
PRODUCT OVERVIEW . FEATURES . CONTENTS
. . . . . . . . . . . . . . . . . . . . . . 2
. . . . . . . . . . . . . . . . . . . . . . . . . . . 2
INSTALLATION
. . . . . . . . . . . . . . . . . . . . . . . . . . PROGRAMMING .
.
ADVANCED MENU
.
.
.
.
.
.
SET UP WARNINGS . .
.
PRINT FORMAT
OPERATION .
.
.
.
.
.
.
.
.
.
.
.
.
.
.
.
.
.
.
.
.
5
6
7
. . . . . . . . . . . . . . . . . . . . . . . 8
.
.
4
. . . . . . . . . . . . . . . . . . . . . SCHEDULE EVENTS (BUZZER)
TIME CARDS.
.
. . . . . . . . . . . . . . . . . . . . . . . .
SET UP COLUMN SHIFT . .
.
.
.
.
.
. . . . . . . . . . . . . . . . . . . .
.
.
.
.
.
.
.
.
.
.
.
.
.
.
.
.
.
.
.
.
.
.
.
.
.
.
.
.
.
.
.
.
.
.
.
.
10
.
11
. . . . . . . . . . . . . . . . .
TROUBLESHOOTING, PRINT ADJUST & MASTER RESET. . . . . . . 9
10
. . . . . . . . . . . . . . . . . . . . . . . . . .
REPLACING RIBBON CARTRIDGE . FAQs.
3
. . . . . . . . . . . . . . . . . . . . . . . . . . .
12
13
.
.
.
.
.
.
.
.
.
.
.
.
.
.
.
.
.
.
.
.
.
.
.
.
.
.
14
ACCESSORIES .
.
.
.
.
.
.
.
.
.
.
.
.
.
.
.
.
.
.
.
.
.
.
.
.
.
14
.
.
.
SPECIFICATIONS.
15
. . . . . . . . . . . . . . . . . . . . . . . . WARRANTY & CUSTOMER SUPPORT .
.
.
.
.
.
.
.
.
.
.
.
.
.
.
16-17
ESPAÑOL .
.
.
.
.
.
.
.
.
.
.
.
.
.
.
18-34
FRANÇAIS .
.
.
.
.
.
.
.
.
.
.
.
.
.
.
.
pyramidtimesystems.com
.
.
.
.
.
.
.
.
.
.
.
.
.
.
.
.
.
.
.
.
.
.
35-51
TABLE OF CONTENTS
1
AUTO ALIGNING TIME CLOCK INSTRUCTIONS
Model 2650
PRODUCT OVERVIEW
Thank you for choosing the 2650 Auto Aligning Time Clock! The 2650 stays on
top of employee arrival time, breaks & departure time. The 6-column time card
accommodates up to 3 In & Out punch intervals for lunch & overtime hours. 2-color
ink indicates early/late punches in red. Simple set-up, simple operation & a compact
design makes this time clock the perfect fit for small workplaces!
Please read through this User Guide for simple set-up & operation.
AUTO ALIGNING TIME CLOCK : FEATURES
Employee Capacity
Unlimited
Card Alignment
Top
Ribbon Ink
2 Color (black & red)
Audio Signal
Buzzer
Program Display Language
English, Spanish & French
Display
Time, Date & Day of Week, backlit LCD screen
Printing Format
Hour & minutes
Printing
Dot matrix
Automatic Time Reset
Short months, Leap Year & Daylight Savings Time
Battery Back-Up
Safeguards data & settings for up to 30 days
without power
Tamper-Proof
Security lock protects against costly time theft
Warranty
1-Year manufacturer's limited warranty
2
PRODUCT OVERVIEW & FEATURES
888.479.7264
AUTO ALIGNING TIME CLOCK INSTRUCTIONS
Model 2650
CONTENTS
6-Column Time Clock
User Guide
pyramidtimesystems.com
2650
Auto Aligning Time Clock
42415
Time Card (25)
2650 User Guide
2650 MOUNTING TEMPLATE
Screw Guide Template Below Is Actual Size
+
+
UP
NOTE:
Bracket is designed
for single or double
electrical box.
For more information contact us at 888.479.7264
pyramidtimesystems.com
42498 Rev. A
Level Line Marker
Mounting
Template
Security
Keys (2)
WHAT YOU WILL NEED
Tape Measure
Pencil
Phillips Head
Screw Driver
Power Drill
(Optional)
KNOW YOUR SERIAL #
IMPORTANT:
lease write down serial #
P
located on back of time
clock before mounting.
s
Write your
serial # here:
E
L
SAMP
pyramidtimesystems.com
CONTENTS
3
AUTO ALIGNING TIME CLOCK INSTRUCTIONS
Model 2650
DESKTOP SET UP
1
Remove time clock from carton & place on a flat, level surface.
2
Plug unit into AC wall outlet.
WALL MOUNTING
4
1
Select a location convenient to employees
clocking IN & OUT. Be sure power outlet is
within 5 feet of mounting location.
2
Use masking tape to hold mounting template
on wall, making certain template is positioned
so bottom of time clock is approximately
45 inches from floor.
3
Drill holes using template as a guide.
4
Remove template from wall & install #10 screws,
leaving approximately 3/16 inch of screws
exposed. For sheetrock walls, use plastic
anchors.
5
Hang time clock on wall, aligning keyholes on the
rear with screw heads. Press downward on time
clock until it lowers onto screws.
6
Plug unit into AC wall outlet.
INSTALLATION
Model 2650
888.479.7264
AUTO ALIGNING TIME CLOCK INSTRUCTIONS
Model 2650
PROGRAMMING
Select
1
2
3
4
5
6
1
Use key to unlock & remove top/front cover. Locate programming buttons
labeled SELECT, s(UP) & t(DOWN).
2
Press SELECT until desired feature is displayed (see chart below).
3
Press s(UP) or t(DOWN) to scroll through feature options.
4
Press SELECT to save option setting & move to next feature.
AUTO ALIGNING TIME CLOCK : FEATURES SET UP
=
FEATURE
(SELECT)
DISPLAY
OPTIONS (SCROLL st)
Set Language
LANG = ENGLISH
ENGLISH, Spanish (ESPANOL), French (FRANCAIS)
Set Year
SET YEAR = 2013
DISPLAYED YEAR +/- 1 Year
Set Month
SET MONTH = JAN
DISPLAYED MONTH +/- 1 Month
Set Date
SET DAY = 1
DISPLAYED DATE +/- 1 Day
Set Daylight
Savings Time
(DST) Rule
DAYL’T SAV = USA
USA: USA DST: Begins 2nd SUN of MAR, Ends 1st
SUN of NOV
EURO: European DST: Begins Last SUN of MAR, Ends
Last Sun of OCT
OTHER: Set a custom DST Rule.1
OFF: No adjustment for DST.
Set Format
DSPLY FMT = AM/PM
AM/PM: 12 Hour,
MIL: Military, 24 Hour
Set Printed
Time Format
PRINT FMT = AM/PM
AM/PM: 12 Hour (e.g. 3:30PM)
MIL: Military, 24 Hour (e.g. 15:30)
ATAAP: Military, 24 Hour, Minutes expressed in
hundredths of one hour (e.g. 15.50)
24H.1: Military, 24 Hour, Minutes expressed in
tenths of one hour (e.g. 15.5)
Advanced
Menu
ADVANCED MENU = N
NO: No advanced settings.
YES: Set Column Shift, Warnings, Events, Buzzer
Volume or Print Adjustments (see page 6-9)
Set Hour
SET HOUR = 12AM
DISPLAYED HOUR +/- 1 Hour
Set Minutes
SET MINUTES = 0
DISPLAYED MINUTE +/- 1 Minute
SELECT DAYL’T SAV=OTHER. SCROLL & SELECT START & END SUNDAY (Available options are the 1st, 2nd, 3rd, 4th and
LST Sunday of each month). You will have to reprogram your custom DST if either the START or END date falls on
the last day of the month.
1
pyramidtimesystems.com
PROGRAMMING
5
AUTO ALIGNING TIME CLOCK INSTRUCTIONS
Model 2650
ADVANCED MENU
Pyramid’s Auto Aligning Time Clock enables you to set column shifts, warnings (early
or late punches will print in red), buzzer schedule & volume, as well as adjust printing
alignment. Use the ADVANCED MENU to select & set desired features.
AUTO ALIGNING TIME CLOCK : ADVANCED MENU
FEATURE
(SELECT)
DISPLAY
OPTIONS (SCROLL st)
Set Advanced
Menu
ADVANCED MENU = N
NO: No Advanced Menu settings configured.
YES: Press s(UP) & select YES to set up column
shifts, warnings, buzzer schedule, buzzer volume
or print alignment adjustments.
Set Column
Shift
COL SHIFT = MAN
MANUAL: Select MAN to accommodate multiple
shifts.
AUTO: Press s(UP) & select AUTO to
accommodate one shift.
(see SET UP AUTO OR A/MAN COLUMN SHIFT on
page 7)
AUTO MANUAL: Press s(UP) & select A/MAN to
override auto settings & manually shift columns.
Set Warnings
SET WARNING # NO
NO: No Warnings configured.
YES: Press s(UP) & select YES to set up
parameters for early or late punches. (see SET UP
WARNINGS on page 8)
Set Events
SET EVENT # NO
NO: No event(s) scheduled.
YES: Press s(UP) & select YES to schedule
buzzer event(s) SET EVENT #1-50 (see page 9)
Set Buzzer
Volume
VOLUME = OFF
OFF: No volume adjustment.
ON: Press s(UP) to scroll through volume settings (e.g. 1,2,3…11). Select desired volume.
Adjust Print
PRINT
ADJUST = N
NO: No print adjustment configured.
YES: Setup print adjustment. Press s(UP) &
select YES if you need to adjust printing left,
right, up or down (see page 13).
6
ADVANCED MENU
888.479.7264
AUTO ALIGNING TIME CLOCK INSTRUCTIONS
Model 2650
SET UP AUTO OR AUTO/MANUAL COLUMN SHIFT
The 2650 is pre-programmed in the MANUAL punch setting (default setting). In this setting, the user manually chooses which column to punch by selecting the corresponding
button (1-6). Alternatively, the 2650 allows you to program the clock to automatically
“shift” to a specific column at a pre-set time (AUTO), or if preferred, the user may
override the automatic setting, and switch back to a manual setting at any time
(AUTO/MANUAL).
1
In the ADVANCED MENU = N menu, press s(UP) to choose “YES”.
2
Use SELECT button to scroll through Advanced Menu options until COL SHIFT = MAN
menu is displayed.
3
In the COL SHIFT = MAN menu, press s(UP) to choose “AUTO/MANUAL” or
“MANUAL”.
4
Press SELECT.
5
In the COL SHIFT SET = N menu, press s(UP) to choose “YES”.
6
Press SELECT.
7
In the COL 1 SETUP = N menu, press SELECT if no time setting is desired for column
1, or to assign a time to begin punches in column 1, press s(UP) to choose “YES”.
8
Press SELECT.
9
In the COL 1 HOUR = OFF menu, press s(UP) to select “HOUR”. Press s(UP) or
t(DOWN) to scroll to desired hour.
10 Press SELECT.
11
In the COL 1 MINUTE = 0 menu, press s(UP) or t(DOWN) to scroll to desired minute.
12
Press SELECT.
13
Repeat steps 7-12 for columns 2-6.
Column time must be assigned when using “AUTO SET”.
pyramidtimesystems.com
SET UP COLUMN SHIFT
7
AUTO ALIGNING TIME CLOCK INSTRUCTIONS
Model 2650
SET UP WARNINGS
The 2650 allows you to program the clock to print early or late punches in red ink.
Up to 12 “warning” time periods may be programmed.
Example: If start time is 7:00AM & you want to know if an employee is punching in more
than 10 minutes early (indicated by red ink), than:
AM/PM FORMAT
MILITARY FORMAT
Warning #1 Start Hour = 6AM
Warning #1 Start Hour = 6
Warning #1 Start Minute = 0
Warning #1 Start Minute = 0
Warning #1 End Hour= 6AM
Warning #1 End Hour = 6
Warning #1 End Minute= 50
Warning #1 End Minute = 50
Early punches occurring between 6:00AM & 6:50AM will print in red ink.
Example: If start time is 7:00AM & you want to know if an employee is punching in more
than three minutes late (indicated by red ink), than:
AM/PM FORMAT
MILITARY FORMAT
Warning #2 Start Hour = 7AM
Warning #2 Start Hour = 7
Warning #2 Start Minute = 3
Warning #2 Start Minute = 3
Warning #2 End Hour = 11AM
Warning #2 End Hour = 11
Warning #2 Start Minute = 0
Warning #2 End Minute = 0
Late punches occurring between 7:03AM & 11:00AM will print in red ink.
MENU : SET WARNINGS st Set Parameters for Early or Late Punches
8
1
In the ADVANCED MENU = N menu, press s(UP) to choose “YES”.
2
Use SELECT button to scroll through Advanced Menu options until
SET WARNING # NO menu is displayed.
3
In SET WARNING # NO menu, press s(UP) to set up warning #1-12.
4
In SET WARNING # 1 menu, press SELECT to set up warning time.
5
In START HR = OFF menu, press s(UP) or t(DOWN) to set warning time period, then
press SELECT (In START HR = 12AM (AM/PM) or START HR = 0 (Military) menu.
6
In START MIN = 0 menu, press s(UP) or t(DOWN) to scroll to desired minute, then
press SELECT.
7
In END HR = 12AM (AM/PM) or END HR = 0 (Military) menu, press s(UP) or t(DOWN) to
scroll to desired hour, then press SELECT.
8
In END MIN = 0 menu, press s(UP) or t(DOWN) to scroll to desired minutes, then
press SELECT.
9
In SET WARNING # NO menu, press SELECT if no additional warnings are desired, or
press s(UP) & SELECT “YES” to set up additional warning time periods.
10
Follow steps 4-9.
SET UP WARNINGS
888.479.7264
AUTO ALIGNING TIME CLOCK INSTRUCTIONS
Model 2650
SCHEDULE EVENTS (BUZZER)
The time clock has an internal buzzer to alert workers of schedule events, such as start
time, breaks, lunch & dismissal times.
MENU : SET EVENT st SCHEDULE AN EVENT (e.g. Sound Internal Buzzer)
1
In the ADVANCED MENU = N menu, press s(UP) to choose “YES”.
2
Use SELECT button to scroll through Advanced Menu options until
SET EVENT # NO menu is displayed.
3
In SET EVENT # NO menu, press s(UP) to schedule event.
4
In SET EVENT #1 menu, set event number (e.g. 1,2,3…50). If prior events have been
programmed, time clock will advance to next available event #. To edit previously
programmed events, press s(UP) or t(DOWN) to scroll, then press SELECT.
5
In EVENT 1 = OFF menu, press s(UP) to scroll to desired duration (e.g. .5,1...15 sec)
(determines length of time buzzer sounds), then press SELECT.
6
In EVENT HR = 12AM (AM/PM) or EVENT HR = 0 (Military) menu, press s(UP) or
t(DOWN) to scroll to desired hour, then press SELECT.
7
In EVENT MIN=0 menu, press s(UP) or t(DOWN) to scroll to desired minute, then
press SELECT.
8
In EVENT DAY = ALL menu, press s(UP) or t(DOWN) to scroll to desired option
(see below) & press SELECT:
All week event: ALL (Sun-Sat)
Monday thru Friday event: M-F
One day event: SUN, MON, TUE, WED, THU, FRI or SAT
MENU : VOLUME st ADJUST BUZZER VOLUME
1
In the ADVANCED MENU = N menu, press s(UP) to choose “YES”.
2
Use SELECT button to scroll through Advanced Menu options until VOLUME = OFF
menu is displayed.
3
In VOLUME = OFF menu, press s(UP) to adjust buzzer volume level (e.g. 1,2, . . . 11).
Press SELECT for desired volume level.
MENU : PRINT ADJUSTMENT st
ADJUST PRINTING LEFT/RIGHT UP/DOWN
FEATURE
(SELECT)
DISPLAY
OPTIONS (SCROLL st)
Adjust Printing
PRINT ADJUST = N
Use this feature if needed. See page 13 for
instructions.
pyramidtimesystems.com
SCHEDULE EVENTS (BUZZER)
9
AUTO ALIGNING TIME CLOCK INSTRUCTIONS
Model 2650
TIME CARDS
A
B
No. _________________ Period ___________________________________________
No. _________________ Period ___________________________________________
Name __________________________________________________________________
Name __________________________________________________________________
Regular Hours ______________ Rate ________________ Amount ______________
Regular Hours ______________ Rate ________________ Amount ______________
Overtime Hours ______________ Rate ________________ Amount ______________
Overtime Hours ______________ Rate ________________ Amount ______________
IN
DATE
OUT
IN
OUT
Deductions
_____________
Deductions
Actual Pay
_____________
Actual Pay
_____________
Pay Date
_____________
Pay Date
_____________
IN
OUT
TOTAL
DATE
IN
OUT
IN
OUT
_____________
IN
OUT
Use only time card #42415
which includes official Pyramid
Time Systems Trademark. Using
time cards other than Pyramid
item #42415 voids the warranty.
TOTAL
16
1
17
2
18
3
19
4 No. _________________ Period ___________________________________________
20
5
21
6
22
Name __________________________________________________________________
7
23
8
24
Amount ______________
9 Regular Hours ______________ Rate ________________
25
10
26
11 Overtime Hours ______________ Rate ________________
27
Amount ______________
12
28
13
29
Deductions _____________
14
30
15
31
A
Signature ____________________________________________________
Approval ____________________________________________________
pyramidtimesystems.com
© 2009 Pyramid Time Systems, LLC
ITEM
#42415 Rev. G
Actual Pay
_____________
Signature ____________________________________________________
Approval ____________________________________________________
Pay Date
pyramidtimesystems.com
Made in USA
FRONT
© 2009 Pyramid Time Systems, LLC
_____________
ITEM
#42415 Rev. G
Made in USA
BACK
#42415IN
DATETimeIN CardOUT
OUT
IN
TOTAL
OUT
1
TIME CARD PRINT FORMAT
2
3
4
5
6 7:02A 10:01A 10:15A 12:00P 12:40P 4:00P
7
8
Prints
Hour, Minute, AM/PM up to 6 columns.
9
10
11
12
13
14
15
Indicates early or late punches
in red ink.
Signature ____________________________________________________
Approval ____________________________________________________
pyramidtimesystems.com
© 2009 Pyramid Time Systems, LLC
ITEM
#42415 Rev. G
Made in USA
10
TIME CARD & PRINT FORMAT
888.479.7264
AUTO ALIGNING TIME CLOCK INSTRUCTIONS
Model 2650
USING TIME CLOCK
AUTO or AUTO/MANUAL PUNCH
1 To Punch IN or OUT, gently feed time card
(#42415) into time card slot located at the
top of the time clock, making sure correct
side of time card is facing towards user.
2 Quickly release the card, as it will
automatically be pulled.
3 Do not force or jam the time card.
4 Card will release back to user once punch
is printed.
MANUAL or AUTO/MANUAL PUNCH
1 Press corresponding button to activate
the desired column. Button will light
up red when activated.
Activated column
lights up red.
2 To Punch IN or OUT, gently feed time
card (#42415) into time card slot
located at the top of the time clock,
making sure correct side of time card
is facing towards user.
3 Quickly release the card, as it will
automatically be pulled.
IN
OUT
IN
OUT
IN
OUT
4 Do not force or jam the time card.
5 Card will release back to user once
punch is printed.
Auto Manual punch format allows user to toggle between Auto & Manual punch mode
if necessary. Please see Column Shift instructions on page 7 for setting up Auto
Manual punch mode.
pyramidtimesystems.com
OPERATION
11
AUTO ALIGNING TIME CLOCK INSTRUCTIONS
Model 2650
REPLACING RIBBON CARTRIDGE
For optimum performance, the ribbon cartridge should be replaced every 6 months.
A
Select
1
2
3
4
5
6
D
E
C
F
B
A – Ribbon Cartridge C – Tab
B – Clips
E - Manual Advance Knob
D – Ribbon Guide F – Retaining Pins
1
Prior to removing old ribbon, press button 4 & hold for approximately 6 seconds
to park ribbon in center position.
2
Unplug time clock.
3
To remove old ribbon, pull two white clips B towards you & simultaneously lift
ribbon cartridge, pull straight up using tab C located on top of cartridge.
4
Remove new ribbon cartridge from packaging & turn the manual ribbon advance
knob E clockwise to straighten ribbon.
5
Holding tab C install ribbon cartridge into print carriage, making certain to
lower the ribbon in front of the ribbon guide D first, then make certain
retaining pins F are within clips B (see diagram).
6
Gently push down cartridge until it snaps into carriage while turning the manual
ribbon advance knob clockwise.
7
Turn manual ribbon advance knob clockwise a few rotations to ensure ribbon is
positioned correctly in front of print head.
8
Replace the cover & lock unit.
9
Feed a time card through unit to test print quality.
If time clock prints incomplete characters, the ribbon is not fully installed over print
head. If time clock prints lines that become increasingly light, the cartridge is not
fully snapped into the holder. Reinstall ribbon cartridge, following steps 1-7 until a
complete & consistent time card prints.
For assistance, please contact customer support at 888.479.7264 ext 1.
12
REPLACING RIBBON CARTRIDGE
888.479.7264
AUTO ALIGNING TIME CLOCK INSTRUCTIONS
Model 2650
TROUBLESHOOTING
TIME CARD MISFEED
In the event the time card will not feed, re-feed the time card. If issue persists, please
check list for possible causes:
2650 : TIME CARD MISFEED
POSSIBLE CAUSES
Time card inserted too hard into time clock
Time card held too long
Time card inserted into time clock on an angle Time card is wet or damaged ACTION
Re-Feed Card
Re-Feed Card
Re-Feed Card
Use new time card
2650 : WRONG SIDE PRINTING
PROBABLE CAUSE
Time card is facing wrong way
ACTION
Make sure “active” time card side is facing user
IMPAIRED PRINTING
In the event the time clock printing is impaired, please check list for possible causes:
2650 : IMPAIRED PRINTING
SYMPTOM
Time card feeds
with no printing
Punches print outside
of date box
PROBABLE CAUSE
Ribbon not installed properly ACTION
Check that ribbon cartridge is
properly installed. See page 12.
Follow Print Adjustment
instructions below
PRINT ADJUSTMENT
1
2
3
4
5
6
7
8
9
In the ADVANCED MENU = N menu, press s(UP) to choose “YES”.
Press SELECT button to scroll through Advanced Menu options until
PRINT ADJUST = N menu is displayed
Press SELECT button.
In the LEFT/RIGHT = 0 menu, press s(UP) to adjust printing to left (e.g. 1,2,3 . . . 9),
or press t(DOWN) to adjust printing to right (e.g. 1,2,3 . . . 9).
Press SELECT for desired left/right adjustment.
In the UP/DOWN = 0 menu press s(UP) to move printing up or t(DOWN) to move
printing down.
Press SELECT for desired up/down adjustment.
Feed time card through time clock to test print adjustment.
Repeat steps 1-7 if additional adjustments are necessary.
MASTER RESET
Erases time clock’s memory & restores default factory settings:
1 Unplug time clock.
2 Press the s(UP) button and hold while plugging unit back in.
Continue to hold s(UP) button for a few seconds & release.
3 88:88 TIME NOT SET flashes on display screen.
4 Re-program time clock.
pyramidtimesystems.com
TROUBLESHOOTING, PRINT ADJUST
& MASTER RESET
13
AUTO ALIGNING TIME CLOCK INSTRUCTIONS
Model 2650
FAQS
Q: A: What does ATAAP mean?
ATAAP is the acronym used by the U.S. government that describes how time
is accounted for using hundredths of hour (i.e. one and a quarter hours
equals 1.25 hours).
ACCESSORIES
2650 : ACCESSORIES
ITEM # DESCRIPTION
42416
Replacement Ink Ribbon Cartridge
42415
Time Cards (100pk)
400-3
25 Capacity Adjustable Time Card Rack
300-1
Heavy Duty Metal Time Card Rack
400-X
25 Capacity Expanding Time Card Rack
To order accessories visit pyramidtimesystems.com,
call 888.479.7264, or visit an authorized Pyramid dealer.
14
FAQS & ACCESSORIES
888.479.7264
AUTO ALIGNING TIME CLOCK INSTRUCTIONS
Model 2650
SPECIFICATIONS
2650 : SPECIFICATIONS
OPERATING CONDITIONS
Temperature 0°C - 50°C, 32°F - 122°F
Humidity 10-95% RH, non condensing
POWER FAILURE
Battery Back-Up
30 Days, Data & Time
Battery Life 10 Years
CALENDAR
Automatic Leap Year & Daylight Savings Time
CLOCK ACCURACY
Less than 30 seconds/year
POWER
100-240 V AC, 50/60 Hz
CERTIFICATIONS
UL & CUL, Power Supply
WEIGHT
3.7lbs (1.67kg)
DIMENSIONS
6.5inW x 8inH x 4.75inD (16.5cm x 20.3cm x 12cm)
MOUNTING
Desktop or Wall
pyramidtimesystems.com
SPECIFICATIONS
15
AUTO ALIGNING TIME CLOCK INSTRUCTIONS
Model 2650
LIMITED HARDWARE WARRANTY
Time System warrants its equipment to original user against defective
◦ ◦ Pyramid
material or workmanship for a period of 1-year from date of purchase. Proof of
purchase & purchase date are required for warranty service on this product.
Please remember to register your product at
pyramidtimesystems.com/ProductRegistration/.
Time Systems’ responsibility under this warranty is limited to
◦ ◦ Pyramid
replacement of defective part(s). Replacement is the sole discretion of
Pyramid Time Systems.
product is the sole responsibility of the customer. Pyramid Time Systems will
not assume any responsibility for loss or damage incurred in shipping.
Return Shipments to Pyramid Time Systems, product must be shipped in its
◦ ◦ For
original carton or equivalent. The return freight method and cost for warranteed
Time Systems reserves the right to determine whether parts failed
◦ ◦ Pyramid
because of defective material, workmanship or other causes.
caused by accident, alteration, misuse or improper packaging of
◦ ◦ Failure
returned unit is not covered by this warranty.
repair done by the customer without the consent from Pyramid Time
◦ ◦ Any
Systems will automatically void the warranty.
in countries other than Canada and USA should contact the Dealer from
◦ ◦ Users
whom the unit was purchased.
rights under this warranty are limited to the original user and may not be
◦ ◦ The
transferred to subsequent users.
MONEY BACK GUARANTEE
Pyramid Time Systems offers a 30-day money back guarantee. If an RMA is issued for
an unwanted product before 30 days, Pyramid Time Systems will refund the entire
purchase price less shipping if purchased from Pyramid Time Systems. Pyramid Time
Systems will assess a 15% restocking fee on any returns received between 31 and 60
days from the date of purchase. No returns will be accepted after 60 days. Pyramid
Time Systems will not issue a call tag for pickup of products. Customers are responsible for shipping the product back including the cost of shipping. Pyramid Time
Systems will assume the cost of ground shipping for the replacement product to the
customer. Pyramid Time Systems will also assess a 15% fee if any item(s) are missing
in an open box return. Shipping back to Pyramid Time Systems from a Pyramid Time
Systems Partner is the responsibility of the Pyramid Time Systems Partner. No call
tags will be issued. Items returned to Pyramid Time Systems without an RMA will not
be credited. No returns will be accepted for opened TimeTrax™ PC products.
16
WARRANTY
888.479.7264
AUTO ALIGNING TIME CLOCK INSTRUCTIONS
Model 2650
EXTENDED WARRANTY PLANS
Protect your investment with a Pyramid TimeKeeper Warranty Plan. Please contact
Pyramid Time Systems or visit pyramidtimesystems.com for more information.
TIME CLOCK COVERAGE
1 TimeKeeper begins with a complimentary 1 year warranty on your time clock.
2 TimeKeeper continues by activating an annual warranty plan available
for the life of your time clock. Call us to activate a plan.
3 Pyramid Customer Care is here to help. Call us Monday-Friday, 8am-5pmEST at
888.479.7264 or visit pyramidtimesystems.com for support information.
ANNUAL TIME CLOCK WARRANTY ACTIVATION
1 Call Pyramid Customer Care at 888.479.7264 prior to expiration date of
complimentary 1 year warranty plan.
2 Enroll in TimeKeeper annual warranty plan.
3 Enjoy peace of mind. In the event a replacement time clock is needed,
we will ship it to you no later than the next business day.
CONTACT US:
For more information, visit pyramidtimesystems.com
or call customer care at 888.479.7264 during regular
business hours: 8:00am-5:00pm EST, M-F.
pyramidtimesystems.com
CUSTOMER SUPPORT
17