1
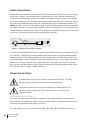
60Hz. From the rear of the m201, open the trap door next to the IEC power inlet with a small screwdriver. Carefully pull the voltage select cam straight out and then insert with the desired voltage
showing. Do not try to rotate the cam while it is in the power input module. Replace the fuses
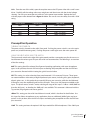
with the proper value selected from <figure 2> below. Be sure to use a time delay fuse with a 250V
rating.
CAM SETTING
100V~
120V~
230V~
230V~
240V~
<figure 2 - fuse value table>
LINE VOLTAGE
100V~
120V~
220V~
230V~
240V~
FUSE VALUE
250V~ T 500mA L
250V~ T 500mA L
250V~ T 315mA L
250V~ T 315mA L
250V~T 315mA L
Preamplifier Operation
TURNING THE POWER ON
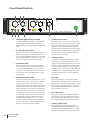
The power switch is located on the m201 front panel. Pushing the power switch in turns the mains
power on (switch illuminates green). Pushing the power switch again turns the mains power off.
USING THE INPUT MODE SELECTOR SWITCH
The input mode switch to the right of the gain control provides a convenient way for the user to select between the various types of inputs the m201 can accommodate. The following is an overview
of the four settings:
48V This setting should be selected for all general recording applications with most microphone
types. In this position, the main XLR mic inputs are feeding the preamplifier and the dual XLR outputs are active. Proceed with the ‘setting the gain’ discussion below.
HI-Z This setting is used to select the front panel mounted 1/4” instrument DI inputs. These inputs
can accommodate a wide variety of high impedance input sources, including bass guitar, keyboards,
electric guitars etc... In this mode, the rear panel XLR inputs are not active, while the dual balanced
XLR outputs carry the amplified signal from the DI inputs. There is no 48V phantom available on this
input. The phase reverse switch is active, and the gain range of this input is -2dB to +44dB (20dB less
than the 48V input), so therefor the -20dB pad is not available. This connector is balanced with the
Tip positive, Ring negative and Sleeve ground.
ribbon This setting puts the m201 into ‘ribbon mic mode’, which is described in detail below. Use
this input for ribbon microphones or any application where an additional 10dB of gain may be required. In this position, the main XLR mic inputs are feeding the preamplifier and the dual XLR outputs are active.
130V This setting activates the optional 130V input module for DPA microphones. If the 130V input
grace design m201
owner’s manual
7