1
Installation Guide
NXA-KLB Kensington Lock Bracket for NXT-1200V and -VG Series Panels
Overview
Securing locations for Kensington Lock Brackets
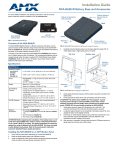
The NXA-KLB (FG2259-10) is an optional accessory for AMX Table Top (NXT-) 1200V
and VG-Series touch panels, which allows you to use a standard Kensington Lock
System to prevent theft.
Connector plate cover (open to access the
connectors on the rear of the base)
The Kensington Lock System itself (including lock, key and security cable) is sold
separately.
The Kengsington Lock System is a security system from Kensington Technology
Group (www.kensington.com) that discourages the theft of portable computers and
other devices (in this case touch panels) by using a security cable and lock to anchor
the panel to an object in the room. The security cable is looped through a permanent
object in the room, then looped through itself and locked into the slot. Once secured in
this way, the panel cannot be removed from its location unless it is unlocked (using the
key that comes with the Kensington Lock assembly).
The NXA-KLB Bracket attaches to the base of the Table Top 1200V and VG-Series
panels (listed below) using keyed-lock securing screws that can only be removed with
the included AMX Keyed-Lock screw driver adapter. This screwdriver head fits into
most hex-type screwdrivers or electric drills.
There are two versions of the Bracket included with the kit, as indicated in FIG. 1:
•
The Flat Lock Bracket fits neatly into the rear of the panel’s base, allowing you
to close the rear connector plate cover on the base while the panel is secured.
•
The Raised Lock Bracket also allows you to use the Kensington Lock System
to secure the panel, while providing a surface to which you can secure incoming
cables.
Touch Panel glass (facing down)
Base plate
FIG. 2 Location of the securing locations on an NXT (Table Top) panel
Method A: Installing the Raised Lock Bracket
Note that once installed, the shape of the Raised Lock Bracket will not allow the
Connector Plate Cover on the base of the panel to be closed.
1.
Raised Lock Bracket
Raise the Connector Plate Cover, and align the openings on the bottom of the
Raised Lock Bracket to the securing locations on the Base Plate of the panel
(FIG. 2).
Kensington Lock/Security Cable
assembly (not included)
Keyed-Lock
Securing Screws
Connector plate cover
AMX Keyed-Lock screwdriver adapter
(fits into any standard hex-type
screwdriver or drill)
Raised Lock Bracket
Keyed-Lock Securing Screws
Flat Lock Bracket
AMX Keyed-Lock screwdriver adapter
FIG. 1 NXA-KLB Components
Product Specifications
NXA-KLB Specifications
Compatible AMX
Touch Panels:
•
•
•
•
NXT-1200V, 12" Modero Video Table Top Panel (FG2250-60)
NXT-1200VG, 12" Modero Multimedia Table Top Panel (FG2250-61)
NXT-1500VG, 15" Modero Multimedia Table Top Panel (FG2252-61)
NXT-1700VG, 17" Modero Multimedia Table Top Panel (FG2257-61)
Requirements:
• The NXA-KLB must be used with a standard Kensington Lock System
Note: The Kensington Lock System must be purchased separately, and is
not provided by AMX.
Included
Accessories:
•
•
•
•
FIG. 3 Raised Kensington Lock Bracket Components and Installation
2.
3.
Insert two Keyed-Lock Securing Screws into their respective locations (FIG. 3).
Use the Keyed-Lock screwdriver adapter to tighten these screws, securing the
Raised Lock Bracket to the base plate (FIG. 4).
Kensington Lock/Security Cable
assembly (not included)
Thread incoming cables through this
opening between the Bracket
and the Base
Raised Lock Bracket (with cable tie down) (black)
Flat Lock Bracket (black)
AMX Keyed-Lock screwdriver adapter
Keyed-Lock Securing Screws (5)
Raised Lock Bracket
Preparing the Touch Panel to Install the NXA-KLB
1.
•
Gently place the touch panel LCD facedown onto a soft cloth to expose the
under-side of the base and prevent scratching of the LCD (FIG. 2).
You may find it easier to handle the panel if you carefully detach all connectors.
•
Tilt the base forward so that the bottom surface of the base is easily accessible.
This provides access to the underside of the unit and exposes the securing location for the Kensington Lock Bracket (FIG. 2).
Determine which type of bracket (Raised or Flat) you will be installing:
If your installation requires secured cables, use the Raised Lock Bracket.
2.
3.
•
If your installation requires a low-profile security solution, use the Flat Lock
Bracket.
Securing locations
Base Plate
FIG. 4 Raised Securing locations
4.
5.
6.
Thread the incoming cables through the opening between the bottom of the
Raised Bracket and the Base Plate (FIG. 4).
Reconnect the cables (on the rear connector plate).
Thread a tie-wrap (not included) through the center pair of circular openings on
the bracket (FIG. 5) and use it to secure all of the NXA-MTC/RGB cables to the
bracket. Trim off any excess length on the tie-wrap (if necessary).
Method B: Installing the Flat Lock Bracket
1.
2.
If you removed the connectors previously, re-insert them into their proper locations on the touch panel. This ensures that the Flat Bracket will not obstructing
any of the connectors on the rear panel.
Align the openings on the bottom of the Flat Lock Bracket to the securing
locations on the left side of the touch panel connector plate (located under the
connector plate cover, as indicated in FIG. 7).
Security key
(not included)
Incoming cables
FIG. 5 Thread a tie-wrap through the center holes on the Raised Lock Bracket
7.
8.
Assemble the Kensington Lock/Security Cable (not included). Refer to the documentation provided by the lock manufacturer for details.
Open the Lock to rotate the lock mechanism so that it can be inserted into the
slot on the top center of the Raised Lock Bracket (FIG. 6).
Security key
(not included)
Kensington Lock/Security
Cable assembly
(not included)
Connector plate cover
Kensington Lock/Security
Cable assembly
(not included)
Flat Lock Bracket
Keyed-Lock Securing Screws (2)
Base
Base Plate
AMX Keyed-Lock screwdriver adapter
Raised Lock Bracket
FIG. 7 Flat Lock Bracket - Components and Installation
3.
4.
Lock insertion slot
5.
FIG. 6 Lock mechanism and insertion location
6.
Insert two Keyed-Lock Securing Screws into their respective locations (FIG. 7).
Use the AMX Keyed-Lock screwdriver adapter to tighten the screws and
secure the Flat Lock Bracket to the base plate (FIG. 7).
Assemble the Kensington Lock/Security Cable (not included). Refer to the documentation provided by the lock manufacturer for details.
Open the Lock to rotate the lock mechanism so that it can be inserted into the
opening in the top of the Flat Lock Bracket (FIG. 8).
Security key
(not included)
Kensington Lock/Security Cable
assembly (not included)
Lock mechanism
Flat Lock Bracket
Lock insertion point
FIG. 8 Lock mechanism and insertion point
AMX Corporation reserves the right to alter specifications without notice at any time.
For full warranty information, refer to the AMX Instruction Manual(s) associated with your Product(s).
036-004-2870 4/05 ©2005
AMX Corporation. All rights reserved. The AMX logo is a trademark of AMX Corporation. AMX reserves the right to alter specifications without notice at any time.
3000 RESEARCH DRIVE, RICHARDSON, TX 75082 • 800.222.0193 • fax 469.624.7153 • technical support 800.932.6993 • www.amx.com
93-2259-10
REV: A