1
Installation Guide
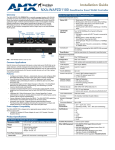
NXA-BASE/B Battery Base and Accessories
For more detailed installation and operating instructions, refer to the touch
panel’s instruction manual, available on-line at www.amx.com.
Captive fasteners
(secure base to
panel)
Battery Compartment
pulls outwards
Back
NXT-BP
Modero Power Pack
NXA-BASE/B
Battery Base
FIG. 1 NXA-BASE/B and NXT-BP
Overview of the NXA-BASE/B
The NXA-BASE/B (Battery Base) is a Modero accessory that allows a touch
panel to function off the collective charge of two internally connected NXT-BP
batteries (FG2255-10). The base provides both power and battery information to
the panel via the panel interface connector (FIG. 2).
Front
Alignment
pegs
Panel Interface
connector (female)
FIG. 2 NXA-BASE/B showing Panel Interface and connector locations
4.
Carefully place the Modero panel over the base alignment pegs (FIG. 3).
These pegs assist in aligning the panel to the base.
This base is also sold as part of an NXA-BASE/B Kit (FG2255K) that contains
one (1) battery base and two (2) batteries. The accompanying batteries can be
charged through either the base or optional NXT-CHG Modero Power Station
(FG2250-50). Refer to the 12" and 15" Modero Touch Panel Series Owner/
Reference Manual for more information.
Top view
Bottom view
Interface
connector
(male)
Specifications
Specifications
Dimensions (HWD):
NXA-BASE/B
(FG2255)
NXT-BP
(FG2255-10)
• 1.13" x 8.63" x 11.81" (2.86 cm x 21.91 cm x 30.00 cm)
• 0.69" x 3.50" x 5.81" (1.75 cm x 8.89 cm x 14.76 cm)
Power:
• NXA-BASE/B: 2.7 A @ 12 VDC (max power draw while
charging)
• NXT-BP: Voltage - 11.1 Volts
Weight:
• Base unit: 1.25 lbs (0.567 kg)
• Base and 2 batteries: 3.23 lbs (1.47 kg)
NXA-BASE/B:
Features
• Charge current 2.5A @ 12 VDC
• Charge time for two depleted batteries ~ 5 - 8 hours
• The Modero unit plus battery base requires a PSN6.5
power supply
• Operating Environment: 10° C (50° F) to 35° C (95° F)
• Storage Temperature: -20° C (-4° F) to +60° C (140° F)
NXT-BP Features:
•
•
•
•
Battery Usage: 4 to 8 hours (time is usage-dependent)
Charge Capacity: 6300mAh
Operating Environment: 10° C (50° F) to 35° C (95° F)
Storage/Discharge Temperature: -20° C (-4° F) to +60° C
(140° F)
Optional
Accessories:
• NXT-CHG Kit (FG2250-50K):
1 charger (FG2250-50) and 2 NXT-BP batteries (FG225510)
• NXT-BP batteries (FG2255-10)
• NXT-CHG charger (FG2250-50)
ATTENTION! Before beginning the installation of the battery base to a CV
series touch panel (NXDT-CV7, -CV10, or -CV17), verify that the firmware
on the panel is Build 27 or higher. This build incorporates the necessary
updates for using the Modero with the NXA-BASE/B. This does not apply
to other Modero touch panels. Refer to the touch panel’s instruction
manual for detailed firmware update procedures.
Installing the NXT-BASE/B to an NXT Modero Panel
1.
2.
3.
Power Off the panel before attempting to use the NXA-BASE/B.
Place the empty battery base onto a flat/level surface.
Verify the alignment of the Panel Interface connectors between the panel
(male connector) and base (female connector) (FIG. 2).
Alignment
pegs
Panel Interface
connector
(female)
Captive
fasteners
FIG. 3 NXA-BASE/B shown aligning with NXT panel
5.
6.
Gently apply downward pressure until the panel is securely mounted to the
battery base.
Firmly grip both the panel (from side) and battery base (from below).
ATTENTION! The battery base CANNOT be "hot-swapped". A panel
receiving power through a connected PSN6.5 cannot have a Panel
Interface connector from the battery base inserted into the bottom of the
panel. POWER OFF the panel before installing the NXA-BASE/B.
7.
Gently place the touch panel LCD facedown onto a soft cloth. This
prevents scratching of the LCD while the battery base is secured.
8.
Locate the captive fastners on the underside of the battery base (FIG. 4) by
angling the base combo slightly forwards.
9.
Push down on each fastener head by using a flat-head screwdriver to turn
them clockwise until the NXA-BASE/B is securely attached to the
underside of the NXT Modero touch panel.
10. After securing is complete, firmly grip both the panel LCD/base combo and
gently place the unit back onto a flat surface.
3.
Captive fasteners
(secure base to
panel)
4.
5.
6.
Align the battery connectors with their corresponding battery connector
ports (located on the battery slot inside the battery compartment) (FIG. 6).
Insert the NXT-BP battery until the connectors securely fit into the battery
connector port within the slot.
Repeat steps 3 and 4 for the remaining battery.
Apply a small amount of pressure to close the battery compartment until
the compartment latches.
ATTENTION! The AMX logo will appear to indicate that the panel is
receiving power.
Updating Firmware and Setup pages
1.
2.
Download the latest Modero firmware from the AMX.com website.
Update the latest firmware to the Modero panel. Refer to the instruction
manual for detailed download and update instructions.
NOTE: With older panels, such as the NXDT-CV7, -CV10, or -CV17 touch
panels, the Modero firmware must be Build 27 or higher.
FIG. 4 NXT-BASE/B showing underside fastener locations
Checking the NXT-BP Charge
3.
1.
4.
5.
Press the Battery Life Indicator button (FIG. 5) once to illuminate the
Battery Life LEDs and display the percent charge remaining on the
battery (this indication lasts for a few seconds).
6.
Battery Life (Charge)
Battery Life Indicator
button
7.
It’s recommended to
fully charge the
batteries before their
initial use
Download the TPDesign4 setup patch from the AMX.com website to
update the current release of TPD4 for use with the NXA-BASE/B.
Launch the patch TPD4 Patch.EXE to update your TPD4 program.
After rebooting your machine, create a new TPD4 project that consists of
a single blank NXT Modero touch panel page and button.
Download this page to the panel using the Full Clean - Download to Panel
feature in TPD4. Refer to the manual for more detailed information. This
step updates the Setup pages (more specifically, the Battery Base page)
on your Modero panel.
Press and hold the Front Setup Access button (FIG. 7) for 3-seconds to
access the on-screen Setup page.
FIG. 5 NXT-BP Modero Power Pack (showing Battery Life Indicator and button)
2.
3.
(simulated image)
Repeat the above step for the remaining NXT-BP battery.
Charge the batteries by inserting them within the battery base.
It is recommended to fully charge the batteries before they are initially
inserted into the base. Refer to the following section for more detailed
information on this process.
ATTENTION! If the 25% LED indicator is blinking, this indicates that the
battery has less than 5% of a charge remaining.
Front Setup
Access button
Installation of an NXT-BP into the NXA-BASE/B
The base does not directly connect to a power supply, but rather receives the
power necessary to charge the batteries from the Modero panel (through the
Panel Interface connector).
1.
With the panel atop the base, open the battery compartment (FIG. 6) by
pulling the handle outwards. This compartment is capable of housing two
(2) NXT-BP batteries.
FIG. 7 NXA-BASE/B and Modero panel combo
8.
NXT-BP Battery #2
Battery
Connectors
9.
10.
Interface
connector
Press the on-screen Protected Setup button and press the on-screen
Reboot button to restart the panel and incorporate the new changes.
After startup, repeat step 7 to access the Setup page.
Press the on-screen BATTERY BASE button to access the Battery Base
page. This page allows you to both confirm communication between the
two units (panel and battery base) and the charging/discharging status of
the batteries within the battery base.
Charging the NXT-BPs using the NXA-BASE/B
Battery
Connector
Port
1.
2.
Insert the two (2) batteries into the battery compartment shown in FIG. 6.
Insert a 2-pin connector, from a PSN6.5 power supply, to the rear PWR
connector on the NXT Modero panel.
FRONT
Battery
Compartment
NXT-BP Battery #1
FIG. 6 Battery installation procedure
2.
Install the NXT-BP battery with the "label-side" facing down
For full warranty information, refer to the AMX Instruction Manual(s) associated with your Product(s).
12/08
©2008 AMX. All rights reserved. AMX and the AMX logo are registered trademarks of AMX.
AMX reserves the right to alter specifications without notice at any time.
3000 RESEARCH DRIVE, RICHARDSON, TX 75082 • 800.222.0193 • fax 469.624.7153 • technical support 800.932.6993 • www.amx.com
93-2255
REV: E