1
I nsta lla tio n - Getting St art ed
2. 4 S witch O n
If the HDX’s network facilities are to be used ensure that
it is connected to a working internet connection before
switching it on and that all the necessary peripheral
equipment is appropriately connected and configured.
Switch on the HDX using the rear panel power switch.
Note: If the HDX is to be switched on from shutdown mode,
the power switch must be switched off and on again. See
Section 2.8 for more on shutdown mode.
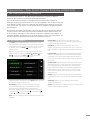
After approximately one minute’s delay, the user interface
Home menu will appear on the front panel touch screen
(and any connected display). Navigate around the
interface and select options by touching the screen or
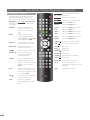
using the remote handset navigation (3456), ok, home
and back keys.
Note: It is occasionally possible for the default remote handset
command set to conflict with other remote controlled
equipment in the home. A conflict will be apparent if the
handset appears to control an unintended device or if
another handset appears to control the HDX. If a conflict
occurs the HDX handset command set can be changed.
While pointing the handset towards the HDX, press and hold
both the page down and input keys while simultaneously
pressing the 2 or 3 key to change the command set. Press the
1 key to return to the default command set.
2. 5 E x ternal S c re e n Se tup
If an external display is used, the HDX external display
setup may need to be modified. Navigate, via the System
menu, to the System Settings menu. Select and save the
desired External Display Theme, External Display Aspect
Ratio, External Display Mode and TV System. Initially disable
the Screen Saver (found on System Setup page 1).
Note: The External Display Mode setting configures the
external display for use with either an external touch
screen or a remote handset. In touch screen mode, four
shortcut buttons are displayed on the right of the screen
that correspond to the home, browse, find and back keys
on the remote handset. The on screen shortcut buttons
can only be accessed from the touch screen so are not
shown in remote control mode.
Note: Once you have become used to the interface and
are familiar with its functions the screen saver can be
re-enabled.
2. 6 First Use
The HDX is shipped with some music files already stored
on its hard disk. One of these can be used to check that
playback is operating correctly. Navigate via the Front
Panel Display Interface from the Home Menu to the Quick
Play menu and select Play Random to play a track.
To “rip” a CD to the HDX hard disk, use the front panel
open button to open the CD drawer. Insert a CD and
4
press the open button again to close the drawer. The
ripping process will begin automatically. When CD ripping
is complete the HDX will eject the CD automatically. See
Section 6 for further information on ripping CDs.
Only CDs owned personally should be ripped. Ripping a
borrowed CD may violate copyright law.
Note: Although the HDX contains a small internal music
database, to be able to identify a CD and download its
associated data during the ripping process, it must be
connected to a working internet connection.
2 . 7 S of t w a r e Up g r a d e
Software upgrade CDs will occasionally be released for
the HDX. New software is installed simply by inserting the
upgrade CD in the drawer. The software upgrade process
will commence automatically. As part of the upgrade
process the HDX will eject the CD and re-boot. The front
panel display may also go blank temporarily. The upgrade
process is complete once the display returns to the Home
Menu.
Note: Any specific instructions included with the upgrade
CD should be followed carefully.
Never switch off the HDX from the rear panel power
switch or unplug it from the mains supply while a software
upgrade process is underway.
2 . 8 S w i t ch i n g O f f
Switching off the HDX from its rear panel power switch
is not normally necessary unless it is to be un-installed. It
can be put into shutdown mode by pressing the handset
shutdown key or pressing and holding the front panel
shutdown button for one second. The HDX may take up
to one minute to enter shutdown mode during which time
the shutdown button will flash. The shutdown button will
remain lit when the HDX is in shutdown mode. Wait until
the shutdown button stops flashing and remains lit before
switching off the HDX from the rear panel mains switch.
Never switch off the HDX from the rear panel mains switch
or unplug it from the mains supply unless it is in shutdown
mode.
To switch the HDX back on from shutdown mode, the
power switch must be switched off and on again.
2 . 9 Da t a B a ck u p
HDX does not incorporate an integral backup disk drive
and we strongly advise that you protect your stored music
by implementing a regular backup to a Network Attached
Storage (NAS) hard disk drive.
Implementing regular backups to a network share can
be set up via the HDX System menu. This is described in
Section 4.8.4.