1
RACKMOUNT CONFIGURATION
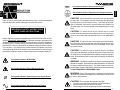
This UPS comes with mounting brackets for the standard 19" (46.5cm) rack.
The mounting brackets to fit a 23" (59.2cm) standard rack are also available.
The screws for mounting the UPS to the rack are not included (screw size
varies with rack size).
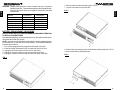
1. Locate the mounting bracket screw holes on the side panels of the UPS, at
the front of the UPS. NOTE: The mounting brackets can also be mounted
in the middle of the UPS.
2. Align the mounting bracket with the mounting bracket screw holes.
3. Attach the mounting bracket with the retaining screws.
4. Mount the UPS into the rack and secure with the retaining screws.
WARNING: Use two or more people when installing the UPS. Use CAUTION,
the UPS is extremely heavy. Do not move the rack after the units have been
installed. The rack may be unstable due to the weight distribution.
5. The Rackmount Configuration is complete. See Connecting your Equipment
TOWER CONFIGURATION
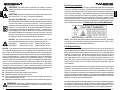
The tower configuration allows the user to install the UPS in the up-right position next to the tower computer. The tower brackets are provided with the UPS.
WARNING: Use two or more people when installing the UPS. Use CAUTION,
the UPS is extremely heavy.
1. Once the location of the UPS has been determined, place the tower brackets in the desired location.
WARNING: The UPS must be installed in the proper up-right position. If the
UPS is not installed in the proper up-right position the Batteries will be damaged. Once the UPS is placed in the tower position, looking at the front panel
the YELLOW Battery disconnected label on the top cover of the UPS MUST be
on your left hand side.
8
9
English
English
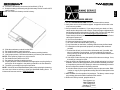
INSTALLATION
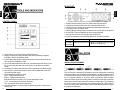
Be sure to read the installation placement and all the cautions before installing
the UPS. Place the UPS in the final desired location and complete the rest of
the installation procedure. These UPSs are shipped with the internal batteries
disconnected. The batteries must be connected before putting these UPSs
into service. See the Connecting The Batteries procedure to connect the batteries.
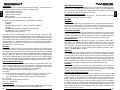
CONNECTING THE BATTERIES
(QUALIFIED SERVICE PERSONNEL ONLY)
Please read all of the WARNINGS and CAUTIONS before attempting to connect the batteries.
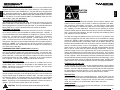
1. Remove the UPS from the shipping box and set on the floor or a bench top.
2. Remove the front panel retaining screws.
3. Lay the front panel on top of the UPS.
4. Verify proper polarity. Connect the battery connectors (red and black) together.
NOTE: Some sparking might occur, this is normal.
5. Re-install the front panel onto the UPS.
6. Re-install the front panel retaining screws.
7. Continue with the rest of the Installation.