1
FocalPoint™ Instructions and Assembly Guides
Clicking on size or page number below will take you to that particular assembly guide.
Page
FocalPoint Assembly Instructions ............................................................................................................................... 2
FocalPoint Assembly Guides ..................................................................................................................................3-26
4:3 NTSC Format
Image Area
Image Area
Overall Size
Overall Size
(Inches)
(cm)
(Inches)
(cm)
Diagonal
60" X 80"
152 X 203
68" X 92"
173 x 234
100"
3
72" x 96"
183 x 244
80" x 104"
203 x 264
150"
4
90" x 120"
229 x 305
98" x 128"
249 x 325
150"
5
108" x 144"
274 x 366
116" x 152"
295 x 386
180"
6
126" x 168"
320 x 427
134" x 176"
340 x 447
210"
7
144" x 192"
366 x 488
152" x 200"
386 x 508
240"
8
162" x 216"
411 x 549
170" x 224"
432 x 569
270"
9
180" x 240"
457 x 610
188" x 248"
478 x 630
300"
10
16:9 HDTV Format
45" x 80"
114 x 203
56" x 92"
142 x 234
92"
11
54" x 96"
137 x 244
62" x 104"
157 x 264
110"
12
67½" x 120"
171 x 305
80" x 128"
203 x 325
138"
13
81" x 144"
206 x 366
92" x 152"
234 x 386
165"
14
94½" x 168"
240 x 427
104" x 176"
264 x 447
193"
15
108" x 192"
274 x 488
116" x 200"
295 x 508
220"
16
121½" x 216"
309 x 549
134" x 224"
340 x 569
248"
17
135" x 240"
343 x 610
146" x 248"
371 x 630
275"
18
16:10 Format
50" x 80"
127 x 203
62" x 92"
157 x 234
94"
19
60" x 96"
152 x 244
68" x 104"
173 x 264
113"
20
75" x 120"
191 x 305
86" x 128
218 x 325
142"
21
90" x 144"
229 x 366
98" x 152"
249 x 386
170"
22
105" x 168"
267 x 427
116" x 178"
295 x 447
198"
23
120" x 192"
305 x 488
128" x 200"
325 x 508
226"
24
135" x 216"
343 x 549
146" x 224"
371 x 569
255"
25
150" x 240"
381 x 610
158" x 248"
401 x 630
283"
26
FocalPoint Leg Assembly Guides .........................................................................................................................27-29
®
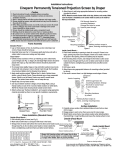
Assembly Instructions
FocalPoint™ Projection Screen by Draper
Caution
① Read instructions through completely before proceeding; retain for future
reference.
② Handle viewing surface with care; do not allow it to come in contact with
sharp or dirty objects.
③ These instructions are based on assembly by a minimum of two people.
④ Make sure screen is level.
⑤ Do not write on viewing surface.
⑥ The ideal temperature range for assembling folding screens to prevent
damaging the surface is 68°-78° F (20°-26° C). Assembling below
recommended temperatures may damage surface and void warranty.
⑦ Do not permit screen fabric to contact border material or loops when
folded. Store in pouch provided.
Patent
Pending
⑦ Attach legs to frame (see Fig. 4) using provided Leg Cranks as follows:
Package A–3 cranks per leg; Package B–4 cranks per leg; and Package
C–5 cranks per leg. Leg Cranks should be placed as follows: 1 at the lowest attachment point, 1 at the highest attachment point, and the rest evenly
spaced between the two.
⑧ Attach viewing surface to frame (see Fig. 5).
Frame/Screen Assembly
Figure 5
① Remove tarp from case and place on the ground.
② Remove frame pieces from case and place in the appropriate locations
on the tarp.
Please Note: For screens with Viewing areas of 18’ or larger Draper
ships a special corner labeled “Large Screen corner”. If you did not
order a complete screen do not use the standard “corner” for the large
screens. Contact Draper if needed.
Please Note: Each piece is color-coded: refer to FocalPoint™ Assembly
Map included with screen for correct layout (see reverse side).
Please Note: Frame pieces should be placed with "forks" running
counter-clockwise and DuraLoop Attachment Lugs facing out.
⑨ Raise FocalPoint into place (this step requires at least two people, depending on screen size) (see Fig. 6).
Figure 6
⑩ Attach the back extensions to the leg bases (see Fig. 7).
Figure 1
③ Assemble frame by inserting "forks" of each piece into extrusions on the
adjoining piece (see Fig. 1). Tighten by turning color-coded attachment
knobs (see Fig. 2).
Figure 7
⑪ If provided, attach Anti-Sway Stabilizers to the frame and legs. First,
unhook the viewing surface from the bottom of the frame near the attachment points. Attach ends with threaded hole through the square extrusion
to the fifth visible hole in from each end of the screen. Attach end with
metal extension to the closest leg extrusion hole (see Fig. 8).
Figure 2
④ Remove leg pieces from case and place in the appropriate locations on
the tarp.
⑤ Assemble leg according to color-coded assembly map by inserting "forks"
of front extension into extrusion on the leg base and tighten color-coded
attachment knobs. Also, attach vertical frame members in the same manner. Do not yet attach the back extension to the leg base (see Fig. 3).
Figure 3
⑥ Place the screen frame on top of the legs (see Fig. 4).
Figure 8
Please Note: You may need to use the built-in adjustment knob to shorten or lengthen the Anti-Sway Stabilizer so it will reach holes (see Fig. 9).
Adjustment
Knob
Figure 9
⑫ If provided, attach HD Leg Braces to frame and legs. Attach ends with
threaded hole through the square extrusion to the frame. Attach end with
metal extension to the back foot extrusion (see Fig. 10).
Figure 4
®
Caution:
Beware of
pinch points.
Figure 10
Copyright © 2011 Draper Inc.
Form FocalPoint_Inst11-R
Printed in U.S.A.
If you encounter any difficulties assembling your FocalPoint™, call your dealer
or Draper, Inc. in Spiceland, Indiana, 765-987-7999, or fax 765-987-7142.
FocalPoint™ Projection Screen by Draper—Assembly Map
Page 3
60" x 80" (152 x 203 cm) Image Area—4:3 Format
2' (61cm)
4' (122 cm)
Leg Kit A
(two legs
per screen)
For use with these part numbers
385030
385086
CineFlex
Silver Anodized Black
385038
2' (61cm)
Black-Backed M1300
Silver Anodized Black
385094
• Frame sections should be arranged so that:
➽ Viewing surface attachment posts are on the outside
of the frame
➽ Guide pins should point counterclockwise
➽ Bolt heads should face upward
4' (122 cm)
2' (61cm)
4' (122 cm)
Form FocalPoint_60x80_Assy
For use with screens up to
126" high viewing area
Leg Kit C—
For use with screens above
126" high viewing area
Leg Kits come with Leg
Cranks as noted below:
Package A–3 cranks per leg/
total 6
Package B–4 cranks per leg/
total 8
Package C–5 cranks per leg/
total 10
Leg Cranks should be placed
as follows: 1 at the lowest attachment point, 1 at the highest
attachment point, and the rest
evenly spaced between the two.
Front
®
Copyright © 2010 Draper Inc.
For use with screens up to
80" high viewing area
Leg Kit B—
2' (61cm)
• Assemble the frame and legs before attaching the screen
surface.
All Pins
should point
counterclockwise.
Bolt heads should
face up.
4' (122 cm)
4' (122 cm)
Before you start:
• Spread the tarp (included).
Leg Kit A—
Printed in U.S.A.
Caution:
Beware of
pinch points.
2' (61cm)
2' (61cm)
FocalPoint™ Projection Screen by Draper—Assembly Map
72" x 96" (183 x 244 cm) Image Area—4:3 Format
3' (91 cm)
4' (122 cm)
For use with these part numbers
385087
385039
3' (91 cm)
2' (61cm)
385031
CineFlex
Silver Anodized Black
385095
Before you start:
Leg Kit A—
For use with screens up to
80" high viewing area
For use with screens up to
126" high viewing area
• Assemble the frame and legs before attaching the screen
surface.
➽ Viewing surface attachment posts are on the outside
of the frame
2' (61cm)
3' (91 cm)
➽ Bolt heads should face upward
4' (122 cm)
3' (91 cm)
4' (122 cm)
2' (61cm)
• Frame sections should be arranged so that:
➽ Guide pins should point counterclockwise
Leg Kit C—
For use with screens above
126" high viewing area
Leg Kits come with Leg
Cranks as noted below:
Package A–3 cranks per leg/
total 6
Package B–4 cranks per leg/
total 8
Package C–5 cranks per leg/
total 10
Leg Cranks should be placed
as follows: 1 at the lowest attachment point, 1 at the highest
attachment point, and the rest
evenly spaced between the two.
Front
®
Form FocalPoint_72x96_Assy10-R Printed in U.S.A.
Leg Kit A
(two legs
per screen)
Leg Kit B—
• Spread the tarp (included).
All Pins
should point
counterclockwise.
Bolt heads should
face up.
Copyright © 2010 Draper Inc.
2' (61cm)
Black-Backed M1300
Silver Anodized Black
Caution:
Beware of
pinch points.
2' (61cm)
2' (61cm)
FocalPoint™ Projection Screen by Draper—Assembly Map
Page 5
90" x 120" (229 x 305 cm) Image Area—4:3 Format
4' (122 cm)
3' (91 cm)
2' (61cm)
2' (61cm)
For use with these part numbers
385032
CineFlex
Silver Anodized Black
385088
385040
385096
• Spread the tarp (included).
➽ Viewing surface attachment posts are on the outside
of the frame
4' (122 cm)
3' (91 cm)
3½' (107 cm)
➽ Guide pins should point counterclockwise
3' (91 cm)
Leg Kit B—
For use with screens up to
126" high viewing area
For use with screens above
126" high viewing area
• Frame sections should be arranged so that:
➽ Bolt heads should face upward
For use with screens up to
80" high viewing area
Leg Kit C—
• Assemble the frame and legs before attaching the screen
surface.
All Pins
should point
counterclockwise.
Bolt heads should
face up.
2' (61cm)
Leg Kit A—
2' (61cm)
Before you start:
3½' (107 cm)
3' (91 cm)
Black-Backed M1300
Silver Anodized Black
Leg Kit B
(two legs
per screen)
Leg Kits come with Leg
Cranks as noted below:
Package A–3 cranks per leg/
total 6
Package B–4 cranks per leg/
total 8
Package C–5 cranks per leg/
total 10
Leg Cranks should be placed
as follows: 1 at the lowest attachment point, 1 at the highest
attachment point, and the rest
evenly spaced between the two.
4' (122 cm)
4' (122 cm)
®
Front
Copyright © 2010 Draper Inc.
Form FocalPoint_90x120_Assy
Printed in U.S.A.
Caution:
Beware of
pinch points.
3' (91 cm)
3' (91 cm)
FocalPoint™ Projection Screen by Draper—Assembly Map
Page 6
108" x 144" (274 x 366 cm) Image Area—4:3 Format
3' (91 cm)
4' (122 cm)
4' (122 cm)
2' (61cm)
For use with these part numbers
385033
385089
CineFlex
Silver Anodized Black
385041
385097
Before you start:
• Spread the tarp (included).
All Pins
should point
counterclockwise.
Bolt heads should
face up.
• Assemble the frame and legs before attaching the screen
surface.
Leg Kit B—
For use with screens up to
126" high viewing area
For use with screens above
126" high viewing area
➽ Viewing surface attachment posts are on the outside
of the frame
4' (122 cm)
4' (122 cm)
Leg Kits come with Leg
Cranks as noted below:
Package A–3 cranks per leg/
total 6
Package B–4 cranks per leg/
total 8
Package C–5 cranks per leg/
total 10
Leg Cranks should be placed
as follows: 1 at the lowest attachment point, 1 at the highest
attachment point, and the rest
evenly spaced between the two.
4' (122 cm)
3' (91 cm)
4' (122 cm)
➽ Bolt heads should face upward
4' (122 cm)
For use with screens up to
80" high viewing area
Leg Kit C—
• Frame sections should be arranged so that:
➽ Guide pins should point counterclockwise
4' (122 cm)
Leg Kit A—
2' (61cm)
4' (122 cm)
4' (122 cm)
Black-Backed M1300
Silver Anodized Black
Leg Kit B
(two legs
per screen)
®
Front
Copyright © 2010 Draper Inc.
Form FocalPoint_108x144_Assy Printed in U.S.A.
Caution:
Beware of
pinch points.
3' (91 cm)
3' (91 cm)
FocalPoint™ Projection Screen by Draper—Assembly Map
Page 7
126" x 168" (320 x 427 cm) Image Area—4:3 Format
4' (122 cm)
3' (91 cm)
4' (122 cm)
2' (61cm)
385090
385042
385098
• Assemble the frame and legs before attaching the screen
surface.
• Frame sections should be arranged so that:
➽ Viewing surface attachment posts are on the outside
of the frame
➽ Bolt heads should face upward
2' (61cm)
4' (122 cm)
4' (122 cm)
For use with screens up to
80" high viewing area
Leg Kit B—
For use with screens up to
126" high viewing area
4' (122 cm)
Leg Kits come with Leg
Cranks as noted below:
Package A–3 cranks per leg/
total 6
Package B–4 cranks per leg/
total 8
Package C–5 cranks per leg/
total 10
Leg Cranks should be placed
as follows: 1 at the lowest attachment point, 1 at the highest
attachment point, and the rest
evenly spaced between the two.
4' (122 cm)
3' (91 cm)
2' (61cm)
Leg Kit A—
For use with screens above
126" high viewing area
4' (122 cm)
➽ Guide pins should point counterclockwise
Leg Kit B
(two legs
per screen)
Leg Kit C—
3½' (107 cm)
All Pins
should point
counterclockwise.
Bolt heads should
face up.
2' (61cm)
3½' (107 cm)
Before you start:
• Spread the tarp (included).
2' (61cm)
385034
CineFlex
Silver Anodized Black
4' (122 cm)
2' (61cm)
For use with these part numbers
Black-Backed M1300
Silver Anodized Black
®
Front
Copyright © 2010 Draper Inc.
Form FocalPoint_126x168_Assy Printed in U.S.A.
Caution:
Beware of
pinch points.
3' (91 cm)
3' (91 cm)
FocalPoint™ Projection Screen by Draper—Assembly Map
Page 8
144" x 192" (366 x 488 cm) Image Area—4:3 Format
4' (122 cm)
4' (122 cm)
3' (91 cm)
4' (122 cm)
385091
CineFlex
Silver Anodized Black
385043
385099
Before you start:
3' (91 cm)
385035
4' (122 cm)
Black-Backed M1300
Silver Anodized Black
2' (61cm)
3' (91 cm)
For use with these part numbers
Leg Kit C
(two legs
per screen)
Leg Kit A—
For use with screens up to
80" high viewing area
Leg Kit B—
4' (122 cm)
For use with screens up to
126" high viewing area
• Spread the tarp (included).
• Assemble the frame and legs before attaching the screen
surface.
➽ Viewing surface attachment posts are on the outside
of the frame
➽ Guide pins should point counterclockwise
Leg Kit C—
4' (122 cm)
• Frame sections should be arranged so that:
4' (122 cm)
All Pins
should point
counterclockwise.
Bolt heads should
face up.
➽ Bolt heads should face upward
4' (122 cm)
4' (122 cm)
4' (122 cm)
Form FocalPoint_144x192 _Assy Printed in U.S.A.
Caution:
Beware of
pinch points.
Leg Kits come with Leg
Cranks as noted below:
Package A–3 cranks per leg/
total 6
Package B–4 cranks per leg/
total 8
Package C–5 cranks per leg/
total 10
Leg Cranks should be placed
as follows: 1 at the lowest attachment point, 1 at the highest
attachment point, and the rest
evenly spaced between the two.
4' (122 cm)
®
Copyright © 2010 Draper Inc.
4' (122 cm)
3' (91 cm)
4' (122 cm)
3' (91 cm)
For use with screens above
126" high viewing area
3' (91 cm)
Front
3' (91 cm)
FocalPoint™ Projection Screen by Draper—Assembly Map
Page 9
162" x 216" (411 x 549 cm) Image Area—4:3 Format
4' (122 cm)
4' (122 cm)
4' (122 cm)
3' (91 cm)
2' (61cm)
CineFlex
Silver Anodized Black
385044
385100
Before you start:
• Spread the tarp (included).
• Assemble the frame and legs before attaching the screen
surface.
• Frame sections should be arranged so that:
➽ Viewing surface attachment posts are on the outside
of the frame
➽ Guide pins should point counterclockwise
3' (91 cm)
➽ Bolt heads should face upward
3' (91 cm)
4' (122 cm)
4' (122 cm)
4' (122 cm)
Caution:
Beware of
pinch points.
Form FocalPoint_162x216 _Assy Printed in U.S.A.
For use with screens up to
80" high viewing area
Leg Kit B—
For use with screens up to
126" high viewing area
For use with screens above
126" high viewing area
Leg Kits come with Leg
Cranks as noted below:
Package A–3 cranks per leg/
total 6
Package B–4 cranks per leg/
total 8
Package C–5 cranks per leg/
total 10
Leg Cranks should be placed
as follows: 1 at the lowest attachment point, 1 at the highest
attachment point, and the rest
evenly spaced between the two.
4' (122 cm)
®
Copyright © 2010 Draper Inc.
4' (122 cm)
2' (61cm)
4' (122 cm)
2' (61cm)
Leg Kit A—
Leg Kit C—
4' (122 cm)
3½' (107 cm)
All Pins
should point
counterclockwise.
Bolt heads should
face up.
3' (91 cm)
385092
3½' (107 cm)
3' (91 cm)
385036
4' (122 cm)
Black-Backed M1300
Silver Anodized Black
Leg Kit C
(two legs
per screen)
2' (61cm)
2' (61cm)
For use with these part numbers
3' (91 cm)
Front
3' (91 cm)
FocalPoint™ Projection Screen by Draper—Assembly Map
Page 10
180" x 240" (457 x 610 cm) Image Area—4:3 Format
4' (122 cm)
4' (122 cm)
Black-Backed M1300
Silver Anodized Black
385093
385045
385101
4' (122 cm)
385037
CineFlex
Silver Anodized Black
4' (122 cm)
Before you start:
3' (91 cm)
4' (122 cm)
For use with these part numbers
4' (122 cm)
2' (61cm)
4' (122 cm)
4' (122 cm)
4' (122 cm)
4' (122 cm)
4' (122 cm)
➽ Viewing surface attachment posts are on the outside
of the frame
4' (122 cm)
• Frame sections should be arranged so that:
➽ Bolt heads should face upward
4' (122 cm)
4' (122 cm)
Form FocalPoint_180x240 _Assy Printed in U.S.A.
Leg Kit B—
For use with screens up to
126" high viewing area
Caution:
Beware of
pinch points.
Leg Kits come with Leg
Cranks as noted below:
Package A–3 cranks per leg/
total 6
Package B–4 cranks per leg/
total 8
Package C–5 cranks per leg/
total 10
Leg Cranks should be placed
as follows: 1 at the lowest attachment point, 1 at the highest
attachment point, and the rest
evenly spaced between the two.
3' (91 cm)
®
Copyright © 2010 Draper Inc.
For use with screens up to
80" high viewing area
For use with screens above
126" high viewing area
• Assemble the frame and legs before attaching the screen
surface.
➽ Guide pins should point counterclockwise
4' (122 cm)
Leg Kit A—
Leg Kit C—
• Spread the tarp (included).
All Pins
should point
counterclockwise.
Bolt heads should
face up.
Leg Kit C
(two legs
per screen)
2' (61cm)
4' (122 cm)
2' (61cm)
4' (122 cm)
3' (91 cm)
3' (91 cm)
Front
3' (91 cm)
FocalPoint™ Projection Screen by Draper—Assembly Map
Page 11
45" x 80" (114 x 203 cm) Image Area—16:9 HDTV Format
2' (61cm)
For use with these part numbers
Black-Backed M1300
Silver Anodized Black
385046
CineFlex
Silver Anodized Black
385102
385055
385111
• Assemble the frame and legs before attaching the screen
surface.
• Frame sections should be arranged so that:
➽ Viewing surface attachment posts are on the outside
of the frame
➽ Guide pins should point counterclockwise
➽ Bolt heads should face upward
4' (122 cm)
2' (61cm)
4' (122 cm)
Caution:
Beware of
pinch points.
Form FocalPoint_45x80_Assy
For use with screens up to
80" high viewing area
For use with screens up to
126" high viewing area
Leg Kit C—
For use with screens above
126" high viewing area
Leg Kits come with Leg
Cranks as noted below:
Package A–3 cranks per leg/
total 6
Package B–4 cranks per leg/
total 8
Package C–5 cranks per leg/
total 10
Leg Cranks should be placed
as follows: 1 at the lowest attachment point, 1 at the highest
attachment point, and the rest
evenly spaced between the two.
Front
®
Copyright © 2010 Draper Inc.
Leg Kit A—
Leg Kit B—
2' (61cm)
• Spread the tarp (included).
3' (91 cm)
3' (91 cm)
Before you start:
All Pins
should point
counterclockwise.
Bolt heads should
face up.
Leg Kit A
(two legs
per screen)
2' (61cm)
4' (122 cm)
Printed in U.S.A.
2' (61cm)
2' (61cm)
FocalPoint™ Projection Screen by Draper—Assembly Map
Page 12
54" x 96" (137 x 244 cm) Image Area—16:9 HDTV Format
4' (122 cm)
3' (91 cm)
385047
385103
CineFlex
Silver Anodized Black
385056
385112
• Spread the tarp (included).
• Frame sections should be arranged so that:
➽ Viewing surface attachment posts are on the outside
of the frame
➽ Guide pins should point counterclockwise
➽ Bolt heads should face upward
4' (122 cm)
)mc 19( '3
3' (91 cm)
4' (122 cm)
Caution:
Beware of
pinch points.
Form FocalPoint_54x96_Assy
For use with screens up to
80" high viewing area
For use with screens up to
126" high viewing area
Leg Kit C—
For use with screens above
126" high viewing area
Leg Kits come with Leg
Cranks as noted below:
Package A–3 cranks per leg/
total 6
Package B–4 cranks per leg/
total 8
Package C–5 cranks per leg/
total 10
Leg Cranks should be placed
as follows: 1 at the lowest attachment point, 1 at the highest
attachment point, and the rest
evenly spaced between the two.
Front
®
Copyright © 2010 Draper Inc.
Leg Kit A—
Leg Kit B—
2' (61cm)
• Assemble the frame and legs before attaching the screen
surface.
3½' (107 cm)
3½' (107 cm)
Before you start:
All Pins
should point
counterclockwise.
Bolt heads should
face up.
2' (61cm)
For use with these part numbers
Black-Backed M1300
Silver Anodized Black
Leg Kit A
(two legs
per screen)
Printed in U.S.A.
2' (61cm)
2' (61cm)
FocalPoint™ Projection Screen by Draper—Assembly Map
Page 13
67½" x 120" (1471 x 305 cm) Image Area—16:9 HDTV Format
2' (61cm)
3' (91 cm)
4' (122 cm)
Leg Kit A
(two legs
per screen)
For use with these part numbers
385105
385058
385114
Before you start:
2' (61cm)
385049
CineFlex
Silver Anodized Black
3' (91 cm)
2' (61cm)
Black-Backed M1300
Silver Anodized Black
For use with screens up to
80" high viewing area
Leg Kit B—
• Spread the tarp (included).
• Frame sections should be arranged so that:
➽ Guide pins should point counterclockwise
➽ Bolt heads should face upward
3' (91 cm)
4' (122 cm)
4' (122 cm)
2' (61cm)
2' (61cm)
3' (91 cm)
➽ Viewing surface attachment posts are on the outside
of the frame
Caution:
Beware of
pinch points.
Form FocalPoint_67_1-2x120_AssyPrinted in U.S.A.
For use with screens up to
126" high viewing area
Leg Kit C—
For use with screens above
126" high viewing area
Leg Kits come with Leg
Cranks as noted below:
Package A–3 cranks per leg/
total 6
Package B–4 cranks per leg/
total 8
Package C–5 cranks per leg/
total 10
Leg Cranks should be placed
as follows: 1 at the lowest attachment point, 1 at the highest
attachment point, and the rest
evenly spaced between the two.
Front
®
Copyright © 2010 Draper Inc.
2' (61cm)
• Assemble the frame and legs before attaching the screen
surface.
All Pins
should point
counterclockwise.
Bolt heads should
face up.
Leg Kit A—
2' (61cm)
2' (61cm)
FocalPoint™ Projection Screen by Draper—Assembly Map
Page 14
81" x 144" (206 x 366 cm) Image Area—16:9 Format
2' (61cm)
2' (61cm)
3' (91 cm)
4' (122 cm)
4' (122 cm)
Leg Kit B
(two legs
per screen)
For use with these part numbers
385106
385059
385115
2' (61cm)
385050
CineFlex
Silver Anodized Black
4' (122 cm)
Black-Backed M1300
Silver Anodized Black
Leg Kit A—
For use with screens up to
80" high viewing area
Leg Kit B—
For use with screens up to
126" high viewing area
Before you start:
• Spread the tarp (included).
• Frame sections should be arranged so that:
➽ Bolt heads should face upward
4' (122 cm)
4' (122 cm)
Caution:
Beware of
pinch points.
Form FocalPoint_81x144_Assy
Leg Kits come with Leg
Cranks as noted below:
Package A–3 cranks per leg/
total 6
Package B–4 cranks per leg/
total 8
Package C–5 cranks per leg/
total 10
Leg Cranks should be placed
as follows: 1 at the lowest attachment point, 1 at the highest
attachment point, and the rest
evenly spaced between the two.
4' (122 cm)
®
Copyright © 2010 Draper Inc.
4' (122 cm)
➽ Viewing surface attachment posts are on the outside
of the frame
➽ Guide pins should point counterclockwise
3' (91 cm)
For use with screens above
126" high viewing area
2' (61cm)
4' (122 cm)
All Pins
should point
counterclockwise.
Bolt heads should
face up.
Leg Kit C—
• Assemble the frame and legs before attaching the screen
surface.
Printed in U.S.A.
Front
3' (91 cm)
3' (91 cm)
FocalPoint™ Projection Screen by Draper—Assembly Map
Page 15
94½" x 168" (239 x 427 cm) Image Area—16:9 HDTV Format
3' (91 cm)
4' (122 cm)
4' (122 cm)
2' (61cm)
385051
385107
CineFlex
Silver Anodized Black
385060
385116
Before you start:
• Spread the tarp (included).
➽ Viewing surface attachment posts are on the outside
of the frame
For use with screens up to
126" high viewing area
For use with screens above
126" high viewing area
4' (122 cm)
4' (122 cm)
➽ Bolt heads should face upward
3' (91 cm)
Leg Kit B—
• Frame sections should be arranged so that:
➽ Guide pins should point counterclockwise
2' (61cm)
For use with screens up to
80" high viewing area
Leg Kit C—
• Assemble the frame and legs before attaching the screen
surface.
3' (91 cm)
4' (122 cm)
All Pins
should point
counterclockwise.
Bolt heads should
face up.
Leg Kit A—
2' (61cm)
4' (122 cm)
3' (91 cm)
Black-Backed M1300
Silver Anodized Black
2' (61cm)
For use with these part numbers
Leg Kit B
(two legs
per screen)
4' (122 cm)
Leg Kits come with Leg
Cranks as noted below:
Package A–3 cranks per leg/
total 6
Package B–4 cranks per leg/
total 8
Package C–5 cranks per leg/
total 10
Leg Cranks should be placed
as follows: 1 at the lowest attachment point, 1 at the highest
attachment point, and the rest
evenly spaced between the two.
4' (122 cm)
®
Front
Copyright © 2010 Draper Inc.
Form FocalPoint_94_1-2x168_AssyPrinted in U.S.A.
Caution:
Beware of
pinch points.
3' (91 cm)
3' (91 cm)
FocalPoint™ Projection Screen by Draper—Assembly Map
Page 16
108" x 192" (274 x 488 cm) Image Area—16:9 HDTV Format
4' (122 cm)
4' (122 cm)
4' (122 cm)
3' (91 cm)
385052
385108
CineFlex
Silver Anodized Black
385061
4' (122 cm)
4' (122 cm)
Black-Backed M1300
Silver Anodized Black
385117
2' (61cm)
Before you start:
• Spread the tarp (included).
• Assemble the frame and legs before attaching the screen
surface.
➽ Viewing surface attachment posts are on the outside
of the frame
➽ Guide pins should point counterclockwise
4' (122 cm)
4' (122 cm)
4' (122 cm)
Caution:
Beware of
pinch points.
Form FocalPoint_108x192 _Assy Printed in U.S.A.
For use with screens up to
80" high viewing area
Leg Kit B—
For use with screens up to
126" high viewing area
Leg Kits come with Leg
Cranks as noted below:
Package A–3 cranks per leg/
total 6
Package B–4 cranks per leg/
total 8
Package C–5 cranks per leg/
total 10
Leg Cranks should be placed
as follows: 1 at the lowest attachment point, 1 at the highest
attachment point, and the rest
evenly spaced between the two.
4' (122 cm)
®
Copyright © 2010 Draper Inc.
Leg Kit A—
For use with screens above
126" high viewing area
4' (122 cm)
➽ Bolt heads should face upward
3' (91 cm)
Leg Kit B
(two legs
per screen)
Leg Kit C—
• Frame sections should be arranged so that:
4' (122 cm)
4' (122 cm)
All Pins
should point
counterclockwise.
Bolt heads should
face up.
2' (61cm)
For use with these part numbers
Front
3' (91 cm)
3' (91 cm)
FocalPoint™ Projection Screen by Draper—Assembly Map
Page 17
121½" x 216" (309 x 549 cm) Image Area—16:9 HDTV Format
4' (122 cm)
4' (122 cm)
4' (122 cm)
3' (91 cm)
2' (61cm)
385053
385109
CineFlex
Silver Anodized Black
385062
385118
Before you start:
• Spread the tarp (included).
3½' (107 cm)
• Assemble the frame and legs before attaching the screen
surface.
All Pins
should point
counterclockwise.
Bolt heads should
face up.
• Frame sections should be arranged so that:
➽ Viewing surface attachment posts are on the outside
of the frame
➽ Bolt heads should face upward
2' (61cm)
2' (61cm)
3' (91 cm)
4' (122 cm)
4' (122 cm)
Leg Kit B—
For use with screens up to
126" high viewing area
For use with screens above
126" high viewing area
4' (122 cm)
Leg Kits come with Leg
Cranks as noted below:
Package A–3 cranks per leg/
total 6
Package B–4 cranks per leg/
total 8
Package C–5 cranks per leg/
total 10
Leg Cranks should be placed
as follows: 1 at the lowest attachment point, 1 at the highest
attachment point, and the rest
evenly spaced between the two.
4' (122 cm)
®
Caution:
Beware of
pinch points.
Copyright © 2010 Draper Inc. Form FocalPoint_121_1-2x216 _Assy Printed in U.S.A.
For use with screens up to
80" high viewing area
Leg Kit C—
4' (122 cm)
4' (122 cm)
➽ Guide pins should point counterclockwise
Leg Kit A—
2' (61cm)
3½' (107 cm)
4' (122 cm)
Black-Backed M1300
Silver Anodized Black
Leg Kit B
(two legs
per screen)
2' (61cm)
2' (61cm)
For use with these part numbers
Front
3' (91 cm)
3' (91 cm)
FocalPoint™ Projection Screen by Draper—Assembly Map
Page 18
4' (122 cm)
4' (122 cm)
4' (122 cm)
4' (122 cm)
3' (91 cm)
385110
4' (122 cm)
385054
CineFlex
Silver Anodized Black
385063
385119
Leg Kit
C (two
legs per
screen)
3' (91 cm)
3' (91 cm)
For use with these part numbers
Black-Backed M1300
Silver Anodized Black
2' (61cm)
135" x 240" (343 x 610 cm) Image Area—16:9 HDTV Format
3½' (107 cm)
Leg Kit A—
• Spread the tarp (included).
All Pins
should point
counterclockwise.
Bolt heads should
face up.
• Assemble the frame and legs before attaching the
screen surface.
• Frame sections should be arranged so that:
➽ Viewing surface attachment posts are on the
outside of the frame
4' (122 cm)
3½' (107 cm)
Before you start:
For use with screens up to
80" high viewing area
Leg Kit B—
For use with screens up to
126" high viewing area
Leg Kit C—
For use with screens above
126" high viewing area
4' (122 cm)
3' (91 cm)
4' (122 cm)
4' (122 cm)
3' (91 cm)
➽ Bolt heads should face upward
4' (122 cm)
4' (122 cm)
®
Copyright © 2010 Draper Inc. Form FocalPoint_135_1-2x240_Assy Printed in U.S.A.
4' (122 cm)
4' (122 cm)
➽ Guide pins should point counterclockwise
Caution:
Beware of
pinch points.
3' (91 cm)
Leg Kits come with Leg
Cranks as noted below:
Package A–3 cranks per leg/
total 6
Package B–4 cranks per leg/
total 8
Package C–5 cranks per leg/
total 10
Leg Cranks should be placed
as follows: 1 at the lowest attachment point, 1 at the highest
attachment point, and the rest
evenly spaced between the two.
Front
3' (91 cm)
FocalPoint™ Projection Screen by Draper—Assembly Map
Page 19
50" x 80" (127 x 203 cm) Image Area—16:10 Format
2' (61cm)
4' (122 cm)
385066
385122
CineFlex
Silver Anodized Black
385077
385133
• Assemble the frame and legs before attaching the screen
surface.
• Frame sections should be arranged so that:
➽ Viewing surface attachment posts are on the outside
of the frame
Leg Kit B—
➽ Guide pins should point counterclockwise
➽ Bolt heads should face upward
2' (61cm)
4' (122 cm)
4' (122 cm)
Caution:
Beware of
pinch points.
Form FocalPoint_50x80_Assy
For use with screens up to
126" high viewing area
Leg Kit C—
For use with screens above
126" high viewing area
Leg Kits come with Leg
Cranks as noted below:
Package A–3 cranks per leg/
total 6
Package B–4 cranks per leg/
total 8
Package C–5 cranks per leg/
total 10
Leg Cranks should be placed
as follows: 1 at the lowest attachment point, 1 at the highest
attachment point, and the rest
evenly spaced between the two.
Front
®
Copyright © 2010 Draper Inc.
Leg Kit A—
For use with screens up to
80" high viewing area
2' (61cm)
• Spread the tarp (included).
3½' (107 cm)
3½' (107 cm)
Before you start:
All Pins
should point
counterclockwise.
Bolt heads should
face up.
2' (61cm)
For use with these part numbers
Black-Backed M1300
Silver Anodized Black
Leg Kit A
(two legs
per screen)
Printed in U.S.A.
2' (61cm)
2' (61cm)
FocalPoint™ Projection Screen by Draper—Assembly Map
Page 20
60" x 96" (152 x 244 cm) Image Area—16:10 Format
4' (122 cm)
3' (91 cm)
For use with these part numbers
Black-Backed M1300
Silver Anodized Black
385123
385078
385134
• Spread the tarp (included).
• Assemble the frame and legs before attaching the screen
surface.
• Frame sections should be arranged so that:
➽ Viewing surface attachment posts are on the outside
of the frame
➽ Guide pins should point counterclockwise
➽ Bolt heads should face upward
4' (122 cm)
Caution:
Beware of
pinch points.
Form FocalPoint_60x96_Assy
Leg Kit C—
For use with screens above
126" high viewing area
Leg Kits come with Leg
Cranks as noted below:
Package A–3 cranks per leg/
total 6
Package B–4 cranks per leg/
total 8
Package C–5 cranks per leg/
total 10
Leg Cranks should be placed
as follows: 1 at the lowest attachment point, 1 at the highest
attachment point, and the rest
evenly spaced between the two.
Front
®
Copyright © 2010 Draper Inc.
For use with screens up to
80" high viewing area
For use with screens up to
126" high viewing area
4' (122 cm)
)mc 19( '3
3' (91 cm)
Leg Kit A—
Leg Kit B—
2' (61cm)
All Pins
should point
counterclockwise.
Bolt heads should
face up.
4' (122 cm)
4' (122 cm)
Before you start:
2' (61cm)
385067
Leg Kit A
(two legs
per screen)
CineFlex
Silver Anodized Black
Printed in U.S.A.
2' (61cm)
2' (61cm)
FocalPoint™ Projection Screen by Draper—Assembly Map
75" x 120" (191 x 305 cm) Image Area—16:10 Format
4' (122 cm)
2' (61cm)
3' (91 cm)
Leg Kit A
(two legs
per screen)
For use with these part numbers
385125
385080
385136
Before you start:
Leg Kit A—
2' (61cm)
385069
CineFlex
Silver Anodized Black
3½' (107 cm)
2' (61cm)
Black-Backed M1300
Silver Anodized Black
• Spread the tarp (included).
➽ Viewing surface attachment posts are on the outside
of the frame
2' (61cm)
➽ Bolt heads should face upward
4' (122 cm)
3' (91 cm)
2' (61cm)
3½' (107 cm)
• Frame sections should be arranged so that:
➽ Guide pins should point counterclockwise
Form FocalPoint_75x120_Assy
For use with screens up to
126" high viewing area
Leg Kit C—
For use with screens above
126" high viewing area
4' (122 cm)
Leg Kits come with Leg
Cranks as noted below:
Package A–3 cranks per leg/
total 6
Package B–4 cranks per leg/
total 8
Package C–5 cranks per leg/
total 10
Leg Cranks should be placed
as follows: 1 at the lowest attachment point, 1 at the highest
attachment point, and the rest
evenly spaced between the two.
Front
®
Copyright © 2010 Draper Inc.
Leg Kit B—
• Assemble the frame and legs before attaching the screen
surface.
All Pins
should point
counterclockwise.
Bolt heads should
face up.
2' (61cm)
For use with screens up to
80" high viewing area
Printed in U.S.A.
Caution:
Beware of
pinch points.
2' (61cm)
2' (61cm)
FocalPoint™ Projection Screen by Draper—Assembly Map
Page 22
90" x 144" (229 x 366 cm) Image Area—16:10
4' (122 cm)
3' (91 cm)
4' (122 cm)
385070
CineFlex
Silver Anodized Black
385126
385081
385137
Before you start:
• Spread the tarp (included).
• Assemble the frame and legs before attaching the screen
surface.
➽ Viewing surface attachment posts are on the outside
of the frame
4' (122 cm)
4' (122 cm)
➽ Bolt heads should face upward
4' (122 cm)
Leg Kits come with Leg
Cranks as noted below:
Package A–3 cranks per leg/
total 6
Package B–4 cranks per leg/
total 8
Package C–5 cranks per leg/
total 10
Leg Cranks should be placed
as follows: 1 at the lowest attachment point, 1 at the highest
attachment point, and the rest
evenly spaced between the two.
4' (122 cm)
Caution:
Beware of
pinch points.
Form FocalPoint_90x144_Assy
For use with screens up to
126" high viewing area
For use with screens above
126" high viewing area
®
Copyright © 2010 Draper Inc.
Leg Kit B—
• Frame sections should be arranged so that:
➽ Guide pins should point counterclockwise
3' (91 cm)
For use with screens up to
80" high viewing area
Leg Kit C—
3' (91 cm)
3½' (107 cm)
All Pins
should point
counterclockwise.
Bolt heads should
face up.
Leg Kit A—
2' (61cm)
3½' (107 cm)
3' (91 cm)
Black-Backed M1300
Silver Anodized Black
Leg Kit B
(two legs
per screen)
2' (61cm)
For use with these part numbers
Printed in U.S.A.
Front
3' (91 cm)
3' (91 cm)
FocalPoint™ Projection Screen by Draper—Assembly Map
Page 23
105" x 168" (267 x 427 cm) Image Area—16:10 Format
4' (122 cm)
4' (122 cm)
2' (61cm)
3' (91 cm)
385127
385082
385138
Before you start:
• Spread the tarp (included).
• Assemble the frame and legs before attaching the screen
surface.
➽ Bolt heads should face upward
3' (91 cm)
2' (61cm)
4' (122 cm)
4' (122 cm)
➽ Guide pins should point counterclockwise
Leg Kit B—
For use with screens up to
126" high viewing area
For use with screens above
126" high viewing area
• Frame sections should be arranged so that:
➽ Viewing surface attachment posts are on the outside
of the frame
For use with screens up to
80" high viewing area
Leg Kit C—
4' (122 cm)
4' (122 cm)
All Pins
should point
counterclockwise.
Bolt heads should
face up.
Leg Kit A—
2' (61cm)
4' (122 cm)
4' (122 cm)
385071
CineFlex
Silver Anodized Black
2' (61cm)
For use with these part numbers
Black-Backed M1300
Silver Anodized Black
Leg Kit B
(two legs
per screen)
4' (122 cm)
Leg Kits come with Leg
Cranks as noted below:
Package A–3 cranks per leg/
total 6
Package B–4 cranks per leg/
total 8
Package C–5 cranks per leg/
total 10
Leg Cranks should be placed
as follows: 1 at the lowest attachment point, 1 at the highest
attachment point, and the rest
evenly spaced between the two.
4' (122 cm)
®
Front
Copyright © 2010 Draper Inc.
Form FocalPoint_105x168_Assy Printed in U.S.A.
Caution:
Beware of
pinch points.
3' (91 cm)
3' (91 cm)
FocalPoint™ Projection Screen by Draper—Assembly Map
Page 24
120" x 192" (305 x 488 cm) Image Area—16:10 Format
4' (122 cm)
4' (122 cm)
4' (122 cm)
3' (91 cm)
385128
385083
385139
3' (91 cm)
Before you start:
2' (61cm)
4' (122 cm)
385072
CineFlex
Silver Anodized Black
2' (61cm)
2' (61cm)
For use with these part numbers
Black-Backed M1300
Silver Anodized Black
• Spread the tarp (included).
• Assemble the frame and legs before attaching the screen
surface.
• Frame sections should be arranged so that:
4' (122 cm)
➽ Guide pins should point counterclockwise
➽ Bolt heads should face upward
2' (61cm)
4' (122 cm)
3' (91 cm)
4' (122 cm)
For use with screens up to
80" high viewing area
Leg Kit B—
For use with screens up to
126" high viewing area
For use with screens above
126" high viewing area
4' (122 cm)
➽ Viewing surface attachment posts are on the outside
of the frame
Leg Kit A—
Leg Kit C—
3' (91 cm)
All Pins
should point
counterclockwise.
Bolt heads should
face up.
Leg Kit B
(two legs
per screen)
4' (122 cm)
Leg Kits come with Leg
Cranks as noted below:
Package A–3 cranks per leg/
total 6
Package B–4 cranks per leg/
total 8
Package C–5 cranks per leg/
total 10
Leg Cranks should be placed
as follows: 1 at the lowest attachment point, 1 at the highest
attachment point, and the rest
evenly spaced between the two.
4' (122 cm)
®
Front
Copyright © 2010 Draper Inc.
Form FocalPoint_120x192 _Assy Printed in U.S.A.
Caution:
Beware of
pinch points.
3' (91 cm)
3' (91 cm)
FocalPoint™ Projection Screen by Draper—Assembly Map
4' (122 cm)
4' (122 cm)
4' (122 cm)
3' (91 cm)
2' (61cm)
385073
CineFlex
Silver Anodized Black
385129
385084
3' (91 cm)
4' (122 cm)
3' (91 cm)
For use with these part numbers
Black-Backed M1300
Silver Anodized Black
2' (61cm)
135" x 216" (343 x 549 cm) Image Area—16:10 Format
Page 25
385140
Leg Kit C
(two legs
per screen)
Leg Kit A—
For use with screens up to
80" high viewing area
Before you start:
• Spread the tarp (included).
• Assemble the frame and legs before attaching the screen
surface.
4' (122 cm)
All Pins
should point
counterclockwise.
Bolt heads should
face up.
• Frame sections should be arranged so that:
4' (122 cm)
3½' (107 cm)
3½' (107 cm)
Leg Kit B—
➽ Viewing surface attachment posts are on the outside
of the frame
➽ Guide pins should point counterclockwise
2' (61cm)
3' (91 cm)
4' (122 cm)
4' (122 cm)
4' (122 cm)
4' (122 cm)
®
Copyright © 2010 Draper Inc. Form FocalPoint_135x216 _Assy
4' (122 cm)
3' (91 cm)
➽ Bolt heads should face upward
Printed in U.S.A.
Caution:
Beware of
pinch points.
3' (91 cm)
For use with screens up to
126" high viewing area
Leg Kit C—
For use with screens above
126" high viewing area
Leg Kits come with Leg
Cranks as noted below:
Package A–3 cranks per leg/
total 6
Package B–4 cranks per leg/
total 8
Package C–5 cranks per leg/
total 10
Leg Cranks should be placed
as follows: 1 at the lowest attachment point, 1 at the highest
attachment point, and the rest
evenly spaced between the two.
Front
3' (91 cm)
FocalPoint™ Projection Screen by Draper—Assembly Map
4' (122 cm)
4' (122 cm)
4' (122 cm)
4' (122 cm)
3' (91 cm)
Black-Backed M1300
Silver Anodized Black
385074
CineFlex
Silver Anodized Black
385130
385085
385141
3' (91 cm)
4' (122 cm)
3½' (107 cm)
For use with these part numbers
2' (61cm)
150" x 240" (381 x 610 cm) Image Area—16:10 Format
Page 26
Leg Kit C
(two legs
per screen)
Leg Kit A—
For use with screens up to
80" high viewing area
Leg Kit B—
For use with screens up to
126" high viewing area
4' (122 cm)
• Frame sections should be arranged so that:
4' (122 cm)
• Assemble the frame and legs before attaching the
screen surface.
3½' (107 cm)
All Pins
should point
counterclockwise.
Bolt heads should
face up.
4' (122 cm)
4' (122 cm)
Before you start:
• Spread the tarp (included).
➽ Viewing surface attachment posts are on the
outside of the frame
➽ Guide pins should point counterclockwise
4' (122 cm)
➽ Bolt heads should face upward
3' (91 cm)
4' (122 cm)
4' (122 cm)
4' (122 cm)
4' (122 cm)
4' (122 cm)
®
Copyright © 2010 Draper Inc.
Form FocalPoint_150x240_Assy Printed in U.S.A.
Caution:
Beware of
pinch points.
3' (91 cm)
Leg Kit C—
For use with screens above
126" high viewing area
Leg Kits come with Leg
Cranks as noted below:
Package A–3 cranks per leg/
total 6
Package B–4 cranks per leg/
total 8
Package C–5 cranks per leg/
total 10
Leg Cranks should be placed
as follows: 1 at the lowest attachment point, 1 at the highest
attachment point, and the rest
evenly spaced between the two.
Front
3' (91 cm)
FocalPoint™ Projection Screen by Draper—Assembly Map for Leg Kits
Page 27
Leg Kit A
For use with screens up to 80" high viewing area
2' (61cm)
2' (61cm)
Leg Cranks
(3 per leg)
4' (122 cm)
Caution:
Beware of
pinch points.
Front
2' (61cm)
®
2' (61cm)
Leg Kits come with Leg Cranks as noted below:
Package A–3 cranks per leg/total 6
Package B–4 cranks per leg/total 8
Package C–5 cranks per leg/total 10
Leg Cranks should be placed as follows: 1 at the lowest attachment point, 1
at the highest attachment point, and the rest evenly spaced between the two.
Copyright © 2010 Draper Inc. Form FocalPoint_LegAssemblyA_Inst10 Printed in U.S.A.
FocalPoint™ Projection Screen by Draper—Assembly Map for Leg Kits
Leg Kit B
For use with screens up to 126" high viewing area
2' (61cm)
2' (61cm)
4' (122 cm)
Caution:
Beware of
pinch points.
Leg Cranks
(4 per leg)
HD
Br Leg
ac
e
4' (122 cm)
y
wa
-S izer
i
t
An abil
St
An
St ti-Sw
ab
iliz ay
er
Front
3' (91 cm)
3' (91 cm)
®
Copyright © 2011 Draper Inc. Form FocalPoint_LegAssemblyB_Inst11 Printed in U.S.A.
Leg Kits come with Leg Cranks as noted below:
Package A–3 cranks per leg/total 6
Package B–4 cranks per leg/total 8
Package C–5 cranks per leg/total 10
Leg Cranks should be placed as follows: 1 at the lowest attachment point, 1
at the highest attachment point, and the rest evenly spaced between the two.
FocalPoint™ Projection Screen by Draper—Assembly Map for Leg Kits
Leg Kit C
For use with screens above 126" high viewing area
2' (61cm)
3' (91 cm)
4' (122 cm)
Leg Cranks
(5 per leg)
HD
Bra Leg
ce
4' (122 cm)
Caution:
Beware of
pinch points.
4' (122 cm)
y
wa r
S
i
t
ize
An abil
St
An
St ti-Sw
ab
iliz ay
er
Front
3' (91 cm)
3' (91 cm)
®
Copyright © 2011 Draper Inc. Form FocalPoint_LegAssemblyC_Inst11 Printed in U.S.A.
Leg Kits come with Leg Cranks as noted below:
Package A–3 cranks per leg/total 6
Package B–4 cranks per leg/total 8
Package C–5 cranks per leg/total 10
Leg Cranks should be placed as follows: 1 at the lowest attachment point, 1
at the highest attachment point, and the rest evenly spaced between the two.