1
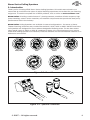
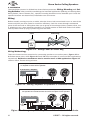
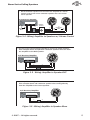
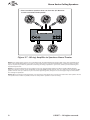
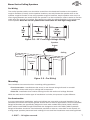
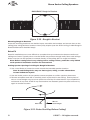
Storm Series Ceiling Speakers
3. Installation
The Installation process is divided into three distinct processes: Wiring, Mounting and Setting Switches. After carefully considering the intended application (Defining a Listening Area,
Mono/Stereo, Home Theater, etc.), specific mounting locations can be decided upon. Once the
specific locations are determined, installation can commence.
Wiring
Before actually running any wire or cable, take the time to look around each room or area of the
house and plan your wire paths for maximum efficiency. Look for routes through uncluttered
parts of the stud wall or ceiling that allow you to group all low-voltage (video, speaker wires, Cat5, telephone, etc.) wires wherever possible. It is a good practice to label both ends of all cables
and to protect wires by tying a plastic bag over the ends.
Label
Plastic Bag
LEFT
SPK
Figure 3.1 - Wiring Label & Plastic Bag
Wiring Methodology
There are three common scenarios for connecting speaker to an audio system. Figures 3.2 to
3.4 show stereo pairs, while Figures 3.5 and 3.6 show examples of mono and DVC applications,
respectively. Each stereo method can also be used for mono or DVC applications. Figure 3.7
shows a Home Theater wiring scheme.
• Two separate 2 conductor speaker wires run from the A/V Receiver
or amplifier to each stereo speaker.
A/V Receiver/Amplifier
+
+
+
+
-
-
-
-
Figure 3.2 - Wiring: Amplifier to Speakers-2 Conductor Direct
• One 4-conductor speaker wire runs from the amplifier to a splice near
one speaker. A 2-conductor wire runs from the splice to each speaker.
A/V Receiver/Amplifier
Splice
4
Conductor
Wire
+
+
+
+
-
-
-
-
2
Conductor
Wire
Figure 3.3 - Wiring: Amplifier to Speakers-4 Conductor to 2 Conductor
4
©2007 • All rights reserved.