1
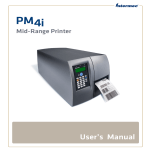
PF2i | PF4i
Mid-Range Printer
User’s Manual
Intermec Technologies Corporation
Worldwide Headquarters
6001 36th Ave.W.
Everett, WA 98203
U.S.A.
www.intermec.com
The information contained herein is provided solely for the purpose of allowing customers to
operate and service Intermec-manufactured equipment and is not to be released, reproduced, or
used for any other purpose without written permission of Intermec Technologies Corporation.
Information and specifications contained in this document are subject to change without prior
notice and do not represent a commitment on the part of Intermec Technologies Corporation.
© 2008 - 2009 by Intermec Technologies Corporation. All rights reserved.
The word Intermec, the Intermec logo, Norand, ArciTech, Beverage Routebook, CrossBar,
dcBrowser, Duratherm, EasyADC, EasyCoder, EasySet, Fingerprint, i-gistics, INCA (under license),
Intellitag, Intellitag Gen2, JANUS, LabelShop, MobileLAN, Picolink, Ready-to-Work, RoutePower,
Sabre, ScanPlus, ShopScan, Smart Mobile Computing, SmartSystems, TE 2000, Trakker Antares,
and Vista Powered are either trademarks or registered trademarks of Intermec Technologies
Corporation.
There are U.S. and foreign patents pending.
Wi-Fi is a registered certification mark of the Wi-Fi Alliance.
Microsoft, Windows, and the Windows logo are registered trademarks of Microsoft Corporation
in the United States and/or other countries.
Kimdura is a registered trademark of Kimberly Clark.
Valeron is a registered trademark of Valéron Strength Films, an ITW Company.
The name Centronics is wholly owned by GENICOM Corporation.
TrueDoc is a registered trademark of Bitstream, Inc.
TrueType is a trademark of Apple Computer Inc.
Unicode is a trademark of Unicode Inc.
This product includes software developed by the OpenSSL Project for use in the OpenSSL Toolkit
(www.openssl.org).
This product includes cryptographic software written by Eric Young ([email protected]).
This product uses Regex++, Index software during its operational phases. The owner of Regex++
has granted use of the software to anyone provided such use is accompanied by the following
copyright and permission notice:
Regex++, Index. (Version 3.31, 16th Dec 2001)
Copyright © 1998-2001 Dr John Maddock
Permission to use, copy, modify, distribute and sell this software and its documentation for any
purpose is hereby granted without fee, provided that the above copyright notice appear in all
copies and that both that copyright notice and this permission notice appear in supporting
documentation. Dr John Maddock makes no representations about the suitability of this software
for any purpose. It is provided “as is” without express or implied warranty.
ii
PF2i and PF4i Mid-Range Printer User’s Manual
Document Change Record
This page records changes to this document. The document was
previously released as 1-960585-02.
Version
Number Date
-001
Description of Change
10/2009 • Updated part number to 935-023-001.
• Combined the Fingerprint (P/N 934-022-001) and
IPL (P/N 934-020-001) versions of the user’s guides.
• Incorporated the EasyLAN User’s Guide
(P/N 1-960590-03) and the EasyCoder Printer RFID
User’s Guide (P/N 934-008-002) into this manual.
• Removed configuration information from the
EasyLAN Ethernet Interface Kit Installation Instructions
(P/N 1-960589-01) and the EasyLAN Wireless Interface
Kit Installation Instructions (P/N 1-960610-04) and
added it to this manual.
• Added information to support the latest firmware
release, including:
• USB host support
•
•
•
•
•
•
•
•
400 dpi support
New keypad
Ethernet interface
Monotype font support
Multiple network interfaces
Multiple firmware support
IPv6 functionality
Multiple NET connections
-001
3/2008
Revised P/N 1-960585-02 to 934-031-001. Bring into
Adobe FrameMaker 8.0.
-02
2/2004
Revised to support IPL v2.20. Information on Intermec
Ready-To-Work Indicator added. New method for
returning to factory default added. More bar codes
supported.
-01
10/2003 Revised to support IPL v2.10. Information about
EasyLAN Wireless interface added.
-00
5/2003
Supports original IPL version (v2.00).
PF2i and PF4i Mid-Range Printer User’s Manual
iii
iv
PF2i and PF4i Mid-Range Printer User’s Manual
Contents
Contents
Before You Begin. . . . . . . . . . . . . . . . . . . . . . . . . . . . . . . . . . . . . . . . . . . . . . . . . . . . . . . . . . . . . . . . . . x
Safety Information . . . . . . . . . . . . . . . . . . . . . . . . . . . . . . . . . . . . . . . . . . . . . . . . . . . . . . . . x
Global Services and Support . . . . . . . . . . . . . . . . . . . . . . . . . . . . . . . . . . . . . . . . . . . . . . xi
Warranty Information. . . . . . . . . . . . . . . . . . . . . . . . . . . . . . . . . . . . . . . . . . . . xi
Web Support . . . . . . . . . . . . . . . . . . . . . . . . . . . . . . . . . . . . . . . . . . . . . . . . . . . . xi
Telephone Support . . . . . . . . . . . . . . . . . . . . . . . . . . . . . . . . . . . . . . . . . . . . . . xi
Service Location Support . . . . . . . . . . . . . . . . . . . . . . . . . . . . . . . . . . . . . . . . . xi
Who Should Read This Manual . . . . . . . . . . . . . . . . . . . . . . . . . . . . . . . . . . . . . . . . . . . xii
Related Documents . . . . . . . . . . . . . . . . . . . . . . . . . . . . . . . . . . . . . . . . . . . . . . . . . . . . . . xii
Patent Information . . . . . . . . . . . . . . . . . . . . . . . . . . . . . . . . . . . . . . . . . . . . . . . . . . . . . xiii
1 Using the Printer
........................................................ 1
Learning About the Printer . . . . . . . . . . . . . . . . . . . . . . . . . . . . . . . . . . . . . . . . . . . . . . . . . . . . . . . . 2
What’s New?. . . . . . . . . . . . . . . . . . . . . . . . . . . . . . . . . . . . . . . . . . . . . . . . . . . . . . . . . . . . . . 2
Identifying the Parts of the Printer . . . . . . . . . . . . . . . . . . . . . . . . . . . . . . . . . . . . . . . . . 3
Selecting a Printer Language . . . . . . . . . . . . . . . . . . . . . . . . . . . . . . . . . . . . . . . . . . . . . . . 4
Understanding the Control Panel . . . . . . . . . . . . . . . . . . . . . . . . . . . . . . . . . . . . . . . . . . 5
Understanding the Buttons . . . . . . . . . . . . . . . . . . . . . . . . . . . . . . . . . . . . . . . . 6
Understanding the LEDs . . . . . . . . . . . . . . . . . . . . . . . . . . . . . . . . . . . . . . . . . . 6
Understanding the Screen . . . . . . . . . . . . . . . . . . . . . . . . . . . . . . . . . . . . . . . . . 7
Understanding the Printer Sounds . . . . . . . . . . . . . . . . . . . . . . . . . . . . . . . . . . . . . . . . . 8
Loading Media. . . . . . . . . . . . . . . . . . . . . . . . . . . . . . . . . . . . . . . . . . . . . . . . . . . . . . . . . . . . . . . . . . . . 8
Loading Media for Tear-Off Printing . . . . . . . . . . . . . . . . . . . . . . . . . . . . . . . . . . . . . . . 9
Loading Tear-Off Media With Quick-Load Guides . . . . . . . . . . . . . . . . . . . . . . . . . . 14
Loading Media for Peel-Off Printing . . . . . . . . . . . . . . . . . . . . . . . . . . . . . . . . . . . . . . . 16
Loading Media for Cut-Off Printing (PF4i Only). . . . . . . . . . . . . . . . . . . . . . . . . . . . 24
Loading Media From an External Supply. . . . . . . . . . . . . . . . . . . . . . . . . . . . . . . . . . . 30
Loading Ribbon . . . . . . . . . . . . . . . . . . . . . . . . . . . . . . . . . . . . . . . . . . . . . . . . . . . . . . . . . . . . . . . . . 30
Printing a Test Label . . . . . . . . . . . . . . . . . . . . . . . . . . . . . . . . . . . . . . . . . . . . . . . . . . . . . . . . . . . . . 36
Creating and Printing Labels . . . . . . . . . . . . . . . . . . . . . . . . . . . . . . . . . . . . . . . . . . . . . . . . . . . . . . 39
Printing on RFID Media (PF2i Only). . . . . . . . . . . . . . . . . . . . . . . . . . . . . . . . . . . . . . . . . . . . . . . 39
PF2i and PF4i Mid-Range Printer User’s Manual
v
Contents
2 Connecting the Printer
. . . . . . . . . . . . . . . . . . . . . . . . . . . . . . . . . . . . . . . . . . . . . . . . 41
Connecting the Printer to Your PC . . . . . . . . . . . . . . . . . . . . . . . . . . . . . . . . . . . . . . . . . . . . . . . . 42
Connecting the Printer to a PC Through the Serial Port . . . . . . . . . . . . . . . . . . . . . 42
Connecting the Printer to a PC Through the USB Device Port . . . . . . . . . . . . . . . 43
Connecting the Printer to a PC Through the IEEE 1284 Port . . . . . . . . . . . . . . . . 43
Connecting the Printer to Your Network . . . . . . . . . . . . . . . . . . . . . . . . . . . . . . . . . . . . . . . . . . . 44
Setting Up Ethernet Communications . . . . . . . . . . . . . . . . . . . . . . . . . . . . . . . . . . . . . 44
Manually Configuring IP Settings . . . . . . . . . . . . . . . . . . . . . . . . . . . . . . . . . . . . . . . . . 46
Setting Up 802.11 Radio Communications . . . . . . . . . . . . . . . . . . . . . . . . . . . . . . . . . 47
Configuring 802.11 Wireless Security Using Fingerprint . . . . . . . . . . . . 50
Configuring 802.11 Wireless Security Using IPL . . . . . . . . . . . . . . . . . . . . 53
Connecting Peripherals to the USB Host Port . . . . . . . . . . . . . . . . . . . . . . . . . . . . . . . . . . . . . . 57
Using a USB Mass Storage Device . . . . . . . . . . . . . . . . . . . . . . . . . . . . . . . . . . . . . . . . . 57
Connecting a Keyboard to the USB Host Port . . . . . . . . . . . . . . . . . . . . . . . . . . . . . . 57
Connecting a Bar Code Scanner to the USB Host Port. . . . . . . . . . . . . . . . . . . . . . . 58
Connecting a USB Hub to the USB Host Port . . . . . . . . . . . . . . . . . . . . . . . . . . . . . . 58
3 Configuring the Printer
. . . . . . . . . . . . . . . . . . . . . . . . . . . . . . . . . . . . . . . . . . . . . . . . 59
Configuring Your Printer . . . . . . . . . . . . . . . . . . . . . . . . . . . . . . . . . . . . . . . . . . . . . . . . . . . . . . . . . 60
Configuring Your Printer From the Screen . . . . . . . . . . . . . . . . . . . . . . . . . . . . . . . . . 60
Configuring Your Printer From the Printer Home Page. . . . . . . . . . . . . . . . . . . . . . 62
Configuring Communications Settings . . . . . . . . . . . . . . . . . . . . . . . . . . . . 63
Configuring Media Settings . . . . . . . . . . . . . . . . . . . . . . . . . . . . . . . . . . . . . . 63
Configuring RFID Settings (PF2i With RFID Option). . . . . . . . . . . . . . . 64
Configuring Print Engine Settings . . . . . . . . . . . . . . . . . . . . . . . . . . . . . . . . 65
Configuring Web Shell Settings . . . . . . . . . . . . . . . . . . . . . . . . . . . . . . . . . . . 66
Configuring Alerts . . . . . . . . . . . . . . . . . . . . . . . . . . . . . . . . . . . . . . . . . . . . . . . 67
Configuring General Network Settings . . . . . . . . . . . . . . . . . . . . . . . . . . . . 69
Configuring Mail Settings . . . . . . . . . . . . . . . . . . . . . . . . . . . . . . . . . . . . . . . . 71
Configuring SNMP Settings . . . . . . . . . . . . . . . . . . . . . . . . . . . . . . . . . . . . . . 73
Configuring TCP/IP Settings . . . . . . . . . . . . . . . . . . . . . . . . . . . . . . . . . . . . . 75
Configuring the Network Type. . . . . . . . . . . . . . . . . . . . . . . . . . . . . . . . . . . . 77
Configuring Avalanche Settings . . . . . . . . . . . . . . . . . . . . . . . . . . . . . . . . . . . 78
Configuring SmartSystems Settings . . . . . . . . . . . . . . . . . . . . . . . . . . . . . . . 79
Configuring Wireless LAN Settings. . . . . . . . . . . . . . . . . . . . . . . . . . . . . . . . 80
Configuring 802.1x Settings . . . . . . . . . . . . . . . . . . . . . . . . . . . . . . . . . . . . . . 82
Configuring Your Printer With PrintSet. . . . . . . . . . . . . . . . . . . . . . . . . . . . . . . . . . . . 84
Configuring Your Printer With Commands Sent From Your PC. . . . . . . . . . . . . . 84
Configuring Your Printer Using SmartSystems Foundation . . . . . . . . . . . . . . . . . 85
Configuring Your Printer Using Wavelink Avalanche . . . . . . . . . . . . . . . . . . . . . . . . 86
vi
PF2i and PF4i Mid-Range Printer User’s Manual
Contents
Choosing an Ethernet or Wireless Network. . . . . . . . . . . . . . . . . . . . . . . . . . . . . . . . . . . . . . . . . 86
Choosing the Network Type From the Printer Screen . . . . . . . . . . . . . . . . . . . . . . . 87
Choosing the Network Type Using Printer Commands . . . . . . . . . . . . . . . . . . . . . . 87
Upgrading Firmware . . . . . . . . . . . . . . . . . . . . . . . . . . . . . . . . . . . . . . . . . . . . . . . . . . . . . . . . . . . . . 88
Downloading Fonts and Graphics . . . . . . . . . . . . . . . . . . . . . . . . . . . . . . . . . . . . . . . . . . . . . . . . . 89
4 Troubleshooting and Maintaining the Printer
. . . . . . . . . . . . . . . . . . . . . . 91
Troubleshooting the Printer . . . . . . . . . . . . . . . . . . . . . . . . . . . . . . . . . . . . . . . . . . . . . . . . . . . . . . 92
Contacting Product Support. . . . . . . . . . . . . . . . . . . . . . . . . . . . . . . . . . . . . . . . . . . . . . 92
Understanding Error Messages . . . . . . . . . . . . . . . . . . . . . . . . . . . . . . . . . . . . . . . . . . . . 93
Troubleshooting Printer Problems and Finding Solutions . . . . . . . . . . . . . . . . . . . 97
Resetting the Printer . . . . . . . . . . . . . . . . . . . . . . . . . . . . . . . . . . . . . . . . . . . . . . . . . . . .102
Adjusting the Printer . . . . . . . . . . . . . . . . . . . . . . . . . . . . . . . . . . . . . . . . . . . . . . . . . . . . . . . . . . . .103
Adjusting the Pressure Arm . . . . . . . . . . . . . . . . . . . . . . . . . . . . . . . . . . . . . . . . . . . . . .104
Adjusting the Label Stop Sensor. . . . . . . . . . . . . . . . . . . . . . . . . . . . . . . . . . . . . . . . . .105
Adjusting the Printhead Pressure . . . . . . . . . . . . . . . . . . . . . . . . . . . . . . . . . . . . . . . . .109
Adjusting the Ribbon Break Shaft . . . . . . . . . . . . . . . . . . . . . . . . . . . . . . . . . . . . . . . .110
Installing Quick-Load Guides . . . . . . . . . . . . . . . . . . . . . . . . . . . . . . . . . . . . . . . . . . . .110
Maintaining the Printer . . . . . . . . . . . . . . . . . . . . . . . . . . . . . . . . . . . . . . . . . . . . . . . . . . . . . . . . .113
Cleaning the Printer. . . . . . . . . . . . . . . . . . . . . . . . . . . . . . . . . . . . . . . . . . . . . . . . . . . . .113
Cleaning the Exterior of the Printer. . . . . . . . . . . . . . . . . . . . . . . . . . . . . . .114
Cleaning the Media Guides . . . . . . . . . . . . . . . . . . . . . . . . . . . . . . . . . . . . . .114
Cleaning the Printhead . . . . . . . . . . . . . . . . . . . . . . . . . . . . . . . . . . . . . . . . . .116
Replacing the Printhead . . . . . . . . . . . . . . . . . . . . . . . . . . . . . . . . . . . . . . . . . . . . . . . . .118
A Specifications
. . . . . . . . . . . . . . . . . . . . . . . . . . . . . . . . . . . . . . . . . . . . . . . . . . . . . . . . 123
Specifications. . . . . . . . . . . . . . . . . . . . . . . . . . . . . . . . . . . . . . . . . . . . . . . . . . . . . . . . . . . . . . . . . . .124
Interfaces. . . . . . . . . . . . . . . . . . . . . . . . . . . . . . . . . . . . . . . . . . . . . . . . . . . . . . . . . . . . . . . . . . . . . . .126
RS-232 Serial Interface . . . . . . . . . . . . . . . . . . . . . . . . . . . . . . . . . . . . . . . . . . . . . . . . . .126
USB Interface. . . . . . . . . . . . . . . . . . . . . . . . . . . . . . . . . . . . . . . . . . . . . . . . . . . . . . . . . . .127
USB Host Interface. . . . . . . . . . . . . . . . . . . . . . . . . . . . . . . . . . . . . . . . . . . . . . . . . . . . . .128
Ethernet Interface. . . . . . . . . . . . . . . . . . . . . . . . . . . . . . . . . . . . . . . . . . . . . . . . . . . . . . .128
Parallel IEEE 1284 Interface . . . . . . . . . . . . . . . . . . . . . . . . . . . . . . . . . . . . . . . . . . . . .129
Media Specifications . . . . . . . . . . . . . . . . . . . . . . . . . . . . . . . . . . . . . . . . . . . . . . . . . . . . . . . . . . . .130
Accessories for the Printer . . . . . . . . . . . . . . . . . . . . . . . . . . . . . . . . . . . . . . . . . . . . . . . . . . . . . . .143
PF2i and PF4i Mid-Range Printer User’s Manual
vii
Contents
B Default Settings
. . . . . . . . . . . . . . . . . . . . . . . . . . . . . . . . . . . . . . . . . . . . . . . . . . . . . . 145
Default Configuration . . . . . . . . . . . . . . . . . . . . . . . . . . . . . . . . . . . . . . . . . . . . . . . . . . . . . . . . . .146
Fingerprint Default Configuration . . . . . . . . . . . . . . . . . . . . . . . . . . . . . . . . . . . . . . .146
IPL Default Configuration. . . . . . . . . . . . . . . . . . . . . . . . . . . . . . . . . . . . . . . . . . . . . . .149
C Fingerprint and IPL Setup Menus
. . . . . . . . . . . . . . . . . . . . . . . . . . . . . . . . . . . 153
Fingerprint Setup Menus . . . . . . . . . . . . . . . . . . . . . . . . . . . . . . . . . . . . . . . . . . . . . . . . . . . . . . . .154
Fingerprint Main Level Setup Menu . . . . . . . . . . . . . . . . . . . . . . . . . . . . . . . . . . . . . .154
Fingerprint Ser-Com,UART1 Menu. . . . . . . . . . . . . . . . . . . . . . . . . . . . . . . . . . . . . . .154
Fingerprint Net-Com,NET1 Menu . . . . . . . . . . . . . . . . . . . . . . . . . . . . . . . . . . . . . . .154
Fingerprint COM Menu . . . . . . . . . . . . . . . . . . . . . . . . . . . . . . . . . . . . . . . . . . . . . . . . .155
Fingerprint Network Menu . . . . . . . . . . . . . . . . . . . . . . . . . . . . . . . . . . . . . . . . . . . . . .155
Fingerprint RFID Menu . . . . . . . . . . . . . . . . . . . . . . . . . . . . . . . . . . . . . . . . . . . . . . . . .155
Fingerprint Feedadj Menu . . . . . . . . . . . . . . . . . . . . . . . . . . . . . . . . . . . . . . . . . . . . . . .155
Fingerprint Media Menu . . . . . . . . . . . . . . . . . . . . . . . . . . . . . . . . . . . . . . . . . . . . . . . .156
Fingerprint Print Defs Menu. . . . . . . . . . . . . . . . . . . . . . . . . . . . . . . . . . . . . . . . . . . . .157
IPL Setup Menus. . . . . . . . . . . . . . . . . . . . . . . . . . . . . . . . . . . . . . . . . . . . . . . . . . . . . . . . . . . . . . . .158
IPL Main Level Setup Menu. . . . . . . . . . . . . . . . . . . . . . . . . . . . . . . . . . . . . . . . . . . . . .158
IPL Ser-Com Menu. . . . . . . . . . . . . . . . . . . . . . . . . . . . . . . . . . . . . . . . . . . . . . . . . . . . . .158
IPL COM Menu. . . . . . . . . . . . . . . . . . . . . . . . . . . . . . . . . . . . . . . . . . . . . . . . . . . . . . . . .158
IPL Network Menu. . . . . . . . . . . . . . . . . . . . . . . . . . . . . . . . . . . . . . . . . . . . . . . . . . . . . .159
IPL RFID Menu. . . . . . . . . . . . . . . . . . . . . . . . . . . . . . . . . . . . . . . . . . . . . . . . . . . . . . . . .159
IPL Test/Service Menu . . . . . . . . . . . . . . . . . . . . . . . . . . . . . . . . . . . . . . . . . . . . . . . . . .159
IPL Media Menu . . . . . . . . . . . . . . . . . . . . . . . . . . . . . . . . . . . . . . . . . . . . . . . . . . . . . . . .160
IPL Configuration Menu . . . . . . . . . . . . . . . . . . . . . . . . . . . . . . . . . . . . . . . . . . . . . . . .160
D Advanced Configuration
. . . . . . . . . . . . . . . . . . . . . . . . . . . . . . . . . . . . . . . . . . . . . 161
Printer File System (Fingerprint) . . . . . . . . . . . . . . . . . . . . . . . . . . . . . . . . . . . . . . . . . . . . . . . . .162
Device Tree Structure . . . . . . . . . . . . . . . . . . . . . . . . . . . . . . . . . . . . . . . . . . . . . . . . . . .162
Devices and Directories. . . . . . . . . . . . . . . . . . . . . . . . . . . . . . . . . . . . . . . . . . . . . . . . . .162
Customizing the Printer Home Page . . . . . . . . . . . . . . . . . . . . . . . . . . . . . . . . . . . . . . . . . . . . . .164
Web Style Guide Files . . . . . . . . . . . . . . . . . . . . . . . . . . . . . . . . . . . . . . . . . . . . . . . . . . .165
Content of a Web Style Guide File . . . . . . . . . . . . . . . . . . . . . . . . . . . . . . . . . . . . . . . .165
Required Environment Variables . . . . . . . . . . . . . . . . . . . . . . . . . . . . . . . . .165
Optional Environment Variables . . . . . . . . . . . . . . . . . . . . . . . . . . . . . . . . .166
x-www-url-Encoding Syntax Rules. . . . . . . . . . . . . . . . . . . . . . . . . . . . . . . .167
Memory and Storage . . . . . . . . . . . . . . . . . . . . . . . . . . . . . . . . . . . . . . . . . . . .168
Creating a Web Style Guide File . . . . . . . . . . . . . . . . . . . . . . . . . . . . . . . . . . . . . . . . . .168
viii
PF2i and PF4i Mid-Range Printer User’s Manual
Contents
I Index
. . . . . . . . . . . . . . . . . . . . . . . . . . . . . . . . . . . . . . . . . . . . . . . . . . . . . . . . . . . . . . . . . . . . 169
PF2i and PF4i Mid-Range Printer User’s Manual
ix
Contents
x
PF2i and PF4i Mid-Range Printer User’s Manual
Before You Begin
Before You Begin
This section provides you with safety information, technical support
information, and sources for additional product information.
Safety Information
Your safety is extremely important. Read and follow all warnings and
cautions in this document before handling and operating Intermec
equipment. You can be seriously injured, and equipment and data can
be damaged if you do not follow the safety warnings and cautions.
This section explains how to identify and understand warnings,
cautions, and notes that are in this document.
A warning alerts you of an operating procedure, practice,
condition, or statement that must be strictly observed to avoid
death or serious injury to the persons working on the equipment.
A caution alerts you to an operating procedure, practice,
condition, or statement that must be strictly observed to prevent
equipment damage or destruction, or corruption or loss of data.
Note: Notes either provide extra information about a topic or contain
special instructions for handling a particular condition or set of
circumstances.
This icon appears at the beginning of any procedure in this
manual that could cause you to touch components (such as
printed circuit boards) that are susceptible to damage from
electrostatic discharge (ESD). When you see this icon, you must
follow standard ESD guidelines to avoid damaging the
equipment you are servicing.
PF2i and PF4i Mid-Range Printer User’s Manual
xi
Before You Begin
Global Services and Support
Warranty Information
To understand the warranty for your Intermec product, visit the
Intermec web site at www.intermec.com and click Support >
Returns and Repairs > Warranty.
Disclaimer of warranties: The sample code included in this document
is presented for reference only. The code does not necessarily
represent complete, tested programs. The code is provided “as is with
all faults.” All warranties are expressly disclaimed, including the
implied warranties of merchantability and fitness for a particular
purpose.
Web Support
Visit the Intermec web site at www.intermec.com to download our
current manuals (in PDF).
Visit the Intermec technical knowledge base (Knowledge Central) at
www.intermec.com and click Support > Knowledge Central to
review technical information or to request technical support for your
Intermec product.
Telephone Support
In the U.S.A. and Canada, call 1-800-755-5505.
Outside the U.S.A. and Canada, contact your local Intermec
representative. To search for your local representative, from the
Intermec web site, click About Us > Contact Us.
Service Location Support
For the most current listing of service locations, go to
www.intermec.com and click Support >Returns and Repairs >
Repair Locations.
For technical support in South Korea, use the after service locations
listed below:
xii
PF2i and PF4i Mid-Range Printer User’s Manual
Before You Begin
AWOO Systems
102-1304 SK Ventium
522 Dangjung-dong
Gunpo-si, Gyeonggi-do Korea, South 435-776
Contact: Mr. Sinbum Kang
Telephone: +82-31-436-1191
E-mail: [email protected]
IN Information System PTD LTD
6th Floor
Daegu Venture Center Bldg 95
Shinchun 3 Dong
Donggu, Daegu City, Korea
E-mail: [email protected] or [email protected]
Who Should Read This Manual
This manual is for the person who is responsible for installing,
configuring, and maintaining the PF2i and PF4i.
This manual provides you with information about the features of the
PF2i and PF4i, and how to install, configure, operate, maintain, and
troubleshoot it.
Before you work with the PF2i and PF4i, you should be familiar with
your network and general networking terms, such as IP address.
Related Documents
This table contains a list of related Intermec documents and their
part numbers.
Document Title
Part Number
Intermec Fingerprint Developer’s Guide
P/N 934-019-xxx
Intermec Fingerprint Command Reference Manual
P/N 937-005-xxx
Intermec Printer Language (IPL) Developer’s Guide
P/N 934-013-xxx
Intermec Printer Language (IPL) Command Reference
Manual
P/N 937-007-xxx
DSim Programmer’s Guide
P/N 937-008-xxx
ZSim Programmer’s Guide
P/N 937-009-xxx
PF2i and PF4i Mid-Range Printer User’s Manual
xiii
Before You Begin
The Intermec web site at www.intermec.com contains our
documents (as PDF files) that you can download for free.
To download documents
1 Visit the Intermec web site at www.intermec.com.
2 Click Support > Manuals.
3 Use the Product Category field, the Product Family field, and
the Product field to help you locate the product whose
documentation you want to download.
Patent Information
Product is covered by one or more patents. There may be other U.S.
and foreign patents pending.
xiv
PF2i and PF4i Mid-Range Printer User’s Manual
1
Using the Printer
Use this chapter to familiarize yourself with the PF2i and PF4i
printers. This chapter contains these sections:
•
Learning About the Printer
•
Loading Media
•
Loading Ribbon
•
Printing a Test Label
•
Creating and Printing Labels
•
Printing on RFID Media (PF2i Only)
1
Chapter 1 — Using the Printer
Learning About the Printer
The PF2i and PF4i Mid-Range Printers are rugged, sturdy, direct
thermal printers. These compact printers provide all the features and
benefits of larger bar code printers without giving up valuable space.
The PF2i and PF4i include integrated USB, RS-232, and Ethernet
interfaces and can easily adapt to changes in host environments or
applications.
The PF2i and PF4i support a maximum print width of 2 or 4 inches,
respectively. Throughout this manual, both models of the printer are
referred to as “printer” unless otherwise noted.
What’s New?
This version of the PF2i and PF4i Mid-Range Printer User’s Guide
includes information to support these additional features:
•
The ability to choose between these printer command languages
has been added: IPL, Fingerprint, Direct Protocol, DSim, and
ZSim.
•
Ethernet communications is standard.
•
USB host support for a mass storage device for booting the printer
and downloading fonts.
•
The keypad has been updated.
•
IPv6 functionality.
•
The printers now support multiple network interfaces and
multiple NET connections.
•
An 802.11b/g radio option is available.
The PF2i and PF4i Mid-Range Printers with an 802.11b/g radio
installed are Wi-Fi® certified for interoperability with other
802.11b/g wireless LAN devices.
2
PF2i and PF4i Mid-Range Printer User’s Manual
Chapter 1 — Using the Printer
Identifying the Parts of the Printer
Use this section to familiarize yourself with the parts of the printer.
LEDs
Screen
Keypad
Print
button
Front door
Print
mechanism
Media
cover
Front View
Wireless antenna connector
(option)
Provision for IEEE 1284
parallel interface board
On/Off switch
CompactFlash (CF) card slot
Ethernet interface
AC power cord socket
RS-232 serial interface
USB interface
USB host port
Machine label
Back View
PF2i and PF4i Mid-Range Printer User’s Manual
3
Chapter 1 — Using the Printer
Selecting a Printer Language
Your printer comes loaded with different printer command
languages. The first time you start your printer, you are prompted to
select a printer language. The language you select automatically runs
each time you turn on your printer.
Printer Language Descriptions
Printer
Language
Description
Fingerprint
Intermec Fingerprint is a BASIC-inspired, printer-resident
programming language you use to design label formats
and write custom printer application software.
Intermec Printer IPL is an easy-to-use programming language that lets you
Language (IPL) design, download, and modify formats.
ZSim
ZSim is a Zebra™ interpreter program that interprets ZPL
II or later programs. To setup, configure, and use ZSim,
see the ZSim Programmer’s Guide.
DSim
DSim is a Datamax™ simulation program that runs
Datamax programs. To setup, configure, and use DSim,
see the DSim Programmer’s Guide.
To select your printer language
•
Press the key that corresponds to the printer language you want to
run on your printer.
Status
PF4i
F1=FP, F2=IPL
F3=ZSIM, F4=DSIM
Shift
F1
F2
F3
F4
F5
Startup Screen: This screen appears the first time you turn on your printer.
The language you select automatically runs each time you turn on
your printer.
4
PF2i and PF4i Mid-Range Printer User’s Manual
Chapter 1 — Using the Printer
Once your printer is running a particular printer language, you can
change the printer language from the Setup menu. The way that you
access the command language menu depends on which language you
are currently running.
Changing the Printer Language From the Setup Menu
Language
How to Access the Command Language Menu
IPL
• Go to SETUP > TEST/SERVICE > CMD
Fingerprint or
Direct Protocol
• Go to SETUP > PRINT DEFS > CMD LANGUAGE.
ZSim or DSim
1
2
3
4
LANGUAGE.
Press T.
Enter the Fingerprint password: 8311.
Press E.
Go to SETUP > PRINT DEFS > CMD LANGUAGE.
You can also change the printer language from the printer’s home
page. For help, see “Configuring Your Printer From the Printer
Home Page” on page 62.
Understanding the Control Panel
The control panel provides buttons, LEDs, and a liquid crystal display
(LCD) for you to interact with the printer.
Status
PF4i
Shift
F1
F2
F3
F4
F5
7
8
9
Pause
4
5
6
Setup
1
2
3
Feed
./-
0
Clear
Enter
Control Panel: Use this illustration to familiarize yourself with the buttons and
lights on the printer.
PF2i and PF4i Mid-Range Printer User’s Manual
5
Chapter 1 — Using the Printer
Understanding the Buttons
Use the buttons and button combinations to perform functions on
the printer. If you are using Fingerprint applications, you can assign
custom functions to each button or disable individual buttons. For
help, see the Intermec Fingerprint Developer’s Guide.
Understanding the Function Buttons
Button Name Button
Description
Print
Feeds or pauses a print job. Reprints the last
printed label
Pause
P
Pause + Shift
P + S Stops a Fingerprint application.
Setup
E
Enters Setup mode.
Feed
F
Feeds a blank label or other media type.
Feed + Shift
F + S Perform a Testfeed (feed a blank label and adjust
the media feed).
i
I
<>
L or R After you press I, use these buttons to scroll
through error and information messages.
Pauses and resumes printing.
Display error messages, Ready-to-Work status,
and communication channel information.
Understanding the LEDs
The printer has three LEDs: Power, Status, and the Intermec Readyto-Work® indicator.
Understanding the LEDs
LED
Icon
State
Description
Power
Solid green
Power is on.
Status
Status Solid green
The printer is ready.
Flashing green The printer is communicating.
Solid red
6
There is a printer error. For more
information, see “Troubleshooting
the Printer” on page 92.
PF2i and PF4i Mid-Range Printer User’s Manual
Chapter 1 — Using the Printer
Understanding the LEDs (continued)
LED
Intermec
Ready-toWork
Indicator
Icon
State
Description
Off
The Intermec Ready-to-Work Indicator
is off when the printer:
• is in Setup mode (you pressed T on
the keypad).
• is in Information mode (after you
press the I button).
• firmware is being upgraded.
Solid blue
The printer is powered on and
operating.
Blinking blue
A blinking light indicates one of these
conditions:
• The printer is initializing.
• The printer is waiting for external
resources.
• There is a printer error that requires
you to perform an action. For more
information, see “Troubleshooting
the Printer” on page 92.
Understanding the Screen
The screen provides background illumination and displays two lines
of text, each with 16 characters. The screen displays error messages, as
well as useful information when you start, setup, and upgrade your
printer.
The Intermec Fingerprint programming language and Intermec
Direct Protocol allow custom-made messages to be composed and
displayed according to the requirements of the application.
PF2i and PF4i Mid-Range Printer User’s Manual
7
Chapter 1 — Using the Printer
Understanding the Printer Sounds
The printer plays sounds in response to certain actions. The sounds
that are played depend on which version of firmware you are running:
•
•
If you are running IPL:
•
the printer beeps when you press a button.
•
the printer beeps continuously if the printer is out of media or
ribbon.
•
you can use an IPL command to create an audio alarm. For
help, see the Intermec Printer Language (IPL) Developer’s
Guide.
If you are running Fingerprint:
•
the printer beeps when you press a button. You can also use a
Fingerprint command to turn off this beep.
•
the printer beeps when an error occurs.
•
you can use Fingerprint commands to specify the frequency
and duration of beeps for different conditions or even make
the printer play simple melodies. For help, see the Intermec
Fingerprint Developer’s Guide.
Loading Media
The printer can print on labels, tickets, tags, and continuous stock in
various forms. The method you use to load media depends on how
you want the printer to operate. The printer can print in these modes:
•
Tear-off (straight-through)
•
Tear-off with Quick-Load (straight-through)
•
Cut-off (PF4i only)
•
Peel-off (self-strip)
•
External supply
If you are using Fingerprint, use the F key to load the same type of
media. If you change the media type, or if the printer does not feed the
media properly, simultaneously press the S and F keys to perform
a “testfeed.”
8
PF2i and PF4i Mid-Range Printer User’s Manual
Chapter 1 — Using the Printer
If you are using IPL, save the label with the sensitivity number
attached to the media roll. You need this number to set the media
sensitivity.
Loading Media for Tear-Off Printing
In tear-off, or straight-through, printing mode, you manually tear off
the media against the printer’s tear bar. In tear-off mode, use these
types of media:
•
Non-adhesive continuous stock
•
Self-adhesive continuous stock with liner
•
Self-adhesive labels with liner
•
Tickets with gaps (gap stock), with or without perforations
•
Tickets with black marks (mark stock), with or without
perforations
You can also install an optional label taken sensor so that the next
copy in the batch is not printed until the current copy is removed. For
more information, see “Accessories for the Printer” on page 143.
To load media for tear-off printing
1 Open the media cover.
PF2i and PF4i Mid-Range Printer User’s Manual
9
Chapter 1 — Using the Printer
2 To raise the printhead, turn the printhead lift lever clockwise.
3 Remove any empty core from the media supply hub.
3
2
1
4
10
PF2i and PF4i Mid-Range Printer User’s Manual
Chapter 1 — Using the Printer
4 Fit a new roll of media on the supply hub. Adjust the edge guide so
the roll becomes flush with the center section.
3
2
1
4
5 Route the media through the print mechanism and push it toward
the center section as far as it goes.
bw
fw
Route the Media
PF2i and PF4i Mid-Range Printer User’s Manual
11
Chapter 1 — Using the Printer
Media Path
6 To lower the printhead, turn the printhead lift lever counterclockwise.
12
PF2i and PF4i Mid-Range Printer User’s Manual
Chapter 1 — Using the Printer
7 Adjust the position of the green edge guide so the media is guided
with a minimum of play.
8 Close the media cover.
9 Press the Print button to advance the media and adjust the media
feed. Tear off the media by pulling it downwards.
PF2i and PF4i Mid-Range Printer User’s Manual
13
Chapter 1 — Using the Printer
Loading Tear-Off Media With Quick-Load Guides
You can use a set of optional quick-load guides to make loading
media for tear-off printing easier. To order quick-load guides, contact
your Intermec representative. For help installing the Quick-Load
guides, see “Installing Quick-Load Guides” on page 110.
To load tear-off media with quick-load guides
1 Open the media cover.
2 Remove any empty core from the media supply roll post.
3
2
1
4
14
PF2i and PF4i Mid-Range Printer User’s Manual
Chapter 1 — Using the Printer
3 Fit a new roll of media on the supply post. Adjust the edge guide
so the roll becomes flush with the center section.
3
2
1
4
4 If necessary, adjust the outer quick-load guide to fit the width of
the media.
PF2i and PF4i Mid-Range Printer User’s Manual
15
Chapter 1 — Using the Printer
5 Insert the media between the guides and feed the media forward
until it reaches the platen roller and stops.
6 Press the Print button while pushing the media forward. Tear off
the media by pulling it downward.
7 Close the media cover.
Loading Media for Peel-Off Printing
In peel-off, or self-strip mode, self-adhesive labels are separated from
the liner immediately after printing. Peel-off printing:
•
can only be used for self-adhesive labels with liner.
•
cannot be performed with optional quick-load guides installed.
•
sets high demands on the media, such as label stiffness, release
characteristics of the adhesive and liner, and resistance against
electrostatic charging. Consult your media supplier or test the
media to make sure that it is suitable for your application.
•
may limit registration performance when printing on labels that
have a label length of less than 25 mm (1 in).
You can also install an optional label taken sensor so that the next
copy in the batch is not printed until the current copy is removed. For
more information, see “Accessories for the Printer” on page 143.
16
PF2i and PF4i Mid-Range Printer User’s Manual
Chapter 1 — Using the Printer
To load media for peel-off printing
1 Open the media cover.
2 Turn the printhead lift lever clockwise to raise the printhead.
PF2i and PF4i Mid-Range Printer User’s Manual
17
Chapter 1 — Using the Printer
3 Pull out the handle to collapse the takeup hub, and then remove
any liner.
4 Remove any empty core from the media supply roll post.
3
2
1
4
18
PF2i and PF4i Mid-Range Printer User’s Manual
Chapter 1 — Using the Printer
5 Fit a new roll of media on the supply post. Fold up and adjust the
edge guide so the roll becomes flush with the center section.
3
2
1
4
6 Remove labels from the first 50 cm (20 in) of the liner. Route the
liner through the print mechanism and push it inward toward the
center section as far as it goes.
bw
fw
PF2i and PF4i Mid-Range Printer User’s Manual
19
Chapter 1 — Using the Printer
7 Route the liner around the tear bar and the liner drive roller and
back under the print mechanism and guide shafts.
bw
fw
Route the Liner
Media and Liner Path
20
PF2i and PF4i Mid-Range Printer User’s Manual
Chapter 1 — Using the Printer
8 Insert the start of the liner under the lip of the takeup hub, and
then rotate the hub counterclockwise a few turns to wind up some
of the liner.
Wind Up the Liner
Media and Liner Path
PF2i and PF4i Mid-Range Printer User’s Manual
21
Chapter 1 — Using the Printer
9 Turn the printhead lift lever counterclockwise to engage the
printhead.
10 Adjust the position of the green edge guide so the media is guided
with a minimum of play.
22
PF2i and PF4i Mid-Range Printer User’s Manual
Chapter 1 — Using the Printer
11 Close the media cover.
12 Adjust the label taken sensor (LTS) so that the media feeds
correctly.
a On your printer’s keypad, press T to enter the Setup menu.
b If you are using Fingerprint, go to PRINT DEFS > LTS > LTS
ADJUST.
If you are using IPL, go to CONFIGURATION > LTS
CALIBRATION and press E.
c
Press E to self-calibrate the LTS.
d When you are prompted, remove your test label.
e Press E.
13 Your printer is configured for Peel-Off mode. Press T to exit the
Setup menu.
14 Press the Print button to advance the media and adjust the media
feed.
PF2i and PF4i Mid-Range Printer User’s Manual
23
Chapter 1 — Using the Printer
Loading Media for Cut-Off Printing (PF4i Only)
You can install the automatic paper cutter option to cut off the
media. Cut-off printing can be used for non-adhesive continuous
stock and self-adhesive labels with liner (cut only liner between
labels). The cutter option:
•
is designed for paper-based media with a thickness between
60 and 175 μm, roughly corresponding to a paper weight of
60 to 175 grams/m2 (basis weight 40 to 120 lb).
•
should not be used to cut through labels, because the adhesive
sticks to the shears, which can damage the cutter.
•
can be used with both standard edge guide and the quick-load
guides.
You can also install an optional label taken sensor so that the next
copy in the batch is not printed until the current copy is removed. For
more information, see “Accessories for the Printer” on page 143.
To load media for cut-off printing
1 Turn off the printer.
2 Open the cutter and media cover.
24
PF2i and PF4i Mid-Range Printer User’s Manual
Chapter 1 — Using the Printer
3 Turn the printhead lift lever clockwise to raise the printhead.
4 Remove any empty core from the media supply roll post.
3
2
1
4
PF2i and PF4i Mid-Range Printer User’s Manual
25
Chapter 1 — Using the Printer
5 Fit a new roll of media on the supply post. Adjust the edge guide
so the roll becomes flush with the center section.
3
2
1
4
6 Route the media through the print mechanism and cutter. Then,
push it towards the center section as far as it will go.
Route the Media
26
PF2i and PF4i Mid-Range Printer User’s Manual
Chapter 1 — Using the Printer
Media Path
7 Turn the printhead lift lever counterclockwise to engage the
printhead.
PF2i and PF4i Mid-Range Printer User’s Manual
27
Chapter 1 — Using the Printer
8 Adjust the position of the green edge guide so the media is guided
with a minimum of play. Lock with the nut.
9 Close the media cover.
28
PF2i and PF4i Mid-Range Printer User’s Manual
Chapter 1 — Using the Printer
10 Close the cutter while pulling the media tight.
11 Press the Print button to advance the media and adjust the media
feed. The labels can be collected on an optional tray.
PF2i and PF4i Mid-Range Printer User’s Manual
29
Chapter 1 — Using the Printer
Loading Media From an External Supply
You can place the media supply, such as fanfold tickets or tags, behind
the printer. The external supply can be used with tear-off (straightthrough) and cut-off printing.
Note: Make sure to protect the media from dust, dirt, or other foreign
particles that can impair the printout quality or cause unnecessary
wear to the printhead.
Fanfold Media Path
Loading Ribbon
The printer can perform direct thermal printing on special heatsensitive media or thermal transfer printing on special ink-coated
ribbon. The printer can use transfer ribbon rolls wound with the inkcoated side facing either outward or inward.
Thermal transfer printing lets you use a wide range of receiving face
materials and provides a durable printout that is less vulnerable to
external influences, such as oil, chemicals, heat, and sunlight than
direct thermal printing. Make sure to select ribbon that matches the
type of receiving face material and set up the printer accordingly.
30
PF2i and PF4i Mid-Range Printer User’s Manual
Chapter 1 — Using the Printer
To load ribbon
1 Open the media cover.
2 Turn the printhead lift lever clockwise to raise the printhead.
PF2i and PF4i Mid-Range Printer User’s Manual
31
Chapter 1 — Using the Printer
3 If necessary, remove any used ribbon and empty ribbon cores.
bw
fw
4 Slide the ribbon roll onto the supply hub so the ink-coated side
faces down when the ribbon is routed through the print
mechanism.
bw
fw
32
PF2i and PF4i Mid-Range Printer User’s Manual
Chapter 1 — Using the Printer
5 Route the ribbon through the print mechanism above the
transparent upper LSS guide and pull out approximately
20 cm (8 in) of ribbon leader.
bw
fw
6 Without releasing the ribbon, turn the printhead lift lever
counterclockwise to engage the printhead and lock the ribbon.
PF2i and PF4i Mid-Range Printer User’s Manual
33
Chapter 1 — Using the Printer
7 Slide the empty cardboard core onto the ribbon rewind hub so the
ribbon is wound up when the hub rotates counterclockwise.
bw
fw
8 Turn the printhead lift lever clockwise to raise the printhead and
release the ribbon.
34
PF2i and PF4i Mid-Range Printer User’s Manual
Chapter 1 — Using the Printer
9 Manually advance the ribbon until all of the transparent leader
has passed the printhead and the ribbon becomes tight.
10 Turn the printhead lift knob counterclockwise to engage the
printhead.
PF2i and PF4i Mid-Range Printer User’s Manual
35
Chapter 1 — Using the Printer
11 Close the media cover.
3
2
1
4
bw
fw
12 Set the Paper Type to Thermal Transfer Ribbon (TTR).
a On your printer’s keypad, press T to enter the Setup menu.
b If you are using Fingerprint, go to Media > Paper Type >
Transfer.
If you are using IPL, go to Media > Paper Type > TTR.
c
Press E.
d Press T to exit the Setup menu.
Printing a Test Label
You can print a test label (perform a testprint) to:
36
•
make sure that your printer is working properly.
•
get your printer’s setup, hardware, and network information.
•
get RFID tag information.
•
check print quality and determine which adjustments to make.
PF2i and PF4i Mid-Range Printer User’s Manual
Chapter 1 — Using the Printer
To perform a testprint
1 Press T to enter the Setup menu, and use the keypad to go to the
TESTPRINT menu:
•
If you are running Fingerprint, go to SETUP > PRINT DEFS >
TESTPRINT.
•
If you are running IPL, go to SETUP > TEST/SERVICE >
TESTPRINT > CONFIG.
2 Select a testprint to perform. For more information, see the next
tables.
Fingerprint Testprint Options
Testprint
Description
Diamonds
Prints a diamond pattern.
Chess
Prints a chess board pattern.
Bar Codes #1
Prints a horizontal set of bar codes.
Bar Codes #2
Prints a vertical set of bar codes.
Setup Info
Contains current configuration parameters stored in the
printer’s memory, defined pages, defined formats, defined
graphics, defined fonts, and any installed printer options.
Hardware Info
Contains printer memory information; printer mileage;
printhead settings; firmware checksum, program, and
version number.
RFID Test Label Prints an RFID test label that includes the tag type name.
Network Info
Contains WINS name, MAC address, IP selection, IP
address, netmask, default router, name server, mail server,
primary WINS server, secondary WINS server, and
network statistics.
IPL Testprint Options
Testprint
Description
Config
SW
Contains current configuration parameters stored
in the printer’s memory, defined pages, defined
formats, defined graphics, defined fonts, and any
installed printer options.
PF2i and PF4i Mid-Range Printer User’s Manual
37
Chapter 1 — Using the Printer
IPL Testprint Options (continued)
Testprint
Description
HW
Contains printer memory information; printer
mileage; printhead settings; firmware checksum,
program, and version number.
Network
Contains WINS name, MAC address, IP selection, IP
address, netmask, default router, name server, mail
server, primary WINS server, secondary WINS
server, and network statistics.
RFID Test Label
Prints an RFID test label that includes the tag type
name.
Test Labels
Pitch
Contains an even pattern of small dots that reveals
failing printhead dots and variations of printout
darkness due to uneven printhead pressure or bad
energy regulation to the printhead.
Print Quality
Contains bar codes with different characteristics
and useful information about the printer model,
program version, print speed, and media sensitivity
setup.
Format
All > Print Formats Contains a single format that you can use to
evaluate the print quality of a particular format.
This option prints labels for all the formats stored
in the printer’s memory.
Page
All > Print Pages
Tests the ability of the printer to receive and print
single or multiple pages of label data that is sent
from the host. This option prints labels for all the
pages stored in the printer’s memory.
UDC
All > Print UDC
Font
38
Tests the ability of the printer to receive and print
single or multiple user-defined characters (bitmap
graphics) that are sent from the host. This option
prints labels for all the UDCs stored in the printer’s
memory.
Contains all the characters in a single font. This
option prints labels for all the user-defined fonts
(UDF) stored in the printer’s memory.
PF2i and PF4i Mid-Range Printer User’s Manual
Chapter 1 — Using the Printer
Creating and Printing Labels
The easiest way to create and print labels, is to use the label design
software LabelShop®. You can download LabelShop from the
PrinterCompanion CD that shipped with your printer, or you can
download it from the Downloads page for your printer on the
Intermec web site at www.intermec.com.
You can also use Fingerprint and IPL to create and print labels. For
more information, see the Intermec Fingerprint Command Reference
Manual or the IPL Command Reference Manual.
Printing on RFID Media (PF2i Only)
Media containing RFID tags is slightly thicker where the RFID tag is
located. The slight thickness of this part of the label may affect print
quality. For thermal transfer labels, Intermec recommends using a
high-quality ink ribbon, such as TMX 2304 or TMX 1500.
To achieve the best possible print quality, follow these guidelines:
•
After you load RFID media, restart the printer or run a
TESTFEED to let the printer identify the RFID media type.
•
If necessary, modify the TAGADJUST variable to make sure that
the RFID labels are properly aligned with the antenna.
•
If necessary, avoid printing on the thickest part of the label.
•
For printers running Fingerprint:
•
If you are using thermal transfer labels, start with the ribbon
constant set to 80 and the ribbon factor set to 25. You may
need to adjust these values depending on the type of media you
choose.
•
To write to Gen 2 RFID tags using the TAGFIELD command,
set the start and length parameters to even numbers.
PF2i and PF4i Mid-Range Printer User’s Manual
39
Chapter 1 — Using the Printer
•
For printers running IPL:
•
Start with the sensitivity set to 565. You may need to adjust
this value depending on the type of media you choose.
•
To write to Gen 2 RFID tags, set the start and length
parameters of the RFID tag field setup command (a) to even
numbers.
For help configuring RFID parameters, see the Intermec Fingerprint
Command Reference Manual or the IPL Command Reference Manual.
40
PF2i and PF4i Mid-Range Printer User’s Manual
2
Connecting the Printer
This chapter contains these sections:
•
Connecting the Printer to Your PC
•
Connecting the Printer to Your Network
•
Connecting Peripherals to the USB Host Port
41
Chapter 2 — Connecting the Printer
Connecting the Printer to Your PC
You can easily connect the printer to your PC using one of these ports:
•
RS-232 serial port
•
USB device port
•
IEEE 1284 communications port (optional, PF4i only)
Connecting the Printer to a PC Through the Serial Port
You can use a serial connection to communicate with your PC and
run PrintSet, LabelShop, or InterDriver. You can also use the serial
port to send commands directly to the printer through a terminal
connection, for instance with Telnet.
Before you can establish a serial connection, make sure that the
settings on the PC match those of your printer.
Serial Port Settings on the Printer
42
Parameter
Default Setting
Baud rate
9600
Data bits (IPL) or Character length (Fingerprint)
8
Parity
None
Stop bits
1
RTS/CTS (Fingerprint only)
Disable
ENQ/ACK (Fingerprint only)
Disable
XON/XOFF, data to host (Fingerprint only)
Disable
XON/XOFF, data from host (Fingerprint only)
Disable
New line (Fingerprint only)
CR/LF
Receive buffer (Fingerprint only)
1024 bytes
Transmit buffer (Fingerprint only)
1024 bytes
PF2i and PF4i Mid-Range Printer User’s Manual
Chapter 2 — Connecting the Printer
To connect the printer to a PC through the serial port
1 Connect one end of the RS-232 cable that ships with your printer
to the back of the printer and connect the other end of the cable to
a serial COM port on the PC.
2 If necessary, change the PC serial port configuration to match
your printer.
Connecting the Printer to a PC Through the USB Device Port
Note: You cannot communicate with the printer using PrintSet
through a USB connection. To use PrintSet, you must be connected
serially or through the Ethernet or 802.11 network.
Intermec recommends that you only connect one printer to each PC,
either directly, or through a hub. To connect the printer to a PC
through the USB device port, you need:
•
a USB Type B to USB Type A cable.
•
Intermec InterDriver® software, which is available on the
PrinterCompanion CD that ships with the printer. To make sure
you have the latest version of InterDriver, you may want to go to
the downloads page for the printer on the Intermec web site at
www.intermec.com.
To connect the printer to a PC through the USB port
1 Download and install the InterDriver software on your PC.
2 Connect the USB cable to the Type B connector on the back of the
printer and connect the other end to your PC.
You do not need to set up any parameters for USB communications.
Connecting the Printer to a PC Through the IEEE 1284 Port
If you have a PF4i, you can use the parallel connection with LabelShop
or Intermec InterDriver. The parallel port supports Universal Plug
and Play (UPnP) and additional status reporting through IEEE 1284
nibble ID mode.
PF2i and PF4i Mid-Range Printer User’s Manual
43
Chapter 2 — Connecting the Printer
If you are using a parallel port to communicate with the printer, you
need:
•
an IEEE 1284 interface adapter installed in the printer. If you do
not have the parallel interface installed in your printer, you can
purchase the field installable option and have it installed by an
authorized Intermec service technician. For help, contact your
Intermec representative.
•
a parallel cable to run between the printer and the PC.
To connect your printer to a PC parallel port
•
Connect the IEEE 1284 cable connector to the interface adapter
port on the back of the printer and connect the other end of the
cable into a parallel port on the PC.
Connecting the Printer to Your Network
You can connect your printer to your network using the:
•
integrated Ethernet interface.
•
optional 802.11 wireless interface.
These network interfaces provide features such as security, FTP server,
web server, and Alert handling.
Setting Up Ethernet Communications
Use the Ethernet port to set up the printer as a network printer. If
Ethernet is selected as your Network Type, when you turn on your
printer, it automatically retrieves an IP address from the network
(DHCP+BOOTP). You can use the network connection with
LabelShop or the Intermec InterDriver. You can also use this
connection to send commands directly to the printer through a
terminal connection (Telnet) or FTP.
44
PF2i and PF4i Mid-Range Printer User’s Manual
Chapter 2 — Connecting the Printer
To connect your printer to your Ethernet network
1 Make sure that Ethernet is selected as your Network Type.
a On the keypad, press T to enter the Setup menu.
b Go to SETUP > NETWORK > NETWORK TYPE >
ETHERNET.
c
Press T again to exit the Setup menu.
2 Connect the cable from your Ethernet network to the Ethernet
port on your printer’s back plate.
3 Turn your printer off and then on.
4 Enter Information mode by pressing the I button. The printer
displays interface information in five-second intervals. Note the IP
address displayed under I/O net1.
5 On your PC, start your web browser.
6 Enter the IP address of your printer in the address field and press
Enter. Your printer home page appears.
7 When you are prompted to enter a login and password. The
default values are: login = admin, password = pass.
For help using the printer web page to configure your printer, see
“Configuring Your Printer From the Printer Home Page” on
page 62.
PF2i and PF4i Mid-Range Printer User’s Manual
45
Chapter 2 — Connecting the Printer
If your network does not automatically assign an IP address, or the
Intermec Ready-to-Work indicator is blinking to indicate a network
error, you can use PrintSet (available on the PrinterCompanion CD or
as a download from www.intermec.com) to correct the network
settings.
Manually Configuring IP Settings
You can configure the IP settings of your printer by sending
Fingerprint or IPL commands through a serial connection. After you
configure the IP settings, you can disconnect the printer from your PC
and communicate with the printer using Ethernet communications.
To configure the IP settings serially using Fingerprint
1 Connect the printer to your PC using a serial cable. For help, see
“Connecting the Printer to a PC Through the Serial Port” on
page 42.
2 Send the following commands to permanently assign the IP
address, subnet mask, default router, and name server:
setup
setup
setup
setup
setup
"network,IP selection,manual"
"network,IP address,xxx.xxx.xxx.xxx"
"network,netmask,xxx.xxx.xxx.xxx"
"network,default router,xxx.xxx.xxx.xxx"
"network,nameserver,xxx.xxx.xxx.xxx"
where xxx is a number from 0 to 255.
3 Disconnect the printer from the PC.
4 On your PC, enter the IP address of the printer in the address field
of your web browser (for example http://10.200.27.94) and press
Enter.
The home page of the printer appears.
To configure the IP settings serially using IPL
1 Connect the printer to your PC using a serial cable. For help, see
“Connecting the Printer to a PC Through the Serial Port” on
page 42.
46
PF2i and PF4i Mid-Range Printer User’s Manual
Chapter 2 — Connecting the Printer
2 Send the following commands to permanently assign the IP
address, subnet mask, default router, and name server:
<SI>nn[,m1[,m2]]
where:
n is the IP address of the printer in the format n.n.n.n, where n is a
number from 0 to 255.
,m1 is the subnet mask address in the format n.n.n.n, where n is a
number from 0 to 255.
,m2 is the router address in the format n.n.n.n, where n is a
number from 0 to 255.
Note: You must specify at least two of the three parameters for the
command to take effect.
3 Disconnect the printer from the PC.
4 On your PC, enter the IP address of the printer in the address field
of your web browser (for example http://10.200.27.94) and press
Enter.
The home page of the printer appears.
Setting Up 802.11 Radio Communications
If your printer has an optional 802.11 b/g radio, you can transfer and
receive data using wireless communications. This manual assumes
that you have already set up your wireless communications network
including your access points. This section describes how to set up
wireless security on your printer.
The printer supports these authentication modes:
•
none
•
WEP (64 bit and 128 bit)
•
WPA Personal and Enterprise mode (802.1x authentication)
•
WPA2 Personal and Enterprise mode (802.1x authentication)
Note: WPA and WPA2 Enterprise mode currently support PEAP,
TTLS, LEAP, and EAP-FAST. For LEAP authentication, the printer
supports Open EAP, but does not support Network EAP.
PF2i and PF4i Mid-Range Printer User’s Manual
47
Chapter 2 — Connecting the Printer
To set up the printer to work in your wireless network, you need:
•
a serial cable.
•
a PC running Windows or Linux.
•
PrintSet. PrintSet is available on the CD that ships with your
Printer. For the latest version of PrintSet, go to the Downloads
page of the Intermec web site at www.intermec.com.
•
(optional) Serial port software such as HyperTerminal. If you are
using IPL commands with HyperTerminal, you may want to be
able to see the commands as you type them on your screen. For
help, see “Configuring Your Printer With Commands Sent
From Your PC” on page 84.
To set up the printer for 802.11 communications using PrintSet
1 Download and install PrintSet on your PC.
2 Connect one end of the serial cable to your printer, and connect
the other end to your PC.
3 If necessary, change the serial port settings on your PC to match
your printer:
Parameter
Default Setting
Baud rate
9600
Data bits
8
Parity
None
Stop bits
1
4 On your PC, start PrintSet.
5 In the General Tasks box, click Add Printer.
6 Step through the Add Printer Wizard until you have successfully
added your printer.
7 In the Printer Tasks box, click Wireless Setup Wizard.
8 Step through the Wireless Setup Wizard to set up wireless network
and security parameters.
48
PF2i and PF4i Mid-Range Printer User’s Manual
Chapter 2 — Connecting the Printer
To set up the printer for 802.11 communications using HyperTerminal
1 Connect one end of the serial cable to your printer, and connect
the other end to your PC.
2 On your PC, open HyperTerminal and set these serial port
parameters:
Parameter
Default Setting
Baud rate
9600
Data bits
8
Parity
None
Stop bits
1
3 From the host PC, check the wireless settings. For help, see
“Manually Configuring IP Settings” on page 46.
If you are running IPL, send this command to the printer:
<STX><SI>wt<ETX>
If you are running Fingerprint, send these commands to the
printer:
setup write "wlan","uart1:"
setup write "8021x","uart1:"
4 Configure your printer to use the correct SSID and authentication
modes. For help, see the next section, “Configuring 802.11
Wireless Security Using Fingerprint” or “Configuring 802.11
Wireless Security Using IPL” on page 53.
5 If you are using certificates for validation, Intermec recommends
testing first without the certificate. Only after performing this test
should you transfer the certificate to the printer. The printer can
accept PEM (.pem), DER (.der), and PKCS #12 (.p12 or .pfx)
certificates.
6 Verify that the printer is connected to the access point and make
sure it has an IP address allocated to it.
Use the following sections to set most of your wireless
communication settings. For more information, see the Intermec
Fingerprint Command Reference Manual or the IPL Command
Reference Manual.
PF2i and PF4i Mid-Range Printer User’s Manual
49
Chapter 2 — Connecting the Printer
Configuring 802.11 Wireless Security Using Fingerprint
Use the following procedures to configure 802.11 wireless security
parameters on your printer using Fingerprint.
To configure the printer to use WEP authentication
1 Send the following commands to login as an admin and set the
SSID:
run"su -p pass admin"
setup write "wlan","uart1:"
setup "wlan","SSID","xxxxx"
where xxxxx can be from 0 to 32 ASCII characters, not including
the double quote.
To enter non-alphanumeric octets, use “%nn,” where nn is two
hexadecimal digits representing the value of the character
Note: The default password for logging in as an admin is “pass.”
If you have changed the password, you will need to use your
password instead of “pass.”
2 Send the following commands to configure the WEP keys.
The following example sets WEP key 1 to 01234 and enables
WEP key 1.
setup
setup
setup
setup
"wlan","WEP1","0x3031323334"
"wlan",".WEP_KEY","1"
"wlan","ACTIVE","1"
write "wlan","uart1:"
To configure the printer to use WPA-PSK or WPA2-PSK mode
1 Send the following commands to login as an admin and set the
SSID:
run"su-p pass admin"
setup write "wlan","uart1:"
setup "wlan","SSID","xxxxx"
where xxxxx can be from 0 to 32 alphanumeric characters.
To enter non-alphanumeric octets, use “%nn,” where nn is two
hexadecimal digits representing the value of the character
Note: The default password for logging in as an admin is “pass.”
If you have changed the password, you will need to use your
password instead of “pass.”
50
PF2i and PF4i Mid-Range Printer User’s Manual
Chapter 2 — Connecting the Printer
2 Send one of the following WPA/WPA2 ON commands to turn on
WPA or WPA2 authentication. Send the WPA-PSK or WPA2-PSK
command to set a pre-shared key:
setup
setup
setup
setup
setup
"wlan","WPA","OFF"
"wlan","WPA2","ON"
"wlan","WPA_PSK","xxxxxxxxxx"
"wlan","ACTIVE","1"
write "wlan","uart1:"
where xxxxxxxxxx is a value between 8 and 64 characters.
To configure the printer to use WPA or WPA2 Enterprise mode
1 Send the following commands to login as an admin and set the
SSID:
run"su-p pass admin"
setup write "wlan","uart1:"
setup "wlan","SSID","xxxxx"
where xxxxx can be from 0 to 32 alphanumeric characters.
To enter non-alphanumeric octets, use “%nn,” where nn is two
hexadecimal digits representing the value of the character
Note: The default password for logging in as an admin is “pass.”
If you have changed the password, you need to use your password
instead of “pass.”
2 Send one of the following WPA/WPA2 ON commands to set up
WPA-802.1x or WPA2-802.1x authentication. You should also
send the WPA_PSK command that does not contain a value:
setup
setup
setup
setup
"wlan","WPA","OFF"
"wlan","WPA2","ON"
"wlan","WPA_PSK",""
write "wlan","uart1:"
To view the 802.1x values, send this command:
setup write "8021x","uart1:"
PF2i and PF4i Mid-Range Printer User’s Manual
51
Chapter 2 — Connecting the Printer
3 Send these commands to configure the EAP_TYPE:
setup "8021x","EAP_TYPE","xxxx"
where xxxx can be OFF, LEAP, PEAP, TTLS, or EAP-FAST.
setup "8021x",".EAP_USER","xxxx"
setup "8021x","EAP_PASS","xxxx"
where xxxx is the unique username and the unique password for
this protocol.
4 If you are using TTLS, you may need to send this command to set
the TTLS outer name:
setup "8021x","TTLS_USER","xxxx"
where xxxx is the outer name.
5 If you are using EAP-FAST, you can use PAC and ACQUIRE_PAC
commands. The PAC setting specifies the PAC file to use for EAPFAST authentication. The ACQUIRE_PAC setting checks to see if
automatic PAC file provisioning is enabled. You can set
ACQUIRE_PAC to on or off.
•
Send the following command to set PAC to use /tmp/my.pac
with a pass phrase of “verysecret”:
setup "8021x","PAC","/tmp/my.pac@verysecret"
•
Send the following command to set ACQUIRE_PAC to on:
setup "8021x","ACQUIRE_PAC","ON"
6 If you are using certificates for validation, here are some
commands you may need to use.
•
Send the following commands to set a certificate and enable
validation:
setup "8021x","CA_CERT","c:/test.pfx@export"
setup "8021x","VALIDATE","ON"
where c:/test.pfx is the location and name of the certificate on
the printer and export is the passphrase.
52
PF2i and PF4i Mid-Range Printer User’s Manual
Chapter 2 — Connecting the Printer
•
Send the following commands to set a common name for
server 1 and server 2:
setup "8021x",".SERVER_CN1","xxxxxxxxxx"
setup "8021x",".SERVER_CN2","xxxxxxxxxx"
where xxxxxxxxxx is at least 8 characters but less than 96
characters.
•
Send the following commands to make sure your values match
those used by the access point:
setup write "8021x","uart1:"
setup write "wlan","uart1:"
•
You may need to send the following command several times for
the wireless station to connect:
setup "wlan","ACTIVE","1"<ETX>
Configuring 802.11 Wireless Security Using IPL
Use the following procedures to configure 802.11 wireless security
parameters on your printer using IPL.
To configure the printer to use WEP authentication
1 Send the following commands to login as an admin and set the
SSID:
<STX><ESC>.x,su -p pass admin<ETX>
<STX><SI>ws,SSID,xxxxx<ETX>
where xxxxx can be from 0 to 32 ASCII characters.
To enter non-alphanumeric octets, use “%nn,” where nn is two
hexadecimal digits representing the value of the character.
Note: The default password for logging in as an admin is “pass.”
If you have changed the password, you will need to use your
password instead of “pass.”
2 Send the following commands to configure the WEP keys.
The following example sets WEP key 1 to 01234 and enables
WEP key 1.
<STX><SI>ws,WEP1,0x3031323334<ETX>
<STX><SI>ws,.WEP_KEY,1<ETX>
3 Send the following command to activate the settings.
<STX><SI>ws,ACTIVE,1<ETX>
PF2i and PF4i Mid-Range Printer User’s Manual
53
Chapter 2 — Connecting the Printer
To configure the printer to use WPA-PSK or WPA2-PSK mode
1 Send the following commands to login as an admin and set the
SSID:
<STX><ESC>.x,su -p pass admin<ETX>
<STX><SI>ws,SSID,xxxxx<ETX>
where xxxxx can be from 0 to 32 alphanumeric characters.
To enter non-alphanumeric octets, use “%nn,” where nn is two
hexadecimal digits representing the value of the character
Note: The default password for logging in as an admin is “pass.”
If you have changed the password, you need to use your password
instead of “pass.”
2 Send one of the following commands to turn on WPA or WPA2
authentication. Send the WPA-PSK or WPA2-PSK command to set
a pre-shared key:
<STX><SI>ws,WPA,OFF<ETX>
<STX><SI>ws,WPA2,ON<ETX>
<STX><SI>ws,WPA_PSK,xxxxxxxxxx<ETX>
where xxxxxxxxxx is a value between 8 and 64 characters.
3 Send the following command to activate the settings:
<STX><SI>ws,ACTIVE,1<ETX>
To configure the printer to use WPA or WPA2 Enterprise mode
1 Send the following commands to login as an admin and set the
SSID:
<STX><ESC>.x,su -p pass admin<ETX>
<STX><SI>ws,SSID,xxxxx<ETX>
where xxxxx can be from 0 to 32 alphanumeric characters.
To enter non-alphanumeric octets, use “%nn,” where nn is two
hexadecimal digits representing the value of the character
Note: The default password for logging in as an admin is pass.
If you have changed the password, you need to use your password
instead of pass.
54
PF2i and PF4i Mid-Range Printer User’s Manual
Chapter 2 — Connecting the Printer
2 Send one of the following commands to enable WPA-802.1x or
WPA2-802.1x authentication. You should also send the WPA_PSK
command that does not contain a value:
<STX><SI>ws,WPA,OFF<ETX>
<STX><SI>ws,WPA2,ON<ETX>
<STX><SI>ws,WPA_PSK, <ETX>
3 Send these commands to configure the EAP_TYPE:
<STX><SI>ws,EAP_TYPE,xxxx<ETX>
where xxxx can be OFF, LEAP, PEAP, TTLS, or EAP-FAST.
<STX><SI>ws,.EAP_USER,xxxx<ETX>
<STX><SI>ws,EAP_PASS,xxxx<ETX>
where xxxx is the unique username and the unique password for
this protocol.
4 If you are using TTLS, you may need to send this command to set
the TTLS outer name:
<STX><SI>ws,TTLS_USER,xxxx<ETX>
where xxxx is the outer name.
5 If you are using EAP-FAST, you can use PAC and ACQUIRE_PAC
commands. The PAC setting specifies the PAC file to use for EAPFAST authentication. The ACQUIRE_PAC setting checks to see if
automatic PAC file provisioning is enabled. You can set
ACQUIRE_PAC to on or off.
•
Send the following command to set PAC to use /tmp/my.pac
with a pass phrase of “verysecret”:
<STX><SI>ws,PAC,/tmp/my.pac@verysecret<ETX>
•
Send the following command to set ACQUIRE_PAC to on:
<STX><SI>ws,ACQUIRE_PAC,ON<ETX>
PF2i and PF4i Mid-Range Printer User’s Manual
55
Chapter 2 — Connecting the Printer
6 If you are using certificates for validation, here are some
commands you may need to use.
•
Send the following commands to set a certificate and enable
validation:
<STX><SI>ws,CA_CERT,c:/testCA.pfx@export<ETX>
<STX><SI>ws,VALIDATE,ON<ETX>
where c:/testCA.pfx is the location and name of the certificate
on the printer and export is the passphrase.
•
Send the following commands to set a common name for
server 1 and server 2:
<STX><SI>ws,.SERVER_CN1,xxxxxxxxxx<ETX>
<STX><SI>ws,.SERVER_CN2,xxxxxxxxxx<ETX>
where xxxxxxxxxx is at least 8 characters but less than 96
characters.
•
Send the following command to make sure your values match
those used by the access point:
<STX><SI>wt<ETX>
All variables are returned with the exception of EAP_PASS
which always returns “****” if configured and CA_CERT
which transmits the name of the last certificate authority
successfully installed. An additional read-only variable for the
supplicant state, called STATE, is also returned.
•
You may need to send the following command several times for
the wireless station to connect:
<STX><SI>ws,ACTIVE,1<ETX>
56
PF2i and PF4i Mid-Range Printer User’s Manual
Chapter 2 — Connecting the Printer
Connecting Peripherals to the USB Host Port
You can connect these peripheral devices to the USB host interface
port on the printer:
•
USB mass storage device
•
Keyboard
•
Bar code scanner
•
USB hub
Using a USB Mass Storage Device
You can use a USB mass storage device (thumb drive) to store
additional fonts and images for the printer. You can also use the
device to upgrade your firmware. For more information on using the
USB mass storage device to upgrade the printer, see “Upgrading
Firmware” on page 88.
Connecting a Keyboard to the USB Host Port
You can use an external USB keyboard to input data in Fingerprint
applications. Some applications may require more complex input
from users than the simple push of a button.
The printer comes with five keyboard layouts: US, Swedish, French,
German, and User Defined.
To change the keyboard layout
1 Plug your USB keyboard into the USB host connector on the back
of the printer.
2 Turn on the printer.
3 On your printer keypad, press T.
4 Navigate to COM > USB KEYBOARD.
5 Choose a keyboard layout.
6 Exit Setup mode by pressing T again.
PF2i and PF4i Mid-Range Printer User’s Manual
57
Chapter 2 — Connecting the Printer
Connecting a Bar Code Scanner to the USB Host Port
If your printer is running Fingerprint, you can connect a HID
(Human Interface Device) bar code scanner to the printer. The
“usbhost:” device receives data from the scanner the same way it does
from a USB keyboard. You can then use this data in a Fingerprint
application.
The keyboard layout you choose (see the previous procedure) applies
for connected scanners too.
Connecting a USB Hub to the USB Host Port
You can connect a USB hub to the printer so that you can connect
several USB devices to the printer at the same time.
Note: You can only connect one USB mass storage device and one
HID (keyboard or scanner) peripheral to the USB hub at a time.
58
PF2i and PF4i Mid-Range Printer User’s Manual
3
Configuring the Printer
Use this chapter to understand how to configure the printer,
upgrade firmware, and download fonts and graphics. This
chapter contains these sections:
•
Configuring Your Printer
•
Choosing an Ethernet or Wireless Network
•
Upgrading Firmware
•
Downloading Fonts and Graphics
59
Chapter 3 — Configuring the Printer
Configuring Your Printer
You can change the configuration settings of your printer:
•
directly from the screen.
•
from the printer home page.
•
using PrintSet.
•
using commands sent from your PC.
•
remotely using SmartSystems Foundation.
•
remotely using Wavelink Avalanche.
Configuring Your Printer From the Screen
To configure your printer from the screen, you need to enter Setup
mode.
To enter Setup mode
•
Press the T button.
You mainly use the arrow keys to navigate in Setup mode.
Navigating in Setup Mode
Press This Key:
To Do This:
L or R
Scroll through the main menu and sub-menus.
D
Select a sub-menu item.
U
Exit a sub-menu without changing the setting.
E
Select a sub-menu item.
T
Exit Setup mode.
Use the following illustrations to understand the Setup menu. The
main menus of the setup tree are organized in a loop. Each main
menu branches out to a number of sub-menus. If you have optional
accessories installed in your printer, the firmware adds the necessary
setup parameters to the Setup tree.
60
PF2i and PF4i Mid-Range Printer User’s Manual
Chapter 3 — Configuring the Printer
T
Starting point
SETUP:
SER-COM, UART2
SETUP:
SER-COM, UART1
SETUP:
PRINT DEFS
Option
>R
L
SETUP:
MEDIA
SETUP:
SER-COM, UART3
Option
SETUP:
SER-COM, UART4
Option
SETUP:
FEEDADJ
SETUP:
SER-COM, UART5
SETUP:
RFID
Option
SETUP:
NET-COM, NET1
SETUP:
NETWORK
Option
SETUP:
COM
The Main Menus in Setup Mode for Fingerprint
T Starting point
SETUP:
COM
SETUP:
SER-COM
SETUP:
CONFIGURATION
L
R
SETUP:
NETWORK
SETUP:
RFID
SETUP:
MEDIA
Option
SETUP:
TEST/SERVICE
The Main Levels of the Setup Menu in IPL
For more information on the IPL and Fingerprint menu systems, see
Appendix C, “Fingerprint and IPL Setup Menus” on page 153.
PF2i and PF4i Mid-Range Printer User’s Manual
61
Chapter 3 — Configuring the Printer
Configuring Your Printer From the Printer Home Page
If you are using an Ethernet or 802.11 wireless connection, you can
change configuration settings from your printer’s home page.
Note: You should have already connected your printer to your
network and obtained an IP address. For help, see “Connecting the
Printer to Your Network” on page 44.
To access your printer’s home page
1 Start your web browser application.
2 In the address field, enter the IP address of your printer.
3 Press Enter. Your printer’s home page appears.
The home page displays the assigned name, firmware version,
Active Command Set, MAC address, and IP address of your
printer. The home page also displays the contents of the image
buffer, as well as the status of the Ready-to-Work indicator.
4 Click Configuration.
5 Click the link for the settings you want to configure.
6 When you are prompted, enter your login and password. The
default values are: login = admin, password = pass.
Use the next sections to understand and configure the settings on
each configuration page.
62
PF2i and PF4i Mid-Range Printer User’s Manual
Chapter 3 — Configuring the Printer
Configuring Communications Settings
Use the communications page to configure serial communications,
the communications interface, and the keyboard layout.
To configure communications settings
1 Click Printer > Communication.
2 Choose the settings you want to change.
3 Click Submit Setup.
Configuring Media Settings
Use the media page to view and change media settings such as
XSTART position, media type, and contrast.
To configure media settings
1 Click Printer > Media.
PF2i and PF4i Mid-Range Printer User’s Manual
63
Chapter 3 — Configuring the Printer
2 Enter the correct information for the media you are using.
3 Click Submit Setup.
Configuring RFID Settings (PF2i With RFID Option)
Use the RFID page to configure settings for printing on RFID media.
To configure media settings
1 Click Printer > Rfid.
2 Enter the correct information for the RFID media you are using.
3 Click Submit Setup.
64
PF2i and PF4i Mid-Range Printer User’s Manual
Chapter 3 — Configuring the Printer
Configuring Print Engine Settings
Use the print engine page to adjust the media feed direction (start and
stop adjust positions) and print speed. The value of the head
resistance is read-only and is measured by the firmware when the
printer starts up.
To configure print engine settings
1 Click Printer > Print Engine.
2 Enter the correct information for the print engine.
3 Click Submit Setup.
PF2i and PF4i Mid-Range Printer User’s Manual
65
Chapter 3 — Configuring the Printer
Configuring Web Shell Settings
Use the Web Shell page to view and change test and default settings.
You can also use the Web Shell page to print test labels and change the
command language.
To configure Web Shell settings
1 Click Printer > Web Shell.
2 Select the action you want to take or the setting you want to
change.
•
For the actions at the top of the screen, the printer performs
the action and may prompt you to reboot the printer.
•
For the settings at the bottom of the screen, select the settings
you want and click Submit Setup. A message appears stating,
“Application change will take effect at reboot.” You can select
Reboot or wait until you are done making other configuration
changes.
Use the following table to understand the Web Shell settings.
Understanding the Web Shell Settings
Setting
Description
Testfeed [value] Calibrates the label stop sensor performs a testfeed.
Selecting this setting is equivalent to issuing the
TESTFEED command on the printer.
Ribbon Sensor
[value]
66
Detects if the printer runs out of ribbon during printing.
PF2i and PF4i Mid-Range Printer User’s Manual
Chapter 3 — Configuring the Printer
Understanding the Web Shell Settings (continued)
Setting
Description
Default Setup
Returns the printer to factory default settings. Passwords,
alerts, and the selected application are not changed.
Reboot
Reboots the printer.
Print Test Label Prints the predefined test label you choose.
Command
Language
Sets the command language to Fingerprint, Direct
Protocol, IPL, ZSim, or DSim. You need to reboot the
printer for the change to take effect.
Fingerprint
Application
Defines the application to run as the default on startup.
You need to reboot the printer for the change to take
effect.
Standard I/O
Defines the port the printer listens to. You need to reboot
the printer for the change to take effect.
Configuring Alerts
Use the Alerts page to view and change the printer alert settings.
To configure alerts
1 Click Printer > Alerts.
2 Change the alert settings:
•
From the Setting list, choose Enabled or Disabled.
•
In the text field, specify a Delay repeat.
•
In the Delay Unit list, select seconds or occurrences.
•
In the Message text field, enter a message.
PF2i and PF4i Mid-Range Printer User’s Manual
67
Chapter 3 — Configuring the Printer
3 Select the Notification method.
4 Click Submit Settings.
Use the following table to understand the Alert Settings.
Understanding the Alert Settings
Setting
Description
Label Not Taken
(Fingerprint only)
Sent when the printed label is not taken from the
printer. This setting applies to label and ticket media
and requires an optional label taken sensor.
Cutter Error
There was an error related to the label cutter.
Head Lifted
A printer job was sent to the printer while the
printhead was lifted.
Out of Ribbon
You have thermal transfer ribbon selected and the
printer is out of ribbon.
Pause Mode
The printer is in Pause mode.
Setup Mode
The printer is in Setup mode.
Error Condition
(Fingerprint only)
An error has occurred in the Fingerprint application.
The error does not have to be critical to the print job for
the printer to send this alert.
Application Break A running Fingerprint application has been
(Fingerprint only) interrupted manually or because of an error.
Print Job Complete The print job has been successfully completed.
(Fingerprint only)
Odometer Count 1 The amount of media printed has reached a preset
amount, measured in meters or in number of labels.
The Delay repeat setting represents how often the alert
message will be sent when the preset value is reached.
Notification
Method
68
The method used to send an alert message. You can
choose from mail, SNMP-trap, or both.
PF2i and PF4i Mid-Range Printer User’s Manual
Chapter 3 — Configuring the Printer
Configuring General Network Settings
Use the General network page to view the printer name, change
passwords, and set restrictions.
To configure general network settings
1 Click Network Admin > General.
2 View or update your settings.
Note: To enter a new password, you need to check the Set
password check box.
3 Click Submit General settings.
Use the following table to understand the general network settings.
Understanding the General Network Settings
Setting
Description
Printer Name
The network identification name (WINS name) of the
printer. The default name is INTERMEC followed by
the last six positions of the MAC address.
System Location
(Optional) The printer location.
System Contact
(Optional) The printer administrator.
Set Password
You must check this box if you want to change the
admin password.
PF2i and PF4i Mid-Range Printer User’s Manual
69
Chapter 3 — Configuring the Printer
Understanding the General Network Settings (continued)
70
Setting
Description
Old Admin
Password
You need to enter the old password before you can
change the password.
New Admin
Password
The new password you want to use.
Restrictions
Sets restrictions on who is allowed to upgrade the
printer firmware or view and change network settings.
You cannot remove “admin” from the list of authorized
users.
Users allowed to update: Defines who may perform a
firmware upgrade using FTP, PrintSet, or IFAB. This
setting does not affect upgrading from a Compact
Flash card.
Users allowed to read/write protected LAN1
settings: (Fingerprint only) Defines who may read/
write settings in the LAN1 section.
Users allowed to change network settings:
(Fingerprint only) Defines who may change the
network node in the setup. This setting is not
supported if you are setting up the printer from its
internal keyboard.
Users allowed to change wireless settings: Defines
who may change WLAN or 802.1x settings.
PF2i and PF4i Mid-Range Printer User’s Manual
Chapter 3 — Configuring the Printer
Configuring Mail Settings
Use the mail settings page to view and change e-mail (SMTP) server
settings.
To configure mail settings
1 Click Network Admin > Mail.
2 Select the mail server settings and enter mail addresses.
3 Click:
•
Submit Mail Settings to send the changes to the printer.
•
Submit & Send test mail to send the changes to the printer
and test your new settings.
PF2i and PF4i Mid-Range Printer User’s Manual
71
Chapter 3 — Configuring the Printer
Use the following table to understand the mail settings.
Understanding the Mail Settings
72
Setting
Description
Mail (SMTP)
Server
Choose a configuration method for your mail server
settings:
• SMTP settings from DHCP: Choose this setting if
you want the printer to receive settings
automatically from your DHCP server. This setting
requires that you choose DHCP and IP Selection in
the TCP/IP section.
• Manual settings: Choose this option to manually
configure the Mail Server address and port. The
default port is 25.
Mail addresses
Defines the e-mail addresses to use when the printer
sends alert messages:
• From address: The address that displays as the
sender of alert messages. E-mail will be returned to
this address if the recipient is unreachable. To
prevent e-mail bounces when the recipient is
unreachable, leave this field empty.
• To address: The recipient of alert messages. To
enter several addresses, separate them with a comma
(,) or a semicolon (;).
PF2i and PF4i Mid-Range Printer User’s Manual
Chapter 3 — Configuring the Printer
Configuring SNMP Settings
Use the SNMP page to view and change SNMP settings.
To configure SNMP settings
1 Click Network Admin > SNMP.
2 Change the SNMP settings.
3 Click Add to add trap settings. You can define up to four
authentication failure traps.
After you add a trap, it appears in the Trap Address Settings list.
You can edit or delete each trap in the list by clicking Edit or
Delete.
4 Click Submit SNMP settings.
PF2i and PF4i Mid-Range Printer User’s Manual
73
Chapter 3 — Configuring the Printer
Use the following table to understand SNMP settings.
Understanding the SNMP Settings
Setting
Description
Read Community
Community with rights to read the SNMP MIBs.
Read/Write
Community
Community with rights to read and write SNMP MIBs.
Username
Username when using SNMPv3. The default value is
“initial”.
Authentication Key The authentication key for SNMPv3. The default value
is “auth_key”.
74
Encryption Key
The privacy key for SNMPv3. The default value is
“priv_key”.
System Name
Administrative name for the SNMP node.
Authentication
Failure Trap
Defines if a trap is sent when an unauthorized SNMP
request tries to access the printer. Choose Enable to
send the trap.
Trap Address
Settings
Click Add to specify these trap address settings:
• Trap Address: IP address of the receiver of SNMP
traps. You can specify up to four trap addresses.
• Trap Port: The port where SNMP traps are sent.
The default port if 162.
• Trap Community: Defines the community to
which SNMP traps will be sent.
• Friendly Name: A user-defined text string that
identifies the trap.
• Trap Enable Status: Defines whether the specified
trap is enabled.
PF2i and PF4i Mid-Range Printer User’s Manual
Chapter 3 — Configuring the Printer
Configuring TCP/IP Settings
Use the TCP/IP settings page to view and change TCP/IP network
settings.
To configure TCP/IP settings
1 Click Network Admin > TCP/IP.
2 View or update your settings.
3 Click Submit TCP/IP settings.
Use the following table to understand the TCP/IP settings.
Understanding the TCP/IP Settings
Setting
Description
IPV4 Settings
Configuration method: The method by which an IP
address is assigned to the printer. You can choose
between DHCP, BOOTP, DHCP+BOOTP, or
MANUAL.
Address: The current IP address of the printer.
Netmask: Manually assigned netmask for the printer.
Default Router: The IP address of the default router.
PF2i and PF4i Mid-Range Printer User’s Manual
75
Chapter 3 — Configuring the Printer
Understanding the TCP/IP Settings (continued)
76
Setting
Description
IPV6 Settings
Configuration method: The method by which an IP
address is assigned to the printer. You can choose
between:
• AUTO: The IP address is obtained using stateless
auto-configuration. This is the default
configuration method.
• AUTO+DHCP: The IP address is obtained using
stateless auto-configuration, but DNS options are
obtained using DHCP.
• DHCP: The IP address and DNS options are
obtained using DHCP.
• MANUAL: The IP address is set to a static address
that you enter in the Static Address field.
Current addresses: A list of all the currently
configured IP addresses for the Ethernet interface. The
address starting with FE80:: is the link-local address
and is available regardless of the configuration method
you choose.
Static address: This address applies if you selected
manual as the configuration method. The IP address
is specified as an address and a prefix separated by a
slash. You can use “::” to represent a large number of
consecutive zeros. You should typically set the prefix
to 64.
Example:
2001:DB8:0:F101::2/64
Name Resolution
DNS Server: The IP address of the name server.
DNSv6 Server: The IP address of the name server for
IPv6.
WINS Server (Primary and Secondary): The IP
addresses of the primary and secondary WINS servers.
If you chose DHCP or BOOTP for the configuration
method, you may see the currently assigned WINS IP
addresses depending on the configuration of your
DHCP server.
Printer Service
NET1 TCP Port Number: The port number for raw
TCP. The default is 9100.
NET1 Queuing: Determines whether queuing for the
TCP port is turned on, off, or enabled for multiple
network connections (Multi).
PF2i and PF4i Mid-Range Printer User’s Manual
Chapter 3 — Configuring the Printer
Configuring the Network Type
Use the Network Type page to choose whether you are using an
Ethernet or wireless 802.11 network.
To configure the network type
1 Click Network Admin > Network Type.
2 Select either Ethernet or Wireless 802.11.
3 Click Submit new settings.
4 Reboot the printer for the changes to take effect.
Note: Once you change the network type to Wireless 802.11, you
cannot communicate with the printer using Ethernet. You need to
change the command through the Setup menu or send a command
through a serial connection.
PF2i and PF4i Mid-Range Printer User’s Manual
77
Chapter 3 — Configuring the Printer
Configuring Avalanche Settings
Use the Avalanche page to view and change Wavelink Avalanche
settings.
To configure Avalanche settings
1 Click Network Admin > Avalanche.
2 View or update your settings.
3 Click Submit Avalanche settings.
Use the following table to understand the Avalanche settings.
Understanding the Avalanche Settings
78
Setting
Description
Enabler Mode
Click one of the option buttons:
• Disabled: Disables Avalanche.
• Manual settings: Enables Avalanche. You need to
enter the Agent address and Port in the text fields.
• Find agent by broadcast: Enables Avalanche and
the network connection broadcasts to find the
agent.
Agent
authorization
Enter your user name and password in the entry fields.
PF2i and PF4i Mid-Range Printer User’s Manual
Chapter 3 — Configuring the Printer
Configuring SmartSystems Settings
Use the SmartSystems page to view or change the SmartSystems
server IP address and the master port number.
To configure the SmartSystems settings
1 Click Network Admin > SmartSystems.
2 View or change the settings.
3 Click Submit SmartSystems settings.
PF2i and PF4i Mid-Range Printer User’s Manual
79
Chapter 3 — Configuring the Printer
Configuring Wireless LAN Settings
Use the Wireless LAN page to view and change 802.11 settings.
Note: The Wireless LAN settings are only available if your printer has
the wireless 802.11 radio interface option installed and is running
Fingerprint 8.77.0 or later, or IPL v2.77.0 or later.
To configure wireless LAN settings
1 Click Network Admin > Wireless LAN.
2 View or update your settings.
3 Click Submit 802.11 settings.
Use the following table to understand the Wireless LAN settings.
Understanding the Wireless LAN Settings
80
Setting
Description
SSID
The network name of the printer.
Mode
Set the operating mode of the device to Ad-Hoc or
Infrastructure.
WEP
Set Wired Equivalent Privacy (WEP) to on or off.
WEP Keys
You can enter values for up to 4 WEP keys.
Active WEP key
Chooses the active WEP key.
PF2i and PF4i Mid-Range Printer User’s Manual
Chapter 3 — Configuring the Printer
Understanding the Wireless LAN Settings (continued)
Setting
Description
Authentication
Sets the type of authentication to use for your WEP
keys. You can choose between Auto, Open System, and
Shared.
WPA
Sets the Wi-Fi Protected Access (WPA) to either on or
off.
WPA Pre-shared
key
Sets the WPA Pre-shared key.
WPA2
Sets the Wi-Fi-Protected Access version 2 to either on or
off.
Roaming setting
Sets the roaming reluctancy to 1, 2 or 3. Setting the
roaming reluctancy to 0 turns off the roaming feature.
Current channel
(Read only or read/write for adhoc connections)
AP MAC Address
(Read only) MAC address of the access point to which
the printer is connected.
Signal strength
(Read only) Radio signal strength of the access point.
Shows the current channel being used.
Speed
(Read only) Speed of the current connection.
Region
(Read only) Shows the country short names provided
by the 802.11d standard for the currently selected
region or country.
PF2i and PF4i Mid-Range Printer User’s Manual
81
Chapter 3 — Configuring the Printer
Configuring 802.1x Settings
The 802.1x settings page is only available if you have the optional
wireless interface installed in your printer. Use the 802.1x page to view
and change 802.1x security settings.
To configure 802.1x settings
1 Click Network Admin > 802.1x.
2 View or update your settings.
3 Click Submit 802.1x settings.
Use the following table to understand the 802.1x settings.
Understanding the 802.1x Settings
82
Setting
Description
EAP Type
Choose the Extensible Authentication Protocol (EAP)
type:
• TTLS
• LEAP
• PEAP
• EAP-FAST
• Off (disables 802.1x security) (default)
PF2i and PF4i Mid-Range Printer User’s Manual
Chapter 3 — Configuring the Printer
Understanding the 802.1x Settings (continued)
Setting
Description
Choose the inner authentication method:
Inner
Authentication
• PAP (TTLS only)
(TTLS, EAP-FAST,
• MSCHAPv2
and PEAP only)
• EAP/MSCHAPv2
• EAP/MD5
• EAP/GTC
Outer Name (TTLS Specify the EAP identity passed in the clear. The default
only)
is anonymous.
PAC- Key A-ID Info The Protected Access Credential (PAC) setting
is used to specify the PAC file used by EAP-FAST
authentication. This setting is automatically filled up
by the printer if ACQUIRE_PAC is enabled and current
installed PAC file fails authenticating the printer to the
network. You can manually import a PAC file using a
pass phrase the same way you install a certificate.
Automatic
Provision (PAC)
Set Automatic PAC file Provisioning to on or off.
Root Certificate
The common name of the installed root CA certificate.
You can also specify a different certificate (provided
that it has already been installed on the printer) by
entering the path to the new certificate in this field. If a
pass phrase is required, add it to the end of the path in
the form of “@passphrase”.
Server Common
Name #1
Server Common
Name #2
(TTLS and PEAP
only)
Specify common names. If you specify one common
name, the server certificate common name must match
this name for authentication. If you specify two
common names, the server certificate common name
must match at least one of them. The default is “” (any
common name).
Server Certificate
Validation (TTLS
and PEAP only)
Enables certificate validation. Specifies whether or not
to check if the installed CA certificate is the root of the
server certificate.
PF2i and PF4i Mid-Range Printer User’s Manual
83
Chapter 3 — Configuring the Printer
Configuring Your Printer With PrintSet
Note: You cannot communicate with the printer using PrintSet
through a USB connection. To use PrintSet, you must be connected
serially or through the Ethernet or 802.11 network.
PrintSet is a printer configuration tool that allows you to easily
change your setup parameters. You can also use PrintSet’s setup
wizards to guide you through common configuration tasks.
To configure the printer with PrintSet
1 Make sure that you have a PC running Microsoft Windows 2000
or later.
2 Download PrintSet from the Downloads page of the Intermec web
site at www.intermec.com.
3 Connect your printer to your PC using a serial cable. For help, see
“Connecting the Printer to a PC Through the Serial Port” on
page 42.
Configuring Your Printer With Commands Sent From Your PC
You can change configuration parameters by sending commands
directly to the printer using your terminal program (HyperTerminal)
and a serial or network connection.
If your printer uses the Fingerprint language, you use the SETUP
command, followed by the node, subnode, and parameters setting.
This Fingerprint example sets the media setting to labels with gaps:
SETUP "MEDIA,MEDIA TYPE,LABEL (w GAPS)"
If your printer uses the IPL language, you would send this command:
<STX><SI>T1<ETX>
To see the node, subnode, and parameters for Fingerprint and IPL, see
Appendix C, “Fingerprint and IPL Setup Menus” on page 153.
Fingerprint automatically sends feedback to HyperTerminal as you
type. If you want to see what you are typing with IPL, you need to
perform the following procedure.
84
PF2i and PF4i Mid-Range Printer User’s Manual
Chapter 3 — Configuring the Printer
To see IPL commands as you type
1 From the HyperTerminal menu, select File > Properties > the
Settings tab.
2 Click the ASCII Setup button.
3 Select Echo typed characters locally.
4 Click OK twice.
For more information on how to change configuration settings, see
either the Intermec Fingerprint Command Reference Manual or the
IPL Command Reference Manual.
Configuring Your Printer Using SmartSystems Foundation
SmartSystems™ Foundation is an Intermec software platform that
lets you manage all of your SmartSystems-enabled devices
simultaneously from a central server. The SmartSystems Console
displays all SmartSystems-enabled computers and peripherals in your
network.
Through the Console, you can:
•
drag-and-drop configuration bundles, OS updates, and firmware
upgrades to multiple computers.
•
create a “golden” device configuration to use when updating other
computers.
•
remotely change settings on SmartSystems-enabled computers
and peripherals.
With an AutoDeploy license, SmartSystems can automatically push
software, configuration settings, and other files to connected PF2i
and PF4i printers. AutoDeploy can report on asset locations and
battery status, making it easier to manage your mobile devices. The
license also enables Scan-to-Connect, which makes connecting
additional PF2i and PF4i printers to your secure wireless network as
easy as reading bar codes.
You can download SmartSystems Foundation at no charge from the
Intermec web site. For more information on SmartSystems, go to
www.intermec.com/SmartSystems. To purchase an AutoDeploy
license, contact your local Intermec sales representative.
PF2i and PF4i Mid-Range Printer User’s Manual
85
Chapter 3 — Configuring the Printer
Configuring Your Printer Using Wavelink Avalanche
You can use the Wavelink Avalanche device management system to
configure all of your wireless printers. You printer ships with the
Avalanche Enabler already loaded.
Each time the Avalanche Enabler is activated (typically on a warm
boot), the printer attempts to connect to the Avalanche Agent. When
the printer connects to the Agent, the Agent determines whether an
update is available and immediately starts the software upgrade, file
transfer, or configuration update.
To use Avalanche to remotely manage the printer
1 Install the configuration updates for the printer using the
Avalanche Administrative Console.
2 Schedule the printer updates or manually initiate an update using
the Avalanche Administrative Console.
For more information on using Wavelink Avalanche, contact your
local Intermec representative or visit the Wavelink web site at
www.wavelink.com.
Choosing an Ethernet or Wireless Network
If you have an 802.11 wireless radio option installed in your printer,
you need to choose between an Ethernet network or a wireless 802.11
network.
You can choose the network type of your printer:
86
•
directly from the screen.
•
using commands sent from your PC.
•
using SmartSystems Foundation. For help, see the previous
section “Configuring Your Printer Using SmartSystems
Foundation.”
•
from the printer home page. For help, see “Configuring the
Network Type” on page 77.
•
using PrintSet. For help, see “Configuring Your Printer With
PrintSet” on page 84.
PF2i and PF4i Mid-Range Printer User’s Manual
Chapter 3 — Configuring the Printer
Choosing the Network Type From the Printer Screen
To configure the printer from the screen, you need to enter Setup
mode.
To choose the network type from the printer screen
1 Press T to enter Setup mode.
2 Navigate to Network > Network Type and press E.
3 Select either Ethernet or Wireless 802.11 and press E.
4 Press T to exit Setup mode.
5 Reboot the printer for the change to take effect.
Choosing the Network Type Using Printer Commands
You can use a serial connection to send Fingerprint or IPL commands
the printer.
To choose the network type using printer commands
1 Connect your printer to your PC using a serial cable. For help, see
“Connecting the Printer to a PC Through the Serial Port” on
page 42.
2 Start a terminal application, such as HyperTerminal.
•
If you are running Fingerprint, send this command to the
printer:
setup "NETWORK","NETWORK TYPE","n"
where n is either Ethernet or Wireless 802.11.
•
If you are using IPL, send this command to the printer:
<STX><SI>n,,,p<ETX>
where p is either 0 (select Ethernet interface) or 1 (Select Wireless
802.11 interface).
3 Reboot the printer for the change to take effect.
PF2i and PF4i Mid-Range Printer User’s Manual
87
Chapter 3 — Configuring the Printer
Upgrading Firmware
The latest firmware and software is available for download from the
Downloads page on the Intermec web site at www.intermec.com.
You can upgrade your printer’s firmware using:
•
PrintSet. You can download PrintSet from the downloads page for
the printer on the Intermec web site at www.intermec.com.
•
a CompactFlash (CF) card or USB storage device (maximum 2GB).
•
an Ethernet or 802.11 network connection.
•
a serial or USB connection.
To download firmware updates
1 Go to the Intermec web site at www.intermec.com.
2 Click Support > Downloads.
3 Use the Product Category, Product Family, and Product fields,
to select the printer.
4 Click Submit.
5 The latest available software appears on the page.
6 Download the latest firmware version to your PC.
7 Extract the .zip file to a folder on your PC.
To upgrade using PrintSet
1 Download the latest version of PrintSet from the Intermec web
site at www.intermec.com.
2 Select File > Add Printer. The Add Printer Wizard starts.
3 Under My Printers, select your printer.
4 Go to Printer > Firmware Wizard.
5 Follow the steps to update your firmware.
To upgrade using a CF card or USB storage device
1 Copy the firmware upgrade file to a CF card or USB device.
2 Insert the CF card or USB device in the appropriate slot on the
back of your printer.
3 Turn on your printer.
88
PF2i and PF4i Mid-Range Printer User’s Manual
Chapter 3 — Configuring the Printer
To upgrade using a serial or USB connection
•
Use Fingerprint or IPL commands to send the upgrade file to your
printer.
For help, see the Intermec Fingerprint Command Reference Manual
or the IPL Command Reference Manual.
To upgrade using an Ethernet or 802.11 network connection
1 Start your web browser application.
2 In the address field, enter the IP address of your printer.
3 Press Enter. Your printer’s home page appears.
4 From the menu at the top of the page, click Maintenance. The
firmware upgrade screen appears.
5 Click Browse and browse to the location of the firmware upgrade
file.
6 Double-click the file, and then click Upgrade.
Downloading Fonts and Graphics
The printer supports 15 scalable Unicode TrueType and TrueDoc
fonts as standard. The Unicode standard allows the use of special
characters for various languages including non-Latin fonts, such as
Arabic, Cyrillic, Chinese (including enhanced Simplified Chinese
GB18030), Japanese, Korean, and Hebrew.
You can download additional fonts to the printer’s Flash memory
using:
•
PrintSet. You can download PrintSet from the downloads page for
the printer on the Intermec web site at www.intermec.com.
•
Fingerprint or IPL commands. For help, see the Intermec
Fingerprint Command Reference Manual or the IPL Command
Reference Manual.
•
a CompactFlash card or external 2GB USB mass storage device.
PF2i and PF4i Mid-Range Printer User’s Manual
89
Chapter 3 — Configuring the Printer
90
PF2i and PF4i Mid-Range Printer User’s Manual
4
Troubleshooting and Maintaining
the Printer
This chapter contains possible solutions to problems you may
encounter while using the printer. This chapter also contains
information on booting the printer and performing routine
maintenance. This chapter contains these sections:
•
Troubleshooting the Printer
•
Adjusting the Printer
•
Maintaining the Printer
91
Chapter 4 — Troubleshooting and Maintaining the Printer
Troubleshooting the Printer
You may have printer operation, print quality, or printer
communication problems at some time during the life of your printer.
You can easily fix most of the problems you encounter. If you cannot
find the answer to your problem in this section, you may need to
contact Product Support.
Contacting Product Support
Before contacting Intermec Product Support, you may want to visit
the Intermec technical knowledge base (Knowledge Central) at
intermec.custhelp.com to review technical information or to request
technical support. If you still need help after visiting Knowledge
Central, you may need to call Product Support.
To talk to an Intermec Product Support representative in the U.S.A.
or Canada, call:
1-800-755-5505
Outside the U.S.A. and Canada, go to www.intermec.com and click
Contact to find your local Intermec representative.
Before calling Intermec Product Support, make sure you have the
following information ready:
•
Printer serial number
•
Firmware type and version
•
Ethernet, wireless, or serial port settings
You can find all of the information listed above in the printer menu
system or on a test print page.
92
PF2i and PF4i Mid-Range Printer User’s Manual
Chapter 4 — Troubleshooting and Maintaining the Printer
Understanding Error Messages
Use the following tables to troubleshoot common error messages you
may see displayed on your printer’s screen. Keep in mind that some
error messages:
•
are specific to the type of firmware you are running.
•
have corresponding error numbers.
•
cause the Intermec Ready-to-Work indicator to blink or turn off.
Fingerprint Error Messages
Ready-to-Work Error
Indicator Status Number
Message
Description
Application
break
If you perform a user break by pressing S - P to Off
stop an application from running, or if a runtime
error occurs, the Intermec Ready-to-Work indicator
turns off. You can turn the indicator on by changing
to Direct Protocol or running an application.
But, if the application handles the break (ON
BREAK) or runtime error (ON ERROR GOTO), the
Intermec Ready-to-Work indicator is not affected,
and the application sets the status. For more
information, see the Intermec Fingerprint Command
Reference Manual.
Application
load error
If an application is started but does not run, the
Intermec Ready-to-Work indicator blinks. For
example, if there is a syntax error in the loaded
program file.
Blinking
Cutter does
not respond
Open and shut the cutter.
Blinking
1059
Cutter error1
Open and shut the cutter.
Blinking
1701
Cutter error2
Open and shut the cutter.
Blinking
1702
Cutter error3
Open and shut the cutter.
Blinking
1703
Cutter open
Shut the cutter.
Generic DP
error
In Direct Protocol, you can enable error handling for Blinking
specific errors using the ERROR statement. When
errors added to the built-in error handling occur, this
event is set. The text included in the SNMP trap is
the standard text corresponding to the error.
Head lifted
The printhead is lifted. Lower the printhead.
PF2i and PF4i Mid-Range Printer User’s Manual
1704
Blinking
1022
93
Chapter 4 — Troubleshooting and Maintaining the Printer
Fingerprint Error Messages (continued)
Message
Description
Ready-to-Work Error
Indicator Status Number
Initializing
The printer is initializing.
Off
IP
The printer is trying to acquire an IP address from
configuration the network. Wait for the printer to complete the
error
task before taking any action.
Blinking
IP link error
No network connection.
Blinking
Label not
taken
Label not taken
Blinking
LSS too high
Blinking
This error can occur when you run a test feed
without any media installed, or if you have incorrect
media settings. Load the printer with media and
select the appropriate media type. For help, see
“Loading Media” on page 8.
1007
LSS too low
Blinking
This error can occur when you run a test feed
without any media installed, or if you have incorrect
media settings. Load the printer with media and
select the appropriate media type. For help, see
“Loading Media” on page 8.
1008
Maintenance
The printer is upgrading its firmware. Wait for the
printer to complete this task.
Off
Next label not Next label not found
found
Blinking
1031
No RFID
support
installed
Blinking
1320
Blinking
1321
Out of paper
The printer is out of paper. Load a new roll of media. Blinking
For help, see “Loading Media” on page 8.
1005
Out of
transfer
ribbon
The printer is out of transfer ribbon. Load a new roll Blinking
of ribbon. For helps, see “Loading Ribbon” on
page 30.
1027
Pause Mode
Entered
The print job is paused.
Blinking
Power supply
Over
temperature
The power supply is overheated and needs to cool
down.
Off
The optional RFID interface is not installed in the
printer.
No tag found No RFID tag has been found.
94
1718
PF2i and PF4i Mid-Range Printer User’s Manual
Chapter 4 — Troubleshooting and Maintaining the Printer
Fingerprint Error Messages (continued)
Ready-to-Work Error
Indicator Status Number
Message
Description
Press any key
to continue
If an error occurs in the Fingerprint immediate
Off
mode, for example “out of paper” when the print key
is pressed, this event is set.
Printer crash
Printer crash. In most instances, when the printer
Off
crashes, the screen is reset which causes the Intermec
Ready-to-Work indicator to turn off.
Printer turned The printer is off.
off
Off
Printhead not Printhead not found.
found
Off
Printhead too The printhead is overheated and needs to cool down. Off
hot
You need to resend your print job.
1088
Rebooted
The printer has been rebooted.
Off
RtW blink by
application
This condition is set by the Fingerprint SYSHEALTH Blinking
command. For more information, see the Intermec
Fingerprint Command Reference Manual.
RtW off by
application
This condition is set by the Fingerprint SYSHEALTH Off
command. For more information, see the Intermec
Fingerprint Command Reference Manual.
Setup Mode
Entered
The printer is in Setup mode.
Off
Testfeed not
done
The printer did not perform a test feed before it
printed out test labels. Performing a test feed
calibrates the sensor.
Blinking
1606
Blinking
1058
To perform a testfeed
• Press the Print button.
Transfer
ribbon is
installed
This is not an error condition. This message briefly
appears after a new roll of transfer ribbon is
installed.
PF2i and PF4i Mid-Range Printer User’s Manual
95
Chapter 4 — Troubleshooting and Maintaining the Printer
IPL Error Messages
Message
Ready-to-Work Error
Indicator Status Number
Description
No Printhead Printhead not found
Off
Open & Shut
Cutter
Cutter error 1. Open and shut the cutter.
Blinking
1058
Open & Shut
Cutter
Cutter error 2. Open and shut the cutter.
Blinking
1022
Open & Shut
Cutter
Cutter error 3. Open and shut the cutter.
Blinking
1059
Paper Fault
LSS too high. This error can occur when you run a Blinking
test feed without any media installed, or if you have
incorrect media settings. Load the printer with
media and select the appropriate media type. For
help, see “Loading Media” on page 8.
1701
Paper Fault
Blinking
LSS too low. This error can occur when you run a
test feed without any media installed, or if you have
incorrect media settings. Load the printer with
media and select the appropriate media type. For
help, see “Loading Media” on page 8.
Paper Fault
The printer did not perform a test feed before it
printed out test labels. Performing a test feed
calibrates the sensor.
Blinking
To perform a test feed
• Press the Print button.
Paper Out
The printer is out of paper. Load a new roll of media. Blinking
For help, see “Loading Media” on page 8.
Paused
This is not an error condition. This message appears Blinking
when the print job is paused.
Press Feed
Press the F button to resume.
Blinking
Printhead Hot The printhead is overheated and needs to
cool down. Wait for printing to resume
automatically.
Off
Printhead Up The printhead is lifted. Lower the printhead.
Blinking
Psu Over
Temp
Off
96
Power supply over temperature
1005
1027
PF2i and PF4i Mid-Range Printer User’s Manual
Chapter 4 — Troubleshooting and Maintaining the Printer
IPL Error Messages (continued)
Message
Ready-to-Work Error
Indicator Status Number
Description
Ribbon Fitted This is not an error condition. This message briefly
appears after a new roll of transfer ribbon is
installed.
Ribbon Out
Blinking
The printer is out of transfer ribbon. Load a new roll Blinking
of ribbon. For helps, see “Loading Ribbon” on
page 30.
Setup mode entered.
Off
IP link error. No network connection.
Blinking
1031
Blinking
IP configuration error. The printer is trying to
acquire an IP address from the network. Wait for the
printer to complete the task before taking any
action.
Rebooted
Off
Initializing
Off
Printer crash. In most instances, when the printer
Off
crashes, the screen is reset which causes the Intermec
Ready-to-Work indicator to turn off.
Printer turned off
Off
Maintenance
Off
Troubleshooting Printer Problems and Finding Solutions
Use this section to find possible solutions to printer problems.
Print Quality Problems and Possible Solutions
Problem
The printout is weak, overall.
Possible Solution
Try these possible solutions in order:
• Make sure that your media setting is appropriate for the
type of media you are using.
• The contrast may be too low. Try increasing the contrast.
• The printhead pressure may be too low. Increase the
printhead pressure. For help, see “Adjusting the
Printhead Pressure” on page 109.
• Replace the printhead. For help, see “Replacing the
Printhead” on page 118.
PF2i and PF4i Mid-Range Printer User’s Manual
97
Chapter 4 — Troubleshooting and Maintaining the Printer
Print Quality Problems and Possible Solutions (continued)
Problem
Possible Solution
The printout is weaker on one side. Adjust the pressure arm. For help, see “Adjusting the
Pressure Arm” on page 104.
There are weak spots on the
printout.
Try these possible solutions in order:
• There may be foreign particles on the media. Clean or
replace the media.
• Make sure that your media and ribbon are compatible.
• Make sure that you are using high quality media and
ribbon.
• The contrast may be too low. Try increasing the contrast.
• The printhead may be worn. Replace the printhead. For
help, see “Replacing the Printhead” on page 118.
• The platen roller may be worn. For help, contact your
Intermec service representative.
The printout is dark, overall.
Or,
There is excessive bleeding on the
media.
Try these possible solutions in order:
• Make sure that your media setting is appropriate for the
type of media you are using.
• The contrast may be too high. Try decreasing the
contrast.
• The printhead pressure may be too high. Decrease the
printhead pressure. For help, see “Adjusting the
Printhead Pressure” on page 109.
• The printhead voltage may be incorrect or the energy
control may be faulty. For help, contact your Intermec
service representative.
There are dark lines along the media There may be foreign particles on the printhead. Clean the
path.
printhead. For help, see “Cleaning the Printhead” on
page 116.
There are white vertical lines on the Try these possible solutions in order:
printout.
• There may be foreign particles on the printhead. Clean
the printhead. For help, see “Cleaning the Printhead”
on page 116.
• There may be missing dots on the printhead. Replace the
printhead. For help, see “Replacing the Printhead” on
page 118.
98
PF2i and PF4i Mid-Range Printer User’s Manual
Chapter 4 — Troubleshooting and Maintaining the Printer
Print Quality Problems and Possible Solutions (continued)
Problem
Possible Solution
Part of a dotted line is missing.
Try these possible solutions in order:
• The printhead may be failing. Replace the printhead. For
help, see “Replacing the Printhead” on page 118.
• The strobe signal may be failing. For help, contact your
Intermec service representative.
The inner edge of the printout is
missing.
Try these possible solutions in order:
• The media may not be properly installed or aligned.
Reload the media. For help, see “Loading Media” on
page 8.
• The small core and supply post may be in the upper
position. Move the post to the lower position.
• The X-start parameter may be set too low. Increase the
setting.
The content on my printout is
compressed.
The print speed may be too high. Lower the print speed.
Nothing shows up on my thermal
transfer printout.
The ink-coated side of the ribbon may not be facing the
media. Reload the ribbon. For help, see “Loading Ribbon”
on page 30.
When I feed or print a label, the
Make sure Paper Type is set to Thermal Transfer Ribbon
ribbon is not taken up. Instead, it
(TTR):
spills out of the front of the printer. 1 On your printer’s keypad, press T to enter the Setup
menu.
2 If you are using Fingerprint, go to MEDIA > PAPER
TYPE > TRANSFER.
If you are using IPL, go to MEDIA > PAPER TYPE >
TTR.
3 Press E.
4 Press T to exit the Setup menu.
The transfer ribbon breaks.
Try these possible solutions in order:
• Make sure that your media setting is appropriate for the
type of media you are using.
• Make sure that the ribbon is fitted correctly. Reload the
ribbon. For help, see “Loading Ribbon” on page 30.
• The energy control may be faulty. For help, contact your
Intermec service representative.
PF2i and PF4i Mid-Range Printer User’s Manual
99
Chapter 4 — Troubleshooting and Maintaining the Printer
Print Quality Problems and Possible Solutions (continued)
Problem
Possible Solution
The transfer ribbon wrinkles.
Try these possible solutions in order:
• The ribbon break shaft may not be adjusted correctly.
For help, see “Adjusting the Ribbon Break Shaft” on
page 110.
• You may need to adjust the media edge guide. For help,
see “Loading Media” on page 8.
• The printhead pressure may be too high. Decrease the
printhead pressure. For help, see “Adjusting the
Printhead Pressure” on page 109.
The media feed is not working
properly.
Try these possible solutions in order:
• The media characteristics may have changed. Press the
Print button.
• One of these parameters may not be properly configured:
Label rest dots, Media type, or LSS position. Verify the
settings for these parameters.
• The sensors may be dirty. Clean the media guides. For
help, see “Cleaning the Media Guides” on page 114.
• The sensors may need to be replaced. For help, contact
your Intermec service representative.
Networking Problems and Possible Solutions
Problem
Possible Solution
I am having problems with my
Ethernet or 802.11 radio network
connection.
Try these possible solutions:
• Make sure that your network cable is:
• securely connected to your printer.
• a straight “pin to pin” cable, not a “crossover” cable.
• Make sure that your PC is correctly configured for and
connected to your network.
• Make sure that your printer is correctly configured for
your network.
I cannot connect to my printer
home page.
If you are connecting your printer with a crossover network
cable, you may need to disable the web browser’s proxy
settings on your computer to access your printer’s home
page.
100
PF2i and PF4i Mid-Range Printer User’s Manual
Chapter 4 — Troubleshooting and Maintaining the Printer
RFID Problems and Possible Solutions
Problem
Possible Solution
I loaded my printer with RFID
media, but it is not writing to the
tags.
After you load RFID media, restart the printer or run a
TESTFEED to let the printer identify the RFID media type.
The RFID kit is installed, but
The printer is not communicating properly with the RFID
“RFID” does not appear in the setup hardware. For help, contact your local Intermec
tree.
representative.
When I try to set RFID MODE to
An RFID kit is not installed in the printer. For help, contact
ENABLE, I get one of these error
your local Intermec representative.
messages:
• “Error in filename” (Fingerprint
or Intermec Direct Protocol)
• “No RFID support” (IPL)
None of the RFID commands work, RFID MODE is disabled. Change MODE to ENABLE.
and I get this message: “RFID
Inactive.”
Printing on regular media (not
RFID MODE is enabled. Change MODE to DISABLE.
RFID) is slow and halted in between
labels.
I am using an application to write to • The printer may not recognize the RFID media type. For
RFID tags, and the printer is
Fingerprint printers, run a TESTFEED. For IPL printers,
printing “VOID” labels.
raise and lower the printhead, and then press F or turn
on the printer.
• You may need to modify the TAGADJUST parameter.
• You may need to adjust the output power (field strength)
to the antenna.
When I try to perform a TESTFEED, • Make sure that you are using RFID media.
I get this message, “No tag found.” • You may need to modify the TAGADJUST parameter.
• The tag may be broken. Try printing on a different label.
I get this error message: “Not
supported by tag type.”
(Fingerprint)
This error message indicates that a command:
• may be trying to access a tag data segment that is not
available on the RFID media.
• is being used with a level of security that is not allowed by
the tag type.
Make sure that you are using the appropriate media for
your application.
PF2i and PF4i Mid-Range Printer User’s Manual
101
Chapter 4 — Troubleshooting and Maintaining the Printer
RFID Problems and Possible Solutions (continued)
Problem
Possible Solution
When I send a TAGREAD or
TAGWRITE command, I get this
error message: “Tag format error.”
The TAGFORMAT defined for the operation determines
the number of required parameters. You may need to
modify the TAGFORMAT. For help, see the Intermec
Fingerprint Command Reference Manual or the IPL
Command Reference Manual. For more information, see the
EPC Tag Data Standard (v1.1, revision 1.27) available from
the EPCglobal web site at www.epcglobalinc.org.
Data can be written unlawfully to a For some ISO 18000-6B tag chips, the functionality to
write protected ISO 18000-6B tag. protect the tag memory from being rewritten has not been
implemented. Switch to tags with a different chip that have
this functionality implemented.
I can read ISO 18000-6B tags, but
Class 1 tags require an MPR6100 RFID Radio Module. To
when I try to read Class 1 tags, I get order an MPR6100 kit, contact your local Intermec
this error message: “No tag found.” representative.
(Fingerprint only) My printer
displays an error code.
Use the error code text to troubleshoot the problem:
1320
No RFID support installed.
1321
No tag found.
1322
Access outside tag memory.
1323
Tag format error.
1324
RFID inactive.
1325
Not supported by tag type.
1326
RFID module too hot.
1327
RFID duty cycle exceeded.
1328
RFID lock error. Tag cannot be locked.
1329
RFID access error. Tag is locked.
Note: If you are using Intermec Direct Protocol, error codes
1320 to 1329 are supported and displayed with the error
text.
Resetting the Printer
When you reset the printer, you return it to the factory default
settings. Resetting the printer removes all files used to store settings.
But, it does not reset settings that have already been read when the
files. So, wireless communication settings, such as SSID and keys
retain their values from the previous start. However, the next reboot
resets them to the factory default values.
102
PF2i and PF4i Mid-Range Printer User’s Manual
Chapter 4 — Troubleshooting and Maintaining the Printer
Resetting the printer also does not change the selected printer
language (Fingerprint, IPL, ZSim, or DSim).
There are two ways to reset the printer:
•
Insert a special CompactFlash memory card and restart the
printer.
•
Use the printer’s keypad.
To reset the printer using the keypad
1 Turn off the printer.
2 Open the right cover and lift the printhead.
3 Turn on the printer and press and hold the I key until the
printer beeps.
4 Quickly press the following keys in sequence:
DUUL
The following message appears:
Factory Default?
Enter=Yes ESC=No
5 Within 10 seconds, press E to reset the printer to its factory
default settings. The parameters are reset and the printer
continues the normal startup process.
If you do not press E within 10 seconds, the normal startup
continues and the printer is not reset.
Adjusting the Printer
You may need to adjust your printer to accommodate your printing
needs or improve performance. You can adjust the:
•
pressure arm.
•
label stop sensor (LSS) position.
•
printhead pressure.
•
ribbon break shaft.
PF2i and PF4i Mid-Range Printer User’s Manual
103
Chapter 4 — Troubleshooting and Maintaining the Printer
Adjusting the Pressure Arm
The printer is factory-adjusted for full-size media width. If you are
using media that is less than full width, Intermec recommends that
you adjust the position of the pressure arm so that it is centered on
the media and provides even pressure.
A poorly adjusted pressure arm may be detected by a weaker printout
on either side of the media path.
To adjust the pressure arm
1 Open the media cover.
2 Remove any ribbon.
104
PF2i and PF4i Mid-Range Printer User’s Manual
Chapter 4 — Troubleshooting and Maintaining the Printer
3 Loosen the nut that secures the pressure arm.
Center of media
Screw
Pressure arm
4 Move the pressure arm inward or outward until the arrow on the
tip of the arm is centered with the media.
Note: Move the pressure arm at the part closest to the screw, not at
the tip. If the arm is difficult to move, lift the printhead and pull
the printhead bracket free from the magnet in the arm.
5 When the pressure arm is centered, tighten the nut to secure the
arm.
6 Adjust the edge guides.
Adjusting the Label Stop Sensor
The label stop/black mark sensor (LSS) is a photoelectric sensor that
controls the printer’s media feed by detecting gaps between labels, or
slots or black marks in continuous stock, depending on the printer’s
media type setup. The LSS must be aligned with the gaps, slots, or
black marks. If you are using irregularly shaped labels, align the LSS
with the front tips of the labels.
One part of the sensor is on the upper media guide and the other part
of the sensor is under the lower guide. You need to adjust the guides
individually to the same position.
PF2i and PF4i Mid-Range Printer User’s Manual
105
Chapter 4 — Troubleshooting and Maintaining the Printer
One diode +
One sensor
Upper part of LSS
One diode +
One sensor
Lower part of LSS
Print mechanism
Adjusting the Label Stop Sensor
The LSS can be moved laterally between five fixed positions.
LSS Positions
Position
Distance
One click out
3 mm (0.118 in)
Two clicks out
8 mm (0.315 in)
Three clicks out 12 mm (0.472 in)
Four clicks out
16 mm (0.639 in)
Five clicks out
20 mm (0.787 in)
To adjust the LSS
1 Use a small screwdriver to push the sensors in as far as possible.
2 One at a time, pull the sensors out while counting the clicks.
To test the LSS
1 Make sure that your printer is properly configured for the type of
media you are using. Go to SETUP > MEDIA > MEDIA TYPE.
2 Open the media cover.
106
PF2i and PF4i Mid-Range Printer User’s Manual
Chapter 4 — Troubleshooting and Maintaining the Printer
3 Lift and lower the printhead.
4 Press the Print button.
5 Make sure there is a label (not a gap or mark) at the LSS.
6 Make sure that the media is routed as close to the center section as
the guide allows.
7 Press T to enter the Setup menu, and use the keypad to go to the
LSS menu:
•
If you are running Fingerprint, go to SETUP > PRINT DEFS >
LSS TEST > LSS AUTO.
•
If you are running IPL, go to SETUP > TEST/SERVICE > LSS
TEST > LSS AUTO.
The screen displays the LSS AUTO menu with the cursor in the
center.
LSS AUTO
Note: There is no way to adjust the LSS function; the menus
only indicate values obtained from the LSS. The test menu can
determine if the sensor unit is not physically in position, is blocked
by dust or stuck labels, or is defective in some way.
8 Check gap detection:
a Lift the printhead.
b Slowly pull out the media. When the LSS detects a gap or
detection slot, the cursor moves to the right.
LSS AUTO
PF2i and PF4i Mid-Range Printer User’s Manual
107
Chapter 4 — Troubleshooting and Maintaining the Printer
9 Check mark detection:
a Lift the printhead.
b Slowly pull out the media. When the LSS detects a black mark,
the cursor moves to the left.
LSS AUTO
10 If the LSS does not move as described in Steps 8 and 9, make sure
that:
108
•
the cursor position is accurate. Refresh the cursor position by
pressing the D key.
•
the LSS is laterally aligned with the slots or black marks.
•
both the upper and lower parts of the LSS are aligned with
each other.
•
the transfer ribbon is properly loaded so it does not interfere
with the LSS. For help, see “Loading Ribbon” on page 30.
•
the LSS guides are clean and free from stuck labels or other
objects that may interfere with the light that goes from one
part of the LSS to the other. For help, see “Cleaning the
Printer” on page 113.
•
the media does not have some kind of preprint that may
disturb detection.
•
there is enough difference between the black marks and the
surrounding areas.
•
the liner is transparent enough.
•
the LSS works properly with another type of media.
PF2i and PF4i Mid-Range Printer User’s Manual
Chapter 4 — Troubleshooting and Maintaining the Printer
Adjusting the Printhead Pressure
The pressure of the thermal printhead against the direct thermal
media is factory-adjusted. But, you may need to adjust the printhead
pressure to accommodate thicker or thinner media.
Note: Do not use a higher printhead pressure than necessary, because
it may increase the wear of the printhead and shorten its life.
To adjust the printhead pressure
1 Using a slotted screwdriver, turn the adjustment screw clockwise
for more pressure and a darker printout (+) or counterclockwise
for less pressure (-) and a lighter printout.
Adjustment screw
2 Print test labels to check the print quality. For help, see “Printing
a Test Label” on page 36.
To return the printhead pressure to the factory default setting
•
Tighten the screw (+) as far as you can, and then loosen it (-) six
full turns for a PF2i and four full turns for a PF4i.
PF2i and PF4i Mid-Range Printer User’s Manual
109
Chapter 4 — Troubleshooting and Maintaining the Printer
Adjusting the Ribbon Break Shaft
If ribbon wrinkling occurs, you may need to adjust the alignment of
the front ribbon break shaft so that it runs parallel to the printhead
and the ribbon supply and rewind hubs.
To adjust the ribbon break shaft
•
Using a slotted screwdriver, carefully turn the adjustment screw:
•
If the ribbon tends to slide outward, turn the screw clockwise
(fw) to move the outer end of the break shaft forward.
•
If the ribbon tends to slide inward, turn the screw
counterclockwise (bw) to move the outer end of the break
shaft backward.
Adjustment screw
Ribbon break shaft
Installing Quick-Load Guides
You can use the quick-load guides to help load media from behind
the print mechanism and guide media from an external supply.
The quick-load guides are designed for media that is 40 to 60 mm
(1.57 to 2.36 in) wide.
Note: Quick-load guides cannot be used for peel-off printing.
110
PF2i and PF4i Mid-Range Printer User’s Manual
Chapter 4 — Troubleshooting and Maintaining the Printer
To install the quick-load guides
1 Turn off the printer.
2 Open the media cover.
3 Disengage the upper guide from the lower guide by lifting the
inner part of the upper guide and pulling it out. Make sure not to
damage the cable.
PF2i and PF4i Mid-Range Printer User’s Manual
111
Chapter 4 — Troubleshooting and Maintaining the Printer
4 Lift the upper guide.
5 Remove the standard green edge guide.
6 Slide the quick-load guides onto the shaft, making sure that the
lower media guide rail slides through the notches.
7 Slide the inner guide as far as possible down the shaft so that it is
flush with the center section.
112
PF2i and PF4i Mid-Range Printer User’s Manual
Chapter 4 — Troubleshooting and Maintaining the Printer
8 Adjust the outer guide to accommodate your media width. For
help, see “Loading Tear-Off Media With Quick-Load Guides”
on page 14.
Maintaining the Printer
To keep your printer working properly, you should perform regular
maintenance.
Cleaning the Printer
To properly maintain your printer, you should regularly clean it. You
can clean the:
•
exterior of the printer.
•
media guides.
•
printhead.
To avoid possible personal injury or damage to the printer, never
insert any pointed or sharp objects into the printer.
Use only the cleaning agents specified in this section. Intermec is
not responsible for damage caused by any other cleaning
materials used on this printer. Clean the printer with a cotton
swab saturated with alcohol.
When cleaning or replacing the printhead, take precautions to
avoid electrostatic discharges.
Follow these guidelines for cleaning the printer:
•
Always remove the power cord before cleaning.
•
Never spray the printer. Protect it from water when cleaning the
premises.
•
Never use any sharp tools for removing stuck labels. The printhead
and rollers are delicate.
PF2i and PF4i Mid-Range Printer User’s Manual
113
Chapter 4 — Troubleshooting and Maintaining the Printer
Cleaning the Exterior of the Printer
Clean the exterior of the printer as needed.
To clean the exterior of the printer
•
Wipe external surfaces with a soft cloth slightly moistened with
water or a mild detergent.
Cleaning the Media Guides
Both parts of the label stop sensor, which controls the media feed, are
covered by plastic guides. The guides are transparent to allow the light
to pass between the two parts of the label stop sensor. These areas
must be kept clean from dust, stuck labels, and adhesive residue.
If your printer starts to feed labels in an unexpected way, pull out
the upper guide check for objects, such as dust, adhesive residue, or
labels, that may be blocking the beam of light. If necessary, clean the
guides.
Isopropyl alcohol [(CH 3)2CHOH; CAS 67-63-0] is a highly
flammable, moderately toxic, and mildly irritating substance.
To clean the media guide
1 Turn off the printer.
2 Open the media cover.
114
PF2i and PF4i Mid-Range Printer User’s Manual
Chapter 4 — Troubleshooting and Maintaining the Printer
3 Disengage the upper guide from the lower guide by lifting the
inner part of the upper guide and pulling it out. Make sure not to
damage the cable.
4 Lift the upper guide.
5 Clean the areas marked with gray with a cleaning card or a soft
cloth soaked in isopropyl alcohol. Be careful not to scratch the
guides.
6 Replace the upper guide.
PF2i and PF4i Mid-Range Printer User’s Manual
115
Chapter 4 — Troubleshooting and Maintaining the Printer
7 Close the media cover.
Cleaning the Printhead
Cleaning the printhead on a regular basis is important for the life of
the printhead and for the printout quality. You should clean the
printhead each time you replace the media. This section describes how
to clean the printhead using cleaning cards. If additional cleaning is
required, for example removing adhesive residue from the platen
roller or tear bar, use a cotton swab moistened with isopropyl alcohol.
Isopropyl alcohol [(CH 3)2CHOH; CAS 67-63-0] is a highly
flammable, moderately toxic, and mildly irritating substance.
To clean the printhead
1 Turn off the printer.
2 Open the media cover.
116
PF2i and PF4i Mid-Range Printer User’s Manual
Chapter 4 — Troubleshooting and Maintaining the Printer
3 Turn the printhead lift lever clockwise to raise the printhead.
4 Remove any media and ribbon.
5 Open the cleaning card envelope and pull out the cleaning card.
Read the warning text.
6 Insert most of the cleaning card under the printhead, and then
lower the printhead.
7 Pull out the cleaning card and raise the printhead.
8 Wait for approximately 30 seconds to allow the cleaning fluid to
dissolve the residue.
9 Repeat Steps 6 through 8.
10 If necessary, repeat the process with a fresh cleaning card.
11 Allow the cleaned parts to dry before loading media and ribbon.
PF2i and PF4i Mid-Range Printer User’s Manual
117
Chapter 4 — Troubleshooting and Maintaining the Printer
Replacing the Printhead
The printhead is subject to wear both from the direct thermal media
or ribbon and from the rapid heating and cooling process during
printing. So, you need to periodically replace the printhead.
How often you need to replace the printhead depends factors such as
the print images, the type of direct thermal media or ribbon in use,
the amount of energy to the printhead, the print speed, and the
ambient temperature.
You must turn off the power before replacing the printhead. The
firmware can only detect the new printhead when the printer is
restarted.
To replace the printhead
1 Turn off the printer.
2 Open the media cover.
118
PF2i and PF4i Mid-Range Printer User’s Manual
Chapter 4 — Troubleshooting and Maintaining the Printer
3 Turn the printhead lift lever clockwise to raise the printhead.
4 Remove any media and transfer ribbon.
5 Pull the printhead bracket away from the magnet in the pressure
arm.
PF2i and PF4i Mid-Range Printer User’s Manual
119
Chapter 4 — Troubleshooting and Maintaining the Printer
6 Disconnect the printhead bracket from the print mechanism, and
pull out the printhead as far as the cables allow.
7 Disconnect the cables from the printhead:
120
•
Note the snap-lock on the inner connector.
•
Be sure to pull at the connectors, not at the cables.
PF2i and PF4i Mid-Range Printer User’s Manual
Chapter 4 — Troubleshooting and Maintaining the Printer
8 Connect the two cables to the replacement printhead.
9 Install the printhead. Make sure that the printhead cables run
freely.
10 Turn the printhead lift lever counterclockwise so the magnet
engages the printhead bracket.
11 Load a new supply of media and ribbon. For help, see “Loading
Media” on page 8 and “Loading Ribbon” on page 30.
PF2i and PF4i Mid-Range Printer User’s Manual
121
Chapter 4 — Troubleshooting and Maintaining the Printer
122
PF2i and PF4i Mid-Range Printer User’s Manual
A
Specifications
This appendix contains specifications for the printer and
media. It also contains information about accessories for the
printer.
123
Appendix A — Specifications
Specifications
Physical Specifications
PF2i Dimensions:
19.4 x 39.7 x 17.8 cm (7.64 x 15.63 x 7.00 in)
(With long side door)
PF2i Weight:
5.5 kg (12 lb)
PF4i Dimensions:
With long side door: 24.4 x 39.7 x 17.8 cm (9.61 x 15.63 x 7.00 in)
With paper cutter: 25.3 x 44.7 x 17.8 cm (9.96 x 17.60 x 7.00 in)
With 8-in Megatop: 24.4 x 47.1 x 22.5 cm (9.61 x 18.54 x 8.86 in)
PF4i Weight:
7 to 8 kg (15.5 to 17.7 lb)
Power Specifications
Printer Voltage:
v100-240 V, 2-1A, 50/60Hz
Temperature and Humidity Specifications
Operating Temperature: 5°C to 40°C (41°F to 104°F)
Storage Temperature:
-20°C to 70°C (-4°F to 158°F)
Relative Humidity:
20 to 80% non-condensing
Communications and Connectivity
•
Serial port (RS-232)
•
USB device
•
USB full speed host
•
Ethernet, 100 Mbps
•
802.11b/g (optional)
•
IPv6
Memory
124
•
32MB RAM
•
16MB Flash
•
CompactFlash (CF) card (optional)
•
USB memory device (optional)
PF2i and PF4i Mid-Range Printer User’s Manual
Appendix A — Specifications
Print Speed and Resolution
Specification
Description
Print Mode
Direct Thermal
Thermal Transfer (option for PF2i)
Print Speed (variable)
100 to 200 mm/sec (4 to 8 in/sec)
Printhead Resolution
8 dots/mm at 203 dpi
Print Width (max)
PF2i
PF4i
56 mm (2.2 in)
104 mm (4.095 in)
Print Length (max)
409.5 cm (161.25 in)
Note: The maximum print length is
also restricted by the amount of free
SDRAM memory.
Media Width (min/max)
PF2i with standard edge guide
PF2i with quick-load guides
PF4i with standard edge guide
PF4i with quick-load guides
25 to 60 mm (1 to 2.36 in)
40 to 60 mm (1.57 to 2.36 in)
25 to 114.3 mm (1 to 4.5 in)
40/80 to 114.3 mm (1.57/3.15 to 4.5 in)
Media Roll Diameter (max)
213 mm (8.38 in)
Medial Roll Core Diameter
38 to 40 mm (1.5 in) or 76 mm (3 in)
Ribbon Width (min/max)
PF2i
PF4i
25 to 60 mm (1 to 2.36 in)
55 to 110 mm (2.17 to 4.33 in)
Ribbon Roll Diameter (outer, max) 64 mm (2.56 in)
240 to 300 m (787 to 985 ft) of ribbon,
depending on ribbon thickness
Ribbon Roll Core Diameter (inner) 25.4 mm (1.00 in)
Print Directions
PF2i and PF4i Mid-Range Printer User’s Manual
4
125
Appendix A — Specifications
Interfaces
This section describes the standard interfaces available on the printer
printer.
RS-232 Serial Interface
Use this table to understand the default settings of the serial port.
Default Settings of the Serial Port
Parameter
Default Setting
Baud rate
9600
Character Length or Data Bits
8
Parity
None
Stop Bits
1
Handshaking
none (Fingerprint
XON/XOFF (IPL)
The printer end of the serial cable is a DB9 pin and the PC end is
dependent on the model of the PC.
1
2 3 4 5
6 7 8 9
RS-232 Serial Cable DB9 Pins
Serial Cable Pins and Description
Pin
Signal
1
Description
External +5 V DC, Max 500 mA
2
TXD
Transmit data
3
RXD
Receive data
GND
Ground
4
5
6
126
PF2i and PF4i Mid-Range Printer User’s Manual
Appendix A — Specifications
Serial Cable Pins and Description (continued)
Pin
Signal
Description
7
CTS
Clear to send
8
RTS
Request to send
9
USB Interface
The printer supports USB full speed v2.0 Host. To use the USB
interface to print from a PC, you need to have the Intermec
InterDriver printer driver installed on your PC. For help setting up
USB communications, see “Connecting the Printer to a PC
Through the USB Device Port” on page 43.
The printer is a “self-powered device.” Intermec recommends that you
only connect one printer to each USB port on the PC, either directly
or through a hub. You can connect other devices, such as a keyboard
or a mouse, to the same hub. If you need more than one USB printer
to a host, you should use different USB ports.
The USB cable that ships with the printer has a USB Type A connector
on one end to connect to the PC and a USB Type B connector on the
other end to connect to the printer. You do not need to configure
communications for the USB port.
USB Type A Connector
USB Type B Connector
PF2i and PF4i Mid-Range Printer User’s Manual
127
Appendix A — Specifications
USB Host Interface
The printer has a USB host interface for connecting USB devices such
as HID bar code scanners and keyboards, USB storage devices, and
USB hubs.
1
2 3 4
USB Host Interface
USB Host Interface Pins and Descriptions
Pin
Description
1
VBUS
2
D-
3
D+
4
Gnd
Ethernet Interface
The Ethernet interface has an RJ-45 socket for use with a standard
RJ-45 cable. The interface supports 10/100 Mbps Fast Ethernet
(10BASE-T, 100BASE-TX) and is fully compliant with the IEEE
802.3u standard. The network card MAC address can be found on
the label below the socket.
Ethernet Socket
Ethernet Connector
128
PF2i and PF4i Mid-Range Printer User’s Manual
Appendix A — Specifications
One yellow and one green LED indicate the network status.
Understanding the Ethernet LEDs
LED
Status
Description
Green
On
Link
Off
No link
Yellow
Blinking
Network activity
On
100BASE-TX
Off
10BASE-T
Parallel IEEE 1284 Interface
The parallel port supports Universal Plug and Play (UPnP) and
additional status reporting through IEEE 1284 nibble ID mode.
Parallel IEEE 1284 Pins and Descriptions
Pin
Description
Transmitter
1
nStrobe
Host
2 to 9
Data 0-7
Host
10
nAcknowledge
Printer
11
Busy
Printer
12
Perror
Printer
13
Select
Printer
14
nAutoFd
15 to 16
Not connected
17
Chassis ground
18
External +5 V DC
19 to 30
Signal ground
31
nInit
32
nFault
33
Signal ground
34 to 35
Not connected
36
nSelectIn
PF2i and PF4i Mid-Range Printer User’s Manual
Comments
Max 500 mA
Printer
129
Appendix A — Specifications
Media Specifications
Core and Roll Specifications
Measurement
Value
Core inside diameter, standard
38 to 40 mm (1.5 in)
Core inside diameter, with adapter
76.2 mm (3 in)
Core width
must not protrude
outside the media
Maximum roll outside diameter, Position 1
152 mm (6.00 in)
Maximum roll outside diameter, Position 2
203 mm (8.00 in)
Maximum roll outside diameter, Position 3
213 mm (8.38 in)
Maximum media width, PF2i
60 mm (2.36 in)
Maximum media width, PF4i
114.3 mm (4.50 in)
Minimum media width, standard guide
25 mm (1.00 in)
Minimum media width, quick-load guides
40 mm (1.57 in)
Minimum media width, wide quick-load guides, PF4i 80.0 mm (3.15 in)
Non-Adhesive Strip
PF2i Media Width (a)
Measurement
Value
Maximum
60 mm (2.36 in)
Minimum, standard guides
25.0 mm (1.00 in)
Minimum, quick-load guides
40 mm (1.57 in)
PF4i Media Width (a)
130
Measurement
Value
Maximum
114.3 mm (4.50 in)
Minimum, standard guides
25.0 mm (1.00 in)
Minimum, quick-load guides
40 mm (1.57 in)
Minimum, wide quick-load guides
80.0 mm (3.15 in)
PF2i and PF4i Mid-Range Printer User’s Manual
Appendix A — Specifications
Media Type
Set media type to one of these values:
•
•
Fingerprint:
•
FIX LENGTH STRIP
•
VAR LENGTH STRIP
IPL: CONTINUOUS
a
Non-Adhesive Strip
PF2i and PF4i Mid-Range Printer User’s Manual
131
Appendix A — Specifications
Self-Adhesive Strip
PF2i Media Width Including Liner (a)
Measurement
Value
Maximum
60 mm (2.36 in)
Minimum, standard guides
25.0 mm (1.00 in)
Minimum, quick-load guides
40 mm (1.57 in)
PF4i Media Width Including Liner (a)
Measurement
Value
Maximum
114.3 mm (4.50 in)
Minimum, standard guides
25.0 mm (1.00 in)
Minimum, quick-load guides
40 mm (1.57 in)
Minimum, wide quick-load guides
80.0 mm (3.15 in)
Liner (b)
The liner must not extend more than a total of 1.6 mm (0.06 in)
outside the face material and should protrude equally on both sides.
PF2i Media Width Excluding Liner (c)
Measurement
Value
Maximum
58.4 mm (2.30 in)
Minimum
23.8 mm (0.94 in)
PF4i Media Width Excluding Liner (c)
132
Measurement
Value
Maximum
112.7 mm (4.43 in)
Minimum
23.8 mm (0.94 in)
PF2i and PF4i Mid-Range Printer User’s Manual
Appendix A — Specifications
Media Type
Set media type to one of these values:
•
•
Fingerprint:
•
FIX LENGTH STRIP
•
VAR LENGTH STRIP
IPL: CONTINUOUS
a
c
b
b
Self-Adhesive Strip
PF2i and PF4i Mid-Range Printer User’s Manual
133
Appendix A — Specifications
Self-Adhesive Labels
PF2i Media Width Including Liner (a)
Measurement
Value
Maximum
60 mm (2.36 in)
Minimum, standard guides
25.0 mm (1.00 in)
Minimum, quick-load guides
40 mm (1.57 in)
PF4i Media Width Including Liner (a)
Measurement
Value
Maximum
114.3 mm (4.50 in)
Minimum, standard guides
25.0 mm (1.00 in)
Minimum, quick-load guides
40 mm (1.57 in)
Minimum, wide quick-load guides
80.0 mm (3.15 in)
Liner (b)
The backing paper must not extend more than a total of 1.6 mm
(0.06 in) outside the labels and should protrude equally on both side.
Recommended minimum transparency: 40% (DIN 53147).
PF2i Label Width Excluding Liner (c)
Measurement
Value
Maximum
58.4 mm (2.30 in)
Minimum
23.8 mm (0.94 in)
PF4i Label Width Excluding Liner (c)
134
Measurement
Value
Maximum
112.7 mm (4.43 in)
Minimum
23.8 mm (0.94 in)
PF2i and PF4i Mid-Range Printer User’s Manual
Appendix A — Specifications
Label Length (d)
Measurement
Value
Maximum
Dependent on SDRAM size
Minimum
8.0 mm (0.32 in)
Note: Under ideal circumstances, a minimum label length of 4 mm
(0.16 in) could be used. It requires the sum of the label length (d) and
the label gap (e) to be larger than 7 mm (0.28 in), that batch printing is
used, and that no pull back of the media is performed. Intermec does
not guarantee that such short labels will work, but it is up to users to
test this in their unique application.
Label Gap (e)
Measurement
Value
Maximum
21.3 mm (0.83 in)
Recommended
3.0 mm (0.12 in)
Minimum
1.2 mm (0.05 in)
The Label Stop Sensor (LSS) must be able to detect the extreme front
edges of the labels.
PF2i and PF4i Mid-Range Printer User’s Manual
135
Appendix A — Specifications
a
c
d
e
b
b
Self-Adhesive Labels
Media Type
Set media type to one of these values:
136
•
Fingerprint: LABEL (w GAPS)
•
IPL: GAP
PF2i and PF4i Mid-Range Printer User’s Manual
Appendix A — Specifications
Tickets With Gaps (Gap Stock)
PF2i Media Width Including Liner (a)
Measurement
Value
Maximum
60 mm (2.36 in)
Minimum, standard guides
25.0 mm (1.00 in)
Minimum, quick-load guides
40 mm (1.57 in)
PF4i Media Width Including Liner (a)
Measurement
Value
Maximum
114.3 mm (4.50 in)
Minimum, standard guides
25.0 mm (1.00 in)
Minimum, quick-load guides
40 mm (1.57 in)
Minimum, wide quick-load guides
80.0 mm (3.15 in)
Copy Length (b)
Measurement
Value
Maximum length between slots Dependent on SDRAM size
Minimum length between slots 8.0 mm (0.32 in)
Note: Under ideal circumstances, a minimum ticket length of 4 mm
(0.16 in) could be used. It requires the sum of the copy length (b) and
the detection slit height (e) to be larger than 7 mm (0.28 in), that batch
printing is used, and that no pull back of the media is performed.
Intermec does not guarantee that such short tickets will work, but it is
up to users to test this in their unique application.
PF2i and PF4i Mid-Range Printer User’s Manual
137
Appendix A — Specifications
LSS Detection Position (c)
This position is variable. For help, see “Adjusting the Label Stop
Sensor” on page 105.
Detection Slit Length (d)
The length of the detection slit (excluding corner radii) must be a
minimum of 2.5 mm (0.10 in) on either side of the LSS detection
position (c).
Detection Slit Height (e)
Measurement
Value
Maximum
21.3 mm (0.83 in)
Recommended
1.6 mm (0.06 in)
Minimum
1.2 mm (0.05 in)
Media Type
Set media type to one of these values:
•
Fingerprint: TICKET (w GAPS)
•
IPL: MARK
Note: Do not allow a perforation to break the edge of the media,
because the media may split and jam the printer.
138
PF2i and PF4i Mid-Range Printer User’s Manual
Appendix A — Specifications
a
b
c
e
d
Tickets With Gaps (Gap Stock)
PF2i and PF4i Mid-Range Printer User’s Manual
139
Appendix A — Specifications
Tickets With Black Mark (Mark Stock)
PF2i Media Width Including Liner (a)
Measurement
Value
Maximum
60 mm (2.36 in)
Minimum, standard guides
25.0 mm (1.00 in)
Minimum, quick-load guides
40 mm (1.57 in)
PF4i Media Width Including Liner (a)
Measurement
Value
Maximum
114.3 mm (4.50 in)
Minimum, standard guides
25.0 mm (1.00 in)
Minimum, quick-load guides
40 mm (1.57 in)
Minimum, wide quick-load guides
80.0 mm (3.15 in)
Copy Length (b)
Measurement
Value
Maximum
Dependent on SDRAM size
Minimum
20 mm (0.8 in)
LSS Detection Position (c)
This position is variable. For help, see “Adjusting the Label Stop
Sensor” on page 105.
Black Mark Width (d)
The detectable width of the black mark should be at least 5.0 mm
(0.2 in) on either side of the LSS detection point.
Black Mark Length (e)
140
Measurement
Value
Maximum
21.3 mm (0.83 in)
Common
12.5 mm (0.5 in)
Minimum
5.0 mm (0.2 in)
PF2i and PF4i Mid-Range Printer User’s Manual
Appendix A — Specifications
Black Mark Y-Position (f)
Intermec recommends that you place the black mark as close to the
front edge of the ticket as possible and use a negative Stop Adjust
value to control the media feed, so the tickets can be properly torn off.
Media Type
Set media type to one of these values:
•
Fingerprint: TICKET (w MARK)
•
IPL: MARK
Note: The black mark should be non-reflective carbon black on a
whitish background. Do not allow a perforation to break the edge of
the media, because the media may split and jam the printer.
Note: Try to avoid preprint that may interfere with the detection of
the black mark. However, if your are running Fingerprint, you can use
the command LBLCOND to temporarily disable the sensor for a
specified amount of media feed to avoid unintentional detection. For
help, see the Intermec Fingerprint Command Reference Manual.
PF2i and PF4i Mid-Range Printer User’s Manual
141
Appendix A — Specifications
a
b
c
e
d
f
Tickets With Black Mark (Mark Stock)
Media With RFID Tags or Inlays (PF2i, Only)
When printing on RFID media, special consideration must be taken
to the position and shape of the tag. Specific recommendations for
different kinds of Intermec-approved RFID media can be found on
the Intermec web site at www.intermec.com. Additional information
is provided in the documentation that came with your RFID kit.
142
PF2i and PF4i Mid-Range Printer User’s Manual
Appendix A — Specifications
Accessories for the Printer
You can use these accessories (sold and ordered separately) with the
printer. To order accessories, contact your local Intermec sales
representative.
Integral Liner Takeup Unit
Use this accessory, which comes with a guide shaft, for peel-off (selfstrip) printing.
Paper Cutter (PF4i, Only)
Use this accessory to cut off continuous paper-based stock or liner
between labels. You can collect the cut-off labels, tickets, or tags in an
optional tray.
If you are running Fingerprint or Direct Protocol, you can control the
paper cutter using the commands CUT, CUT ON, and CUT OFF. For
help, see the Intermec Fingerprint Command Reference Manual.
Media Supply Hub
Use the rotating media supply hub for media roll cores with an
internal diameter of 38 to 40 mm (1.5 in).
Transfer Ribbon Mechanism (PF2i, Only)
Use the transfer ribbon mechanism to load ribbon for thermal
transfer printing. For help, see “Loading Ribbon” on page 30.
76 mm (3-in) Adapter
Use the 76 mm (3-in) adapter with a rotating media supply hub to use
media rolls with 76 mm (3-in) inner diameter cores. The adapter
cannot be used with a media supply roll post.
Label Taken Sensor
The label taken sensor (LTS) is a photoelectric sensor that enables the
printer’s firmware to detect if the last printed label, ticket, tag, etc. has
been removed before printing another copy. The LTS cannot be used
with a paper cutter.
If you are running Fingerprint or Direct Protocol, you can enable or
disable the LTS using the commands LTS& ON and LTS& OFF. For
help, see the Intermec Fingerprint Command Reference Manual.
PF2i and PF4i Mid-Range Printer User’s Manual
143
Appendix A — Specifications
Real Time Clock
The Real Time Clock (RTC) automatically keeps track of the current
time. The RTC has its own backup battery backup that lasts for at
least 10 years.
Font Card
The font card is a CompactFlash memory card loaded with doublebyte font sets including Kanji, Korean, and Chinese.
Media Cover
You can choose a short side door, long side door, or long side door
with a Bigtop (PF2i) or Megatop (PF4i) based on your printing needs.
Thick Media Printhead (PF4i, Only)
Your printer comes with an 8 dots/mm (203.2 dots/in) thermal
printhead. But, you can use the thick media printhead for media that
is 170 to 220 μm (6.6 to 8.7 mils)
Interface Boards
A number of interface boards are available for use with the printer
printer. The interface boards are either installed at the factory or can
easily be installed by an Intermec authorized service technician.
The printer can accommodate these interface boards:
144
•
802.11 Radio Interface Board
•
Parallel Interface Board (IEEE 1284)
•
Serial/Industrial Interface Board
•
RFID/Serial Interface Board (PF2i, only)
PF2i and PF4i Mid-Range Printer User’s Manual
B
Default Settings
145
Appendix B — Default Settings
Default Configuration
The following tables list the default values of the configuration
commands supported on the PF2i and PF4i. If you restore the printer
to factory default settings, the printer uses these values.
The commands are grouped by function and reflect the organization
of the IPL and Fingerprint setup menus. For detailed information on
most of the commands, see the Intermec Fingerprint Command
Reference Manual or the IPL Command Reference Manual. You can
download both documents from the Intermec web site at
www.intermec.com.
Fingerprint Default Configuration
Ser-Com “uart1:” Parameters
Parameter
Default Value
Baud rate
9600
Character length
8
Parity
None
Stop bits
1
Flow control
RTS/CTS
ENQ/ACK
XON/XOFF; data to host
XON/XOFF; data from host
Disable
Disable
Disable
Disable
New line
CR/LF
Receive buffer
1024 bytes
Transmit butter
1024 bytes
Net-Com “net1:” Parameters
146
Parameter
Default Value
New line
CR/LF
PF2i and PF4i Mid-Range Printer User’s Manual
Appendix B — Default Settings
COM Parameters
Parameter
Default Value
USB keyboard
US
Network Parameters
Parameter
Default Value
IP selection
DHCP+BOOTP
IP address
N/A
Netmask
N/A
Default router
N/A
IPv6 selection
Auto
IPv6 address
N/A
Nameserver
N/A
Nameserver6
N/A
DHCP response
Broadcast
MAC address
N/A
Network type
Ethernet (if no 802.11 radio is installed)
Wireless 802.11 (if an 802.11 radio is installed)
RFID Parameters
Parameter
Default Value
Mode
Enable
Tagadjust
+0%
Retries
1
Voidtext
N/A
Fieldstrength
100
Feedadjust Parameters
Parameter
Default Value
Startadjust
0
Stopadjust
0
PF2i and PF4i Mid-Range Printer User’s Manual
147
Appendix B — Default Settings
Media Parameters
Parameter
Default Value
X-start
8 dots/mm = 203.2 dpi
11.81 dots/mm = 300 dpi
24 dots
36 dots
Width
8 dots/mm = 203.2 dpi
11.81 dots/mm = 300 dpi
832 dots
1248 dots
Length
8 dots/mm = 203.2 dpi
11.81 dots/mm = 300 dpi
1200 dots
1800 dots
Media type
Label (with gaps)
Paper type
Thermal transfer
Ribbon constant
90
Ribbon factor
25
Label offset
0
Ribbon sensor
14
Low diameter (ribbon)
0 dots
Label constant
85
Label factor
40
Contrast
+0%
Paper sensor
10
Low diameter (paper)
0 dots
Testfeed
N/A
Testfeed mode
Fast
Len (slow mode)
0
Print Defines Parameters
148
Parameter
Default Value
Head resistance
N/A
Testprint
N/A
Print speed
100 mm/sec
LSS test
N/A
Clip default
Off
Cmd language
N/A
PF2i and PF4i Mid-Range Printer User’s Manual
Appendix B — Default Settings
Print Defines Parameters (continued)
Parameter
Default Value
Label taken sensor (LTS)
LTS adjust
LTS test
LTS value
N/A
N/A
10
IPL Default Configuration
Ser-Com Parameters
Parameter
Default Value
Baud rate
9600
Data bits
8
Parity
None
Stop bits
1
Protocol
XON/XOFF
COM Parameters
Parameter
Default Value
USB keyboard
US
Network Parameters
Parameter
Default Value
IP selection
DHCP+BOOTP
IP address
N/A
Netmask
N/A
Default router
N/A
IPv6 selection
Auto
IPv6 address
N/A
Nameserver
N/A
Nameserver6
N/A
PF2i and PF4i Mid-Range Printer User’s Manual
149
Appendix B — Default Settings
Network Parameters (continued)
Parameter
Default Value
DHCP response
Broadcast
MAC address
N/A
Network type
Ethernet (if no 802.11 radio is installed)
Wireless 802.11 (if an 802.11 radio is installed)
RFID Parameters
Parameter
Default Value
Mode
Enable
Tagread
N/A
Tagadjust
+0%
Retries
1
Voidtext
N/A
Fieldstrength
100
Test/Service Parameters
150
Parameter
Default Value
Testprint
Config
Test labels
Format
Page
UDC
Font
N/A
Data dump
No
Memory reset
All
LSS test
N/A
Cmd language
N/A
PF2i and PF4i Mid-Range Printer User’s Manual
Appendix B — Default Settings
Media Parameters
Parameter
Default Value
Media type
Gap
Paper type
DT (Direct Thermal)
LBL length dots
1200 dots
Testfeed mode
Fast
Sensitivity
420
Darkness
0%
LBL rest point
0
Form adj dots X
0
Form adj dots Y
0
Ribbon low
0
Paper low
0
Configuration Parameters
Parameter
Default Value
Emulation mode
None
Print speed
4 in/sec
Cutter
Not installed
LTS calibration
Not installed
PF2i and PF4i Mid-Range Printer User’s Manual
151
Appendix B — Default Settings
152
PF2i and PF4i Mid-Range Printer User’s Manual
C
Fingerprint and IPL Setup Menus
The setup parameters of the printer control the way the
printer operates. This appendix provides an overview of the
setup menu you can use to configure parameters for your
printer.
153
Appendix C — Fingerprint and IPL Setup Menus
Fingerprint Setup Menus
Use this section to learn about the Fingerprint setup menus and
options.
Fingerprint Main Level Setup Menu
SETUP:
SER-COM,UART1
SETUP:
NET-COM,NET1
SETUP:
COM
SETUP:
NETWORK
SETUP:
FEEDADJ
SETUP:
MEDIA
SER-COM,UART1:
PARITY
SER-COM,UART1:
STOPBITS
SER-COM,UART1:
FLOWCONTROL
PARITY:
NONE
PARITY:
EVEN
PARITY:
ODD
PARITY:
MARK
PARITY:
SPACE
STOP BITS:
1 STOP BITS:
2
FLOWCONTROL:
RTS/CTS
FLOWCONTROL:
ENQ/ACK
FLOWCONTROL:
XON/XOFF
SETUP:
RFID
SETUP:
PRINT DEFS
Fingerprint Ser-Com,UART1 Menu
SETUP:
SER-COM,UART1
SER-COM,UART1:
BAUDRATE
SER-COM,UART1:
CHAR LENGTH
BAUDRATE:
CHAR LENGTH:
115200
8 CHAR LENGTH
BAUDRATE:
300
BAUDRATE:
7
600
BAUDRATE:
1200
BAUDRATE:
2400
BAUDRATE:
4800
BAUDRATE:
9600
BAUDRATE:
19200
BAUDRATE:
38400
SER-COM,UART1:
NEW LINE
SER-COM,UART1:
REC BUF
SER-COM,UART1:
TRANS BUF
NEW LINE:
CR/LF
NEW LINE:
LFNEW LINE:
CR
REC BUF:
10000
TRANS BUF:
1024
XON/XOFF:
DATA
TO HOST
XON/XOFF:
DATA FROM HOST
Fingerprint Net-Com,NET1 Menu
SETUP:
NET-COM,NET1
NET-COM,NET1:
NEW LINE
NEW LINE:
CR/LF
NEW LINE:
LFNEW LINE:
CR
154
PF2i and PF4i Mid-Range Printer User’s Manual
Appendix C — Fingerprint and IPL Setup Menus
Fingerprint COM Menu
SETUP:
COM
COM:
USB KEYBOARD
USB KEYBOARD:
USUSB KEYBOARD:
SWEDISH
USB KEYBOARD:
FRENCH
USB KEYBOARD:
GERMAN
USB KEYBOARD:
USER DEFINED
Fingerprint Network Menu
SETUP:
NETWORK
NETWORK:
IP SELECTION
NETWORK:
IP ADDRESS
NETWORK:
NETMASK
NETWORK:
DEFAULT ROUTER
NETWORK:
IPV6 SELECTION
NETWORK:
IPV6 ADDRESS
IP SELECTION:
DHCP+BOOTP
PARITY:
MANUAL
PARITY:
DHCP
PARITY:
BOOTP
IP ADDRESS:
0.0.0.0
NETMASK:
0.0.0.0
DEFAULT ROUTER:
0.0.0.0
IPV6 SELECTION:
IPV6 ADDRESS:
AUTO
0000::000:0000:0
IPV6 SELECTION:
AUTO+DHCP
IPV6 SELECTION:
DHCP
IPV6 SELECTION:
MANUAL
NETWORK:
NAMESERVER
NETWORK:
NAMESERVER6
NETWORK:
DHCP RESPONSE
NETWORK:
MAC ADDRESS
NETWORK:
NETWORK TYPE
NAMESERVER:
0.0.0.0
NAMESERVER6:
00::0
DHCP RESPONSE:
BROADCAST
DHCP RESPONSE:
UNICAST
MAC ADDRESS:
nnnnnnnnnnnn
Read-only
NETWORK TYPE:
Ethernet
NETWORK TYPE:
Wireless 802.11
Fingerprint RFID Menu
SETUP:
RFID
These menus are only displayed when the optional RFID module is installed.
RFID:
MODE
RFID:
TAGADJUST
RFID:
RETRIES
RFID:
VOIDTEXT
RFID:
FIELDSTRENGTH
MODE:
ENABLE
MODE:
DISABLE
TAGADJUST:
+0
RETRIES:
1
VOIDTEXT:
VOID
Read-only
FIELDSTRENGTH:
72
Fingerprint Feedadj Menu
SETUP:
FEEDADJ
FEEDADJ:
STARTADJ
FEEDADJ:
STOPADJ
STARTADJ:
+0
STOPADJ:
+0
PF2i and PF4i Mid-Range Printer User’s Manual
155
Appendix C — Fingerprint and IPL Setup Menus
Fingerprint Media Menu
SETUP:
MEDIA
MEDIA:
MEDIA SIZE
MEDIA:
MEDIA TYPE
MEDIA SIZE:
XSTART
MEDIA SIZE:
WIDTH
MEDIA SIZE:
LENGTH
XSTART:
24
WIDTH:
832
LENGTH:
1200
MEDIA TYPE:
FIX
LENGTH
MEDIA
TYPE:STRIP
MEDIA
TYPE:
VAR
LENGTH
STRIP
LABEL
GAPS)
MEDIA(wTYPE:
TICKET
MARK)
MEDIA (w
TYPE:
TICKET (w GAP)
TRANSFER:
RIBBON CONSTANT
TRANSFER:
RIBBON FACTOR
TRANSFER:
LABEL OFFSET
TRANSFER:
RIBBON SENSOR
TRANSFER:
LOW DIAMETER
RIBBON CONSTANT:
90
RIBBON FACTOR:
25
LABEL OFFSET:
0
RIBBON SENSOR:
14
LOW DIAMETER:
0
MEDIA:
PAPER TYPE
PAPER TYPE:
TRANSFER
MEDIA:
CONTRAST
PAPER TYPE:
DIRECT THERMAL
156
CONTRAST:
+0%
+0%/+2%/+4%/+6%
+8%/+10%/-10%/-8%
-6%/-4%/-2%/-0%
DIRECT THERMAL:
LABEL CONSTANT
DIRECT THERMAL:
LABEL FACTOR
LABEL CONSTANT:
85
LABEL FACTOR:
40
MEDIA:
TESTFEED
MEDIA:
TESTFEED MODE
MEDIA:
LEN (SLOW MODE)
TESTFEED:
26 28 0 10
Press E to perform a
testfeed. Values are
read-only.
TESTFEED MODE:
FAST
TESTFEED MODE:
SLOW
LEN (SLOW MODE):
0
MEDIA:
PAPER
PAPER:
PAPER SENSOR
PAPER:
LOW DIAMETER
PAPER SENSOR:
10
LOW DIAMETER:
0
Only displayed if a paper sensor is installed.
PF2i and PF4i Mid-Range Printer User’s Manual
Appendix C — Fingerprint and IPL Setup Menus
Fingerprint Print Defs Menu
SETUP:
PRINT DEFS
PRINT DEFS:
HEAD RESIST
PRINT DEFS:
TESTPRINT
HEAD RESIST:
nnn
TESTPRINT:
PRINT SPEED:
DIAMONDS
100
TESTPRINT:
CHESS
TESTPRINT:
BAR
CODES #1
TESTPRINT:
BAR
CODES #2
TESTPRINT:
SETUP
INFO
TESTPRINT:
HARDWARE
INFO
TESTPRINT:
RFID
TEST LABEL
TESTPRINT:
NETWORK INFO
PRINT DEFS:
PRINT SPEED
PRINT DEFS:
LSS TEST
LSS TEST:
LSS AUTO
LSS TEST:
LSS MANUAL
LSS AUTO:
LSS [G: 1]D: 13
Toggle between
gain (G) and drive (D)
Decrease or increase
value in brackets
PRINT DEFS:
CLIP DEFAULT
PRINT DEFS:
CMD LANGUAGE
PRINT DEFS:
LTS
CLIP DEFAULT:
ONCLIP DEFAULT:
OFF
CMD LANGUAGE:
Fingerprint
CMD LANGUAGE:
Direct
Protocol
CMD LANGUAGE:
IPL
CMD LANGUAGE:
ZSim
CMD LANGUAGE:
DSim
LTS:
LTS ADJUST
LTS:
LTS TEST
LTS:
LTS VALUE
REMOVE LABEL AND
PRESS ENTER
REMOVE LABEL
ENTER TO STOP
LTS VALUE:
10
Only displayed if a paper sensor is installed.
SENSITIVITY 10
OUT OF 9-10
PF2i and PF4i Mid-Range Printer User’s Manual
157
Appendix C — Fingerprint and IPL Setup Menus
IPL Setup Menus
Use this section to learn about the IPL setup menus and options.
IPL Main Level Setup Menu
SETUP:
SER-COM
SETUP:
COM
SETUP:
NETWORK
SETUP:
RFID
SETUP:
TEST/SERVICE
SETUP:
MEDIA
SETUP:
CONFIGURATION
IPL Ser-Com Menu
SETUP:
SER-COM
SER-COM:
BAUDRATE
SER-COM:
DATA BITS
BAUDRATE:
DATA BITS:
9600
8 CHAR LENGTH
BAUDRATE:
19200
BAUDRATE:
7
38400
BAUDRATE:
57600
BAUDRATE:
115200
BAUDRATE:
1200
BAUDRATE:
2400
BAUDRATE:
4800
SER-COM:
PARITY
SER-COM:
STOP BITS
SER-COM:
PROTOCOL
PARITY:
NONE
PARITY:
EVEN
PARITY:
ODD
PARITY:
SPACE
STOP BITS:
1 STOP BITS:
2
PROTOCOL:
XONPROTOCOL:
XOFF
XON/XOFF+STATUS
PROTOCOL:
STANDARD
IPL COM Menu
SETUP:
COM
COM:
USB KEYBOARD
USB KEYBOARD:
USUSB KEYBOARD:
SWEDISH
USB KEYBOARD:
FRENCH
USB KEYBOARD:
GERMAN
USB KEYBOARD:
USER DEFINED
158
PF2i and PF4i Mid-Range Printer User’s Manual
Appendix C — Fingerprint and IPL Setup Menus
IPL Network Menu
SETUP:
NETWORK
NETWORK:
IP SELECTION
NETWORK:
IP ADDRESS
NETWORK:
NETMASK
NETWORK:
DEFAULT ROUTER
NETWORK:
IPV6 SELECTION
IP SELECTION:
DHCP+BOOTP
PARITY:
MANUAL
PARITY:
DHCP
PARITY:
BOOTP
IP ADDRESS:
0.0.0.0
NETMASK:
0.0.0.0
DEFAULT ROUTER:
0.0.0.0
IPV6 SELECTION:
IPV6 ADDRESS:
AUTO
0000::000:0000:0
IPV6 SELECTION:
AUTO+DHCP
IPV6 SELECTION:
DHCP
IPV6 SELECTION:
MANUAL
NETWORK:
NAMESERVER
NETWORK:
NAMESERVER6
NETWORK:
DHCP RESPONSE
NETWORK:
MAC ADDRESS
NETWORK:
NETWORK TYPE
NAMESERVER:
0.0.0.0
NAMESERVER6:
00::0
DHCP RESPONSE:
BROADCAST
DHCP RESPONSE:
UNICAST
MAC ADDRESS:
nnnnnnnnnnnn
Read_only
NETWORK TYPE:
Ethernet
NETWORK TYPE:
Wireless 802.11
NETWORK:
IPV6 ADDRESS
IPL RFID Menu
SETUP:
RFID
Only displayed if an RFID module is installed.
RFID:
MODE
RFID:
TAGREAD
RFID:
TAGADJUST
RFID:
RETRIES
RFID:
VOIDTEXT
RFID:
FIELDSTRENGTH
MODE:
ENABLE
MODE:
DISABLE
TAGREAD:
TAGADJUST:
+0
RETRIES:
1
VOIDTEXT:
VOID
Read-only
FIELDSTRENGTH:
100
Read-only
IPL Test/Service Menu
SETUP:
TEST/SERVICE
TEST/SERVICE:
TESTPRINT
TESTPRINT:
CONFIG
TESTPRINT:
TEST LABELS
TESTPRINT:
FORMAT
TESTPRINT:
PAGE
TESTPRINT:
UDC
TESTPRINT:
FONT
CONFIG:
SWCONFIG:
HWCONFIG:
RFIDLABEL
CONFIG:
NETWORK
TEST LABELS:
PITCH
TEST LABELS:
PRINT QUALITY
FORMAT:
ALL
PAGE:
ALL
UDC:
ALL
FONT:
ALL
ALL:
PRINT FORMATS
ALL:
PRINT PAGES
ALL:
PRINT UDCs
ALL:
PRINT UDFs
TEST/SERVICE:
DATA DUMP
TEST/SERVICE:
MEMORY RESET
TEST/SERVICE:
LSS TEST
TEST/SERVICE:
CMD LANGUAGE
PRINT DEFS:
LTS
DATA DUMP:
NODATA DUMP:
YES
MEMORY RESET:
ALL
MEMORY RESET:
CONFIGURATION
LSS TEST:
LSS AUTO
CMD LANGUAGE:
IPL
CMD LANGUAGE:
ZSim
CMD LANGUAGE:
DSim
CMD LANGUAGE:
Fingerprint
CMD LANGUAGE:
Direct Protocol
LTS:
LTS ADJUST
LTS:
LTS TEST
LTS:
LTS VALUE
REMOVE LABEL AND
PRESS ENTER
REMOVE LABEL
ENTER TO STOP
LTS VALUE:
10
LSS AUTO:
Only displayed if a paper sensor is installed.
SENSITIVITY 10
OUT OF 9-10
PF2i and PF4i Mid-Range Printer User’s Manual
159
Appendix C — Fingerprint and IPL Setup Menus
IPL Media Menu
SETUP:
MEDIA
MEDIA:
MEDIA TYPE
MEDIA:
PAPER TYPE
MEDIA:
LBL LENGTH DOTS
MEDIA:
TESTFEED MODE
MEDIA:
SENSITIVITY
MEDIA:
DARKNESS
MEDIA TYPE:
GAP
MEDIA TYPE:
MARK
MEDIA TYPE:
CONTINUOUS
PAPER TYPE:
DT
PAPER TYPE:
TTR
LBL LENGTH DOTS:
1200
100/200/400/800/
1200/1600/2000/
2500/3000/3600/
4200/4800
TESTFEED MODE:
FAST
SENSITIVITY:
420
120/130/140/160/170/
180/222/226/236/238/
366/369/420/440/450/
460/470/480/513/527/
533/563/565/567/623/
627/633/647/673/677/
687/720/854/864
DARKNESS:
0
0/1/2/3/4/5/6/7/8/
9/10/-10/-9/-8/-7/
-6/-5/-4/-3/-2/-1
MEDIA:
LBL REST POINT
MEDIA:
FORM ADJ DOTS X
LBL REST POINT:
FORM ADJ DOTS X:
0
0
0/2/4/6/8/10/15/20/25/ -30 to 500
30/-30/-25/-20/-15/-10/
-8/-6/-4/-2
MEDIA:
FORM ADJ DOTS Y
MEDIA:
RIBBON LOW
MEDIA:
PAPER LOW
FORM ADJ DOTS Y:
0
-30 to 500
RIBBON LOW:
PAPER LOW:
0
0
0/5/10/15/20/25/30/35/ 0/10/20/30/40/50/60/70/
40/45/50/55/60/65/70/ 80/90/100/110/120/130/
75/80
140/150
IPL Configuration Menu
SETUP:
CONFIGURATION
CONFIGURATION:
PWRUP EMULATION
PWRUP EMULATION:
EMULATION MODE
CONFIGURATION:
PRINT SPEED
PRINT SPEED:
5PRINT
IN/SEC
SPPED:
6PRINT
IN/SEC
SPPED:
7PRINT
IN/SEC
SPPED:
EMULATION MODE:
8PRINT
IN/SEC
SPPED:
NONE
EMULATION MODE:
2PRINT
IN/SECSPPED:
5MIL
EMULATION MODE:
3PRINT
IN/SEC
SPPED:
86XX-10MIL
4 IN/SEC
EMULATION MODE:
86XX-15MIL
160
CONFIGURATION:
CUTTER
CONFIGURATION:
LTS CALIBRATION
CUTTER:
NOT
INSTALLED
CONFIG:
ENABLE
CONFIG:
DISABLE
LTS CALIBRATION:
PRESS <ENTER>
Labels are fed out
REMOVE LABEL AND
PRESS ENTER
Press E
SENSITIVITY 9
OUT OF 8-14
Read only,
press E
PF2i and PF4i Mid-Range Printer User’s Manual
D
Advanced Configuration
This appendix contains information on the printer file system
and how to modify the appearance of the printer web page.
161
Appendix D — Advanced Configuration
Printer File System (Fingerprint)
As you access the printer for communications, you encounter
different parts of the printer file system. The following sections
contain a device tree structure and brief descriptions of the different
devices and directories of the file system.
Device Tree Structure
This illustration shows the device tree structure of the printer.
/ (root)
c
ADMIN
boot
card1
dev
pffs
rom
images
secure
tmp
Devices and Directories
The file system of the printer is case-sensitive, which is important
because filenames in Fingerprint commands are translated into
capital letters by default. Directories or files with lowercase names are
inaccessible for Fingerprint commands and programs.
162
PF2i and PF4i Mid-Range Printer User’s Manual
Appendix D — Advanced Configuration
The commands you use depend on how you navigate the printer file
system:
•
If you are accessing the printer through an FTP client or a web
browser, you can easily navigate through the different devices and
directories. Lowercase letters are not an issue for FTP or a web
browser.
•
If you are accessing the printer through raw TCP (“net1:”), you use
Fingerprint to communicate with the printer. Because Fingerprint
commands are translated into uppercase letters, you are restricted
from accessing devices and directories with lowercase names. For
more information on using Fingerprint, see the Intermec
Fingerprint Command Reference Manual.
/(root)
The root node is write protected to preserve the device and file
structure of the printer.
/c (or c:)
/c is the user file system. You can create directories here to store files
such as programs, fonts, and images.
/c/ADMIN (or c:ADMIN)
This directory is only accessible for the admin user. It contains start
order, Fingerprint restrictions, and other configuration parameters
only configurable for an administrator.
/c/boot (or c:boot)
This directory contains the firmware, password file, and other system
information.
/card1 (or card1:)
This directory is the CompactFlash (CF) card file system used to store
files such as large fonts and images. You can also use the CF card to
upgrade printer firmware.
/dev
This directory contains devices used for input/output, such as uart1,
Flash, net1, parallel IEEE 1284.
PF2i and PF4i Mid-Range Printer User’s Manual
163
Appendix D — Advanced Configuration
/pffs (or pffs:)
The power fail file system is used to store files that need to be saved
when the printer is turned off. Files stored in this location cannot
exceed 256 bytes each. The total size of the “pffs” unit is 32 KB.
/rom (or rom:)
This device is used to store a collection of files that are available by
default in the printer, for example the default web pages, fonts, and
images.
/rom/images (or rom:images)
This directory is used to store images used for the default web pages.
/rom/secure (or rom:secure)
This directory is used to store the password protected web pages.
/tmp (or tmp:)
This is the printer’s temporary read/write memory. Files in this
location are not saved when the power is turned off or if there is a
power failure. Do not store valuable data in this location. You may
want to use “tmp:” instead of “/c” to temporarily store data, because
data can be written to SDRAM faster than to the flash memory.
Customizing the Printer Home Page
The easiest way to modify the appearance of the printer web page is to
create an HTML file called “INDEX.HTM” on the device “/c” with
custom designed logo and colors. From this file you can easily link to
the printer configuration pages. The web server generates these web
pages with dynamic information on the fly. This process makes the
real-time generated pages of the printer appear in the Intermec style.
The colors and logo of the customer are ignored.
164
PF2i and PF4i Mid-Range Printer User’s Manual
Appendix D — Advanced Configuration
Web Style Guide Files
The printer network cards customizes the default web pages by
changing the configuration of the engine that generates the pages.
While generating the pages, the web server accesses configuration
parameters, like the background color, the name of logos to display
on the page and generates the HTML code. Default configuration of
these parameters makes the printer’s web page appear in the Intermec
style, with corporate colors and logos. When changing the
parameters, the web pages are permanently customized.
Customization of these parameters has to be done in specific files
called “Web Style Guide Files”, assigning user-defined values to several
support environment variables.
Web style guide files contain parameters to set web page content and
layout. These files can be stored either on /c or pffs:.
In the file system, /c has priority over pffs:, which implies that if there
is a web style guide on /c (for example /c/webstyleguide.0), the printer
will not look for pffs:webstyleguide.1. Intermec recommends that you
store web style guides on pffs to minimize the risk of them being
accidentally removed.
Content of a Web Style Guide File
A Web Style Guide file has to contain a set of mandatory environment
variables and it can also contain optional variables. All variables have
to be lowercase, followed by a “=” sign and a consistent value. There is
no specific order of the variables.
Required Environment Variables
Use the reference table below to understand all of the required
environment variables.
Understanding Required Environment Variables
Variable
Description
bgco
Background color, BGCOLOR attribute of BODY tag.
coli
Copyright link, link to html file showing Copyright notes.
cona
Company name.
PF2i and PF4i Mid-Range Printer User’s Manual
165
Appendix D — Advanced Configuration
Understanding Required Environment Variables (continued)
Variable
Description
loat
Logotype attributes, contains all attributes for the IMG-tag to
replace the Intermec logo.
trna
Trade name.
Optional Environment Variables
The optional environment variables are used to specify extra
parameters; for instance, these variables permit to change the printer’s
model name. The web server only recognizes the following model
names:
•
PF2i
•
PF4i
•
PM4i
•
PX4i
•
PX6i
The web server checks the available hardware and then displays the
correct model name in the web page. If the page has to show a
different name of the printer, the web style guide file has to contain
the optional variable printer=your name.
Optional Variables Reference Table
Variable Description
166
Comments
alco
Active link color, ALINK attribute of
BODY tag.
BGLI
Background image link, BACKGROUND
attribute of BODY tag.
heon
Help on, enables a help link on the page.
heli
Help link, link associated to the Help tag.
hena
Help link name, the label to be shown on
the web page.
If this parameter is in
the webstyle guide
file, the variables
“heli” and “hena”
must have a value.
PF2i and PF4i Mid-Range Printer User’s Manual
Appendix D — Advanced Configuration
Optional Variables Reference Table (continued)
Variable Description
Comments
lico
Link color, LINK attribute of BODY tag.
suon
Support link on, enables a support link on If this parameter is in
the page.
the webstyle guide
file, then the
variables “suli” and
“suna” must have a
value.
suli
Support link, this is the link associated
withe the support tag.
suna
Support link name, this is the label to be
shown on the web page.
teco
Text color, TEXT attribute of the BODY
tag.
vlco
Visited link color.
x-www-url-Encoding Syntax Rules
The value given to environment variables has to be specified
respecting the x-www-url-encoding syntax rules. According to the
syntax rules, characters can be inserted using the notation %<ASCII
Hex>. For example, space in the ASCII table has the Hex number 20 so
it corresponds to %20. For example, “Intermec Technologies
Corporation” corresponds to
“Intermec%20Technologies%20Corporation” (it can also be written
“Intermec+Technologies+Corporation”).
Colors are specified according to the RGB syntax: %23cdcdcd
corresponds to #cdcdcd.
Any quotation marks (%22) must be preceded by a back slash (\).
The file must contain only one line, where the different variables and
valuers are separated by ampersand (&) characters.
PF2i and PF4i Mid-Range Printer User’s Manual
167
Appendix D — Advanced Configuration
Memory and Storage
Web Style Guide files are designed to be placed on the printer’s pffs, as
mentioned. Due to the memory limits of the pffs the environment
variables have very short name (4 bytes), which may make them less
user friendly to use, but this allows more space to be used for the value
of the variable.
There is also a size limit per file that is set to 256 bytes. In case the
Web Style Guide File you want to create is bigger than 256 bytes, the
content has to be split in more than one file.
The parser daemon will start looking for the first Web Style Guide
File which has to be named “webstyleguide.0”, then it will try to read
the next file called “webstyleguide.1” and so on.
Creating a Web Style Guide File
You can create Web Style Guide Files with a standard text editor and
then transfer them to the printer. Follow these rules when creating a
Web Style Guide File:
•
The name has to be lowercase.
•
The first file has to have extension “.0”. The following files have to
have sequential extension number if one number is missing in the
sequence the parser will stop reading the files.
•
The split point between one web style guide and the other cannot
be in the middle of a line. The last line of the file has to be
consistent in the syntax and the first line of the following web style
guide file has to be a new line.
•
If variables are specified more than one time, the last value is the
one assumed.
Intermec recommends that you use the FTP server to transfer the
files.
Example (the default Web Style Guide):
bgco=%23ffffff&loat=src%3d\%22/rom/images/
itclogo1.gif\%22+align%3dbottom+alt%3d\%22Intermec_
Technologies_Corporation\ %22+border%3d0
&cona=Intermec+Technologies+Corporation&coli=copyrigh
t.htmf&suli=support.htmf&suna=Support&suon=t&trna=Eas
yCoder
168
PF2i and PF4i Mid-Range Printer User’s Manual
I
Index
169
Index
Numerics
76 mm (3-in) adapter,
accessory 143
802.11
choosing as network type 77, 86
radio
communications,
setting up 47
connection,
troubleshooting 100
security, setting from
web page 80
802.1x
configuring from web page 82
settings, described 82
A
accessories, printer 143
adjusting
LSS position 105
pressure arm 104
printhead pressure 109
ribbon break shaft 110
advanced configuration 161
alerts
configuring from web page 67
settings, described 68
application break, error message 93
application load error, error
message 93
authentication modes,
supported 47
Automatic Provision (PAC),
turning on or off 83
Avalanche
configuring from web page 78
settings, described 78
Avalanche, using to configure the
printer 86
B
back view of printer 3
bar code scanner, connecting to
printer 58
batch takeup
label taken sensor accessory 143
loading media 16, 24
blank printout, troubleshooting 99
bleeding, troubleshooting 98
buttons, understanding 6
170
C
calibrating the sensor 96
CF card
font card accessory 144
using to download fonts and
graphics 89
using to upgrade firmware 88
changing command language 5
Class 1 tag, troubleshooting 102
cleaning
exterior 114
media guides 114
printhead 116
COM menu
Fingerprint 155
IPL 158
command language
changing from the Setup
menu 5
changing from web page 66
selecting at startup 4
communications
page 63
ports and options 124
setting up 802.11 radio 47
setting up Ethernet 44
settings, configuring 63
compressed printout,
troubleshooting 99
configuration
advanced 161
menu, IPL 160
settings, changing 60–85
contacting Product Support 92
control panel
illustrated 5
understanding 5
core and roll, media
specifications 130
cover, options 144
creating labels 39
cut-off printing, loading media 24
cutter, error message 93, 96
D
default configuration
Fingerprint 146
IPL 149
serial port settings 42
settings 146–151
PF2i and PF4i Mid-Range Printer User’s Manual
Index
default configuration (continued)
viewing and changing with web
page 66
device tree structure 162
DHCP, default setting 44
directories, printer 162
door, options 144
downloading
firmware 88
fonts and graphics 89
PrintSet 88
DSim, command language
changing 5
described 4
E
EAP Type, choosing 802.1x with
web page 82
error
messages, understanding 93
numbers 93–97
error in filename, error message 101
Ethernet
choosing as network type 86
choosing network type 77
connection,
troubleshooting 100
interface description 128
LEDs, understanding 129
setting up communications 44
exterior, cleaning 114
external supply, loading media 30
F
factory default
resetting the printer 102
settings 146–151
Feed button, described 6
Feedadj menu, Fingerprint 155
file system, Fingerprint printer 162
Fingerprint
COM menu 155
command language
changing 5
described 4
configuring wireless security 50
default configuration 146
Feedadj menu 155
Media menu 156
Net-Com, NET1 menu 154
Network menu 155
Print Defs menu 157
PF2i and PF4i Mid-Range Printer User’s Manual
RFID menu 155
Ser-Com, UART1 menu 154
Setup menu illustration 61
sounds, described 8
using commands to upgrade
firmware 89
using to configure network
type 87
using to configure the printer 84
using to download fonts and
graphics 89
using to serially configure IP
settings 46
firmware
downloading updates 88
upgrading
overview 88
using PrintSet 88
with CF card or USB mass
storage device 88
with printer commands 89
upgrading with web page 89
font card, accessory 144
fonts, downloading 89
front view of printer 3
G
General network web page
configuring settings 69
understanding settings 69
generic DP error, error message 93
graphics, downloading 89
H
head lifted, error message 93
home page
customizing printer 164
illustration 45
printer login and password 45
humidity specifications 124
HyperTerminal
sending configuration
commands 84
setting up wireless
communications 49
turning on typing with IPL 85
I
i button, described 6
IEEE 1284
interface, pins and
descriptions 129
171
Index
IEEE 1284 (continued)
port, using to connect printer to
PC 43
incomplete printout,
troubleshooting 99
Information button, described 6
Information mode, using to find IP
address 45
initial startup screen 4
inner authentication, choosing
802.1x with web page 82
Integral Liner Takeup Unit 143
InterDriver software, how to
download 43
interface
Ethernet 128
IEEE 1284 129
serial 126
standard 126
USB 127
USB host 128
interface board, accessory 144
Intermec Ready-to-Work Indicator
blinking 93–97
described 7
off 93–97
IP address
configuring manually 46
retrieving with DHCP 45
IP configuration error, error
message 94, 97
IP link error, error message 94
IP settings, configuring serially 46
IPL
COM menu 158
command language
changing 5
described 4
Configuration menu 160
configuring wireless security 53
default configuration 149
Media menu 160
Network menu 159
RFID menu 159
Ser-Com menu 158
Setup menu illustration 61
sounds, described 8
Test/Service menu 159
using commands to upgrade
firmware 89
172
using to configure network
type 87
using to configure the printer 84
using to download fonts and
graphics 89
using to serially configure IP
settings 46
IPV4 settings, web page,
described 75
IPV6 settings, web page,
described 75
ISO 18000-6B tag, write
protected 102
K
keyboard
changing layout 57
configuring layout from web
page 63
connecting to the printer 57
Knowledge Central, web site 92
L
label
creating and printing 39
printing test 36
label not taken, error message 94
label taken sensor, accessory 143
LEDs, described 6
line
dark, troubleshooting 98
missing, troubleshooting 99
white, troubleshooting 98
loading media
batch takeup 16, 24
cut-off printing 24
described 8
from an external supply 30
LTS 16, 24
peel-off printing 16
self-strip printing 16
tear-off printing 9
loading ribbon 30
login name, home page 45
LSS position, adjusting 105
LSS too high, error message 94
LSS too low, error message 94
LSS, testing 106
LTS
accessory 143
loading media 16, 24
PF2i and PF4i Mid-Range Printer User’s Manual
Index
M
mail settings, configuring from web
page 71
maintaining the printer 113
maintenance, error message 94
media
feed direction, configuring 65
loading 8
menu
Fingerprint 156
IPL 160
not feeding,
troubleshooting 100
RFID, printing on 39
roll diameter, max and min 125
settings, configuring 63
specifications 130
core and roll 130
non-adhesive strip 130
self-adhesive labels 134
self-adhesive strip 132
tickets with black mark 140
tickets with gaps 137
thicker or thinner, adjusting
for 109
web page 63
width, max and min 125
media guides, cleaning 114
media supply hub, accessory 143
memory and storage, web style
guide 168
memory, printer 124
missing part of printout,
troubleshooting 99
missing printout,
troubleshooting 99
N
navigating in Setup mode 60
Net-Com, NET1 menu,
Fingerprint 154
Network menu
Fingerprint 155
IPL 159
network type
choosing Ethernet or wireless
802.11 86
choosing from the screen 87
choosing with printer
commands 87
configuring from web page 77
PF2i and PF4i Mid-Range Printer User’s Manual
network, connecting your
printer 44
new features 2
next label not found, error
message 94
no printhead, error message 96
no RFID support installed, error
message 94
no RFID support, error
message 101
no tag found, error
message 94, 101, 102
non-adhesive strip, media
specifications 130
not supported by tag type, error
message 101
O
optional environment variables,
web style guide 166
out of paper, error message 94
out of transfer ribbon, error
message 94
P
paper cutter, accessory 143
paper fault, error message 96
paper out, error message 96
paper sensor, accessory 143
parallel port
pins and descriptions 129
using to connect printer
to PC 43
password
changing with web page 69
home page 45
pause button, described 6
peel-off printing, loading media 16
performing a testprint 36
physical specifications 124
power LED, described 6
power specifications 124
power supply over temperature,
error message 94, 96
press feed, error message 96
pressure arm, adjusting 104
print button, described 6
Print Defs menu, Fingerprint 157
print engine settings,
configuring 65
print speed, configuring 65
print width, max and min 125
173
Index
printer
accessories 143
adjusting 103
break shaft 110
LSS 105
pressure arm 104
printhead pressure 109
back view 3
choosing network type from the
screen 87
configuring 60–85
from screen 60
from the home page 62
using commands 84
using PrintSet 84
using SmartSystems
Foundation 85
using Wavelink Avalanche 86
connecting to a PC 42–44
through the IEEE 1284
port 43
through the serial port 42
through the USB device
port 43
connecting to your network 44
directories, Fingerprint file
system 162
file system, Fingerprint 162
front view 3
home page
login name and password 45
problems connecting to,
troubleshooting 100
identifying parts 3
initial startup screen 4
maintaining 113
memory 124
modifying web page 161
resetting 102
ribbon break shaft,
adjusting 110
slow, troubleshooting 101
sounds, described 8
specifications 124
standard interfaces 126
troubleshooting 92
printer crash, error message 95
printer home page
illustration 45
using to configure printer 62
printer name, viewing 69
174
printhead
cleaning 116
pressure, adjusting 109
replacing 118
special, accessory 144
up, error message 96
printhead hot, error message 96
printhead not found, error
message 95, 96
printhead too hot, error message 95
printing
a test label 36
labels, how to 39
on RFID media 39
printout
blank, troubleshooting 99
compressed, troubleshooting 99
dark, troubleshooting 98
incomplete, troubleshooting 99
lines, troubleshooting 98
partly missing,
troubleshooting 99
spots, troubleshooting 98
weak, troubleshooting 97
PrintSet
downloading 88
using to configure the printer 84
using to download fonts and
graphics 89
using to set up wireless
communications 48
using to upgrade firmware 88
Product Support, contacting 92
PSU over temperature, error
message 96
R
real time clock, accessory 144
replacing, printhead 118
required environment variables,
web style guide 165
resetting the printer 102
RFID
error codes, troubleshooting 102
media, printing on 39
menu
Fingerprint 155
IPL 159
settings, configuring 64
troubleshooting 101–102
web page 64
PF2i and PF4i Mid-Range Printer User’s Manual
Index
RFID inactive, error message 101
ribbon
breaks, troubleshooting 99
loading thermal transfer 30
not winding, troubleshooting 99
roll diameter, max and min 125
width, max and min 125
wrinkles, troubleshooting 100
ribbon break shaft, adjusting 110
ribbon out, error message 97
RS-232 serial interface 126
RtW blink by application, error
message 95
RtW off by application, error
message 95
S
scanner, connecting to printer 58
screen
choosing network type 87
initial startup 4
understanding 7
using to configure the printer 60
security, configuring wireless 80
selecting a command language 4
self-adhesive labels, media
specifications 134
self-adhesive strip, media
specifications 132
self-strip printing, loading
media 16
sensor, calibrating 96
Ser-Com, UART1 menu,
Fingerprint 154
serial communications,
configuring from web
page 63
serial interface
default settings 126
illustration and pin
descriptions 126
serial port
default communication
settings 42
using to connect printer
to PC 42
Setup button, described 6
Setup menu
changing command language 5
Fingerprint illustration 61
IPL illustration 61
PF2i and PF4i Mid-Range Printer User’s Manual
setup menus
Fingerprint 154
IPL 158
Setup mode
entering 60
navigating 60
Shift button, described 6
slow printing, troubleshooting 101
SmartSystems
configuring with web page 79
Foundation, using to configure
the printer 85
SNMP
configuring with web page 73
setting descriptions 74
sounds, described 8
specifications
humidity 124
media 130
physical 124
power 124
printer 124
temperature 124
SSID 80
status LED, described 6
style guide
content of web 165
creating web 168
memory and storage 168
optional environment
variables 166
required environment
variables 165
URL encoding syntax rules 167
web pages 165
T
tag format error, error message 102
TCP/IP
configuring with web page 75
setting described 75
tear-off printing, loading media 9
temperature specifications 124
test labels
printing from Setup menu 36
printing from web page 66
Test/Service menu, IPL 159
testfeed not done, error message 95
testfeed, described 6
thermal transfer ribbon, loading 30
175
Index
thumb drive. See USB mass storage
drive
tickets with black mark, media
specifications 140
tickets with gaps, media
specifications 137
troubleshooting
printer 92
resetting the printer 102
U
updates, downloading firmware 88
upgrading firmware 88
URL encoding syntax rules, web
style guide 167
USB
host interface, pins and
descriptions 128
hub, connecting to printer 58
interface description 127
USB device port, using to connect
printer to PC 43
USB host port
connecting a USB hub 58
connecting bar code scanner 58
connecting keyboard 57
connecting peripherals 57
USB mass storage device
using to download fonts and
graphics 89
using to upgrade firmware 88
using with printer 57
V
views, printer 3
W
Wavelink Avalanche
configuring from web page 78
settings, described 78
using to configure the printer 86
weak printout
preventing 104
troubleshooting 97
176
web page
creating a web style guide 168
customizing the home page 164
modifying printer 161
style guide content 165
style guide files 165
using to configure printer 62
using to upgrade firmware 89
Web Shell settings
configuring 66
described 66
web style guide files 165
WEP
configuring with Fingerprint 50
configuring with IPL 53
keys 80
web page setting and
description 80
Wi-Fi certified information 2
wireless LAN, configuring from
web page 80
wireless security
configuring from web page 80
configuring with Fingerprint 50
configuring with IPL 53
WPA 81
configuring with Fingerprint 51
configuring with IPL 54
WPA2
configuring with Fingerprint 51
configuring with IPL 54
WPA2-PSK
configuring with Fingerprint 50
configuring with IPL 54
WPA-PSK 81
configuring with Fingerprint 50
configuring with IPL 54
wrinkling, troubleshooting 110
writer protected ISO 18000-6B
tag 102
Z
ZSim, command language
changing 5
described 4
PF2i and PF4i Mid-Range Printer User’s Manual
Worldwide Headquarters
6001 36th Avenue West
Everett, Washington 98203
U.S.A.
tel 425.348.2600
fax 425.355.9551
www.intermec.com
© 2009 Intermec Technologies
Corporation. All rights reserved.
PF2i and PF4i Mid-Range Printer User’s Manual
*935-023-001*
P/N 935-023-001