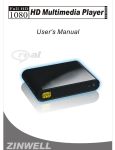
Download Edimax MA-2000 Digital Network Media Adapter
Transcript
1 Table of Contents Chapter I Production Introduction……………………………………….…………7 1-1 Package Contents…………………………………………………………7 1-2 Safety Introductions……………………………………………………….8 1-3 System Requirements……...……………………………………………10 1-4 Highlights of the Digital Network Media Adapter..….…………….……11 1-5 Familiar with the Digital Network Media Adapter/Remote Controller..… ……………………………………………………………...12 1-6 Install the Digital Network Media Adapter.…………..…….…………...18 Chapter II Using the Digital Network Media Adapter…………..……............…21 2-1 General Settings…………………………………….……………………21 2-2 OSD Home Menu Instructions…………………………………………..23 2-2-1 Setup Menu Instructions………………………………………………25 2-2-2 IP Camera Menu Instructions…………………………………………30 2-2-3 Network Media Menu Instructions………………..…..………………32 2-2-4 USB Storage Menu Instructions……………………………………...36 2-2-5 Download Media Menu Instructions………………………………….37 Chapter III Start Using Multi-Media Payback……………………………………39 3-1 Music Playback…………………………………………………………...39 3-2 Video Playback………………………………………………………...…41 3-3 Photo Playback………………………………………………………...…44 Chapter III Troubleshooting……………………………………………………….46 Chapter IV Specification…………………………………………………………..47 2 Copyright by Edimax Technology Co, LTD. all rights reserved. No part of this publication may be reproduced, transmitted, transcribed, stored in a retrieval system, or translated into any language or computer language, in any form or by any means, electronic, mechanical, magnetic, optical, chemical, manual or otherwise, without the prior written permission of this company. This company makes no representations or warranties, either expressed or implied, with respect to the contents hereof and specifically disclaims any warranties, merchantability or fitness for any particular purpose. Any software described in this manual is sold or licensed "as is". Should the programs prove defective following their purchase, the buyer (and not this company, its distributor, or its dealer) assumes the entire cost of all necessary servicing, repair, and any incidental or consequential damages resulting from any defect in the software. Further, this company reserves the right to revise this publication and to make changes from time to time in the contents hereof without obligation to notify any person of such revision or changes. The product you have purchased and the setup screen may appear slightly different from those shown in this QIG. For more detailed information about this product, please refer to the User Manual on the CD-ROM. The software and specifications are subject to change without notice. Please visit our web site www.edimax.com for the update. All rights reserved including all brand and product names mentioned in this manual are trademarks and/or registered trademarks of their respective holders. Notice according to GNU/GPL-Version 2 This product includes software that is subject to the GNU/GPL-Version 2. You find the text of the license on the product cd/dvd. The program is free software and distributed without any warranty of the author. We offer, valid for at least three years, to give you, for a charge no more than the costs of physically performing source distribution, a complete machine-readable copy of the corresponding source code. Please contact Edimax at: Edimax Technology co., Ltd, NO. 3, Wu-Chuan 3rd RD Wu-Ku-Industrial Park, Taipei Hsien, Taiwan. R.O.C., TEL : +886-2-77396888, FAX : +886-2-77396887, [email protected] 3 Federal Communication Commission Interference Statement FCC Part 68 This equipment complies with Part 68 of the FCC Rules. On the bottom of this equipment is a label that contains the FCC Registration Number and Ringer Equivalence Number (REN) for this equipment. You must provide this information to the telephone company upon request. The REN is useful to determine the quantity of devices you may connect to the telephone line and still have all of those devices ring when your number is called. In most, but not all areas, the sum of the REN of all devices connected to one line should not exceed five (5.0). To be certain of the number of devices you may connect to your line, as determined by the REN, you should contact your local telephone company to determine the maximum REN for your calling area. If the modem causes harm to the telephone network, the telephone company may discontinue your service temporarily. If possible, they will notify you in advance. But if advance notice isn't practical, you will be notified as soon as possible. You will be advised of your right to file a complaint with the FCC. The telephone company may make changes in its facilities, equipment, operations, or procedures that could affect the proper operation of your equipment. If they do, you will be notified in advance to give you an opportunity to maintain uninterrupted telephone service. If you experience trouble with this modem, please contact your dealer for repair/warranty information. The telephone company may ask you to disconnect this equipment from the network until the problem has been corrected or you are sure that the equipment is not malfunctioning. 4 This equipment may not be used on coin service provided by the telephone company. Connection to party lines is subject to state tariffs. Installation This device is equipped with a USOC RJ11C connector. FCC Part 15 This equipment has been tested and found to comply with the limits for a Class B digital device, pursuant to Part 15 of FCC Rules. These limits are designed to provide reasonable protection against harmful interference in a residential installation. This equipment generates, uses, and can radiate radio frequency energy and, if not installed and used in accordance with the instructions, may cause harmful interference to radio communications. However, there is no guarantee that interference will not occur in a particular installation. If this equipment does cause harmful interference to radio or television reception, which can be determined by turning the equipment off and on, the user is encouraged to try to correct the interference by one or more of the following measures: 1. Reorient or relocate the receiving antenna. 2. Increase the separation between the equipment and receiver. 3. Connect the equipment into an outlet on a circuit different from that to which the receiver is connected. 4. Consult the dealer or an experienced radio technician for help. FCC Caution This equipment must be installed and operated in accordance with provided instructions and a minimum 20 cm spacing must be provided between computer mounted antenna and person’s body (excluding extremities of hands, wrist and feet) during wireless modes of operation. This device complies with Part 15 of the FCC Rules. Operation is subject to the following two conditions: (1) this device may not cause harmful interference, and (2) this device must accept any interference received, including interference that may cause undesired operation. Any changes or modifications not expressly approved by the party responsible for compliance could void the authority to operate equipment. Federal Communication Commission Radiation Exposure Statement This equipment must be installed and operated in accordance with provided 5 instructions and a minimum 20 cm spacing must be provided between computer mounted antenna and person’s body (excluding extremities of hands, wrist and feet) during wireless modes of operation. The equipment version marketed in US is restricted to usage of the channels 1-11 only. R&TTE Compliance Statement This equipment complies with all the requirements of DIRECTIVE 1999/5/EC OF THE EUROPEAN PARLIAMENT AND THE COUNCIL of March 9, 1999 on radio equipment and telecommunication terminal Equipment and the mutual recognition of their conformity (R&TTE). The R&TTE Directive repeals and replaces in the directive 98/13/EEC (Telecommunications Terminal Equipment and Satellite Earth Station Equipment) As of April 8, 2000. Safety This equipment is designed with the utmost care for the safety of those who install and use it. However, special attention must be paid to the dangers of electric shock and static electricity when working with electrical equipment. All guidelines of this and of the computer manufacture must therefore be allowed at all times to ensure the safe use of the equipment. EU Countries Intended for Use The ETSI version of this device is intended for home and office use in Austria, Belgium, Denmark, Finland, France, Germany, Greece, Ireland, Italy, Luxembourg, Bulgaria, Cyprus, Czech Republic, Estonia, Hungary, Latvia, Lithuania, Malta, Poland, Romania, Slovakia, Slovenia, the Netherlands, Portugal, Spain, Sweden, and the United Kingdom. The ETSI version of this device is also authorized for use in EFTA member states: Iceland, Liechtenstein, Norway, and Switzerland. EU Countries Not intended for use None. CE Mark Warning This is a class B product. In a domestic environment, this product may cause radio interface, in which case the user may be required to make adequate measures. A CE declaration of conformity is available on www.edimax.com 6 Chapter I Product Introduction 1-1 Package Contents Thank you for purchasing this Digital Network Media Adapter! Before you start to use this product, please check every item in the package. If any of them is missing, please ask your dealer of purchase for a new package. Packaging List Item No. Name Quantity 1 Digital Network Media Adapter 1 2 Remote Control 1 3 Stand 1 4 Power Adapter 12VDC, 2A 1 5 HDMI Cable 1 6 Composite AV Cable 1 7 Quick Installation Guide 1 8 CD (Including Manual/QIG) 1 7 1-2 Safety Instructions This product has been engineered and manufactured to assure your personal safety. However, any improper use can result in potential electric shock or fire hazards. In order not to defeat the safe-guards incorporated in this instrument and its accessories, please adhere to the following instructions when installing, operating and servicing. Power Source Warning A marking label attached on the rear side of the adapter (supplied) indicates the correct power source for this equipment. Operate this product only from an electrical outlet with the voltage and frequency indicated on the product label. Incorrect power source may result in a risk of electric shock or fire. If you are uncertain of the type of power supplied to your home, consult your local power company or appliance dealer. Only use the power cord and adapter provided by the manufacturer. Internal component may be damaged if you use a different adapter to power this product. To avoid electric shock and fire hazard, match the plug and outlet connections carefully, then fully insert. If the plug fails to fit the outlet, please contact an electrician to update your power outlets. Do not overload electrical outlets, extension cords, or integral convenience receptacles as this can result in a risk of fire or electric shock. And to prevent power cord damage, arrange all power cords so that people cannot walk on the cords. Do not place objects on the cords. Place this product in a location that is close enough to an electrical outlet and where the power cord is easily accessible to be disconnected from the wall outlet. Usage Warning To reduce the risk of electric shock, do not remove the cover or attempt to disassemble this product. There are no user-serviceable parts inside. Please refer all servicing to qualified service personnel. 8 Protect this product from foreign objects. Never push object of any kind into this product through openings as they may touch dangerous voltage points or short-out parts that could result in a fire or electric shock. Do not expose this product to liquids, rain or moisture. This product has ventilation openings that protect it from overheating. Never block or cover these openings. And do not place this product near heat sources such as radiators, heat registers, stoves or other products producing heat. Before cleaning or wiping this product, make sure your power cord is already unplugged from the electrical outlet. Only use damp cloth to clean this product, and never use a liquid cleaner or an aerosol cleaner. During a thunderstorm, or when this product is unused for long periods of time, unplug power cord from the wall outlet. This will prevent damage to the product due to lightning and power-line surges. Service Warning Refer all servicing to qualified service personnel. For damage that requires service, please unplug your power cord from the AC outlet first, and contact your dealer or servicing personnel to obtain service for the following conditions. - If there is damage to the adapter, power cord or plug. If liquid enters this product. - If you drop this product, a heavy object falls on this product, or damage occurs to the cover of this product. If you expose this product to rain or water. - If this product does not operate normally by following the operating instructions. If this product exhibits a distinct change in performance. 9 1-3 System Requirements Display with an HDMI / Composite video/audio / S-VIDEO / Component input External USB storage device with a USB 2.0 connector 10 1-4 Highlights of the Digital Network Media Adapter Thanks again for choosing this Digital Network Media Adapter. The MA-2000 is a multimedia player for playback of high-definition media files form the external USB storage, networked NAS or PCs on your HD TV or display, bringing digital entertainment to your living room. The MA-2000 is also an Internet downloader. With built-in BitTorrent engine / client, the MA-2000 can download corresponding multimedia files into the attached USB Storage according to the BitTorrent requests. Playing and downloading your favorite media files is now PC-free. The MA-2000 supports most video / audio / image formats so you do not need to convert downloaded media to another format. Besides, you can plug in your USB devices to MA-2000 to play music, movies and pictures on TV via the user-friendly on-screen display (OSD) menu. You can also access the shared folders of the networked NAS or PCs through the intranet (local area network) and play the digital media files without any difficulties. 11 1-5 Familiar with the Digital Network Media Adapter / Remote Controller Front Item Name No. 1 Power Button Description Press to turn on MA-2000 or switch to standby mode Red: MA-2000 is in standby mode. 2 Power LED Blue: The power cable is connected and the power is on. Off: MA-2000 is power off or the power cable is disconnected. 3 HDMI LED Green: HDMI is your choice of interface option 4 YPbPr LED Green: YPbPr is your choice of interface option. 5 VIDEO LED Green: VIDEO is your choice of interface option 6 LAN LED Green: Local area network is connected. Blinking: Data transmission is in the progress. 7 USB Ports Connect to external USB storage, portable media players, or digital cameras with USB connectors 12 Back Item Name No. Description 1 DC IN Connects to 12V 2A power adapter 2 LAN 10/100Mbps fast Ethernet port (Connects to your local area network) 3 S-VIDEO Connects to S-VIDEO video/audio cable to your display’s S-VIDEO port. 4 VIDEO (Audio L/R) Connects to VIDEO (Yellow) / Audio L (White) R (RED) cables to your display’s analog video and audio ports 5 Y/Pb/Pr Connects composite cables to your display’s analog video and audio ports 6 HDMI OUT Connects HDMI cable to your display’s HDMI port 7 S/PDIF Connects optical digital audio (S/PDIF) cable to your digital sound system Note: After connecting the cables, the Video Output item of the Setup menu must be set to corresponding CVBS/S-VIDEO/COMPONENT/HDMI position. 13 Remote Controller - Front Name Description HOME Press to bring up the OSD Home menu POWER Press to turn on MA-2000 and switch to standby mode Press to bring up the list of photo, video and music PHOTO/VIDEO/MUSIC files in the external USB storage devices while in OSD Home menu VIDEO OUT Press to switch the video output between HDMI / Component / VIDEO /S-VIDEO while in OSD Home menu INFO Press to display the information of media files while in play mode SETUP Press to bring up Setup menu while in OSD Home menu RETURN Press to go back to the previous display NAVIGATION BUTTONS Press to navigate through menu screens and media libraries OK Press to display the selected screens and media directions or press to begin playback of the selected media files SUBTITLE Press to display the subtitle of video (if any) 14 PG DN / PG UP Press to scroll up and scroll down the viewing page DOWNLOAD Press to bring up “Download Media” menu while in OSD Home menu SHUFFLE Press to play music in random order while in play mode only REPEAT Press to enable / disable repeat of current all music / video SLIDE SHOW Press to view photos in a slide shoe mode RT ROTATE / LT Press to rotate the viewing photo clockwise / ROTATE counter-clock wise MUTE Press to mute the sound PREV Press to jump to the previous image / video / audio file NEXT Press to jump to next image / video / audio file MULT-FUNCTION BUTTONS Refer the instructions in the screen when playing the media files PLAY / PAUSE Press to switch between playback / pause. STOP Press to stop the playback and return to the previous screen VOLUME Press to adjust the volume 15 Remote Controller - Top IR Transmitter Name Description IR Transmitter Infrared signal transmitter. When using the remote controller, point the IR transmitter to the front of the MA-2000. DO NOT use your finger or other object to block the IR transmitter, or your command will not be received by the MA-2000. 16 Remote Controller - Back Battery Lid Name Description Battery Lid Pull the battery lid out to open battery compartment (to install or remove CR-2025 lithium battery). Note: Caution: Risk of explosion if battery replaced by an incorrect type 17 1-6 Install the Digital Network Media Adapter Please follow the following instructions to get the MA-2000 Adapter installed: 1. Unpack the MA-2000’s package, and make sure no item in the package is missing. 2. Plug the Ethernet cable to the “LAN” jack on the rear panel of the MA-2000 for wired internet connection. The MA-2000 will detect the network automatically. Note: If you have the optional *wireless USB dongle we approved, it is possible to connect the MA-2000 to the network wirelessly using Wi-Fi 802.11 b/g. You need to plug the USB dongle into one of the USB porst on the front panel of the MA-2000 and connect to the internet through wireless IP sharing router. You may need to know your wireless AP, name of the router, and encryption keys in order to set up correctly. * Edimax EW-7316Ug is suggested. 18 3. Plug the power adapter to wall socket and connect the power connector to the power jack located on the back panel of the MA-2000. 4. Connect the MA-2000 to your TV (or display) through the desired video/audio interface.. Note: You can only connect to HDMI / Composite / S-VIDEO / Component r port at a time. 19 5. Connect the MA-2000 2000 to your TV or display which has an optical audio port by using an optical digital audio (S / PDIF) cable. cable Note: You can skip this step if your yo TV or display doesn’t n’t have an optical audio port. 6. Press the button on the front panel of the MA-2000, MA 2000, and the Power LED would be lighted in blue. Or press POWER MA-2000 on. button to turn the 7. Please check the status stat of the ‘Power’ LED located on the front of the MA-2000. If it is not lighted light in blue,, please check all connections and the status of electrical power outlet, or refer to Chapter 3 Troubleshooting for possible solutions. 8. After choosing the desired video and audio connection, you need to select appropriate video input mode for your TV or display by pressing the VIDEO OUT button on the remote control to switch to the corresponding video output. 20 Chapter II Using Digital Network Media Adapter 2-1 General Settings Please follow the following instructions to start using the MA-2000: 1. Use this menu to select the display language 2. Use this menu to select the way videos are displayed. Make sure your TV or display can support Wide Screen resolution, or the inappropriate setting can result in a distorted video display. 21 3. If the settings are correct, please select Done and press OK on the remote controller. If not, please select Cancel and press OK on the remote controller to return to the first step. 22 2-2 OSD Home Menu Instructions 1. Once the system is booted, press and OK to access the desired option. The option where the highlight is positioned is the target option. On-Screen home menu allows you to access the following functions: (1) IP Cam: If you have Edimax IP Cameras* over the intranet / local area network, you can select this option to view real time video on your TV or display from IP Cameras. * Edimax IP Camera IC-3010/IC-7000PT series only (2) USB Storage: If you have an external USB storage plugged into the MA-2000, you can select this option to list and play the media files on your TV or display. (3) Network media: This option allows you to access the shared multimedia files, such as videos, music and photos saved in the networked NAS or PCs. (4) Download Media: Once the MA-2000 reads the .torrent seed saved in the external USB storage, networked NAS or PCs, you can select this option to download corresponding media files. 23 (5) Setup: Used for network configurations, system settings and software update, and system information. You can also select the Default Setting to set your system to the default factory value. 2. Use OK to enable or adjust the selected function in sub-menu. 24 2-2-1 Setup Menu Instructions Network: Press OK buttons to access Setup on the On-Screen home menu. And press OK buttons to select Network. This option is needed only when using “Network Media” and “Download Media” functions. If your wired network equipment such as the IP Sharing router or AP (Access Point), uses DHCP to assign IP address, by default the MA-2000 will automatically request the IP and other related information to set up the MA-2000 over the network in DHCP mode (under Setup-Network-Wired). If your network does not have DHCP server, switch to the Static IP mode (under Setup-Network-Wired) and set up various parameters manually. If you have a compatible *wireless USB dongle, and have already set up the wireless router/AP according to the instructions that come with the dongle, please enter Network-Wireless mode to input the WEP or WPA keys. * Edimax EW-7316Ug is suggested. 1. DHCP (1) Press OK to access Setup on the main menu, and Press OK buttons to select Network. (2) Press OK buttons to select Wired on the Network menu, and press OK buttons to select DHCP. 25 (3) Press OK buttons to select Yes to implement DHCP network setting. The MA-2000 will automatically receive its IP address from a DHCP sever that is built into the access point or IP sharing router. 2. Static IP (1) Press OK buttons to select Wired on the Network menu, and press OK buttons to select Static IP. (2) Press OK button to pull out the On-Screen keyboard, and press button to input the value of IP Address, Subnet mask, Gateway, and DNS text box, respectively. After inputting the value, press to highlight Save to manually implement the network setting. Please acquire information of these setting values from your ISP(Internet Service Provider)first. 3. Wireless Network Setting (1) On the Network menu, press OK buttons to select Wireless (2) Most wireless Access Point (AP) provides the encryption function that can keep unintended users out of the network. The MA-2000 will show available encryption modes (WEP/ WPA). Press OK button to select the desired WEP or WPA encryption mode. Note: The MA-2000 supports WPA-PSK and WPA2-PSK encryption mode only. (3) Press OK button to pull out the on-screen keyboard, and press button to input the keys. (4) Press “Save” to save the setting. System: Select this option to configure the MA-2000’s general settings. Press OK buttons to access Setup on the On-Screen home menu. And press OK buttons to select System under Setup menu. 26 1. Press buttons to highlight each option on the System menu and press to setup below options. (1) OSD Language: This option lets you select OSD language. You could choose English / 繁體中文 / 简体中文 according to your personal preference. (2) Video Output: This option allows you to select video output, such as CVBS / S-VIDEO / COMPONENT/ HDMI. (3) Aspect Ratio: This option allows you to select aspect ratio including Full, 16:9 Pillar Box, 4:3 Letter Box. (4) Video Resolution: You can select video resolution in this option. Please select 720P if HDMI video output is your choice of interface option, And if your choice of video output is CVBS / S-VIDEO, please select 480i. Besides, please select 480i, 480p and 720p if your choice of video output is Component. (5) Audio Output: This option lets you select PCM or RAW output format as your desired option. Or you can select Off to turn the digital audio off. 3. After pressing to select the desired option, press buttons to highlight Apply and press OK to confirm and implement the system settings. 27 Default Setting: Select this option to initialize your system to the default factory value. 1. Press OK buttons to select Default Setting under Setup menu, and a warning message will pop up. 2. Press OK buttons to select Yes to erase all personal settings or select No to return to the previous menu. After returning to the default, the initial installation page will appear and return to CVBS / S-VIDEO source. System Information: Select this option to display the information of the current software-related information and network configurations. 1. Press OK buttons to select the System Information under Setup menu, and you can see Software-related information of the MA-2000. 28 2. Press the RETURN button on the remote control to return to the previous menu. Software Update: Select this option for software update.. 1. Press OK buttons to select Software Update under Setup menu. You can enable Network to update the software available online. Or you can enable USB to update the software through the downloaded software saved in the external USB storage. Besides, when new software or firmware is available, you also can download it at www.edimax.com. 2. Press OK buttons to select Update to update the software or select Return to return to the previous menu. 29 2-2-2 IP Camera Menu Instructions The MA-2000 can search Edimax IP cameras* deployed in LAN and allow you to view real time video from IP Cameras on your TV or display. This great integration can easily transfer your TV or display to a home surveillance center. Before starting this function, please make sure your IP Cam is connected to the router wire or wirelessly and have the same subnet of IP address with the MA-2000. For example: MA-2000 IP address: 192.168.2.6 IP Camera IP address: 192.168.2.100 1. Connect your IP camera to your wired or wireless router. 30 2. Press OK to enter IP Camera to search the available IP camera automatically over the intranet, and press OK to select desired IP Camera. Or you can press to setup the IP address of IP Camera manually. 3. You will see the real-time video from the IP camera on your TV or display and press to view the previous / next IP Camera’s image. 31 2-2-3 Network Media Menu Instructions * Before activate this function and enable the MA-2000 to access folders on your networked NAS or PCS, please make sure: 1. The network is properly set up; 2. The MA-2000 is connected to the network; 3. To designate the folders/files on your PC as shared resources. Please refer to Microsoft’s official website: http://www.microsoft.com/windowsxp/using/networking/setup/homenet.ms px to see the initial and detailed process of Home Network Setup in Windows XP. Please refer to the following instructions to enable the MA-2000 to access the shared folders in the networked PCs. 1. Right click on the folder to be shared and select Sharing and Security. 2. If this is the first time you intend to share a folder, Windows XP will prompt a warning message, urging you to use the Network Setup Wizard for safety purpose. Choose to either run the Wizard or do it yourself. XP will display another warning. If you want the firewall enabled, select Use the wizard to enable file sharing. Otherwise, select Just enable file sharing. 3. You may now specify a “Share Name”, which will be used for users on the network to access the shared folder. The icon of the shared folder will be changed to showing a hand holding the folder. 32 If your operating system is Windows Vista, please refer to the following instructions: 1. Open the Control Panel and then open Network and Sharing Center. 2. Click the down arrow to the right of File Sharing to expand it. 3. Click Turn on file sharing and then click Apply. 33 You may also refer to Setup menu on the OSD screen of MA-2000 to select wired or wireless connection. You can now search and play all available media files on the remote PC within the network or intranet, other than on the USB device. 1. Press OK to enter the Network Media to search for the networked PCs or NAS within the local area network, and press OK to choose available PCs or NAS. 34 2. Press to select Music, Video or Photo, and press OK to see files listed by Folders or see All files. 3. Please refer to Chapter III Start Using Multi-Media Payback to enjoy the media files saved in the networked NAS or PCs on the same local area network (LAN). 35 2-2-4 USB Storage Menu Instructions The MA-2000 can search and play available multimedia files such as music, video and photos saved in the external storage through USB interface. 1. Plug your external USB storage into the USB slots on the front panel of the MA-2000. 2. Press OK to enter the USB Storage to search for the USB storage, and press OK to choose the external USB storage. 3. Please refer to Chapter III Start Using Multi-Media Playback for more navigation options. 36 2-2-5 Download Media Menu Instructions *Before activating this function, you have to make sure: 1. The MA-2000 is connected to the network; 2. The network is properly set up. BitTorrent is the leading and the most common peer-to-peer file-sharing communications protocol. The built-in BitTorrent client / engine allows MA-2000 to download media files to the external USB storage. This BT download process is computer-free. Firstly, you need to prepare at least one external USB storage with 20GB of free capacity, in the format of NTFS or EXT-3, and connect it to the USB port at the front panel of the MA-2000. Note: Files cannot be downloaded if there is less than 10% of the capacity left on the external USB storage. 37 1. Press OK to enter Download Media on the On-Screen home menu. If your external USB storage has not been formatted, the warning message “This action will erase all data on the device. Are you sure to continue?” will appear to remind you to format your hard drive. Then, please press OK to select Yes to format your USB storage device. It may take up to several minutes, according to the size of your external USB storage. 2. A message will pop up to ask you to choose one external USB storage as the media download destination. Press OK to select one for the .torrent seeds. Note: Before downloading media files associated with the .torrent seeds to your external USB storage, networked NAS or PCs, please make sure the desired .torrent seeds are already imported to the external USB storage, networked NAS or PCs. Besides, the BT downloaded files only can be saved into the external USB storage. 3. Press OK to select .torrent files to download, and then you can see the download process page. To ensure the system’s efficiency, only 3 download tasks will take place simultaneously, and each .torrent file will be downloaded in sequence. You can also press OK to adjust the priority of the download files. To see the downloaded files in your USB devices, please go to USB Storage menu. 38 Chapter III Start Using Multi-Media Payback 3-1 Music Playback 1. If you select the Music Folders, a list of the available shared folders will appear. You can press OK to select one of these shared folders. If you select All Music, a list of all audio files will be displayed. 2. Once the music files are visible on the screen, please press to navigate to the desired files and press OK to play the music in Music Player. Note: (1) The MA-2000 supports following audio formats: WMA, mp3, OGG, 39 FLAC, and real audio (ra.). (ra.). Other audio formats may not be compatible. Please check the original format of your music file to verify that it is a compatible format MA-2000 MA supports. (2) Press below buttons on the remote control to play the song: :Play the previous song. :Pause the song and press again to resume playing. : :Press to stop the playback. :Skip to play the next song. :Fast forward the MP3, OGG files playing. :Repeat the single song or all available tracks, or turn this function off. :Play songs in random sequence, or turn this function off. off volume :Increase or decrease the volume. :Mute volume. :See information of the music, including title, length, file name 3. Press RETURN button on the remote control to go back to the previous menu. 40 3-2 Video Playback To begin with, please refer to Step 1 in Music Playback Section to see the list of all the video files saved in the external USB storage, networked NAS or PCs. 1. Once the video files are visible on the screen, press to navigate to the desired files and press OK to play the video. 41 Note: (1) The MA-2000 2000 supports following video formats: WMV 7/8, MPEG-4, MPEG H.264, AVI, DivX 3/4/5, 3/4/5 XviD, MKV, DAT, Real Video (rm., rmvb.) rmvb. and ISO/IFO.. Some video files may not be playable because the format of the video is not supported by the MA-2000. (2) Press below buttons on the remote control to play the video: :Play previous track of playing video. :Pause the video and resume the video playing. : :Press to stop the playback. :Play next track of the playing video. :Fast forward. :Fast backward. :Increase or decrease the volume of the video. :Mute the audio portion of the playing video. resolution :See information of the video, including title, length and resolution. You can press the SUBTITLE button to select the suitable SRT text subtitles. For example, BIG5 (traditional Chinese) or GB (Simplified Chinese) encoded subtitle can be selected selected when playing the video. SUB or SSA subtitle formats are not supported. (2) If video / movie ie has DVD main menu, you can press navigation and OK buttons to select and activate the selection such as Chapter, Video Clip or Subtitle on the he DVD menu. menu 42 2. Press the RETURN button on the remote control to return to the previous menu. 43 3-3 Photo Playback egin with, please refer to Step 1 in Music Playback Section to see the 1. To begin thumbnails of the photo files saved in the external USB storage, networked NAS or PCs. 2. Once the photo files are visible on the screen, press to navigate to the desired files and press OK to see the photo. The he selected photo in the album will be displayed in full-screen full mode. 3. In the thumbnail photo viewer, you can also press the button on the remote control for the Slide show mode. The MA-2000 2000 will randomly select music files as the “background music”. music”. If there is no music saved in the external USB storage, networked NAS or PCs, the MA-2000 2000 will play its default sample music clips. c 44 Note: (1) The MA-2000 2000 supports following photo formats: JPEG, GIF, BMP and PNG.. Some image files may not be b viewable due to the format of the photo is not supported. Animated GIF file is not supported. (2) Press below buttons on the remote control to check photos in the full-screen mode: :Show previous photo. :Show next photo on the play list. :Return to the original picture. OK: :Rotate the viewing picture clockwise/counterclockwise. :See information of the picture, including title and resolution. (3) Picture size limitation: JPG: baseline JPEG, size: 12 MB, color depth: 8 bit, Resolution: 30M pixels. A simple or "baseline" JPEG file is stored as one toptop-to-bottom scan of the image. BMP: size: 10 MB, resolution: 3M pixels. PNG: size: 3 MB, resolution: 3M pixels. GIF: size: 1 MB, resolution: 3M pixels. 4. Press the RETURN button on the remote control to return to the previous menu. 45 Chapter III Troubleshooting Don’t panic if the Digital ital Network Media Adapter is not function properly! In most cases, you can solve the problem by yourself and you don’t have h to send the Digital Network Media Adapter back to dealer of purchase to ask of help. Please refer to this troubleshooting table to find out possible solution. Scenario Solution Check the power cord connection. Or connect the power cord to another power outlet. No picture is displayed. Are the Component Y/Pb/Pr/ AUDIO L/R cables or HDMI Cable loose or disconnected? Make sure one of connections is correct. Try the “SOURCE” button on the remote control of the external display/ TV, to select the correct input source. Make sure Video Output selection on in the setup menu, such as CVBS/ S-VIDEO/ VIDEO/ COMPONENT/ HDMI, is correct. Press button on the remote controller for Video Output selection until you see the picture on your screen. Check your wired/ wireless connection to make sure that it’s working properly. Use an Ethernet LAN cable to When entering “Network Media” menu, the available networked NAS and PCs list is not displayed. connect from the Network jack of the MA-2000 MA to the network router or Access Point. Or check the setting between your external rnal USB wireless dongle and IP sharing. Check your Network Setting of the Setup menu. Check the setting on the shared folder / file on your networked NAS or PCs. No USB device is searched under “USB Storage” menu The BT multimedia files can’t be downloaded. Check USB device is already firmly connected. conne Check the format of your USB drive: is it in NTFS/EXT-3 NTFS/EXT format? For BitTorrent, users need to set up port forwarding on the TCP range 6881-6890 6890 of Access Point or IP sharing. 46 Chapter IV Specification pecifications *Video support subject to change without notice. 47 48


