1
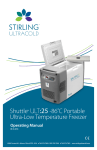
SU105U -86˚C
Ultra-Low Storage
Operating Manual
04.29.2014
6000 Poston Rd Athens, Ohio 45701, USA t: 740.274.7900 / 855.274.7900 f: 740.274.7901 www.stirlingultracold.com
T H I S PAG E I N T E N T I O N A L LY L E F T B L A N K
2 of 40
Operating Manual: SU105U 9783.3 | 04.29.2014
SU105U Quick Guide
Initial Setup
1.
Unpack freezer unit and included components, ensure all packaging material has been
removed from around the fan inlet and outlet holes.
2.
Plug AC power cord into the main power socket at the back of the unit and then into
an electrical outlet.
3.
Turn the AC power switch to the “On” position.
4.
Turn on battery power. Battery switch is located in main power housing on the rear
of the freezer.
5.
Ensure setpoint is within desired range (default is -86˚C) or change setpoint to user-preferred
temperature according to the control functions outlined below.
Guide to Basic GUI Functions
ON / OFF
Switch the main power on, located at the back of the unit above the AC cord.
Battery Power
Switch on the battery power located on the left of the Recessed Electrical
Panel. This is essential if monitoring is required in the event of a power failure.
Change Setpoint
Tap Home > Setup > Setup > Enter PIN > Enter > Change > Setpoint > +/- > Save
Silence Alarm
Tap Home > Setup > Silence
Event Log
Tap Home > Setup > Event Log > Prev. Page, Next Page
Chart History
Tap Home > Setup > Chart History
Guide to Advanced GUI Functions
Alarm Setup
Tap Home > Setup > Setup > Enter PIN > Enter > Alarms > xxx Delay > +/- > Save
Date and Time
Tap Home > Setup > PIN > Date & Time > +/- > Save
Change PIN
Tap Home > Setup > Setup > Enter PIN > Enter > PIN > Enter New PIN > Enter >
Re-enter New PIN > Enter
Calibrate RTDs
Tap Home > Setup > About > Service > RTD Calibr. > RTD Select > +/- > Calib.
Notice:
Before engaging door latch, ensure handle is fully rotated
down to the stop point in order to reset latching mechanism. To engage door latch when closing, push outer
door IN before rotating door handle to UP position.
Operating Manual: SU105U
9783.3 | 04.29.2014
www.stirlingultracold.com
3 of 40
T H I S PAG E I N T E N T I O N A L LY L E F T B L A N K
4 of 40
Operating Manual: SU105U 9783.3 | 04.29.2014
SU1
05
U
-86˚C Ultra-Low Storage
The model SU105U incorporates next generation free-piston Stirling engine technology.
Free-piston Stirling engine technology differs from conventional compressor-based refrigeration by providing high efficiency, deep-temperature cooling in a lightweight package.
Table of Contents:
1. INTRODUCTION���������������������������������������������������������������������� 6-7
1.1 Description��������������������������������������������������������������������������������������6
1.2 Intended Uses ��������������������������������������������������������������������������������6
1.3 Documentation������������������������������������������������������������������������������6
1.3.1 Operating Manual ��������������������������������������������������������������������6
1.4 Organization of this Operating Manual��������������������������������7
2. FEATURES OF THE SU105U FREEZER ���������������� 8-11
2.1 Free-Piston Stirling Engine ��������������������������������������������������������8
2.2 Cabinet Design Features������������������������������������������������������������8
2.3 Temperature Monitoring Features������������������������������������������8
2.4 The Swift GUI Touch Screen������������������������������������������������������9
2.5 Pictorial Tour����������������������������������������������������������������������������������10
2.6 Included Items������������������������������������������������������������������������������10
2.7 Options��������������������������������������������������������������������������������������������11
2.7.1 Adapter Installation Procedure��������������������������������������������11
2.7.2 Power Cord Change ����������������������������������������������������������������11
3. SAFETY PRECAUTIONS���������������������������������������� 12-13
4. UNPACKING AND INSTALLATION ���������������������� 14-15
4.1 Freezer Site Qualification ��������������������������������������������������������14
4.2 Setup������������������������������������������������������������������������������������������������15
5. OPERATION ���������������������������������������������������������� 16-31
5.1 Operation of the SU105U Freezer�����������������������������������16-29
5.1.1 Swift touch Screen Control Panel����������������������������������������17
5.1.2 Control Panel Quick Guide ���������������������������������������������18-19
5.1.3 Swift Graphical User Interface (GUI) Instructions�����20-29
5.2 Managing Freezer Contents����������������������������������������������������30
5.3 Cleaning������������������������������������������������������������������������������������������30
5.4 Calibration of the RTDs��������������������������������������������������������������31
6. TRANSPORTING, MOVING AND STORAGE������������ 31
7. SPECIFICATIONS�������������������������������������������������� 32-33
7.1 Freezer Specifications����������������������������������������������������������������32
7.2 Materials Specifications������������������������������������������������������������33
8. TROUBLESHOOTING ������������������������������������������ 34-35
9. WARRANTY ���������������������������������������������������������� 36-37
10. CE DOCUMENTATION���������������������������������������������� 39
Operating Manual: SU105U
9783.3 | 04.29.2014
EU Authorized
Representative:
Global Cooling, BV
Lage Dijk 22,
Helmond, 5705 BZ
The Netherlands
www.stirlingultracold.com
5 of 40
1. Introduction
1.1 – Description
The Stirling Ultracold SU105U free-piston Stirling engine Ultra-Low Temperature
(-86°C) Freezer uses proven M150A free-piston Stirling engine technology to provide
high efficiency, deep-temperature cooling.
1.2 – Intended Uses
The SU105U freezer provides ultra-low temperature storage for both medical and
non-medical purposes. The SU105U is registered with the FDA as a Class I medical
device (Product Code JRM). The storage of blood or blood products intended for
medical purposes is prohibited.
1.3 – Documentation
1.3.1 – Operating Manual
• This operating manual describes all aspects of receiving, installing, use, moving and
storage of the Stirling Ultracold SU105U Freezer. More detail on specific aspects of
operation of the freezer is available via online supplementary documentation.
• Performance of the freezer is controlled by electronic logic that is programmed
through a touch screen interface termed the Swift Graphical User Interface (GUI).
This operating manual describes use of the Swift GUI, and the appended Swift GUI
Supplement expands that description with pictorials of each screen and option.
User Advisory:
Deep temperatures are dangerous, use proper precautions when operating ultralow temperature freezers. This ultra-low temperature freezer is intended for storage
of frozen sample product or vials at deep temperatures. Stirling Ultracold, Division
of Global Cooling, Inc. cannot be held responsible for damages or loss of stored
product attributed to unintended use. In no case will Stirling Ultracold, Division of
Global Cooling, Inc. be held liable for loss of stored product resulting from electrical,
mechanical or structural failure. As with any ultra-low temperature freezer, appropriate back-up and redundancy considerations are the responsibility of the user.
6 of 40
Operating Manual: SU105U 9783.3 | 04.29.2014
1. Introduction
1.4 – Organization of this Operating Manual
This manual is organized as follows:
• Unpacking and installation
• Set-up
• Operation
• Transporting and moving
Please note that precautions and safety instructions are part of each section of the
manual, and must be observed to avoid damage to the freezer or harm to its users.
Two Model SU105U cabinets stacked.
Shown with optional stacking adapter.
Operating Manual: SU105U
9783.3 | 04.29.2014
www.stirlingultracold.com
7 of 40
2. Features of the SU105U freezer
2.1 – Free-Piston Stirling Engine
The SU105U Ultra-Low Temperature Freezer uses the
state of the art Stirling Ultracold Model M150A freepiston Stirling engine to provide high efficiency, deeptemperature cooling. No HCFC or CFC refrigerants are
used in the M150A and SU105U. The M150A Stirling cycle engine uses approximately
2 grams of helium gas as a working fluid. The secondary coolant loop uses
60 - 65 grams of refrigerant, R-508B (“SUVA® 95” *), as a working fluid.
2.2 – Cabinet Design Features
The cabinet is VIP insulated with polyurethane foam support providing an internal
volume of cabinet approximately 105 liters. The blowing agent is HFC R245a. A
locking cam door latch ensures door gasket compression when closed. Door sealing
consists of three gaskets and is factory replaceable. A door defrost minimizes water
or ice deposition on the gasket interface.
2.3 – Temperature Monitoring Features
Two resistance temperature detectors (RTDs) measure the internal cabinet temperature of the SU105U. One provides input to the free-piston Stirling engine controller
and the other provides input for the Swift GUI display and for reporting and logging.
The display RTD may be user calibrated through the Swift GUI. The Swift GUI provides
a door open timeout alarm and monitors the temperature reporting RTD for excursions beyond high and low limits that are set automatically or manually. Alarms are
reported through an audible alarm in the freezer enclosure and through a contact
closure that may be connected to an external alarm. The Swift GUI provides options
to temporarily suppress alarms and set a delay time before the alarm is reported via
the contact closure. A one-time temperature alarm suppression provided by the
Swift software allows for the initial cooling of the freezer after start-up.
AC power from 85 to 264 Volts is allowable, with a maximum current draw of about
3.0 Amps at 120V and 1.5 Amps for 240V.
* Trademark DuPont.
8 of 40
Operating Manual: SU105U 9783.3 | 04.29.2014
2. Features
2.4 – The Swift GUI Touch Screen
•
•
•
•
•
•
The Swift GUI is implemented on a touch screen control
panel on the front of the cabinet. Its capabilities are described
in detail later. General features of the control panel are:
Set freezer control, alarm and communications parameters
Provide password protected access to parameter changes
Display freezer status
Display temperature graph and event log
Display diagnostic and service information
Display freezer identification information
Values for the following SU105U parameters are viewed and modified through
the touch screen.
Modifiable Values
Accessible Values
Temperature setpoint
Current freezer interior temperature
Under temperature limit
Temperature history chart
Over temperature limit
Interior vs. free-piston Stirling engine temperatures
Over temperature delay after door opening
Alarm status
Audible alarm silence interval
Swift GUI firmware event log
External contact delay upon alarm
“About” screen (general information)
Door open alarm delay
Service contact information
Door defroster status
Diagnostics screen
Door auto-defrost status
Manual defrost time
Password Identification Number (PIN) status
Current date
Current time
RTD calibration adjustments
Operating Manual: SU105U
9783.3 | 04.29.2014
www.stirlingultracold.com
9 of 40
2.5 – Pictorial Tour
1. Control Panel
2. Locking Latch
3. Door Gasket
4. Fixed Stainless Steel Shelf
5. Air Inlet
8
6. Access Port
— For thermocouple wires, purge gas, etc.
D
B
A
7. Air Outlet
C
8. Recessed Electrical Panel
A. AC Power Connector
B. AC Power Switch
C. External Alarm Terminal Strip,
Dry Contacts (NC, NO, C)
D. Battery Power Switch
1
5
6
4
2
3
Model SU105U. Shown with optional
stainless steel inventory racks.
2.6 – Included Items
•
•
•
•
•
•
•
Packing List
Operation Manual - (this document, including Warranty Card). 1 pc
AC Power Cord - Approx. length 1.6 meters. 1 pc
Port Sealant
1 Port Plug
2 Keys
1 Wrench
10 of 40
Operating Manual: SU105U 9783.3 | 04.29.2014
7
2. Features
2.7 – Options
• Stacking Adapter
When stacking two Stirling Ultracold SU105U free-piston Stirling engine UltraLow Temperature (-86°C) Freezers, a stacking adapter is required. The Stacking
Adapter consists of two (2) plates and twelve (12) screws.
2.7.1 – Adapter Installation Procedure
1. Remove rear casters
from both freezers.
Install adjustable
leveling feet.
2. Move 2nd unit over
the top of 1st unit
sitting on floor.
Note the net
weight is about
220 lbs. Three
person job.
3 holes on upper unit and 3
holes on lower unit need to
be lined up.
3. Adjust height
if necessary.
Clearance between bottom
of upper unit and top of
lower unit is 1.5 inches.
4. Level top freezer.
5. Attach stacking plate and tighten six screws (torque 8 to 10 lb-in) at both sides.
Note that the stacking plate should not hold the weight of upper unit.
The upper unit should sit on the leveling feet.
• Power Cords
One power cord is supplied with each SU105U, however a simple line cord
change can allow for multiple power and receptacle types.
2.7.2 – Power Cord Change
To change the line cord, unplug the old line cord from the AC Power Connector
found on the rear of the unit and plug the new line cord in its place. Make sure
to use the cord and plug appropriate for your location.
The options below are available:
1. Line Cords for North America. 120V, AC, 60Hz. NEMA 5-15P plug.
Requires standard NEMA 5-15R receptacle.
2. Line Cords for Europe/International. 240V, AC, 50Hz. Standard two-pin
plug requires two-pin receptacle.
Operating Manual: SU105U
9783.3 | 04.29.2014
www.stirlingultracold.com
11 of 40
3. Safety Precautions
Potential hazards associated with use of the SU105U freezer may impact the safety of
persons in the workplace in which the freezer is installed. This includes persons who
operate the freezer, and other personnel in its vicinity. The freezer itself may also be
damaged or its warranty voided by improper operation or usage. It is very important
that all personnel that install, operate, transport or place the freezer into storage read
this entire manual to understand those hazards. Likewise, it is imperative to place this
manual for ready reference adjacent to the freezer at all times.
Specific appropriate precautions are included in each section of this operating
manual. However, several important general precautions must be observed and
are described below.
• Do not disassemble, modify or repair. There are no user serviceable parts inside the
freezer unit.*
• Do not operate freezer with the top cover removed as this will affect freezer performance. To avoid risk of electrical shock and injury disconnect power before removing
top cover.
• Do not immerse in water, pour water on the unit, or operate where water may drip
or fall on the unit. Operation under extreme environmental conditions, e.g., in very
high humidity environments (RH 85% or more) also may lead to condensation or
water intrusion.*
• Warning: Unauthorized modification to the cabinet, controls or free-piston Stirling
engine will void all warranty provisions.
• Do not cut, change or modify the power cable.*
• Do not store flammable items such as gasoline, thinner or solvents in the freezer.
• The freezer is NOT rated as an explosion-proof freezer.
• Do not use hard and/or sharp objects, such as knives, screwdrivers, etc. to remove
any frost or ice that has accumulated on the inside of the freezer. The inside panels
are heat exchangers and can be damaged. Defrosting the cabinet is described later
in this operating manual.
*Doing so will void the warranty.
12 of 40
Operating Manual: SU105U 9783.3 | 04.29.2014
3. Safety Precautions
• Do not use solvents to clean the panel or the outside or inside of the freezer.
• When removing the power cable, hold onto the plug and not the cable.
• Do not block the air intake or air discharge vents used by the free-piston Stirling
engine (See pictorial on Page 10 for locations.)
• Ultra-low temperature freezers are different from home freezers in that at -86°C
frostbite can occur instantly.
• For the personal safety of freezer users, safe operating procedures are essential.
— Never handle samples or freezer accessories with bare hands. Be especially
careful not to spill ultra-low temperature materials onto skin or clothing.
— Do not use gloves that become brittle at ultra-low temperatures.
— Nitrile and latex gloves are inadequate.
• Permeable gloves are dangerous because frozen materials can contact skin
and cause damage.
— Be especially careful that materials at low temperatures are not spilled onto
skin or clothing.
• Ultra-low temperatures may adversely impact freezer contents:
— Do not put ice or liquid water directly in the freezer box; always use
suitable containers.
— Use only sample containers that have been approved or tested for ultra-low temperature use.
— Do not use glass containers when the contents might freeze and expand.
— Some plastics shatter at ultra-low temperatures. Avoid splinter hazards.
— Biological and chemical hazards are still hazardous at ultra-low temperatures. Always wear proper protective equipment and follow appropriate isolation
protocols.
— Many types of labels will fall off and/or break at ultra-low temperatures. Some types of ink which stick to glass and/or plastic at room temperature lose adhesion at ultra-low temperature.
• In addition to the ULT hazards above, there are also physical hazards to consider:
— Be cautious when closing the door to avoid a pinching hazard.
— Be careful when loading the cabinet with heavy items.
Operating Manual: SU105U
9783.3 | 04.29.2014
www.stirlingultracold.com
13 of 40
4. Unpacking and Installation
Verify the SU105U freezer shipment by uncrating the freezer and included items,
inspecting them for damage during shipping, and compare the items to the
packing list for completeness.
4.1 – Qualify the installation site for the freezer before
placing it into service.
1. Note the shipping packaging dimensions of 31" H x 31" D x 41" W | (787.4 x
787.4 x 1041.4 mm) and shipping weight of 266 lbs. | (121 kg), crated ocean
weight of 396 lbs. | (180 kg).
2. When moving the shipment from the point of receipt to the place where it
will be uncrated. The installation site must accommodate the freezer exterior
dimensions of 34" H x 28" D x 27" W | (864 x 711 x 686 mm) and weight of 220
lbs. | (99 kg).
3. There are no specific required clearances for the top, back and sides of the
freezer; however allowances must be made for electrical connections to the
panel on the back of the freezer.
4. Ingress to the access port (see Page 10) is required during normal operation.
5. The freezer must be installed on a nominally level surface and leveling feet will
accommodate small variations from level. SU105U freezers are stackable up to
two high. Requires optional stacking adapter.
6. The aisle way into which the freezer door opens must be wide enough to
allow access to the contents of the freezer and not present a hazard to those
using the aisle way.
7. The facility/room lighting must not obscure the readability of the touch
screen display and must provide good visibility for working with the contents
of the freezer.
8. After the freezer is placed into its installation location, any blockages to the
air inlet and outlet must be removed. (See Page 10 for locations.)
9. Care must be taken while unpacking and installing the freezer not to injure
personnel or damage the freezer by loss of control of its motion during the
processes. Be mindful of its size and weight. Dropping the freezer is likely to
damage it.
14 of 40
Operating Manual: SU105U 9783.3 | 04.29.2014
4. Unpacking and Installation
4.2 – Set-up
1. Before switching on electrical power to the freezer, make all desired external
connections:
A.
AC power connection
B.
External alarm
2. Turn on the AC switch. If the DC power option has been provided please
see the supplemental instructions.
3. In normal operation, the freezer access port (see Page 10 for location)
is plugged with a rubber stopper.
4. After the freezer reaches its operating temperature and its door is opened
and closed, the partial vacuum created when warm air is admitted, then
cooled, will prevent reopening of the door until the pressure is equalized.
A vacuum relief port is provided to accelerate this process.
5. Be mindful of any electrical shock hazards associated with making electrical
connections to the freezer, especially the external alarm connection.
6. Notice: To activate the battery for the alarm system, please place the
battery switch to the “on” position. Battery switch is located in the main power
housing on the rear of the freezer.
Operating Manual: SU105U
9783.3 | 04.29.2014
www.stirlingultracold.com
15 of 40
5. Operation
5.1 – Operation of the SU105U freezer comprises four stages:
1. Monitoring temperature performance using the Swift GUI and touch screen
control panel.
2. Managing the freezer contents.
3. Cleaning and defrosting the freezer.
4. Calibrating the freezer's display RTD.
Specification of responsibilities for each of the above components of freezer operation should be part of the procedures and policy documents and guidelines for the
clinical, laboratory, or other activity for which the freezer is used. Safety requirements
are integral to these responsibilities.
16 of 40
Operating Manual: SU105U 9783.3 | 04.29.2014
5. Operation
5.1.1 – Swift touch screen control panel:
A Password Identification Number (PIN) may be set, but is not displayed. The default
PIN is 1234 and may be changed by the user to any four-digit numeric. Use the PIN
to control access to parameter change screens.
The Swift GUI is preprogrammed with generic default values for most parameters
listed above, so entering the date, time and temperature setpoint are the most
essential actions. Unless temperature limits are set manually, the software calculates
default values appropriate for the temperature setpoint.
The Swift GUI uses a menu system to display and modify system values. Generally,
each screen displays certain values and contains “soft” buttons that are pressed to
access other screens (according to the menu structure), and each screen has a soft
button to return to the Home screen and a “Back” soft button to return to the next
higher level of the menu (from which it was called).
Operating Manual: SU105U
9783.3 | 04.29.2014
www.stirlingultracold.com
17 of 40
5.1.2 – Control Panel Quick Guide
The Swift GUI menu tree below starts with the Home screen. (How to get there
is described later.) Soft buttons provide navigation to the screens on the next level
of the menu tree.
Home – display current freezer temperature.
• Setup – display Password Identification Number (PIN) status, door defrost status,
temperature setpoint, system date and time and alarm status.
• Setup – display temperature setpoint.
Change Setpoint – display and change the temperature setpoint and high
and low temperature limits.
Alarm Setup – display and change the Temp. Delay (to delay an over temperature alarm after a door opening), Audible Delay (time interval to silence the
audible alarm upon request), Ext. Delay (to delay remote alarm contact closure
after alarm condition is detected) and Door Delay (period that the door may
remain open without alarm).
Date & Time Setup – display and change system date and time.
Door Defrost – enable/disable automatic door defrosting and/or set a manual
defrost time and initiate manual defrost.
PIN Setup – disable/enable the system PIN and change the PIN.
• Silence Alarm – temporarily silence audible alarm.
• Event Log – tracks the last approximately 200 alarm conditions such as door openings, temperature setpoint changes, over temperature condition, and power outages.
• Chart History – display the cabinet interior air temperature over the last 24 or 48
hours, or 7 days.
• About – display freezer model number, serial number, firmware version, engine
number, run hours, temperature setpoint, and install date.
–– Service – display cabinet, control and cold-head RTD temperatures, warm-head
thermistor temperature and engine voltage, current and power.
Diagnostics – display temperature setpoint, engine running power as a
percentage of maximum running power, and freezer condition status.
Service Contact – provides phone, email, and web address for manufacturer.
RTD Calibration – display RTD readings and calibration offsets to apply to
reading (used to compensate for discrepancies between Display RTD and
user-supplied temperature standards).
• Firmware Upgrade – display screen for firmware check and upgrade options.
• Alarm Test – Tests alarm.
18 of 40
Operating Manual: SU105U 9783.3 | 04.29.2014
5. Operation
Basic Controls
• Generally, to change a value on a screen, Tap the appropriate soft button
to highlight the parameter.
• Use the +/- buttons to enter the desired value and then use the “Save” soft button
to complete the change.
• PINs are entered through a numeric keypad screen with an “Enter” soft button
to complete the entry and an “Exit” soft button to terminate it.
• PINs may be disabled on the PIN Setup screen by leaving the new PIN value blank.
When the PIN is disabled, any person can perform all actions available via the Swift GUI, including silencing alarms and calibrating the RTDs.
• The following examples of Swift GUI usage describe sequential button taps, e.g.,
1 > 2 means: tap button labeled “1” then tap button labeled “2”. Swift GUI display
screens are named and those names are shown in bold. Access to certain screens
requires entry of the system PIN via a numeric keypad screen; this entry is shown
as the PIN button tap.
Guide to Basic GUI Functions
ON / OFF
Switch the main power on, located at the back of the unit
above the AC cord.
Battery Power
Switch on the battery power located on the left of the
Recessed Electrical Panel. This is essential if monitoring is
required in the event of a power failure.
Change Setpoint
Tap Home > Setup > Setup > Enter PIN > Enter > Change >
Setpoint > +/- > Save
Silence Alarm
Tap Home > Setup > Silence
Event Log
Tap Home > Setup > Event Log > Prev. Page, Next Page
Chart History
Tap Home > Setup > Chart History
Guide to Advanced GUI Functions
Alarm Setup
Tap Home > Setup > Setup > Enter PIN > Enter > Alarms >
xxx Delay > +/- > Save
Date and Time
Tap Home > Setup > PIN > Date & Time > +/- > Save
Change PIN
Tap Home > Setup > Setup > Enter PIN > Enter > PIN > Enter
New PIN > Enter > Re-enter New PIN > Enter
Calibrate RTDs
Tap Home > Setup > About > Service > RTD Calibr. > RTD
Select > +/- > Calib.
Operating Manual: SU105U
9783.3 | 04.29.2014
www.stirlingultracold.com
19 of 40
5.1.3 – Swift Graphical User Interface (GUI) Instructions
1. Start Screen:
Turn On Freezer and Battery Power
• Stirling Ultracold splash screen will appear for 3 seconds
2. Home Screen:
The Home screen will be displayed next
• Tap the Setup button to proceed to system settings
20 of 40
Operating Manual: SU105U 9783.3 | 04.29.2014
5. Operation
3. Data Setup:
From the Setup Screen
• Tap the Set-up button to change alarm settings, date & time, door defrost heater, and PIN
• Tap the Silence button to temporarily silence the audible alarm
• Tap the Event Log button to track the last approximately 200 events
• Tap the Chart History button to track the box air temperature over the last 12 hours, 24 hours or 7 days
• Tap the About button for freezer information including build and service and calibration
• Tap the Back button to return to the Setup Screen
• Tap the Home button to take you back to the Home Screen
4. PIN Number:
By default, Silence and Calibration require PIN
• Tap 1 2 3 4
• Tap Enter
Operating Manual: SU105U
9783.3 | 04.29.2014
www.stirlingultracold.com
21 of 40
5. Secure Temperature Setpoint:
To observe the current temperature setpoint
• Tap Change to change the temperature setpoint and over / under temperature thresholds
• Tap the Alarms button to change the alarm delays
• Tap the Date & Time button to change system date and time
• Tap the Door Defrost button to setup auto defrost or to start a manual defrost
• Tap PIN to change or disable PIN
• Tap the Back button to return to the Setup Screen
• Tap the Home button to take you back to the Home Screen
6. Alarm Setpoint:
To change the setpoint or over/under temperature thresholds
• Select the appropriate parameter then use the + and – buttons to adjust then tap Save
(Note: If Save is not tapped new values will not be used)
• Tap the Back button to return to the Setup Screen
• Tap the Home button to take you back to the Home Screen
22 of 40
Operating Manual: SU105U 9783.3 | 04.29.2014
5. Operation
7. Alarm Delay:
From the Setup Alarms Screen
• Select the appropriate parameter then use the + and – buttons to adjust then tap Save
(Note: If Save is not tapped new values will not be used)
•Temp. Delay delays an over temp alarm after a door opening
•Audible Delay delays beeper for a period of time when silence is tapped
•Ext. Delay delay between audible alarm and remote alarm
•Door Delay period of time that the door can be open before sounding an alarm
• Tap the Save button to save configurations
• Tap the Back button to return to the Setup Screen
• Tap the Home button to take you back to the Home Screen
8. Date and Time:
To setup the date and time select
•Change Time – use the <, >, +, - buttons to set the time then tap Save
•Change Date – use the <, >, +, - buttons to set the date then tap Save
• Tap the Back button to return to the Setup Screen
• Tap the Home button to take you back to the Home Screen
Operating Manual: SU105U
9783.3 | 04.29.2014
www.stirlingultracold.com
23 of 40
9. Door Defrost Heater:
When set to Auto Defrost, the door defrost heater will cycle 15 minutes ON
and 20 minutes OFF unless otherwise programmed
•Auto Defrost parameters are not adjustable
•To enable Manual Defrost tap the Auto Manual button to activate Manual mode
•Set Manual Defrost for any value up to 30 minutes
•Tap Enter
•When the desired cycle is completed the system will revert to the Auto Defrost Mode
10. Change PIN:
By default the PIN is enabled. Use the PIN setup to change
or disable the PIN
• To change the PIN use the keypad to enter a new 4 digit PIN then tap Enter.
You will then be prompted to reenter the new PIN then tap Enter
• To disable PIN leave the Enter New PIN field blank and tap Enter
24 of 40
Operating Manual: SU105U 9783.3 | 04.29.2014
5. Operation
11. Event Log:
The Event Log will display the last approximately 200* events in about 30
pages, listing 7 events per page. The last 7 events are shown by default.
Events beyond 30 pages will not be saved
• Tap Prev Page and Next Page to scroll through the pages
• Tap the Back button to return to the Setup Screen
• Tap the Home button to take you back to the Home Screen
12. Chart History:
Chart History will display the internal box air temperature for the last
24 or 48 hours, or 7 days
• Tap the Back button to return to the Setup Screen
• Tap the Home button to take you back to the Home Screen
* Approximate because the length of the stored parameter changes depending on the event.
Once the registers are full, the oldest data is rejected to make place for the newest data.
Operating Manual: SU105U
9783.3 | 04.29.2014
www.stirlingultracold.com
25 of 40
13. Chart History, Zoom:
The Chart History can be enlarged to use the entire display
• Tap the screen to enlarge or reduce the Chart History Screen
14. About Freezer:
To observe specific freezer information including Model and Serial Number, Firmware Version, Engine Number, Run Hours, Setpoint, and Date
• Tap the Service button to look at freezer parameters such as temperatures and engine voltage,
current, and power
• Tap the Back button to return to the Setup Screen
• Tap the Home button to take you back to the Home Screen
26 of 40
Operating Manual: SU105U 9783.3 | 04.29.2014
5. Operation
15. Performance Snapshot:
The Service Screen gives you access to system information and calibration, as
well as Firmware Upgrade options, Alarm Tests, Diagnostics, Service Contact,
and RTD Calibration
• Tap the Firmw. Upgrade button to for system firmware upgrades
• Tap the Alarm Test button to test temperature alarms
• Tap the Diag. button to get to the system diagnostics screen
• Tap the SVC Contact button find dealer information
• Tap the RTD Calibr. button to calibrate the RTD (Note: PIN required to calibrate the RTD)
• Tap the Back button to return to the Setup Screen
• Tap the Home button to take you back to the Home Screen
16. Alarm Test:
Alarm Test Screen provides alarm testing
• Tap the Firmw. Upgrade button to for system firmware upgrades
• Tap the Alarm Test button to test temperature alarms
• Tap the Alarm Test button again to stop beeping
Operating Manual: SU105U
9783.3 | 04.29.2014
www.stirlingultracold.com
27 of 40
17. Diagnostics:
Diagnostic Screen provides system health information
• Tap the Back button to return to the Setup Screen
• Tap the Home button to take you back to the Home Screen
18. Service Contact:
Service Contact Screen provides phone, email, and web address
for manufacturer
• Tap the Back button to return to the Setup Screen
• Tap the Home button to take you back to the Home Screen
28 of 40
Operating Manual: SU105U 9783.3 | 04.29.2014
5. Operation
19. Calibration:
RTD Calibration Screen is used to compensate for discrepancies
between the Display RTD and a user provided standard
• Tap RTD Select until the desired RTD is selected then use the + and – buttons
to adjust the offset. Tap the Calib. button to save changes
• Tap the Back button to return to the Setup Screen
• Tap the Home button to take you back to the Home Screen
Operating Manual: SU105U
9783.3 | 04.29.2014
www.stirlingultracold.com
29 of 40
5.2 – Managing Freezer Contents
The SU105U freezer is designed for long-term storage of sample materials with ultralow, well-regulated temperature storage requirements. Many times these materials
are collected in cassettes or other carriers for ease of inventory and transportation.
Such carriers have respective safety requirements and best practices for usage that
become part of the requirements for managing freezer contents.
• The temperature setpoint for the freezer should be changed as appropriate for the
materials being stored using the Swift GUI as described above, as may the high and
low temperature limits, as necessary.
• The current freezer temperature is displayed on the Home control panel screen,
and a temperature history chart is available on the control panel screen.
• Materials may be placed in the freezer in any convenient arrangement that does not
block the access port, interfere with the door gasket, or prevent the door from closing
completely.
• The Safety Precautions section of this Operating Manual is especially pertinent to this
component of SU105U freezer operation, as ultra-low temperatures are encountered
directly. The user is directed to review those Safety Precautions.
5.3 – Cleaning
Cleaning the Freezer Surfaces
• Clean the exterior surfaces of the SU105U cabinet as needed by using a soft cloth
and mild detergent. Do not use solvent (such as bleach) or harsh abrasive cleansers
or pads.
• When appropriate, remove ice that accumulates inside the freezer by defrosting it.
— Transfer the contents of the freezer to alternate storage, switch off the power to the freezer and wait for the ice to melt.
— Wipe up moisture with a clean cloth. If the freezer door can be left ajar safely, defrosting will be more rapid.
— After defrosting the freezer, switch the power back on. When the temperature reaches the setpoint, return the contents to the freezer.
• Note the Safety Precautions section of this Operating Manual while defrosting
the freezer.
30 of 40
Operating Manual: SU105U 9783.3 | 04.29.2014
5-6. Contents, Cleaning, Transportation
5.4 – Calibration of the RTDs
The SU105U Display RTD and Control RTD may be calibrated by inserting a temperature
sensor through the access port of the cabinet wall and securing it next to the RTDs
located in the right rear corner of the interior just above the shelf.
• To provide access to the RTDs, it may be necessary to transfer the contents of the
freezer to alternate storage. Note the Safety Precautions section of this Operating
Manual while making such transfers.
• Navigate to the RTD Calibration screen using the Swift GUI.
• To calibrate:
— Use the “RTD Select” soft button to highlight the RTD reading on the screen.
— Use the “+” and “–“soft buttons to adjust the offset to the desired value.
— Tap the “Calib” soft button to save changes.
6. Transporting, Moving and Storage
To move the freezer to another location or temporarily place it into storage, perform
the following steps:
• Transfer the contents of the freezer to alternate storage. Note the Safety Precautions
section of this Operating Manual while making such transfers.
• Shut down the freezer by turning off the power and allowing it to come to room
temperature.
• Dry the inside of the freezer compartment and clean any spills.
• Disconnect wires and cable connected to the freezer. See Section 4.2 for precautions
associated with this task.
• Disinfect with suitable sterilizing agent if the freezer has been used for biohazards.
Do not use bleach.
• Close and secure the door to the freezer.
• Move the freezer. See Section 4.1 for precautions associated with this task.
Operating Manual: SU105U
9783.3 | 04.29.2014
www.stirlingultracold.com
31 of 40
7. Specifications
7.1 – Freezer Specifications
Electric Power
Universal power system, 120V or 240V single phase 50 or 60Hz
Maximum Power
(Current)
300 watts (3 amps @120V, 1.5 amps @240V)
Auto-Voltage Capability
85V to 264V, 50 or 60 Hz
Electric Supply Rating
15 amp or greater grounded circuit
Cooling System / Device
Direct cooling by a free-piston Stirling engine and thermosiphon
heat transfer
Refrigerant
R-508B nonflammable CFC/HCFC-Free
Temperature Range
-86ºC to -20ºC @ 32ºC (90ºF) ambient, adjustable in 1ºC increments
Ambient Operating
Temperature
+5ºC to +35ºC (41ºF to 95ºF)
Warehouse Storage
Temperature
-5°C to +60°C (at RH 65%)
Operational
Environment
This ultra-low temperature freezer is designed for use in a normal
laboratory environment. Avoid unusual dust or particles circulated
through the rejection heat exchanger.
Useful Life
12 years
Volume
3.7 cu.ft. | (105 liters)
Interior Dimensions
21" H x 17" D x 18" W | (533 x 432 x 457 mm)
Exterior Dimensions
34" H x 28" D x 27" W | (864 x 711 x 686 mm)
Net Weight, Empty
220 lbs. (99 kg)
Insulation
High performance vacuum insulated panels and polyurethane foam
Noise
Advanced noise abatement, <60 dB(A) at 1 meter
Current Fuse
No fuse is used. Maximum current is below 3 Amps at
120 Volts. No surge current is required at start and stop.
Control Sensor
Two RTDs (PT100 Class B)
Dry Contacts
Normally closed, normally open, common; activated by power
outage or any alarm condition
Battery Back-up
48 hour control battery back-up for touchscreen
(Panasonic 6V Lead Acid Battery)
Pull-Down
9 hours from ambient temperature to -80ºC setpoint
Recovery
1.8 hours from 1 minute door opening to -80ºC setpoint
Warm-Up Profile
from -80ºC Setpoint
2 hours to -60ºC | 5.2 hours to -40ºC | 10 hours to -20ºC
Energy Use
4 kWh/day (average power 165 watts)
Heat Dissipation
(at -80ºC)
563 Btu/h (load to HVAC)
32 of 40
Operating Manual: SU105U 9783.3 | 04.29.2014
7. Specifications
7.2 – Materials Specifications
Part
Material
Color
Treatment
Body: Main Body, Door,
Front Cover and Top Cover
Mild steel
White
Powder coated
Interior
Stainless Steel
-
-
Shelf
Stainless Steel
(non-adjustable)
-
-
Handle
Aluminum
Gray
Powder coated
Hinges
Steel
White
Powder coated
LCD Bezel
Polycarbonate
Gray
Natural
27.0" (686 mm)
3.5" (89 mm)
18.0" (457 mm)
5.5" (140 mm)
NOTICE:
When stacking freezers remove rear
casters and replace with adjustable
leveling feet.
Temperature Sensor
(2 - RTD)
17" (432 mm)
TOP
4.3" (109 mm)
28" (711 mm)
6.8"
(173 mm)
Operating Manual: SU105U
21.0" (533 mm)
3.5" (89 mm)
32.5" (826 mm)
SIDE
FRONT
1.5" (38 mm)
34" (864 mm)
Temperature Sensors
9783.3 | 04.29.2014
www.stirlingultracold.com
33 of 40
8. Troubleshooting
Problem
Possible Cause
Freezer does not
power on
Check the connections to
the power supply
Power is not getting to the
freezer from the Power Supply Assure that the wall plug is
firmly seated
Inadequate air circulation
Remove airflow obstructions
Inadequate power
Assure that the wall plug is
firmly seated
Freezer does not
achieve desired
temperature
Remove freezer from direct
sunlight, hot room, etc.
Improper environment
Freezer cools
slowly
34 of 40
Solution
Check that freezer is level. Tilts
of more than 12 degrees in
some directions will degrade
performance.
Door is not completely closed
Check for ice buildup,
remove if necessary, and
properly close door
Door is open and closed
too often
Minimize opening and
closing of door
Inadequate air circulation
Unblock air vents
Operating Manual: SU105U 9783.3 | 04.29.2014
8. Troubleshooting
Note
This freezer is designed for storage of frozen product.
For best results:
• Always operate your freezer at full capacity with real or simulated product
to increase the thermal mass, displace air and maintain optimal stability.
• Always minimize the frequency and duration of door openings.
Operating Manual: SU105U
9783.3 | 04.29.2014
www.stirlingultracold.com
35 of 40
9. Warranty
The following Warranty applies to the SU105U manufactured by
Global Cooling, Inc. In order to maintain maximum uptime and to
optimize customer service, Global Cooling, Inc. reserves the right
to exchange the SU105U with a serviceable new or previously used
replacement at its discretion.
Limited Warranty, USA
• The warranty period starts TWO WEEKS after the original date of shipment
from Global Cooling, Inc.
• The Stirling Ultracold freezer is warranted for a period of TWO YEARS for materials
and labor.
• The Stirling Ultracold Humm™ free-piston Stirling engine and thermosiphon is
warranted for a full SEVEN YEARS, parts only, from original date of shipment from
Global Cooling, Inc.
• If a service issue arises, contact Global Cooling, Inc. Service Department to register
Warranty Service and initiate a resolution.
• Advanced authorization for a service company to diagnose the problem must
be approved by Global Cooling, Inc.
• Global Cooling, Inc. will not be responsible for charges incurred for service calls
made by a third party prior to authorization by Global Cooling, Inc.
• Global Cooling, Inc. retains the right to replace any product in lieu of servicing
it in the field.
• Liability in all events is limited to the purchase value only.
• Under no circumstances will Global Cooling, Inc. be responsible or held liable for
consequential or incidental damages associated with loss of stored product in the
event of an equipment failure.
• Extended warranty programs are available. Contact Global Cooling, Inc. for
a custom warranty solution.
Limited Warranty, CANADA
• The warranty period starts ONE MONTH after the original date of shipment from
Global Cooling, Inc.
• The Stirling Ultracold freezer is warranted for a period of TWO YEARS for materials
and labor.
• The Stirling Ultracold Humm™ free-piston Stirling engine and thermosiphon is
warranted for a full SEVEN YEARS, parts only, from original date of shipment from
Global Cooling, Inc.
36 of 40
Operating Manual: SU105U 9783.3 | 04.29.2014
9. Warranty
• If a service issue arises, contact Global Cooling, Inc. Service Department to register
Warranty Service and initiate a resolution.
• Advanced authorization for a service company to diagnose the problem must
be approved by Global Cooling, Inc.
• Global Cooling, Inc. will not be responsible for charges incurred for service calls
made by a third party prior to authorization by Global Cooling, Inc.
• Global Cooling, Inc. retains the right to replace any product in lieu of servicing
it in the field.
• Under no circumstances will Global Cooling, Inc. be responsible or held liable for
consequential or incidental damages associated with loss of stored product in the
event of an equipment failure.
• Extended warranty programs are available. Contact Global Cooling, Inc. for
a custom warranty solution.
International Distributor Limited Warranty
• Global Cooling warrants that Distributor shall acquire products purchased hereunder
free and clear of all liens and encumbrances.
• Global Cooling further warrants all products to be free from defects in materials under
normal use and service for a period of TWO YEARS.
• The Stirling Ultracold Humm™ free-piston Stirling engine and thermosiphon is
warranted for a full SEVEN YEARS, parts only, from original date of shipment from
Global Cooling, Inc.
• Warranty will start ONE MONTH after the ship date from Global Cooling.
• Global Cooling shall provide to Distributor, without charge, replacement parts
to substitute for parts that must be replaced by reason of valid warranty claims.
• This warranty obligation is limited solely to the replacement of replaceable
defective parts.
• All service charges with respect to the repair or replacement of defective parts of
products shall be the responsibility of the Distributor and/or Distributor's customer.
• Distributor, on behalf of Global Cooling, shall perform such ordinary and customary
servicing, repair and/or parts replacement within the Territory at Distributor's expense;
which may be passed on to Distributor's customer, at Distributor's discretion.
Operating Manual: SU105U
9783.3 | 04.29.2014
www.stirlingultracold.com
37 of 40
T H I S PAG E I N T E N T I O N A L LY L E F T B L A N K
38 of 40
Operating Manual: SU105U 9783.3 | 04.29.2014
13. CE Documentation
10. CE Documentation
Operating Manual: SU105U
9783.3 | 04.29.2014
www.stirlingultracold.com
39 of 40
6000 Poston Road Athens, Ohio 45701, USA
t: 740.274.7900 / 855.274.7900 f: 740.274.7901 www.stirlingultracold.com
©2014 Stirling Ultracold, Global Cooling, Inc . All Rights Reserved.
HUMM™ technology is manufactured under U.S. and International patents.
Stirling Ultracold, Shuttle™, HUMM™ and Swift™ are trademarks of Global Cooling, Inc.
Specifications subject to change without notice. Refer to www.stirlingultracold.com for the latest specifications.
Operating Manual:
SU105U
©2014 Stirling Ultracold OW9783.3 04/14
9783.3 | 04.29.2014
www.stirlingultracold.com
40 of 40