1
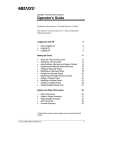
RECOVERY WINCH
INSTALLATION, OPERATION, AND PREVENTATIVE
MAINTENANCE MANUAL
This manual must always accompany winch and remain within easy access of
winch operator.
Read and understand this manual before installing, operating, or servicing your
Braden recovery winch.
PB-162 R3
4/2010
Printed in U.S.A.
1
FOREWORD
Read and understand this entire manual before operating or servicing your Braden winch. Retain this manual
for future reference.
The minimum service intervals specified are for operating hours of the prime mover.
This manual contains installation, operation and preventive maintenance instructions for most current model
Braden Worm Gear winches. As there are many product variations, you must become familiar with your
Braden winch to fully benefit from the information contained in this publication.
Some illustrations in this manual may show details or attachments which may be different from your winch.
Also, some components may be removed for illustrative purposes.
Whenever a question arises regarding your Braden winch or this manual, please contact your nearest Braden
dealer of the Braden Service Department at 918-251-8511, Monday-Friday, 8:00 am to 4:30 p.m. CST, or by
FAX at 918-259-1575. Provide the complete winch model and serial number when making inquiries.
Parts and Service
Braden provides parts and service through a network of authorized dealers. Parts and service are not available directly from Braden. For the name of your nearest dealer, consult your local phone directory or call
Braden at the phone number shown above.
TABLE OF CONTENTS
GENERAL SAFETY RECOMMENDATIONS . . . . . . . . . . . . . . . . . . . . . . . . . 3
WORM GEAR WINCH TERMINOLOGY . . . . . . . . . . . . . . . . . . . . . . . . . . . . 5
THEORY OF OPERATION . . . . . . . . . . . . . . . . . . . . . . . . . . . . . . . . . . . . . . . . 5
WINCH MODEL NUMBER AND ASSEMBLY IDENTIFICATION . . . . . . . 7
WINCH OPERATION
Drum Clutch Operation . . . . . . . . . . . . . . . . . . . . . . . . . . . . . . . . . . . . . 10
Basic Winch Operating Method . . . . . . . . . . . . . . . . . . . . . . . . . . . . . . . 12
Winch Break-In . . . . . . . . . . . . . . . . . . . . . . . . . . . . . . . . . . . . . . . . . . . 13
Capstan Use . . . . . . . . . . . . . . . . . . . . . . . . . . . . . . . . . . . . . . . . . . . . . 13
Auxiliary Rigging . . . . . . . . . . . . . . . . . . . . . . . . . . . . . . . . . . . . . . . . . . 14
WINCH INSTALLATION . . . . . . . . . . . . . . . . . . . . . . . . . . . . . . . . . . . . . . . . . . 16
PREVENTATIVE MAINTENANCE
Recommended Preventative Maintenance Intervals . . . . . . . . . . . . . . . 26
Worm Shaft End-Play Adjustment . . . . . . . . . . . . . . . . . . . . . . . . . . . . . 27
Safety Brake Service & Adjustment . . . . . . . . . . . . . . . . . . . . . . . . . . . . 28
Assembly Change Instructions . . . . . . . . . . . . . . . . . . . . . . . . . . . . . . . . 32
SPECIFICATIONS
Recommended Worm Gear Oil . . . . . . . . . . . . . . . . . . . . . . . . . . . . . . . .34
Recommended Fastener Torque . . . . . . . . . . . . . . . . . . . . . . . . . . . . . . 35
Oil Capacity and Worm Shaft End-Play . . . . . . . . . . . . . . . . . . . . . . . . . 36
Common Hydraulic Equations . . . . . . . . . . . . . . . . . . . . . . . . . . . . . . . . 37
Metric Conversion Chart . . . . . . . . . . . . . . . . . . . . . . . . . . . . . . . . . . . . 38
Maximum Line Speed and Torque Information . . . . . . . . . . . . . . . . . . . . 39
2
GENERAL SAFETY RECOMMENDATIONS
Safety informational callouts in this manual include:
CAUTION
Caution – This emblem is used to warn against
potential or unsafe practices which could result in
injury and product or property damage if proper
procedures are not followed.
Warning – This emblem is used to warn against hazards and unsafe practice which could result in severe
injury or death if proper procedures are not followed.
Safety for operators and ground personnel is of
prime concern. Always take the necessary precautions to ensure safety of others as well as yourself.
To ensure safety, the prime mover and winch must
be operated with care and concern by the operator
for the equipment and a thorough knowledge of the
machine’s performance capabilities. The following
recommendations are offered as a general safety
guide. Local rules and regulations will also apply.
6. On machines having hydraulically, mechanically and/or cable controlled equipment or attachments, be certain the equipment is blocked securely before servicing, adjusting and/or repairing
the winch. Always apply the parking brakes before dismounting a vehicle.
7. Inspect rigging and winch at the beginning of
each work shift. Defects should be corrected immediately.
8. Keep equipment in good operating condition.
Perform scheduled servicing and adjustments
listed in the “Preventive Maintenance” section of
this manual.
Failure to obey the following safety recommendations may result in property damage, injury, or
death.
9. An equipment warm-up procedure is recommended for all start-ups and essential at ambient temperatures below +40°F (5°C). Refer to
“Warm-Up Procedure” listed in the “Preventive
Maintenance” section of this manual.
1. Read all warning tag information and become familiar with all controls before operating winch.
2. Never attempt to clean oil or perform any maintenance on a machine with the engine or prime
mover running, unless instructed to do so in this
manual.
10. Worm gear winch clutches may disengage and
drop or lose control of a load if they are not fully
engaged at the beginning of a lift or pull. The
winch operator must visually determine that the
clutch is fully engaged before lifting or pulling a
load. Check drum clutch to be certain that the
negative draft angle is clearly evident on the
clutch and drum lugs. Replace a worn sliding
clutch, clutch plate or cable drum. Do not use the
winch if the negative draft angle is worn straight
or the edges of the clutch lugs are rounded or
chipped.
3. Never operate winch controls unless you are
properly positioned at the operators station and
you are sure personnel are clear of the work
area.
4. Assure that personnel who are responsible for
hand signals are clearly visible and that the signals to be used are thoroughly understood by everyone.
11. The winches described herein are neither designed nor intended for use or application to
equipment used in the lifting or moving of persons.
5. Ground personnel should stay in view of the
operator and clear of winch drum. Do not allow
ground personnel near winch line under tension.
A safe distance of at least 1-1/2 times the length
of the unspoiled cable should be maintained.
12. Do not exceed the maximum pressure, PSI (kPa),
or flow, GPM (LPM), stated in the winch specifications for hydraulically driven winches.
3
13. Match winch line speeds to job conditions.
22. “Deadman” controls, which automatically shut
off power to the capstan drive or winch whenever the operator leaves his station, should be
installed whenever possible.
14. Leather gloves should be used when handling
winch cable.
15. Never attempt to handle winch cable when the
hook end is not free. Keep all parts of body and
clothing clear of cable rollers, cable entry area of
fairlead and winch drum.
23. Never allow anyone to stand under a suspended
load.
24. Avoid sudden “shock” loads or attempting to “jerk”
a load free. This type of operation may cause
heavy loads in excess of rated capacity, which
may result in failure of cable and/or winch.
16. When winding winch cable on the winch drum.
Never attempt to maintain tension by allowing
winch cable to slip through hands. Always use
“hand-over-have” technique, being careful to
keep hands and clothing away from winch drum
and fairlead rollers.
25. Whenever possible, install the capstan drive or
winch in a location where the rotating capstan
shaft or extension shaft is not adjacent to a “normal” operators station.
17. Never use winch cable with broken strands. Replace winch cable.
26. All winch and/or capstan controls shall be located within easy reach of the operator. The controls shall be installed in such a location that the
operator is removed from the electrical path to
ground if the load, rigging, cable or rope come in
contact with or within proximity to an energized
conductor.
18. Do not weld on any part of the winch.
19. Use recommended hydraulic oil and gear lubricant.
20. Appropriate guards should be installed around exposed portions of an extension shaft and/or capstan shaft. Install guarding to prevent personnel
from getting any part of body or clothing caught
at a point where rope is wound onto a capstan,
cable is wound onto a cable drum or where rope
and/or cable is drawn through guide rollers.
27. All rope used on a capstan must be non-conducting such that the operator is removed from
the electrical path to ground if the load, rigging or
rope come in contact with or within proximity to
an energized conductor.
21. Install switches or valves which will shut off power to the drive or winch in locations where they
can be reached by anyone entangled in the rope
or cable before being drawn onto the capstan,
cable drum, guide rollers or any “pinch point”.
4
WORM GEAR WINCH TERMINOLOGY
AND THEORY OF OPERATION
The model shown above is a MS50-2B R RA
Terminology Often Used With
Worm Gear Winches:
The illustration shown above points out the basic
components of a typical upright worm gear winch.
Torque is applied to the input end of the worm shaft
by a PTO driven sprocket and chain or a hydraulic
or electric motor. The steel worm and worm shaft are
supported by anti-friction roller bearings. Tapered
bearings are shown in this illustration while ball
bearings and needle roller bearings may be used on
other models. As the steel worm turns, the “threads”
push or pull the aluminum-bronze alloy worm gear.
The worm gear is keyed to the drum shaft which
is supported on bronze bushings in the worm gear
housing and bearing leg. A sliding dog-type clutch is
splined or keyed to the cable drum shaft. The drum
clutch transmits the torque of the worm gear to the
cable drum.
Starting Input Torque – The torque applied to the
winch input shaft required to start a rated load upward from a suspended position. It is expressed in
pound-feet, pound-inches, kilogram-meters or Newton-meters. May be referred to as static torque.
Running Input Torque – The torque applied to the
winch input shaft required to maintain upward movement of rated load. It is expressed in pound-feet,
pound-inches, kilogram-meters or Newton-meters.
May also be referred to as dynamic torque.
Rated Input Speed – The maximum permissible input speed at rated load expressed in RPM. Exceeding rated input speed may cause damage to the
worm gear set.
An oil cooled automatic safety brake is installed on
the end of the worm shaft on most winches with a
12,000 pound (5,444 Kg) or greater rated capacity.
The majority of the worm gear winch’s load holding
ability is achieved by the inability to back-drive the
worm gear set. The safety brake provides additional
resistance to rotation of the worm shaft and absorbs
the inertia of the PTO gear train if so equipped. A
band-type brake or small shoe-type brake is installed
on most worm gear winches to reduce wire rope
“birdnesting” when the drum clutch is disengaged to
pull wire rope out by hand. These drum brakes are
NOT designed for load holding.
Full Drum or Maximum Layers – A drum containing
the maximum number of cable layers which would
leave a freeboard of 0.7 x the cable diameter below
the drum flange.
Drum Storage Capacity – The maximum length
of wire rope which may be wound on a cable drum
without exceeding the maximum number of layers. It
is expressed in feet or meters.
5
Layer – All wraps on the same level between drum
flanges.
Rated Line Pull – The line pull on any layer that
results from the output torque which produces maximum rated line pull on the first layer. Rated first layer line pull is based on maintaining an acceptable
structural safety factor while providing an acceptable component service life. Line pull is expressed
in pounds or kilograms.
Freeboard – The amount of drum flange that extends radially past the last layer of wire rope.
Mean Drum – A theoretical point located midway between the first layer of wire rope on the cable drum
barrel and the top layer. Often used as a reference
point in measuring winch performance.
Rated Line Speed – The line speed on any specific layer that results from rated input speed. It is
expressed in feet/minute or meters/minute.
Gear Set Efficiency – The relationship between the
input horsepower transmitted to the winch by the
prime mover and the output horsepower transmitted by the winch to the wire rope. Expressed as a
percentage.
Thermal Rating (Duty Cycle) – The result of a test,
expressed as the distance (feet or meters) a load
travels up and down while hoisting and lowering a
specified weight until the lubricating oil rises from
100°F to 250°F (38°C to 121°C). 250°F (121°C) is
the maximum intermittent gear oil temperature allowed. Most gear oils “break down” rapidly at higher
temperatures and seals may be damaged.
Largest Recommended Wire Rope Size – Should
be no larger than 1/8th the cable drum barrel diameter for most recovery applications.
Extension Shaft – the standard cable drum shaft is
extended or replaced by an extra long shaft which
permits the use of capstans or CR reels at the side
of the vehicle. Usually installed on the curb side of
the vehicle, most extension shafts are limited to an
standard length of 44 to 46-1/2 in. (112-118 cm) from
the cable drum center-line.
Drum Clutch – Also known as a “dog-clutch” or “jaw
clutch”, consists of two or more drive lugs which
engage similar driven lugs to transmit torque to the
cable drum.
Capstan – Usually a small removable drum used to
apply force to fiber rope wrapped around the barrel
with tension applied by hand. Most have a nominal
barrel diameter of 7 in. (178 mm).
Free Spooling – The operation of manually unspooling wire rope from the cable drum by pulling on the
free end of the rope while the cable drum is disconnected (declutched) from its power train.
CR Reel – Collapsible recovery reels are used for
picking up and coiling power and telephone lines
which have been removed from the poles and lowered to the ground. Most CR (reels have a nominal
barrel diameter of 20 in. (508 mm).
Wrap – A single coil of wire rope wound on a drum.
“Bull Gear” – Bronze alloy gear powered by the
steel worm. Braden refers to the “bull gear” as the
worm gear.
Fleet Angle – That angle between the wire rope’s position at the extreme end wrap on a drum, and a line
drawn perpendicular to the axis of the drum through the center of the nearest fixed sheave or load attachment point. (Refer to illustration below.)
6
WINCH MODEL NUMBER AND ASSEMBLY IDENTIFICATION
Braden worm gear winches are identified by model and serial number stamped into a smooth surface near
the top of the worm gear housing. The winch model number and serial number must be referenced when
ordering service parts or requesting information. Do not try to identify a Braden winch by using a raised or
foundry casting number.
LOW MOUNT MODEL
A
M
S
U
3
-
A - DESIGN TESTED
TO SAE J706A
10
F
EB
R
RA
RA - RIGHT HAND
ASSEMBLY
LA - LEFT HAND
C - CONVERTIBLE BASE
E - ELECTRIC DRIVE
H - HYDRAULIC DRIVE
L - LIGHTWEIGHT
HOUSING
M - MECHANICAL DRIVE
ASSEMBLY
R - RIGHT HAND
GEAR CUT
L - LEFT HAND
GEAR CUT
EB - EXTENSION SHAFT
ONE SIDE ONLY
EEB - EXTENSION SHAFT
BOTH SIDES
SPL - SPECIAL
G - REVISED GEAR PROFILE
S - SPACER ADDED BETWEEN
WORM GEAR AND
HOUSING
U - UNDERSLUNG OR LOW MOUNT
F - FRONT OR BUMPER MOUNT
IN MOST COMMON INSTALLATION
3 - BASIC MODEL NUMBER
10 - 10 IN. NOMINAL DRUM BARREL LENGTH
BETWEEN DRUM FLANGES
7
UPRIGHT WINCHES
UPRIGHT
A
M
S
1 0
MODEL
-
18
B
*
L
LA
LA
A - DESIGN TESTED
TO SAE J706A
- LEFT HAND
ASSEMBLY
RA - RIGHT HAND
BR - BRADEN SPEED
REDUCER, DRUM
FURNISHED BY CUST.
C - CONVERTIBLE BASE
E&EC - HIGH EFFICIENCY
CONSTANT DUTY
H - HYDRAULIC DRIVE
M - MECHANICAL DRIVE
MF - MARINE FISHING
INDUSTRY DESIGN
OS - OSHA SPEC DRUM
UT - UTILITY INDUSTRY
REDUCER (DRUM
OFTEN FURNISHED BY
CUSTOMER)
ASSEMBLY
R - RIGHT HAND
GEAR CUT
L - LEFT HAND
GEAR CUT
EB
- EXTENSION SHAFT
ONE SIDE ONLY
EEB - EXTENSION SHAFT
BOTH SIDES
SPL - SPECIAL
--- UNIT CONTROLLED DRUM CLUTCH
ADJUSTABLE SHOE TYPE
DRUM BRAKE
A - REMOTE CONTROLLED DRUM
CLUTCH SHOE TYPE DRUM BRAKE
B - REMOTE CONTROLLED
ADJUSTABLE BAND-TYPE
DRUM BRAKE AND DRUM CLUTCH
S - SPACER ADDED
BETWEEN WORM GEAR
AND HOUSING
10 - BASIC WINCH MODEL
18 - 18 IN. NOMINAL DRUM BARREL LENGTH
BETWEEN DRUM FLANGES
8
GEAR CUT INFORMATION
The following information will help you determine the cut of thread direction of the worm and worm gear and
the assembly configuration of the worm gear housing designated in the winch model number.
Example: R (LA) – right cut gear set, left hand assembly.
1. All winch model assembly designations are specified for standing at the rear of the vehicle, looking forward. Left side is often referred to as driver or street side; right side may be referred to as passenger or
curb side.
2. The assembly designation for the winch (RA, LA) describes which side of the winch the worm gear housing is installed on. Generally the worm gear housing is matched to the same side the power take-off is
mounted to the transmission to make routing of hoses or dive lines easier. If the PTO is mounted to the
right hand side of the transmission, then specify (RA) for winch assembly; (LA) for left hand PTO mounting.
3. The standard assembly configuration for low mount, front bumper installations would position the input
shaft or hydraulic motor toward the rear (radiator).
4. The standard assembly configuration for upright mounted installations would position the input shaft or
hydraulic motor toward the front (cab). If the worm shaft is to point toward the rear wheels, specify “rear
drive”.
5. The standard assembly configuration of the winch safety brake is always for “overwind” of the cable onto
the winch drum. If underwind drum rotation is required, you must specify “set brake for underwind”.
6. Power take-off output shaft rotation is determined in relation to the vehicle engine. It may be termed “engine rotation” or “opposite engine rotation”.
Winches Mounted Behind Cab of Truck
Power Take-Off
Rotation
Direction of
Spooling
PLAIN HANGER
BEARING
Worm and Gear
Required
ENGINE ROTATION
OVER DRUM
UNDER DRUM
LEFT HAND
RIGHT HAND
RIGHT HAND
LEFT HAND
OPPOSITE ENGINE
ROTATION
OVER DRUM
UNDER DRUM
RIGHT HAND
LEFT HAND
LEFT HAND
RIGHT HAND
2-Speed Hanger Bearing
(H2 & FH2) and PHD
Power Divider
Worm and Gear Required
Winches Mounted on Front End of Truck
ENGINE ROTATION
OVER DRUM
UNDER DRUM
RIGHT HAND
LEFT HAND
LEFT HAND
RIGHT HAND
OPPOSITE ENGINE
ROTATION
OVER DRUM
UNDER DRUM
LEFT HAND
RIGHT HAND
RIGHT HAND
LEFT HAND
When ordering, designate worm and gear set as such:
R(RA) = Right worm and gear set
Right Hand Assembly
L(RA) = Left worm and gear set
Right Hand Assembly
R(LA) = Right worm and gear set
Left Hand Assembly
L(LA) = Left worm and gear set
Left Hand Assembly
9
WINCH OPERATION
Drum Clutch Operation:
Visually check that drum clutch is fully engaged, shift handle at full travel or locked in detent, before operating the winch drum under load.
DO NOT move the load, the winch, or the winch platform before making certain the drum clutch is set to
“engage” and the clutch is fully engaged. A partially engaged drum clutch may “jump out” of engagement.
A load on the winch line may prevent a partially engaged clutch from disengaging, but any change in the
load may allow the clutch to disengage unexpectedly. This may cause a loss of load control, which could
result in property damage, injury, or death.
Procedure for Shifting Clutch (where equipped):
A. To Engage Clutch.
1. Insure winch motor or PTO is not running and the winch cable and cable drum are not loaded.
The prime mover is stopped in neutral with parking brake set.
2. Lift lock knob on shift handle (where applicable) to disengage lock detent. Move handle to full
travel to engage clutch. If shift handle lock knob will not engage detent hole, the clutch is not
fully engaged. At this point, it may be necessary to manually rotate the cable drum slightly
in either direction to align clutch lugs while holding slight pressure on shift handle.
B. To Disengage Clutch
1. Insure winch motor or PTO is not running and the winch cable and cable drum are not loaded.
The prime mover is stopped in neutral with parking brake set.
2. Lift lock knob on shift handle (where applicable) to disengage lock detent. Move shift handle full
travel to disengage clutch. If shift handle has resistance to shift, cable drum may be manually
rotated in the direction to haul-in cable to relieve the self-energized load on the drum clutch lugs
and allow the shift.
DO NOT attempt to engage drum clutch while cable drum is rotating.
DO NOT attempt to disengage drum clutch with a load applied to the winch cable.
DO NOT use “cheaters” to extend the shift handle length or other means to apply undue force on the shift
handle.
Engaging or disengaging the drum clutch while the cable drum is rotating or under load, or the use of
undue force, may result in damage to drum clutch components. Damaged drum clutch components may
disengage under load, and cause a loss of load control, which could result in property damage, injury, or
death.
NOTE: If your operation involves lifting loads and does not require the clutch to be disengaged, Braden
strongly recommends the drum clutch be mechanically locked in the fully engaged position to avoid accidental disengagement of the clutch.
Accidental disengagement of the clutch while lifting or lowering a load may cause a loss of load control,
which could result in property damage, injury, or death.
10
Procedure For Determining Condition of Clutch Lugs:
There is typically a negative draft angle on the load bearing faces of the clutch and drum lugs to prevent
disengagement of the clutch under load. Since these surfaces cannot be visually inspected on all winches
without disassembling the winch, the following procedure was devised to insure that the clutch lug condition
is such that the clutch cannot disengage under load.
NEGATIVE
DRAFT
1. Fully engage clutch (as described above).
2. Power about 10 feet (9 m) of cable off the drum.
3. Power in very slowly while holding 2-4 lb. (1-2 Kg) of tension on
the cable. This tension must be maintained throughout the balance of this procedure. The purpose of this step is to take up the
slack in the power train and maintain a no-slack condition.
4. Stop the winch, leaving the clutch engaged and approximately 3
feet (1m) of cable off drum.
5. Mark one line on or near the outside diameter of the drum flange
and another on the worm gear housing adjacent to the first line.
6. While maintaining cable tension, disengage the clutch slowly and
observe the lines. The drum flange should move 1/16 in. – 5/16
in. (1.5 – 8 mm) in the direction that spools cable onto the drum.
If less than 1/16 in. (1.5 mm) travel occurs, or if the travel is in the
opposite direction, the winch should be disassembled and the
clutch visually inspected for wear and/or damage and replaced if
necessary. The drum clutch should be routinely inspected using
the above procedure.
11
Basic Winch Operating Method
Before taking your new winch to the jobsite, we suggest that you operate the winch under no-load conditions
to familiarize yourself with the winch controls at various line speeds.
Engine speed, PTO controls and winch controls will influence your “feel” of the winch operation. Remote
lever controls, air-shift cylinders and emergency stop systems should be adjusted at time of installation and
all operators fully trained on their operation under a no-load condition.
Ground personnel must stay in view of the operator and clear of load and capstan drive or winch. Do not
allow personnel near rope or cable under tension, or to be in line with the load. A broken rope or cable and/
or loss of load control may cause property damage, personal injury or death. A safe distance of at least
1-1/2 times the working length of the rope or cable should be maintained by ground personnel.
Typical Winch Maneuver:
When possible, position winch such that the centerline of the winch drum is perpendicular to the winch load.
The angle the winch must pull from (fleet angle) must not exceed 1-1/2°. If the fleet angle exceeds 1-1/2°, the
cable will not spool correctly resulting in damaged cable and prematurely worn winch components.
Disengage the drum clutch, as described earlier, and pull cable off of winch drum. If equipped, apply shoe or
band type drum brake to control drum over-spin or “birdnesting”.
The small shoe and band-type drum brakes are to be used to control drum over-spin or “birdnesting” only.
They are NOT intended to control the winch load. The worm gear set and safety brake are designed to hold
the winch load. Attempting to hold a load using a shoe or band type drum brake may result in the loss of a
winch load, property damage, severe personal injury, or death.
Avoid powering out winch cable as this practice causes unnecessary heat and accelerated wear of winch
brake components.
Securely attach winch cable to load in such a manner to avoid damage to the load or cable. Fully engage
the drum clutch as described earlier.
Worm gear winch clutches may disengage and drop or lose control of a load if they are not fully engaged
at the beginning of a lift or pull. The winch operator must visually determine that the clutch is fully engaged
before lifting or pulling a load. Failure to do so may result in property damage, severe personal injury, or
death.
Release band type drum brake, if so equipped, and engage winch control. Operate controls smoothly to
avoid “jerking” of load. Operate winch at slowest speed practicable for your application to reduce worm gear
heat rise and maintain winch load control.
Observe winch operation carefully to make certain that all ground personnel remain clear of winch cable and
load and that load does not shift requiring the repositioning of the winch cable or winch. When the load is
properly positioned, stop the winch. The automatic safety brake and worm gear set are designed to hold the
load when properly adjusted. (Refer to “Safety Brake Service & Adjustment”).
Secure the load in position. Pay out enough winch cable to remove all tension on cable and drum. Disengage
drum clutch and disconnect winch cable from load.
12
Engage drum clutch as described earlier. When possible, visually determine that the drum clutch is fully engaged.
Wind winch cable back onto cable drum while maintaining minimum fleet angle and sufficient tension to
cause the cable to spool properly being careful to keep hands and clothing away from cable drum and fairlead rollers.
Winch Break-In:
As a worm gear winch operates, the steel worm will burnish a unique wear pattern onto the aluminum-bronze
alloy worm gear. For this reason, we recommend that a worm gear should not be replaced without also replacing the steel worm. A proper “break-in” of a new winch or a repaired winch with a new worm gear set,
is needed to produce a gear wear pattern which will maximize component life. Follow the procedure listed
below to properly “break-in” a Braden worm gear winch before operating at rated capacity.
Make certain the winch is properly mounted to the vehicle. Refer to “Winch Installation” section of this manual.
Fill winch to oil level plug with recommended worm gear oil. The proper oil level for most worm gear winches
is near or slightly above the centerline of the worm shaft. Locate the proper oil level plug for your application.
Refer to “Preventive Maintenance” section for additional information.
Spool the new cable onto the winch at very low speed while monitoring worm gear housing temperature if a
load is used to hold tension on new wire rope. The first ten winching operations should be made at approximately 60% of rated capacity and at less than rated line speed to obtain a good worm gear wear pattern.
Never operate winch at speeds higher than the published maximum input RPM for the given load as excessive heat and accelerated worm gear wear may result.
Capstan Use:
Braden has provided two basic types of capstans: Quick disconnect bayonet type and a bolt-on type.
• Before installing a bayonet type capstan, make certain the spring is properly located in the bore. The
spring holds the capstan in the lock position on the extension or capstan shaft. If the spring is omitted,
the capstan may come off of the shaft and cause a sudden loss of load control which may result in
property damage, personal injury, or death. Also, closely inspect the edges of the lock pocket to make
certain they are still sharp and not rounded from extensive use. A badly worn lock pocket may prevent
the capstan from locking securely to the shaft which could allow the capstan to come off the shaft and
cause a sudden loss of load control which may result in property damage, personal injury, or death.
• Make certain that the vehicle is positioned such that the load line and hand line are perpendicular to the
center of the capstan barrel. Do not allow rope to pull against either flange of the capstan as the rope
may get damaged or may “jump” over flange and cause a sudden loss of load control which may result
in property damage, personal injury, or death.
• If a bolt-on capstan is being used, make certain that a ¾ in. X 5-1/4 in. (19 X 133 mm) Grade 8 capscrew
and self-locking nut are used. A soft bolt or pin may shear off and cause a sudden loss of load control
which may result in property damage, personal injury, or death.
13
As a general rule, always wrap rope around the capstan in the same direction that wire rope is wrapped
around the cable drum to take advantage of the worm shaft brake which is effective in one direction only.
To install the bayonet type capstan, push the capstan onto the extension shaft, against spring tension, then
turn counter-clockwise (viewed from the outside) to the stop. Release the capstan and verify that the spring
has pushed the capstan outward into the lock position.
Exposed areas of extension shafts and/or capstan shafts are dangerous. Clothing and other items may
become tangled and wrapped around the shaft when rotating. Appropriate guarding should be installed to
prevent any part of the body or clothing from contacting the shaft when it is rotating. Failure to provide appropriate guarding could result in property damage, injury, or death.
Auxiliary Rigging:
Snatch Block
An auxiliary sheave or “Snatch Block” as it is often called, increases the versatility of the winch and is
highly recommended for the following applications:
When fleet angles exceed 1-1/2°
When winch loads exceed the safe winch or wire rope capacity.
When slower line speeds are required for precise load control.
Securely attach snatch block to anchor point following manufacturers recommendations. Only use a snatch
block of the recommended type and load capacity for your application.
Tree Protector
If a winch cable or snatch block must be secured to a tree or other structure for recovery applications, a heavy
nylon web sling of proper capacity rating should be used to avoid inflicting serious damage to the tree.
A poorly attached or undersized snatch block may break loose and cause a sudden loss of load control
which could result in property damage, severe personal injury, or death.
14
15
WINCH INSTALLATION
General:
The winch must be securely mounted to a rigid surface which will not flex when the winch is in use. The
winch should be installed with the centerline of the drum in a horizontal position, and the worm shaft located
in a horizontal position and below the cable drum. The mounting surface must be flat within .020 in (.50 mm)
to maintain proper alignment of the worm gear housing and bearing leg assembly. Contact the factory for
deviations from the above requirements.
Flexing or uneven mounting surfaces will produce internal winch distortion which may result in rapid component wear, overheating, poor winch performance or improperly engaged drum clutch mechanism which
may disengage and drop or lose control of a load causing property damage, severe injury, or death.
The winch should be mounted or operated perpendicular to an imaginary line from the center of the cable
drum to the first sheave or load to ensure even cable spooling. Make certain this fleet angle does not exceed
1-1/2°. Fleet angles greater than 1-1/2° will cause uneven cable spooling onto the cable drum which may
result in damaged cable.
It is the responsibility of the person(s) installing the winch to make certain that the winch is secured to the
vehicle with equivalent or greater strength capscrews than Braden has used to secure the winch to the base
angles.
The winch base angles should be securely mounted to the vehicle frame in a manner acceptable to the
vehicle manufacturer. The frame adapter brackets should be bolted to the winch base angles as close to
the worm gear housing and bearing leg assembly as practicable. This method would provide the greatest
strength and minimize distortion.
All mounting fasteners must be SAE Grade 8 (10.9 metric) or better and evenly tightened to the torque values
shown in the chart found in the Specifications section of this manual.
Mechanical Drive System:
General
If the winch is mechanically driven, make certain guards are installed over exposed drive train components
(PTO shafts, couplings, sprockets and chains, etc.) to protect against injury. A sufficient final sprocket reduction between the hanger bearing or pillow block and the winch is recommended to reduce torque loads applied to the PTO drive shafts and to provide a reduced winch line speed for better load control. PTO driveline
angularity must not exceed the driveline manufacturer’s recommendation.
Use a straight edge to ensure axial alignment of
all sprockets
Make certain all pillow blocks, PTO and hanger
bearing shafts are parallel to each other
16
Hydraulic Drive System
General
If the winch is hydraulically driven, make certain the entire hydraulic system is clean and all components
(control valve/linkage, pump, relief valve and filters) function properly. Hydraulic lines, hoses and components must be of sufficient size to assure minimum back pressure. Back pressure is measured at the outlet
or low pressure side of the hydraulic motor when the winch or capstan drive is operated. Back pressure is
caused by all restrictions to flow between the motor and reservoir. High back pressure will cause excessive
system heat, require higher pressure to achieve specified performance, waste horsepower and damage
seals. Consult the motor manufacturer’s service literature for maximum allowable back pressure.
Directional Control Valve
Most installation instructions and schematic diagrams published by Braden correctly describe the control
valve to be used, but do not specify the valve to be spring centered and without detents. The updated control
valve description and schematic representation appear below.
The directional control valve must be a three position, four- way valve without detents and with a
spring centered motor spool such that the valve returns to the centered position whenever the handle is released, and both work ports are open to tank (open center, open port).
DO NOT use a control valve with any detents or latching mechanism that would hold the control valve in an actuated or running
position when the operator releases the control handle. Use of
the wrong type of control valve could lead to unintentional operation of the capstan drive and/or winch, which could result in
property damage, personal injury, or death.
Hydraulic Fluid
We have briefly listed the most important characteristics to consider when evaluating a hydraulic fluid.
Correct viscosity, High viscosity index (VI), High film strength for proper lubrication,
High oxidation resistance, Good water separating ability, Good anti-rust properties,
Good resistance to foaming and Good anti-wear ability.
We recommend a premium quality, industrial anti-wear, hydraulic fluid be used with the motors on Braden
products. Consistent use of the proper fluid, which matches the motor design and application will reduce motor wear and give better overall performance.
Viscosity
One of the most important hydraulic fluid characteristics to consider is viscosity. The oil selected must have
the proper viscosity to maintain a lubricating film between bearing and sealing surfaces at maximum operating temperatures and still be able to flow easily during a cold start-up.
17
Viscosity index (VI) is a measure of the way viscosity changes with temperature. The smaller the viscosity
change with temperature, the higher the VI. Multiple viscosity oils, such as SAE 10W-30, contain additives to
improve viscosity index. As a general rule, we do not recommend multiple viscosity oils. Oils with a viscosity
of 100 SUS (21 centistokes) at working temperatures will provide best overall performance.
The following chart provides some general guidelines for selecting a hydraulic oil:
Motor Design
Conventional Gear
Geroller and Gerotor
Optimum ViscositySUS (Centistokes)
Maximum Startup Viscosity
SUS (Centistokes)
“ATF” Fluids
Maximum Operating Temperature
Typical Viscosity Index- VI
Hydraulic System
Operating Temperature
90-125°F (32-52°C)
105-140°F (41-60°C)
118-154°F (46-68°C)
134-172°F (57-78°C)
170-190°F (77-88°C)
100 (21)
100-200 (20-43)
7,500 (1,620)
10,000 (2,100)
OK
200°F (93°C)
Marginal
180°F (82°C)
90-105
ISO-VG
SUS @
CST @ 40°C
100°F
22
125
32
170
40
200
57
300
140
750
90-105
ISO-VG
SUS @
CST @ 40°C
100°F
32
150
46
225
68
315
100
465
300
1,500
*pump inlet cavitation will be the limiting consideration on most systems.
Cold Weather Operation
Oils selected for use in cold weather operation should be selected in accordance with pump manufacturer’s
guidelines. In general, the minimum pour point of the fluid should be at least 20°F (11°C) below the minimum expected startup temperature. Startup procedures should allow for a gradual warm-up until the fluid
reaches a reasonably fluid state.
Filtration
Cleanliness of hydraulic fluid is of extreme importance. Experience has shown that excessive contamination will severely affect component life. In general, a filter with a Beta 10 > 20 and a system cleanliness of
ISO 18/13 should be adequate for motors used on Braden products. Other components in the hydraulic
system may require a higher degree of filtration.
Direct Mount Hydraulic Motors (Char-Lynn)
The mounting flange, support bearing and shaft seal has been eliminated from these motors to greatly
reduce the package size of the winch when compared to conventional add-on adapters and motors.
The orbital motor drive shaft couples directly to the winch worm shaft. The conventional worm shaft oil seal
and motor shaft seal are replaced by a quad-ring seal and seal container which must separate the heavy
worm gear oil from the hydraulic oil.
To achieve optimum motor life, run-in new motor for approximately one hour at no more than 30% of rated
pressure before application of full load. Always be sure all hydraulic lines and motor are filled with oil prior
to any load application.
18
CAUTION
Failure to properly install and run-in a new hydraulic motor will result in accelerated component wear and
unsatisfactory winch performance.
Hydraulic Circuits
NOTE: A case drain is required for all applications
19
SPECIFICATIONS:
Two Speed Winches:
Motor Back Pressure Limits:
100 PSI (689 kPa) Continuous (Capstan)
200 PSI (1379 kPa) Intermittent (Winch)
600 PSI (4137 kPa) Peak
• 100 PSI (689 kPa) Differential pressure is required to shift the motor into high speed.
• A customer supplied 3-way hydraulic valve is required to shift the motor into high speed. S ¼ in.
(6 mm) valve rated for over 2.0 GPM (7.6 lpm) is
adequate and may be manually, electrically, or
otherwise remotely actuated to suite the application. (NOTE: In low speed, the 3-way valve
must connect the motor port S to tank to prevent
a false motor shift to high speed.)
Port Sizes:
(A) and (B) Supply Ports, -10 SAE
O-Ring Boss (7/8 – 14 Thread)
(T) Tank Port: Single Speed, -4 SAE
O-Ring Boss (7/16 – 20 Thread)
Two-Speed, -6 SAE
O-Ring Boss (9/16 – 18 Thread)
(S) Two-Speed Shift Port, -4 SAE
O-Ring Boss Port (7/16 – 20 Thread)
• Due to the design of the Char-Lynn 2-speed motor valving, some applications may experience a
high pitched noise when operated in one direction of high speed rotation. This can be corrected
by creating a limited back pressure on the motor
port B (port closest to the motor mounting flange).
This may be accomplished by installing relief/
free-flow valve which will apply a back pressure
to only port B of the Char-Lynn motor. A typical
valve would be Sun Hydraulic #YCFC-FEN-BK,
250 PSI (1724 kPa), Braden part number 29656.
(NOTE: A relief/free-flow valve such as 29656 is
required with all 2-speed motors.) Run the winch
at full speed, no load, and increase the back
pressure until the high pitched noise decreases.
This will typically occur at 250-300 psi (1,7242,069 kPa).
Parker Hannifin 700 Series Two-Speed Motors
Beginning in August, 1997 the Parker Hannifin 700 Series motor replaced the Char-Lynn 2000 Series as the
optional two-speed motor for worm gear products. The Parker motor uses a 12 volt solenoid shift valve to
shift the motor between low and high speeds. The back pressure valve required for the Char-Lynn motor is
not needed with the Parker motor. These two features should simplify installation of winches with the Parker
motor. The two-speed function in the Parker motor is a series/parallel design which should provide better
efficiency than the Char-Lynn motor. Mounting flange and shaft dimensions are the same as the Char-Lynn
motor, so field replacements can be made easily. Note, however, the Parker motors are ½ to 1 ½ inches
longer than the Char-Lynn motors they replace.
The Parker motors are normally supplied to operate in low-speed, high torque mode with the solenoid deenergized. The motor is shifted into high-speed, low-torque mode by energizing the 12 volt solenoid. This
sequence can be reversed by reversing the main motor spool as shown in the drawing on page 22. The
motors are also equipped with a manual override selector on the solenoid. If for some reason 12 volt power
is not available, the motor can be manually shifted as shown in the drawing. The hydraulic schematics that
follow show the motor operation with the spool in the “normal” position.
20
Parker Hannifin 700 Series Two-Speed Hydraulic Motor
Motor is shown with the solenoid de-energized and the power elements in parallel (low speed, high torque
mode). This is the “normal” configuration for the motor.
Energizing the solenoid shifts the motor into high speed, low torque mode.
NOTE 1: Motor case drain optional. Case drain not required unless peak backpressure exceeds 600 psi
(4137 kPa). If problems are encountered while shifting the motor, the addition of a case dain line may resolve
the problem.
21
The main motor spool can be installed in either direction, as shown above, to reverse “normal” motor operation. Note that the spring is always on the side of the spool opposite the pilot port.
Normally Parallel spool position
Solenoid de-energized = low speed, high torque mode
Solenoid energized = high speed, low torque mode
Normally Series spool position
Solenoid de-energized = high speed, low torque mode
Solenoid energized = low speed, high torque mode
Motors are installed at the factory with the spool in the normally parallel position.
The two position manual override selector is also shown above.
The motor can be manually shifted if the solenoid is faulty or 12 volt power is unavailable.
Position 1 is the normal operating mode.
Position 2 is the equivalent of energizing the solenoid. Note that with the selector in this position,
energizing the solenoid has no affect on motor operation.
PORT SIZES:
Port A & B -10 SAE O-Ring Boss (7/8-14 Thread)
Port T (All) -4 SAE O-Ring Boss (7/16-20 Thread)
NOTE: Long port adapters, P/N 102342, are used in ports A & B to aid installation of motor control lines.
Port Sizes:
Port A & B - 10 SAE o-ring boss (7/8-14 Thread)
Port T (All) - 4 SAE O-ring Boss (7/16-20 Thread)
NOTE: Long Port Adapters PN 103342, are used in Ports A & B to aid installation of motor control lines
22
23
Wire Rope Installation:
All winches are rated at bare drum line pull. As the cable drum fills, the line pull will decrease (loss of leverage) as the line speed increases (larger circumference). Therefore, install the minimum length of cable possible for your application so that the winch will operate on lower layers (smaller diameter) and deliver the
maximum line pull.
Using larger cable will not always increase strength as the larger cable may be more prone to bending fatigue
failure than smaller wire rope. Consult your wire rope supplier for his recommendations for the wire rope and
other rigging which best suits your application.
Most winches utilize some type of worm shaft brake which acts with the worm gear system to hold the load.
Most of these brakes allow free rotation of the worm shaft in the haul-in direction and lock-up to provide resistance in the pay-out direction. Install the wire rope so that when the worm shaft turns easily, the wire rope is
pulled in. If you wish to wind the cable onto the drum for the opposite direction, underwound vs. overwound,
refer to the winch “Safety Brake” section of this manual. It should be noted, that some winch models are designed to operate without a worm shaft brake and rely on the worm gear set alone to hold the load.
On winches equipped with worm shaft brakes, the wire rope must be installed for the correct direction of
drum rotation for the brake to be effective. Winding cable onto the winch with the brake set for opposite
rotation may result in the loss of winch load control and cause property damage, severe injury, or death.
Generally speaking, wire rope is secured to the cable drum by one of four common methods; u-bolt clamp,
set screw, wedge and pocket, or cable ferrule. Refer to the procedure which matches your winch.
Worm gear winch cable anchors (u-bolts, set screws, wedges, etc.) are NOT designed to hold rated loads.
Winch loads applied directly to the cable anchor may cause the cable to pull free and result in the sudden
loss of load control and cause property damage, severe personal injury, or death. A minimum of 5 wraps
of cable must be left on the drum barrel to achieve rated load. Do not use knots to secure or attach winch
cable. We suggest that the last 5 wraps of cable be painted bright red to serve as a visual warning.
U-Bolt Clamp:
Prepare the end of the wire rope as recommended by the wire rope
manufacturer. Pass the wire rope through the U-bolt clamp until the end
extends 1-1/2-2 wire rope diameters beyond the clamp. Evenly tighten
the U-bolt clamp nuts until the wire rope deforms slightly under the Ubolt and the rope is held securely.
24
Set-Screw Clamp:
Prepare the end of the wire rope as recommended by the wire rope manufacturer.
Insert the wire rope into the anchor hole in the cable drum barrel until it is visible
from the open end but does not protrude beyond the end of the hole.
Tighten the set screw until the wire rope deforms slightly under the set screw and
the rope is held securely.
Wedge and Pocket:
Prepare the end of the wire rope as recommended
by the wire rope manufacturer. Pass the free end of
the wire rope through the small opening of the cable
drum anchor pocket. Loop the wire rope and push
the free end about ¾ of the way back through the
pocket.
Install the wedge in the loop then pull the slack out of the loop with the working line. The wedge will slip into
the pocket and secure the wire rope into the drum.
Cable wedges are designed to accommodate specific wire rope sizes. Refer to the applicable sales specification brochure for additional information.
CAUTION
The free end of the wire rope should be toward the center of the cable drum and the working line should
exit the anchor pocket next to the drum flange to achieve even spooling of wire rope.
INSTALLATION OF SPIRAL FERRULES
Re-usable, field-installed spiral ferrules are supplied with some Paccar winches. These ferrules are for use
with standard six-strand, IWRC (Independent Wire Rope Core) type wire rope. Refer to ferrule selection chart
in the “Specifications” section of this manual.
Step One
Step Two
Insert cable through the small opening of the ferrule. Spread strands and lay them in individual grooves in
spiral wedges.
Tap wedges and cable into the ferrule leaving approximately 3/8 in. (10 mm) extending from the top. The first
load will seat cable and wedges securely in the ferrule.
25
PREVENTIVE MAINTENANCE
Recommended Preventive Maintenance Intervals:
A regular program of preventive maintenance for your Braden winch will minimize the need for emergency
servicing and promote long product life and trouble-free service.
The service intervals suggested in this manual will optimize component service life. The intervals may be
gradually increased or decreased with experience of a particular lubricant and evaluation of your
application.
• Never attempt to service a winch with the prime mover running as accidental engagement may result in
property damage, severe personal injury, or death.
• Make certain all load is removed from winch cable and cable drum before servicing winch. A loaded
winch cable may rapidly unspool resulting in property damage, severe personal injury, or death.
Daily when winch is in regular use.
1. Inspect cable and rigging for broken wires or other damage as recommended by the wire rope and rigging
manufacturer.
2. Carefully inspect drum clutch and adjust shift mechanism to make certain it can be fully engaged and disengaged.
(Refer to “Drum Clutch Operations.”)
Weekly
1. Perform all daily inspections.
2. Check worm gear housing oil level and fill to the proper level with recommended oil. The proper oil level for
most worm gear winches is near the centerline of the worm shaft. Locate the proper oil level plug for your
application. For boom tip winches, turret winches and winches mounted upside down, fill to level plug or
halfway up on worm and be certain that the safety brake has sufficient oil when it is located in the highest
position. Overfilling the winch may result in oil leaks. Underfilling the winch may result in rapid wear of the
worm gear set..
3. Lubricate the grease fittings on the bearing legs and cable drum. On some winches, you may have to unspool the wire rope to gain access to the grease fittings in the cable drum. Use a high-quality, moly-type
grease with a rating of NLGI-2 or better.
4. Inspect and retighten as required, all winch mounting fasteners. Inspect and repair as required, all winch
mounting brackets and welds.
Monthly
1. Check alignment of sprockets, chains and PTO shafts to minimize wear on mechanical drive components.
Refer to “Winch Installation”.
2. Check/adjust hydraulic system relief valve to ensure proper performance and component protection on
hydraulically-driven systems.
3. Service hydraulic system filters/strainers as recommended by the system manufacturer.
4. Check drum clutch to be certain that the negative draft angle is clearly evident on the clutch and drum lugs.
Replace a worn sliding clutch, clutch plate or cable drum. (Refer to “Drum Clutch Operations.”)
26
DO NOT use the winch if the negative draft angle is worn straight or the edges of the clutch lugs are
rounded or chipped. A defective drum clutch may suddenly become disengaged which could cause a loss
of load control which may result in property damage, personal injury, or death.
5. Check/adjust worm shaft safety brake, if equipped.
Yearly
1. Check/adjust worm shaft end play if winch has been in heavy use. Refer to “Worm Shaft End Play Adjustment” procedure.
2. Change oil as follows:
a. Place winch in level position and remove drain plug. Drain oil into a suitable container and dispose of in
an environmentally-responsible manner.
Hot oil may cause injury. Make certain oil has cooled to a safe temperature before servicing
b. Install drain plug and fill winch with kerosene and run for 5 minutes with no load to dislodge any accumulated contaminants. Drain the kerosene into the container and reinstall plug. Note: It is normal to see a
small amount of fine bronze particles in the drain oil. If large flakes or chips are present, the winch should
be disassembled and the worm gear set inspected.
c. Refill winch to proper level with recommended worm gear oil. Refer to “Recommended Worm Gear Oil”
chart in Specifications section of this manual.
Worm Shaft End-Play Adjustment:
When repairing the winch, the worm shaft end-play should be carefully checked. Excessive worm shaft endlay will cause oil leaks around the worm shaft seals and greater heating and wear of the worm gear set. Too
little worm shaft end-play will not allow for thermal expansion of the worm which may cause damage to the
worm shaft bearings and bearing containers.
Worm shaft end-play is adjusted by adding or removing gaskets between the worm gear housing and the
bearing container. Refer to the “Oil Capacity and Worm Shaft End-Play” chart for specifications. Before adjusting worm shaft end-play, the worm gear set should be inspected for excessive wear or shock-load damage. Shock loaded gears may be distorted to the point where the self-locking gear design no longer provides
adequate braking action and the worm shaft safety brake repeatedly requires adjustment or slips under heavy
loads. Severely worn gears may not have adequate strength to withstand shock loads and heavy pulls.
If the gears have been distorted, the tips of the gear teeth may appear to be leaning in one direction in relation to the gear tooth root. Do not confuse this with the normal worm gear tooth helix angle. Replace all worn
or damaged parts as required.
Check/adjust worm shaft end-play as follows:
1. Remove hydraulic motor and motor adapter from winch if equipped. Remove safety brake housing if
equipped. Remove drive sprocket or sheave from worm shaft if equipped. Retighten bearing container
capscrews to recommended torque values from torque chart.
2. Attach dial indicator base to worm gear housing and place probe of dial indicator squarely against the end
of the worm shaft.
27
3. Grasp the cable drum and rotate firmly in one direction
and hold constant tension. Zero the dial indicator. Now
firmly rotate the drum in the other direction and hold constant tension. Record the worm shaft end-play and compare with specifications.
4. If too tight, remove the bearing container capscrews and
bearing container and add one shim/gasket at a time between the bearing container and the worm gear housing.
Then recheck end-play. If too loose, remove one gasket at
a time to achieve the recommended end-play.
5. Complete end-play adjustment procedure by re-tightening
the bearing container capscrews to the recommended
torque, refilling winch with recommended worm gear oil
and adjusting the worm gear safety brake.
Refer to “Oil Capacity And Worm Shaft End Play” chart in
“Specifications” section.
Safety Brake Service & Adjustment:
Oil-Cooled-Type Brake Service and Adjustment:
The Braden oil cooled safety brake is installed on the model OS4 and all winches with a capacity rating of
12,000 lbs. (53.4 kN) or higher. When properly serviced and adjusted, this break will provide reliable service for many years.
Description
The oil cooled safety brake consists of a brake rotor assembly located between two friction discs. An adjustable leaf spring assembly pushes against a pressure plate to hold the discs against the rotor.
The safety brake is located on the worm shaft of the winch and is contained in the brake housing. The spring
tension may be adjusted to compensate for component wear until wear limits are reached. The adjusting nut
is readily accessible without removing any parts from the winch.
Slow unwinding of the cable drum under load may be a warning that the safety brake needs adjustment or
repair. Do not continue to use a winch with a worn brake. Loss of load control may result in property damage, severe personal injury, or death.
28
The rotor assembly (see illustration) is actually a one-way clutch which allows the worm shaft to turn freely
in the haul-in direction but immediately locks up when winch operation is complete and the load tries to back
drive the winch. When the winch is powered in the haul-in direction the rotor driver turns free of the rotor disc
due to the tapered design of the roller pocket. When input power is removed and the load tries to drive the
worm shaft in the opposite direction, the rollers are forced to the narrow end of their pockets and lock the rotor driver to the rotor disc. The disc is locked in place by the friction discs, and the load is held.
The friction discs are held against the rotor disc at all times, but only experience relative movement when the
winch is being powered out to lower a load.
SERVICING
Drain oil from worm gear housing as described earlier. Remove the capscrews which secure the brake housing to the worm housing.
Remove the brake housing, leaf spring assembly, pressure plate and outer brake disc. Before removing the
rotor assembly, mark it to insure that it will be reinstalled in the same direction of rotation.
Remove the rotor assembly and inner friction disc.
Inspect the rotor assembly for damaged rollers, roller springs/plungers or rotor discs. Replace rotor as an
assembly if any part is damaged or unit fails to turn smoothly in the free direction and lock firmly in the opposite direction.
The leaf spring should be replaced as an assembly if it has lost its tension, has cracked spring leaves or
damaged adjuster threads.
After thorough cleaning and inspection, reassemble brake using the following procedure:
Install a new rotor drive key into the worm shaft. Pre-lubricate brake discs with worm gear oil and place the
inner friction disc over the worm shaft against the bearing container.
Install the rotor assembly onto the worm shaft in the same direction as it was removed.
Check that the rotor assembly has been properly installed by holding the rotor housing (disc area) stationary
while rotating the worm shaft in the haul-in direction. If the shaft turns free of the rotor housing in haul-in, it is
correctly installed. Install the outer friction disc, pressure plate and leaf spring assembly (refer to the drawings following).
Install the brake housing using new gaskets and seals as required. Evenly tighten capscrews to recommended torque.
Refill the winch to the proper level with recommended oil.
29
Winches smaller than MS20
Note that the leaf spring is positioned between the cast ribs in
the safety brake housing.
MS20 winches and larger
In the drawing on the left, the leaf spring is shown properly positioned
in the safety brake housing. Note that it IS NOT located between the
cast lugs. The drawing on the right shows the leaf spring properly
positioned in relationship to the pressure plate. The dotted lines represent the position of the cast lugs in the housing when the pressure
plate is in place.
• Periodic inspection and adjustment of the safety brake is required due to normal wear. Failure to maintain the safety brake adjustment may prevent the winch from holding the maximum rated load securely.
Loss of control may result in property damage, severe personal injury, or death.
• If the brake rotor is not installed for the proper direction of winch rotation, the brake will not be effective wiich may result in the loss of load control and cause property damage, severe personal injury, or
death.
ADJUSTMENT
There are three (3) methods for adjusting the Braden oil-cooled safety brake. Method 1 is the preferred
method and is used at the factory as the standard adjustment procedure. Method 2 and 3 may be used when
the proper tools are not available. Method 3 may be used for periodic field adjustment and as a final test for
method 2.
Method 1
Disengage the drum clutch. Adjustment is made by turning the brake adjustment nut in the center of the safety brake housing counter-clockwise to tighten the brake or clockwise to loosen it. Some winch models are
equipped with an adjusting screw lock-plate on the end of the brake housing
which is locked into place with two small capscrews. These capscrews must
be removed before the brake can be adjusted.
A torque wrench can be equipped with a special adapter or socket which
will engage the key (similar to the one shown in the illustration), in the input
end of the worm shaft. Proper torque can then be applied to the worm shaft
to adjust the brake (refer to torque chart below). NOTE: Only the input end
of the worm shaft must be turned with the torque wrench, NOT the brake
adjusting nut. In the event that the special adapter is not available, the use
of a pipe wrench and weights has been successful in some cases. To use
the pipe wrench method, place the wrench on the input shaft in a horizontal
position. Hang a weight from the handle, one foot (305 mm) from the center
of the shaft. Select the weight that matches the torque from the chart. If the
weight can be hung two feet (610 mm) from the shaft, use one half the weight
shown. It is a good idea to tighten the brake adjustment first, then apply the
weight and loosen the adjustment until the weighted wrench begins to move.
Retighten until the wrench stops.
30
Method 2 – For Mechanically Driven Winches Only
Disengage the drum clutch. Engage the power take-off to drive the winch in the reel-out direction. With the
truck in neutral, operate the engine at 1,500 r.p.m. and disengage the truck clutch. If the safety brake is properly adjusted, the winch drive sprocket will stop turning immediately. The brake will overcome the inertia of
the gear train from the truck transmission through the safety brake.
Method 3 – May Be Used For Hydraulically-driven Winches
Thoroughly inspect winch drum clutch, wire rope and rigging. Repair or replace as required. Refer to the
“Maximum Load and Input RPM” chart in the specifications section of this manual to determine the safe working limits of your particular winch.
Securely attach winch cable to test load which should be the maximum weight anticipated in your application.
Raise load a short distance then stop. Winch should hold the load. With engine at recommended PTO operating speed, lower load and stop before load contacts ground. Winch should stop and hold the load securely.
If, when using one of these methods for checking the adjustment, the brake does not hold, turn the adjusting
nut ½ turn in the counter-clockwise direction and repeat the testing sequence until the brake holds properly.
CAUTION
Do not adjust the safety brake to higher torque values than shown in the chart below as this will cause
excessive heating, glazing and abnormal wear of the friction discs under normal pay-out operations. Using
a winch with worn brake components may result in a loss of load control which could cause property damage, severe personal injury, or death.
Winch Model
Torque
LB-FT (N.m)
Winch Model
Torque
LB-FT (N.m)
AC12, BR40, ALGU2
24 (33)
AMU7
40 (54)
M5, MU5, AMU5, M6, MS6, AMS6, M8,
M9, UT12, MU9, MSU9
35 (47)
AMGU5, AMS7, MU10, MS18
45 (61)
MGU5, MU7, AMS9, AMSU9, UT15
*60 (81)
MS10, AMS10, AMSU10,
MSU12, AMSU12, MS12
50 (68)
OS4- 1 & 2 16:1
24 (33)
MS20, AMS20, MS30, MS50
95 (129)
OS4- 3 & 4 32:1, BR30, BR30B
16 (22)
W150A (M150A)
*350 (475)
*Models UT15 and W150A are equipped with a spring applied, multi-disc oil brake which is adjusted by turning the adjusting screw
clockwise to tighten and counter-clockwise to loosen, all others counter-clockwise to tighten.
Dry Band-Type Automatic Safety Brake:
The Braden dry band-type, automatic safety brake is used on several models of winches with capacity ratings of less than 12, 000 pounds (53.4 kN). The brake utilizes an external, contracting, self-energizing dry
brake band acting on the worm shaft brake drum. One feature of this brake is that it may be adjusted for
increased load requirements or it may be fully released for special applications.
It should be noted that the majority of a worm gear winch’s braking effort is achieved by the inability to backdrive the worm gear set. The band-type safety brake provides additional resistance to rotation of a worm
shaft and absorbs the inertia of the P.T.O. gear train if so equipped.
31
The brake band and cover must be installed over the brake drum so that the worm shaft can turn freely to
haul-in a load and must overcome the resistance of the brake band to pay-out a load.
Adjustment:
Loosen the jam nut on the brake band stud next to the tension spring. Turn the adjusting nut clockwise, in ½
turn increments, to tighten the brake and counter-clockwise to loosen the brake. When adjustment is completed, tighten the jam nut.
Assembly Change Instructions:
This procedure provides instructions for changing Braden worm gear winches equipped with the oil-cooled
safety brake, from a left-hand assembly to a right-hand assembly or from a right-hand assembly to a lefthand assembly. No additional parts required.
NOTE: There is a different housing for AHU7 LA winches and AHU7 RA winches which allows the hydraulic motor to bolt directly to the housing. The new housing is needed to change the assembly on AHU7
winches.
1. Place the winch on a sturdy work surface so that the input shaft
is away from you and the oil-cooled safety brake is toward you.
The winch shown in drawing is a front-drive, left-hand assembly
with under-winding cable spooling.
2. Remove the drain plug and drain the oil into a suitable container
as described previously.
3. Remove the capscrews which secure the safety brake housing to the worm housing. Remove the safety
brake housing containing the leaf spring assembly and pressure place.
4. Remove the outer friction disc. Mark the outer surface of the safety brake rotor assembly to assist in reassembly. Remove the rotor assembly and inner friction disc. Remove the bearing container from the worm
housing. Note the number and total thickness of the gaskets removed. Gaskets may be reused if not damaged.
5. Using a pair of locking type pliers and a hammer, remove the sprocket key from the input end of the shaft.
Remove any burrs or sharp edges on the shaft end and around the keyway to prevent damage to the shaft
seal.
6. Remove the input end bearing container. Note the number and total thickness of the gaskets removed because the same amount (thickness) must be replaced to keep the original worm shaft end play adjustment.
Remove the worm shaft, worm and bearing assembly from the worm housing by rotating the shaft until the
worm thread is disengaged from the worm gear teeth.
7. Insert the worm shaft into the opposite side of the worm housing and rotate the shaft to screw the worm
thread into engagement with the worm gear. Place the input end bearing container and gaskets over the
input end of the worm shaft. Lift the worm shaft up into full engagement with the worm and push the bearing
container into the orm gear housing. Install the input end bearing container capscrews and tighten finger
tight at this time. Place the brake end bearing container and gaskets over the brake end of the worm shaft
and support the worm shaft as you push the bearing container into the worm gear housing.
32
8. Install the safety brake housing (without rotor and discs) and capscrews. Evenly tighten the brake housing
and bearing container capscrews to recommended torque. Attach dial indicator base to worm gear housing to place
probe of dial indicator squarely against the end of the worm shaft. Grasp the cable drum
and rotate firmly in one direction and hold constant tension. Zero the dial indicator. Now firmly rotate the
drum in the other direction and hold constant tension. Record the worm shaft end play and compare with
specifications. If too tight, remove the bearing container capscrews and bearing container and add one
shim at a time between the bearing container and the worm gear housing. Then recheck end play. If too
loose, remove one gasket at a time to achieve the recommended end play. Complete end play adjustment
procedure by reassembling the brake as described in “Oil Cooled Safety Brake Service”. Retighten the
bearing container capscrews to the recommended torque and refill winch with recommended worm gear
oil. Adjust the worm gear safety brake as described earlier.
IF YOUR WINCH IS EQUIPPED WITH A CABLE DRUM BAND BRAKE, THE FOLLOWING ADDITIONAL
INSTRUCTIONS ARE APPLICABLE.
9. Remove the drum clutch and band brake control shafts from the base of the winch. This is accomplished
by loosening the set screws in the thrust collars and levers, then pulling the control shafts from the winch.
Do not disconnect any parts from the drum brake band unless they prevent its removal from reversing.
Remove all levers and collars from the shafts and brake band anchor bracket from the base angle.
10.Remove the brake band from the cable drum, turn around from the original position and replace on the
cable drum. Install the control shafts, collars, levers and set screws. Secure the brake band anchor
bracket to the base angle as shown.
11.Attach the brake band link to the brake band and
the anchor bracket. Since the control shafts are
reversed because of the brake band arrangement, it is necessary to change the control linkage for the winch clutch as well.
12.This illustration shows a front-drive, right-hand
assembly with over-wind cable spooling.
33
SPECIFICATIONS
Recommended Worm Gear Oil:
We have published the following specifications to help you determine which lubricant is best suited to your
application. For simplicity, Braden has listed readily available products in each temperature range which has
been tested and found to meet our specifications. This is not to say that other lubricant brands would not
perform equally as well.
If the following lubricant brands are not available in your area, make certain your lubricant vendor supplies
you with oil that is equivalent to those products listed below.
°F -40 -30 -20 -10 0 10 20 30 40 50 60 70 80 90 100 110 120 130°F
A
B
C
D
°C -40
-30
-20
-10
0
10
20
30
40
50
55 °C
A. AGMA Grade 3 EP; Mobilgear 600xp 100 or equivalent
B. AGMA Grade 5 EP; Mobilgear 600xp 220 or equivalent
C. AGMA Grade 7 EP; Mobilgear 600xp 460 or equivalent
D. AGMA Grade 8 EP; Mobilgear 600xp 680 or equivalent
Brand recommendations in tier C climate range:
MOBIL Mobilgear 600xp 460
SHELL Omala 460
CHEVRON Gear Compounds EP460
TEXACO Meropa 460
NOTE: For cold weather applications, synthetic versions of the recommended oils may be used. Please note
that use of synthetic oils in worm gear winches requires the gear set to be “broken in” with mineral oil before
using the synthetic oil. Failure to break in the gear set with mineral oil will cause slippage between the gears
which could allow the load to slip or fall.
Do not use aftermarket additives in worm gear oil. Some additives may contain substances which could
cause glazing of brake discs or impede the firm locking action in the brake rotor assembly. Both symptoms
could reduce load control which may result in property damage, severe personal injury or death.
34
RECOMMENDED FASTENER TORQUE
The general purpose torque shown in the chart applies to SAE Grade 5 & 8 bolts, studs and standard steel
full, thick and high nuts.
Higher or lower torques for special applications will be specified such as the use of spanner nuts, nuts on shaft
ends, jam nuts and where distortion of parts or gaskets is critical.
Lubricated Torque values based on use of SAE 30wt engine oil applied to threads and face of bolt or nut.
Avoid using thread lubricants as the applied torque may vary by 10-40% depending upon product used.
Torque LB-FT (N.m)
Torque LB-FT (N.m)
Bolt
Diam.
Inches
Thread
per
inch
Bolt
Diam.
Inches
Thread
per
inch
Dry
Lubed
Dry
Lubed
1/4
20
28
8
(11)
6
(8)
12
(16)
Dry
Lubed
Dry
Lubed
9
(12)
3/4
10
16
265
(359)
200
(271)
380
(515)
280
(380)
5/16
18
24
17
(23)
13
(17)
24
(33)
18
(24)
7/8
9
14
420
(569)
325
(441)
600
(813)
450
(610)
3/8
16
24
31
(42)
23
(31)
45
(61)
35
(47)
1
8
14
640
(868)
485
(658)
910
(1234)
680
(922)
7/16
14
20
50
(68)
35
(47)
70
(95)
50
(68)
1 1/8
7
12
790
(1071)
590
(800)
1290
(1749)
970
(1315)
1/2
13
20
75
(102)
55
(75)
110
(149)
80
(108)
1 1/4
7
12
1120
(1518)
835
(1132)
1820
(2468)
1360
(1817)
9/16
12
18
110
(149)
80
(108)
150
(203)
110
(149)
1 3/8
6
12
1460
(1979)
1095
(1485)
2385
(3234)
1790
(2427)
5/8
11
18
150
(203)
115
(156)
210
(285)
160
(217)
1 1/2
6
12
1940
(2360)
1460
(1979)
3160
(4284)
.2370
(3214)
Grade 5
Grade 8
To convert LB-FT to Kg-m, multiply LB-FT value by 0.1383
NOTE: Aluminum housing, use Grade 5 torque value.
35
Grade 5
Grade 8
OIL CAPACITIES AND WORM SHAFT END PLAY:
OIL CAPACITY
Pints (Lt.)
WORM END PLAY
Inches (mm)
HC4
7/8 (.21)
.002-.007 (.05-.18)
C4
5/8 (.15)
.002-.007 (.05-.18)
MU2, M3, MS3, AMS3, MU3, MSU3, AMSU3,
CM5, HCM5
3/4 (.18)
.007-.015 (.18-.38)
EC4, LU4, ALU2, LGU2, ALGU2, A8, AU8, OS4,
MF6
1 (.47)
.007-.015 (.18-.38)
AC12, MU5, AMU5, MGU5, AMGU5
2 (.95)
.007-.015 (.18-.38)
2-1/4 (1.07)
.010-.020 (.25-.51)
3 (1.42)
.010-.020 (.25-.51)
MU9, MSU9, AMSU9, MU10, MSU10, AMSU10
4-1/2 (2.13)
.010-.020 (.25-.51)
MS12
4-3/4 (2.25)
.010-.020 (.25-.51)
M8, M9, MS9, AMS9, MS10, AMS10, MSU12,
AMSU12, MU15
5 (2.37)
.010-.020 (.25-.51)
RMS3, ARMS3
6 (2.84)
NOT APPLICABLE
MS18
6 (2.84)
.015-.025 (.38-.64)
MS20, AMS20
7 (3.31)
.015-.025 (.38-.64)
BR30, BR30B WINCH DRIVE
7-1/2* (3.55)*
.010-.020 (.25-.51)
BR30, BR30B ROTATION DRIVE
WINCH MODEL
MU7, AMU7
MS5, MS6,AMS6, AMS7
7-1/2* (3.55)*
.001-.006 (.025-.15)
MS30
8 (3.79)
.015-.025 (.38-.64)
MS50
34 (22)
.010-.015 (.25-.38)
BR40
16 (7.6)
.010-.020 (.25-.51)
EU8A
1-1/2 (.71)
.002-.010 (.05-.25)
1/2 (.24)
.007-.015 (.18-.38)
MU8, HU8
W150A, M150A
76 (36)
.000-.010 (.00-.25)
5-1/2* (2.60)
.000-.010 (.00-.25)
UT12
7* (3.31)*
.007-.015 (.18-.38)
WR30 WINCH DRIVE
7* (3.31)*
.007-.015 (.18-.38)
4-1/2* (2.13)*
.000-.002 (.00-.05)
UT15, WR40
WR30 ROTATION DRIVE
* OIL CAPACITY GIVEN FOR REFERENCE ONLY. ALWAYS FILL TO LEVEL PLUG AS
UNITS ARE OFTEN INSTALLED IN VARIOUS POSITIONS WHICH MAY REQUIRE
MORE OR LESS OIL.
36
37
METRIC CONVERSION TABLE
English to Metric
Metric to English
LINEAR
inches (in.)
feet (ft.)
miles (mi.)
X 25.4
X 0.3048
X 1.6093
= millimeters (mm)
= meters (m)
= kilometers (km)
millimeters (mm)
meters (m)
kilometers (km)
X 0.3937
X 3.281
X 0.6214
= inches (in.)
= feet (ft.)
= miles (mi.)
AREA
2
inches (sq.in.)
feet2 (sq.ft.)
2
2
millimeters 2 (mm 2)
meters2 (m 2)
= millimeters (mm )
= meters2 (m 2)
X 645.15
X 0.0929
X 0.000155 = inches2 (sq.in.)
= feet 2 (sq.ft.)
X 10.764
VOLUME
3
inches (cu.in.)
quarts (qts.)
gallons (gal.)
inches3 (cu.in.)
feet3 (cu.ft.)
feet3 (cu.ft.)
fluid ounce (fl.oz.)
X
X
X
X
X
X
X
0.01639
0.94635
3.7854
16.39
28.317
0.02832
29.57
= liters (l)
= liters (l)
= liters (l)
= centimeters3 (cc)
= liters (l)
= meters3 (m 3)
= millileters (ml)
liters (l)
liters (l)
liters (l)
centimeters3 (cc)
liters (l)
meters3 (m3)
milliliters (ml)
X
X
X
X
X
X
X
61.024
1.0567
0.2642
0.06102
0.03531
35.315
0.03381
=
=
=
=
=
=
=
inches3 (cu.in.)
quarts (qts.)
gallon (gal.)
inches3 (cu.in.)
feet 3 (cu.ft.)
feet 3 (cu.ft.)
fluid ounce (fl.oz.)
X
X
X
X
X
0.03527
2.2046
0.001102
1.1023
0.000984
=
=
=
=
=
ounces (oz.)
pounds (lbs.)
tons (2000 lbs.)
tons (2000 lbs.)
tons (long) (2240 lbs.)
X
X
X
X
X
X
0.2961
0.145
14.22
14.5
4.0193
0.01
= inches Hg (60oF)
= pounds/sq.in. (PSI)
= pounds/sq.in. (PSI)
= pounds/sq.in. (PSI)
o
= inches H2O (60 F)
= bars
MASS
ounces (oz.)
pounds (lbs.)
tons (2000 lbs.)
tons (2000 lbs.)
tons (long) (2240 lbs.)
X
X
X
X
X
28.35
0.4536
907.18
0.90718
1013.05
= grams (g)
= kilograms (kg)
= kilograms (kg)
= metric tons (t)
= kilograms (kg)
grams (g)
kilograms (kg)
kilograms (kg)
metric tons (t)
kilograms (kg)
PRESSURE
o
inches Hg (60 F)
pounds/sq.in. (PSI)
pounds/sq.in. (PSI)
pounds/sq.in. (PSI)
o
inches H2O (60 F)
bars
X
X
X
X
X
X
3600
6.895
0.0703
0.069
0.2488
100
= kilopascals (kPa)
= kilopascals (kPa)
= kilograms/sq.cm. (kg/cm 2)
= bars
= kilopascals (kPa)
= kilopascals (kPa)
kilopascals (kPa)
kilopascals (kPa)
kilograms/sq.cm. (kg/cm2)
bars
kilopascals (kPa)
kilopascals (kPa)
POWER
horsepower (hp)
ft.-lbs./min.
X 0.746
X 0.0226
= kilowatts (kW)
= watts (W)
kilowatts (kW)
watts (W)
X 1.34
X 44.25
= horsepower (hp)
= ft.-lbs./min.
X 8.851
X 0.7376
X 7.233
= pound-inches (in.lbs.)
= pound-feet (ft.-lbs.)
= pound-feet (ft.-lbs.)
X 0.6214
X 3.281
X 3.281
= miles/hour (m/h)
= feet/second (ft./sec.)
= feet/minute (ft./min.)
TORQUE
pound-inches (in.-lbs.) X 0.11298
pound-feet (ft.-lbs.)
X 1.3558
pound-feet (ft.-lbs.)
X .1383
= newton-meters (N-m)
= newton-meters (N-m)
= kilograms/meter (kg-m)
newton-meters (N-m)
newton-meters (N-m)
kilogram/meter (kg-m)
VELOCITY
miles/hour (m/h)
feet/second (ft./sec.)
feet/minute (ft./min.)
X 0.11298
X 0.3048
X 0.3048
= kilometers/hour (km/hr)
= meter/second (m/s)
= meter/minute (m/min)
kilometers/hour (km/hr)
meters/second (m/s)
meters/minute (m/min)
TEMPERATURE
o
Celsius = 0.556 (oF - 32)
o
Fahrenheit = (1.8oC) + 32
COMMON METRIC PREFIXES
mega
kilo
hecto
deka
(M)
(k)
(h)
(da)
=
=
=
=
1,000,000 or 106
1,000 or 103
100 or 102
10 or 101
deci
centi
milli
micro
38
(d)
(c)
(m)
(m)
=
=
=
=
0.1 or 10-1
0.01 or 10-2
0.001 or 10-3
0.000.001 or 10-6
39
The warning label shown above is available through all Braden dealers. Have your dealer order part
number 100600. It is a self-adhesive weather-resistant vinyl label that we recommend be installed near the
winch controls of all Braden winches with a drum clutch
Copyright 2008 PACCAR Winch Division.
All Rights Reserved
40