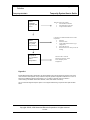
1
Networked
Robotics
Page 1 of 63
Tempurity System User’s Guide
Tempurity-04-0006.2
Tempurity System
User’s Guide
Tempurity Version 1.0
Copyright ©2005, 2006 Networked Robotics Corporation. All rights reserved.
5.8.2006
Networked
Robotics
Page 2 of 63
Tempurity System User’s Guide
Tempurity-04-0006.2
Table of Contents
Table of Contents................................................................................................................ 2
Introduction......................................................................................................................... 6
About Tempurity............................................................................................................. 6
The Networked Robotics Mission .................................................................................. 6
Tempurity Components .................................................................................................. 6
Tempurity Architecture................................................................................................... 6
System Requirements.......................................................................................................... 7
Tempurity Server ............................................................................................................ 7
Tempurity Monitor.......................................................................................................... 7
NTMS Network Hardware.............................................................................................. 7
Ultracold (-80°C) Freezers.............................................................................................. 7
Connecting to Tempurity .................................................................................................... 8
Overview of the Connection Process.............................................................................. 8
Networked Robotics’ NTMS Hardware ......................................................................... 8
Physical Connection to your Computer .......................................................................... 9
Power the NTMS .......................................................................................................... 12
The NTMS Configuration Utility ................................................................................. 12
Introduction............................................................................................................... 12
Downloading the NTMS Configuration Utility........................................................ 12
Starting the NTMS Configuration Utility ................................................................. 12
The Initial Connection .............................................................................................. 13
Network Configuration ............................................................................................. 13
Temperature Port Configuration ............................................................................... 14
Reading and Saving Settings .................................................................................... 14
Connecting the NTMS to your Monitored Device ....................................................... 15
Refrigerators/ Freezers/ Incubators/ Ovens/ Rooms ................................................. 15
Ultracolds (-80°C)..................................................................................................... 17
Wireless Networking ................................................................................................ 17
The Tempurity Server ....................................................................................................... 19
Downloading the Tempurity Server Software .............................................................. 19
Tempurity Taskbar........................................................................................................ 20
Starting and Stopping the Tempurity Server ................................................................ 20
Tempurity Server Configurable Variables.................................................................... 21
Configuring Monitored Devices ................................................................................... 23
Editing Configuration Files Manually ...................................................................... 24
Tempurity Data ................................................................................................................. 25
Copyright ©2005, 2006 Networked Robotics Corporation. All rights reserved.
5.8.2006
Networked
Robotics
Page 3 of 63
Tempurity System User’s Guide
Tempurity-04-0006.2
Measurement Interval ................................................................................................... 25
Time Constant............................................................................................................... 25
Accuracy ....................................................................................................................... 25
Location ........................................................................................................................ 25
Temperature Alarms ..................................................................................................... 26
Communication Alarms ................................................................................................ 26
Data Retention .............................................................................................................. 27
The Tempurity Monitor Client.......................................................................................... 28
Downloading and Installing.......................................................................................... 28
Starting the Tempurity Monitor .................................................................................... 29
Main Monitor Screen .................................................................................................... 29
Alarm Status Icons.................................................................................................... 30
Alarm Window.............................................................................................................. 31
Monitored Device Information Window ...................................................................... 32
Graphing Temperatures ................................................................................................ 33
Alarm Notifications ...................................................................................................... 36
Distributed Alarm Notification ................................................................................. 38
Running the Server and the Monitor on the Same Computer................................... 38
SMTP Server versus Internal SMTP......................................................................... 38
Ensuring the Reception of Alarm Notifications........................................................ 39
Obtaining an SMTP Server....................................................................................... 39
Text Message Gateways ........................................................................................... 40
E-mail Capacity and Response Time........................................................................ 41
Monitoring Multiple Tempurity Servers from a Single Computer............................... 41
Configuring Monitor Autostart ..................................................................................... 41
Inserting an Autostart File into the Windows Startup Directory .............................. 42
Configuring Automatic Login................................................................................... 42
Time Zones, Time Accuracy, and Time Synchronization ................................................ 44
System Operations ............................................................................................................ 46
Redundancy................................................................................................................... 46
Power Outages .............................................................................................................. 47
Power Outage at the Monitored Device.................................................................... 47
At the Monitor Client................................................................................................ 47
At the Server ............................................................................................................. 48
Maintenance.................................................................................................................. 48
Probe Care................................................................................................................. 48
Ultracold Freezers..................................................................................................... 48
Freezer Overloading.................................................................................................. 48
Safety ............................................................................................................................ 48
Regulatory Use.............................................................................................................. 49
Suggestions for Operation............................................................................................. 49
Copyright ©2005, 2006 Networked Robotics Corporation. All rights reserved.
5.8.2006
Networked
Robotics
Page 4 of 63
Tempurity System User’s Guide
Tempurity-04-0006.2
Appendix A: USP Temperature Storage Definitions........................................................ 51
Appendix B: Debugging a Connection ............................................................................. 52
Appendix C: Networked Robotics’ Temperature Probe................................................... 54
Appendix D: Tempurity System Specifications ............................................................... 55
Appendix E: File Locations .............................................................................................. 56
Appendix F: Networked Robotics’ NTMS Hardware FCC Certification ........................ 57
Appendix G: Forma and Revco Connectors ..................................................................... 58
Appendix H: Cell Phone and Pager Gateways ................................................................. 59
Index ................................................................................................................................. 62
Copyright ©2005, 2006 Networked Robotics Corporation. All rights reserved.
5.8.2006
Networked
Robotics
Page 5 of 63
Tempurity System User’s Guide
Tempurity-04-0006.2
Customer Support Information
Networked Robotics Corporation
1-874-864-8578
www.networkedrobotics.com
Copyright
Trademarks
Information in this document is subject to change without
notice. The temperatures used in the examples are
fictitious and are not actual temperatures recorded from
any organization. No part of this document may be
reproduced or transmitted in any form or by any means
without the express written consent of Networked Robotics
Corporation.
The Networked Robotics NR logo is a trademark of
Networked Robotics Corporation.
@2005 Networked Robotics Corporation All Rights
Reserved. Printed in the USA
Tempurity System User Manual Tempurity Version 1.0
This document and the associated online and printed
documentation are the property of Networked Robotics
Corporation and are loaned to the user under the terms of
the license agreement. Unauthorized copying or use of the
software or any associated materials is contrary to the
proprietary rights of Networked Robotics Corporation and
is a violation of state and federal law. This material must
be returned to Networked Robotics Corporation upon
demand.
LinkSys is a registered trademark of Cisco-LinkSys
Corporation California. Microsoft, Windows, Windows XP,
and the Windows logo are registered trademarks of
Microsoft Corporation in the United States and/or other
countries. Sprint PCS is a registered trademark of Sprint
Communications Company L.P. US Telecom Inc. T-Mobile
is a registered trademark of Deutsche Telekom Ag.
Corporation. Cingular is a registered trademark of Cingular
Wireless LLC. Verizon is a registered trademark of Verizon
Trademark Services LLC. Nextel is a registered trademark
of Nextel Communications, Inc. Forma is a registered
trademark of Thermo Forma Inc. Corporation. Revco is a
registered trademark of GSLE Development Corporation,
Kelvinator is a registered trademark of Electrolux Home
Products, Inc.
Other product names mentioned may be service marks,
trademarks, or registered trademarks of their respective
companies and are hereby acknowledged.
Networked Robotics Corporation
825 Chicago Avenue
Suite F
Evanston, IL 60202
Copyright ©2005, 2006 Networked Robotics Corporation. All rights reserved.
5.8.2006
Networked
Robotics
Page 6 of 63
Tempurity System User’s Guide
Tempurity-04-0006.2
Introduction
About Tempurity
The Tempurity System is the most powerful system on the market for monitoring your scientific
temperatures. By allowing your ultracolds, freezers, refrigerators, rooms, and incubators to be
attached to the network, scientific temperatures can be obtained anywhere at anytime.
The Networked Robotics Mission
Networked Robotics’ mission is to enable real-time data collection from diverse sources with
regulatory-compliant hardware and software. All of our systems are designed and documented for
use in United States Food and Drug Administration Good Laboratory Practices and Good
Manufacturing Practices Environments.
Tempurity Components
The system is comprised of both advanced software and unique new network hardware. The
software can be downloaded and used without charge on any Windows XP professional computer
subject to the license agreement. The hardware is connected directly to any scientific refrigerator,
freezer, incubator, room, or oven and to the network.
Tempurity Architecture
The peer-to-peer architecture of Tempurity means that the system is flexible to a degree that has
not been achieved by monitoring systems to-date. Tempurity components can be rapidly installed
anywhere, and can be quickly configured to communicate with other Tempurity components. The
Tempurity architecture is “distributed” because pieces of the system communicate with each other
and run on different devices. A Tempurity Server can collect from Networked Robotics’ NTMS
hardware anywhere on a corporate network or over the internet if security allows. Any Windows XP
Professional computer can function as a Tempurity Server. Any computer on the network can
monitor any Tempurity Server and temperature alarm notifications can be defined independently by
any computer. Temperatures can be collected from monitored devices that are anywhere on the
network.
Copyright ©2005, 2006 Networked Robotics Corporation. All rights reserved.
5.8.2006
Networked
Robotics
Page 7 of 63
Tempurity System User’s Guide
Tempurity-04-0006.2
System Requirements
Tempurity Server
o Pentium III or better PC running Windows XP Professional
o 128 Megabytes of RAM
o At least 1 gigabyte of free disk space for data storage
o PC must be connected to the same network as the NTMS hardware
Tempurity Monitor
o Pentium III or better PC running Windows XP Professional
o 128 Megabytes of Ram
o At least 100 megabytes of free disk space
o PC must be connected to the same network as the Tempurity Server
NTMS Network Hardware
o An Ethernet TCP/IP network
o Standard 115-Volt, 60 Hertz AC power outlet for each NTMS hardware device
Ultracold (-80°C) Freezers
o Ultracold freezers that support Forma-compatible or Revco-compatible
communications protocols (this includes many brands in addition to Forma and
Revco)
o Ultracold freezers with serial data interface connectors
Copyright ©2005, 2006 Networked Robotics Corporation. All rights reserved.
5.8.2006
Networked
Robotics
Page 8 of 63
Tempurity System User’s Guide
Tempurity-04-0006.2
Connecting to Tempurity
Overview of the Connection Process
In order to connect your refrigerator or freezer to the Tempurity System you will need to first
configure Networked Robotics’ NTMS4 hardware for use in your laboratory and network
environment. For a new installation you will also need to install and configure the Tempurity Server
and the Tempurity Monitor client.
The major steps to follow for a new installation are as follows:
1)
Set up the NTMS4 network device
A.
Configure the NTMS4 device to work on your network.
B.
Configure the NTMS4 for the type of monitored device
C.
Physically connect the NTMS4 to the monitored device.
2)
Set up the Tempurity Server
A.
Install the Tempurity Server software and configuration utility
B
Configure the Tempurity server for collection from your devices.
C
Start the Tempurity Server
3)
Set up the Tempurity Clients
A.
Download and install the Tempurity Monitor
B.
Set your alarm notification parameters
C.
Review temperature data as needed
Networked Robotics’ NTMS Hardware
The Networked Robotics NTMS4 is a network device designed to collect temperatures from up to
four scientific temperature sources. Most commonly these are ultracold (-80°C) freezers, freezers,
refrigerators, incubators, and rooms. The device must be configured for both your network
environment, and the type of monitored device from which you will collect.
A front view of the NTMS4i is shown below. The four temperature ports are on the left side of the
NTMS with temperature port 1 the leftmost jack. The network connector has a silver rim and is the
rightmost jack when facing the unit.
Copyright ©2005, 2006 Networked Robotics Corporation. All rights reserved.
5.8.2006
Networked
Robotics
Page 9 of 63
Tempurity System User’s Guide
Tempurity-04-0006.2
FIGURE 1
The NTMS must be configured for use on your network. The assistance of your information
technology department may be needed in order to provide an internet address, called an IP
address. The process of setting up this unit on your network is similar to that of setting up a home
router or of other network devices such as computers or some kinds of printers.
The NTMS’ temperature ports must be configured for the type of monitored device from which it will
be collecting. Each of the NTMS4’s four connection ports can be used to collect temperatures from
either a Networked Robotics temperature probe or from the serial data communications port of an
ultracold freezer. Any combination of monitored device types may be configured on the four
temperature ports. For example all four could be configured to utilize temperature probes, or two
could connect to temperature probes, one to a Forma-compatible device, and one to a Revcocompatible device.
Physical Connection to your Computer
In order to initially configure your NTMS, we recommend connecting it directly to your computer.
This can be done with either: a crossover cable or a switch/hub with two standard Ethernet cables.
See the Quick Connect Guide for an illustration of the methods.
Copyright ©2005, 2006 Networked Robotics Corporation. All rights reserved.
5.8.2006
Networked
Robotics
Page 10 of 63
Tempurity System User’s Guide
Tempurity-04-0006.2
Option 1: Crossover Cable
A crossover network cable can be purchased at any electronics store
such as Best Buy or Radio Shack. Crossover cables use the same
RJ-45 plugs as regular Cat-5 Ethernet cables, although they have
different internal wiring.
Connect the crossover network cable directly from your computer’s
network port to the NTMS4’s network socket (the silver connector).
Option 2: Switch or Hub
If you don’t have a crossover cable you can connect your computer
to a switch or hub with a standard network cable, and then connect
the NTMS to the same switch or hub with another standard network
cable, the NTMS4 is a 10 Mb/s device. It should be used on 10/100
switches on 10 Mb-or-less hubs.
The default IP address of the NTMS is 192.168.1.44. In order to communicate to it the first time
you will need to set the IP address of your computer to an IP address that is capable of
communicating to 192.168.144. A common setting would be 192.168.1.xxx, where xxx is any
number between 1 and 254 except 44. In Windows XP Professional, click ‘Start’ and then click on
the ‘Control Panel’.
FIGURE 2
Then click on ‘Network Connections’. You should see a Local Area Connection window like this:
Copyright ©2005, 2006 Networked Robotics Corporation. All rights reserved.
5.8.2006
Networked
Robotics
Page 11 of 63
Tempurity System User’s Guide
Tempurity-04-0006.2
FIGURE 3
Right-click on the connection and go to ‘Properties’. You should then see the screen below. Go to
‘Internet Protocol TCP/IP’ and click ‘Properties’.
FIGURE 4
Record your current settings so that they can be restored later. Now you can set the IP address of
your computer to 192.168.1.xxx, where xxx is any number between 1 and 254 except 44. The
subnet mask should be set to 255.255.255.0. You should leave all other fields blank.
Copyright ©2005, 2006 Networked Robotics Corporation. All rights reserved.
5.8.2006
Networked
Robotics
Page 12 of 63
Tempurity System User’s Guide
Tempurity-04-0006.2
FIGURE 5
Power the NTMS
If this is the first time that you power up the NTMS, do so with the reset switch depressed. You can
use a pen or paper clip to hold in the button. Wait for the yellow light to flash once. This reset step
sets the device for initial configuration and should only be performed when configuring for the first
time.
You will see that the three LEDs on the left side of the NTMS. The yellow LED is the “link” light, and
normally indicates that the NTMS is connected to the network. After powering up, the yellow light
will blink once to indicate that the firmware is operating properly. The green light will flicker when
connected to an active network. The red and green lights indicate communication with monitored
devices.
The NTMS Configuration Utility
Introduction
The NTMS Configuration utility 1) sets the network parameters necessary for you on your
network and 2) configures each of the NTMS4’s temperature ports for communication with
the appropriate type of monitored device for your laboratory or facility.
The procedure for setting up an NTMS is similar to that used to set up other network
devices such as wireless or wired routers. If you have connected such devices previously,
you should be able to configure the NTMS. Otherwise, the aid of an information
technology specialist from your company or internet service provider may be helpful.
Downloading the NTMS Configuration Utility
You can download this utility from www.networkedrobotics.com/download. If the utility has
been previously installed you may need to specifically uninstall it first using the
WindowsÆControl PanelÆAdd or Remove programs function.
Starting the NTMS Configuration Utility
Open the NTMS Configuration utility from WindowsÆStartÆAll Programs Æ and start the
program as identified by the screwdriver icon shown
.
Copyright ©2005, 2006 Networked Robotics Corporation. All rights reserved.
5.8.2006
Networked
Robotics
Page 13 of 63
Tempurity System User’s Guide
Tempurity-04-0006.2
The Initial Connection
Set the host address in the NTMS configuration screen to match the IP address of the
NTMS that you are configuring. For a new unit this will be the default address of
192.168.1.44. The control network port address is always port 3000. Note that the NTMS
can always be reset to default parameters by holding in the restart button while powering
up the unit. You can use a paper clip or pen to access the button. The first time you
configure the NTMS you should power the NTMS with the restart button depressed. This
sets the unit to a state that is appropriate for configuration. Do not use the restart button
again unless you wish to set the unit to its manufacturers default parameters.
Click the ‘Connect’ button. The color indicator light on the right side should turn from red to
green. If it remains red, check the physical cable connections and make sure that you
have set the computer and the NTMS network parameters correctly. Then click
‘Disconnect’ and attempt to connect again. The figure below shows the NTMS
Configuration utility screen as it is set to a new IP address and configured for use with a
temperature probe, two Revco-compatible devices, and a Forma-compatible monitored
device.
FIGURE 6
Network Configuration
You will need to obtain a static (non-changing) IP address from your network
administrator.
IP address
Copyright ©2005, 2006 Networked Robotics Corporation. All rights reserved.
5.8.2006
Networked
Robotics
Page 14 of 63
Tempurity System User’s Guide
Tempurity-04-0006.2
In the box labeled ‘IP’, enter the IP address that has been assigned to you by your
network administrator for use with the NTMS. The format is XXX.XXX.XXX.XXX as shown
in the figure above.
In the box labeled ‘Mask’, enter the subnet mask identified by your network administrator
for the building or location in which the NTMS is to be employed.
Network Port Address
All network messages on a TCP/IP network are sent to an IP address/network port
address combination. Your company may be implementing a firewall that is blocking some
network port numbers. You may wish to check with your network administrator to ensure
that the network ports you select are valid especially if communicating over a wide-area
network. Allowable network port numbers are between 0001 and 9999. Each of the four
temperature ports (on an NMTS4) must have a unique address.
Temperature Port Configuration
The NTMS4 requires that the type of monitored device be identified for each temperature
port.
The three options are as follows:
1)
2)
3)
Probe – The Networked Robotics proprietary probe based on the
Dallas/Maxim temperature sensing integrated circuit. The RJ-11 end of the
temperature probe will be plugged in to the RJ-45 jack temperature port of
the NTMS. The probe end will be affixed inside the monitored device.
Revco – A serial connection to a Revco brand or compatible ultracold
freezer – compatible brands include Kelvinator, Harris, Baxter, and others. A
Cat5 patch cable will be plugged into the temperature port. The other end is
plugged into the ultracold’s serial adapter.
Forma – A serial connection to a Forma brand or compatible ultracold
freezer – compatible brands include VWR and others. A Cat5 patch cable
will be plugged into the temperature port. The other end is plugged into the
ultracold’s serial adapter.
Almost every ultracold brand utilizes one of the two freezer data communications
protocols. Networked Robotics’ NTMS hardware is designed to collect from all of
these ultracold brands, but must be configured to do so as above. The system
connects directly to the serial connector of the ultracold. Most new -80°C freezers
have this capability.
Reading and Saving Settings
Read Settings
This button reads the current configuration parameters from the NTMS. This function
allows you to view any previous configuration, and to confirm a proposed configuration
before activating it on the NTMS4.
Copyright ©2005, 2006 Networked Robotics Corporation. All rights reserved.
5.8.2006
Networked
Robotics
Page 15 of 63
Tempurity System User’s Guide
Tempurity-04-0006.2
Set Settings
This button stores the current configuration parameters into the NTMS memory. Once set,
power cycling the unit will activate the new settings. Usually these are implemented by
selecting the ‘Activate Settings’ button.
Activate Settings
After you have clicked the ‘Set Settings’ button and/or the ‘Read Settings’ button, verify
that all network and temperature port parameters are correct and then click the ‘Activate
Config’ button. You must click this button for your entered values to be used by the
NTMS4. Once selected, the configuration is permanently stored in non-volatile memory.
Your NTMS is now ready for the field. Note that the 'Activate Config' function performs the
same functions as power cycling the NTMS.
Note: Once you have changed the IP address of the NTMS, your computer may no longer
be able to communicate with your network. Change the IP address of your computer to
reflect the new settings or change the settings to the original values for your organization.
Connecting the NTMS to your Monitored Device
You can now physically place the NTMS in the laboratory to be monitored. However you may want
to test basic connectivity first.
Plug an active network cable into the silver network jack on the NTMS. Power up the NTMS and
make sure that all three LEDs are lit. One of the LEDs should be flickering. It is a good idea to test
basic network connectivity with the ping command. From another computer go to the Windows
command prompt via WindowsÆStartÆRun Æ CmdÆ and then type “Ping ipaddress” where
ipaddress is the IP address of the NTMS. If the device responds to the ping, proceed with the
connection, otherwise, examine your configuration. Was the right IP address configured for this
region of the network? The appendix lists troubleshooting procedures for connecting.
Once the device pings correctly, connect the temperature probes and serial cables that will be used
to connect the NTMS to the monitored device. The below describe the types of installations.
Note: The NTMS ping response times can be highly variable based on the number of configured
devices. High ping times are common.
Refrigerators/ Freezers/ Incubators/ Ovens/ Rooms
Networked Robotics’ proprietary temperature probes are used to gather temperatures
from non-ultracold monitored devices. The probes are usually installed through the seal of
the refrigerator or freezer door on the hinge side. The door must be open to install the
probe.
Networked Robotics probes are constructed of ultra-thin wires that will ensure the integrity
of the door’s rubber seal. Make sure that the probe wire is installed flat and not twisted as
it runs through the seal.
Copyright ©2005, 2006 Networked Robotics Corporation. All rights reserved.
5.8.2006
Networked
Robotics
Page 16 of 63
Tempurity System User’s Guide
Tempurity-04-0006.2
FIGURE 7
Some incubators have smaller openings between the instrument and the door. This
makes probe insertion difficult in these cases. It may be helpful to remove the probe duallock adhesive backing before inserting the probe through the hinge space. Add new duallock to the probe before affixing it to the interior wall of the incubator.
Do not install probes in ovens that reach temperatures of higher than 100°C.
The appendix includes a diagram of the physical dimensions of the probe.
Probe Positioning
The location of the probe within the device will have an effect on the temperature reading.
Usually lower placement of probes results in colder readings. There can be a temperature
gradient of 5 degrees C or more in a full-sized refrigerator. In the devices of some
manufacturers the temperatures near the cooling coils may be at a lower temperature than
other locations in the refrigerator.
Networked Robotics recommends that probes be positioned ¼ of the way from the top of
a refrigerator or freezer about one foot deep, if possible, on the door hinge side wall.
Placing the probe on the hinge side reduces the degree of fluctuation in temperature
measurement caused by opening the door.
Probe Installation
The probe head includes a dual-lock strip that is designed to attach to an opposite duallock strip on the wall of the freezer. The wall of the freezer must be dry to apply. Use a
paper towel to dry the region where the probe will be mounted. In some cases it may be
necessary to warm the wall with a gloved hand for 15 or 20 seconds before the probe is
affixed. The warmer and dryer the interior wall, the more likely that the dual-lock will
adhere permanently. If the probe does not attach, remove the old dual-lock strip and try
again.
The probe is not designed to be installed in environments where frost covers the interior
wall of the device.
Probe Removal
Copyright ©2005, 2006 Networked Robotics Corporation. All rights reserved.
5.8.2006
Networked
Robotics
Page 17 of 63
Tempurity System User’s Guide
Tempurity-04-0006.2
To remove the probe from the freezer wall, use a slight twisting motion while pulling the
probe away from the wall of the freezer. Unplug the probe from the NTMS’ RJ-45
temperature jack.
Ultracolds (-80°C)
The following diagram shows how ultracold freezers are connected to the Tempurity
System. The system does not use a temperature probe in these cases, but rather
connects to the freezer’s data port to collect the temperatures as they are reported by the
ultracold’s internal temperature sensor. This figure shows a schematic connection from
the ultracold freezer to the NTMS and thus to the Tempurity system. Cat5 patch cable is
used to connect the NTMS hardware to an adapter (DB-9 to RJ-45) that connects to the
serial port of the ultracold.
FIGURE 8
You will need either the Forma-style or Revco-style freezer adapter to connect to the
appropriate monitored device. You must use the appropriate adapter in order to collect
temperatures.
Wireless Networking
You can use a wireless network with your NTMS for any monitored device. Just connect
the NTMS to a wireless bridge or access point. The figure below shows an example
wireless installation. The wireless router and access point or bridge (both shown in blue)
are equipment that can be obtained from your wireless network vendor.
Copyright ©2005, 2006 Networked Robotics Corporation. All rights reserved.
5.8.2006
Networked
Robotics
Page 18 of 63
Tempurity System User’s Guide
Tempurity-04-0006.2
FIGURE 9
In the example installation the NTMS4 hardware is connected directly to the wireless
access point using Cat5 network patch cable. Connect the NTMS network connector (with
the silver edges) to the network ports on the wireless access point.
See your wireless device’s manual for more information. Some router/access points have
an “internet” connector. This is the access point’s connection to the host network and is
not the appropriate jack for connection to the NTMS. Some wireless networking
equipment is defined as a router/access point. You may need to configure your wireless
device to act in something called access point mode or point-to-point mode. You may wish
to use fixed IP addressing for these network devices since the NTMS also requires fixed
addressing. The LinkSys ‘WET11’ access point works will with Networked Robotics’
NTMS hardware.
Copyright ©2005, 2006 Networked Robotics Corporation. All rights reserved.
5.8.2006
Networked
Robotics
Page 19 of 63
Tempurity System User’s Guide
Tempurity-04-0006.2
The Tempurity Server
The Tempurity Server’s function is to collect temperatures from each monitored device at the scheduled
interval and to store that data on the Tempurity Server computer. It also responds to requests from all
Tempurity Monitor clients. The software responsible for these functions runs in the background. You can use
the Tempurity Server computer for any other normal functions, such as word processing, browsing the web
etc., during which time temperatures will continue to be collected.
Downloading the Tempurity Server Software
Both the Tempurity Server, the software that will collect and store temperatures, and the Tempurity
Monitor, the software that will show temperatures and respond to alarms, can be downloaded and
installed through the web. The client Tempurity Monitor can be downloaded from
http://www.networkedrobotics.com/download, and the Tempurity Server and utilities can be
downloaded from http://www.networkedrobotics.com/serverdownload.
FIGURE 10
If a previous version of the Tempurity Server is installed you may need to uninstall the previous
version using the Windows add/remove programs option of the control panel as shown in the figure
below.
Copyright ©2005, 2006 Networked Robotics Corporation. All rights reserved.
5.8.2006
Networked
Robotics
Page 20 of 63
Tempurity System User’s Guide
Tempurity-04-0006.2
FIGURE 11
When the Tempurity Server software is installed on a computer, an icon will appear in the Windows
taskbar.
Tempurity Taskbar
The Tempurity Taskbar application is automatically started after the computer starts and the user
first logs into Windows. The taskbar shows at-a-glance whether the Tempurity Server is running
and the temperature collection is enabled.
When the Tempurity Server is stopped, you will see:
Stopped
When the Tempurity Server is running you will see:
Started
Note that the server may or may not be collecting temperatures if the taskbar icon is green. The
taskbar icon indicates whether the server software is operating and has no relevance to the
collection status of monitored devices. If the network parameters for the monitored devices have
not been configured appropriately, or if another communication problem exists, temperatures may
not be collected even though the icon is green. The Tempurity Monitor should be used on the
server for a more detailed examination of the collection and alarm status of the monitored devices.
To use the Monitor on the server, enter a Tempurity Monitor address of “localhost”.
Starting and Stopping the Tempurity Server
Copyright ©2005, 2006 Networked Robotics Corporation. All rights reserved.
5.8.2006
Networked
Robotics
Page 21 of 63
Tempurity System User’s Guide
Tempurity-04-0006.2
The Tempurity Server must be instructed how and from where to collect temperatures and must be
given the allowable temperature limits for each monitored device. These instructions are made
through the Tempurity Server Configuration utility.
1.
Open the Tempurity Configure utility. The program’s icon is a wrench. You can start it by
“StartÆProgramsÆ Tempurity ServerÆTempurity Configure”.
The Tempurity Server Configuration initial display is shown below. In the example below 14
monitored devices are identified for temperature collection. The first time you run the program for
your network only a few example devices will be defined. You will use the program to edit and add
the parameters for monitored devices as appropriate for your laboratory or facility.
FIGURE 12
Tempurity Server Configurable Variables
The following must be defined for each monitored device:
2
Copyright ©2005, 2006 Networked Robotics Corporation. All rights reserved.
5.8.2006
Networked
Robotics
Page 22 of 63
Tempurity System User’s Guide
Tempurity-04-0006.2
Variable Name1
Explanation
Legal Values
Monitored Device ID
Unique number for the
monitored device. Data will be
stored by filenames under this
number.
Unique name for the monitored
device. This will often
correspond to the scientific
organization’s labeling on the
front of each monitored device.
IP address of Networked
Robotics’ NTMS or other
network hardware to which the
monitored device is connected.
The network port address to
which the monitored device is
connected. These port
addresses are defined when
you use the NTMS
configuration utility to set the
network parameters of the
NTMS hardware.
Time in hours, minutes and
seconds to trigger a stage 1
alarm. Seconds are allowed in
this field but alarm resolution is
about 10 minutes. It is not
recommended to choose a
value less than 10 minutes.
Time in hours, minutes and
seconds to trigger a stage 2
alarm. Seconds are allowed in
this field but alarm resolution is
about 10 minutes. It is not
recommended to choose a
value less than 20 minutes.
Time in hours, minutes and
seconds to trigger a first stage
communication alarm.
Communication alarms usually
occur 10 minutes after this
specified interval because ten
minutes is the usual
measurement period. It is not
recommended to choose a
value less than 10 minutes.
Time in hours, minutes and
seconds to trigger a second
stage communication alarm.
Communication alarms usually
occur 10 minutes after this
Number between 1 and 999
Monitored Device Name
IP
Port
Alarm 1 Interval
Alarm 2 Interval
Comm 1 Interval
Comm 2 Interval
String (1-8 characters long)
Legal IPV4 address
Number between 0 and 65535
Positive Integer
Positive Integer
Positive integer
Positive integer
Copyright ©2005, 2006 Networked Robotics Corporation. All rights reserved.
5.8.2006
Networked
Robotics
Page 23 of 63
Tempurity System User’s Guide
Tempurity-04-0006.2
specified interval. It is not
recommended to choose a
value less than 20 minutes.
Low Temp
High Temp
Temperature in degrees
Celsius. If the temperature
drops below this value for the
alarm interval time, it will trigger
an alarm. The low temperature
should be less than the high
temperature.
Temperature in degrees
Celsius. If the temperature goes
above this value for the alarm
interval time, it will trigger an
alarm. The high temperature
should be higher than the Low
Temp parameter.
Integer
Integer
FIGURE 13
Configuring Monitored Devices
The following functions can be used to specify the network, identification, and alarm parameters for
each monitored device.
Insert: Add a new monitored device
Duplicate: Create another device with similar settings to a previous device
Edit: Change a device’s settings
Remove: Remove an old device
Menu
File
Save: Saves the settings to configuration files
Revert: Loads the currently saved settings, overwriting all recent setting changes. Note: Once you
save you can no longer revert to old settings.
Copyright ©2005, 2006 Networked Robotics Corporation. All rights reserved.
5.8.2006
Networked
Robotics
Page 24 of 63
Tempurity System User’s Guide
Tempurity-04-0006.2
FIGURE 14
Click the ‘insert’ button to add a new device:
1.
2.
3.
Enter the appropriate values into each of the fields. Each device must have a unique ID.
When the settings for a device are complete, click the ‘OK’ button.
Go back to step 2 if there are more devices to add.
Devices can be eliminated by highlighting them in the list, and then clicking the ‘Remove’ button.
If adding multiple similar devices, use the duplicate button to enter a copy of an existing monitored
device configuration into the settings. Edit previously added devices by double-clicking on them, or
first highlighting them and the clicking the ‘Edit’ button.
Editing Configuration Files Manually
The set of text files that define Tempurity Server operation are called configuration files. These are
created automatically by the Tempurity Server Configuration utility and can be found in the
Tempurity\configs directory. The absolute location of the directory is defined at the time of
Tempurity Server installation. By default this is in the Windows directory
C:\Windows\System32\Tempurity. Editing configuration files manually is not recommended. Some
of the names in the configuration files may differ from the variable names used in the Tempurity
Configuration utility.
Copyright ©2005, 2006 Networked Robotics Corporation. All rights reserved.
5.8.2006
Networked
Robotics
Page 25 of 63
Tempurity System User’s Guide
Tempurity-04-0006.2
Tempurity Data
Measurement Interval
The system collects temperatures at approximately 5-minute intervals. The collection period may
vary by only a few seconds. If a communication failure occurs, the program will try again at oneminute intervals until another 5 minutes have passed. If no measurement is successfully made at
this time, a communication error is logged. Measurement target times are independent, that is each
device is on a different time schedule.
Time Constant
The Tempurity system samples temperatures at individual time points, rather than for an average of
measurements during the measurement period. The time constant of the Networked Robotics
digital probe is faster than that of some chart recorder probes. If you have both a chart recorder
and a Networked Robotics digital temperature probe in a monitored device, the two will react
differently to the same temperature event based on the differences in the response time.
Accuracy
Networked Robotics NTMS hardware uses Dallas/Maxim DS18s20Z and DS18b20Z integrated
circuits to measure temperature in non-ultracold devices. The specifications of the system for nonultracolds are identical to the specifications of these integrated circuits. The Dallas chips show
higher accuracy at physiological temperatures than at temperatures near the low range of the chip
(about -50°C). See the appendix for a detailed accuracy chart of the Networked Robotics digital
temperature probes.
Temperatures from DS18B20Z integrated circuits report to .1 degrees Centigrade.
For ultracold freezers, the Tempurity System uses the monitored device’s serial port to obtain
temperatures directly from its internal microprocessor and temperature sensor. See the ultracold
manufacturer’s specifications for the accuracy for these readings.
Location
Temperature data is stored in Windows text files on the Tempurity Server. Data files are stored as
text files in subdirectories based on the monitored device ID and date. There is a temperature file
for each monitored device for each day. A temperature file might not be created for a given day if a
persistent communication error exists for the monitored device on that day or days
Copyright ©2005, 2006 Networked Robotics Corporation. All rights reserved.
5.8.2006
Networked
Robotics
Page 26 of 63
Tempurity System User’s Guide
Tempurity-04-0006.2
Each temperature data file has an associated checksum file used to verify the validity of the
temperatures on that day.
The Appendix lists the location of the Windows text files that store temperature data.
Temperature Alarms
Tempurity System temperature alarms are defined by the parameters of temperature and time.
Out-of-range conditions are not considered alarms until the temperature has been continuously outof-range for the time indicated by the Stage One time threshold parameter (for a yellow alarm) or
for the State Two time threshold parameter (for a red alarm). These alarm threshold parameters
can be defined for each individual monitored device. For example, if desired, incubators could be
set to a 1-hour yellow Stage One alarm time, and refrigerators and freezers to a 2-hour yellow
Stage One alarm threshold. These alarm time thresholds are defined via the Tempurity Server
Configuration utility that must be run on the Tempurity Server computer. Low and high temperature
thresholds for each device are also defined here.
Even a single in-range measurement will reset the alarm time counters in the software. When this
occurs, the device must once again be continuously out-of-range for the Stage One time threshold
before an alarm will be generated. Note that a device that is cycling in and out of range may never
trip a Tempurity temperature alarm despite being out-of-range for a considerable percentage of the
day. This can occur when the monitored device is cycling such that the tip of the temperature cycle
is just within normal range.
Communication Alarms
Monitored devices that don’t respond to requests for temperature will eventually elicit a
communications alarm.
A communication alarm, sometimes referred to in this manual as a communication error, may have
several causes. The most common is a temporary interruption of network service in the path
between the Tempurity Server and the monitored device. This may be due to a planned interruption
of network service by the network administrators or an unexpected failure of your organization’s
network components such as routers or switches. Because the Tempurity Server must get a
response from the monitored device within a defined time period, an overloaded network may
sometimes cause an increased frequency in this type of error. A router that is intermittently
functioning may also be the cause of common communication alarms. The Tempurity System,
when installed on a wide scale in a facility can serve as a sensitive indicator of the organization’s
network status.
Other causes of communication errors:
•
•
•
•
Temperature probe failure or disconnection
NTMS hardware failure or disconnection
Freezer failure (ultracolds only) or disconnection
A loss of power or an unplugged power cable to an ultracold freezer or NTMS
Temperature alarms depend on new temperature measurements to update their status. If a
monitored device is in a Stage One alarm, and then moves to a communication error state, the
Stage One alarm will wait to clear and will wait to move to a Stage Two alarm until at least one
Copyright ©2005, 2006 Networked Robotics Corporation. All rights reserved.
5.8.2006
Networked
Robotics
Page 27 of 63
Tempurity System User’s Guide
Tempurity-04-0006.2
more temperature measurement is acquired for that monitored device. When the temperature value
is received, if it is out-of-range, the “missing” data is assumed to have been continuously out-ofrange. Communication errors resolve automatically when the conditions causing them are
reversed.
The two types of alarms, communication and temperature, cannot be selectively enabled or
disabled. However communications alarms and temperature alarms can be configured to have
different time thresholds. There are four time thresholds defined for Tempurity alarms, stage one
and two communication alarm thresholds, and stage one and two temperature time thresholds.
These are entered separately into fields of the Tempurity Server Configuration Utility for each
monitored device.
Temperature Scale
Tempurity allows the viewing of temperatures through the Monitor in either Celsius or Fahrenheit
scale. To choose the appropriate scale select the View option from the menu bar and then Use
Celsius. If there is check mark at “Use Celsius” then all temperatures will be viewed in Celsius
scale. The temperatures in the data files are always expressed in Celsius.
When defining high and low temperature ranges using the Tempurity Server Configuration utility all
temperatures must be in Celsius. See the Appendix for common temperature ranges for different
classes of monitored device.
Data Retention
There are no mechanisms for deleting temperature data through the Tempurity System. If you wish
to delete temperature data you must delete the relevant temperature data files through the
operating system. We do not recommend deleting temperature data at any time.
Copyright ©2005, 2006 Networked Robotics Corporation. All rights reserved.
5.8.2006
Networked
Robotics
Page 28 of 63
Tempurity System User’s Guide
Tempurity-04-0006.2
The Tempurity Monitor Client
`
The Tempurity Monitor application is used to view temperatures and to implement alarm notifications such
as e-mail or text messages in response to temperature alarms. The Monitor may run on any computer on
the network. The main Monitor user interface displays, at a glance, the status of all monitored devices as
collected by the Tempurity Server. Devices with normal conditions are shown in green. Devices with otherthan-normal conditions are shown in other colors.
Unique to the Tempurity System, e-mail and text message alarm notifications are defined in the Tempurity
Monitor client rather than at the Tempurity Server. In this way, each user, running the monitor on their own
individual computer, can define criteria for the notification of alarm conditions according to their needs.
Downloading and Installing
The Tempurity client software can be downloaded from the Networked Robotics web site at
http://www.networkedrobotics.com/download. Installation requires administrative access to the
computer on which you are installing the software. The client program is loaded by default to the
directory “Program Files\Networked Robotics\Tempurity Monitor”.
FIGURE 15
During the download process you may either open directly (start the download) or save the
download file to your disk. Click on the downloaded file and respond to the prompts. If you have
previously installed the program you may need to uninstall it using WindowsÆStartÆControl
PanelÆ Add/remove programs as shown below before installing the new version.
Copyright ©2005, 2006 Networked Robotics Corporation. All rights reserved.
5.8.2006
Networked
Robotics
Page 29 of 63
Tempurity System User’s Guide
Tempurity-04-0006.2
FIGURE 16
Starting the Tempurity Monitor
Once installed, run the Tempurity Monitor by going to:
2.
WindowsÆStartÆAll ProgramsÆ Tempurity Monitor
A dialog will appear as shown, asking for the Tempurity Server name. You must enter the DNS
hostname or IP address of the Tempurity Server computer that is collecting the temperature data of
interest. After clicking ‘OK’, the main monitor screen labeled ‘Tempurity Monitor’ will appear. If the
Tempurity Monitor successfully connects to the Tempurity Server, the server name will change
from red to white in the upper portion of the main monitor screen.
FIGURE 17
Main Monitor Screen
The main monitor screen shows an at-a-glance view of the status of each of the monitored devices
connected to the Tempurity Server. The status is indicated by a) color and b) text descriptions.
Copyright ©2005, 2006 Networked Robotics Corporation. All rights reserved.
5.8.2006
Networked
Robotics
Page 30 of 63
Tempurity System User’s Guide
Tempurity-04-0006.2
FIGURE 18
Alarm Status Icons
The alarm status on the main Monitor screen is represented by the following colored icons:
Green – The monitored device is operating within temperature range. A temperature on
this icon indicates an out-of-range condition that has not persisted for long enough to
generate an alarm condition.
Blue – Temperature cannot be obtained – this is a communication error and may mask a
temperature condition in the monitored device.
Gray – No device is present. This occurs when the monitored device ID was configured
for collection but did not collect at least one temperature from the monitored device since
the Tempurity Server was last started.
Copyright ©2005, 2006 Networked Robotics Corporation. All rights reserved.
5.8.2006
Networked
Robotics
Page 31 of 63
Tempurity System User’s Guide
Tempurity-04-0006.2
Yellow – A Stage One alarm exists for this monitored device. The temperature at the last
measurement will be shown.
Red – A Stage Two alarm exists for this device. The temperature at the last measurement
is shown.
“Comm” indicates that a communication error exists for this monitored device. The Tempurity
Server has collected at least one measurement, but can no longer collect. The device may or may
not be within the defined temperature range. The icon will be blue.
Note that devices indicated as gray on the monitor may also be suffering from an inability to collect
temperatures. When the Tempurity Server starts, it must be able to make a network connection to
the indicated network address. If it cannot collect temperatures, the monitor icon for that device
remains gray. When the connectivity problem is corrected, the device will return to green status. If a
subsequent communication error occurs the monitor icon will show as a blue communication error
rather than a gray inactive indication.
Alarm Window
The alarm window of the main monitor screen shows a list of the Communication, Stage One, and
Stage Two alarms that have occurred within the last year. It also shows the time, if any, that these
alarms cleared. Usually there will be a clear event for every alarming monitored device. The
exceptions are when the Tempurity Server is down or after a reconfiguration of monitored devices
using the Tempurity Configuration utility.
No temperature or alarm data are ever deleted through the Tempurity System.
The alarm window display can be toggled on or off using the option on the ‘View’ menu as shown
below.
Copyright ©2005, 2006 Networked Robotics Corporation. All rights reserved.
5.8.2006
Networked
Robotics
Page 32 of 63
Tempurity System User’s Guide
Tempurity-04-0006.2
FIGURE 19
Monitored Device Information Window
More detailed information about the current status of the monitored device may be obtained by
clicking on the representative box for any device. This includes the time of the next reading, a
graph of the temperatures in the previous two hours, the time of the last reading, the last
temperature recorded and the alarm status. The IP address and the port address of the monitored
device are also displayed. If this window is left open, this information will be updated every minute.
Copyright ©2005, 2006 Networked Robotics Corporation. All rights reserved.
5.8.2006
Networked
Robotics
Page 33 of 63
Tempurity System User’s Guide
Tempurity-04-0006.2
FIGURE 20
The time of the next reading is an important parameter. Usually the system will examine and record
temperatures every ten minutes. Communication errors can interrupt this normal logging sequence.
When the Tempurity Server is first started, the times of measurement and collection for every
monitored device are similar. After days or weeks, measurements will become progressively
desynchronized due to intermittent communication errors that slightly alter target measurement
times.
Graphing Temperatures
Graphs of temperatures can either be obtained from the main Monitor screen or by clicking on a
monitored device icon and selecting the graph button. Figure 21 shows how to graph from the main
monitor screen, and Figure 22 shows the ‘Open Graph’ button from the Monitored Device
Information window.
FIGURE 21
Copyright ©2005, 2006 Networked Robotics Corporation. All rights reserved.
5.8.2006
Networked
Robotics
Page 34 of 63
Tempurity System User’s Guide
Tempurity-04-0006.2
FIGURE 22
Figure 23 below shows a graph of temperatures. The graph will autoscale by default. The autoscale
can be overridden by entering maximum and minimum Y axis values. The date range of the plot
can be defined by clicking the ‘+’ or ‘-‘ buttons. The time interval can be selected by clicking the ‘<’
or ‘>’ buttons.
FIGURE 23
Copyright ©2005, 2006 Networked Robotics Corporation. All rights reserved.
5.8.2006
Networked
Robotics
Page 35 of 63
Tempurity System User’s Guide
Tempurity-04-0006.2
Setting
Definition
Device
Top Temp
The graph of the selected monitored device
The temperature at the top of the graph
Bottom Temp
+
The temperature at the bottom of the graph
The Top Temp and Bottom Temp will be
automatically set based on the temperatures in the
selected time range
Zooms into a shorter time range
-
Zooms out to a greater time range
>
Moves forward the current time interval
<
Moves backwards the current time interval
Graph
Draws a graph with the given settings
Autoscale Temperature Range
The ‘File’ menu allows printing of graphs to view numeric temperatures. These numeric
temperatures can be copied and passed into other applications e.g. Microsoft Excel. Figure 24
shows the ‘File’ menu options.
Copyright ©2005, 2006 Networked Robotics Corporation. All rights reserved.
5.8.2006
Networked
Robotics
Page 36 of 63
Tempurity System User’s Guide
Tempurity-04-0006.2
FIGURE 24
Alarm Notifications
Tempurity allows e-mail to be sent in the event of alarms. These can be either a traditional e-mail
or e-mail to a cell phone through a service provider’s text message gateway.
Copyright ©2005, 2006 Networked Robotics Corporation. All rights reserved.
5.8.2006
Networked
Robotics
Page 37 of 63
Tempurity System User’s Guide
Tempurity-04-0006.2
FIGURE 25
The above shows the process of defining alarm notifications. First an alarm group is defined. You
may want to define groups by area of responsibility, “Tox”, “QA”, or “Gene Tox” for example.
Individual freezers can be assigned to each alarm group. Alarm notification addresses, either email or text message phone numbers must be defined. When an alarm occurs a message will be
sent to these addresses.
FIGURE 26
The options are to select or clear all Stage One or Stage Two alarms, select or clear all alarms, or
select individual monitored devices with individual alarm stages. Note that communication alarms
cannot be selected independently of temperature alarms. If a notification is selected when a
monitored device is in temperature alarm state, notification will also be sent when a communication
alarm exists for that device. The time thresholds for these two events are different, as specified in
the Tempurity Server Configuration utility. For example, if the Stage One temperature threshold is 1
hour, and the stage 1 communication threshold is 4 hours, and if that device stops responding to
the Tempurity Server at 45 minutes after out-of-range values began, a notification will be sent 4
hours and 10 minutes after temperatures stopped being received. The communication alarm
supersedes the temperature alarm in this case and an alarm notification was not sent at the 1 hour
mark.
Copyright ©2005, 2006 Networked Robotics Corporation. All rights reserved.
5.8.2006
Networked
Robotics
Page 38 of 63
Tempurity System User’s Guide
Tempurity-04-0006.2
FIGURE 27
Test alarm notification messages are always sent after each e-mail configuration change. The
program will not be able to recognize if the entered e-mail address or SMTP server address is
valid. Therefore, always check that the test e-mail or text message sent by the Tempurity Monitor
was received as expected to ensure that the alarm e-mails or text messages will be received.
Be aware that e-mail addresses and phone numbers change. Therefore, test alarms should be sent
and their reception confirmed on a monthly basis.
Distributed Alarm Notification
The Tempurity System is fundamentally different from other monitoring systems in that alarm
notifications are configured and executed in the client software. Instead of defining how alarm emails are to be sent in a single computer, there can be an unlimited number of “watching”
computers, all monitoring a Tempurity Server for alarms in its population of monitored device in
different ways. For example, the Quality Assurance department could set up a Tempurity Monitor
with an alarm group that sends e-mail to only the QA department. QA would be responsible for the
administration of the Monitor program on its computers. The Facilities department could start a
Monitor process on one of their computers that sent e-mail both to Facilities and to scientific
groups.
A scientific department could also set a Tempurity Monitor that did all of the above. By having
multiple monitors all watching simultaneously, redundancy can be built into the function of
notification of out-of-range temperatures.
Running the Server and the Monitor on the Same Computer
The most common computer for a Tempurity Monitor will often be the Tempurity Server. This is the
more traditional approach to temperature monitoring. Placing both Tempurity Monitor and
Tempurity Server on the same machine allows centralized management. Enter a server address of
‘localhost’ when the Tempurity Monitor prompts for a server address.
SMTP Server versus Internal SMTP
E-mail alarm notifications can be sent using two methods, internal SMTP, and through an SMTP
server. The internal method is the easiest to use but may be less reliable. This method requires no
setup, it is enabled at the time that the Tempurity Monitor is installed on your machine, and it
assumes that all receiving e-mail servers are active at the time that the alarm notification is sent.
This is usually true but depends on the reliability of the internet service providers’ mail servers. The
SMTP server method may be more reliable because if the message can be received by a SMTP
server, the server will store the message and wait until the email servers at the destination ISPs are
available. The disadvantage of this configuration is that an SMTP server has to be available to you,
and it has to be configured to allow the transmission of email to the alarm notification addresses.
More advanced skills are required in setting up an SMTP server or in connecting to a corporate
mail server. To use the SMTP server method, enter the name of the server into the option under
Alarm Notification on the Main Monitor screen.
Copyright ©2005, 2006 Networked Robotics Corporation. All rights reserved.
5.8.2006
Networked
Robotics
Page 39 of 63
Tempurity System User’s Guide
Tempurity-04-0006.2
Ensuring the Reception of Alarm Notifications
In order for the e-mail function to work properly the following must be true. The last 3 items
relate to the SMTP server method:
•
•
•
•
The Monitor software must be running on your client or server machine.
There must be connectivity between the program on which the Monitor software is running
and the SMTP server.
The SMTP server must be running and configured properly to send messages to
appropriate, valid accounts.
The SMTP server’s security settings allow the Tempurity Server to use it to send email to
designated addresses.
Obtaining an SMTP Server
As of this writing a free SMTP server is available from Postcast and can be downloaded free from
www.postcast.com and installed on the client or server. You can enter the IP address “localhost” as
the address of the SMTP server. In this case the Postcast server must be enabled and running in
order to send alarm notifications. You can also use the IP address 127.0.0.1 as the address of the
machine on which the Monitor and the SMTP server are running.
An SMTP server is also available on any Windows XP computer through installation of Internet
Information Services (IIS). This function is not enabled by default during normal Windows installs.
To enable this SMTP server, choose
WindowsÆControl PanelÆAdd\remove programsÆAdd\remove Windows components ÆInternet
Information Services. You will need to provide the Windows XP Professional installation disks in
order to complete the installation.
If you are using the Windows XP IIS SMTP server you will need to configure the software by going
into WindowsÆControl PanelÆAdministrative toolsÆInternet Information ServicesÆSMTP
serverÆComputer Name – then right-click on the SMTP server to access the properties items.
From these items choose ‘Access’ – then go to the ‘Relay’ item. Within the ‘Relay’ screen you must
add 127.0.0.1 (the address of your local machine) or the IP address of the computer you are using
as the Tempurity Monitor or both.
Copyright ©2005, 2006 Networked Robotics Corporation. All rights reserved.
5.8.2006
Networked
Robotics
Page 40 of 63
Tempurity System User’s Guide
Tempurity-04-0006.2
FIGURE 28
The Tempurity Monitor uses IP port 25 to communicate e-mails and text messages. If this
port is blocked, alarm notification messages will not get through. Check with your network
administrator or ISP to see whether router configuration allows this type of network
communication. Some virus protection software may guard against the sending of e-mail
from your machine. Check your security software provider’s manual for information. In
McAffee Security Center e-mail scanning is enabled by default. You must use the
Viruscan advanced options to turn off outbound e-mail scanning in order for alarm
notifications to be successfully received.
Text Message Gateways
Cell phone and paging companies provide e-mail to text message gateways that are used by the
Tempurity System to send alarm notifications. In the case of cell phones, by sending e-mail to the
specified address, a text message or page is sent to the cell phone of the customer. The addresses
listed here and in the appendix are maintained by communications companies. They may change
at any time. The most common services are tested by Networked Robotics. Several companies
have more than one format, often as the result of mergers or acquisitions in their industry. The
appendix lists gateways for many companies. Some of the most common are listed below. We
recommend that you try the lowest number first for any particular vendor. For example T-Mobile 2
is the lowest of the possible T-Mobiles.
If you choose the Tempurity email option and specify the email according to the full text provided
the alarm notification will be sent just as if you had entered a number and a service.
At the time of this writing here are some of the gateways for cell phone providers:
If the user has a text-message or SMS-enabled phone, you can send them a
message via Internet e-mail. Here is a list of known e-mail addresses: (replace
xxx with your 10 digit wireless phone number!)
AT&T Pocketnet: [email protected]
Sprint PCS:
[email protected] (160 character limit)
T-Mobile 2:
[email protected] (140 character limit)
Nextel 1 :
[email protected]
Cingular Wireless 3 :
[email protected] (160 character limit)
Verizon PCS :
[email protected] (160
character limit)
Many providers now allow users to set up their own e-mail alias for text messaging.
Please check with your provider for details.
Check with your cell phone provider for any updates to these addresses.
Be aware that these e-mail addresses must be accessible from the chosen SMTP server.
Corporate SMTP servers may be configured to only send to corporate e-mail accounts –
not external accounts. Check with your mail administrator if test email or text messages
are not received.
Copyright ©2005, 2006 Networked Robotics Corporation. All rights reserved.
5.8.2006
Networked
Robotics
Page 41 of 63
Tempurity System User’s Guide
Tempurity-04-0006.2
E-mail Capacity and Response Time
Both mail systems and Tempurity Monitor computers have practical limits to the amount of
email or text messages that can be sent in a given time. In testing, with one commercial
email server we found that 20 alarm notification addresses sent for 50 monitored devices
took as long as 8 hours to arrive. Tempurity sends one email for each monitored device
for each email address. In the example above 1000 emails would have been sent. For this
reason we recommend that alarm notification groups be kept to 10 notification addresses
or less if the server is near the capacity of 50 monitored devices, or that multiple alarm
groups be created, each responding to conditions on subpopulations of monitored devices
on that server.
Some email software has increasingly sophisticated mechanisms for recognizing
“Spamming” of messages. It may be necessary to set parameters in your mail system
that will allow Tempurity alarm notification messages to bypass this protection in order to
be received in your mail account.
Monitoring Multiple Tempurity Servers from a Single
Computer
Each Tempurity Server can obtain temperatures from up to 50 monitored devices. A single
computer running several instances of the Tempurity Monitor can watch the status of as many as
50 Tempurity Servers in parallel.
To monitor multiple Tempurity Servers from one machine, start the Tempurity Monitor once for
each server you wish to monitor. Enter the unique Tempurity Server address into each instance of
the Tempurity Monitor. Alarm groups and their corresponding alarm notification addresses are
independent in each instance of the Monitor.
Ensure that reboots will not affect the ability to send alarm notifications by following the procedures
below.
Configuring Monitor Autostart
The Tempurity Monitor is responsible for sending alarm notifications and thus must be operational
in order for messages to be sent and received by the addresses in the alarm notification groups.
After a computer reboot, the default state is that the Monitor, and thus alarm notification, is
disabled. The following changes can be made to the Windows operating system autostart
parameters that will allow the Monitor software to start when the computer is powered on. It is
strongly recommended to follow these procedures for any monitoring computer that might be
subject to temporary power failure or other reboot. Note that one source of unexpected reboots is
the execution of Windows automatic updates.
The recommended method is to
1)
2)
insert an autostart file in the Windows startup directory
configure the computer to log in automatically at boot time
Copyright ©2005, 2006 Networked Robotics Corporation. All rights reserved.
5.8.2006
Networked
Robotics
Page 42 of 63
Tempurity System User’s Guide
Tempurity-04-0006.2
Inserting an Autostart File into the Windows Startup Directory
Cut and paste the following text and put it into a text file using Notepad and call it
monitor.bat (any .bat file name is ok). Type in the server address you wish to connect to
in the field ‘xxx.xxx.xxx.xxx’.
rem This file should be placed in the startup directory
rem C:\Documents and Settings\All Users\Start Menu\Programs
rem The Tempurity monitor will open when a user LOGS in
rem It may not run the monitor at reboot unless the automatic login option of Windows is
also configured
rem Get this file from ww.networkedrobotics.com/utilities
rem
rem
"C:\program files\networked robotics\Tempurity Monitor\monitor.exe" xxx.xxx.xxx.xxx
Store the file in the startup directory for your computer, usually: C:\Documents and
Settings\All Users\Start Menu\Programs. The address of the Tempurity Server is listed on
the last line. You can start multiple versions of the Monitor by adding additional lines that
invoke the monitor to watch other Tempurity Server addresses. See the previous section
on monitoring multiple Tempurity Servers from a single computer.
Configuring Automatic Login
In Windows choose Start – Run and type “control userpasswords2”
.
FIGURE 29
Deselect the box that says “Users must enter a name and password to use this computer”
and then click Apply. The Automatically Log On window will appear. Enter the account
name and confirmed password that will be used to automatically log on to the computer.
This option is secure because external parties cannot connect without the password.
Although you can also set autostart by removing passwords on your account, this option
reduces security and is not recommended.
Note that if the Monitor computer is also a Tempurity Server, the account that you choose
must be an administrator account.
Copyright ©2005, 2006 Networked Robotics Corporation. All rights reserved.
5.8.2006
Networked
Robotics
Page 43 of 63
Tempurity System User’s Guide
Tempurity-04-0006.2
FIGURE 30
Copyright ©2005, 2006 Networked Robotics Corporation. All rights reserved.
5.8.2006
Networked
Robotics
Page 44 of 63
Tempurity System User’s Guide
Tempurity-04-0006.2
Time Zones, Time Accuracy, and Time
Synchronization
The Tempurity System is designed to operate in an environment in which temperatures can originate in
many world time zones. As a result, the system has features that facilitate use and data interpretation from
temperature sources in multiple geographical regions.
The server stores each temperature collection time in universal time. When a Tempurity Monitor Client
displays temperatures or alarms, these events are shown as having occurred in the appropriate local time.
The Monitor uses the setting for the local time zone in Windows in order to determine the appropriate
temperature collection and alarm times to display.
An example of time synchronization features:
A temperature measurement was collected from a Tempurity Server based in New York at 3:00 pm
US EST. The temperature showed a spike of 0°C over a baseline of -20°C. A stage 1 alarm was
issued at that time recognizing the out-of-range condition. Assume that each Windows Monitor
client has their correct time zone specified in the Windows Date and Time option of the Windows
control panel, if a Tempurity Monitor client reviews that temperature spike from Denver at Mountain
Standard Time, it will appear on graphs and in the data view option as having occurred at 1:00 pm
in US Mountain time. If a Monitor client in London connects to that same Tempurity Server in New
York and views the data, that same 0°C temperature spike will be plotted as having occurred at
8:00 PM.
Time next logged in the monitored device window will also reflect the times in the local time zone.
The Main Monitor Screen shows the local time of the client computer in white numbers. This is the
Tempurity Monitor computer’s Windows system time and is unrelated to server time or time zone.
The Windows time zone defined on the server does not affect the time displayed by any client. If you change
time zone on the Tempurity Server computer there will be no affect to temperature collection times viewed
by any Monitor Client in any time zone. However, if you change the Windows time of day on that server, this
will be reflected in the temperature record for all time zones.
For all Tempurity Server computers we recommend the use of a time synchronization server. You can
automatically synchronize your Tempurity Server by clicking on the Windows time, usually at the bottom
right of the Start bar. Choose internet time and the “automatically synchronize” option. This will match your
Tempurity Server computer’s time with the network time server and thus will always be accurate as long as
the CPU is connected to the network.
Copyright ©2005, 2006 Networked Robotics Corporation. All rights reserved.
5.8.2006
Networked
Robotics
Page 45 of 63
Tempurity System User’s Guide
Tempurity-04-0006.2
FIGURE 31
Copyright ©2005, 2006 Networked Robotics Corporation. All rights reserved.
5.8.2006
Networked
Robotics
Page 46 of 63
Tempurity System User’s Guide
Tempurity-04-0006.2
System Operations
Redundancy
The Tempurity System allows greater reliability through the use of redundant processes. You can
download and configure multiple Tempurity Servers that collect temperatures from monitored
devices simultaneously. You can also establish several monitoring clients, each running on a
different computer, which can send alarm notifications.
The figure below shows one strategy for redundancy called “near-far”. Two Tempurity Servers and
two Tempurity Monitors have been implemented. The Tempurity Monitor at site A, shown in blue,
watches its local Tempurity Server. The site B Tempurity Server, shown in green, collects
temperatures from the monitored devices at site A; the site B Tempurity Monitor watches its local
Tempurity Server. At least one location will survive any negative event that causes large-scale
power or network failure. In this way communication alarm notifications are guaranteed as long as
power and network are available at one of the sites and both sites have a network environment that
supports e-mail transmission.
FIGURE 32
Copyright ©2005, 2006 Networked Robotics Corporation. All rights reserved.
5.8.2006
Networked
Robotics
Page 47 of 63
Tempurity System User’s Guide
Tempurity-04-0006.2
Power Outages
The NTMS hardware and the Tempurity Server require continuous power in order to collect
temperatures. All network equipment in the path between the NTMS and the Tempurity Server
requires continuous power in order for the system to collect. You may wish to provide backup
power to some or all system components in order to eliminate or reduce the risk of either the
inability to collect temperatures, or the inability to notify when alarm conditions are recognized. The
following describes the behavior of Tempurity System components under conditions of power
outage.
Power Outage at the Monitored Device
The Tempurity System will never collect temperatures during a power failure that affects
ultracold freezers because the system relies on the ultracold to communicate temperature.
Tempurity will issue a communication alarm in these cases and will notify the alarm
notification addresses as long as the network is intact at both the monitoring client and at
the Tempurity Server. In the event of a large-scale power failure, the main monitor screen
may appear as follows:
FIGURE 33
Note that a large number of notifications could be sent depending on how the alarm
groups are defined. See also the section on e-mail capacity.
At the Monitor Client
The Monitor must be running in order to send alarm notifications. Although the Tempurity
Server automatically restarts upon computer reboot, the Tempurity Monitor must be
configured to do so. (See the section on Monitor Autostart).
Copyright ©2005, 2006 Networked Robotics Corporation. All rights reserved.
5.8.2006
Networked
Robotics
Page 48 of 63
Tempurity System User’s Guide
Tempurity-04-0006.2
At the Server
The Tempurity Server computer requires power in order to collect temperatures from the
monitored devices and in order to allow monitor clients to recognize the existence of alarm
conditions. Server functionality will resume immediately after server reboot, however
alarm timings will be reset.
Maintenance
Probe Care
The Networked Robotics digital temperature probe is designed to withstand temperatures
within the normal probe operating range of -50°C to +120°C. It is designed to operate in
high humidity; even underwater.
The probe is sensitive to repeated mechanical stress due to its extremely flat cable. The
action of repeatedly opening and closing a refrigerator door may be a concern in some
types of monitored devices such as double-glass-door refrigerators. For these devices it
may be necessary to drill an entry point in the side of the device. Many commercial
scientific freezers have built-in chases that can be used to feed a temperature probe to the
interior. For monitored devices with rubber seals, frequent door opening will usually not
affect the probe. The Tempurity Server will issue a communication alarm if the
temperature can not be measured due to a broken probe wire.
Ultracold Freezers
Ultracold freezers must have calibrated, properly functioning temperature sensors. Since
Tempurity reports on the temperature derived from the ultracold, a failure in this sensor
could result in inaccurate data. See your ultracold manufacturer service representative or
metrology specialist.
Freezer Overloading
Avoid placing samples in contact with the Networked Robotics digital temperature probe.
This will affect the probe’s time constant and will give variable results that are related to
the mass of the sample or container. Refrigerators and freezers that are overly full may
result in temperature readings that do not reflect the internal air temperature of the
freezer.
Safety
Copyright ©2005, 2006 Networked Robotics Corporation. All rights reserved.
5.8.2006
Networked
Robotics
Page 49 of 63
Tempurity System User’s Guide
Tempurity-04-0006.2
The contents of scientific refrigerators and freezers are often hazardous. Recognize safety
concerns. Use appropriate protective equipment before opening any scientific device containing
scientific samples. Be aware of any procedures that need to be followed in the event of a
hazardous material spill. Protective gloves should be worn at all times. The contents of the
refrigerator or freezer should always be labeled and sealed to prevent accidents.
Regulatory Use
The Tempurity system was designed for use in FDA regulated environments, specifically for use
under the United States Food and Drug Administration’s Good Laboratory Practices and Good
Manufacturing Practices standards. Networked Robotics has validated the Tempurity System for
use in these environments. Our validation package is open for audit to regulated customers at
Networked Robotics’ offices in the Chicago area.
Compliance with these standards often includes corporate standard operating procedures for
reacting to potential sample quality issues caused by the failure of refrigerators, freezers, or other
equipment. Networked Robotics can provide samples of such procedures that can serve as
templates for these procedures for use in your organization.
Some clients might define the Stage One alarm as an event designed to enable a sample quality
hazard to be addressed and reserve the execution of strict quality review procedures only for
reacting to Stage Two alarms. Some organizations find that communication alarms should be
considered to be equally important as temperature alarms from a regulatory and quality point of
view while others may wish to disregard communications alarms. Procedures for reacting to
Tempurity events will be uniquely defined by your company scientists, management, and quality
assurance specialists.
Suggestions for Operation
Based on our experience, the most reliable freezer monitoring depends on several overlapping
methods – each with assigned human responsibility. The first line of defense is often the freezer’s
internal audible alarm, where nearby lab personnel can respond to the alarm and correct the
problem. The second line of defense, with the advent of Tempurity’s advanced distributed data, is
centralized monitoring of an entire organization’s samples, which might be accomplished by a
facilities or security group. Hallway displays showing the entire population of freezers for a group or
department can be a third line of defense. If a responsible scientist is out of the office it is important
that another person can recognize and correct a problem.
Monitoring freezers is sometimes assumed to be a “reactive” process. Many of our clients find that
the value of Tempurity is less in the generation of alarm notifications for out of range conditions
than in the ability to examine the daily cycling of the temperatures of their samples under “normal”
conditions. It is common for freezers to be replaced after the installation of the Tempurity System
because organizations now can more effectively view comprehensive temperature histories. Some
customers will be able to recognize trends in temperature history that signal the need for
replacement or maintenance of their monitored device.
A person is still the best judge of a temperature quality problem and how to fix it. For these reasons
we feel that the most powerful feature of Tempurity is, rather than mail or text message alarm
notifications, the ubiquitous access to the temperatures of monitored devices. People and
Copyright ©2005, 2006 Networked Robotics Corporation. All rights reserved.
5.8.2006
Networked
Robotics
Page 50 of 63
Tempurity System User’s Guide
Tempurity-04-0006.2
processes must be appropriately employed in order to assure sample quality and these are best
served by the use of new tools like the Tempurity System by Networked Robotics.
Copyright ©2005, 2006 Networked Robotics Corporation. All rights reserved.
5.8.2006
Networked
Robotics
Page 51 of 63
Tempurity System User’s Guide
Tempurity-04-0006.2
Appendix A: USP Temperature Storage Definitions
From US Pharmacopeia Quality Review No. 40, Revised 6/94
“In some USP monographs, there are specific directions for stating the temperature at which Pharmacopeial
articles shall be stored….. The following are storage definitions, as defined in the General Notices section of
the USP XXII-NF XVII, for recommended conditions commonly specified on product labels.”
Freezer
A place in which the temperature is maintained thermostatically between -20°C and -10°C (-4°F and
14°F).
Cold
Any temperature not exceeding 8°C (46 F). A refrigerator is a cold place in which the temperature is
maintained thermostatically between 2°C and 8°C (36°F- 46 F).
Cool
Any temperature between 8°C and 15°C (46°F-59 F). An article that requires cool storage, alternatively
may be stored in a refrigerator, unless otherwise specified by the individual USP monograph.
Room Temperature
The temperature prevailing in a working area.
Controlled Room Temperature
A temperature maintained thermostatically that encompasses the usual and customary working
environment of 20°C to 25°C (68°F-77°F) that allows for brief deviations between 15°C and 30°C (59°F86 F) that are experienced in pharmacies, hospitals, and warehouses. Articles may be labeled for
storage at "controlled room temperature" or at "up to 25", or other wording. An article for which storage
at Controlled room temperature is directed may, alternatively, be stored in a cool place, unless
otherwise specified in the individual monograph or on the label. (See the entire revised definition of
Controlled Room Temperature in the Ninth Supplement to USP XXII-NF XVII.)
Warm
Any temperature between 30°C and 40°C (86°F-104 F).
Excessive Heat
Any temperature above 40°C (104°F).
Copyright ©2005, 2006 Networked Robotics Corporation. All rights reserved.
5.8.2006
Networked
Robotics
Page 52 of 63
Tempurity System User’s Guide
Tempurity-04-0006.2
Appendix B: Debugging a Connection
This appendix provides procedures that will help identify the source of a communication alarm or other problem
in connectivity. They are based on the connection of a computer directly to the NTMS using the “Telnet”
command.
Stop the Tempurity Server with the Stop option of the Tempurity Taskbar.
Choose Start and then Run from Windows and then type CMD in the RUN window and hit return. When the
black command screen appears, type:
“Telnet xx.xx.xx.xx portaddress”
Where xx.xx.xx.xx is the current IP address of the NTMS and portaddress is the network port address of the
temperature jack of the NTMS that you wish to check. On NTMS4 hardware the default network port addresses
for the four temperature jacks are 8088, 8089, 8090 and 8091.
If the device connects properly (only a blank screen may be visible) type a “T” (case sensitive) to elicit a
temperature.
The figure below shows potential sources of problems depending on the results of the Telnet to the device.
Copyright ©2005, 2006 Networked Robotics Corporation. All rights reserved.
5.8.2006
Networked
Robotics
Page 53 of 63
Tempurity System User’s Guide
Tempurity-04-0006.2
Telnet
command
responds with
error?
Network connectivity problem:
•
network address mismatch
•
firewall blocking connection
•
wrong destination address
Connection to NTMS but NTMS does not return
temperature:
•
bad probe
•
bad freezer cable
•
wrong NTMS monitored device type
configuration
•
probe cable too long
•
ultracold freezer or its serial port are not
working
Telnet
connects but
“T” yields
only an error
Responds to
“T” command
with a
temperature?
Connection OK. If still not
collecting in Tempurity, ensure
correct Tempurity Server
configuration.
Figure B-1
If the NTMS responds with a temperature, the network, NTMS, and probe are functioning properly. If this is the
case, and there is still a problem, it may be with the Tempurity System configuration at the server. If an error is
returned, the NTMS is functioning but the probe is not. If nothing is returned, there is a problem in
communicating to the NTMS. Check the IP address, subnet, and network connectivity.
You can use these diagnostic steps to replace or reconfigure malfunctioning components and repeat the tests
above.
Copyright ©2005, 2006 Networked Robotics Corporation. All rights reserved.
5.8.2006
Networked
Robotics
Page 54 of 63
Tempurity System User’s Guide
Tempurity-04-0006.2
Appendix C: Networked Robotics’ Temperature Probe
Reproduced below is the error curve of the Dallas/Maxim DS18S20 and DS18B20 integrated circuits used in
the Networked Robotics probes. The error curve shows the probability of a single probe showing the indicated
error at each temperature.
Networked Robotics probes used in regulatory environments are confirmed to defined tolerances before being
released into production.
The figure below is reprinted from Dallas/Maxim data sheets for their integrated circuits.
Figure C-1
The following diagram does not include the dual-lock backing normally applied to the bottom of the probe.
Figure C-2
Copyright ©2005, 2006 Networked Robotics Corporation. All rights reserved.
5.8.2006
Networked
Robotics
Page 55 of 63
Tempurity System User’s Guide
Tempurity-04-0006.2
Appendix D: Tempurity System Specifications
Maximum Number of Monitored Devices on Each Tempurity Server
50
Server Operating System
Windows XP Professional
Temperature Scale
Celsius and Fahrenheit in the Monitor Client
Celsius only in the Tempurity Server Configuration
Alarm Levels
2
Data Retention
There is no capability for data deletion or modification through the Tempurity system.
Data Format
Temperatures are stored in a series of Windows text files.
Network Access
Access to a properly functioning network connection is required. The Networked Robotics
NTMS4 hardware is designed to work in a network environment of 10 Mb/sec or less. For
high traffic environments it may be necessary to install a network switch in order to reduce
the network traffic sent to the NTMS.
Ultracold Compatibility
Ultracold freezers (if lower than -55°C) must have a serial port connector and must respond
to either Revco or Forma data transfer protocols. Most ultracold brands, in addition to
Forma and Revco, support these data transfer formats.
Power Backup
Tempurity relies on the availability of power and network to collect temperatures. UPS
power should be used on all network devices, including Networked Robotics hardware to
withstand power outages.
Copyright ©2005, 2006 Networked Robotics Corporation. All rights reserved.
5.8.2006
Networked
Robotics
Page 56 of 63
Tempurity System User’s Guide
Tempurity-04-0006.2
Appendix E: File Locations
C:\Windows\System32\Tempurity
BinConfigData -
executable files
configuration files
temperature and verification files
C:\Program Files\Networked Robotics
stores client executables and needed DLLs and DLL registration utility
Some needed DLL files are also stored in the Windows\System32 directory.
Copyright ©2005, 2006 Networked Robotics Corporation. All rights reserved.
5.8.2006
Networked
Robotics
Page 57 of 63
Tempurity System User’s Guide
Tempurity-04-0006.2
Appendix F: Networked Robotics’ NTMS Hardware FCC
Certification
The NTMS4 version I network hardware complies with FCC Part 15 Subpart A requirements.
NOTE: This equipment has been tested and found to comply with the limits for a Class A digital
device, pursuant to Part 15 of the FCC Rules. These limits are designed to provide reasonable
protection against harmful interference when the equipment is operated in a commercial
environment. This equipment generates, uses, and can radiate radio frequency energy and, if not
installed and used in accordance with the instruction manual, may cause harmful interference to
radio communications. Operation of this equipment in a residential area is likely to cause harmful
interference in which case the user will be required to correct the interference at his own expense.
The NTMS4 version R network hardware complies with FCC Part 15 Subpart B requirements.
Note: This equipment has been tested and found to comply with the limits for a Class B digital
device, pursuant to Part 15 of the FCC Rules. These limits are designed to provide reasonable
protection against harmful interference in a residential installation. This equipment generates, uses
and can radiate radio frequency energy and, if not installed and used in accordance with the
instructions, may cause harmful interference to radio communications. However, there is no
guarantee that interference will not occur in a particular installation. If this equipment does cause
harmful interference to radio or television reception, which can be determined by turning the
equipment off and on, the user is encouraged to try to correct the interference by one or more of the
following measures:
- Reorient or relocate the receiving antenna.
- Increase the separation between the equipment and receiver.
- Connect the equipment into an output on a circuit different from that to which the
receiver is connected.
- Consult the dealer or an experienced radio/TV technician for help.
Copyright ©2005, 2006 Networked Robotics Corporation. All rights reserved.
5.8.2006
Networked
Robotics
Page 58 of 63
Tempurity System User’s Guide
Tempurity-04-0006.2
Appendix G: Forma and Revco Connectors
The figures below show the internal wiring of the adapters used to connect Revco and Forma compatible ultracolds to the
NTMS. Each connector has a DB-9 end and a RJ-45 jack end. The colors shown are based on common adapters from
electronics supply houses but these colors may be different in other connector models. Both figures show RJ45-to female
DB-9 adapters. A male-male gender changer (not shown) is required to connect to the data interface of a REVCO
freezer.
Copyright ©2005, 2006 Networked Robotics Corporation. All rights reserved.
5.8.2006
Networked
Robotics
Page 59 of 63
Tempurity System User’s Guide
Tempurity-04-0006.2
Appendix H: Cell Phone and Pager Gateways
The following list cell phone and pager e-mail gateways for many communications companies. These gateways are
subject to change. Verify that test alarm notifications are received before use.
ACS Wireless }
Advantage Communications
1
}
@paging.acswireless.com
Morris Wireless }
@beepone.net
@advantagepaging.com
Motient }
@isp.com
@correo.movistar.net
Airtouch Pagers 1
}
@myairmail.com
Movistar }
Airtouch Pagers 2
}
@alphapage.airtouch.com
Mumbai BPL Mobile }
@bplmobile.com
Airtouch Pagers 3
}
@airtouch.net
Mumbai Orange }
@orangemail.co.in
Airtouch Pagers 4
}
AlphNow
Alltel
}
}
Alltel PCS
}
Ameritech Paging 1
}
Ameritech Paging 2
}
American Messaging
}
Ameritech Clearpath
}
Andhra Pradesh Airtel
}
Arch Pagers - Wireless
Arch Pagers (PageNet
AT&T Free2Go
AT&T PCS
}
}
}
@airtouchpaging.com
NBTel }
@wirefree.informe.ca
[email protected]
Netcom }
@sms.netcom.no
@alltelmessage.com
Nextel 1 }
@messaging.nextel.com
@message.alltel.com
Nextel 2 }
@page.nextel.com
@paging.acswireless.com
Nextel 3 }
@nextel.com.br
@pageapi.com
NPI Wireless }
@npiwireless.com
@page.americanmessaging.net
Ntelos }
@pcs.ntelos.com
@clearpath.acswireless.com
O2 }
[email protected]
@airtelap.com
O2 (M-mail }
@mmail.co.uk
@archwireless.net
Omnipoint 1 }
@omnipoint.com
@epage.arch.com
Omnipoint 2 }
@omnipointpcs.com
@mmode.com
One Connect Austria }
@onemail.at
@mobile.att.net
OnlineBeep }
@onlinebeep.net
AT&T Pocketnet PCS }
@dpcs.mobile.att.net
Optus Mobile }
@optusmobile.com.au
Beepwear }
@beepwear.net
Orange }
@orange.net
BeeLine GSM }
@sms.beemail.ru
Bell Atlantic }
@message.bam.com
Bell Canada }
@txt.bellmobility.ca
Oskar }
@mujoskar.cz
Bell Canada }
@bellmobility.ca
P&T Luxembourg }
@sms.luxgsm.lu
@pacbellpcs.net
Orange Mumbai }
Orange - NL /
Dutchtone }
@orangemail.co.in
@sms.orange.nl
Bell Mobility (Canada }
@txt.bell.ca
Pacific Bell }
Bell Mobility }
@txt.bellmobility.ca
PageMart }
@pagemart.net
Bell South (Blackberry }
@bellsouthtips.com
PageMart Advanced }
@airmessage.net
Bell South 1 }
@sms.bellsouth.com
PageMart Canada }
@pmcl.net
Bell South 2 }
@wireless.bellsouth.com
PageNet Canada }
@pagegate.pagenet.ca
Bell South 3 }
@blsdcs.net
PageOne NorthWest }
@page1nw.com
Bell South 4 }
@bellsouth.cl
Bell South Mobility }
@blsdcs.net
PCS One }
Personal
Communication }
Blue Sky Frog }
@blueskyfrog.com
Pioneer / Enid Cellular }
Bluegrass Cellular }
@sms.bluecell.com
PlusGSM }
@pcsone.net
[email protected] ( in subject line
}
@msg.pioneerenidcellular.com
@text.plusgsm.pl
Copyright ©2005, 2006 Networked Robotics Corporation. All rights reserved.
5.8.2006
Networked
Robotics
Page 60 of 63
Tempurity System User’s Guide
Tempurity-04-0006.2
Boost }
@myboostmobile.com }
BPL mobile }
@bplmobile.com
Carolina West Wireless }
Carolina Mobile
Communications }
@cwwsms.com
Pondicherry BPL
Mobile }
Powertel }
Price Communications
}
@bplmobile.com
@voicestream.net
@mobilecell1se.com
@cmcpaging.com
Primco }
@[email protected]
Cellular One East Coast }
@phone.cellone.net
Primtel }
@sms.primtel.ru
Cellular One South West }
@swmsg.com
ProPage }
Public Service Cellular
[email protected]
Cellular One PCS }
@paging.cellone-sf.com
Cellular One 1 }
@mobile.celloneusa.com
Qualcomm }
[email protected]
Cellular One 2 }
@cellularone.txtmsg.com
Qwest }
@qwestmp.com
Cellular One 3 }
@cellularone.textmsg.com
RAM Page }
Rogers AT&T Wireless
@ram-page.com
}
@sms.pscel.com
Cellular One 4 }
@cell1.textmsg.com
Cellular One 5 }
@message.cellone-sf.com
Rogers Canada }
@pcs.rogers.com
Cellular One 6 }
@sbcemail.com
Safaricom }
@safaricomsms.com
Cellular One West }
@mycellone.com
Satelindo GSM }
@satelindogsm.com
@csouth1.com
Satellink }
SBC Ameritech Paging
[email protected]
Cellular South }
Central Vermont
Communications }
@cvcpaging.com
}
@pcs.rogers.com
)
@paging.acswireless.com
CenturyTel }
@messaging.centurytel.net
SCS-900 }
@scs-900.ru
Chennai RPG Cellular }
@rpgmail.net
SFR France }
@sfr.fr
Chennai Skycell / Airtel }
@airtelchennai.com
Skytel Pagers }
@skytel.com
Cincinnati Bell }
@mobile.att.net
Skytel Pagers }
@email.skytel.com
Cingular }
@cingularme.com
Simple Freedom }
@text.simplefreedom.net
Cingular Wireless 1 }
@mycingular.textmsg.com
Smart Telecom }
@mysmart.mymobile.ph
Cingular Wireless 2 }
@mobile.mycingular.com
Southern LINC }
@page.southernlinc.com
Cingular Wireless 3 }
@mobile.mycingular.net
Southwestern Bell }
@email.swbw.com
Clearnet }
@msg.clearnet.com
Sprint Paging }
@sprintpaging.com
Comcast }
@comcastpcs.textmsg.com
Sprint PCS }
@messaging.sprintpcs.com
@pageme.comspeco.net
ST Paging }
[email protected]
Communication Specialists }
Communication Specialist
Companies }
Comviq }
Cook Paging }
Corr Wireless
Communications }
[email protected]
SunCom }
@tms.suncom.com
@sms.comviq.se
SunCom }
@suncom1.com
@cookmail.com
Sunrise Mobile }
@mysunrise.ch
@corrwireless.net
Sunrise Mobile }
Surewest
Communicaitons }
@freesurf.ch
Delhi Aritel }
@airtelmail.com
Delhi Hutch }
@delhi.hutch.co.in
Swisscom 1 }
@bluewin.ch
Digi-Page / Page Kansas }
@page.hit.net
T-Mobile 2 }
@tmomail.net
@mobile.dobson.net
T-Mobile 3 }
@voicestream.net
@sms.t-mobile.at
Dobson Cellular Systems }
Dobson-Alex Wireless
/Cellular One }
@mobile.surewest.com
@mobile.cellularone.com
T-Mobile Austria }
DT T-Mobile }
@t-mobile-sms.de
T-Mobile Germany }
Dutchtone / Orange-NL }
@sms.orange.nl
Edge Wireless }
@sms.edgewireless.com
EMT }
@sms.emt.ee
Tele2 Latvia }
@sms.tele2.lv
Escotel }
@escotelmobile.com
Telefonica Movistar }
@movistar.net
T-Mobile UK }
Tamil Nadu BPL
Mobile }
@t-d1-sms.de
@t-mobile.uk.net
@bplmobile.com
Copyright ©2005, 2006 Networked Robotics Corporation. All rights reserved.
5.8.2006
Networked
Robotics
Page 61 of 63
Tempurity System User’s Guide
Tempurity-04-0006.2
Fido }
@fido.ca
Telenor }
@mobilpost.no
Galaxy Corporation }
[email protected]
Teletouch }
@pageme.teletouch.com
GCS Paging }
@webpager.us
Telia Denmark }
@gsm1800.telia.dk
Goa BPLMobil }
@bplmobile.com
Telus }
@msg.telus.com }
Golden Telecom }
@sms.goldentele.com
TIM }
@timnet.com
GrayLink / Porta-Phone }
@epage.porta-phone.com
Triton }
@tms.suncom.com
GTE 1 }
@airmessage.net
TSR Wireless }
@alphame.com
GTE 2 }
@gte.pagegate.net
TSR Wireless }
@beep.com
GTE 3 }
@messagealert.com
UMC }
@sms.umc.com.ua
Gujarat Celforce }
@celforce.com
Unicel }
@utext.com
Houston Cellular }
@text.houstoncellular.net
Uraltel }
@sms.uraltel.ru
Idea Cellular }
@ideacellular.net
US Cellular 1 }
@email.uscc.net
Infopage Systems }
[email protected]
US Cellular 2 }
@uscc.textmsg.com
Inland Cellular Telephone }
@inlandlink.com
US West }
Uttar Pradesh Escotel
@uswestdatamail.com
The Indiana Paging Co }
[email protected]
JSM Tele-Page }
[email protected]
Verizon Pagers }
@myairmail.com
Kerala Escotel }
@escotelmobile.com
Verizon PCS }
@vtext.com
}
@escotelmobile.com
Kolkata Airtel }
@airtelkol.com
Verizon PCS }
@myvzw.com
Kyivstar }
@smsmail.lmt.lv
Vessotel }
@pager.irkutsk.ru
Lauttamus Communication }
@e-page.net
Virgin Mobile 1 }
@vmobl.com
LMT }
@smsmail.lmt.lv
Virgin Mobile 2 }
@vxtras.com
Maharashtra BPL Mobile }
@bplmobile.com
Vodafone Italy }
@sms.vodafone.it
Maharashtra Idea Cellular }
@ideacellular.net
Vodafone Japan 1 }
@c.vodafone.ne.jp
Manitoba Telecom Systems }
@text.mtsmobility.com
Vodafone Japan 2 }
@h.vodafone.ne.jp
MCI Phone }
@mci.com
Vodafone Japan 3 }
@t.vodafone.ne.jp
MCI }
@pagemci.com
Vodafone UK }
VoiceStream / T-Mobile
@vodafone.net
Meteor 1 }
@mymeteor.ie
Meteor 2 }
@sms.mymeteor.ie
}
WebLink Wiereless 1 }
@voicestream.net
@airmessage.net
Metrocall }
@page.metrocall.com
WebLink Wiereless 2 }
West Central Wireless
@pagemart.net
Metrocall 2-way }
@my2way.com
Metro PCS 1 }
@mymetropcs.com
Western Wireless }
@cellularonewest.com
Metro PCS 2 }
@metropcs.sms.us
Wyndtell }
@wyndtell.com
Microcell }
@fido.ca
Midwest Wireless }
@clearlydigital.com
MiWorld }
@m1.com.sg
Mobilecom PA }
@page.mobilcom.net
Mobilecomm }
@mobilecomm.net
Mobileone }
@m1.com.sg
Mobilfone }
@page.mobilfone.com
Mobility Bermuda }
@ml.bm
Mobistar Belgium }
@mobistar.be
Mobitel Tanzania }
@sms.co.tz
Mobtel Srbija }
@mobtel.co.yu
@sms.wcc.net
}
Copyright ©2005, 2006 Networked Robotics Corporation. All rights reserved.
5.8.2006
Networked
Robotics
Page 62 of 63
Tempurity System User’s Guide
Tempurity-04-0006.2
Index
Index
Activate settings
Alarm
stage one
stage one interval
stage one time threshold
stage two interval
Alarm notification
definition
test
Alarm Window
Alarms
Baxter
Cat5
Cell phone
AT&T Wireless
Cingular
Nextel
Sprint PCS
T-Mobile
Verizon
Client software installation
Communication alarm
comm one interval
comm two interval
description
intermittent
Crossover cable
Data retention
DLL
DNS hostname
DS18b20Z
E-mail
capacity
port 25
E-mail scanning
Email spam protection
Fahrenheit
FDA
Forma
Forma-compatible
Freezer failure
Graph
autoscale
parameters
Guaranteed alarm notification
Harris
15
37
27
21
26
21
Inactive
Kelvinator
Main monitor screen
blue
gray
green
red
yellow
Monitored device
debugging a connection
maximum number
Monitoring multiple Tempurity Servers
Network
hub
switch
Network time server
NTMS
10 Mb/s
default IP
default port addresses
FCC certification
green led
initial connection
IP address
Part 15 compliance
port 3000
red led
subnet
temperature port 1
yellow led
NTMS Configuration utility
downloading
screwdriver icon
NTMS hardware
Ovens
Pager
Peer-to-peer
Ping
Power outages
Probe
diagram
dual-lock
error curve
humidity
IC maker's error curve
installation
36
38
31
26
14
14
40
41
41
41
41
41
7
21
21
26
26
10
55
56
29
25
41
40
40
41
27
6
14
13
26
35
33
46
14
Copyright ©2005, 2006 Networked Robotics Corporation. All rights reserved.
5.8.2006
31
14
30
31
30
31
31
52
55
41
10
10
44
7
10
10
52
57
12
13
14
57
13
12
53
8
12
12
12
13
52
16
59
6
15
47
54
17
54
48
54
16
Networked
Robotics
Page 63 of 63
Tempurity System User’s Guide
Tempurity-04-0006.2
positioning
range
removal
Redundancy
data collection
near-far
Requirements
Revco
Revco-compatible
RJ-45
Safety
Serial port
Server reboot
SMTP server
corporate
Internet Information Services
Postcast
Spam
Specifications
Standard operating procedures
TCP/IP
Telnet
Temperature data
accuracy
deletion
location
measurement Interval
time constant
Temperature data files
Temperature scale
Tempurity Monitor
autostart
downloading
16
48
17
main monitor screen
multiple monitors
starting
Tempurity Server
Configuring Monitored Devices
downloading
operating system
time synchronization
Tempurity Server computer time
Tempurity Taskbar
Text message
alias
gateway
Time synchronization
Time zones
Ultracold
adapter
adapter pinout
connection
freezers
USP definition
cold
cool
excessive heat
freezer
room temperature
warm
VWR
Windows startup
Windows XP Professional
Wireless bridge
Wireless networking
46
46
7
14
13
14
49
55
48
41
39
39
41
55
49
14
52
25
27
25
25
25
56
27
42
28
Copyright ©2005, 2006 Networked Robotics Corporation. All rights reserved.
5.8.2006
29
38
29
23
19
55
44
44
20
41
40
44
44
17
58
17
55
51
51
51
51
51
51
14
42
6
17
17