1
SON3t:
3-862-568-21
Trinitron" Color TV
Operating
Instructions
KV-32S40
KV-32V40
KV-35S40
KV-32S45
KV-32V65
KV-35S45
KV-32S65
© 1998 by Sony Corporation
KV-35S65
KV-35V65
CAUTION
WARNING
When
TO prevent
to fain
fire
or shock hazard,
do not
expose
the TV
of f_oistut'e,
using
TV games,
computers,
and
pattern
is left
on the screen
for
long
periods
a high brightness
or picture contrast
can be permanently
imprinted
onto
Continuously
the imprint
types
Note
CHC_UE
ELECTRICO
NOABRIR
Note
are
setting,
the image
the screen.
program
can cause
the TV screen. These
not covered
are the result
at
by your
interference
on
Caption
on
the
I_S_DE
damage
the
finish
generates,
fTeq_ency
energy
accordance
inteference
there
if not installed
that
radio
and used
Interference
installation.
interference
which
in
on, the user
the interference
will
not
occur
If this equipment
does
to radio or television
can be determined
off and
following
This
and can radiate
the instructions,
may cause harmful
radio communications.
However,
is no guarantee
in a particular
cause harmful
instagation.
uses,
and,
with
with
equipment
Vision
cleaning
in a residentiaJ
equipment
reception,
warranty
of misuse.
by one
by turning
is encouraged
the
to try to
or more of the
measures:
•
Reorient
or relocate
•
Increase
receiver.
the separation
•
Connect
different
the equipment
into an outlet on a circuit
from that to which the receiver
is
TV
the
receiving
antennas.
between
the equipment
and
connected.
Clean the TV with a soft dry cloth. Never use strong
solvents
such as thinner
or benzine,
which
might
DO NOT REMOVE COVE_ CG_BACK)
_0 USER SERVICEABLE PA_S
they
of time
This television receiver provides display of television
closed captioning in accordance with §15.119 of the
FCC rules.
PRECAUClON
OE
products
correct
RPSOUEDECHOCELECTRIQUE,
NEPASOUVRIR
RIE_O
watching
the same
of station
_ogos onto
of imprints
because
ATTIENTION
similar
with your TV, keep the brightness
and picture contrast
functions
at tow settings, if a fixed (non-moving)
•
Consult
the dealer
technician
of the cabinet,
for
or an experienced
radio/TV
help.
_EFER 5ERVlCING TO OUAUFJED SERVICE pERSOnNEL
Note
to
CATV
system
This reminder
is provided
to caU the
installer's
attention
to Article 820-40
provides
guidelines
for proper
the presence of unlnsulated
"dangerous
This symbol is intended
to alert the user to
voltage"
within
the product's enclosure
that
particular,
specifies
connected
to the grounding
may
close to the point
be of sufficient
a risk of electric
magnitude
to constitute
that
You
installer
of cable
CATV system
of the NEC that
grounding
the cable
system
entry
and,
ground
viewing
television
of programs
receiver
of the building,
This
as
company
this
document
is for
the
remote
controls
RM-Y165/Y167.
than
private
on UHF or VHF
and/or
program
KV-32S40,
35S40,
32S45,
35S45,
32S65,
35565,
321/40,
32V65,
351/65
or
transmitted
by cable companies
for the use of the
general
public may require
authorization
from the
broadcaster/cable
or
as practical.
for other
broadcast
airy changes
in
shall be
MODELS:
Use of this
that
not expressly
approved
in this
void your authority
to operate
equipment.
shock to persons.
the presence
important
and to
This
syr_bQ( isofintended
to operating
alert the user
maintenance (servicing) instructions in the
literature accompanying the appbance.
are cautioned
modifications
manual
could
Sony has determined
owner.
CAUTION
NOTIFICATION
TO PREVENTELECTRICSHOCK, DO NOT USETHIS
POLARIZEDAC PLUGWiTH AN EXTENSIONCORD,
RECEPTACLE.
OR OTHER OUTLETUNLESSTHE BLADESCAN
BE FULLY INSERTEDTO PREVENTBLADEEXPOSURE.
This equipment has been tested and found to comply
with the timlts for a Class B digital device pursuant to
Part 15 of the FCC Rules. These limits are designed to
provide reasonable protection against harmful
that
this
product or product models meets
As
ENERGYSTAR
STAR
® Partner,
the an
ENERGY
• guidelines
for
ENERGY
energy
STARe ls a U.S. registered
efficiency.
mark.
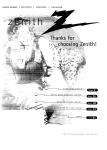
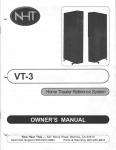
Remote
Control
In the instructions that follow, we will refer
to the buttons on your remote control. Model
shown is RM-Y167, your remote control may
not look like the one illustrated.
Keepthis flap unfolded and lookto this page
for reference.
SYSTEM OFF
(page
TV/VTR
(page 16}
DISPLAY
SLEEP
JUMP
Getting
remote
TV (POWER)
Names
TV (FUNCTION)
presented in different colors to represent
available functions,
--
PiP (page 17-19)
TV/VIDEO
ANT (page 5 and 16)
--
0- 9 buttons
--
--
@ TV/DBS -(page 16)
MUTING
to know
control
of the buttons
VOL +/-
on the remote control
are
the
Press to select the component
you want to control; e.g.
VTR (VCR)/DVD, DBS (Direct
Broadcast Satellite)/CABLE,
orTV
Green ...............
Buttons relevant to power
operations, like turning the
TV, DBS (Direct Broadcast
Satellite)/CABLE,
or
VTR (VCR)/DVD
on or off
Label color
White ...............
TV/VTR (VCR)/DVD/DBS
(Direct Broadcast Satellite)/
CH +/Yellow ...............
Blue .................
CODE SET -(page 30-32)
on the
Transparent .........
MTS/GUIDE (page 24)
RESET
(page 22, 23, and 25)
buttons
Button color
ENTER
Select buttons
(page 13 and 20)
MENU
the
Green ...............
CABLE operation buttons
PIP operation butt m_
DBS (Direct Broadcast
Satellite) operation
buttons
SYSTEM OFF operation button
SONY
For a detailed
"l_
t, hinq
eaplana
tiolt
the FV" on tm_e
of most
15.
buttons,
see
Table of Contents
Welcome! ........................................
3
Precautions ......................................
3
Connecting
a DVD Player
Using This Manual ..........................
3
Connecting
an audio
Connecting
an A/V
Connecting
two VCRs .........................
10
Connecting
a camcorder
11
Connecting
Making
and
Connections
Installing
the
4
...................... 5
Connecting
directly
to cable
or an antenna ...................................
S-link
Connections
5
system
with
a VCR ..........................
Connecting
a VCR and TV with a
cable box ...........................................
DBS Connections
Connecting
.............................................
a DBS receiver
...................
Connecting
a DBS receiver
and a VCR .........................................
.....................
........................................
10
12
to a DBS ...............
Using the VIDEO [_ menu ......................... 22
Using the AUDIO _ menu .......................... 23
Using the TIMER @ menu ......................... 25
Using
batteries
..........................................
the remote control move &
select buttons ..................................
help/instructions
13
........................
13
..................
14
Your
7
Setting
up the "IV automatically
8
Watching
the TV ............................................
15
8
Watching
two programs
at one
time-PIP ..........................................
17
Single
Tuner
Dual Tuner
Video Equipment
the remote
control ................ 30
13
Using
New
menu ....................... 26
Using the BASIC _3 menu ......................... 29
Operating
Up
Set
On-screen
8
Learning menu selection .............................. 20
Quick start to the menus ............................... 21
Programming
7
7
..............
12
Inserting
TV
9
S-Link
6
an antenna/cable
................
Connecting
Basic
Connecting
receiver
9
12
5
.............................................
system
....................
S-Link to a VCR ..............
6
VCR Connections
9
Connecting
Cable and antenna .................................
Cable box and cable ............................... 6
..................................
Using the SET UP _
Cable Box Cormections ...................................
Cable box .................................................
Connections
Using Your Menus
TV
.......................................
Cable or Anten, na Connections
Additional
TV
PIP ...................................
17
PIP .....................................
19
Operating
Receiver
a Cable
Programming
the remote
Box
or DBS
control
................
32
Troubleshooting ...........................
33
Specifications ................................
34
Index ..............................................
36
_W
Welcome!
l-_CoJt!O
Thank you for purchasing
the Sony
Trinitron _"Color TV. This manual is written
for the models listed below. Before reading,
check the model number located on the front
of this manual or on the rear of your TV.
Model KV-35S45 is used for menu and
illustration purposes.
Differences in
operation are indicated in the text; for
example, "KV-35S45 only".
,od,,
/Z!//i/,
I/
-Jl,J,J'!
KV-32S65
•
KV-32V65
•
•
•
•
KV-35S45 •
_v-3sv6sL
_"
the TV only with 120 V AC.
• The plug is designed, for safety purposes,
to fit in the wall outlet only one way. If
you are unable to insert the plug fully into
the outlet, contact your dealer.
•
•
If any liquid or solid object should fall
inside the cabinet, unplug the TV
immediately
and have it checked by
qualified personnel before operating it
further.
If you will not be using the TV for several
days, disconnect power by pulling the
plug itself. Never pull on the cord.
Installing
•
I • I " L
Operate
For details concerning safety precautions, see the
supplied leaflet "IMPORTANT SAFEGUARDS".
•
•
Safety
•
! " I
Using This Manual
.S
To prevent internal heat build-up, do not
block the ventilation openings.
• Do not install the TV in a hot or humid
place, or in a place subject to excessive
dust or mechanical vibration.
This manual is divided into four major
sections. We recommend
that you carefully
review the contents of each section in the
order presented
to ensure that you fully
understand
the operation of your new TV.
1 Connecting
and Installing the TV
This section guides you through your
initial set up. It shows how to connect to
your antenna or cable, and connect any
accessories or components.
2 Basic Set Up
This section teaches you the basic skills
needed to operate your new TV. It shows
you how to operate special functions of
the remote control.
3 Using
your New TV
This section shows you how to begin
using your new TV. It shows how to use
the Easy Set Up Guide feature, and how to
use your remote control.
4 Using your Menus
This section teaches you how to access
on-screen menus and adjust your TV's
settings.
Instructions in this manual are written for the
remote control. Similar controls may befound on
the TV console.
3
Connecting
Making
and Installing
the TV
Connections
Refer to the table below, it will direct you to the diagram
connecting.
! If you will b_ cor_w_tjng
Cable or antenna
suitable
.....
£_
to the comporlents
_, ,
only
Cable and antenna
5
(KV-32S65, 32V65, 35S65, 35V65 only)
Cable box
5
6
Cable box and cable to view scrambled
35V65 only)
channels
(KV-32S65, 32V65, 35S65,
6
VCR and cable or antenna
7
VCR and cable box
7
Direct Broadcast
Satellite Receiver
VCR and Direct Broadcast
Digital Versatile
Disc player
(DBS)
Satellite Receiver
8
(DBS)
(DVD)
8
9
Audio system
9
A / V receiver
10
T*'_oVCR's for tape editing
Camcorder
{KV-32V40, 32V65, 35V65 only)
to view tapes
S-Link connections
4
you will be
(KV-32S65, 32V65, 35S65, 35V65 only)
10
11
12
Cable or Antenna
Connections
7S-ohm
c
•
Connecting
antenna
directly
A
•
•
or
Cable
•
VHF
only
•
UHF
only
•
VHF/UF_F
7S-ohm
coaxialcable
(Rear of TV)
VHF/UHF
B
300-ohm
twin
lead cable
(Rear of TV)
VHF/UHF
Note
• In order to receive channels
cable
""_
_J_
(Rear
EAC-66
•
UHF
Inot
_J
300-ohm
U/V mixer
supplied)
twin lead cable
Cable and antenna
KV-32S65,32V65,35S65,35V65 only
If your cable provider does not feature local
channels, you may find this set up convenient
for viewing both local and cable channels.
Select cable or antenna mode by pressing
ANT on the remote control. You will be able
to alternate between the two input sources.
CATVcable
(Rear of TV)
AUX
or
Antenna
connector
of TV)
ond
•
VHF only
Gr
VHF/UHF
_
to cable or an
The connection you choose will depend on the
cable found in your home. Newer homes will
be equipped with standard coaxial cable
(see A); older homes will probably have
300-ohm twin lead cable (see B); still other
homes may contain both (see C).
•
VHF
coaxial
(No connection
CONVERTER"
Antenna
"TO
TO CONVERTER_._
in this case)
cable
VHF/UHF
with an
antenr_a, you will need to turn your CABLE
to OFF (see page 26) and perform the
AUTO PROGRAM function.
Connecting
Cable
and
Installing
Box Connections
Some pay cable TV systems use scrambled or
encoded signals that require a cable box to
view all channels.
the TV (continued)
b
If you will be controlling
all channel selection
through your cable box, you should consider using
the CHANNEL FIX feature discussed on page 26.
(Rear of TV)
Cable
Cable box
VHF/UHF
1 Connect
the coaxial connector from your
cable to the IN on your cable box.
2 Using a coaxial cable, connect OUT on
your cable box to VHF/UHF
on your TV.
IN
_-_OUT
Cable box
Cable box and cable
• KV-32S65,
32V65,
35S65,
35V65
only
For this set up, you can switch between
scrambled channels (through your cable box),
and normal (CATV) channels by pressing
ANT on your remote control.
Notes
• Your Sony remote control can be
programmed
to operate your cable box.
(see page 32)
•
lip
When using PIP, you cannot view the
AUX input in the window picture.
"4"
Pressing ANT switches between these inputs,
like to switch between
the A UX and normal (CATV) input you should
If you areusing
connecting
a cable box
through discussed
the AUX input
and26.would
consider
the CHANNEL
FIX feature
on page
Cab{e I_.x
[
(Rear of TV)
_
AUX
channels..._ ]_C_=z]_:_
75-ohm
TO-CONvERTER
coaxial
cable (not supplied)
CATVcable
(unscrambted
channets)
,_ (signal)
VHF/UHF
Disconnect all power sources before making any connections.
VCR Connections
Connecting an antenna/cable
system with a VCR
TV
(KV-32S4_, 3S$45 only).
1
Attach the coaxial connector
from
or antenna
to IN on your VCR.
2
Using A/V connectors,
connect AUDIO and
VIDEO OUT on your VCR to AUDIO and
VIDEO IN on your TV.*
3
(Rear of TV)
VCR must be connected and
turned on to operate PIP
your
Coaxial cable
cable
VCR
[red)
(white)
Using a coaxial connector,
connect OUT on
your VCR to VHF/UHF
on your TV.
" If you
single
lyellow)
are connecting
a monaural
VCR, connect
only the
white audio
output
to the left input
on your TV,
Connecting
cable box
a VCR and TV with a
You will need a splitter
following
con_ection.
(not supplied)
for the
VMC-810S/820S
For optimum
picture quality, use S WDEO instead
of
the yellow A/V cable. $ Wdeo does not provide sound,
your audio
connectors
(not supplied)
I
(Rear of TV)
must still be connected.
w_u._
1
Connect the single (input) jack of the splitter
to your incoming
cable connection.
Connect
the other two (output) jacks (using coaxial
cable) to IN on your cable box and VHF/UHF
on your TV.
2
Using
3
a coaxial
connector,
connect
Coaxialcable
T
OUT on
your cable box to IN on your VCR.
Using A/V connectors,
connect AUDIO and
VIDEO OUT on your VCR to AUDIO
and
VIDEO IN on your TV.
'_
'
6°I
1
AUDIO-R(red)
AUDIO-L
(white)
VCR
VIDEO (yellow)
I
VMC-810S/820S (not supplied)
Cable
Splitter
(not supplied)
Cable box
Ill
Connecting
and
Installing
the TV (continued)
Disconnect all power sources before making any connections.
DBS Connections
Connecting
Broadcast
a DBS (Direct
Satellite)
receiver
1 Connect the cable from ),our satellite
antenna
must still be connected,
Attach the coaxial connector from your
cable or antenna to VHF]UHF on your TV.
3
Using A/V connectors, connect AUDIO
and VIDEO OUT on vour DBS receiver to
AUDIO and VIDEO IN on your TV.
(Rear
of TV)
2 I
|
i
I
OBS receiver
to your DBS receiver.
2
Cable/Antenna
|
For optimum picture quality, use S VIDEO
instead of the yellow A/V cable. S Video does
not provide sound, your audio connectors
1
b,*_....
v.,,_ I
[ .... _-_
antenna
cable
I
w •
•
_
AUDIO2L
-'-
(white)
VIDEO (yellow)
l
Connecting
a DBS (Direct Broadcast
Satellite)
receiver
and a VCR
VMC-810S/820S
1 Connect the cable from your satellite
antenna to your DBS receiver.
2 Attach the coaxial connector from your
cable or antenna to VHF/UHF IN on your
VCR.
3 Using a coaxial connector, connect
VHF/UHF OUT on your VCR to
VHF/UHF on your TV.
4 Using A/V connectors, connect AUDIO
and VIDEO OUT on your DBS receiver to
AUDIO and VIDEO IN on your VCR.
5 Using A/V connectors, connect AUDIO
and VIDEO OUT on your VCR to AUDIO
and VIDEO IN on your TV
8
VMC-810S/820S
(not supplied)
Cable/Antenna
(not supplied)
(Rear of TV)
I
IHF
AUO_Oj T
DBS receiver
control will allow you to view from
Pressing
TV/VIDEO
on the remote
the
DBS or
VCR.
AUDIO-R
(red)
_ _
AUDIO-I.
(whitel
_
VIDEO (yellow)
T
VMC-810S/820S
(not
supp}ied)
Disconnect all power sources before making any connections.
Additional
Connections
The following connections
are for accessories
that will enhance your viewing options.
Connecting
a DVD
For optimum
picture quality, use S VIDEO
instead of the yellow AIV cable. S Video
does not provide sound, your audio
connectors
must still be connected.
Player
(Rear of TV)
......
22o ,
I e_4@@,_
_ /I
(Rear of DVD player)
1 Using A/V connectors,
connect LINE OUT
on your DVD to VIDEO IN on your TV.
UNE
_
AUDIO-L
VIDEO
_
i
VMC-810S/820S
Connecting
an audio system
For enhanced sound, connect your audio
system to your TV.
1 Using AUDIO connectors, connect AUDIO
OUT on your TV to one of the unused line
inputs (e.g. TV, AUX, TAPE 2) on your
stereo.
2 Set your stereo to the chosen line input.
Refer to page 24 of this manual for
additional
audio setup instructions.
(not
supplied)
(Rear of TV)
I o _t_@_®V_"/[ Auo,o-,(white}
RK-74A
/not
supplied)
I
L
_!
AUDIO.R
(red)
2
(white)
(yellow)
AUDIO-R
(red)
Connecting
and Installing
the TV (continued)
Disconnect all power sources before making any connections.
Connecting
•
KV-32V65,
an AN
35V65
receiver
i
only
VMC+IOHG/30HG
1 Using A/V cables, cormect TV OUT on your
"IV to TV IN on your A/V receiver.
VIDEO
(not
supplied)
(
2 Using a single video connector, connect
Monitor OUT on your A/V receiver to
VIDEO 1 IN on your TV.
Tip
A/V outputs
"_"
You may want to use CHANNEL FIX to set your TV's
input to the A/V receiver.Seepage 26.
A/V receiver
putt
r
VMC-810S/820S
Connecting
• KV-32V40,
two
VCRs
32V65, 35V65
only
MONITOR OUT gives you the ability to use a
second VCR to record a program being played
by the primary VCR or to perform tape
editing and dubbing.
] Connect the VCR intended for playback
using the setup instructions on page 7 of
this manual.
2
You cannot change video
inputs
while editing using
MONITOR
OUT.
VCRifo:
(Rear
supplied)
of KV-35V65)
VCR (for
piiyba{k)
Using A/V connectors, connect AUDIO
and VIDEO IN on your VCR intended for
recording to MONITOR AUDIO and
VIDEO OUT on your TV.
recording)
AUDIO-L
2_j__
VMC 8!05/820b
10
(not
(rl_t
supplied)
VMC-81051820S
__ {: _
(not
(white)
VIDEO
AUDIO-R(yellow)
(red)
supplied)
Connecting
Disconnect all power sources before making any connections.
a camcorder
This coruxection is convenient for viewing
picture directly from your camcorder.
a
I Ifyou have an S VIDEO equipped
camcorder, you can use an $ Video
I cable for optimum picture quality.
I
I
Using A/V connectors, connect AUDIO and
VIDEO OUT on your camcorder to AUDIO
and VIDEO IN on your TV.
Connection
can also be made directly to your
A/V input located on the rear of your 'IV.
Note
• If you are connecting a monaural camcorder,
connect only the single white audio output
to the left input on your "IV.
(Front
o_ KV-32V40*,
VIDEO
(yellow)
32V65,
_
_
!_ _--
__=_AV
output
r
35V65
_--
on_y)
AUDIO-R
(red)
AUDIO-L
(white)
T
(not suppl_ed)
• KV-32V40
does Jzothave S VIDEO on the front panel
11
Connecting
and Installing
the TV (continued)
Disconnect all power sources before making any connections.
S-Link connections
• KV-32S65,
32V65,
35S65, 35V65 only
Connect
S-IN
to the CONTROL
on your
]
VCR.
I
' 1.[. vmc-_'os/82os
S-Link is designed to allow your Sony
components to "communicate".
Connecting
S-Link
VIDEO
to a VCR
(yellow)
_
(Rear
of KV-35V65)
(Rear
of KV-3SV65)
VCR
S-Link will automatically
power on the TV
and switch to the correct video input when a
tape is inserted in the VCR.
1 Using A/V connectors, connect AUDIO
and VIDEO OUT on your VCR to AUDIO
and VIDEO IN on your TV.
RK-G69HG
(not supplied)
t
2
2 Using an S-Link connector (mono mini
plug), connect S-LINK/CONTROL
S-IN on
your VCR to S-LINK on your TV.
Connecting
S-Link
to a DBS
S-Link will automatically
power on the TV
and switch to the correct video input when
you power on the DBS.
1 Using A/V connectors, connect AUDIO
and VIDEO OUT on your DBS to AUDIO
and VIDEO IN on your TV.
2 Using an S-Link connector (mono mini
plug), connect S-LINK on your DBS to
S-LINK on your TV.
12
The S-Link connector must be in the
same VIDEO-IN jacks as the A/V cables
on your
TV.
DBS _eceivel
Antenna
Cable
(not
supplied)[
_
J_,--d,-_- AUDIO - R (red)
_ _-AUDIO-L
(white)
t
'_-wDEo
JMC-810S/820S
_l_--
(ye,owl__.=>_
(not
supplied}-
2
_H
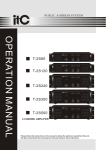
Inserting
Basic Set Up
batteries
Insert two size AA (R6) batteries (supplied) by
matching the + and - on the batteries to the
diagram inside the battery compartment.
Notes
• Remove the batteries to avoid damage
from possible battery leakage whenever
you anticipate that the remote control will
not be used for an extended period.
• Handle the remote control with care.
Avoid dropping it, getting it wet, or
placing it in direct sunlight, near a heater,
or where the humidity is high.
•
Your remote control can be programmed to
operate most video equipment. (see page 30)
Using the remote control
move & select buttons
On-screen
help/instructions
Several menu windows will provide prompts
and instructions to assist you in navigating
through the different functions. When
presented, use these to supplement the instructions
in this manual.
The supplied remote control has "arrow"
buttons (4,, _, _., ._) which allow for
movement of the on-screen selector. Pressing
on the outer buttons will cause the selector to
move in the corresponding
directon. Pressing
the center button ((_)) will select the item.
Adjustment
bars
When menu items present an adjustment bar
(_
or _),
use the arrow buttons to
change the setting.
13
Using Your New TV
Setting
up the TV automatically
Using the buttons on the front of the TV:
s_uPW;_lOeO
The Easy Setup Guide allows you to set the
on-screen language and set all receivable
channels in one step.
The Easy Setup Guide feature does not apply for
installations that use a cable box for all channel
selection.
"_"
• Perfvrmthisfunctionduringth_day, withtheantenna
and/orcableproperlyconnected,toensurethatallavailable
channelswill bebroadcastingandreceivable.
• TheTVmustbesettotheTVinputtoexecuteAUTO
PROGRAM,PressTV/VIDEOuntila channel
numberappears.
• If your cableor antenna is connected toAUX, press
ANT untilAUX appearsnexttothe channelnumber.
(KV-32S65, 32V65, 35S65, 35V65 only)
-CHaNNB..
_OWER
a DEMO of functions
for
and menus.
o 0 IZIZI
IZEI-G
-- VOLUME +
For KV-32V65, 35V65, the control buttons are
located on the top of the TV.
1 Press POWER to turn on the TV.
AUTO
PROGRAM
The Easy Setup Guide screen appears.
To set up the TV manually, refer to "Using the
SET UP menu" on page 26.
Tips
-vogue.
3 Press VOL - to continue or TV/VIDEO
ENGLISH
POWER
:
ESPANOL :
AUTO SET UP:
DEMO :
[CH+]
I[CH-]]
VOL[W/VIDEO]
FRAN_AIS
VOL+
First
please : connect
cable/antenna.
Press ISET UPI to exit
To perform
2 Press CH + to select ENGLISH screens,
CH - to select ESPANOL screens
or VOL + to select FRAN_AIS
-CHANNEL+
AUTO PROGRAM appears and the TV
starts scanning and presetting channels
automatically.
If the TV receives cable TV
channels, CABLE is set ON automatically.
screens.
AUTO SET UP again
Press the SET UP button
steps 2-3.
on the TV and follow
Notes
• When you perform AUTO PROGRAM,
your CHANNEL FIX, CHANNEL BLOCK,
and ON/OFF TIMER settings will be
erased.
To reset your TV to factory settings, turn
the TV on. Then, while pressing the RESET
button on your remote control, press the
POWER key on your TV. The TV will turn
itself off, then back on.
14
Watching
the TV
All of the TV features
can be accessed
_._
via the remote
control. The following
chart will explain the function
of the buttons found on your remote
control.
REFER
TOTHE
ILLUSTRATION
OF
THE
REMOTE CONTROL ON THE
INSIDE FRONT COVER OF
THIS MANUAL AS YOU
REVIEW THIS CHART
_WER
_ovo o_/_
Press when you want to turn equipment
--
Press when you want to control connected components with your remote
control. (see pages 30-32 for instructions on programming your remote control)
CZ)
FU,,_T,O,-'_(_
C_)
(_).
(_
on and off.
Use for direct channel selection. Press 0-9 to select a channel, the channel will
change after 2 seconds, or you can press ENTER for immediate selection.
GH
Keeping the CH + or- pressed
allows you to rapidly scan to the desired channel,
Press to scan through the channels.
JouP
(_)
Press to alternate or jump back and forth between two channels.
between the last two channels selected with the 0-9 keys.
You can jump
MUTING
O
Press
to mute
soundsound.
(MUTING
press VOL
+ tothe
restore
will appear on the screen). Press again or
SLEEP
Press repeatedly until the TV displays the approximate time in minutes (30, 60, or
90) that you want the TV to remain on before shutting off automatically. Cancel by
pressing until SLEEP OFF appears.
15
Using
Your New. i V (co ,,t nued)
CAPTION VISION
fCIosed Caption)
Press repeatedly to cycle through available displays:
Status
o,sPu_y
Channel number, current time, channel caption (if set) are displayed.
CAPTION VISION
Closed Captioning will be displayed if the broadcaster offers this service.
(see right)
To cancel the display, press DISPLAY until DISPLAY OFF appears.
w_woEo
A_
(_
(AUX tnpdt)
Press repeatedly to cycle through available video inputs:
TM and VIDEO 1 (KV-32S40 only)
"rv, VIDEO 1 and VIDEO 2 (KV-32S45, 32S65, 35S40, 35S45, 35S65 only)
TV, VIDEO 1, VIDEO 2 and VIDEO 3 (KV-32V40, 32V65, 35V65 only)
Press to change the VHF/UHF input to the AUX input. (KV-32S65, 32V65, 35S65,
35V65 only)
Press to change to the TV input. (KV-32S40, 32S45, 32V40, 35S40, 35S45 only)
For detailed connection information, see "Cable and antenna" or "Cable box and
cable" on pages 5-6.
WNrR
+O
Press when you are finished using a VCR and you want to switch to the "IV input.
Your VCR power will remain on.
.TS
Press this button to cycle through the Multi-channel
O
GUIDE
STEREO, SAP, MONO. (see page 24)
GUIDE is a feature of DBS, refer to your DBS operation instructions.
TV Sound (MTS) options:
SYSTEM
O_F
The SYSTEM OFF button allows you to power off all Sony equipment
(_
(KV-32S45, 32S65, 32V65, 35S45, 35S65, 35V65 only)
CHANNEL SET UP
CHANNEL BLOCK
FAVORITE CHANNEL
VIDEO LABEL
_CAPTION VISION:
LANGUAGE: ENGLISH
TILT CORRECTtON: 0
_MENU
SET
UP
Select _
Exlt
CAPTION VISION can be used for programs
that are broadcast with closed caption.
CC1, 2, 3 or 4
Shows you a printed version of the dialog or
sound effects of a program. (The mode should
be set to CC1 for most programs)
TEXT1, 2, 3 or 4
Shows you network/station information
presented using either half or the whole screen.
XDS (Extended Data Service)
Shows a network name, program name,
program length, and time of the show if the
broadcaster offers this service.
Note
Press to turn ON or OFF one of the following audio effects:
(_)
w c_s
16
SURROUND: KV-32S40, 32S45, 32S65, 35S40, 35S45, 35S65 only
AUTO VOLUME: KV-32V40, 32V65, 35V65 only
See page 23 for more information on AUDIO settings.
TV/DBS is a feature of DBS, refer to your DBS operating instructions.
at once.
• Poor reception of TV programs can cause
errors in CAPTION VISION and XDS.
Captions may appear with a white box or
other errors instead of intended text.
1
Watching
one time
two programs
- PIP
at
TEe seul_J of the main
p_cture is _eceived
Main
the
The Picture-in-Picture
(PIP) feature allows
you to view two channels simultaneously,
one
in the full size "main" picture and one in a
smaller "window" picture.
Single
Tuner
• KV-32$45,35545only
If you have model KV-32S65, 32V65, 35S65 or
35V65, see page 19.
These models are equipped with a single
tuner. This simply means that a VCR must be
connected and turned on for PIP to operate.
t il,_
";:
•
_
To ensure a correct single tuner PIP connection
make sure the following list is complete before using PIP:
• AcableorantennaisconnectedtotheVCR
•
•
The VCR is connected to your TV (see pages 5-7)
The VCR is turned on
•
The remote control has been programmed
the VCR (see page 30)
'
received
REFER TO THE ILLUSTRATION OF
THE REMOTE CONTROL ON THE
INSIDE FRONT COVER OF THIS
MANUAL AS YOU REWEW THIS
CHART
Press once to display the window picture (1/9 size).
Press again to reduce the size of the window picture (1/16 size).
Press a third time to remove the window picture.
_)
TVNIDEO
Press repeatedly
tuner
picture
PIP
TVNIDEO
through
second
_)
to cycle through available video inputs in the window:
TV, VIDEO 1, VIDEO 2
Press repeatedly
to cycle through available
video inputs in the
main picture:
"IV, VIDEO 1, VIDEO 2
to operate
Note
• You must press TV (FUNCTION)
before
you can control PIP with the yellow
labeled buttons.
picture
::r
the
--"_t'"
L.._: j
PIP
picture
through
TV
AUDIO
(_)
Press to alternate sound between the main picture and the window
picture. A _ will appear for a few seconds to indicate which picture is
receiving sound.
17
Using
_^ •
Your New
TV (continued)
•
CHANGING CHANNELS
CH
Press to change the channel• You must press VTR/DVD
(FUNCTION),
then
1 Press TVNIDEO until you reach the TV input•
2 Press PIP (the window picture appears)•
use the main CH +/- buttons to change
channels in the window picture. (see right)
To change the window picture:
1 Press VTR/DVD (FUNCTION).
POSITION
(_
FREEZE
(_
SWAP
(_
Press to move the location of the window picture (counterclockwise)
around the
main picture.
GH
{(-I-_
2 Press the main CH +/- buttons f_,,,_
to change channels.
(,_
Press to freeze the window picture. Great for copying down phone numbers,
To change the main picture:
1 Press TV (FUNCTION).
addresses, recipes, etc.
Press FREEZE again to restore the picture.
2 Press the main CH +/- buttons to change
channels.
Press to switch the audio and video of the main picture and the window picture.
Each time you press SWAP, the picture and sound of the two will be swapped.
Notes
• If you have the same program in both the
window and the main picture and cannot
change the channel in the window; press
TVNIDEO until you reach the TV input in
the main picture.
• Your remote control must be programmed
to operate the VCR. (see page 30)
18
Watching
one time
two programs
at
- PIP (continued)
Dual Tuner PIP
PIP
Press again to reduce the size of the window picture (1/16 size).
Press a third time to remove the window picture.
•KV-32S65, 32V65, 35S65, 35V65 only
If you have model KV-32S45
or 35545, see pages 17-18.
TVNIDEO
These models are equipped
with dual tuners.
This means that PIP is "ready
to use".
The sound of the main
oicture is received
Main
fJl(ttlre
_
_
I
_
_
/
/
®
Main picture
received through
61
the TV
/ Window
_
received
AUDIO
(_
picture
through
the second tuner
Window
picture
TVNTR
+©
• The AUX input cannot be viewed in the
window picture.
Press repeatedly to cycle through available video inputs:
TV, VIDEO 1, VIDEO 2, VIDEO 3
Press to alternate sound between the main picture and the window picture.
A _ will appear for a few seconds to indicate which picture is receiving sound.
Press to change the TV channel in the window picture.
CH
-©
POSITION
Notes
• Youmustp_ssTV
(FUNCTION)before
you can control PIP with the yellow labeled
buttons.
Press once to display the window picture (1/9 size).
(_
FREEZE
(_
SWAP
(_)
Press to move the location of the window picture (counterclockwise)
around the
main picture.
Press to freeze the window picture.
Great for copying down phone numbers,
addresses, recipes, etc.
Press FREEZE again to restore the picture.
Press to switch the audio and video of the main picture and the window picture.
Each time you press SWAP, the picture and sound of the two will be swapped.
19
Using Your Menus
Learning
menu
Use the MENU button
selection
to access a menu and
use the arrow buttons (• or 4) to alter settings.
Use the following example, in which we
activate the CABLE, to learn how to modify
settings.
1 Press the MENU button.
The main menu
MENU
3 Press • or • to move to the desired
appears.
_
5 Press • or • to make your selection
press (Z).
I'CHANNEL SET UP
CHANNEL BLOCK
FAVORtTE CHANNEL
VIDEO LABEL
CAPTION VISION: _ 1
LANGUAGE: ENGLISH
SETUP
TILT CORRECTION:
O
_MENU
and
CHANNEL SET UP
_' CABLE: ON
CHANNEL FIX: OFF
AUTO P_LOGRAM
CHANN
SKIP/ADD
DMBNU
MOVe_
Select[_
Exit_
4 Press QD.
Options for your selection
highlighted.
MODE :VIVID
option.
will be
I
CHANNEL CAPTION
Move_
Sel_t_
Exit_
]
When you are finished making changes to the
selected menu, choose D MENU to return to
the main menu,
BRIGHTNESS
,,DEO
PICTURE
COLOR
HUE
_MENU
Move_
SHARPNESS
Seleet(_
MBF_I
Exit_
l
2 Press t or • to highlight the desired menu
(in this case SET UP _]) and press (_23 to
select it.
CHANNEL BLOCK
FAVORITE CHANNEL
VIDEO LABEL
CAPTION VISION: _ 1
TILT CORRECTION:
0
CHANNEL
_MENU
UP
J
LANGUAGE:SETENGLISH
Move[_
2O
Setect[_
Exit_
CABLE: OFF
CHANNEL FIX: OFF
AUTO PROGRAM
CHANNEL SKIP/ADD
CHANNEL CAPTION
_MENU
Move_[_
SelectG_
I,SETUP
CHANNEL SET UP
CHANNEL BLOCK
I
VIDEO LABEL
CAPTON V S ON _1
LANGUAGE: ENGLISH
TJLTCORRECTJON:
0
_MENU
FAVORITE CHANNEL
I
Exil_
Move_
SiLect{_}
ExJt_
Notes
• Pressing MENU on the remote control will
allow you to exit from the menus at any
time.
• If any menu items are "grayed out", press
the ANT button on your remote control
until a channel number appears.
Quick
start
to the
menus
The following is a guide to your menus. It will
give you a quick start to the options available
for setting up your TV.
_E
: VNID
pI_RE
BrlIGHTNESS
COLOR
HUE
SHARPNESS
VIDEO
_MENU
MO_
The menus shown arefor model KV-35S45, your
menus may look different from those illustrated.
The VIDEO menu will allow you to make adjustments to your picture settings.
It will also allow you to customize the picture MODE based on the type of
m
p
_
_
_
SekJ_{_
program you are viewing.
E_at_
The AUDIO menu offers enhanced audio options such as listening to second
TREBLE
audio programming
(SAP), or customizing
the EFFECT of the sound on your TV.
EFFECT : OFF
MTS : STEREO
SPEAKER : ON
AUDIO
_M_IU
For detailed information
on using the remote
control to modify menu settings, refer to
"Learning menu selection" on page 20.
To select a menu:
DAYLIGHT SAVI_:
NO
CURRENT TIME SEI
ONOFE
I_M E [t
The TIMER menu sets the clock on your TV and allows you to program your
TV for scheduled viewing using the ON/OFF TIMER.
_MENU
Display
_
Highlight
_
Select
l!
rIMeR
CD
5
CHANNEL BLCCK
FAVORITE CH_.NNEL
VIDEO LABEL
CAPTION VISK3N: _ 1
LANGUAGE: E_LISH
TILT C_RECTION:
0
_MENU
The SET UP menu provides several options for setting
up your channels, labeling your TVNIDEO inputs,
and selecting the LANGUAGE of your menus.
The CHANNEL
SET UP menu is a sub-menu which
provides further options for setting up your TV.
1
CHANNEL
SET UP
I
CABLE: ON
CHANNEL FIX: OFF
AUTO PROGRAM
I-_NNEL SKIP/AOD
_HANNEL CAPTION
I °-°
Mm,e_
_1(_]
Exit_
I
1
The Basic Menu provides quick access to frequently
used settings.
21
Using
Using the
Your Menus
VIDEO
[]
menu
MODE : VIVID
PICTURE
BRIGHTNESS ellmlmm
COLOR
VIDEO
HUE
_
SHARPNESS
Mova_ _MENU
Select(_
(continued)
Exit_
Adjustment
1}
bars
J
For detailed information
on using the remote
control to modify menu settings, refer to
"Learning menu selection" on page 20.
To select the VIDEO [] menu:
Display
_
Highlight
_
_
Select
To restore the factory VIDEO
settings
PressRESETwhile the VIDEO menu is
displayed.
22
MODE
VIVID: Select for a vivid, bright picture for daytime viewing.
Customized pictu,_.
w_w,_!j
STANDARD: Select to receive a standard picture.
MOVIE: Select for night time movie viewing.
PICTURE
Adjust left to decrease picture contrast and soften the color.
Picturecontrast
Adjust right to increase picture contrast and create more vivid color.
BRIGHTNESS
Adjust left to darken the picture.
P_ctureadjustment
Adjust right to brighten the picture.
COLOR
Adjust left to decrease color intensity or saturation.
Colo; saturat;on
Adjust right to increase color intensity or saturation.
HUE
Color tones
Adjust left to increase the red tones.
Adjust right to decrease the red tones.
SHARPNESS
Adjust left to soften the picture detail.
_'Jcturedetail
Adjust right to sharpen the picture detail.
Using the AUDIO
._ menu
Adjustment
bars
BASS
I1_
BALANCE
,===4_.=m
EFFECT : OFF
MTS : STEREO
SPEAKER : ON
TRESLE
,=--1}
_MENU
Move_
SelectGZ]
To select the AUDIO ._ menu:
Highlight_
.... @
Adjust left or right to decrease or increase higher pitched sound.
BASS
Adjust left or right to decrease or increase low pitched sounds.
BALANCE
Adjust left or right to emphasize right and left speaker volume.
AUTO VOLUME
Stab_/_zesvolume
(KV-32V40, 32V65, 35V65 only)
ON: Select to stabilize the volume.
OFF: Select to turn AUTO VOLUME off.
Press (_) for direct se/ectlon of AUTO VOLUME settings.
EFFECT
Enhanced audio
Press • or • to select one of these customized effects:
Exit_
For detailed information
on using the remote
control to modify menu settings, refer to
"Learning menu selection" on page 20.
Display _
TREBLE
m
Select
®
optsons
SURROUND: Simulates theater quality sound (only for stereo programs).
(KV-32S40, 32S45, 32S65, 35S40, 35S45, 35S65 only)
Press _ for direct se/ection of SURROUND settings.
SIMULATED: Adds a stereo-like effect to mono programs.
(KV-32V40, 32V65, 35V65 only)
SRS: Produces a dynamic three dimensional sound for stereo audio signals.
(KV-32V40,
32V65, 35V65 only)
To restore the factory AUDIO
settings
Press RESET while the AUDIO menu is
displayed.
23
Using
Your Menus
Using the AUDIO
(continued)
(continued)
menu
MTS
Et_oy
MTS: Press 4. or _, to select one of the following options:
STEREO: Select when viewing a broadcast in stereo.
SAP: Select to listen to bilingual broadcast. (Non-SAP programs will be muted
when this feature is selected)
MONO: Select to reduce noise during stereo broadcasts for areas of weak
stereo
bilhlgua/
and
mono
pro_fat;3s
reception.
Quick MT$ access:
Press MTS on your remote contre/ to cycle through
the MTS options.
SPEAKER
Custom
ON:
selection
of
For detailed information on using the remote
control to modify menu settings, refer to
"Learning menu selection" on page 20.
aLIdlo
To select the AUDIO ._ menu:
Use to control the
TVs _otume through
Display
tomb
Highlight
_
.... @
C_D
5
24
_
Select
@
output
AUDIO
,7 StC¢_O
source
OUT
Select to listen to the sound from the TV speakers with or without a
separate stereo system.
OFF: Select to turn off the TV speakers and listen to the TV's sound only through
external audio system speakers.
AUDIO OUT can only be set when SPEAKER is set to OFF,
VARIABLE: Sound output varies according to the TV settings,
Useful when you want to use your TV's remote control to adjust the output of a
separate audio system.
FIXED: Sound output is held at a fixed level through your stereo.
Use your A/V receiver's remote control to adjust the volume.
Using the TIMER
(_) menu
1
1
DAYLIGHT SAVING: NO I
CURRENT TIME SET
ON/OFF TIMER
_MENU
___
Move_
Eelect(_}_
- --:-
-- AM
Exit_
DAYLIGHT
SAVING
Spring: Select YES to compensate for Daylight Saving Time.
The current time moves one hour ahead.
Automatically adju._ts
the time
Fall: Select NO at the end of Daylight Saving Time.
The current time moves back one hour.
CURRENT
With the CURRENT
1 Press _.
TIME
SET
Necessary 1of the
ON!OFF
TIMER
For detailed information on using the remote
control to modify menu settings, refer to
"Learning menu selection" on page 20.
Highiight(_=_
....
'5
Press
RESET while
menu
is displayed.
Tip
"_"
Set DAYLIGHT
the ON/OFF
Press _
to select.
TIME SET
- - - - -:_MENU
Move_
- AM
Salect_
Exit_
Any loss of power wi// cause these settings to be erased.
ON/OFF
TIMER
Wake up or
scheduled
To cancel the ON/OFF TIMER
function
Press t or • until the current day is displayed.
Press CD to select.
3 Press • or • until the current hour and AM/PM is
displayed.
Select
®
2
CURRENT
4 Press • or • until the current minute is displayed.
press _.
The clock is set. Press MENU to exit.
To select the TIMER Q menu:
Display _
TIME SET menu open:
vtewmg
With the ON/OFF TIMER menu open:
1 Press _.
ON/OFF
2 Press • or • until the desired day or range of days
is displayed. Press _ to select.
3 Indicate the time that you want the TV to turn on by
pressing • or • and then (E_.
4
Set the time duration (maximum of 6 hours) by
pressing • or • and then CD.
5
Press • or • until you reach the desired channel.
Press _
to select.
TIMER
-:
TIMER
- AM -h
CH---
_MENU
SUN 12:00 AM
Move_
Select[_
ExJt_
The ON/OFF TIMER is now set. Press MENU to exit.
SAVING time before setting the clock.
When you perform AUTO PROGRAM,
all ON/OFF TIMER settings will be erased.
25
Using
Using
the
Your Menus
SET UP [_
(continued)
menu
CHANNEL
SET UP
CHANNEL SET UP
CHANNEL BLOCK
FAVORITE CHANNEL
VIDEO LABEL
CAPTION VISION: _ 1
LANGUAGE: ENGLISH
SET
TILTUPCORRECTION:
0
_MENU
Move_
SeleCt_
Basic
viewing
For detailed information on using the remote
control to modify menu settings, refer to
"Learning menu selection" on page 20.
Display
.-
_
Highlight
_=_11,
@
menu:
Select
®
5
Notes
• Tile FAVORITE CHANNEL
26
CHANNEL
_MEt_U
CAPTION
CHANNEL FIX: Prass _, or S to sst the TV's input to one
_ve_
SeleCtC}_
Exit_
of the following options:
2-6: When a cable box is connected to the VHFJUHF input. Press DBS]CABLE
connected to VHF/UHF. You can alternate between the two inputs by pressing
ANT on the remote control. (KV-32S65, 32V65, 35S65, 35V65 only)
VIDEO 1 : When you have connected video equipment (e.g. AN receiver) and
you want the TV input fixed to it. You will be able to alternate between video
sources using the AN receiver.
OFF: When you want to turn CHANNEL FIX off.
AUTO PROGRAM: Instructs the TV to program all receivable channels.
CHANNEL SKIP/ADD: With the CHANNEL SKIP/ADD
window open:
1 Select the desired channel.
2
feature is not
available for the AU× input.
Your remote control can be programmed to
operate your cable box. (see page 32)
• After setting CABLE, you will need to run
AUTO PROGRAM.
• ON/OFF TIMER and CHANNEL BLOCK
settings will be erased when CHANNEL
FIX is set.
•
CHANNEL
sEnr
UP
_ CABLE:
ON
CHANNEL
FIX: OFF
CHANNER_ SKIp/ADD
AUTOP O_3RAM
(FUNCTION) and then CH +/- to change channels through your cable box.
AUX 2-6: When a cable box is connected to AUX and a cable or antenna is
Exit_
To select the SET UP _
set up
options for
With the CHANNEL SET UP menu open:
Press • or _. to access a feature, then press _.
CABLE: Select ON it your TV is connected to a cable
system.
Press _ to SKIP or ADD (only one option will
be available).
CHANNEL CAPTION: Label up to 12 channels with their
call letters (up to four letters).
With the CHANNEL CAPTION menu open:
1 Press _ and then 4, or _. to access the desired
2
channel, and press (_D again.
Press • or • to display the first letter or number
3
of the caption and press CD to select it.
Press _ to activate. To erase a caption,
press RESET.
SKIP
)ADD
_MENU
Use (0-9] or [CH */-1
I CHANNEL SKIP/ADD
33!
to seJ_,_tthe ehaane_
I*CHANNEL
CAPTION ....
_MENL_
CHANNEL CAPTION
[
33
1
With the CHANNEL BLOCK window open:
1 Chcose 1 or2 and press G_.
CHANNEL
BLOCK
Prevent
to certaill
child
access
channels
CHANNELBLOCK
2 Press _ or $ to display the channel you want to block, press (3_ to activate.
)I.CH
--2. CH --_MENU
When you select the blocked channel, BLOCKED will appear on the screen.
When you perfo/TnAUTO PROGRAM, your CHANNEL BLOCK settings w#lbe erasecL
To erase the CHANNEL BLOCK settthgs,press RESET while the CHANNEL BLOCK menu is displayed.
FAVORITE
CHANNEL
Quick accessto
favorstechannels
Setting FAVORITE CHANNEL:
1 Press _ and then tl. or _. to select AUTO or MANUAL. (Selecting AUTO will display the last
five channels chosen with the remote COntrol's0-9 buttons.)
Select a position
Move_
Select[_
E_
FAVORITE
CHANNEL
_ MODE
:
AUTO
1.
2,
2 Press $ or _ to move tha cursor to l. 2, 3. 4 or 5 and press (3_.
3 Press # or • to access the desired channel and press (E_.
541 :
_MENU
For KV-32S65, 32V65, 35S65, 35V65 only, you can preview your favorite channels in the window picture.
To do SO, set PREVIEW to ON.
Move_
Sel_ _
Ex__a
Using FAVORITE CHANNEL:
1 Press C_ when in normal viewing mode. Your FAVORITE CHANNEL
options will appear.
_1
2 Press t or q. to access the channel you want to watch, and press (_.
_ _
For models KV-32S65, 32V65, 35S65, 35V65 only, if PREVIEW is ON, a window picture displays your
favorite channels as you cycle through the options.
_
27
II
Using Your Menus (continued)
Using the SET UP
(continued)
menu
_ET UP
CHANNEL SET UP
CHANNEL BLOCK
FAVORITE CHANNEL
VIDEO LABEL
CAPTION VISION: _ 1
LANGUAGE: ENGLISH
TILT CORRECTION:
0
_MENU
VIDEO
LABEL
With the VIDEO LABEL window open:
Label connected
1 Press ,I. or _. to access the input mode you want
equipment for easy
to label and press (3_.
2 Press • or • to choose the label and press (3_.
recognition
VIDEO LABEL Options:
VIDEO 1: VHS, 8mm, BETA, LD, GAME, DBS, DVD,
V,DEO
L_EL
_WDEO
_: VHS
VIDEO 2 : GAME
_MENU
Mo_m Se_t_3_ EX,_
WEB, RECEIVER, DTV.
VIDEO 2/3: VHS, 8mm, BETA, LD, GAME, DBS, DVD, WEB, RECEIVER,
OTM, SKIP.
When VIDEO LABEL is set to WEB, the picture will darken, creating an ideal
For detailed information on using the remote
control to modify menu settings, refer to
"Learning menu selection" on page 20.
picture for Web TV viewing, ff you select SKIP, your TV will skip this connection
when you cycle through video sources using the TV/VIDEO button.
LANGUAGE
Select from available languages to display all menus in your language of choice.
TILT
CORRECTION
(KV-35S40, 35S45, 35S65, 35V65 only)
Press ,l. or _, to correct any tilt of the picture between +5 and -5 and press CE_.
To select the SET UP I_ menu:
Display _m_
28
Highlight_m
Select
Using
the
Basic
_
Menu
Basic
Menu
Quick acess to
frequently
settings
Basic Menu
I!
Exit
For detailed information
on using the remote
control to modify menu settings, refer to
"Learning menu selection" on page 20.
MENU
_
HighJight _]'_]m=!l
-
PICTURE: Press t or _, to adjust the picture contrast. (see page 22)
AUDIO: Press _- or _, to set your audio to one of the following settings:
(see page 23)
SURROUND:
KV-32B40, 32S45, 32S65, 35S40, 35S45, 35S65 only
SRS/SIMULATEO:
ADVANCED
To select the Basic E_ Menu:
Display
to change.
2 press _
to select.
VIDEO MODE: Press 4, or • to set the "IV to one of
the following settings:
VIVID, STANDARD, MOVIE (see page 22)
Sscnpe to
Select _
used
With the Basic Menu window open:
1 Press • or t to access the feature you want
KV-32V40, 32V65, 35V65 only
MENU: Select when you want to return to the main menus.
Select
®
Note
•
The 'IV automatically displays the lest
menu used when MENU is pressed.
29
Jm
Operating
Programming
the
Video
Equipment
remote
You can use the supplied remote control to
operate Sony or non-Sony video equipment.
] Press CODE SET.
2 Press VTR/DVD
(FUNCTION),
3 Use the 0-9 buttons to key in the
manufacturer's
code number from the
following chart.
4 Press ENTER.
VCR code numbers
Manufacturer
Sony
Admiral (M. Ward)
Aiwe
Audio Dynamic
Broksonic
Canon
Citizen
Craig
Cdtedon
Curtis Mathis
Daewoo
DSX
Dimensia
Emerson
Fisher
Fonai
General Electdc
Go Video
3O
Code
301,302,
338,
314,
319,
309,
302,
304, 338,
341,312,
314, 336,
319, 320, 316, 317, 318,
330,
329, 304,
322, 339,
303
327
344
337
317
308
332
332
315
309
309
337
304
341
335
338
309
340
Goldstar
Hitachi
tnstant Replay
JC Penney
JVC
Kenwood
LXI (Sears)
Magnavox
Marentz
Matte
Memorex
Minolta
Mitaubishi/MGA
Multitech
NEC
Olympic
Optimus
Panasonic
Pentax
Phi_,o
Philips
Pioneer
Quasar
RCNPROSCAN
309, 305, 304,
314, 336,
332,
304,
Realistic
309, 330,
Sansui
Samsung
Sanyo
Scott
312,313. 321,335,
Sharp
Shintom
Signature 2000 (M. Ward)
SV2000
Sylvania
Symphonic
332
306. 304, 305.338
309,308
330, 314, 336, 337
337, 345, 346, 347
314, 336, 332, 337
305, 330, 335, 338
308, 309, 310
314, 336, 337
332
309, 335
305. 304
323, 324, 325, 326
325, 338, 321
314, 336, 337
309, 308
327
308, 309, 306, 307
305, 304
308, 309
308, 308, 310
308
308, 309, 306
305, 308, 309, 311,
312, 313, 310, 329
328, 335, 324, 338
314
322,313. 321
330, 335
323, 324, 325, 326
327, 328
315
338, 327
338
308, 309, 338, 310
338
Tashiro
Tatung
Teec
Technics
Toshiba
Wards
Yamaha
Zenith
332
314, 336, 337
314. 336, 338,337
309,308
312, 311
327,328, 335, 331,332
314, 330, 336, 337
331
Operatinga VCR
Buttons on the
remote control
To tum on or off
PressVTR/DVD (POWER).
Press the 0 - 9 buttons.
To select a channel
directly
To change
channels
Press CH +/-.
To record
Press _ and •
simultaneously.
Press le_.
PressII,
Press IH_.
Press -_1.
Press II.
To resumenormalplayback,
pressagain or pressI=,,-.
Press _ or ,4<1during
playback.
To resume normalplayback,
release the button.
PressTVNTR.
TO play
To stop
To fast forward
To rewind the tape
To pause
To scan
TO change input
mode
l'ips
•
MDP (Multi Disc Player)
code numbers
"_"
in some rare cases, you may not be able to operate
your non-Sony video equipment with the supplied
remote control. In this case, please use the
equipment's own remote control.
Manufacturer
•
When you remove the batteries, the code number may
revert to the factory setting.
•
The code numbers for Sony VCR's are assigned at the
factory as follows:
VHSVCR
DVD (Digital Versatile
code numbers
301
(preset code for the
supplied remote control)
8 mm VCR
302
Beta, ED Beta VCRs
303
Code
Sony
Panasonic
Pioneer
Operating
701
704, 710
702
an MDP
Buttons
control
To turn on or off
Press VTR/DVD
Press ID.-.
To stop
Press I1.
To scan
To search the chapter
forward or backward
Tip
Manufacturer
Code
Sony
Panasonic
Pioneer
RCA
Toshiba
751
753
752
755
754
on the remote
To play
To pause
Disc)
(POWER).
Press I1.
To resume normal playback,
press again or press I_.-.
Press _
or _
during
playback.
To resume normal playback,
press I1_.
Operating
player
a DVD
If you will not be programming a DBS or cable box into
the DBS/CABLE input, you can use it to program other
video equipment (e.g. DVD, MDP, or second VCR)
(see page 30)
on the remote
To turn on or off
Press VTR/DVD (POWER).
To play
Press I_-.
To stop
Press II,
To pause
Press II.
To resume normal playback,
press again or press I1,.-.
To scan
Press _
or .<1,4during
playback.
To resume normal playback,
press D_-.
To search the
Press CH +/-.
Press CH +/-.
"_"
Buttons
control
chapter forward or
backward
To select chapters
directly
0-9 + ENTER.
MENU
Press to display DVD menu.
To move cursor in
menu
Use your arrow buttons
*, .I., _., ,_.
31
Operating
Programming
the
a Cable Box or DB5 Receiver
If the remote
remote
•
You can program
to operate
a cable
the supplied
remote
box or DBS receiver.
1 Press
CODE
2 Press
DBS/CABLE
]
4 Press
Tips
•
(FUNCTION).
supplied
the
ENTER.
to the operating
with
•
chart.
For more details on operating
cable box or DBS receiver
Refer
First,
using
instructions
the equipment.
doesn't
work
try repeating
the setup procedures
the other codes listed for your
equipment.
SET.
Use the 0-9 buttons
to key in the
manufacturer's
code number
from
following
control
control
Manufacturer
Hamlin/Regal
Jerrold/G.
!f more than one code number is listed, try entering
them one by one until you come to the correct code for
your equipment.
If you enter a new code number, the code number you
previously entered at that setting is erased.
In some rare cases, you may not be able to operate
your equipment with the supplied remote contro!. In
this case, use the equipment's supplied remote control.
•
Whenever you remove the batteries the code numbers
may revert to the factory setting.
I.
201,202,
203, 204, 205, 206,
207, 208, 218
Oak
227, 228, 229
Panasonic
219, 220, 221
Pioneer
214, 215
Sci_t ttific Atlanta
209,210,211
Tocom
216, 217
Zenith
212, 213
DBS receiver
Manufacturer
that were
code numbers
Code
80! (preset code for
remote control)
Sony
General
Electric
Hitachi
Hughes
Panasonic
32
Code
222, 223, 224, 225, 226
"_"
•
the
Cable box code numbers
802
805
8O4
803
RCA/PROSCAN
802, 808
Toshiba
806, 807
Troubleshooting
Consult
the table
below;
it suggests
solutions
to specific
problems.
Cannot operate single tuner PIP
(KV-32S45, 35S45)
• VCR may not be connected
to your TV properly.
• VCR may not be turned on.
• The remote control may not be programmed
to
operate the VCR.
• Ensure that you have set your VCR correctly. (see page 7)
• Program
your remote control to operate the VCR.
(see page 30)
A red light keeps flashing on the
TV for more than a few seconds
• Your TV may need service.
• Call your
TV makes
• This is a normal
a noise
when
turned
function
of your
local Sony service
center.
TV.
on
Screen is not lit and there
sound
Poor or no picture
good sound
Good picture,
No color
{screen
no sound
is no
lit),
• Power cord may not be plugged
in.
• Batteries may nut have been placed with the correct
polarity.
• TV/VIDEO
setting may be incorrect.
VIDEO menu settings may not be adjusted
correctly.
Antenna/cable
connections
may be faulty.
VIDEO LABEL inputs may be set to WEB. {This label
darkens the screen for ideal WebTV viewing)
settings
may not be adjusted
• Check
• Check
correctly.
TV/VIDEO
until
you receive
a channel.
• Readjust your VIDEO menu settings.(see
page 22)
• Check your VIDEO LABEL settings. (see page 281
i ° Press
• Sound may be set to MUTING.
• Your TV i'nay he set to SAP.
• Speaker may not be set correctly.
• Color
• Press
MUTE.
the MTS setting
your SPEAKER
Adjust the COLOR
(see page 22)
in the AUDIO menu. (see page 23)
settings. (see page 23)
settings
in the VIDEO
menu.
33
Specifications
WhatiL_d
Supplied
_e
accessories
i
Only snow and noise
appear on the screen
• CABLE may not be set correctly
in the SET UP menu.
• Ensure
correct
• Antenna/cable
not be correct.
SET UP menu. (see page 26)
• Press ANT on your remote
control to change the input mode.
(see page 16)
connections
may
• TV may be set to AUX mode.
that you have selected
CABLE mode in the
the
Remote
• CABLE setting may not be correct
in the SET UP menu.
• Ensure
that CABLE
Cannot receive
channels
when
cable
any
using
• CABLE setting may not be set
correctly in the SET UP menu.
• Ensure
• Volume may not be adjusted
your cable box.
TV is fixed to one
channel
• CHANNEL
be correct.
If, after reading
these operating
television,
please catl our Direct
34
FIX settings
on
may not
(see
is set to ON
in the SET UP menu. (see page 26)
• Use AUTO PROGRAM
to add
receivable
channels
that are not
presently
page 26)
Cannot gain enough
volume when using a
cable box
in TV memory.
that CABLE
in TV memory.
(see
• Press TV (FUNCTION)
adjust the TV's volume.
and
• Check your CHANNEL
settings. (see page 26)
FIX
instructions
you have additional
quest ons re a ed to the use of your
Response
Center at 1-800-222-SONY
(7669). (U.S residents
only)
(1)
35S40
only)
35V65
only)
size AA (R6) (2)
is set to OFF
in the SET UP menu. (see page 26)
• Use AUTO PROGRAM
to add
receivable
channels
that are not
presently
page 26)
RM-Y165
32V40,
Remote control RM-Y167 ( 1)
(KV-32S45,
32S65, 32V65,
Batteries
Cannot receive upper
channels
(UHF) when
using an antenna
control
(KV-32S40,
Sony
Optional
accessories
Connecting
cables
VMC-810S/820S,
VMC-720M,
YC-15V/30V,
RK-74A
TV Stand
SU-32A3,
U/V mixer
EAC-66
SU-35A3
35S45,
35S65,
KVPower _quirements
Number of inputs/outputs
Video 11
6 Video _
Audio 3)
Audio out _
32S40
120V, 60 Hz
32645
32S65
32V40
120V, 6OHz
32V65
120V, 60 Hz
2
1
3
1
3
2
2
1
2
2
3
3
1
1
1
1
1
120 v, 66 Hz
120 V, 60 Hz
2
1
1
1
1
1
Monitor out"
TV Out 1) 3)
1
S-Unk
Speaker output (W_
5Wx2
5Wx2
Power consumption ON)
In use (Max.)
In standby
Dimensions (W/H/D)
160W
2W
180W
2W
180W
2W
791 x 707 x
604.5 mm
31 x 27 '3/,6
x 23 3/4in.
791 x707x
604.5 mm
31 x 27 W_6
x 23 3/4in.
71.4 kg
157 Ibs
72.7 kg
160 Ibs
(ram)
(in)
Weight (kg)
(Ibs)
T_:..;.;vii
system
_Lmerican TV standard, NTSC
atimnel
€overage
VHF: 2-13/UHF: 14 _9/CATV:
1 - 125
Picture tube
Trmitron ®tube
Visible v_reen size
32-inch pictuxe measured diagonally (KV-32640,
32565, 32V40, 32V65 only)
35-inch picture measured diagonal]y (KV-35640,
356_, 35V65 only)
A_ual
screen
size
34-inch
lcnp ictu re measured diagonally
(KV-32640,
32665, 32V40, 32V65 only)
37-inch picture measured diagonally (KV-35640,
35665, 35V65 only)
35640
35S45
35S65
120V, 60 Hz 120V, 60 Hz 120 V, 60 Hz
2
2
3
1
2
2
1
2
1
1
2
1
3
1
1
1
Yes
Yes
5Wx2
5Wx2
35V65
120V, 60 Hz
Yes
1
Yes
10Wx2
5Wx2
5Wx2
5Wx2
10Wx2
180W
2W
200W
2W
210W
2W
210W
2W
210W
2W
230W
2W
791 x707x
604.5 mm
31 x 27 W_
x 23 3/4in.
821 x 675.3 x
587 mm
32 3/8x 26 %
x 23 VBin.
821 x 675.3 x
587 mm
32 3/8x26 %
x 23 _h in.
870 x 761 x
653 mm
34 V. x30x
25 5/ein.
870 x 761 x
653 mm
34'hx 30 x
25 %in.
870 x 761 x
653 mm
34 V*x 30x
25 %in.
920 x 730.8 x
641.8 mm
36'h x 28 3/4
x 25 'h in.
73 kg
160.5 Ibs
70 kg
154 Ibs
70 kg
154 Ibs
83 kg
183 Ibs
63 kg
183 Ibs
83 kg
183 Ibs
90 kg
203 Ibs
Antenna
75 ohm external
Notes
32645,
35£45,
32645,
35645,
terminal
for VHF/UHF
75 ohms unbalanced,
(O) ® SRS (SOUND
Ii
1 Vp-p,
2)
Y: 1 Vp-p, 75 ohms unbalanced,
sync negative
C: 0.286 Vp-p (Burst signal), 75 ohms
31 500 mVrms Impedance:
4)
sync negative
47 kilohms
More than 408 mVrms at the maximum
setting (variable)
More than 408 mVrms (fix)
Impedance: 50 kilohms
Design
without
and specifications
notice,
are subject
volume
to change
RETRIEVAL SYSTEM)
!
The (e) SRS (SOUND RETRIEVAL SYSTEM) is
manufactured by Sony Corporation under license
from SRS Labs, Inc. It is covered by U.S. Patent No.
4,748,669. Other U.S. and foreign patents pending.
The word 'SRS' and the SRS symbol (@) are
registered trademarks of SRS Labs, Inc.
Licensed by BBE Sound, Inc. under
USP 4638258.4482866. BBE and BBE symbol are
trademarks of BBE Sound, Inc.
35
g Index
A
Adjusting your menus ..............................................
ANT .............................................................................
Antenna cable ...............................................................
Antenna connector ......................................................
AUDIO _) button ......................................................
20
16
5
5
23
AUDIO menu operations
.t
AUDIO OUT ..........................................................
24
AUTO VOLUME ..................................................
BALANCE .............................................................
BASS .......................................................................
EFFECT ..................................................................
MTS .........................................................................
SPEAKER ...............................................................
TREBLE ..................................................................
AUDIO OUT
FIXED .....................................................................
VARIABLE .............................................................
AUTO PROGRAM ....................................................
24
24
26
AUX Hookup
A/V receiver
5
10
...............................................................
..............................................................
23
23
23
23
24
24
23
B
BALANCE ..................................................................
Basic Menu E] ........................................................
BASS ............................................................................
23
29
23
Battery installation ....................................................
BRIGHTNESS .............................................................
13
22
C
CABLE .........................................................................
Cable box ......................................................................
operation
36
................................................................
26
6
32
CAPTION VISION (closed caption) .......................
CATV cable ...................................................................
Coaxial cable .................................................................
16
5
5
CH +/-. .......................................................................
CHANNEL
SKIP/ADD ............................................
CHANNEL
BLOCK ..................................................
CHANNEL CAPTION ..............................................
CHANNEL FIX ..........................................................
COLOR ........................................................................
15
26
27
26
26
22
Connecting
Antenna
TV to
....................................................................
Audio system ..........................................................
A/V receiver ..........................................................
Cable .........................................................................
Cable box and cable ................................................
Camcorder
.............................................................
DBS receiver ............................................................
DBS receiver
and VCR ...........................................
5
9
10
5
6
11
8
8
DVD player ..............................................................
S-Link .....................................................................
Two VCRs ..............................................................
9
12
10
VCR ...........................................................................
CURRENT TIME SET ...............................................
7
25
D
DAYLIGHT
SAVING ................................................
25
DBS receiver
DISPLAY
operation
.............................................
32
CAPTION VISION ...............................................
Status ......................................................................
XDS .........................................................................
16
16
16
DVD operation
...........................................................
31
E
Easy Setup Guide .......................................................
14
Editing using MONITOR
EFFECT
10
OUT ................................
SIMULATED .........................................................
SRS ..........................................................................
SURROUND ..........................................................
23
23
23
F
Factory settings ....................................................
22, 23
FAVORITE CHANNEL ............................................
28
FAVORITE CHANNEL w/preview
....................... 28
FREEZE button ..............................................
13, 18, 19
H
HUE .............................................................................
22
I, J, K
JUMP button ...............................................................
13
L
Language selection ..............................................
14, 28
Learning menus
AUDIO ...................................................................
23
Basic Menu .............................................................
29
SET UP ....................................................................
26
TIMER ....................................................................
25
VIDEO ....................................................................
22
M, N
MDP operation
Menu selection
Mode
...........................................................
...........................................................
31
20
MOVIE ...................................................................
STANDARD ..........................................................
VW1D .....................................................................
22
22
22
MONITOR OUT ........................................................
Mono ............................................................................
MTS
10
24
MONO ....................................................................
SAP .........................................................................
STEREO ..................................................................
MUTING button ........................................................
24
24
24
15
O
On-Screen Help ..........................................................
ON/OFF TIMER ........................................................
13
25
Operating
30
video equipment
.....................................
P, Q
Picture-in-Picture
(PIP)
Main picture ..........................................................
Window picture ....................................................
PIP connections (single tuner) .................................
PIP connections (dual tuner) ....................................
PIP operations
AUDIO .............................................................
17,
CH+/-. .............................................................
18,
FREEZE ............................................................
18,
PIP .....................................................................
17,
POSITION ........................................................
18,
17
17
17
19
19
19
19
19
19
SWAP ...............................................................
TV/VIDEO ......................................................
18, 19
17, 19
SWAP button ........................................................
18, 19
SYSTI_M OFF button .................................................
16
30, 31
R
T, U
TILT CORRECTION
.................................................
28
Remote control .....................................................
13, 15
FUNCTION buttons .............................................
15
Illustration .................................. inside front cover
TIMER menu operations
Q
CURRENT TIME SET ...........................................
DAYLIGHT SAVING ...........................................
25
25
S
SAP ..............................................................................
24
ON/OFF TIMER ...................................................
TREBLE .......................................................................
25
23
Safety .............................................................................
Select buttons .............................................................
3
13
Adjustment bars ....................................................
SET UP menu _
....................................................
AUTO PROGRAM ...............................................
CABLE ....................................................................
CHANNEL SKIP/ADD .......................................
CHANNEL CAPTION .........................................
CHANNEL BLOCK .............................................
FAVORITE CHANNEL .......................................
TILT CORRECTION .............................................
13
26
26
26
26
26
27
28
28
Troubleshooting
...................................................
33,
TV (FUNCTION)
button ...........................................
TV POWER button ....................................................
W/VIDEO
button .....................................................
TV OUT .......................................................................
34
15
15
16
10
V, W, X, Y, Z
VCR ................................................................................
VCR manufacturer
code numbers
..........................
7
30
VCR operation ............................................................
VIDEO LABEL ...........................................................
30
28
Setting up TV ..............................................................
SHARPNESS ..............................................................
SLEEP button .............................................................
S-Link Connections
...................................................
SPEAKER
ON ...........................................................................
14
22
16
12
VIDEO menu operations
{_
BKIGHTNESS ........................................................
COLOR ...................................................................
22
22
Programming
the remote
...................................
24
OFF .........................................................................
24
Specifications
........................................................
34, 35
Splitter ...........................................................................
7
HUE
........................................................................
MODE .....................................................................
PICTURE ................................................................
SHARPNESS .........................................................
VOL +/-. .....................................................................
VTR ..............................................................................
XDS ..............................................................................
22
22
22
22
14
30
16
37
Printed in U.S.A.