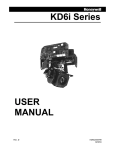
1
Machine Vision
Product Catalogue 2008
®
vision
www.sony-vision.com
Image Sensing Products
I
N
D
E
X
■ New Product Information
■ B/W Camera Function Chart
■ Colour Camera Function Chart
■ Intelligent Camera
• XCI-SX1
• XCI-V3
– Connection Diagram
■ Digital Interface
IEEE1394b-2002
• XCD-U100 (B/W)
• XCD-U100CR (RAW Colour)
• XCD-SX90 (B/W)
• XCD-SX90CR (RAW Colour)
• XCD-V60 (B/W)
• XCD-V60CR (RAW Colour)
Camera Link
• XCL-5000 (B/W)
• XCL-5005 (B/W)
• XCL-5005CR (Colour)
• XCL-U1000 (B/W)
• XCL-U1000C (Colour)
• XCL-X700
• XCL-V500
– Connection Diagram
■ Non-TV Format
• XC-HR90
• XC-HR70
• XC-HR50
• XC-HR57
• XC-HR58
• XC-56
• XC-56BB
– Connection Diagram
New Products Information
4
6
9
10
10
14
16
16
16
16
16
16
22
22
22
26
26
30
30
34
36
40
44
44
48
52
56
60
■ TV Format
B/W Model
• XC-ST70/XC-ST70CE
• XC-ST50/XC-ST50CE
• XC-ST51/XC-ST51CE
• XC-ST30/XC-ST30CE
• XC-ES50/XC-ES50CE
• XC-ES51/XC-ES51CE
• XC-ES30/XC-ES30CE
• XC-EI50/XC-EI50CE
• XC-EI30/XC-EI30CE
• XC-EU50/XC-EU50CE
• XC-ES50L/XC-ES50LCE
62
62
62
62
66
66
66
70
70
74
80
Colour Model
• XC-555/XC-555P
– Connection Diagram
84
88
■ Accessories
XC Model
• DC-700/DC-700CE
• Lenses
• Lens Accessories
• Cables
• Connectors
• Junction Box
• Tripod Adaptor
90
92
92
93
93
93
94
■ 3CCD Colour Video Cameras
• DXC-390/DXC-390P
• DXC-990/DXC-990P
95
99
■ Obsolete Models Last Production Date 103
N E W P R O D U C T I N F O R M AT I O N
IEEE1394b-2002 Standard
XCD Series
Page
16
Features
1/1.8 type progressive scan CCD UXGA output
XCD-U100 (B/W)
XCD-U100CR (RAW color)
1/3 type progressive scan CCD SXGA output
XCD-SX90 (B/W)
XCD-SX90CR (RAW color)
1/3 type progressive scan CCD VGA output
XCD-V60
XCD-V60CR (RAW color)
(B/W)
• High image quality, high speed image
output
• Daisy chain connection
• Hardware-based pre-processing: Equipped
with LUT (Look Up Table) and uses 3x3
pixel matrix calculation (B/W model only)
• Bus synchronization
• Broadcast delivery of command
• Memory channel
• Bulk trigger mode
• Memory shot
• Partial scan
• Binning
• 9-pin connector with fixing screws
• Low power consumption, high vibration
resistance, compact size
• IIDC Ver. 1.31 protocol compliant
4
N E W P R O D U C T I N F O R M AT I O N
5 Megapixel CCD Camera Link Output
XCL-5000 Series
Page
22
Features
2/3 type progressive scan CCD
B/W camera module Standard (non-PoCL)
XCL-5000
B/W camera module Standard (non-PoCL)/PoCL
XCL-5005
Color camera module Standard (non-PoCL)/PoCL
XCL-5005CR
XCL-5000 Series (shared)
• Effective picture elements: 2,456 (H) x
2,058 (V)
• Partial scan function
• Frame rate: 15 fps
• RS-232C control
• Normal/External trigger shutter
• C-mount
• High Shock and vibration resistance
• Output: Digital Camera Link 12 bit/10 bit/8
bit (switchable)
XCL-5000/XCL-5005 (B/W)
• Outline detection, Outline emphasis
• Binarization
• 3x3 pixel matrix calculation
• Read mode: Normal/Bining
• Flip-Flop (XCL-5005 only)
XCL-5005CR (color)
• One-push white balance
• Switching color output (RAW color or RGB)
• Color Bar Charts
5
B/W Camera Function Chart
Digital Interface
Intelligent
IEEE1394b-2002
Model
XCI-SX1 XCI-V3 XCD-U100 XCD-SX90 XCD-V60 XCL-5005 XCL-5000 XCL-U1000 XCL-X700 XCL-V500
Function
Image
device
Progressive Scan
●
●
●
●
●
●
●
●
●
●
Square Pixel
●
●
●
●
●
●
●
●
●
●
●
●
●
●
●
●
●
1/3 type
1/2 type
CCD
Camera Link
●
●
●
1/1.8 type
2/3 type
●
C
Lens
mount
●
●
●
●
●
●
●
●
●
NF
VS (Video Sync.)
VBS
RGB
Y/C
●
●
VGA format
●
SVGA format
Output
●
XGA format
SXGA format
●
●
●
●
UXGA format
5 Mega
●
●
●
●
●
●
●
●
●
●
●
●
●
●
●
●
1N non interlace
Partial scanning
Digital
●
●
IEEE1394
●
●
●
●
●
●
Camera Link
External
synchronization
HD/VD
VS
Restart/Reset
Long exposure
●
●
●
●
●
●
●
●
●
●
Normal
●
●
●
●
●
●
●
●
●
●
●
●
●
●
●
●
●
●
●
●
Mode1 (Nonreset mode)
External
trigger Mode2
(Reset mode)
shutter
Others
Shutter
*1 ●
*1 ●
*1 ●
One shot
●
●
●
CCD Iris
●
●
●
●
●
●
●
●
ATW
White
balance
One push
Fixed
Manual
Others
Negative/
positive reversal
●
●
RS-232C control
●
●
10
10
●
●
●
●
●
22
22
26
30
30
Near infrared
ray measures
Near ultraviolet
ray measures
See page
*1: IEEE1394 Digital camera protocol Trigger mode 0.1.14.15
6
●
Function Chart
16
16
16
Non TV Format
TV Format
Model
XC-HR90 XC-HR70 XC-HR50 XC-HR57 XC-HR58
Function
Image
device
XC-56BB
Progressive Scan
●
●
●
●
●
●
●
Square Pixel
●
●
●
●
●
●
●
1/3 type
●
●
●
●
●
●
1/2 type
CCD
XC-56
XC-ST70
XC-ST50
XC-ST70CE XC-ST50CE
●
●
1/1.8 type
●
2/3 type
●
C
Lens
mount
●
●
●
●
●
●
●
●
●
●
●
●
●
●
NF
●
VS (Video Sync.)
●
●
●
*2 ●
*2 ●
●
●
●
*2 ●
*2 ●
*2 ●
VBS
RGB
Y/C
VGA format
*2 ●
SVGA format
Output
XGA format
SXGA format
*2 ●
*2 ●
UXGA format
5 Mega
1N non interlace
*2 ●
*2 ●
*2 ●
*2 ●
*2 ●
*2 ●
Partial scanning
●
●
●
●
●
●
●
●
●
●
●
●
Digital
IEEE1394
Camera Link
External
synchronization
HD/VD
●
VS
Restart/Reset
●
●
●
●
●
●
●
●
●
Long exposure
●
●
●
●
●
●
●
●
●
Normal
●
●
●
●
●
●
●
●
●
Mode1 (Nonreset mode)
External
trigger Mode2
(Reset mode)
shutter
Others
●
●
●
●
●
●
●
●
●
●
●
●
●
●
●
●
●
●
40
44
44
48
52
56
62
62
Shutter
One shot
CCD Iris
ATW
White
balance
One push
Fixed
Manual
Negative/
positive reversal
Others
●
RS-232C control
Near infrared
ray measures
Near ultraviolet
ray measures
See page
36
*2 : Requires specific acquisition board.
Function Chart
7
TV Format
Model
XC-ST51
XC-ST30
XC-ES50
XC-ES51
XC-ES30
XC-EI50
XC-EI30
XC-EU50 XC-ES50L
XC-ST51CE XC-ST30CE XC-ES50CE XC-ES51CE XC-ES30CE XC-EI50CE XC-EI30CE XC-EU50CE XC-ES50LCE
Function
Image
device
Progressive Scan
Square Pixel
●
1/3 type
1/2 type
CCD
●
●
●
●
●
●
●
●
1/1.8 type
2/3 type
●
●
●
●
●
●
●
●
●
●
●
●
●
●
●
●
●
●
HD/VD
●
●
●
●
●
●
●
●
●
VS
●
●
Restart/Reset
●
●
●
●
●
●
●
●
●
Long exposure
●
●
●
●
●
●
●
●
●
Normal
●
●
●
●
●
●
●
●
●
Mode1 (Nonreset mode)
External
trigger Mode2
(Reset mode)
shutter
Others
●
●
●
●
●
●
●
●
●
●
●
●
●
●
●
●
●
●
●
●
C
Lens
mount
NF
VS (Video Sync.)
VBS
RGB
Y/C
VGA format
SVGA format
Output
XGA format
SXGA format
UXGA format
5 Mega
1N non interlace
Partial scanning
Digital
IEEE1394
Camera Link
External
synchronization
Shutter
One shot
CCD Iris
ATW
White
balance
One push
Fixed
Manual
Negative/
positive reversal
Others
RS-232C control
Near infrared
ray measures
Near ultraviolet
ray measures
See page
8
Function Chart
●
62
62
66
66
66
70
70
74
80
Colour Camera Function Chart
Digital Interface
IEEE1394b-2002
Model
XCD-U100CR
XCD-SX90CR
XCD-V60CR
XCL-5005CR
XCL-U1000C
Progressive Scan
●
●
●
●
●
Square Pixel
●
●
●
●
●
●
●
Function
Image
device
TV Format
Camera Link
1/3 type
●
1/2 type
CCD
●
1/1.8 type
●
●
2/3 type
●
C
Lens
mount
XC-555
XC-555P
●
●
●
●
●
NF
VS (Video Sync.)
●
VBS
RGB
●
Y/C
●
VGA format
SVGA format
Output
XGA format
●
SXGA format
●
●
UXGA format
●
5 Mega
1N non interlace
Partial scanning
●
●
●
IEEE1394
●
●
●
Digital
Camera Link
External
synchronization
●
●
●
●
HD/VD
●
VS
●
Restart/Reset
Long exposure
●
●
●
●
●
Normal
●
●
●
●
●
●
●
●
●
Mode1 (Nonreset mode)
External
trigger Mode2
(Reset mode)
shutter
Others
Shutter
●
*3
●
*3
●
One shot
●
●
●
CCD Iris
●
●
●
●
ATW
●
●
●
●
One push
●
●
●
●
●
*4 ●
Fixed
●
●
●
●
●
●
Manual
●
●
●
●
●
●
Negative/
positive reversal
●
●
●
●
*4 ●
●
●
●
22
26
84
White
balance
Others
*3
●
RS-232C control
Near infrared
ray measures
Near ultraviolet
ray measures
See page
16
*3: IEEE1394 Digital camera protocol Trigger mode 01.14.15
16
16
*4: Only controled by RS-232C
Function Chart
9
Intelligent
Digital Interface
IEEE1394b
Camera Link
Non-TV Format
TV Format
Colour Model
B/W Model
Accessories
INTELLIGENT CAMERA MODULE
XCI-SX1
XCI-V3
Intelligent All-in-
One
*1
C
Lens Mount
*1
PC Less
Progressive
Scan
*2
1/2 Type 1/3 Type
CCD
CCD
Square
Pixels
*2
SXGA
VGA
Output
Output
Long Partial Normal External
Trigger
Exposure Scan Shutter Shutter
*1:XCI-SX1
*2:XCI-V3
B/W
All-in-One
Connection Diagram
P14
Outline
Sony introduces the XCI-SX1 and XCI-V3, equipped with a
1/2-type SXGA (1280x1024) progressive scan CCD and a
1/3-type VGA (640x480) progressive scan CCD,
respectively. Both cameras have an embedded CPU and a
100Base-TX/10Base-T interface for network connectivity.
Incorporating the high-performance and flexible AMD Geode
TM GX533 processor and Linux® kernel, the XCI-SX1 and
XCI-V3 are designed to allow integrators to install a variety of
imageprocessing software applications or to develop and
apply customized applications to meet specific user needs.
If preferred, the camera operating system can be replaced
with Microsoft® Windows® XP Embedded *3 for flexible
system integration with your Windows-based system.
Unlike conventional machine vision cameras, images
captured by these intelligent cameras are processed within
the camera and the processed data is directly transmitted
to a PC over a network. These cameras eliminate the need
for conventional image-processing systems and allows for
simple setup and efficient factory workflow. With its highperformance, flexible integration, and versatile interfaces the
durably designed XCI-SX1and XCI-V3 Intelligent Cameras
are ideal for a wide range of machine vision applications
such as object recognition, inspection, measurement,
alignment, and more.
*3 Windows XP Embedded must be purchased separately from Microsoft
3CCD Colour
Video Camera
Corporation. Contact your local Sony sales office or authorized dealer
for instructions on how.
Dimensions
Features
■High Performance 400MHz Geode GX533 Processor
• x86-compatible architecture
• 256MB main memory (DDR-SDRAM)and 1MB flash memory
• Integrated 128 MB Compact Flash™ memory card
• Low power consumption
■Various Interfaces
• 100Base-TX/10Base-T interface for network operation
• Monitor output
• USB 1.1 interface
• RS-232C serial interface and digital input/output allow cameras to
be connected with external equipment such as sensors, strobe
lights, and Programmable Logic Controllers (PLC).
■1/2-type (XCI-SX1) and 1/3-type (XCI-V3), Progressive Scan
CCDs With Square Pixels
■Linux or Microsoft Windows XP Embedded Support *4
■High-Quality Images
• XCI-SX1: SXGA (1280 x 1024) at 15 fps
• XCI-V3: VGA (640 x 480) at 60 fps
■Horizontal and Vertical Partial Scanning Function
Allows users to select a specific scanning area to reduce data size
and increase frame rate, which minimizes image processing time.
■Binning Function
• Vertical binning combines image data for every two lines vertically
to increase the frame rate, which minimizes image processing
time.
• Horizontal binning combines image data for every two pixels
horizontally, thereby increasing the sensitivity, and shortening the
capture speed, which minimizes image processing time.
■Accurate Image Capture Timing
Equipped with an external trigger input and a trigger delay
function of up to four seconds in 1 ms intervals, these cameras
can accurately capture images of fast moving objects such as in
production lines. What’s more, the XCI-V3 is equipped with a strobe
adjustment function to accurately time an external strobe light.
■Built-in Real Time 3 x 3 Image Pre-Processing Filter
Color Camera Block
The XCI-V3 camera features a 3 x 3 filter that can be used to
emphasize the edges of an object or to change the contrast so that
image details stand out.
■Compact and Lightweight
55 (W) x 55 (H) x 110 (D) mm, 400 g
■Easy Camera Settings
■High Shock and Vibration Resistance
*4 The Linux kernel and camera driver are preinstalled in these cameras.
Color PTZ Model
Please contact your local Sony sales office or authorized dealer for
information on converting the system to Windows XP Embedded.
Accessories
■ Compact camera adaptor
●DC-700/DC-700CE
■ 12-pin camera cable
Unit: mm
10
XCI-SX1/V3
●CCXC-12P02N (2 m)
●CCXC-12P10N (10 m)
●CCXC-12P05N (5 m)
●CCXC-12P25N (25 m)
Location and Function of Parts and Controls
Intelligent
Spectral Sensitivity Characteristics
●XCI-SX1
0.9
Digital Interface
IEEE1394b
Camera Link
➀
1
➁
2
➂
3
Relative
sensitivity
1.0
0.8
0.7
0.6
0.5
0.4
0.3
➃
4
➄
5
0.2
0.1
0
400
500
600
700
800
900
1000
Wavelength (nm)
(Lens characteristics and light source characteristics excluded.)
➀ Lens mount (C-mount)
Relative sensitivity
➁ Auxiliary reference holes (Top)
Non-TV Format
Attach any C-mount lens or other optical equipment.
Note
The lens must not project more than 10 mm from the
lens mount.
10 mm or less
Lens mount face
●XCI-V3
➂ Tripod holes (Top)
These precision screw holes are for locking the camera. Locking
the camera into these holes secures the optical axis alignment.
➄ Tripod holes (Bottom)
Wavelength (nm)
(Lens characteristics and light source characteristics excluded.)
Specifications
Image device
Effective picture elements
Cell size
XCI-V3
1/3 type IT progressive scan CCD
1,280 (H) x 1,024 (V) (SXGA)
640 (H) x 480 (V) (VGA)
4.65 μm (H) x 4.65 µm (V)
7.4 µm (H) x 7.4 µm (V)
15 fps @ SXGA
60 fps @ VGA
Image output
8 bit
Gain
Manual (0 to 18 dB, 1 dB steps)
Shutter speed
2 to 1/50,000 sec (Trigger mode) , 2 to 1/100,000 sec (Normal mode)
Binning
Partial scan
Vertical/horizontal binning
Vertical random read scan: 32 to 1,024 lines, 32-line steps
Vertical random read scan: 30 to 480 lines, 30-line steps
Horizontal random read scan: 384 to 1,280 pixels, 128-pixel steps
Horizontal random read scan: 192 to 640 pixels, 64-pixel steps
Frame rate (example): 34 fps (VGA), 21 fps (XGA)
Frame rate (example): 300 fps (30-lines)
Mode: Pulse edge detection, pulse width detection Delay function: 0 to 4 sec (1 ms steps)
Lookup table Exposure start delay amount: 10 µs max.
Luminance value conversion (gamma correction, 2 values, negative/positive reversal, etc.)
CPU
x86, AMD Geode GX533, 400 MHz
Memory
256 MB DDR-SDRAM, 128 MB CompactFlash
OS
Linux (Kernel version 2.4.18)
LAN
10Base-T/100Base-TX, Network protocol: TCP/IP (IPv4), HTTP, FTP
Monitor output D-sub 15-pin multi-scan monitor support
Version 1.1
Serial interface
RS-232C
Digital I/O
TTL IN/OUT, Isolated IN/OUT, Trigger IN, Exposure OUT
Lens mount
C-mount
4 lx (F1.4, +18 dB gain)
Power requirements
Power consumption
Dimensions
Mass
Storage temperature
1 lx (F1.4, +18 dB gain)
10.5 to 26.4 V
7.8 W
7.5 W
55 (W) x 55 (H) x 110 (D) mm
400 g
-5 to +45 °C
-30 to +60 °C
Performance guarantee temperature
Operating humidity
0 to +40 °C
20 to 80% (no condensation)
Storage humidity
20 to 95% (no condensation)
Vibration resistance
Shock resistance
MTBF
Regulatory compliance
Supplied accessories
Color PTZ Model
Operating temperature
Color Camera Block
USB
Minimum illumination
3CCD Colour
Video Camera
External trigger
Accessories
Frame rate
XCI-SX1
1/2 type IT progressive scan CCD
TV Format
B/W Model
Colour Model
➃ Reference holes (Bottom)
10 G (20 to 200 Hz)
70 G
37,931 hrs (Approx. 4.3 years)
UL60950-1+CSA C22.2 No.60950.1, FCC/ICES-003: Class A, CE: EN55022, EN55024, EN61326, AS/NZ: EN55022, VCCI: Class A
Lens mount cap, Operating instructions
XCI-SX1/V3
11
Intelligent
Rear Panel/Connector Pin Assignments
⑥
6
4
Digital Interface
IEEE1394b
15
3
2
9
10
14
8
13
1
7
12
6
⑪
qa
DC IN
⑫
qs
⑬
qd
⑭
qf
Pin No.
1
2
3
4
⑪
SERIAL
Camera Link
Non-TV Format
TV Format
Colour Model
B/W Model
Accessories
3CCD Colour
Video Camera
Color Camera Block
POWER
RESET STATUS
MODE
⑧
8
⑨
9
1
4
3
2
Pin No.
5
6
7
8
Signal
NC
RDNC
NC
MODE switches
Note
If either of these switches is set to the right side, the camera
doesn't start normally.
⑩
q;
6
Signal
TD+
TD-
RD+
NC
For service use. Both switches are set to the left side as the
factory setting.
LAN
5
Color PTZ Model
1 2 3 4
11
MONITOR
LAN connector
You can connect a LAN cable to this connector to output a video
signal to the host device.
⑦
7
5
12
⑩
87654321
⑫
POWER LED
Lights in green when power is input.
⑥
MONITOR (monitor output) connector (15-pin)
You can connect a monitor cable to this connector to display an
image on a multiscan monitor supporting SXGA resolution.
Note
If you connect a multiscan monitor that does not support SXGA
resolution, an image may not be displayed.
Pin No.
1
2
3
4
5
6
7
8
⑦
Signal
R output
G output
B output
NC
Ground
Ground
Ground
Ground
Pin No.
9
10
11
12
13
14
15
⑬
STATUS LED
Lights in red when the BIOS is starting up.
⑭
RESET switch
Push to restart the camera.
Signal
NC
Ground
NC
NC
H output
V output
NC
Connecting the cables
⑧
1
⑧ ⑧6
7
⑧
2
USB connector
You can connect a USB mouse/keyboard to this connector to
contol a camera.
Pin No.
1
2
⑧
Signal
VBUS
D-
Pin No.
3
4
Signal
D+
Ground
DC IN (DC power input) connector (12-pin)
You can connect a CCXC-12P05N camera cable to input the +12
V DC power supply. The pin configuration of this connector is as
follows.
Pin No.
1
2
3
4
5
6
7
⑨
Signal
Pin No.
Ground
8
+12 V DC
9
Ground
10
ISO output +
Ground
11
TTL input
12
TTL output
Signal
Ground
ISO output Exposure
pulse output
Triger pulse input
Ground
SERIAL connector (6-pin)
You can connect a serial cable to this connector to control a camera from a camera control device (e.g., PC).
Pin No.
1
2
3
Signal
TXD (RS-232C)
RXD (RS-232C)
Ground (RS-232C)
*XCI-SX1 : NC
XCI-V3 : TTL output
XCI-SX1/V3
Pin No.
4
5
6
⑧
3
Signal
ISO output +
ISO output NC/TTL output*
⑧⑧⑧
q;
8
⑧
4
9
⑧
5
⑧
⑧
⑧
⑧
⑧
Monitor cable
USB cable
LAN cable
Camera cable
Serial cable
⑧
⑧
⑧
⑧
⑧
MONITOR connector
USB connector
DC IN connector
SERIAL connector
LAN connector
Connect the camera cable to the DC IN connector.
Also, if needed, connect the LAN cable to the LAN connector, the
monitor cable to the MONITOR connector, the serial cable to the
SERIAL connector, and the USB mouse/keyboard to the USB
connector respectively.
When you connect the monitor cable, turn the two fastening screws
to secure the cable tightly.
Connect the other end of the camera cable to the DC-700/700CE
and the other end the camera. Also, if needed, connect the LAN
cable to the host device, and the monitor cable to the monitor, and
the serial cable to the camera control device.
Note
Make sure to supply power to the camera module and confirm
that the camera module is operating before inputting a trigger
signal. If you input external signals to a camera module without
the power supplied, this may cause a malfunction of the camera
module.
Trigger Mode
The amplitude level is the measure of central tendency
terminated with 10 kΩ.
4.0 to 4.5 V
0V
This value depends on
the shutter settings.
Binning Mode
When selecting Trigger Width
• 1 X 2 (V-binning) mode
In this mode the frame rate almost doubles and the data
volume becomes half by adding two vertical lines.
When the shutter speed
is set, the sensitivity almost doubles.
• 2 X 1 (H-binning) mode
The mode is set to trigger pulse width detection mode.
The following is the formula for the shutter speed T[s]:
T[s] = Trigger width + 6us
You can also set the following on the SHUTTER screen in the
GUI application for camera settings:
• Trigger polarity
This is set to select a trigger input polarity for the camera.
This function is to delay trigger input to this unit, so the
exposure start time can be delayed until the set time.
You can fine adjust the capture timing without changing the
camera position even after the camera is installed.
• Software trigger function
A trigger is generated within this unit to capture a still image at
any timing.
The voltages and pulse widths are values that are measured by
the DC IN (12-pin) and SERIAL (6-pin) connectors on the rear of
the camera.
• Trigger input (DC IN 12-pin connector)
This mode can be set on the HIGH RATE SCAN screen in the
GUI application for camera settings.
In this mode, the desired rectangle area is read out, and the
redundant image area is transmitted at high speed to raise the
frame rate. The read out area can be set separately as effective
image area is vertically and horizontally. For the XCI-SX1, the effective image area is vertically divided into 32 areas and
horizontally divided into 10 areas. For the XCI-V3, the effective
image area is vertically divided into 16 areas and horizontally
divided into 10 areas.
The tables below show approximate frame rate values when the
high rate scan mode is used.
External Control Command
The XCI-SX1 can be controlled externally from a host device via
a serial communication and telnet using such
communication softwares as “HyperTerminal" or "Tera Term."
0 to 0.5 V
2 s or more
XCI-SX1/V3
Color PTZ Model
4.5 to 5.0 V (XCI-SX1)
4.5 to 24 V (XCI-V3)
High Rate Scan Mode
Color Camera Block
Input Specifications
In this mode the frame rate and sensitivity almost double and
the data volume becomes 1/4 by adding two vertical lines and
two horizontal pixels.
Moreover, when the shutter speed is set, the sensitivity
almost doubles again.
3CCD Colour
Video Camera
Trigger delay setting range:
[0 to 4 (sec)] (In units of 1ms)
• 2 X 2 (HV-binning) mode
Accessories
• Trigger delay function
In this mode the sensitivity almost doubles and the data
volume becomes half by adding two horizontal pixels.
As the horizontal synchronization signal frequency is the same
as when in normal mode, the frame rate doesn't change.
TV Format
B/W Model
Colour Model
Select the shutter speed from the following:
[2, 1, 1/15, 1/30, 1/60, 1/120, 1/250, 1/500, 1/1000, 1/2000,
1/4000, 1/10000, 1/25000, 1/50000, Trigger Width] (sec)
This mode can be set on the HIGH RATE SCAN screen in the
GUI application for camera settings.
This mode is used to increase the frame rate and/or sensitivity
by adding pixels in both vertical and horizontal directions.
Select one of the following modes depending on the binning
method.
Non-TV Format
This mode can be set on the SHUTTER screen in the GUI
application for camera settings. In this mode video signals
begin to accumulate by synchronizing with external trigger
input.
The video signals are output after the exposure is finished.
The high-speed movement of objects can be captured with vivid
clarity in this mode. Set the shutter speed in accordance with
the recording conditions.
Digital Interface
IEEE1394b
Camera Link
This mode can be set on the SHUTTER screen in the GUI
application for camera settings.
For the XCI-SX1, output of all individual video signals [1280 (H) x
1024 (V)] is at 15 frames per second as continuous video.
For the XCI-V3, output of all individual video signals [640 (H) x
480 (V)] is at 60 frames per second as continous video.
Continuous normal images can be captured in this mode.
When you set the shutter speed higher, you can capture the
high-speed movement of objects with vivid clarity.
Intelligent
• Exposure output (DC IN 12-pin connector)
Normal Mode
13
Intelligent
Digital Interface
IEEE1394b
Connection Diagram
Camera Link
XCI-SX1/XCI-V3
USB mouse/keyboard
Non-TV Format
Monitor
C-mount lens
XCI-SX1
XCI-V3
Host device (PC, etc.)
Abnormal current
GND2
GND1
TV Format
Colour Model
B/W Model
Ground potential difference
12P (M)
GND1
Abnormal current
Device for camera control
(PC, etc.)
Color Camera Block
3CCD Colour
Video Camera
Accessories
Recommended lens for the XCI-SX1: High-resolution e-mount lens
Color PTZ Model
14
Ground potential difference
Power supply
(DC-700 camera adaptor)
Connection Diagram
Intelligent
Digital Interface
IEEE1394b
Camera Link
Non-TV Format
TV Format
B/W Model
Colour Model
Accessories
3CCD Colour
Video Camera
Color Camera Block
Color PTZ Model
15
Connection Diagram
Intelligent
IEEE1394b
Digital Interface
Camera Link
Non-TV Format
CCD DIGITAL CAMERA MODULE
XCD-U100 (B/W)
XCD-U100CR (RAW Colour)
XCD-SX90 (B/W)
XCD-SX90CR (RAW Colour)
XCD-V60 (B/W)
XCD-V60CR (RAW Colour)
*1
IEEE-1394b
Digital
Output
Progressive
Scan
Square
Pixels
Partial Long Normal
Scan Exposure Shutter
*2
1/1.8 Type 1/3 Type
C
UXGA SXGA
VGA
Output
Output
Output
CCD Nega Posi
Iris Reversal
B/W
RAW
Color
CCD
CCD
Lens Mount
External
Trigger
Shutter
One
Shot
*1:XCD-U100/U100CR
*2:XCD-SX90/SX90CR/V60/V60CR
Connection Diagram P34
Accessories
TV Format
Colour Model
B/W Model
Outline
The six models of the XCD-series digital camera modules
(Black and white models and RAW Colour models)
employing the IEEE1394b-2002 standard are equipped with
quality digital camera features.
Although it is compact, the camera allows high-speed
image transfer and daisy chain connection with two
IEEE1394b connectors. The camera also has versatile
features such as hardware preprocessing in the camera that
reduces the load of image processing in a PC, bus
synchronization, and broadcast delivery of commands.
The XCD-series digital output cameras conforming to the
IIDC 1.31 protocol take full advantages of IEEE1394
capabilities.
Features
Color Camera Block
3CCD Colour
Video Camera
The image device, output frame rate and resolution of the cameras
Color PTZ Model
The camera settings for all the cameras connected to the same
bus can be changed at the same time. For example, the gain
or shutter speed is set to the same value on all the cameras,
or exposure starts on all the cameras simultaneously using a
software trigger.
■Memory channel
The memory channel allows storage of up to 15 sets of camera
settings such as gain and shutter.
■Bulk trigger mode
The Bulk trigger mode allows output of multiple images with
a shot of a trigger signal. Each image is shot with the camera
settings stored in the memory channel. Up to 15 image settings
are possible.
■Memory shot
■High image quality, high-speed image output
16
■Broadcast delivery of commands
are as follows:
• XCD-V60/V60CR: 1/3-type PS IT CCD,
90 fps, VGA
• XCD-SX90/SX90CR: 1/3-type PS IT CCD,
30 fps, SXGA
• XCD-U100/U100CR:1/1.8-type PS IT CCD,
15 fps, UXGA
The image exposed from the sensor is stored in the camera’s
built-in memory. The stored image can be read out using a
command from the host PC when required.
XCD-U100
XCD-SX90
XCD-V60
XCD-U100CR XCD-SX90CR XCD-V60CR
Standard image 1,600 X 1,200
size (H X V)
(UXGA)
Bit
Mono8/
Raw8
8 frames
length Mono16/ 4 frames
Raw16
1,280 X 960
(SXGA)
640 X 480
(VGA)
13 frames
54 frames
6 frames
27 frames
■Daisy chain connection
The camera is equipped with two IEEE1394b connectors that
support connection of multiple cameras. As the power can be
supplied from a 12-pin connector (EIAJ), the camera achieves
daisy chain connection without limitation of power supply capacity
so that a simple image processing system with multiple cameras
can be developed.
■Hardware preprocessing
The camera is equipped with hardware LUT (Lookup Table).
The black and white models are also equipped with 3 x 3 pixel
matrix operation.
■Bus synchronization
The cameras connected to the same bus automatically operate in
synchronization with the 1394 bus, without using an external sync
signal. The exposure timing on multiple cameras is synchronized
correctly via the IEEE1394b cable only.
XCD-U100/U100CR/SX90/SX90CR/V60/V60CR
■Partial scan
Partial scan clips a required angle of view (area) from the entire
screen to be read out. As a part of the image is read out, the unit
takes advantage of reduced image data and high-speed transfer.
The minimum clipping unit is 32 pixels X 24 lines.
■Binning
Binning increases the sensitivity and frame rate based on mixing
the pixel data.
■9-pin connector with fixing screws
■Low power consumption, vibration-resistant structure, and
compact size
■IIDC Ver.1.31 protocol compliant
Intelligent
Dimensions
Accessories
■ Compact camera adaptor
•DC-700 00CE
26
•CCXC-12P02N
•CCXC-12P05N
•CCXC-12P10N
•CCXC-12P25N
2-M3, depth 4
Digital Interface
IEEE1394b
Camera Link
■ 12-pin camera cable (CE standard)
(2 m)
(5 m)
(10 m)
(25 m)
■ Tripod adaptor
13
•VCT-ST70I
65.5
44
57.5
50
IEEE-1394.b connector
(fixing screws)
33
8
12-pin connector
26
13
Non-TV Format
4-M3, depth 4
TV Format
B/W Model
Colour Model
Unit: mm
Specifications
XCD-U100
Image sensor
Effective lines /Output image size
Unit Cell size (H x V)
1/1.8-type progressive scan IT transfer CCD
1,600 x 1,200 (UXGA)
4.4 µm x 4.4 µm
2 lx
F1.4 Gain: +24dB
Mono 8: 8bits/pixel
Mono 16: 10bits/pixel
XCD-SX90
XCD-SX90CR
XCD-V60
XCD-V60CR
1/3-type progressive scan IT transfer CCD
1,280 x 960 (SXGA)
640 x 480 (VGA)
3.75 µm x 3.75 µm
7.4 µm x 7.4 µm
20 lx
F1.4 Gain: +18dB
Raw 8: 8bits/pixel
Raw 16: 10bits/pixel
Color PTZ Model
XCD-U100/U100CR/SX90/SX90CR/V60/V60CR
Color Camera Block
2 lx
20 lx
2 lx
20 lx
F1.4 Gain: +24dB
F1.4 Gain: +18dB
F1.4 Gain: +24dB
F1.4 Gain: +18dB
Mono 8: 8bits/pixel
Raw 8: 8bits/pixel
Mono 8: 8bits/pixel
Raw 8: 8bits/pixel
Mono 16: 10bits/pixel
Raw 16: 10bits/pixel
Mono 16: 10bits/pixel
Raw 16: 10bits/pixel
C mount
IEEE1394b-2002 x2, bilingal (with fixing screw)
IIDC 1394-based Digital Camera Specification Version 1.31 compliant
800 / 400 Mbps
15 fps
30 fps
90 fps
Auto/Manual
Auto/Manual
Auto/Manual
Auto/Manual
Auto/Manual
Auto/Manual
(0 to 24 dB)
( 0 to 18 dB)
(0 to 24 dB)
( 0 to 18 dB)
(0 to 24 dB)
( 0 to 18 dB)
1/100,000 to16 s (Absolute value control possible)
Edge detection (Mode 0), Exposure time setting by trigger width (Mode 1), Software trigger (IEEE1394 bus),
Bulk trigger, Sequential trigger, Trigger inhibition setting, Trigger/strobe delay setting
16 MB
15 sets
Using IEEE1394 BUS, Camera software setting
Partial scan, binning, LUT, 3x3 filter (For Black and white models), Optical filter (Colour model only), AWB (Colour model only)
DC +8 to +30 V (from IEEE1394b 9pin cable or 12pin connector: 12pin : Priority)
3W (+12 V)
2.8 W (+12 V)
44 (W) x 33 (H) x 57.5 (D) mm (not including projecting parts)
140 g
-5 to +45 ºC
-30 to +60 ºC
0 to +40 ºC
20 to 80% (Non condensation)
20 to 95% (Non condensation)
10 G (20 to 200 Hz)
70 G
56270Hrs (Approx. 6.4 years)
58260Hrs (Approx. 6.7 years)
57170Hrs (Approx. 6.5years)
UL60950-1+CSA C22.2 No.60950.1, FCC/ICES-003: Class A, CE: EN61326, AS/NZ: EN55022, VCCI: Class A, MIC
Lens mout cap (1), Operating Instructions (1)
3CCD Colour
Video Camera
Minimum illumination
Bit length
Lens mount
Digital interface
Protocol
Transfer rate
Frame rate
Gain
Electronic shutter
External trigger shutter
Image Memory
Memory Chanel
Broadcast delivery of commands
Functions
Power requirements
Power consumption
Dimensions
Mass
Operation temperature
Storage temperature
Performance guarantee temperature
Operation humidity
Storage humidity
Vibration resistance
Shock resistance
MTBF
Regulatory compliance
Supplied accessories
XCD-U100CR
Accessories
17
Intelligent
Spectral Sensitivity Characteristics
IEEE1394b
●XCD-V60CR
Spectral sensitivity (relative response) parameters
(without lens and light source parameters)
Spectral sensitivity (relative response) parameters
(without lens and light source parameters)
Relative sensitivity
Relative sensitivity
1.0
G
0.9
R
0.8
B
0.7
0.6
Camera Link
Digital Interface
●XCD-V60
0.5
0.4
0.3
0.2
0.0
Accessories
400
450
500
Wavelength (nm)
●XCD-SX90
550
600
650
700
650
700
650
700
Wavelength (nm)
●XCD-SX90CR
Spectral sensitivity (relative response) parameters
(without lens and light source parameters)
Spectral sensitivity (relative response) parameters
(without lens and light source parameters)
Relative sensitivity
Relative sensitivity
1.0
TV Format
Colour Model
B/W Model
Non-TV Format
0.1
R
0.9
G
0.8
0.7
B
0.6
0.5
0.4
0.3
0.2
0.1
0.0
400
450
500
●XCD-U100
550
600
Wavelength (nm)
Wavelength (nm)
●XCD-U100CR
Spectral sensitivity (relative response) parameters
(without lens and light source parameters)
Relative sensitivity
Spectral sensitivity (relative response) parameters
(without lens and light source parameters)
Relative sensitivity
1.0
R
3CCD Colour
Video Camera
0.9
G
0.8
B
0.7
0.6
0.5
Colour PTZ Model Colour Camera Block
0.4
18
0.3
0.2
0.1
0.0
Wavelength (nm)
XCD-U100/U100CR/SX90/SX90CR/V60/V60CR
400
450
500
550
Wavelength (nm)
600
GAIN
➁ Auxiliary
holes (top)
➂ Reference
holes (bottom)
➃ Reference
holes (bottom)
Shutter
Attach any C-mount lens or other optical equipment.
Note
The lens must not project more than 10 mm from the lens mount.
Lens mount face
The relationship between the parameter and the exposure time is
given by the following formulas, where:
➁ Auxiliary holes (top)
These precision screw holes are for locking the camera module.
Locking the camera module into these holes secures the optical axis
alignment.
Four screw reference holes ③ can be used as the tripod adaptor
screw holes, too. Screw the VCT-ST70I tripod adaptor into the four
screw holes when you use a tripod.
If P= 3
E = 0.00001
If 4 <= P <= 1000
E=
P2
1000000
①
If 1000 <= P <= 1150
Rear and Connector Pin Assignments
P = Parameter (003h to 47Eh)
E = Exposure time (s)
E = (P - 1000) x 0.1 + 1
examples
3 (003h) :
32 (020h) :
100 (064h) :
1000 (3E8h) :
1010 (3F2h) :
1150 (47Eh) :
10 µs (1/100000)
1 ms (1/1000)
10 ms (1/100)
1s
2s
16 s
For long exposure times
When the exposure time is longer than the frame period, the camera
enters the long exposure time mode, and the actual frame rate is
reduced in accordance with the exposure time.
3CCD Colour
Video Camera
When Auto Shutter is selected, the exposure time is adjusted
automatically, based on the brightness of the subject. At this time,
the reference level (target point) is set in the AutoExposure register.
Accessories
Setting
—➁
TV Format
B/W Model
Colour Model
➂ Reference holes (bottom)
Non-TV Format
This camera allows both Manual and Auto Shutter settings.
The variable range extends from 10 microseconds to 16.0 seconds;
relative values are indicated by a 12-bit integer, and absolute
values are indicated using a 32-bit floating point value.
① Lens mount (C-mount)
Digital Interface
IEEE1394b
Camera Link
Both Manual and Auto Gain settings are available with this camera.
The variable range extends from 0 to 24 dB for the black and white
models or from 0 to 18 dB for the Colour models. The camera is
designed so that the gain can be subdivided and set by 0.0359 dB.
At the factory default setting, the gain is set to 0 dB. When Auto Gain
is selected, the gain is adjusted automatically, based on the brightness of the subject. At this time, the reference level (target point) is
set in the AutoExposure register.
① Lens mount (C-mount)
10 mm less
Intelligent
Location and Function of Parts and Controls
➃ IEEE1394b connectors
Pin No.
1
2
3
4
5
Signal
TPB-
TPB+
TPA-
TPA+
TPAG
Pin No.
6
7
8
9
Colour Camera Block Colour PTZ Model
Connect an IEEE1394b camera cable (not supplied) to this connector.
Signal
VG
NC
VP
TPBG
➄ 12-pin I/O connector
When power from the IEEE1394b connector is insufficient, power is
supplied through this connector.
Connect a camera cable such as the CCXC-12P05N to this connector.
Pin No.
1
2
3
4
5
6
Signal
Power GND
Power IN
ISO GND
Strobe OUT
GPIO OUT 1-
GPIO OUT 1+
Pin No.
7
8
9
10
11
12
Signal
GPIO IN 2
GPIO OUT 2GPIO OUT 2+
GPIO IN 1
Trigger IN
ISO GND
XCD-U100/U100CR/SX90/SX90CR/V60/V60CR
19
Intelligent
IEEE1394b
Digital Interface
Camera Link
Trigger
Trigger shutter is useful for capturing images in response to a
trigger that starts the exposure to match a preset timing. It can also
be used to capture an image using multiple cameras with the same
timing.
When a trigger shutter is used, the required trigger is input via the
12-pin connector on the rear panel. The input signal is a 5 to 24 V
negative pulse.
As the input connector is pulled inside of the camera, the camera
can receive a trigger only by short-circuiting the input pin and ISO
(GND) pin.
To connect to ground, use a device having a minimum pulse width of
10 microseconds and an input current of 0.5 mA or more.
Non-TV Format
TV Format
Colour Model
B/W Model
Accessories
3CCD Colour
Video Camera
Color Camera Block
Trigger
Exposure
Setting in Memory
Channel 1
High level: 5 to 24 V DC
Low level: 0 to 0.44 V DC
0 V DC
Trigger mode 0
Trigger mode 0 starts exposure by detecting the falling edge of a
trigger signal. The exposure time is determined by the shutter
parameter.
Trigger
Setting in Memory
Channel 2
As this camera is equipped with 15 memory channels, a repeat
pattern of up to 15 image shootings can be set for trigger mode 14
or 15.
The number of the repeat patterns to be set in one cycle can be
determined by the parameter of the trigger mode.
Memory channel 0 is not used for the Bulk trigger mode and the
Sequential trigger mode.
The following features are loaded from the memory to be set for
shooting:
• Brightness • Sharpness • Saturation • White balance • Hue
• Gamma • Shutter • Gain • Pan/Tilt • Optical Filter
Note that the Auto mode of White Balance, Shutter and Gain
cannot be set.
Also note that Pan/Tilt is set only when the current video mode is the
same as the video mode selected when the setting has been stored
in the memory channel.
This camera can also be used with a software trigger that issues the
trigger signal via software command. Trigger modes 0, 1, 14 and 15
can be used with software triggers.
Exposure
Strobe Control
Trigger mode 1
Color PTZ Model
Trigger mode 15 allows shooting of images by loading the camera
settings prestored in memory channels in sequence each time a
trigger is input.
Note
This camera supports four trigger modes: 0, 1, 14 and 15.
20
Trigger mode 15 (Sequential trigger mode)
Trigger mode 1 controls the exposure time using the width of the
trigger signal pulse. When trigger mode 1 is used, there is actually no
limit to the exposure time.
Trigger
Exposure
A strobe control signal is assigned in the 12-pin connector. This
allows direct command of light-emission from the strobe connected
to the camera and controls the light-emission timing and the signal
width.
The output terminal is of the open-collector type and should be
pulled at the strobe side. A strobe that emits light by shortcircuiting the input to ground can be connected to the camera
directly.
Light-emission
timing
Width
Trigger mode 14 (Bulk trigger mode)
Trigger mode 14 allows shooting of multiple images with different
camera settings using only one trigger signal. The camera settings
should be prestored in memory channels.
Strobe output
signal
Trigger
Delay
Note
Exposure
Setting in Memory
Channel 1
Setting in Memory
Channel 2
Use the following conditions:
Recommended pull-up resistor: 4.7 kΩ
Recommended pull-up voltage: 5 V
The camera is equipped with a protective resistor of 220Ω. If the
above conditions prove difficult in use, check the output voltage and
determine the external pull-up resistor. The camera is capable of
outputting a signal of about 10 microsecond width, although the rise
time depends on the pull-up resistor.
XCD-U100/U100CR/SX90/SX90CR/V60/V60CR
This feature controls the Colour density.
This feature controls the white balance by setting the R and B
levels relative to the G level.
The camera also supports the Auto white balance by which the
camera automatically adjusts the white balance.
The camera is equipped with Memory Shot that temporarily stores an
image in the frame memory inside the camera and transfers it later.
When multiple cameras are connected in the same bus, all the
cameras may not output images at the same time due to the
restriction of 800 Mbps band. Memory Shot may resolve this
inconvenience.
When exposure starts, each camera stores an image in the frame
memory without allocating the isochronous resource.
When outputting, each PC outputs the image from the camera
allocating the isochronous resource.
The number of images to be stored depends on the video mode.
Optical Filter
Patterns of Bayer arrangement are as follows:
Pattern 0
B
R
G
Pattern 1
B
G
G
R
The normal1394 communication method specifies the node number
at the host side so that only a specified camera responds to the
command.
If the node number is set to 63, all the cameras connected to the
same bus can receive the command simultaneously, i.e., only one
command issued from the host can control multiple cameras at the
same time.
All the commands including the video mode setting and the feature
control are capable of broadcasting except the block writing
command.
When setting different types of cameras using a broadcast
command, be careful not to issue a command that the cameras do
not support.
Pattern 2
R
G
G
B
G
R
B
G
1394 bus synchronization includes up to 1H cycle jitter. Hardware
external synchronization will ensure greater accuracy.
3CCD Colour
Video Camera
Timing used to start exposure is synchronized with the 1394 bus
time cycle register.
If cameras are connected to the same bus, they are automatically
synchronized in a 1394 bus operation. As 800 Mbps band
restriction can affect the synchronization, you must set the video
mode in which the cameras can transmit a video signal at the same
time.
1394 synchronization does not work in long exposure mode and
Partial scan mode. In a long exposure, the exposure time is set
longer than the image transmission cycle.
Accessories
Pattern 3
1394 Bus Synchronization
TV Format
B/W Model
Colour Model
G
Broadcast Command
Non-TV Format
You can change the Bayer patterns by moving the starting position
from which to output pixel data by one position up, down, right, or
left.
Digital Interface
IEEE1394b
Camera Link
White Balance (Colour models only)
Memory Shot
Intelligent
Saturation (Colour models only)
Color Camera Block
Color PTZ Model
XCD-U100/U100CR/SX90/SX90CR/V60/V60CR
21
Intelligent
IEEE1394b
Digital Interface
Camera Link
CCD DIGITAL CAMERA MODULE
XCL-5000 (B/W)
XCL-5005 (B/W)
XCL-5005CR (Colour)
CL
2/3 Type
Output
CCD
Normal
Shutter
Mode 2
(Reset Mode)
External
Trigger Shutter
Scan
Pixels
*1
*1
5 MEGA Partial
Scan
Output
*1
*2
White
Balance
White
Balance
White
Balance
B/W
Control
*1
RGB
RAW
Outline
Features
The XCL-5000 is monochrome camera module with a
2/3 type 5-megapixel CCD and a compact Camera Link
connector. The new XCL-5005 series of cameras are based
on the XCL-5000 concept. Like the XCL-5000, XCL-5005
series cameras incorporate a 5-megapixel 2/3 type CCD that
produces detailed images. The XCL-5005 is a monochrome
camera, while the XCL-5005CR outputs 24-bit RGB or
RAW Colour data that enables true Colour reproduction.
Both models are compatible with the compact Camera Link
standard (non-PoCL)/PoCL*, are equipped with EIAJ 12-pin
connectors, and feature a selectable power supply (12-pin
power supply has priority). The cameras are equipped with
new functions such as selectable image output for various
bit lengths, as well as hardware-based pre-processing
functions and partial scan function, which are found only
on digital cameras. High resistance to shock and vibration
makes these camera modules ideal for machine vision
and other applications that require high-definition image
reproduction.
*PoCL (Power over Camera Link)
XCL-5000series
■2/3-type 5 Mega pixel CCD
■Effective picture elements: 2456 (H) X 2058 (V)
■Frame rate: 15fps
■Partial scan function (Vertical random read scan)
■Normal /External trigger shutter
■C mount
■High Shock and Vibration Resistance
■RS-232C Control
XCL-5000/5005
■Read mode: Normal/Binning
■Outline detection, Outline Emphasis
■Binarization
■3X3 pixel matrix operation
■Flip-Flop (XCL-5005 only)
XCL-5005CR
■One-push white balance function
■Switching Colour output (RAW Colour or RGB)
■Colour Bar Chart
XCL-5005seires
■CameraLink: Standard (non-PoCL) /PoCL
■Switching an Output tap (1TAP/2TAP)
■Various mode setting
• Shutter speed
• Gamma
• Partial scan
26
3CCD Colour
Video Camera
Dimensions
44
Color Camera Block
4-M3 depth 4
Digital output CameraLink Base Configuration
13
50
44
XCL-5000
XCL-5005
XCL-5005CR
XCL-5005CR
8
57.5
8/10/12bit 80MHz
8/10/12bit 80MHz
8/10/12bit 40MHz
24bitRGB 80MHz
Accessories
■ Compact camera adaptor
●DC-700/700CE
26
■ 12-pin camera cable (CE standard)
Unit: mm
13
50
●CCXC-12P02N
●CCXC-12P05N
●CCXC-12P10N
●CCXC-12P25N
■ Tripod adaptor
●VCT-ST70I
22
1TAP
1TAP
2TAP
1TAP
* PoCL : (Power Over Camera Link)
4-M3 depth 4
Color PTZ Model
Long
Exposure
Connection Diagram P34
Ø28.7
Non-TV Format
TV Format
Colour Model
B/W Model
Lens Mount
One-Push Fixed Manual RS232C
*1:XCL-5005CR
*2:XCL-5005, XCL-5000
Accessories
C
Progressive Square
XCL-5000/5005/5005CR
(2 m)
(5 m)
(10 m)
(25 m)
Intelligent
分光感度特性グラフ
Spectral
Sensitivity Characteristics
●XCL-5000/XCL-5005
●XCL-5005CR
Relative sensitivity
Relative sensitivity
G
Digital Interface
IEEE1394b
Camera Link
1.0
0.9
0.8
0.7
0.6
0.5
0.4
0.3
0.2
0.1
0
400
R
B
450
500
600
650
700
Wavelength (nm)
Non-TV Format
Wavelength (nm)
550
Type
XCL-5000
B/W
Image device
XCL-5005
XCL-5005CR
B/W
Colour
2/3 type Progressive Scan IT transfer CCD
Effective picture elements (H x V)
2456 (H) x 2058 (V)
Effective lines (H x V)
2448 (H) x 2050 (V)
Cell size
3.45 (H) µm x 3.45 (H) µm
Lens mount
C mount
Sync system
Internal
Video output
Digital output
LVDS 12 bits/10 bits/8 bits switching
RAW data/RGB data switching, RAW data: LVDS 12 bits
3760 steps (12bits)
Reference pedestal level
240 steps (12bits)
Output data clock
15 Hz
Sensitivity
Minimum illumination
400 lx F5.6 (0 dB)
2000 lx F5.6 (0 dB)
1 lx (GAIN +18dB, F1.4)
8 lx (GAIN +18dB, F1.4)
Gain
Gamma
0 to +18 dB
OFF/ON (Mode 0 to 5)
Read mode
OFF/ON (Mode 0 to 7)
Normal/Bining/Partial scan
Frame rate
Output data clock
Normal/Partial scan
15 fps
1Tap: 80 MHz
1Tap: 80 MHz/2Tap: 40 MHz 1Tap/ 2Tap switching
(However, only 1TAP when RGB data output of XCL-5005CR)
Shutter mode
Normal/External trigger shutter
Normal shutter speed
2 to 1/10,000s
External trigger shutter
2 to 1/10,000s
ON/OFF (Vertical 16 Zone)
Bining
ON/OFF
ON/OFF
(Starting Position: per 5 lines, Area: per line)
(Starting Position: per 10 lines, Area: per 2 lines)
Vertical (1 x 2)
-
-
PRESET/MANUAL/ONE PUSH (AUTO)
White balance
DVAL/EXPOSURE/GND output (selectable)
Edge detection, Edge emphasis
yes
-
Binarize
yes
-
Matrix
yes
Power requirements
12V DC (Range: +10.5 to 15V with DC IN connector)
Power consumption
3.6 W
Dimensions (W x H x D)
Mass
12V DC (Range: +10.5 to 15V with DC IN connector/digital interface connector)
3.8 W
44 (W) x 44 (H) x 57.5 (D) mm
Approx 135g
Approx 130g
-5 to +45 ºC
Storage temperature
-30 to +60 ºC
Performance guarantee temperature
Operating humidity
0 to +40 ºC
20 to 80 % (no condensation)
Storage humidity
20 to 95 % (no condensation)
Vibration resistance
10 G (20 Hz to 200 Hz, 20 minutes for each direction-X, Y, Z)
Shock resistance
MTBF
Regulatory compliance
Supplied accessories
70 G
67,900Hrs (approx. 7.75years)
75,300Hrs (approx. 8.6 years)
UL60950-1+CSA C22.2 No.60950.1, FCC/ICES-003 : Class A, CE : EN61326, AS/NZ : EN61326, VCCI : Class A, MIC
Lens mout cap(1) Operationg Instructions(1)
XCL-5000/5005/5005CR
Color PTZ Model
Operating temperature
Color Camera Block
Signal output
3CCD Colour
Video Camera
Partial Scanning
/10 bits/8 bits switching, RGB data:LVDS R/G/B 8 bits
Accessories
Reference video output level
TV Format
B/W Model
Colour Model
Specifications
23
Intelligent
Location and Function of Parts and Controls
Digital Interface
IEEE1394b
① Lens mount (C-mount)
② Reference holes (at the top)
Camera Link
Non-TV Format
Attach any C-mount lens or other optical equipment.
Note
The lens must not project more than 10 mm from the lens mount.
Lens mount shoulder
TV Format
Colour Model
B/W Model
Accessories
➁ Reference holes (at the top)
➂ Reference holes/Tripod screw holes (at the bottom)
These precision screw holes are for locking the camera module.
Locking the camera module into these holes secures the optical
axis alignment. You can install the camera on a tripod. To install
on a tripod, you will need to install a tripod adaptor VCT-ST70I
to the camera on the reference holes. 10 mm or less Lens mount
shoulder.
Rear Panel
Color Camera Block
3CCD Colour
Video Camera
①
① DC IN (DC power input)
connector (12-pin)
② DIGITAL IF (Interface)
connector (26-pin)
②
➀ DC IN (DC power input) connector (12-pin)
You can connect a CCXC-12P05N camera cable to input the +12
V DC power supply. If you use a camera module interface board
with support for PoCL, you can operate the camera
without using this connector. The pin configuration of this
connector is as follows.
XCL-5000/5005/5005CR
Connector Pin Assignments
DC IN (DC Power input) 12-pin connector
➀ Lens mount (C-mount)
10 mm or less
Color PTZ Model
You can connect a CameraLink cable to this connector to
control a camera module from a host device utilizing the serial
communication protocol while outputting a video signal from the
camera module. If you use a camera module interface board with
support for PoCL, you can also supply power from this connector.
You can input the external trigger signal via the 26-pin connector
and operate a camera module in the external trigger mode. The
pin configuration of this connector is as follows.
Note
When you operating a camera module by inputting an external
trigger signal via the 26-pin connector, make sure to input
external trigger signal that meet the following specifications to
both the two pins.
③ Reference holes/
Tripod screw holes
(at the bottom)
24
➁ DIGITAL IF (Interface) connector (26-pin)
Pin No.
1
2
3
4
5
6
Signal
Ground
+12 V DC
Ground
NC
Ground
NC
Pin No.
7
8
9
10
11
12
Signal
NC
Ground
NC
Signal* output
Trigger pulse input
Ground
* Signal output from the Tenth pin of *12 pins connector.
You can select one of the following signals according to the
setting.
Ground/DVAL output/Exposure pules output The default setting
in the factory is Ground.
DIGITAL IF (Interface) connector (26-pin)
Camera Link Base Configuration: 1tap
Pin No.
1
2
3
4
5
6
7
8
9
10
11
12
13
Digital signal
Power supply or Ground*
X0 - output (Signal)
X1 - output (Signal)
X2 - output (Signal)
XCLK - output (Signal)
X3 - output (Signal)
Ser TC+ (Signal)
Ser TFG - (Signal)
TRIG - input (Signal)
NC
NC
NC
INNER_SHIELD (Ground)
Pin No.
14
15
16
17
18
19
20
21
22
23
24
25
26
Digital signal
INNER_SHIELD (Ground)
X0+ output (Signal)
X1+ output (Signal)
X2+ output (Signal)
XCLK+ output (Signal)
X3+ output (Signal)
Ser TC - (Signal)
Ser TFG+ (Signal)
TRIG+ input (Signal)
NC
NC
NC
Power supply or Ground*
* The connection differs depending on the type of camera module
interface board you use.
In the case of PoCL support: Both the 1 st pin and 26 th pin are
POWER (Power supply)
In the case of non PoCL support: Both the 1 st pin and 26 th
pin are INNER_SHELD (Ground)
DVAL/Exposure output specific (only DC IN terminal)
Intelligent
Controlling the camera from the host device
You can control the camera from host device such as a PC.
The following table shows the control functions.
Stated in the voltage of when terminating at more than 10k ohms.
Connecting the cables
② DIGITAL
IF (Interface)
connector
④ Camera Link cable
① DC IN
connector
Trigger signal specifications
①
②
③
④
⑤
DIGITAL IF terminal
Connect the Camera cable to the DC IN connector and the Camera
Link cable to the digital Interface cable respectively. If you use a
camera module interface broad with support for PoCL, you can
operate the camera even it connect the Camera Link cable, turn the
two fastening screws on the connector to secure the cable tightly.
Connect the other end of the Camera cable to the DC-700/700CE
and the other end of the Camera Link cable to the camera module
interface board.
3CCD Colour
Video Camera
Convert the signal which meets the specifications above into LVDS
format (3.3V power drive IC output), and inputs the converted
signal.
Specification for the External Trigger Signal
Amplitude
: LVDS using 3.3 volt IC
Connections : Input a TRIG (-) signal to the 9th pin
: Input a TRIG (+) signal to the 22nd pin
Color Camera Block
Note that the signal level cannot be recognized
correctly by the camera if it does not meet the following conditions.
H level: 1.5 V to 1.7V
L level: 0.8 V to 1.0V
Accessories
Input Impedance: Stated in the voltage determined at more than
10k ohms.
DC IN Connector
DIGITAL IF (Interface) Connector
Camera Cable
Camera Link Cable
Fastening Screws
TV Format
B/W Model
Colour Model
③ Camera cable
DC IN terminal
Non-TV Format
⑤ Fastening
screws
Note
Make sure to supply power to the camera module and confirm
that the camera module is operating before inputting a trigger
signal. If you input external signals to a camera module without
the power supplied, this may cause a malfunction of the camera
module.
Digital Interface
IEEE1394b
Camera Link
Control functions
XCL-5000
XCL-5005
XCL-5005CR
Operating mode
Normal/Trigger
Shutter speed Normal
2 to 1/10000s
Trigger
Trigger edge: 2 to 1/10000s
Trigger puls width: Setting by trigger pulse widht
Gain
0 to +18 dB
Binning
OFF/ON
Partial Scan
OFF/ON
Edge detection, Edge emphasis
OFF/ON
Binarization
OFF/ON
Gamma control
OFF/ON (mode1 to mode 7)
3x3 Image filtering
OFF/ON
Video output switch
12 bits/10 bits/ 8 bits
External trigger input
26 pin connector/ 12 pin connector
Switch output tap
1 Tap
1 Tap/ 2Tap
-
RESET/MANUAL/
White balance ONE PUSH(AUTO)
Switch Colour output
-
RAW data/
RGB data
Polarity: positive
Color PTZ Model
XCL-5000/5005/5005CR
25
CL
1/1.8 Type
Output
CCD
*2
Mode 2
(Non-Reset Mode)
External
Trigger Shutter
Square
Pixels
C
Lens Mount
*2
White
Balance
White
Balance
Control
White
Balance
Scan
*1
Long Normal
Exposure Shutter
*2
B/W RGB
*1:XCL-U1000
*2:XCL-U1000C
Connection Diagram P35
Outline
Dimensions
Features
■1/1.8-type progressive scanning CCD with square pixels
■UXGA image (1,600 x 1,200 pixels) captures video at 15 fps
■High sensitivity
• XCL-U1000 :400 lx at F 5.6
• XCL-U1000C:2,000 lx at F8
■Digital output
• XCL-U1000 :LVDS 10 bit
• XCL-U1000C:LDVS R/G/B 8 bit
■Camera Link standard conformity
■Monitor output
■External trigger shutter : 1/15 to 1/10,000 sec.
■C-mount lens
■Partial scanning
■Binning function (XCL-U1000)
■White balance (XCL-U1000C)
• Auto/Manual/Preset selectable
■Matrix function for accurate Colour reproduction
(XCL-U1000C)
■High shock and vibration resistance
Accessories
■ Compact camera adaptor
●DC-700/700CE
■ 12-pin camera cable (CE standard)
●CCXC-12P02N
●CCXC-12P05N
●CCXC-12P10N
●CCXC-12P25N
(2 m)
(5 m)
(10 m)
(25 m)
■ Tripod adaptor
XCL-U1000/U1000C
Camera body of all models
26
Sony’s new XCL Series equipped with a digital video
interface that conforms to the Camera Link™ industry
standard.
These new cameras enable the capture of high-speed, high
resolution images while simplifying connectivity to
machine-vision systems with its standard 3M MDR 26-pin
cable.
The XCL-U1000 and XCL-U1000C cameras incorporate a
1/1.8-type progressive scan CCD that produce detailed,
UXGA resolution images (1,600 x 1,200 pixels).
Sony’s XCL Series of high-performance and feature-rich
cameras is the ideal solution for today’s wide range of
machine vision applications.
4-M3 depth 4
13
87
56
8
95
103
4-M3 depth 4
26
Non-TV Format
TV Format
Colour Model
B/W Model
Accessories
3CCD Colour
Video Camera
Color Camera Block
Color PTZ Model
Output
One-Push Fixed RS232C Manual
●VCT-ST70I
26
UXGA Partial
44
Intelligent
XCL-U1000 (B/W)
XCL-U1000C (Colour)
Camera Link
Digital Interface
IEEE1394b
CCD DIGITAL CAMERA MODULE
Unit: mm
13
50
Intelligent
分光感度特性グラフ
Spectral
Sensitivity Characteristics
●XCL-U1000
●XCL-U1000C
(Typical Values)
Relative sensitivity
Relative sensitivity
1.0
1.0
0.8
0.8
0.6
0.6
0.4
0.4
0.2
0.2
B
Digital Interface
IEEE1394b
Camera Link
(Typical Values)
R
G
400
500
600
700
800
900
1000
400
450
Wavelength (nm)
500
550
600
650
700
Wavelength (nm)
(Lens characteristics and light source characteristics excluded.)
(Lens characteristics and light source characteristics excluded.)
TV Format
B/W Model
Colour Model
Specifications
XCL-U1000
Type
XCL-U1000C
B/W
Colour
Image device
1/1.8 type Progressive scan IT CCD
Effective picture elements (H x V)
1628 (H) x 1236 (V)
Effective lines (H x V)
1600 (H) x 1200 (V)
Output image size
UXGA
Cell size
4. 4(H) x 4.4 (V) µm
Lens mount
C-mout
Sync system
Internal
Video output
Digital output
LVDS 10 bit
LDVS R/G/B 8bit
Reference video output level
940 steps
235 steps
Reference pedestal level
64 steps
16 steps
Monitor output
(analog output)
Reference video output level: 700 mV HD frequency: 75 kHz positive
VD frequency: 60 Hz positive
Output data clock
Sensitivity
Minimum illumination
15 Hz
400 lx F5.6 (0 dB) 2 lx (GAIN +18dB, F1.4)
2000 lx F8 (0 dB)
0 to +18 dB
OFF/ON
Normal/Binning/Partial scan
Frame rate
Normal/Partial scan
15 fps
Output data clock
36 MHz
Shutter mode
Normal/External trigger shutter
Normal shutter speed
1 to 1/10,000 s
External trigger shutter
4 lx (GAIN +18dB, F1.4)
3CCD Colour
Video Camera
Gain
Gamma
Read mode
Accessories
Digital output
Edge detection mode: 1/15 to 1/10,000 s, Pulse width detection mode: 1 to 1/10,000 s
ON/OFF (Vertical 1/16V to 15/16V)
Vertical (1 x 2)
Detail
ON/OFF ON/OFF
White balance
-
Pre-set/Manual/AWB
Matrix
- ON/OFF
Power requirements
DC12 V
Power consumption
5.5 W
Dimensions (W x H x D)
56 (W) x 44 (H) x 95 (D) mm
250 g
Operating temperature
-5 to +45 ºC Storage temperature
Performance guarantee temperature
Color PTZ Model
Mass
-30 to +60 ºC 0 to +40 ºC
Operating humidity
20 to 80 % (no condensation)
Storage humidity
20 to 95 % (no condensation)
Vibration resistance
10 G (20 Hz to 200 Hz, 20 minutes for each direction-X, Y, Z)
Shock resistance
MTBF
Color Camera Block
High rate scan
Bining
Regulatory compliance
Non-TV Format
0.0
0.0
70 G
49,059 hrs.
UL60950-1+CSA C22.2 No.60950.1, FCC/ICES-003: Class A, CE: EN61326, AS/NZ: EN61326, VCCI: Class A
Supplied accessories
Lens mout cap(1) Operationg Instructions(1)
XCL-U1000/U1000C
27
Intelligent
Location and Function of Parts and Controls
① RS-232C connector (6-pin)
You can connect a senal cable to this connector to control a camera module from a camera control device.
Digital Interface
IEEE1394b
1
① Lens mount (C-mount)
② Reference holes
2
(at the top)
Camera Link
③ DC IN (DC power input) connector (12-pin)
③ Reference holes/
3
Non-TV Format
① Lens mount (C-mount)
Attach any C-mount lens or other optical equipment.
Note
The lens must not project more than 10 mm from the lens mount.
Lens mount shoulder
Accessories
TV Format
Colour Model
B/W Model
10 mm or less
You can connect a CCXC-12P05N camera cable to input the +12
V DC power supply. The pin configuration of this connector is as
follows.
④ DIGITAL IF (Interface) connector (26-pin)
You can connect a digital interface cable to this connector to
control a camera module from a host device utilizing the serial
communication protocol while outputting a video signal from the
camera module. You can input the external trigger signal via the
26-pin connector and operate a camera module in the external
trigger mode. The pin configuration of this connector is as
follows.
Note
When operating a camera module by inputting an external
trigger signal via the 26-pin connector, be careful about trigger
pulse input specifications (DIGITAL IF terminal).
② Reference holes (at the top)
③ Reference holes/Tripod screw holes (at the bottom)
These precision screw holes are for locking the camera module.
Locking the camera module into these holes secures the optical
axis alignment.
You can install the camera on a tripod. To install on a tripod, you
will need to install a tripod adaptor VCT-ST70I to the camera on
the reference holes.
Rear Panel
②
①
6
1
4
3
3CCD Colour
Video Camera
5
5
2
③
Color PTZ Model
Color Camera Block
You can connect a monitor cable to this connector to display an
image on a multiscan monitor supporting UXGA resolution.
Note
If you connect a multiscan monitor that does not support UXGA
resolution, an image may not be displayed.
Tripod screw holes
(at the bottom)
28
② Monitor output connector (15-pin)
XCL-U1000/U1000C
4
10
15
④
3
9
14
2
8
13
1
7
12
6
Connector Pin Assignments
Pin No.
1
2
3
Signal
TXD
RXD
Ground
Pin No.
4
5
6
Signal
NC
NC
NC
Pin No.
1
2
3
4
5
6
7
8
Signal
R output
G output
B output
NC
Ground
Ground
Ground
Ground
Pin No.
9
10
11
12
13
14
15
Signal
NC
Ground
NC
NC
HD output
VD output
NC
Pin No.
1
2
3
4
5
6
Signal
Ground
+12 V DC
Ground
NC
Ground
NC
Pin No.
7
8
9
10
11
12
Signal
NC
Ground
NC
Exposure pulse output
Trigger pulse input
Ground
Pin No.
1
2
3
4
5
6
7
8
9
10
11
12
13
Digital signal
INNER_SHIELD (Ground)
X0- output (Signal)
X1- output (Signal)
X2- output (Signal)
XCLK- output (Signal)
X3- output (Signal)
Ser TC+ (Signal)
Ser TFG- (Signal)
TRIG- input (Signal)
NC
NC
NC
INNER_SHIELD (Ground)
Pin No.
14
15
16
17
18
19
20
21
22
23
24
25
26
Digital signal
INNER_SHIELD (Ground)
X0+ output (Signal)
X1+ output (Signal)
X2+ output (Signal)
XCLK+ output (Signal)
X3+ output (Signal)
Ser TC- (Signal)
Ser TFG+ (Signal)
TRIG+ input (Signal)
NC
NC
NC
INNER_SHIELD (Ground)
11
Intelligent
Trigger Pulse Input Specifications
Connecting the cables
DC IN terminal
(When positive pole is set)
⑨ ⑧
⑦
0 to 0.5 V
⑥
100 s to 1s
④
②
①
(When negative pole is set)
4.5 to 5.0 V
⑤
③
0 to 0.5 V
②
④
⑥
⑧
Digital interface connector
Digital interface cable
Serial cable
Monitor output connector
Connect the other end of the camera cable to the DC-700/700CE
and the other end of the digital interface cable to the camera
module interface board. Also, if needed, connect the other end of the
monitor cable to the monitor and the other end of the serial cable to
the camera control device.
• Input impedance: 10 kΩ or more
DIGITAL IF terminal
When operating a camera module by inputting an external trigger
signal via the 26-pin connector, be sure to input trigger signals that
satisfy the following specifications to both of the two terminals.
Trigger signal specifications (conditions)
Amplitude: LVDS (output by the 3.3 volt IC)
Connection: Input a TRIG (-) signal to the 9th pin
Input a TRIG(+) signal to the 22nd pin
Polarity: positive
Exposure Output Specifications (DC IN terminal only)
About the camera control method
Exposure time
ºC When terminated at 10 kΩ or more
Exposure output is output as a pulse that indicates exposure time
when trigger mode is selected.
3CCD Colour
Video Camera
Color Camera Block
Control functions
Description
Operating mode
Normal/Trigger
Shutter speed
Normal
1 to 1/10000
Trigger
Internal setting: 1/15 to 1/10000
Setting by trigger pulse width
Gain
0 to +18 dB
Binning function
OFF/ON
Partial Scan function
OFF/ON
Detail
OFF/ON
External trigger input
26-pin connector / DC-700 / 700CE
White balance
Preset/Manual/AWB
(XCL-U1000C only)
Matrix
OFF/ON
(XCL-U1000C only)
0 to 0.5 V
Accessories
You can control the camera from host device such as a PC. The following table shows the control functions.
You can send a command corresponding to the control items, with
parameters for the desired settings, if necessary, from the host
device to control the camera.
Refer to "Camera Control Command" on page 16 for details on how
to send a command, the commands, and their parameters.
4.0 to 4.5 V
TV Format
B/W Model
Colour Model
Connect the camera cable to the DC IN connector and the digital
interface cable to the digital interface cable respectively. Also, if
needed, connect the monitor cable to the monitor output connector
and the serial cable to the RS-232C connector respectively. When
you connect the digital interface cable or monitor cable, turn the two
fastening screws on the connector to secure the cable tightly.
100 s to 1s
Non-TV Format
① DC IN connector
③Camera cable
⑤ Fastening screws
⑦ Monitor cable
⑨ RS-232C connector
Digital Interface
IEEE1394b
Camera Link
4.5 to 5.0 V
Color PTZ Model
Note
Make sure to supply power to the camera module and confirm
that the camera module is operating before inputting a trigger
signal. If you input external signals to a camera module without
the power supplied, this may cause a malfunction of the camera
module.
XCL-U1000/U1000C
29
Intelligent
XCL-X700
XCL-V500
CL
1/3 Type
Output
CCD
HD VD
CLock
External Sync
External Sync
Square
Pixels
C
Lens Mount
Non-TV Format
TV Format
Colour Model
B/W Model
Accessories
3CCD Colour
Video Camera
Color Camera Block
*1
*2
XGA
VGA
Output
Output
Restart Long Normal
Reset Exposure Shutter
Camera Link
Digital Interface
IEEE1394b
CCD DIGITAL CAMERA MODULE
Color PTZ Model
Mode 2
(Non-Reset Mode)
(Non-Reset Mode)
External
Trigger Shutter
External
Trigger Shutter
*1:XCL-X700
*2:XCL-V500
Connection Diagram P35
Outline
Dimensions
Sony’s new XCL Series equipped with a digital video
interface that conforms to the Camera Linkェ industry
standard.
These new cameras enable the capture of high-speed, high
resolution images while simplifying connectivity to
machine-vision systems with its standard 3M MDR 26-pin
cable.
The XCL-V500 and XCL-X700 cameras feature a 1/3-type
progressive scan CCD that captures high quality black and
white images at a high frame rate, designed in a compact
and lightweight body.
Sony’s XCL Series of high-performance and feature-rich
cameras is the ideal solution for today’s wide range of
machine vision applications.
Camera body of all models
Features
■1/3-type progressive scanning CCD with square pixels
■High-rate scanning
• XCL-X700: XGA image (1,024 x 768 pixels) captures video at 29.2 fps
• XCL-V500: VGA image (648 x 494 pixels) captures video at 60 fps
■Effective picture element
• XCL-X700:1034(H) x 779(V)
• XCL-V500:659(H) x 494(V)
■High sensitivity
• 400 lx at F 5.6
■Camera Link standard conformity
■Compact and lightweight
■External trigger shutter : 1/4 to 1/100,000 sec.
■Synchronization signal : Internal/external (HD/VD)
■C-mount lens
■Partial scanning
■Binning function
■High shock and vibration resistance
Accessories
■ Compact camera adaptor
●DC-700/700CE
■ 12-pin camera cable (CE standard)
●CCXC-12P02N
●CCXC-12P05N
●CCXC-12P10N
●CCXC-12P25N
■ Tripod adaptor
●VCT-333I
30
Mode 1
Partial
Scan
XCL-V500/X700
(2 m)
(5 m)
(10 m)
(25 m)
※1
※2
Unit: mm
*1: for 3-M3 screw
*2: for 4-M2 screw
Intelligent
Spectral Sensitivity Characteristics
●XCL-X700
●XCL-V500
(Typical Values)
Relative sensitivity
Relative sensitivity
1
1
0.8
0.8
0.6
0.6
0.4
0.4
0.2
0.2
400
500
600
700
800
900
1000
0
400
500
Wavelength (nm)
600
700
800
900
1000
Wavelength (nm)
(Lens characteristics and light source characteristics excluded.)
(Lens characteristics and light source characteristics excluded.)
TV Format
B/W Model
Colour Model
Specifications
XCL-X700
Image device
Effective picture elements (H x V)
Effective lines (H x V)
Output image size
Cell size
XCL-V500
1/3 type progressive scan IT CCD
1034(H) x 779(V)
659 (H) x 494 (V)
1024 (H) x 768 (V) 648 (H) x 494 (V)
XGA
VGA
4.65 (H) x 4.65 (V) µm 7.4 (H) x 7.4 (V) µm
C-mout
Synchronization
Internal/External (automatically switched according to input signal)
External sync signal I/O
HD/VD (HD/VD level: 2 to 5 Vp-p)
±1% (horizontal sync frequency)
H Jitter Less than 20nsec (Internal clock)
Video output
LVDS 10 bits
Reference video output level
940 steps
Reference pedestal level
64 steps
White clip
1023 steps
Horizontal resolution
29.2 Hz (Internal clock, normal mode)
59.94 Hz (Internal clock, normal mode)
800TV lines
Sensitivity
400 lx F5.6 (0 dB)
Minimum illumination
1 lx (with the gain control at maximum, F1.4)
Gain
0 to +18 dB
Gamma
1 (fixed)
Read mode
Normal/Bining/Partial scan
External trigger shutter
Shutter speed
External trigger shutter: 1/4 to 1/100000 s
Frame rate
Output data clock
29.2 fps
59.94 fps
29.5 MHz
24.55 MHz
High rate scan
ON/OFF
Bining
Vertical +2Line
Power requirements
Power consumption
+12V DC (Range: +10.5 to 15V)
2.2 W
Dimensions (W x H x D)
55 g
-5 to +45 ºC
Storage temperature
-30 to +60 ºC
Performance guarantee temperature
0 to +40 ºC
Operating humidity
20 to 80 % (no condensation)
Storage humidity
20 to 95 % (no condensation)
Vibration resistance
10G (20 Hz to 200 Hz, 20 minutes for each direction-X, Y, Z)
MTBF
Color PTZ Model
Mass
Shock resistance
2.0 W
29 (W) x 29 (H) x 30 (D) mm
Operating temperature
Regulatory compliance
Color Camera Block
Shutter mode
500TV lines
3CCD Colour
Video Camera
Output signal frequency
Accessories
Lens mount
External sync sallowable frequency
Non-TV Format
0
Digital Interface
IEEE1394b
Camera Link
(Typical Values)
70G
73,880 hrs.
UL60950-1+CSA C22.2 No.60950.1, FCC/ICES-003: Class B, CE: EN61326, AS/NZ: EN61326, VCCI: Class B
Supplied accessories
Lens mout cap(1) Operationg Instructions(1)
XCL-V500/X700
31
Intelligent
Location and Function of Parts and Controls
Rear Panel
Digital Interface
IEEE1394b
① Lens mount (C-mount)
② Guide holes (at the top)
③ Tripod screw holes
(at the bottom)
④ Reference holes
(at the bottom)
① Lens mount (C-mount)
① DC IN (DC power input) connector (12-pin)
Attach any C-mount lens, such as the VCL-12YM standard lens,
or other optical equipment.
Note
Be sure that the lens does not project more than 10 mm from the
lens mount.
10 mm or less
Lens face
② Guide holes (at the top)
These screw holes help to lock the camera module.
③ Tripod screw holes (at the bottom)
These four screw holes on the bottom are for installing the
camera module on a tripod. To install on a tripod, you will need
to install the VCT-333I tripod adaptor using these holes on the
bottom of the camera.
④ Reference holes (at the bottom)
These precision screw holes are for locking the camera module.
Locking the camera module using these holes secures the
optical axis alignment.
You can connect a CCXC-12P05N camera cable to input the +12
V DC power supply. When a sync signal generator is
connected to this connector, the camera module is synchronized
with the external sync signals. The pin configuration of this
connector is as follows.
DIGITAL IF
(Interface) connector (26-pin)
You can connect a Camera Link cable to this connector to
control a camera module from a host device utilizing the serial
communication protocol while outputting a video signal from the
camera module. You can input the external trigger signal/
external sync signal via the 26-pin connector and operate a
camera module in the external trigger mode/external
synchronization mode. The pin configuration of this connector is
as follows.
Note
When you operate a camera module by inputting an external
trigger signal via the 26-pin connector, make sure to input
external trigger signals that meet the following specifications to
both the two pins.
Specifications for the External Trigger Signal
Amplitude:
LVDS using a 3.3 volt IC Polarity: positive
3CCD Colour
Video Camera
Connections:
Input a TRIG (-) signal to the 9th pin.
Input a TRIG (+) signal to the 22nd pin.
Color Camera Block
Connector Pin Assignments
Color PTZ Model
32
①
Camera Link
Non-TV Format
TV Format
Colour Model
B/W Model
Accessories
①
XCL-V500/X700
Ground
Ground
2
+12 V DC
+12 V DC
+12 V DC
+12 V DC
3
—
—
—
—
4
Clock (+) input (Signal)
Clock (+) input (Signal)
Clock (+) input (Signal)
Clock (+) input (Signal)
5
HD output (Ground)
HD input (Ground)
HD input (Ground)
HD input (Ground)
6
HD output (Signal)
HD input (Signal)
HD input (Signal)
HD input (Signal)
7
VD output (Signal)
VD input (Signal)
Reset (Signal)
VD input (Signal)
8
—
—
—
—
9
Clock (–) input (Signal)
Clock (–) input (Signal)
Clock (–) input (Signal)
Clock (–) input (Signal)
10
—
—
—
WEN output (Signal)
11
—
—
—
Trigger pulse input (Signal)
VD input (Ground)
Reset (Ground)
VD input (Ground)
12 VD output (Ground)
Restart reset
External trigger shutter
Digital signal
INNER_SHIELD (Ground)
X0- output (Signal)
X1- output (Signal)
X2- output (Signal)
XCLK- output (Signal)
X3- output (Signal)
Ser TC+ (Signal)
Ser TFG- (Signal)
TRIG (-) input (Signal)
HD (+) input (Signal)
VD (-) input (Signal)
CLOCK (+) input (Signal)
INNER_SHIELD (Ground)
Pin No.
14
15
16
17
18
19
20
21
22
23
24
25
26
Digital signal
INNER_SHIELD (Ground)
X0+ output (Signal)
X1+ output (Signal)
X2+ output (Signal)
XCLK+ output (Signal)
X3+ output (Signal)
Ser TC- (Signal)
Ser TFG+ (Signal)
TRIG (+) input (Signal)
HD (-) input (Signal)
VD (+) input (Signal)
CLOCK (-) input (Signal)
INNER_SHIELD (Ground)
Control functions
Description
Operating mode
Normal/Restart reset/trigger mode 1/trigger mode 2
Normal XCL-X700: OFF (1/29.2) to 1/20000
Shutter speed
XCL-V500: OFF (1/60) to 1/30000
Trigger Internal setting: OFF (the same as above) to 1/100000
Setting by trigger pulse width
Gain
0 to +18 dB
Binning function
OFF/ON
Partial Scan function
OFF/ON
External sync signal input / Internal sync
HD/VD signal I/O signal output
External trigger input
26-pin connector / DC-700/700CE
75 Ω termination
ON/OFF
Master clock
Internal / External
Note
Make sure to supply power to the camera module and confirm
that the camera module is operating before inputting a sync or
trigger signal. If you input external signals to a camera module
without the power supplied, this may cause a malfunction of the
camera module.
Trigger Pulse Specifications
DC IN connector
to
to
to
Connecting the cables
TV Format
B/W Model
Colour Model
Pin No.
1
2
3
4
5
6
7
8
9
10
11
12
13
You can control the camera from host device such as a PC.
The following table shows the control functions.
You can send a command corresponding to the control items, with
parameters for the desired settings, if necessary, from the host
device to control the camera.
Non-TV Format
Note
When you operate a camera module by inputting an external
clock signal, input the external signal using the VIDEO
connectors of the DC-700. Make sure to input external clock
signals that meet the following specifications to both
connectors.
About the camera control method
Digital Interface
IEEE1394b
Camera Link
External Sync mode
(HD/VD)
Ground
Intelligent
Pin Camera sync output
No.
1 Ground
The voltage measuerd when the input impedanced is 10 kΩ or more
⑤ Fastening
screws
Input signals meeting the input specifications above converted to the
signal level of the LVDS system (output by the 3.3 V IC). Be aware that
if the signals fail to meet the following conditions, the camera module
will not recognize the input signals properly.
H level: 1.5 V to 1.7 V
L level: 0.8 V to 1.0 V
The voltage measuerd when terminated with 10 kΩ or more
Output WEN signals synchronized with the falling edge of Internal-VD,
corresponding to the start of video signal output in Trigger Mode1/2.
Color PTZ Model
Connect the Camera cable to the DC IN connector and the Camera
Link cable to the DIGITAL IF (Interface) connector respectively. When
you connect the Camera Link cable, turn the two Fastening screws
on the connector to secure the cable tightly.
Connect the other end of the Camera cable to the DC-700/700CE
and the other end of the Camera Link cable to the camera module
interface board.
Color Camera Block
③ Camera cable
3CCD Colour
Video Camera
WEN Output Specifications (only for the DC connector)
① DC IN
connector
Accessories
DIGITAL IF connector
② DIGITAL
IF (Interface)
connector
④ Camera Link cable
XCL-V500/X700
33
Intelligent
Digital Interface
IEEE1394b
XCD Series
XCD-U100/XCD-U100CR
XCD-SX90/XCD-SX90CR
XCD-U100/XCD-U100CR
*
XCD-V60/XCD-V60CR
XCD-SX90/XCD-SX90CR
Recommended Lens : High resolution lens
C-mount lens
Non-TV Format
Camera Link
Connection Diagram
IEEE1394 Cable
Display
Tripod adaptor
VCT-ST70I
Host device, etc.
120(P)
120(M)
*
TV Format
Colour Model
B/W Model
Camera cables
CCXC-12P02N
CCXC-12P05N
CCXC-12P10N
CCXC-12P25N
Camera adaptor
DC-700/DC-700CE
(EIAJ standard 12-pin assignments)
*
Optional : When Power supply from
the IEEE 1394b connection is insufficient.
Accessories
XCL-5000/5005/5005CR
3CCD Colour
Video Camera
XCL-5000
High-resolution XCL-5005
C-mount lens XCL-5005CR
Color Camera Block
Tripod adaptor
VCT-ST70I
XCL-5005
High-resolution XCL-5005CR
C-mount lens
Camera Module interface board
Camera Link cables (standard non-PoCL)
Camera cables
CCXC-12P02N
CCXC-12P05N
CCXC-12P10N
CCXC-12P25N
Camera adaptor
DC-700/DC-700CE
(EIAJ standard 12-pin assignments)
Camera Module interface board (Support PoCL)
Camera Link cables (PoCL)
Tripod adaptor
VCT-ST70I
Color PTZ Model
34
Host adaptor card
Connection Diagram
Intelligent
Connection Diagram
Monitor
Device for camera cont
(PC, etc.)
AC
TRIG
Tripod adaptor
VCT-ST70I
EXPOSURE
Camera adaptor
(WEN OUT LINE)
DC-700/DC-700CE
(EIAJ standard 12-pin assignments)
Camera Link cables
Camera module interface board
C-mount lens
XCL-X700
XCL-V500
Accessories
XCL-X700/XCL-V500
AC
Camera cables
CCXC-12P02N
CCXC-12P05N
CCXC-12P10N
CCXC-12P25N
HD/VD
WEN
Camera adaptor
TRIG
DC-700/DC-700CE
(EIAJ standard 12-pin assignments)
Camera module interface board
Color Camera Block
Camera Link cables
3CCD Colour
Video Camera
CLOCK
Tripod adaptor
VCT-333I
TV Format
B/W Model
Colour Model
Camera cables
CCXC-12P02N
CCXC-12P05N
CCXC-12P10N
CCXC-12P25N
Non-TV Format
High-resolution
C-mount lens
XCL-U1000
XCL-U1000C
Digital Interface
IEEE1394b
Camera Link
XCL-U1000/XCL-U1000C
Color PTZ Model
Connection Diagram
35
Intelligent
XC-HR90
Non-TV
1/3 Type
Progressive
Scan
Output
HD VD
CCD
Mode 1
Mode 2
(Non-Reset Mode)
(Non-Reset Mode)
External
Trigger Shutter
External
Trigger Shutter
fps
Selectable
External Sync
Square
Pixels
3CCD Colour
Video Camera
Accessories
TV Format
Colour Model
B/W Model
Non-TV Format
Camera Link
Digital Interface
IEEE1394b
HIGH RESOLUTION B/W CAMERA MODULE
C
Lens Mount
Scan
Connection Diagram P60
Outline
Dimensions
The XC-HR90 is an analog interface camera with highspeed, high-quality picture output of approximately 1.25
megapixels (SXGA) at a standard frame rate of 30 fps, with a
compact size that makes it ideal for use in combination with
industrial equipment.
Other features include a partial scan function that enables
faster image read-out, and settings that can be made via the
rear panel or remotely via RS-232C serial interface.
Camera body of all XC-HR models
Features
■1/3 type high-resolution progressive scan CCD
monochrome camera module
■Full pixel read-out, SXGA size
(Effective lines: 1280 (H) x 960 (V))
Image output: 30 fps, 15 fps (selectable)
■Vertical frequency
49.302 MHz (30 fps)
24.651 MHz (15 fps)
■Analog output
■Partial scan function
■Binning function
■External control possible (RS-232C) Accessories
*1: for 3-M3 screw
*2: for 4-M2 screw
Spectral Sensitivity Characteristics
■ Compact camera adaptor
●XC-HR90
●DC-700/700CE
●CCXC-12P02N
●CCXC-12P05N
●CCXC-12P10N
●CCXC-12P25N
(2 m)
(5 m)
(10 m)
(25 m)
(Typical Values)
Relative sensitivity
■ Tripod adaptor
●VCT-55I
Color PTZ Model
Color Camera Block
Output
Restart Long RS232C
Reset Exposure Control
■ 12-pin camera cable (CE standard)
36
SXGA Partial
Wavelength (nm)
(Lens characteristics and light source characteristics excluded.)
XC-HR90
Unit: mm
Intelligent
Location and Function of Parts and Controls
① Lens mount (C-mount)
Attach any C-mount lens or optical equipment suitable for highresolution images (SXGA-compatible).
Note
Be sure that the lens does not project more than 10 mm from the
lens mount.
10 mm or less
Lens mount shoulder
② Reference holes (top)
③ Reference holes/ tripod screw holes (bottom)
TV Format
B/W Model
Colour Model
Specifications
Image device
XC-HR90
1/3 type progressive scan IT CCD
Effective picture elements
1,296 (H) x 966 (V)
Effective lines
1,280 (H)) x 960 (V)
Image size
Unit cell size
SXGA
3.75 μm (H) x 3.75 μm (V)
Lens mount
C mount
Sync system
Internal/External (auto)
HD/VD (HD/VD level: 2.5 to 5 Vp-p, 75 W)
External sync allowable frequency
±1 % (in horizontal synchronous frequency)
Jitter
Scanning system
Output signal frequency
Video output
CCD vertical drive frequency
CCD horizontal drive frequency Horizontal resolution
Minimum illumination
S/N ratio
Gain
Gamma
White clip
Shutter
Normal shutter speed
Binning: 2-line combined / Normal: 1-line sequential output
1.0 Vp-p, sync negative, 75 Ω, unbalanced
30fps: 29.7kHz (Normal mode) 26.79kHz (Binning mode) 15fps: 14.85kHz (Normal mode) 14.85kHz (Binning mode)
30fps: 30Hz (Normal mode) 54.1Hz(Binning mode) 15fps: 15Hz (Normal mode) 30Hz (Binning mode)
960 TV lines
400 lx F5.6 (γ=OFF, FIX GAIN (0 dB))
1 lx (F1.4, g=OFF, GAIN +18 dB)
56 dB (0 dB GAIN)
Manual (0 to +18dB)/FIX (0dB) (adjustable on rear panel or via RS-232C)
OFF (fixed)
820 mV ±70 mV (F1.8, FIX GAIN (0 dB))
Normal shutter, Restart/Reset, External trigger shutter (Mode 1/Mode 2)
1/100, 1/125, 1/250, 1/500, 1/1000, 1/2000, 1/4000, 1/10000, 1/25000, 1/50000, 1/100000 s
DIP switch settings: 1/100, 1/125, 1/250, 1/500, 1/1,000, 1/2,000, 1/4,000, 1/10,000, 1/25,000, 1/50,000, 1/100,000 s
Trigger pulse width settings: 1/4 to 1/50,000 s
External trigger
Polarity: +, Width: 2 µs to 250 ms, Input impedance: 10k Ω or more (H: +2.5 to 5.0 V, L: 0 to +0.6 V)
Partial scanning
Readout of center 480 lines at 56 fps, Readout of center 240 lines at 95.8 fps (settable using DIP switches)
Readout of 60 effective lines selectable from 16 vertical divisions at max. 204.8 fps (settable via RS-232C) Power requirements
Power consumption
Dimensions
Mass
DC 12 V (+10.5 V to +15.0 V)
approx. 2.8 W
29 (W) x 29 (H) x 63.5 (D) mm (not including protruding parts)
80g
-5 to +45 ºC
Storage temperature
-30 to +60 ºC
Performance guarantee temperature
0 to +40 ºC
Operating humidity
20 to 80%
Vibration resistance
Shock resistance
MTBF
Regulatory compliance
Supplied accessories
Color PTZ Model
Operating temperature
Storage humidity
Color Camera Block
External trigger shutter speed
Less than 20 ns
Non-interlace Progressive scan
3CCD Colour
Video Camera
Sensitivity
Accessories
External sync signal input/output
Non-TV Format
③ Reference holes (bottom)/
tripod adaptor screw holes
These precision screw holes are for locking the camera module. Using these holes to lock the camera module secures the optical axis
alignment.
The reference screw holes can also be used as tripod adaptor screw
holes. To install on a tripod, attach the VCT-551 tripod
adaptor using these four screw holes.
Digital Interface
IEEE1394b
Camera Link
① Lens mount (C-mount)
② Reference holes (top)
20 to 95%
10 G (20 Hz to 200 Hz 20 minutes for each direction - x,y,z)
70G
73,880 hrs. (approx. 8.4 years)
UL60065, FCC/ICES-003 : ClassA, CE : EN61326, AS/NZ : EN61326, VCCI : Class A
Lens mount cap (1), Operating instructions (1)
XC-HR90
37
Intelligent
Rear Panel
Factory Mode Settings of Rear Panel
1
①
②
Digital Interface
IEEE1394b
2
3
③
TV Format
Colour Model
B/W Model
Non-TV Format
Camera Link
No. Switch
④
Note
Be sure to turn the power off before making switch settings. As the
variable controller for manual adjustment is a small precise
component, do not apply force more than required when adjusting.
Doing so will break the component. The controller is not a
360-degree rotation type. Do not turn the controller beyond the
stopper of the component. The range of rotation is about 230
degrees. For the adjustment of the variable controller, use a flathead
screwdriver. The sizes of a recommended flathead screwdrivers are
1.9mm width, 0.5mm thickness and more than 0.45mm length.
Connect a CCXC-12P05N camera cable to this connector to obtain
power from the +12V DC power supply and also to enable video
signal output from the camera module. When a sync signal
generator is connected to this connector, the camera module is
synchronized with the external sync signals (HD/VD signals).
Accessories
3CCD Colour
Video Camera
Color Camera Block
2
Shutter speed and mode setting DIP switches
3
Mode setting DIP switches
All OFF (left)
① 75 termination switchON (switch up position)
② HD/VD signal input/output switch`
HD/VD signal input (switch up position)
③ 30 fps/15 fps switch
30 fps (switch down position)
④ RS-232C ON/OFF switch
OFF (switch down position)
* This unit is shipped from the factory with the gain switch (DIP switch 9) being set to "FIX,"
so the M GAIN control knob is not operative unless the switch setting is changed. When the
gain switch (DIP switch 9) is set to MANUAL, you can rotate this knob to adjust gain over
the range 0 to 18 dB.
Connector Pin Assignments
Rear panel
External mode
(HD/VD)
Camera sync
Pin
output
No.
1 Ground
Ground
Ground
External trigger
shutter
Ground
2
+12V DC
+12V DC
+12V DC
+12V DC
3
Video output (Ground)
Video output (Ground) Video output 1 (Ground)
Video output (Ground)
4
Video output (Signal)
Video output (Signal)
Video output 1 (Signal)
Video output (Signal)
5
HD output (Ground)
HD input (Ground)
HD input (Ground)
HD input (Ground)
6
HD output (Signal)
HD input (Signal)
HD input (Signal)
HD input (Signal)
7
VD output (Signal)
VD input (Signal)
Reset (Signal)
VD input (Signal)
8
(RS232C (Rx)) *1
(RS232C (Rx)) *1
(RS232C (Rx)) *1
(RS232C (Rx)) *1
➋ Restart reset/External trigger shutter mode switch
(bits 6 to 8)
9
(RS232C (Tx)) *1
(RS232C (Tx)) *1
(RS232C (Tx)) *1
(RS232C (Tx)) *1
10 —
—
—
WEN output (Signal)
By inputting an external restart/reset signal, you can capture the
information of single screens at arbitrary timing. By inputting an
external trigger signal, you can capture imaging information on
fast-moving objects at a precise moment in time. The factory
settings for these switches are for normal operation
(restart/reset and external trigger shutter OFF).
11 —
—
—
Trigger pulse input (Signal)
② M Gain (Manual Gain) control knob
If you have selected MANUAL (manual adjustment) with DIP
switch 4, this knob adjusts the gain.
③ Shutter speed/Mode setting DIP switch
➊ Shutter speed (bits 1-4)
Set an appropriate shutter speed (factory setting: OFF).
The factory setting of this switch is partial scan OFF.
Color PTZ Model
M GAIN control knob -*
① VIDEO OUT/DC IN/SYNC (video output/DC power/sync
input signal)connector (12-pin connector)
w Partial scan mode switch (5)
38
Factory setting mode
1
➌ Gain switch (bit 9)
This switch selects FIX (fixed) or MANUAL (manual adjustment)
(factory setting: FIX (left side)).
➍ Binning mode switch (bit 0)
Switches the video signal output mode between binning OFF and
binning ON (factory setting: OFF).
④ Mode setting DIP switch
➎ 75Ω termination switch
Turn this to OFF (switch down position) when not terminating
the external sync signal. The factory setting of this switch is ON
(switch up position).
➏ HD/VD signal input/output switch
Set the switch to the down position (INT) to output HD/VD
signals from the camera module, and set it to the up position
(EXT) to input HD/VD signals from an external unit. The factory
setting for this switch is the up position (EXT).
Note
Even when the switch is in the up position (EXT), the camera
operates in internal synchronization mode unless an external HD
signal is input. In this case, however, the camera module will not
output internal sync signals.
➑ 30 fps/15 fps switch
30 fps: switch down position
15 fps: switch up position
XC-HR90
➒ RS-232C ON/OFF switch
ON : switch up position
OFF: switch down position
12 VD output (Ground)
*1
VD input (Ground)
When communicating with RS232C.
Restart/Reset
Reset (Ground)
*2
VD input (Ground) *2
Commom ground for pins 7, 10, 11.
About the Camera Control Method
This camera can be controlled via a host device (such as a personal
computer). The table below shows the functions that can be
controlled. The camera can be controlled by sending commands that
correspond to the control items, with parameters for the desired
settings, if necessary, from the host device.
Control Function
Operating mode
Shutter speed
Description
Normal/ Restart reset/ Trigger mode 1/ Trigger mode 2
30 fps mode: OFF (1/30) to 1/1,000,000
Normal
15 fps mode: OFF (1/15) to 1/5000
Internal setting: OFF (same as above) to 1/100,000
Trigger
Setting by trigger pulse width
Gain
0 to +18 dB
Binning function
OFF/ON
Partial scan function
OFF/ON: Area settings can be made for 16
zones
HD/VD signal input/output
External sync signal input/Internal sync signal
output
75 termination
ON/OFF
Frame rate
30 fps/15 fps
Make sure to supply power to the camera module and confirm that the camera module is
operating before inputting an external sync or trigger signal. Inputting an external signal before
supplying the power may cause the camera module to malfunction.
Note: When using the external sync in combination with control from a host device (such as a
personal computer), make sure the frequency is within the specified range. The camera cannot
be controlled when the input is outside the specified frequency range.
About the Electronic Shutter
There are two shutter types: normal shutter and external trigger
shutter. Select them with the DIP switches on the rear panel.
Intelligent
To Set the External Trigger Shutter
Normal Shutter
There are two ways to set the shutter speed.
Normal
Shutter
Other
modes*
8
8
●Using trigger pulse width
Set all DIP switches (1 to 4 on the rear panel) to OFF.
You can obtain an arbitrary shutter speed by setting the trigger
pulse width to the range of 2 μsec to 250 msec.
Exposure time = Trigger pulse width + 5 μsec
Mode 1
(Non-reset mode)
* "Other modes" refers to restart/reset mode and external trigger shutter mode.
●Normal shutter speed settings
Mode 2
(Reset mode)
1
2
3
4
30fps
1
2
3
4
Note
An incorrect video signal will be output if you input a new trigger
pulse before the video signal output for the previous trigger pulse
is output completely.
Non-TV Format
●Using the DIP switches on the rear panel
For shutter speeds, see the following table.
Mode 1 (Non-reset mode)/Mode 2 (Reset mode)
1/250
1/500
1/1000
1
2
3
4
1
2
3
4
1
2
3
4
1/2000
1/4000
1
2
3
4
1
2
3
4
1/50000
1/10000
1
2
3
4
1/100
1/100000
1
2
3
4
1/25000
1
2
3
4
1
2
3
4
1
2
3
4
(Unit: seconds)
Restart/Reset
TV Format
B/W Model
Colour Model
15fps
1/125
1
2
3
4
Digital Interface
IEEE1394b
Camera Link
This mode provides continuous video output with the electronic
shutter selected by switches to capture a high-speed moving
object clearly.
To Set Restart/Reset Mode
Accessories
The information on one screen can be extracted at any time by
externally inputting restart/reset signals (HD/VD). To enter this mode,
set the trigger shutter switches (6 to 8) on the rear panel of the camera as shown in the figure below.
To use restart/reset mode and Partial scan mode simultaneously, set
the Partial scan mode switch (5) to ON (right side).
(Unit: seconds)
R/R
Inputting an external trigger pulse enables the camera to capture fastmoving objects clearly with precise timing.
Set DIP switches 6, 7, and 8 on the rear panel to Mode 1 or Mode 2.
When you set the trigger pulse width to 1/3 of a second or more, the
output signal changes to the normal VIDEO signal.
6
7
8
Mode 2
6
7
8
Note
High-rate scan mode cannot be used
while in external trigger shutter mode 2.
There are two modes for the timing in which video signals are obtained.
ON
5
5
Long Exposure
The Restart/Reset function extends the CCD accumulation time,
resulting in highly sensitive image capture. This function is effective
when you cannot gain satisfactory sensitivity under normal operating
conditions, or when you want to observe the trail of a moving
object. Extend the VD interval (T) between external VD pulses.
●Mode 1 (Non-reset mode)
* External or internal synchronization is selected automatically depending on the
presence or absence of external HD input.
●Mode 2 (Reset mode)
In this mode, an internal VD is reset, then a video signal is
output a certain period of time after trigger pulse input.
Example of input timing chart
Color PTZ Model
OFF
In this mode,
aON
video signal synchronized with a VD signal is output after
pulse is input.
5 a trigger
5
- The video signal is synchronized with the external VD signal
when an external HD*/VD signal is input.
- The video signal is synchronized with an internal VD signal when
no external HD*/VD signal is input.
EXT-HD
EXT-HD
EXT-VD
EXT-VD
Charge
accumulation
on CCD
Color Camera Block
Mode 1
6
7
8
Partial scan
OFF
3CCD Colour
Video Camera
External Trigger Shutter
T
VIDEO OUT
XC-HR90
39
Non-TV
Progressive
1/3 Type
Square
Pixels
Output
Scan
HD VD
Restart Long Normal
Reset Exposure Shutter
External Sync
CCD
Mode 1
Output
Scan
Mode 2
(Non-Reset Mode)
(Non-Reset Mode)
External
Trigger Shutter
External
Trigger Shutter
Connection Diagram P60
Outline
Dimensions
Camera body of all XC-HR models
14.5
12
2-M2 depth 3
29
Ø27.6 ±0.15
Ø27.3 ±0.15
The XC-HR70 is an ultra-compact monochrome camera
module ideal for high-resolution image capturing applications. A 1/3 type progressive scan CCD
incorporated in the XC-HR70 allows the output of XGA resolution (1024 x 768) images at a rate of 30 frames/sec.
In addition, the XC-HR70 has a “high rate scanning” function
to enable the output of up to 120 frames/sec. for high-speed
image capturing. The compact and light-weight body of the
XC-HR70 makes it easy to install in
space-restricted areas. With high-speed capturing
capability offered in a compact body, the XC-HR70 is the
ideal camera module for demanding applications such as the
inspection of semiconductor production lines and
high-speed assembly lines.
(4.9)
12
8
23.7*1
12
■High resolution image capturing
● XGA resolution (1,024 x 768 pixels) image capturing at a
speed of 30 frames/sec.
● 1/3 type progressive scanning CCD with square pixels
Effective picture element: 1,034 (H) x 779 (V)
■Partial scanning(at restart/reset ON, Binning OFF)
Up to 120 frames/s (Effective line: 152 lines)
■Compact and lightweight
29 (W) x 29 (H) x 30 (D) mm, 50 g
■External trigger shutter 1/4 to 1/100,000 sec.
■Electronic Shutter 1/100 to 1/20,000 sec.
■Synchronization Internal/External (HD/VD)
■C-mount system
■High shock and vibration tolerant
5.1
30
15*1
Features
4-M2 depth 3
3-M3 depth 3
16*2
22*2
42
*1: for 3-M3 screw
*2: for 4-M2 screw
Unit: mm
Spectral Sensitivity Characteristics
●XC-HR70
(Typical Values)
Relative sensitivity
Accessories
■ Compact camera adaptor
●DC-700/700CE
■ 12-pin camera cable (CE standard)
Color PTZ Model
XGA Partial
20
Non-TV Format
TV Format
Colour Model
B/W Model
Accessories
3CCD Colour
Video Camera
Color Camera Block
C
Lens Mount
29
Intelligent
XC-HR70
Camera Link
Digital Interface
IEEE1394b
HIGH RESOLUTION B/W CAMERA MODULE
●CCXC-12P02N
●CCXC-12P05N
●CCXC-12P10N
●CCXC-12P25N
■ Tripod adaptor
●VCT-333I
(2 m)
(5 m)
(10 m)
(25 m)
1.0
0.9
0.8
0.7
0.6
0.5
0.4
0.3
0.2
0.1
0.0
400
500
600
700
800
900
Wavelength (nm)
(Lens characteristics and light source characteristics excluded.)
40
XC-HR70
1000
Intelligent
Location and Function of Parts and Controls
① Lens mount (C-mount)
② Guide holes (at the top)
Note
Be sure that the lens does not project more than 10 mm from the
lens mount.
10 mm or less
Lens mount shoulder
② Guide holes (at the top)
These screw holes help to lock the camera module.
③ Tripod screw holes (at the bottom)
④ Reference holes
(at the bottom)
④ Reference holes (at the bottom)
These precision screw holes are for locking the camera module.
Locking the camera module using these holes secures the optical
axis alignment.
Image device
Effective picture elements
Effective lines
Image size
Unit cell size
XC-HR70
1/3 type progressive scan IT CCD
1,034 (H) x 779 (V)
1,024 (H) x 768 (V)
XGA size : 1,024 (H) x 768 (V)
4.65 μm (H) x 4.65 μm (V)
Lens mount
C mount
Sync system
Internal/External (auto)
External sync signal input/output*1
HD/VD (HD/VD level: 2 to 5 Vp-p, 75 Ω)
External sync allowable frequency
±1 % (in horizontal synchronous frequency)
Jitter
Scanning system
Output signal frequency CCD vertical drive frequency
CCD horizontal drive frequency Horizontal resolution
Sensitivity
Minimum illumination
S/N ratio
Gain
White clip
Shutter
Normal shutter speed
External trigger shutter speed
External trigger
Power requirements
Power consumption
Dimensions
Mass
1.0 Vp-p, sync negative, 75 Ω, unbalanced
23.23 kHz ±1 %
29.2 Hz (normal mode), 58.4 Hz (binning mode)
800 TV lines
400 lx F5.6 (γ=OFF, FIX GAIN (0 dB))
1 lx (F1.8, γ=OFF, GAIN +18 dB)
56 dB (0 dB GAIN)
Manual (0 to 18 dB)/Fix (0 dB) (adjustable on the rear panel)
OFF (fixed)
820 mV ±70 mV (F1.8, FIX GAIN (0 dB))
Normal shutter, Restart/Reset, External trigger shutter (Mode 1/Mode 2)
1/100, 1/125, 1/250, 1/500, 1/1,000, 1/2,000, 1/4,000, 1/10,000, 1/20,000 s
DIP switch settings: 1/100, 1/125, 1/250, 1/500, 1/1,000, 1/2,000, 1/4,000, 1/10,000, 1/25,000, 1/50,000, 1/100,000 s
Trigger pulse width settings: 1/4 to 1/100,000 s Polarity: +, Width: 2 μs to 250 ms, Input impedance: 10k Ω or more (H: +2 to 5.0 V, L: 0 to +0.6 V)
R/R mode binning off: max 120 frames/s (effective line: 152 lines)
binning on: max 180 frames/s (effective line: 89 lines)
External trigger shutter mode (MODE 1) binning off: max 120 frames/s (effective line: 153 lines)
binning on: max 180 frames/s (effective line: 90 lines)
DC 12 V (+10.5 V to +15.0 V)
2.0 W
29 (W) x 29 (H) x 30 (D) mm (not including protruding parts)
50 g
Operating temperature
-5 to +45 ºC
Storage temperature
-30 to +60 ºC
0 to +40 ºC
Operating humidity
20 to 80 %
Vibration resistance
Shock resistance
MTBF
Regulatory compliance
Supplied accessories
Color PTZ Model
Performance guarantee temperature
Storage humidity
Color Camera Block
Partial scanning
Binning: 2-line combined output 29.2 fps/ Normal: 1-line sequential output 58.4 fps
3CCD Colour
Video Camera
Gamma
Less than 20 ns
Non-interlace Progressive scan
Accessories
Video output
TV Format
B/W Model
Colour Model
Specifications
Non-TV Format
③ Tripod screw holes
(at the bottom)
These four screw holes on the bottom are for installing the
camera module on a tripod. To install on a tripod, you will need to
install the VCT-333I tripod adaptor using these holes on the bottom of the camera.
Digital Interface
IEEE1394b
Camera Link
① Lens mount (C-mount)
Attach any C-mount lens, suitable for XGA-compatible resolution
or other optical equipment.
20 to 95 %
10 G (20 Hz to 200 Hz 20 minutes for each direction - x,y,z)
70 G
88,044 hrs. (approx. 10.1 years)
UL6500, FCC/ICES-003 : ClassA, CE : EN61326, AS/NZ : EN61326
Lens mount cap (1), Operating instructions (1)
*1 Automatic switching in response to the presence of an input signal when the switch on the rear panel is set to EXT.
XC-HR70
41
Intelligent
④ M Gain (Manual Gain) control knob
Rear Panel
If you have selected MANUAL (manual adjustment) with DIP
switch 4, this knob adjusts the gain.
⑤ 75Ω termination switch
①
Digital Interface
IEEE1394b
Turn this to OFF when not terminating the external sync signal
(factory setting: ON).
Camera Link
Non-TV Format
TV Format
Colour Model
B/W Model
Accessories
1
③
④
⑤
Note
Be sure to turn the power off before making switch settings.
As the variable controller for manual adjustment is a small
precise component, do not apply force more than required when
adjusting. Doing so will break the component. The controller is
not a 360-degree rotation type. Do not turn the controller
beyond the stopper of the component. The range of rotation is
about 260 degrees. For the adjustment of the variable controller,
use a flathead screwdriver. The sizes of a recommended
flathead screwdrivers are 1.9mm width, 0.5mm thickness and
more than 0.45mm length.
① VIDEO OUT/DC IN/SYNC (video output/DC power/sync
input signal)connector (12-pin connector)
3CCD Colour
Video Camera
Color Camera Block
Color PTZ Model
2
3
4
Switch name
Number
Factory mode setting
1
Shutter speed and mode setting DIP switches
All bits are OFF (left).
2
75Ω termination switch
ON
3
M GAIN control knob
-*
4
HD/VD signal input/output switch
EXT
* This unit is shipped from the factory with the gain switch (DIP switch 9) being set to "FIX,"
so the M GAIN control knob is not operative unless the switch setting is changed. When the
gain switch (DIP switch 9) is set to MANUAL, you can rotate this knob to adjust gain over
the range 0 to 18 dB.
Connect a CCXC-12P05N camera cable to this connector to obtain
power from the +12V DC power supply and also to enable video
signal output from the camera module. When a sync signal
generator is connected to this connector, the camera module is
synchronized with the external sync signals (HD/VD signals).
Connector Pin Assignments
Rear panel
Shutter speed/Mode setting DIP switch
➊ Shutter speed (bits 1-4)
Set an appropriate shutter speed (factory setting: OFF).
➋ Partial scan mode switch (bit 5)
The factory setting of this switch is Partial scan OFF. If you turn
this switch ON to use Partial scan mode, you also need to make
the external VD pulse rate and width settings.
Pin
No.
Camera sync
output
External mode
(HD/VD)
External trigger
shutter
Restart/Reset
1
Ground
Ground
Ground
Ground
2
+12V DC
+12V DC
+12V DC
+12V DC
3
Video output (Ground) Video output (Ground)
Video output 1 (Ground)
Video output (Ground)
By inputting an external restart/reset signal, you can capture the
information of single screens at arbitrary timing. By inputting an
external trigger signal, you can capture imaging information on
fast-moving objects at a precise moment in time. The factory settings for these switches are for normal operation
(restart/reset and external trigger shutter OFF).
4
Video output (Signal)
Video output (Signal)
Video output 1 (Signal)
Video output (Signal)
5
HD output (Ground)
HD input (Ground)
HD input (Ground)
HD input (Ground)
6
HD output (Signal)
HD input (Signal)
HD input (Signal)
HD input (Signal)
7
VD output (Signal)
VD input (Signal)
Reset (Signal)
VD input (Signal)
8
—
—
—
—
➍ Gain switch (bit 9)
9
—
—
—
—
This switch selects FIX (fixed) or MANUAL (manual adjustment)
(factory setting: FIX (left side)).
10 —
—
—
WEN output (Signal)
11 —
—
—
Trigger pulse input (Signal)
➌ Restart reset/External trigger shutter mode switch
(bits 6 to 8)
42
Factory Mode Settings of Rear Panel
➎ Binning mode switch (bit 0)
Switches the video signal output mode between binning OFF and
binning ON (factory setting: OFF).
12 VD output (Ground)
VD input (Ground)
Reset (Ground)
Reset (Ground)*
* Common ground for pins 7, 10, and 11
③ HD/VD signal input/output switch
Set the switch to INT to output HD/VD signals from the camera
module.
Set the switch to EXT to input HD/VD signals from an external
unit (factory setting: EXT).
Note
Even when the switch is set to EXT, the camera module
operates in internal synchronization mode when no external HD
signal is input. In this case, however, the camera module will not
output internal sync signals.
XC-HR70
About the Electronic Shutter
There are two shutter types: normal shutter and external trigger
shutter. Select them with the DIP switches on the rear panel.
* The electronic shutter cannot be used in restart/reset mode. Partial scan can be used in
restart/reset mode and in external trigger shutter mode 1.
Intelligent
Normal Shutter
Mode 1
(Non-reset mode)
Normal
Shutter
Other
modes*
8
8
* "Other modes" refers to restart/reset mode and external trigger shutter mode.
●Normal shutter speed settings
1/125
1/250
1/500
1/1000
1
2
3
4
1
2
3
4
1
2
3
4
1
2
3
4
1/2000
1/4000
1
2
3
4
1
2
3
4
1
2
3
4
Note
An incorrect video signal will be output if you input a new trigger
pulse before the video signal output for the previous trigger pulse
is output completely.
●Using the DIP switches on the rear panel
For shutter speeds, see the following table.
Mode 1 (Non-reset mode)/Mode 2 (Reset mode)
1/20000
1
2
3
4
1
2
3
4
1/100
(Unit: seconds)
6
7
8
1
2
3
4
1
2
3
4
1
2
3
4
1
2
3
4
1/2000
1/4000
1
2
3
4
1
2
3
4
OFF
ON
5
(Partial mode is compatible with Mode
1 only.)
1/25000
1
2
3
4
1
2
3
4
1/100
1/100000
1
2
3
4
1
2
3
4
Restart/Reset
To Set Restart/Reset Mode
The information on one screen can be extracted at any time by
externally inputting restart/reset signals (HD/VD). To enter this mode,
set the trigger shutter switches (6 to 8) on the rear panel of the camera as shown in the figure below.
To use restart/reset mode and Partial scan mode simultaneously, set
the Partial scan mode switch (5) to ON (right side).
Note
High-rate scan mode
cannot
OFF
ONbe used while in external trigger
shutter mode 2.
5
1/10000
(Unit: seconds)
Partial scannig
5
1/1000
R/R
5
ON
5
5
3CCD Colour
Video Camera
6
7
8
There are two modes for the timing in which video signals are
obtained.
Partial scan
OFF
●Mode 1 (Non-reset mode)
* External or internal synchronization is selected automatically depending on the
presence or absence of external HD input.
●Mode 2 (Reset mode)
In this mode, an internal VD is reset, then a video signal is
output a certain period of time after trigger pulse input.
The Restart/Reset function extends the CCD accumulation time,
resulting in highly sensitive image capture. This function is effective
when you cannot gain satisfactory sensitivity under normal operating
conditions, or when you want to observe the trail of a moving
object. Extend the VD interval (T) between external VD pulses.
Example of input timing chart
There are two ways to set the shutter speed.
EXT-HD
EXT-HD
●Using trigger pulse width
EXT-VD
EXT-VD
Set all DIP switches (1 to 4 on the rear panel) to OFF.
You can obtain an arbitrary shutter speed by setting the trigger
pulse width to the range of 2 μsec to 250 msec.
Exposure time = Trigger pulse width + 5 μsec
Charge
accumulation
on CCD
Color PTZ Model
To Set the External Trigger Shutter
Long Exposure
Color Camera Block
In this mode, a video signal synchronized with a VD signal is output after a trigger pulse is input.
- The video signal is synchronized with the external VD signal
when an external HD*/VD signal is input.
- The video signal is synchronized with an internal VD signal when
no external HD*/VD signal is input.
Accessories
6
7
8
1/500
1
2
3
4
Inputting an external trigger pulse enables the camera to capture fastmoving objects clearly with precise timing.
6
Set DIP switches 6, 7, and 8 on the rear 6panel to Mode
1 or Mode 2.
7
7
When you set the trigger pulse width to 1/3
of
a
second
or more, the
8
8
output signal changes to the normal VIDEO signal.
Mode 2
1/250
1/50000
External Trigger Shutter
Mode 1
1/125
TV Format
B/W Model
Colour Model
1
2
3
4
1
2
3
4
Non-TV Format
1/10000
Mode 2
(Reset mode)
Digital Interface
IEEE1394b
Camera Link
This mode provides continuous video output with the electronic
shutter selected by switches to capture a high-speed moving
object clearly.
T
VIDEO OUT
XC-HR70
43
XC-HR50
XC-HR57
*1
12TV
Progressive
Output
Scan
VGA
1/60 Sec
Output
1N: Non-interlace
*2
1/3 Type 1/2 Type
CCD
CCD
Partial
Scan
HD VD
External Sync
Square
Pixels
C
VS
Lens Mount
Restart Long
Reset Exposure
Output
Mode 1
(Non-Reset Mode)
External
Trigger Shutter
Mode 2
(Non-Reset Mode)
*1 :XC-HR50
*2 :XC-HR57
External
Trigger Shutter
Connection Diagram P60
Dimensions
Outline
Camera body of all XC-HR models
14.5
12
2-M2 depth 3
29
Ø27.6 ±0.15
Ø27.3 ±0.15
The XC-HR50 and XCHR57 are monochrome camera
modules with full pixel read-out. The XC-HR50 incorporates
a 1/3 type double scan CCD, and the XC-HR57
incorporates a 1/2 type double scan CCD. Both cameras
have VGA resolution (648 (H) x 494 (V)) output at 60 frames/
sec, making them ideal for high-speed image capturing.
Relying on high-density mounting technology, these
cameras are the same size as other Sony cameras in the
XC-HR series and XC-E series, which increases their
mechanical compatibility. These ultra-compact (29 (W) x
29 (H) x 30 (D) mm) double-speed progressive scan
cameras are also lightweight and have a short tact time.
29
(4.9)
Features
30
15*1
8
23.7*1
12
■XC-HR50:1/3 Type PS CCD
XC-HR57:1/2 Type PS CCD
● Double Scan CCD
● The CCD has square pixels eliminating the need for
aspect ratio conversion.
● VGA resolution (648 x 494 pixels) image capturing at a
speed of 60 frames/sec.
■Partial scanning (at restart/reset ON, Binning OFF)
Up to 240 frames/sec. (Effective line: 100 lines)
■Compact and lightweight
29 (W) x 29 (H) x 30 (D) mm, 50 g
■External trigger shutter 1/4 to 1/100,000 sec.
■Electronic Shutter 1/100 to 1/20,000 sec.
■Synchronization Internal/External (HD/VD)
■C-mount system
■High shock and vibration tolerant
5.1
12
20
Intelligent
Digital Interface
IEEE1394b
Camera Link
Non-TV Format
TV Format
Colour Model
B/W Model
Accessories
3CCD Colour
Video Camera
HIGH FRAME RATE CAMERA
4-M2 depth 3
3-M3 depth 3
16*2
22*2
42
*1: for 3-M3 screw
*2: for 4-M2 screw
Unit: mm
Spectral Sensitivity Characteristics
●XC-HR50/HR57
(Typical Values)
Color PTZ Model
Color Camera Block
Relative sensitivity
Accessories
■ Compact camera adaptor
●DC-700/700CE
■ 12-pin camera cable (CE standard)
●CCXC-12P02N (2 m)
●CCXC-12P05N (5 m)
●CCXC-12P10N (10 m)
●CCXC-12P25N (25 m)
■ Tripod adaptor
●VCT-333I
1.0
0.9
0.8
0.7
0.6
0.5
0.4
0.3
0.2
0.1
0.0
400
500
600
700
800
900
Wavelength (nm)
(Lens characteristics and light source characteristics excluded.)
44
XC-HR50/HR57
1000
Intelligent
Location and Function of Parts and Controls
① Lens mount (C-mount)
Attach any C-mount lens or other optical equipment.
② Guide holes (at the top)
10 mm or less
Lens mount shoulder
② Guide holes (at the top)
These screw holes help to lock the camera module.
③ Tripod screw holes (at the bottom)
③ Tripod screw holes
(at the bottom)
④ Reference holes (at the bottom)
④ Reference holes
(at the bottom)
These precision screw holes are for locking the camera module.
Locking the camera module using these holes secures the optical
axis alignment.
Image device
XC-HR50
XC-HR57
1/3 type progressive scan IT CCD
1/2 type progressive scan IT CCD
Effective picture elements
659 (H) x 494 (V)
Effective lines
648 (H) x 494 (V)
Image size
Cell size
Lens mount
Sync system
VGA size : 648 (H) x 494 (V)
7.4 μm (H) X 7.4 μm (V)
9.9 μm (H) X 9.9 μm (V)
C mount
Internal/External (auto)
External sync signal input/output*1
HD/VD (HD/VD level: 2 to 5 Vp-p, 75Ω)
External sync allowable frequency
±1 % (in horizontal sync frequency)
Jitter
Scanning system
Video output
CCD vertical drive frequency
CCD horizontal drive frequency
Horizontal resolution
Sensitivity
Minimum illumination
S/N ratio
Gamma
White clip
Shutter
Normal shutter speed
External trigger shutter speed
External trigger
Power requirements
Power consumption
Dimensions
Mass
1.0 Vp-p, sync negative, 75 Ω, unbalanced
31.468 kHz
59.94 MHz (normal mode), 119.88 Hz (binning mode)
500 TV lines
400 lx F5.6 (γ=OFF, FIX GAIN (0 dB))
1 lx (F1.4, γ=OFF, GAIN +18 dB)
58 dB (0 dB GAIN)
Manual (0 to 18 dB)/Fix (0 dB) (adjustable on the rear panel)
OFF (fixed)
820 mV ±70 mV (F1.4, FIX GAIN (0 dB))
Normal shutter, Restart/Reset, External trigger shutter (Mode 1/Mode 2)
1/100, 1/125, 1/250, 1/500, 1/1,000, 1/2,000, 1/4,000, 1/10,000, 1/15,000, 1/30,000 s
DIP switch settings: 1/100, 1/125, 1/250, 1/500, 1/1,000, 1/2,000, 1/4,000, 1/10,000, 1/25,000, 1/50,000, 1/100,000 s
Trigger pulse width settings: 1/4 to 1/100,000 s Polarity: +, Width: 2 μs to 250 ms, Input impedance: 10kΩ or more
R/R mode binning off: max 240 frames/s (effective line: 102 lines)
binning on: max 362 frames/s (effective line: 59 lines)
External trigger shutter mode (MODE 1) binning off: max 240 frames/s (effective line: 100 lines)
binning on: max 362 frames/s (effective line: 57 lines)
DC 12 V (+10.5 V to +15.0 V)
1.8 W
29 (W) x 29 (H) x 30 (D) mm
50 g
-5 to +45 ºC
Storage temperature
-30 to +60 ºC
Operating humidity
Storage humidity
Vibration resistance
Shock resistance
MTBF
Regulatory compliance
Supplied accessories
Color PTZ Model
Operating temperature
Performance guarantee temperature
Color Camera Block
Partial scanning
Binning: 2-line combined output 120 fps/ Normal: 1-line sequential output 60 fps
3CCD Colour
Video Camera
Gain
Less than 20 ns
Non-interlace Progressive scan
Accessories
Output signal frequency TV Format
B/W Model
Colour Model
Specifications
Non-TV Format
These four screw holes on the bottom are for installing the
camera module on a tripod. To install on a tripod, you will need to
install the VCT-333I tripod adaptor using these holes on the bottom of the camera.
Digital Interface
IEEE1394b
Camera Link
Note
Be sure that the lens does not project more than 10 mm from the
lens mount.
① Lens mount (C-mount)
0 to +40 ºC
20 to 80 % (no condensation)
20 to 95 % (no condensation)
10 G (20 Hz to 200 Hz 20 minutes for each direction - x,y,z)
70 G
88,044 hrs. (approx. 10.1years)
UL6500, FCC/ICES-003 : ClassA, CE : EN61326, AS/NZ : EN61326
Lens mount cap (1), Operating instructions (1)
*1 Automatic switching in response to the presence of an input signal when the switch on the rear panel is set to EXT.
XC-HR50/HR57
45
Intelligent
④ M Gain (Manual Gain) control knob
Rear Panel
If you have selected MANUAL (manual adjustment) with DIP
switch 4, this knob adjusts the gain.
⑤ 75Ω termination switch
①
Digital Interface
IEEE1394b
Turn this to OFF when not terminating the external sync signal
(factory setting: ON).
TV Format
Colour Model
B/W Model
Non-TV Format
Camera Link
Factory Mode Settings of Rear Panel
1
③
④
⑤
Note
Be sure to turn the power off before making switch settings.
As the variable controller for manual adjustment is a small
precise component, do not apply force more than required when
adjusting. Doing so will break the component. The controller is
not a 360-degree rotation type. Do not turn the controller
beyond the stopper of the component. The range of rotation is
about 260 degrees. For the adjustment of the variable controller,
use a flathead screwdriver. The sizes of a recommended
flathead screwdrivers are 1.9mm width, 0.5mm thickness and
more than 0.45mm length.
① VIDEO OUT/DC IN/SYNC (video output/DC power/sync
input signal) connector (12-pin connector)
Connect a CCXC-12P05N camera cable to this connector to
obtain power from the +12V DC power supply and also to
enable video signal output from the camera module. When a sync
signal generator is connected to this connector, the camera module is synchronized with the external sync signals (HD/VD signals).
2
3
4
Switch name
Number
Factory mode setting
1
Shutter speed and mode setting DIP switches
All bits are OFF (left).
2
75Ω termination switch
ON
3
M GAIN control knob
-*
4
HD/VD signal input/output switch
EXT
* This unit is shipped from the factory with the gain switch (DIP switch 9) being set to "FIX",
so the M GAIN control knob is not operative unless the switch setting is changed. When the
gain switch (DIP switch 9) is set to MANUAL, you can rotate this knob to adjust gain over
the range 0 to 18 dB.
Connector Pin Assignments
②Shutter speed/Mode setting DIP switch
➊ Shutter speed (bits 1-4)
Rear panel
Color PTZ Model
Color Camera Block
3CCD Colour
Video Camera
Accessories
Set an appropriate shutter speed (factory setting: OFF).
46
➋ Partial scan mode switch (bit 5)
The factory setting of this switch is Partial scan OFF. If you turn
this switch ON to use Partial scan mode, you also need to make
the external VD pulse rate and width settings.
➌ Restart reset/External trigger shutter mode switch
(bits 6 to 8)
Pin Camera sync
No. output
1 Ground
External mode
(HD/VD)
Ground
Ground
External trigger
shutter
Ground
2
+12V DC
+12V DC
+12V DC
+12V DC
3
Video output (Ground) Video output (Ground)
Video output 1 (Ground)
Video output (Ground)
4
Video output (Signal)
Video output (Signal)
Video output 1 (Signal)
Video output (Signal)
➍ Gain switch (bit 9)
5
HD output (Ground)
HD input (Ground)
HD input (Ground)
HD input (Ground)
This switch selects FIX (fixed) or MANUAL (manual adjustment)
(factory setting: FIX (left side)).
6
HD output (Signal)
HD input (Signal)
HD input (Signal)
HD input (Signal)
7
VD output (Signal)
VD input (Signal)
Reset (Signal)
VD input (Signal)
➎ Binning mode switch (bit 0)
8
—
—
—
—
Switches the video signal output mode between binning OFF and
binning ON (factory setting: OFF).
9
—
—
—
—
10 —
—
—
WEN output (Signal)
11 —
—
—
Trigger pulse input (Signal)
By inputting an external restart/reset signal, you can capture the
information of single screens at arbitrary timing. By inputting an
external trigger signal, you can capture fast-moving objects at
precise locations. The factory settings for these switches are for
normal operation (restart/reset and external trigger shutter OFF).
③ HD/VD signal input/output switch
Set the switch to INT to output HD/VD signals from the camera
module.
Set the switch to EXT to input HD/VD signals from an external
unit (factory setting: EXT).
Note
Even when the switch is set to EXT, the camera module
operates in internal synchronization mode when no external HD
signal is input. In this case, however, the camera module will not
output internal sync signals.
XC-HR50/HR57
12 VD output (Ground)
VD input (Ground)
Restart/Reset
Reset (Ground)
Reset (Ground)*
* Common ground for pins 7, 10, and 11
About the Electronic Shutter
There are two shutter types: normal shutter and external trigger
shutter. Select them with the DIP switches on the rear panel.
* The electronic shutter cannot be used in restart/reset mode. Partial scan can be used in
restart/reset mode and in external trigger shutter mode 1.
Mode 1
(Non-reset mode)
Normal
Shutter
Other
modes*
8
8
1
2
3
4
1
2
3
4
Note
An incorrect video signal will be output if you input a new trigger
pulse before the video signal output for the previous trigger pulse
is output completely.
* "Other modes" refers to restart/reset mode and external trigger shutter mode.
●Using the DIP switches on the rear panel
●Normal shutter speed settings
1/250
1/500
1/1000
1
2
3
4
1
2
3
4
1
2
3
4
1
2
3
4
1/2000
1/4000
1
2
3
4
1
2
3
4
1/30000
1/10000
For shutter speeds, see the following table.
Mode 1 (Non-reset mode)/Mode 2 (Reset mode)
1/15000
1
2
3
4
1
2
3
4
1/100
1
2
3
4
1
2
3
4
(Unit: seconds)
Mode 2
Partial scannig
6
7
8
5
OFF
1/1000
1
2
3
4
1/2000
1/4000
1
2
3
4
1
2
3
4
1/10000
1/25000
1
2
3
4
1
2
3
4
1/100
1/100000
1
2
3
4
External Trigger Shutter
6
7
8
1/500
1
2
3
4
1/50000
6
7
8
Mode 1
1/250
1
2
3
4
1
2
3
4
1
2
3
4
(Unit: seconds)
ON
5
(Partial mode is compatible with Mode
1 only.)
To Set Restart/Reset Mode
This mode allows you to capture the information on single screens
at any time by externally inputting restart/reset signals (HD/VD). To
enter this mode, set the trigger shutter switches (6 to 8) on the rear
panel of the camera as shown in the figure below.
To use restart/reset mode and Partial scan mode simultaneously, set
the Partial scan mode switch (5) to ON (right side).
Note
Partial scan mode cannot be used while in external trigger shutter
mode 2.
High-rate scan
R/R
6
7
8
There are two modes for the timing in which video signals are
obtained.
OFF
5
ON
5
3CCD Colour
Video Camera
●Mode 1 (Non-reset mode)
* External or internal synchronization is selected automatically depending on the
presence or absence of external HD input.
●Mode 2 (Reset mode)
In this mode, an internal VD is reset, then a video signal is
output a certain period of time after trigger pulse input.
Long Exposure
The Restart/Reset function extends the CCD accumulation time,
resulting in highly sensitive image capture. This function is effective
when you cannot gain satisfactory sensitivity under normal
operating conditions, or when you want to observe the trail of a moving object. Extend the VD interval (T) between external VD pulses.
Example of input timing chart
There are two ways to set the shutter speed.
●Using trigger pulse width
Set all DIP switches (1 to 4 on the rear panel) to OFF.
You can obtain an arbitrary shutter speed by setting the trigger
pulse width to the range of 2 μsec to 250 msec.
Exposure time = Trigger pulse width + 6 μsec
Color PTZ Model
To Set the External Trigger Shutter
EXT-HD
EXT-HD
EXT-VD
EXT-VD
Charge
accumulation
on CCD
Color Camera Block
In this mode, a video signal synchronized with a VD signal is output after a trigger pulse is input.
- The video signal is synchronized with the external VD signal
when an external HD*/VD signal is input.
- The video signal is synchronized with an internal VD signal when
no external HD*/VD signal is input.
Accessories
Inputting an external
OFF trigger
ON pulse enables the camera to capture
first-moving objects clearly.
5
5
Set DIP switches 6, 7, and 8 on the rear panel to Mode 1 or Mode 2.
When you set the trigger pulse width to 1/3 of a second or more, the
output signal changes to the normal VIDEO signal.
Restart/Reset
TV Format
B/W Model
Colour Model
6
7
8
1/125
1
2
3
4
Non-TV Format
1/125
Digital Interface
IEEE1394b
Camera Link
This mode provides continuous video output with the electronic
shutter selected by switches to capture a high-speed moving
object clearly.
Mode 2
(Reset mode)
Intelligent
Normal Shutter
T
VIDEO OUT
XC-HR50/HR57
47
Non-TV
Progressive
Output
Scan
1/50 Sec
Partial
Scan
1N: Non-interlace
1/2 Type
CCD
HD VD
External Sync
Square
Pixels
Restart Long
Reset Exposure
Color Camera Block
SVGA
Output
Mode 1
Mode 2
(Non-Reset Mode)
(Non-Reset Mode)
External
Trigger Shutter
External
Trigger Shutter
Connection Diagram P60
Outline
Dimensions
Camera body of all XC-HR models
14.5
12
2-M2 depth 3
29
Ø27.6 ±0.15
Ø27.3 ±0.15
The XC-HR58 is a monochrome camera module that
incorporates 1/2 type double scan CCD with full pixel
readout. With SVGA resolution (767 x 580) output at 50
frames/sec, this camera is ideal for high-speed image
capturing. Relying on high-density mounting technology, this
camera is the same size as other Sony cameras in the XCHR series and XC-E series, which increases its mechanical
compatibility. This ultra-compact (29 (W) x 29 (H) x 30
(D) mm) double-speed progressive scan camera is also
lightweight and has a short tact time.
Features
(4.9)
12
5.1
30
15*1
8
23.7 *1
12
■1/2 Type PS CCD
● Double Scan CCD has square pixels
● The CCD has squre pixels eliminating the need for
aspect ratio conversion.
●SVGA resolution (767 x 580 pixels) image capturing at a
speed of 50 frames/sec
■Partial scanning (at restart/reset ON, Binning OFF)
Up to 200 frames/sec. (Effective line: 111 lines)
■Compact and lightweight
29 (W) x 29 (H) x 30 (D) mm, 50 g
■External trigger shutter 1/4 to 1/100,000 sec.
■Electronic Shutter 1/100 to 1/20,000 sec.
■Synchronization Internal/External (HD/VD)
■C-mount system
■High shock and vibration tolerant
4-M2 depth 3
3-M3 depth 3
16*2
22*2
42
*1: for 3-M3 screw
*2: for 4-M2 screw
Unit: mm
Spectral Sensitivity Characteristics
●XC-HR58
Accessories
Color PTZ Model
VS
Output
29
Non-TV Format
TV Format
Colour Model
B/W Model
Accessories
3CCD Colour
Video Camera
C
Lens Mount
20
Intelligent
XC-HR58
Camera Link
Digital Interface
IEEE1394b
HIGH FRAME RATE CAMERA
■ Compact camera adaptor
●DC-700/700CE
■ 12-pin camera cable (CE standard)
●CCXC-12P02N
●CCXC-12P05N
●CCXC-12P10N
●CCXC-12P25N
■ Tripod adaptor
●VCT-333I
(2 m)
(5 m)
(10 m)
(25 m)
(Typical Values)
Relative sensitivity
1.0
0.9
0.8
0.7
0.6
0.5
0.4
0.3
0.2
0.1
0.0
400
500
600
700
800
900
Wavelength (nm)
(Lens characteristics and light source characteristics excluded.)
48
XC-HR58
1000
Intelligent
Location and Function of Parts and Controls
① Lens mount (C-mount)
Attach any C-mount lens or other optical equipment.
② Guide holes (at the top)
Note
Be sure that the lens does not project more than 10 mm from the
lens mount.
10 mm or less
Lens mount shoulder
② Guide holes (at the top)
These screw holes help to lock the camera module.
③ Tripod screw holes (at the bottom)
④ Reference holes
(at the bottom)
④ Reference holes (at the bottom)
These precision screw holes are for locking the camera module.
Locking the camera module using these holes secures the optical
axis alignment.
Image device
Effective picture elements
Effective lines
Image size
Cell size
XC-HR58
1/2 type progressive scan IT CCD
782 (H) x 582 (V)
767 (H) x 580 (V)
SVGA size : 767 (H) x 580 (V)
8.3 μm (H) x 8.3 μm (V)
Lens mount
C mount
Sync system
Internal/External (auto)
External sync signal input/output*1
HD/VD (HD/VD level: 2 to 5 Vp-p, 75Ω)
External sync allowable frequency
±1 % (in horizontal sync frequency)
Jitter
Scanning system
Output signal frequency CCD vertical drive frequency
CCD horizontal drive frequency Horizontal resolution
Sensitivity
Minimum illumination
S/N ratio
Gain
White clip
Shutter
Normal shutter speed
External trigger shutter speed
External trigger
Power requirements
Power consumption
Dimensions
Mass
1.0 Vp-p, sync negative, 75 Ω, unbalanced
31.250 kHz ±1 %
50 Hz (normal mode), 100 Hz (binning mode)
600 TV lines
400 lx F5.6 (γ=OFF, FIX GAIN (0 dB))
1 lx (F1.4, γ=OFF, GAIN +18 dB)
56 dB (0 dB GAIN)
Manual (0 to 18 dB)/Fix (0 dB) (adjustable on the rear panel)
OFF (fixed)
820 mV ±70 mV (F1.4, FIX GAIN (0 dB))
Normal shutter, Restart/Reset, External trigger shutter (Mode 1/Mode 2)
1/100, 1/125, 1/250, 1/500, 1/1,000, 1/2,000, 1/4,000, 1/10,000, 1/15,000, 1/30,000 s
DIP switch settings: 1/100, 1/125, 1/250, 1/500, 1/1,000, 1/2,000, 1/4,000, 1/10,000, 1/25,000, 1/50,000, 1/100,000 s
Trigger pulse width settings: 1/4 to 1/100,000 s
Polarity: +, Width: 2 μs to 250 ms, Input impedance: 10kΩ or more (H: +2 to 5.0V, L: 0 to +0.6V)
R/R mode binning off: max 200 frames/s (effective line: 111 lines)
binning on: max 300 frames/s (effective line: 59 lines)
External trigger shutter mode (MODE 1) binning off: max 200 frames/s (effective line: 109 lines)
binning on: max 300 frames/s (effective line: 57 lines)
DC 12 V (+10.5 V to +15.0 V)
2.0 W
29 (W) x 29 (H) x 30 (D) mm
50 g
Operating temperature
-5 to +45 ºC
Storage temperature
-30 to +60 ºC
Operating humidity
Storage humidity
Vibration resistance
Shock resistance
MTBF
Regulatory compliance
Supplied accessories
0 to +40 ºC
Color PTZ Model
Performance guarantee temperature
Color Camera Block
Partial scanning
Binning: 2-line combined output 100 fps/ Normal: 1-line sequential output 50 fps
3CCD Colour
Video Camera
Gamma
Less than 20 ns
Non-interlace Progressive scan
Accessories
Video output
TV Format
B/W Model
Colour Model
Specifications
Non-TV Format
③ Tripod screw holes
(at the bottom)
These four screw holes on the bottom are for installing the
camera module on a tripod. To install on a tripod, you will need to
install the VCT-333I tripod adaptor using these holes on the bottom of the camera.
Digital Interface
IEEE1394b
Camera Link
① Lens mount (C-mount)
20 to 80 % (no condensation)
20 to 95 % (no condensation)
10 G (20 Hz to 200 Hz 20 minutes for each direction - x,y,z)
70 G
88,044 hrs. (approx. 10.1 years)
UL6500, FCC/ICES-003 : ClassA, CE : EN61326:, AS/NZ : EN61326
Lens mount cap (1), Operating instructions (1)
*1 Automatic switching in response to the presence of an input signal when the switch on the rear panel is set to EXT.
XC-HR58
49
Intelligent
④ M Gain (Manual Gain) control knob
Rear Panel
If you have selected MANUAL (manual adjustment) with DIP
switch 4, this knob adjusts the gain.
①
Digital Interface
IEEE1394b
Turn this to OFF when not terminating the external sync signal
(factory setting: ON).
Accessories
TV Format
Colour Model
B/W Model
Non-TV Format
Camera Link
3CCD Colour
Video Camera
Color Camera Block
Color PTZ Model
Factory Mode Settings of Rear Panel
1
③
④
⑤
Note
Be sure to turn the power off before making switch settings.
As the variable controller for manual adjustment is a small
precise component, do not apply force more than required when
adjusting. Doing so will break the component. The controller is
not a 360-degree rotation type. Do not turn the controller
beyond the stopper of the component. The range of rotation is
about 260 degrees. For the adjustment of the variable controller,
use a flathead screwdriver. The sizes of a recommended
flathead screwdrivers are 1.9mm width, 0.5mm thickness and
more than 0.45mm length.
① VIDEO OUT/DC IN/SYNC (video output/DC power/sync
input signal) connector (12-pin connector)
Connect a CCXC-12P05N camera cable to this connector to
obtain power from the +12V DC power supply and also to
enable video signal output from the camera module. When a sync
signal generator is connected to this connector, the
camera module is synchronized with the external sync signals
(HD/VD signals).
2
3
4
Switch name
Number
Factory mode setting
1
Shutter speed and mode setting DIP switches
All bits are OFF (left).
2
75Ω termination switch
ON
3
M GAIN control knob
-*
4
HD/VD signal input/output switch
EXT
* This unit is shipped from the factory with the gain switch (DIP switch 9) being set to "FIX,"
so the M GAIN control knob is not operative unless the switch setting is changed. When the
gain switch (DIP switch 9) is set to MANUAL, you can rotate this knob to adjust gain over
the range 0 to 18 dB.
Connector Pin Assignments
Rear panel
Shutter speed/Mode setting DIP switch
➊ Shutter speed (bits 1-4)
Set an appropriate shutter speed (factory setting: OFF).
w Partial scan mode switch (bit 5)
The factory setting of this switch is Partial scan OFF. If you turn
this switch ON to use Partial scan mode, you also need to make
the external VD pulse rate and width settings.
Pin Camera sync
No. output
1 Ground
External mode
(HD/VD)
Ground
Ground
External trigger
shutter
Ground
2
+12V DC
+12V DC
+12V DC
+12V DC
3
Video output (Ground) Video output (Ground)
Video output (Ground)
Video output (Ground)
4
Video output (Signal)
Video output (Signal)
Video output (Signal)
Video output (Signal)
5
HD output (Ground)
HD input (Ground)
HD input (Ground)
HD input (Ground)
6
HD output (Signal)
HD input (Signal)
HD input (Signal)
HD input (Signal)
7
VD output (Signal)
VD input (Signal)
Reset (Signal)
VD input (Signal)
8
—
—
—
—
This switch selects FIX (fixed) or MANUAL (manual adjustment)
(factory setting: FIX (left side)).
9
—
—
—
—
10 —
—
—
WEN output (Signal)
➍ Binning mode switch (bit 0)
11 —
—
—
Trigger pulse input (Signal)
Switches the video signal output mode between binning OFF and
binning ON (factory setting: OFF).
12 VD output (Ground)
➋ Restart reset/External trigger shutter mode switch
(bits 6 to 8)
50
⑤ 75Ω termination switch
By inputting an external restart/reset signal, you can capture the
information of single screens at arbitrary timing. By inputting an
external trigger signal, you can capture imaging information on
fast-moving objects at a precise moment in time. The factory settings for these switches are for normal operation
(restart/reset and external trigger shutter OFF).
➌ Gain switch (bit 9)
VD input (Ground)
Restart/Reset
Reset (Ground)
VD input (Ground)*
* Common ground for pins 7, 10, and 11
③ HD/VD signal input/output switch
Set the switch to INT to output HD/VD signals from the camera
module.
Set the switch to EXT to input HD/VD signals from an external
unit (factory setting: EXT).
Note
Even when the switch is set to EXT, the camera module
operates in internal synchronization mode when no external HD
signal is input. In this case, however, the camera module will not
output internal sync signals.
XC-HR58
About the Electronic Shutter
There are two shutter types: normal shutter and external trigger
shutter. Select them with the DIP switches on the rear panel.
* The electronic shutter cannot be used in restart/reset mode. Partial scan can be used in
restart/reset mode and in external trigger shutter mode 1.
Intelligent
Normal Shutter
Mode 1
(Non-reset mode)
Normal
Shutter
Other
modes*
8
8
* "Other modes" refers to restart/reset mode and external trigger shutter mode.
1/125
1/250
1/500
1/1000
1
2
3
4
1
2
3
4
1
2
3
4
1
2
3
4
1
2
3
4
1
2
3
4
1/30000
Note
An incorrect video signal will be output if you input a new trigger
pulse before the video signal output for the previous trigger pulse
is output completely.
1/10000
For shutter speeds, see the following table.
Mode 1 (Non-reset mode)/Mode 2 (Reset mode)
1/15000
1
2
3
4
1
2
3
4
1/100
1
2
3
4
1
2
3
4
Inputting an external trigger pulse enables the camera to capture fastmoving objects clearly with precise6timing. 6
7 to Mode 1 or Mode 2.
Set DIP switches 6, 7, and 8 on the7 rear panel
8
8
When you set the trigger pulse width to 1/3 of a second or more, the
output signal changes to the normal VIDEO signal.
Mode 2
6
7
8
6
7
8
Partial scannig
OFF
5
ON
5
1/250
1/500
1/1000
1
2
3
4
1
2
3
4
1
2
3
4
1/2000
1/4000
1
2
3
4
1
2
3
4
1/50000
1/10000
1
2
3
4
1/100
1/100000
1
2
3
4
1/25000
1
2
3
4
1
2
3
4
1
2
3
4
(Unit: seconds)
Restart/Reset
To Set Restart/Reset Mode
The information on one screen can be extracted at any time by
externally inputting restart/reset signals (HD/VD). To enter this mode,
set the trigger shutter switches (6 to 8) on the rear panel of the camera as shown in the figure below.
To use restart/reset mode and Partial scan mode simultaneously, set
the Partial scan mode switch (5) to ON (right side).
Note
OFF
ON
Partial scan mode cannot be used while in external trigger shutter
5
5
mode 2.
R/R
6
7
8
OFF
ON
5
5
3CCD Colour
Video Camera
There are two modes for the timing in which video signals are
obtained.
Partial scan
●Mode 1 (Non-reset mode)
* External or internal synchronization is selected automatically depending on the
presence or absence of external HD input.
●Mode 2 (Reset mode)
In this mode, an internal VD is reset, then a video signal is
output a certain period of time after trigger pulse input.
The Restart/Reset function extends the CCD accumulation time,
resulting in highly sensitive image capture. This function is effective
when you cannot gain satisfactory sensitivity under normal
operating conditions, or when you want to observe the trail of a moving object. Extend the VD interval (T) between external VD pulses.
Example of input timing chart
Color PTZ Model
To Set the External Trigger Shutter
Long Exposure
There are two ways to set the shutter speed.
●Using trigger pulse width
Set all DIP switches (1 to 4 on the rear panel) to OFF.
You can obtain an arbitrary shutter speed by setting the trigger
pulse width to the range of 2 μsec to 250 msec.
Exposure time = Trigger pulse width + 5 μsec
EXT-HD
EXT-HD
EXT-VD
EXT-VD
Charge
accumulation
on CCD
Color Camera Block
In this mode, a video signal synchronized with a VD signal is output after a trigger pulse is input.
- The video signal is synchronized with the external VD signal
when an external HD*/VD signal is input.
- The video signal is synchronized with an internal VD signal when
no external HD*/VD signal is input.
Accessories
(Partial mode is compatible with Mode
1 only.)
1/125
1
2
3
4
TV Format
B/W Model
Colour Model
(Unit: seconds)
External Trigger Shutter
Mode 1
1
2
3
4
Non-TV Format
1/4000
1
2
3
4
●Using the DIP switches on the rear panel
●Normal shutter speed settings
1/2000
Mode 2
(Reset mode)
Digital Interface
IEEE1394b
Camera Link
This mode provides continuous video output with the electronic
shutter selected by switches to capture a high-speed moving
object clearly.
T
VIDEO OUT
XC-HR58
51
XC-56
Non-TV
Progressive
Output
Scan
1/30 Sec
Partial
Scan
1N: Non-interlace
1/3 Type
CCD
HD VD
External Sync
Square
Pixels
C
Lens Mount
Restart Long
Reset Exposure
VS
Output
Normal
Shutter
*
VGA
Output
Mode 1
(Non-Reset Mode)
External
Trigger Shutter
Mode 2
(Non-Reset Mode)
* Requires specific acquisition board.
External
Trigger Shutter
Connection Diagram
P61
Outline
Dimensions
The XC-56 is a monochrome camera module that
incorporates a 1/3 type progressive scan CCD.
The XC-56 has VGA-class resolution (647 (H) x 493 (V))
output at 30 frames/sec. and 60 frames/sec. by the binning
function. The body dimensions are 29(W) x 29 (H) x 30(D),
which are same as those of XC-HR series. The pin
assignment is compatible to the current XC-55.
14.5
12
2-M2 depth 3
Ø27.6 ±0.15
Ø27.3 ±0.15
29
29
Features
(4.9)
■Incorporating a 1/3 type progressive scan CCD
■Non-TV format
■Square pixel/ Full pixel read-out
■VGA-class resolution image output, 30 frames/sec.
■Partial scanning function
■External trigger shutter
● Restart/Reset
● Mode 1 (Non-reset mode)
● Mode 2 (Reset mode)
■Various settings are available on the rear panel
12
5.1
30
8
23.7 *1
12
15*1
20
Intelligent
Digital Interface
IEEE1394b
Camera Link
Non-TV Format
TV Format
Colour Model
B/W Model
Accessories
PROGRESSIVE SCAN CAMERA MODULE
4-M2 depth 3
3-M3 depth 3
16*2
22*2
42
Color PTZ Model
Color Camera Block
3CCD Colour
Video Camera
*1: for 3-M3 screw
*2: for 4-M2 screw
Unit: mm
Spectral Sensitivity Characteristics
Accessories
■ Compact camera adaptor
■ 12-pin camera cable (CE standard)
■ Tripod adaptor
●VCT-333I
Relative sensitivity
1.0
0.9
●DC-700/700CE
●CCXC-12P02N
●CCXC-12P05N
●CCXC-12P10N
●CCXC-12P25N
●XC-HR56
(2 m)
(5 m)
(10 m)
(25 m)
0.8
0.7
0.6
0.5
0.4
0.3
0.2
0.1
0.0
400
500
600
700
800
900
Wavelength (nm)
(Lens characteristics and light source characteristics excluded.)
52
XC-56
1000
Intelligent
Location and Function of Parts and Controls
① Lens mount (C-mount)
Attach any C-mount lens or other optical equipment.
②Guide holes (at the top)
Note
Be sure that the lens does not project more than 10 mm from the
lens mount.
10 mm or less
Lens mount shoulder
② Guide holes (at the top)
These screw holes help to lock the camera module.
③ Tripod screw holes (at the bottom)
These four screw holes on the bottom are for installing the
camera module on a tripod. To install on a tripod, you will need to
install the VCT-333I tripod adaptor using these holes on the bottom of the camera.
④ Reference holes
(at the bottom)
④ Reference holes (at the bottom)
These precision screw holes are for locking the camera module.
Locking the camera module using these holes secures the optical
axis alignment.
TV Format
B/W Model
Colour Model
Specifications
Image device
Effective picture elements (HxV)
Effective lines (HxV)
Output image size
Cell size
XC-56
1/3 type Progressive Scan IT CCD
659 (H) x 494 (V)
647 (H) x 493 (V)
VGA class ( 647 (H) x 494 (V) )
7.4 μm (H) x 7.4 μm (V)
Lens mount
C-mout
Sync system
Internal / External (automatically switched according to input signal)
External synchronization input/output*1
Allowable frequency deviation of external synchronization
H jitter
Scan lines
Video output
Horizontal frequency
Output signal frequency
Horizontal resolution
HD/VD (HD/VD level: 2 to 5 Vp-p, 75Ω)*
±1 % (in horizontal synchronous frewuency)
Less than 20 ns
525-line/236-line (Normal mode/ Binning mode)
Normal: 1 -line sequentia output 29.97 fps / Binning: F2 -line sequential output 59.94 fps
1.0Vp-p, sync negative, 75Ω unbalanced
15.734 KHz
29.97 Hz (Normal mode) 59.94 Hz (Bininning mode)
500TV lines
Sensitivity
400 lx F8 (γ= OFF, FIX GAIN (0 dB))
Minimum illumination
0.5 lx ( F1.4, γ= OFF, GAIN +18 dB )
Video S/N ratio
Gamma
White clip
Shutter mode
58 dB (GAIN 0 dB)
Fixed/Manunally adjustable
OFF (γ =1) (fixed)
820 mV ± 70mV
Normal shutter, Restart/Reset, External trigger shutter (Mode1/Mode2)
Normal shutter speed
1/100, 1/125, 1/250, 1/500, 1/1,000, 1/2,000, 1/4,000, 1/8,000, 1/15,000 s
External trigger shutter
DIP switch settings: 1/100, 1/125, 1/250, 1/500, 1/1,000, 1/2,000, 1/4,000, 1/10,000, 1/25,000, 1/50,000, 1/100,000 s
3CCD Colour
Video Camera
Gain
Accessories
Video output mode
Trigger pulse width settings: 1/4 to 1/100,000 s
Polarity: +, Width: 2 μs to 250 ms, Input impedance: 10kΩ or more (H: +2 to 5.0V, L: 0 to +0.6V)
Pin Assignment
Correspondence to EIAJ compliant 12PIN connector pin assignment Unavailable (No.8 pin: Trigger input (G), No.9 pin: Trigger input,
Power requirements
Power consumption
Dimensions Mass
No.10 pin: GRD, No.11pin: +12V) Pins No.10 and 11 are not connected inside the camera
DC 12 V (+10.5 V to +15.0 V)
1.5 W
29 (W) x 29 (H) x 30 (D) mm
50 g
Operating temperature
-5 to +45 ºC
Storage temperature
-30 to +60 ºC
Performance guarantee temperature
Storage humidity
Vibration resistance
Shock resistance
MTBF
Regulatory compliance
Supplied accessories
0 to +40 ºC
20 to 80 % (no condensation)
Color PTZ Model
Operating humidity
Color Camera Block
External trigger Non-TV Format
③ Tripod screw holes
(at the bottom)
Digital Interface
IEEE1394b
Camera Link
① Lens mount (C-mount)
20 to 95 % (no condensation)
10 G (20 Hz to 200 Hz 20 minutes for each direction - x,y,z)
70 G
88,044 hrs. (approx. 10.1 years)
UL6500, FCC/ICES-003 : ClassA, CE : EN61326, AS/NZ : EN61326
Lens mount cap (1), Operating instructions (1), Lens
* Automatic switching in response to the presence of an input signal when the switch on the rear panel is set to EXT.
1
XC-56
53
Intelligent
Rear Panel
Factory Mode Settings of Rear Panel
Digital Interface
IEEE1394b
① VIDEO OUT/DC IN/SYNC connector
q
w
e
r
t
Camera Link
Non-TV Format
TV Format
Colour Model
B/W Model
Accessories
3CCD Colour
Video Camera
Color Camera Block
Color PTZ Model
②Shutter speed /
Mode setting DIP
switches
2
③ HD/VD signal input/output switch
④ M GAIN control knob
⑤ 75Ω termination switch
Note
Be sure to turn the power off before making switch settings.
As the variable controller for manual adjustment is a small
precise component, do not apply force more than required when
adjusting. Doing so will break the component. The controller is
not a 360-degree rotation type. Do not turn the controller
beyond the stopper of the component. The range of rotation is
about 260 degrees. For the adjustment of the variable controller,
use a flathead screwdriver. The sizes of a recommended
flathead screwdrivers are 1.9mm width, 0.5mm thickness and
more than 0.45mm length.
3
4
Switch name
Number
Factory mode setting
1
Shutter speed and mode setting DIP switches
All bits are OFF (left).
2
75Ω termination switch
ON
3
M GAIN control knob
-*
4
HD/VD signal input/output switch
EXT
* This unit is shipped from the factory with the gain switch (DIP switch 9) being set to "FIX,"
so the M GAIN control knob is not operative unless the switch setting is changed. When the
gain switch (DIP switch 9) is set to MANUAL, you can rotate this knob to adjust gain over
the range 0 to 18 dB.
Connector Pin Assignments
① VIDEO OUT/DC IN/SYNC (video output/DC power/sync
input signal) connector (12-pin connector)
Rear panel
Connect a CCXC-12P05N camera cable to this connector to
obtain power from the +12 V DC power supply and also to
enable video signal output from the camera module. When a sync
signal generator is connected to this connector, the
camera module is synchronized with the external sync signals
(HD/VD signals).
Shutter speed/Mode setting DIP switch
➊ Shutter speed (bits 1-4)
Pin Camera sync
No. output
1 Ground
External mode
(HD/VD)
Ground
Ground
External trigger
shutter
Ground
Set an appropriate shutter speed (factory setting: OFF).
2
+12V DC
+12V DC
+12V DC
+12V DC
➋ Partial scan mode switch (bit 5)
3
Video output (Ground) Video output (Ground)
Video output (Ground)
Video output (Ground)
4
Video output (Signal)
Video output (Signal)
Video output (Signal)
Video output (Signal)
5
HD output (Ground)
HD input (Ground)
HD input (Ground)
HD input (Ground)
6
HD output (Signal)
HD input (Signal)
HD input (Signal)
HD input (Signal)
7
VD output (Signal)
VD input (Signal)
Reset (Signal)
VD input (Signal)
8
—
—
—
9
The factory setting of this switch is Partial scan OFF. If you turn
this switch ON to use Partial scan mode, you also need to make
pulse rate settings.
➌ Restart reset/External trigger shutter mode switch (bits 6 to 8)
By inputting an external restart/reset signal, you can capture the
information of single screens at arbitrary timing. By inputting an
external trigger signal, you can capture fast-moving objects at
precise locations. The factory settings for these switches are for
normal operation.
➍ Gain switch (bit 9)
This switch selects FIX (fixed) or MANUAL (manual adjustment)
(factory setting: FIX (left side)).
➎ Binning mode switch (bit 0)
Switches the video signal output mode between binning OFF and
binning ON (factory setting: OFF).
Restart/Reset
—
—
—
—
Trigger pulse input (Signal)
10 —
—
—
—
11 —
—
—
—
12 VD output (Ground)
VD input (Ground)
Reset (Ground)
VD input (Ground)*
* Common ground for pins 7, 10, and 11
③ HD/VD signal input/output switch
Set the switch to INT to output HD/VD signals from the camera
module.Set the switch to EXT to input HD/VD signals from an external unit (factory setting: EXT).
Note
Even when the switch is set to EXT, the camera module
operates in internal synchronization mode unless an external HD
signal is input. In this case, however, the camera module will not
output internal sync signals.
④ M GAIN (Manual Gain) control knob
If you have selected MANUAL (manual adjustment) with DIP
switch 4, this knob adjusts the gain. The dimensions of the
groove on the knob are 0.5 (W) X 1.9 (L) X 0.45 (D)mm.
Use a screwdriver that is appropriate for these dimensions.
The knob can be rotated 260 degrees. Do not rotate the knob
over the stopper on the limit point.
⑤ 75Ω termination switch
Turn this to OFF when not terminating the external sync signal
(factory setting: ON).
54
1
XC-56
About the Electronic Shutter
There are two shutter types: normal shutter and external trigger
shutter. Select them with the DIP switches on the rear panel.
*1 The electronic shutter cannot be used in restart/reset mode.
*2 Partial scan can be used in restart/reset mode and in external trigger shutter mode 1.
Normal
Shutter
Other
modes*
8
8
●Using the DIP switches on the rear panel
For shutter speeds, see the following table.
Digital Interface
IEEE1394b
Camera Link
This mode provides continuous video output with the electronic
shutter selected by switches to capture a high-speed moving
object clearly.
Note
An incorrect video signal will be output if you input a new trigger
pulse before the video signal output for the previous trigger pulse
is output completely.
Mode 1 (Non-reset mode)/Mode 2 (Reset mode)
* "Other modes" refers to restart/reset mode and external trigger shutter mode.
●Normal shutter speed settings
1/125
1/250
1/500
1/1000
1
2
3
4
1
2
3
4
1
2
3
4
1
2
3
4
1/2000
1/4000
1
2
3
4
1
2
3
4
1/50000
1/10000
1/25000
1
2
3
4
1
2
3
4
1/100
1/100000
1
2
3
4
1
2
3
4
Non-TV Format
1
2
3
4
(Unit: seconds)
(Unit: seconds)
Restart/Reset
Inputting an external trigger pulse enables
the
6
6 camera to capture first7
moving objects clearly. Set DIP switches
6, 77, and 8 on the rear panel
8
8
to Mode 1 or Mode 2. When you set the trigger pulse width to 1/3 of
a second or more, the output signal changes to the normal VIDEO
signal.
Mode 1
Mode 2
Partial scannig
6
7
8
6
7
8
5
OFF
ON
To Set Restart/Reset Mode
This mode allows you to capture the information on single screens
at any time by externally inputting restart/reset signals (HD/VD). To
enter this mode, set the trigger shutter switches (6 to 8) on the rear
panel of the camera as shown in the figure below.
To use restart/reset mode and Partial scan mode simultaneously, set
the Partial scan mode switch (5) to ON (right side).
5
R/R
(Partial mode is compatible with Mode
1 only.)
6
7
8
●Mode 1 (Non-reset mode)
* External or internal synchronization is selected automatically depending on the
presence or absence of external HD input.
5
ON
5
Long Exposure
The Restart/Reset function extends the CCD accumulation time,
resulting in highly sensitive image capture. This function is effective
when you cannot gain satisfactory sensitivity under normal
operating conditions, or when you want to observe the trail of a moving object. Extend the VD interval (T) between external VD pulses.
●Mode 2 (Reset mode)
In this mode, an internal VD is reset, then a video signal is
output a certain period of time after trigger pulse input.
To Set the External Trigger Shutter
Example of input timing chart
EXT-HD
EXT-HD
●Using trigger pulse width
Set all DIP switches (1 to 4 on the rear panel) to OFF.
You can obtain an arbitrary shutter speed by setting the trigger
pulse width to the range of 2 μsec to 250 msec.
Exposure time = Trigger pulse width + 8 μsec
EXT-VD
EXT-VD
Mode 1
(Non-reset mode)
1
2
3
4
T
VIDEO OUT
Mode 2
(Reset mode)
Color PTZ Model
Charge
accumulation
on CCD
Color Camera Block
There are two ways to set the shutter speed.
3CCD Colour
Video Camera
In this mode, a video signal synchronized with a VD signal is output after a trigger pulse is input.
- The video signal is synchronized with the external VD signal
when an external HD*/VD signal is input.
- The video signal is synchronized with an internal VD signal when
no external HD*/VD signal is input.
OFF
Accessories
Note
Partial scan mode cannot be used while in external trigger shutter
OFF
ON
mode 2.
There are two 5modes 5for the timing in which video signals are
obtained.
Partial scan
TV Format
B/W Model
Colour Model
External Trigger Shutter
Intelligent
Normal Shutter
1
2
3
4
XC-56
55
XC-56BB
Non-TV
Progressive
Output
Scan
1/30 Sec
Partial
Scan
1N: Non-interlace
Mode 2
1/3 Type
CCD
NF
*
VS
VGA
Output
Output
Square
Pixels
Lens Mount
Restart
Reset
Long Normal
Exposure Shutter
HD VD
External Sync
Mode 1
(Non-Reset Mode)
External
Trigger Shutter
Remote
Head
(Non-Reset Mode)
External
Trigger Shutter
* Requires specific acquisition board.
Accessories
P61
Dimensions
The XC-56BB is a small-sized head-detachable
monochrome camera module that incorporates a 1/3 type
progressive scan CCD. The XC-56BB has the same camera
function as those of XC56. The XC-56BB has VGA-class
resolution output at 30 frames/sec. The XC-56BB is a
compact model succeeding to the XC-55BB with the
dimensions of 22 (W) x 22 (H) x 30 (D) for the camera head
and 29(W) x 29 (W) x 67(D) for the control part.
●CHU
Features
22
5
4-M2 depth2.5
Unit: mm
●CCU
5.8
(80.8)
67
8
Accessories
■ Compact camera adaptor
29
●DC-700/700CE
■ 12-pin camera cable (CE standard)
●CCXC-12P02N (2 m)
●CCXC-12P10N (10 m)
●CCXC-12P05N (5 m)
3.5
44.5
●CCXC-12P25N (25 m)
20
3CCD Colour
Video Camera
Color Camera Block
Color PTZ Model
4.5
2
22
■Incorporating a 1/3 type progressive scan CCD
■Non-TV format
■Square pixel/ Full pixel read-out
■VGA-class resolution image output, 30 frames/sec.
■Partial scanning function
■External trigger shutter
● Restart/Reset
● Mode 1 (Non-reset mode)
● Mode 2 (Reset mode)
■Various settings are available on the rear panel
■Cable Length: 2 m
29
56
30
NF mount
22
Outline
φ19
TV Format
Colour Model
B/W Model
Non-TV Format
Connection Diagram
12
Intelligent
Digital Interface
IEEE1394b
Camera Link
PROGRESSIVE SCAN MODULE
■ C-mount adaptor
●LO-999CMT
■ NF-mount LENS
■ Tripod adaptor
●VCL-03S12XM ●VCT-333I (for CHU)
●VCL-06S12XM ●VCT-55I (for CCU)
●VCL-12S12XM
XC-56BB
4-M3 depth4
Unit: mm
Intelligent
Supplied Accessories
Spectral Sensitivity Characteristics
Dedicated cable CCU and CHU
●XC-56BB
Relative sensitivity
0.9
2m
Ø12.5
(20M)
Ø12.5
(20M)
0.8
Ø5
0.7
40.5
0.6
0.5
40.5
CHU (20pin-M)/CCU (20pin-M)
0.4
0.3
0.2
Digital Interface
IEEE1394b
Camera Link
1.0
0.1
500
600
700
800
900
Non-TV Format
0.0
400
1000
Wavelength (nm)
(Lens characteristics and light source characteristics excluded.)
Image device
Effective picture elements (HxV)
Effective lines (HxV)
Output image size
Cell size
Lens mount
Flange focal length
Sync system
External synchronization input/output*1
Allowable frequency deviation of external synchronization
H jitter
Scan lines
Video output
Horizontal frequency
Output signal frequency
Horizontal resolution
XC-56BB
1/3 type Progressive Scan IT CCD
659 (H) x 494 (V)
647 (H) x 493 (V)
VGA class ( 647 (H) x 494 (V) )
7.4 μm (H) x 7.4 μm (V)
NF-mout
12.0 mm
Internal / External (automatically switched according to input signal)
HD/VD (HD/VD level: 2 to 5 Vp-p, 75Ω)
±1 % (in horizontal synchronous frewuency)
Less than 20 ns
525-line/236-line (Normal mode/ Binning mode)
Normal: 1 -line sequentia output 29.97 fps / Binning: F2 -line sequential output 59.94 fps
1.0Vp-p, sync negative, 75Ω unbalanced
15.734 KHz
29.97 Hz (Normal mode)/59.94 Hz (Bininning mode)
500TV lines
Sensitivity
400 lx F8 (γ= OFF, FIX GAIN (0 dB))
Minimum illumination
0.5 lx ( F1.4, γ= OFF, GAIN +18 dB )
Video S/N ratio
Gamma
White clip
Shutter mode
58 dB
Fixed/Manunally adjustable
OFF (γ =1) (fixed)
820 mV ± 70mV
Normal shutter, Restart/Reset, External trigger shutter (Mode1/Mode2)
Normal shutter speed
1/100, 1/125, 1/250, 1/500, 1/1,000, 1/2,000, 1/4,000, 1/8,000, 1/15,000 s
External trigger shutter
DIP switch settings: 1/100, 1/125, 1/250, 1/500, 1/1,000, 1/2,000, 1/4,000, 1/10,000, 1/25,000, 1/50,000, 1/100,000 s
Trigger pulse width settings: 1/4 to 1/100,000 s
Polarity: +, Width: 2 μs to 250 ms, Input impedance: 10kΩ or more (H: +2 to 5.0V, L: 0 to +0.6V)
Pin Assignment
Correspondence to EIAJ compliant 12PIN connector pin assignment Unavailable (No.8 pin: Trigger input (G), No.9 pin: Trigger input,
Power requirements
Power consumption
Dimensions Mass
No.10 pin: GRD, No.11pin: +12V) Pins No.10 and 11 are not connected inside the camera
DC 12 V (+10.5 V to +15.0 V)
2.2 W
CHU: 22 (W) x 22 (H) x 30 (D) mm CCU: 29 (W) x 29 (H) x 67 (D) mm
CHU: 40 g CCU: 100 g
Operating temperature
-5 to +45 ºC
Storage temperature
-30 to +60 ºC
Performance guarantee temperature
Storage humidity
Vibration resistance
Shock resistance
MTBF
Regulatory compliance
Supplied accessories
0 to +40 ºC
20 to 80 % (no condensation)
Color PTZ Model
Operating humidity
Color Camera Block
External trigger 3CCD Colour
Video Camera
Gain
Accessories
Video output mode
TV Format
B/W Model
Colour Model
Specifications
20 to 95 % (no condensation)
10 G (20 Hz to 200 Hz 20 minutes for each direction - x,y,z)
70 G
73,800 hrs. (approx. 8.4 years)
UL6500, FCC/ICES-003 : ClassB, CE : EN61326, AS/NZ : EN61326
Lens mount cap (1), Operating instructions (1), Dedicated cable (1), Ferrite core (1)
*1 Automatic switching in response to the presence of an input signal when the switch on the rear panel is set to EXT.
XC-56BB
57
Intelligent
Location and Function of Parts and Controls
① VIDEO OUT/DC IN/SYNC (video output/DC power/sync
input signal) connector (12-pin connector)
Connect a CCXC-12P05N camera cable to this connector to
obtain power from the +12 V DC power supply and also to
enable video signal output from the camera module. When a sync
signal generator is connected to this connector, the
camera module is synchronized with the external sync signals
(HD/VD signals).
① Lens mount ( NF-mount)
Digital Interface
IEEE1394b
② Reference holes for locking the camera/
Tripod screw holes (head unit)
④ Reference holes for locking
the camera/Tripod screw holes
(control unit)
Set an appropriate shutter speed (factory setting: OFF).
➋ Partial scan mode switch (bit 5)
3CCD Colour
Video Camera
Accessories
TV Format
Colour Model
B/W Model
Non-TV Format
Camera Link
The factory setting of this switch is Partial scan OFF. If you turn
this switch ON to use high-rate scan mode, you also need to
make pulse rate settings.
③ Connector for
the special cable
➌ Restart reset/External trigger shutter mode switch (bits 6 to 8)
④ Reference holes for locking the
camera/Tripod screw holes
(control unit)
By inputting an external restart/reset signal, you can capture the
information of single screens at arbitrary timing. By inputting an
external trigger signal, you can capture fast-moving objects at
precise locations. The factory settings for these switches are for
normal operation.
② Reference holes for locking the camera/ Tripod screw holes (head unit)
① Lens mount (NF-mount)
Install an NF mounted lens or optical device, e.g., the standard
lens VCL-12S12XM. If you install a C-mount lens on the
XC-56BB, you will need the C-mount adaptor LO-999CMT.
Note
Lens mount
For installing a C-mount lens on 4.1 mm or
shoulder
the XC56BB
less
•If you install a C-mount lens on
the XC56BB, you will need the
C-mount adaptor LO-999CMT (sold separately). Be sure that the
lens does not project more than 4.1 mm from the lens mount.
•For setting the camera when using C-mount adaptor, fix the lens
mount (C-mount) instead of fixing the camera head in
order to avoid applying unnecessary forces to the camera head.
•Avoid using C-mount adaptor in the places where vibrations or
shocks are applied often. Doing so will damage the equipment
or loosen the connection.
② Reference holes for locking the camera/Tripod screw holes (head unit)
You can attach a tripod to the reference holes (4) on the bottom. You
will need a tripod adapter VCT-333I to install the tripod.
There are two more reference holes on the front of the top surface.
Note
•The XC-56BB head unit (CHU) must have the same serial number as
the control unit (CCU).
•Do not connect or disconnect the supplied cable while the
power is
turned on, otherwise the camera may be damaged.
➍ Gain switch (bit 9)
This switch selects FIX (fixed) or MANUAL (manual adjustment)
(factory setting: FIX (left side)).
➎ Binning mode switch (bit 0)
Switches the video signal output mode between binning OFF and
binning ON (factory setting: OFF).
③ HD/VD signal input/output switch
Set the switch to INT to output HD/VD signals from the camera
module.Set the switch to EXT to input HD/VD signals from an external unit (factory setting: EXT).
Note
Even when the switch is set to EXT, the camera module operates
in internal synchronization mode unless an external HD signal is
input. In this case, however, the camera module will not output
internal sync signals.
④ M GAIN (Manual Gain) control knob
If you have selected MANUAL (manual adjustment) with DIP
switch 4, this knob adjusts the gain. The dimensions of the
groove on the knob are 0.5 (W) X 1.9 (L) X 0.45 (D)mm.
Use a screwdriver that is appropriate for these dimensions.
The knob can be rotated 260 degrees. Do not rotate the knob
over the stopper on the limit point.
⑤ 75Ω termination switch
Turn this to OFF when not terminating the external sync signal
(factory setting: ON).
③ Connector for the special cable
Connect the head unit and the control unit with the supplied
cable.
④ Reference holes for locking the camera/Tripod screw holes (control unit)
Connector Pin Assignments
High-precision screw holes for locking the camera onto the lens
mounted surface. Locking the camera minimizes optical axis
deviation. For details, see the Application Guide. You can attach a
tripod to the reference holes on the bottom of the head unit. You
will need a tripod adapter VCT-55I to install the tripod. There are
two more reference holes on the front of the top surface.
Rear panel
Rear Panel
① VIDEO OUT/DC IN/SYNC connector
Color Camera Block
Color PTZ Model
58
② Shutter speed/Mode setting DIP switch
➊ Shutter speed (bits 1-4)
q
w
e
② Shutter speed /
Mode setting DIP
switches
r
t
③ HD/VD signal input/output switch
④ M GAIN control knob
⑤ 75Ω termination switch
Note
Be sure to turn the power off before making switch settings. As the
variable controller for manual adjustment is a small precise component, do
not apply force more than required when adjusting. Doing so will break the
component. The controller is not a 360-degree rotation type. Do not turn
the controller beyond the stopper of the component. The range of rotation
is about 260 degrees. For the adjustment of the variable controller, use a
flathead screwdriver. The sizes of a recommended flathead screwdrivers are
1.9mm width, 0.5mm thickness and more than 0.45mm length.
XC-56BB
Pin Camera sync
No. output
1 Ground
External mode
(HD/VD)
Ground
Ground
External trigger
shutter
Ground
2
+12V DC
+12V DC
+12V DC
+12V DC
3
Video output (Ground) Video output (Ground)
Video output (Ground)
Video output (Ground)
4
Video output (Signal)
Video output (Signal)
Video output (Signal)
Video output (Signal)
5
HD output (Ground)
HD input (Ground)
HD input (Ground)
HD input (Ground)
6
HD output (Signal)
HD input (Signal)
HD input (Signal)
HD input (Signal)
7
VD output (Signal)
VD input (Signal)
Reset (Signal)
VD input (Signal)
8
—
—
—
9
Restart/Reset
—
—
—
—
Trigger pulse input (Signal)
10 —
—
—
—
11 —
—
—
—
12 VD output (Ground)
VD input (Ground)
* Common ground for pins 7, 10, and 11
Reset (Ground)
VD input (Ground)*
There are two shutter types: normal shutter and external trigger
shutter. Select them with the DIP switches on the rear panel.
●Using the DIP switches on the rear panel
For shutter speeds, see the following table.
Digital Interface
IEEE1394b
Camera Link
*1 The electronic shutter cannot be used in restart/reset mode.
*2 Partial scan can be used in restart/reset mode and in external trigger shutter mode 1.
Note
An incorrect video signal will be output if you input a new trigger
pulse before the video signal output for the previous trigger pulse
is output completely.
Mode 1 (Non-reset mode)/Mode 2 (Reset mode)
Normal Shutter
This mode provides continuous video output with the electronic
shutter selected by switches to capture a high-speed moving
object clearly.
Normal
Shutter
Other
modes*
8
8
Intelligent
About the Electronic Shutter
* メOther modesモ refers to restart/reset mode and external trigger shutter mode.
●Normal shutter speed settings
1/125
1/250
1/500
1/1000
1
2
3
4
1
2
3
4
1
2
3
4
1
2
3
4
1/2000
1/4000
1
2
3
4
1
2
3
4
1/50000
1/10000
1
2
3
4
1/100
1/100000
1
2
3
4
1
2
3
4
Non-TV Format
1
2
3
4
1/25000
1
2
3
4
(Unit: seconds)
Restart/Reset
(Unit: seconds)
External Trigger Shutter
This mode allows you to capture the information on single screens
at any time by externally inputting restart/reset signals (HD/VD). To
enter this mode, set the trigger shutter switches (6 to 8) on the rear
panel of the camera as shown in the figure below.
To use restart/reset mode and Partial scan mode simultaneously, set
the Partial scan mode switch (5) to ON (right side).
R/R
Inputting an external trigger pulse enables the camera to capture firstmoving objects clearly. Set DIP switches 6, 7, and 8 on the rear panel
to Mode 1 or Mode 2. When you set the trigger pulse width to 1/3 of
a second or more, the output signal changes to the normal VIDEO
signal.
Mode 1
Mode 2
6 6
7 7
8 8
5
ON
5
Partial scannig
OFF ONON
OFF
5 5
5 5
(Partial mode is compatible with Mode
1 only.)
Note
High-rate scan mode cannot be used while in external trigger
shutter mode 2.
There are two modes for the timing in which video signals are
obtained.
Long Exposure
The Restart/Reset function extends the CCD accumulation time,
resulting in highly sensitive image capture. This function is effective
when you cannot gain satisfactory sensitivity under normal
operating conditions, or when you want to observe the trail of a moving object. Extend the VD interval (T) between external VD pulses.
In this mode, a video signal synchronized with a VD signal is output after a trigger pulse is input.
• The video signal is synchronized with the external VD signal
when an external HD*/VD signal is input.
• The video signal is synchronized with an internal VD signal
when no external HD*/VD signal is input.
●Mode 2 (Reset mode)
In this mode, an internal VD is reset, then a video signal is
output a certain period of time after trigger pulse input.
Example of input timing chart
EXT-HD
EXT-HD
EXT-VD
EXT-VD
Charge
CCD蓄積
accumulation
on CCD
T
Color Camera Block
* External or internal synchronization is selected automatically depending on the
presence or absence of external HD input.
3CCD Colour
Video Camera
●Mode 1 (Non-reset mode)
VIDEO
OUT
ビデオ出力
To Set the External Trigger Shutter
There are two ways to set the shutter speed.
1
2
3
4
Color PTZ Model
●Using trigger pulse width
Set all DIP switches (1 to 4 on the rear panel) to OFF.
You can obtain an arbitrary shutter speed by setting the trigger
pulse width to the range of 2 μsec to 250 msec.
Exposure time = Trigger pulse width + 8 μsec
Mode 1
(Non-reset mode)
Accessories
6 6
7 7
8 8
6
7
8
Partial scan
OFF
TV Format
B/W Model
Colour Model
To Set Restart/Reset Mode
Mode 2
(Reset mode)
1
2
3
4
XC-56BB
59
Intelligent
Digital Interface
IEEE1394b
XC-HR90
High-resolution
C-mount lens
XC-HR90
12P(F)
AC
VIDEO OUT
HD/VD
12P(M)
Camera cable
CCXC-12P02N
CCXC-12P05N
CCXC-12P10N
CCXC-12P25N
WEN
Camera adaptor
TRIG
DC-700
(Conforms to EIAJ 12-pin assignments)
Tripod adaptor
VCT-55I
TV Format
Colour Model
B/W Model
Non-TV Format
Camera Link
Connection Diagram
XC-HR70/XC-HR50/XC-HR57/XC-HR58
C-mount lens
Junction box
JB-77
XC-HR70
XC-HR50
XC-HR57
XC-HR58
Accessories
12P(F)
DC12V
VIDEO OUT
HD/VD
12P(M)
Camera adaptor
DC-700
Camera cable
CCXC-12P02N
CCXC-12P05N
CCXC-12P10N
CCXC-12P25N
AC
VIDEO 2
HD/VD
TRIG
WEN OUT
3CCD Colour
Video Camera
Tripod adaptor
VCT-333I
○ : Usable : Not usable
Note
XC-HR series
(XC-HR70/HR50/HR57/HR58)
Color PTZ Model
Color Camera Block
Normal
Normal shutter
Restart/reset (R/R)
External trigger shutter
WEN OUT
60
Connection Diagram
JB-77
○
○
○
When using the JB-77, not all of the XC-HR series
functions can be used. See the table on the right.
Intelligent
Connection Diagram
VIDEO OUT
HD/VD
TRIG*
Stable power source
DC
12V
XC-56
C-mount lens
12P(F)
12P(M)
AC
VIDEO OUT
HD/VD
TRIG*
Camera adaptor
DC-700/700CE
Tripod adaptor
VCT-333I
XC-56BB
C-mount lens*
20P(M)
XC-56BB
(CCU)
12P(M)
Camera cable
CCXC-12P02N
CCXC-12P05N
CCXC-12P10N
CCXC-12P25N
Junction box
JB-77
DC12V
VIDEO OUT
HD/VD
Accessories
Tripod adaptor
VCT-55I
12P(F)
Supplied accessories
(Dedicated cable)
C-mount adaptor
LO-999CMT
XC-56BB
(CHU)
20P(M)
AC
VIDEO
TRIG*
Tripod adaptor
VCT-333I
3CCD Colour
Video Camera
Camera adaptor
DC-700
HD/VD
NF-mount lens
TV Format
B/W Model
Colour Model
To operate the camera by inputting an trigger signal,
* Use Junction box JB-77 and commercial stabilized
power supply, and input a trigger signal to CLOCK
OUT connector of JB-77.
* Input a trigger signal to Video connector 2 of
Camera adaptor DC-700/700CE
Non-TV Format
Camera cable
CCXC-12P02N
CCXC-12P05N
CCXC-12P10N
CCXC-12P25N
Junction box
JB-77
AC
Digital Interface
IEEE1394b
Camera Link
XC-56
Note
VCL-03S12XM
VCL-06S12XM
VCL-12S12XM
* To use the C-mount lens, attach the C-mount adaptor and connect to the camera.
• Do not connect or disconnect the supplied
cable while the power is turned on, otherwise
the camera may be damaged.
Connection Diagram
Color PTZ Model
To operate the camera by inputting an trigger signal,
* Use Junction box JB-77 and commercial stabilized
power supply, and input a trigger signal to CLOCK
OUT connector of JB-77.
* Input a trigger signal to Video connector 2 of
Camera adaptor DC-700/700CE
Color Camera Block
• The XC-56BB head unit (CHU) must have the
same serial number as the control unit (CCU).
61
XC-ST70/ST70CE
XC-ST50/ST50CE
XC-ST51/ST51CE
XC-ST30/ST30CE
*1
TV
Format
Output
CCD
VS
External Sync
*2
*3
2/3 Type 1/3 Type 1/2 Type
Restart
Reset
CCD
CCD
Long Normal
Exposure Shutter
C
Lens Mount
Mode 1
VS
Output
HD VD
External Sync
Mode 2
(Non-Reset Mode)
(Non-Reset Mode)
External
Trigger Shutter
External
Trigger Shutter
*1 :XC-ST70/ST70CE
*2 :XC-ST30/ST30CE
*3 :XC-ST50/ST50CE/ST51/ST51CE
Connection Diagram
P88
Dimensions
Outline
Camera body of all XC-ST models
13
2-M3 depth 4
26 ±0.3
The XC-ST Series cameras incorporate the latest CCD
and signal processing technologies into a compact black
and white camera module. A new external trigger design
allows the electronic shutter speed to be freely specified
by the width of an external trigger pulse or by a switch
setting on the rear panel of the camera. These cameras
are also user-friendly, with all switch settings located on
the rear panel. Moreover, the XC-ST Series have the exact
same dimensions, simplifying space requirements and
making it easy to interchange them if necessary. These
features, along with high picture quality and high shock and
vibration tolerance make the XC-ST Series cameras ideal for
demanding machine vision applications.
CCD
VIDEO CAMERA MODULE
29
XC-ST50
(8)
44
57.5
65.5
Features
■XC-ST70/ST70CE: 2/3 type IT CCD
■XC-ST51/ST51CE/ST50/ST50CE: 1/2 type IT CCD
■XC-ST30/ST30CE: 1/3 type IT CCD
■Small and lightweight: 44 (W) x 29 (H) x 57.5 (D) mm, 110 g
■Flexible trigger shutter functions
■High sensitivity: XC-ST51/ST51CE: 0.2 lx (F1.4)
XC-ST70/ST70CE/ST50/ST50CE/
ST30/ST30CE: 0.3 lx (F1.4)
■2:1 interlaced/non-interlaced (during external sync input)
■High S/N ratio : 60 dB (XC-ST70/ST50/ST51)
: 58 dB (XC-ST30)
■Electronic shutter function (1/100 to 1/10,000 sec.)
■Synchronization: internal/external (HD/VD, VS)
■Restart/reset function
■Frame/field exposure
■High shock and Vibration tolerant
4-M3 depth 4
26±0.3
Intelligent
Digital Interface
IEEE1394b
Camera Link
Non-TV Format
B/W Model
TV Format
Colour Model
Accessories
3CCD Colour
Video Camera
CCD B/W VIDEO CAMERA MODULE
13
Unit: mm
50 ±0.5
Spectral Sensitivity Characteristics
●XC-ST70
(Typical Values)
Relative sensitivity
Color PTZ Model
0.9
Accessories
0.8
■ Compact camera adaptor
0.7
●DC-700/700CE
■ 12-pin camera cable (CE standard)
●CCXC-12P02N
●CCXC-12P05N
●CCXC-12P10N
●CCXC-12P25N
(2 m)
(5 m)
(10 m)
(25 m)
■ Tripod adaptor
●VCT-ST70I
0.6
相対感度
Color Camera Block
1.0
0.5
0.4
0.3
0.2
0.1
0.0
400
500
600
700
800
900
波長 (nm)
Wavelength (nm)
(Lens characteristics and light source characteristics excluded.)
62
XC-ST70/ST70CE/ST50/ST50CE/ST51/ST51CE/ST30/ST30CE
1000
Intelligent
Location and Function of Parts and Controls
●XC-ST50/XC-ST51/XC-ST30
① Lens mount (C-mount)
(Typical Values)
1.0
0.9
0.8
0.7
相対感度
0.6
0.5
③ Reference holes/
Tripod screw holes
0.4
0.3
① Lens mount (C-mount)
0.2
Attach any C-mount lens or other optical equipment.
500
600
700
800
900
Note
The lens must not project more than 10 mm from the lens mount.
1000
波長 (nm)
Wavelength
(nm)
Lens mount shoulder
10 mm or less
(Lens characteristics included, and light source characteristics excluded.)
② Reference holes (at the top)
③ Reference holes/Tripod screw holes (at the bottom)
These precision screw holes are for locking the camera module.
Locking the camera module using these holes secures the optical
axis alignment.
You can install the camera on a tripod. To install on a tripod, you
will need to install the VCT-ST70I tripod adaptor using the reference
holes on the bottom of the camera.
Specifications
XC-ST70
Image device
2/3 type IT CCD
XC-ST50
XC-ST51
XC-ST30 XC-ST70CE XC-ST50CE XC-ST51CE XC-ST30CE
1/2 type IT CCD 1/3 type IT CCD
Signal system
2/3 type IT CCD 1/2 type IT CCD 1/3 type IT CCD
EIA TV Format
B/W Model
Colour Model
These precision screw holes are for locking the camera module.
Locking the camera module using these holes secures the optical
axis alignment.
Non-TV Format
0.1
0.0
400
Digital Interface
IEEE1394b
Camera Link
② Reference holes
Relative sensitivity
CCIR
Effective picture elements 768 (H) x 494 (V) 752 (H) x 582 (V)
11.6 (H) x 13.5 (V)
8.4 (H) x 9.8 (V) 6.35 (H) x 7.4 (V) 11.6 (H) x 11.2 (V) 8.6 (H) x 8.3 (V) 6.5 (H) x 6.25 (V)
Horizontal frequency
15.734 kHz
15.625 kHz
Vertical frequency
59.94 Hz
50 Hz
Lens mount
Sync system
C mount
Accessories
Effective lines 752 (H) x 485 (V) 736 (H) x 575 (V)
Cell size (µm)
Internal/External
External Sync system input/output*1
HD/VD (HD/VD level: 2 to 5 Vp-p)
External Sync frequency
±1 % (in horizontal sync frequency), VS
less than ±20 nsec (external horizontal frequency)
Scanning system
2:1 Interlaced
Video output 1.0 Vp-p, negative, 75 Ω unbalanced
Horizontal resolution
570 TV lines
560 TV lines
Sensitivity 400 lx, F8
400 lx, F11 400 lx, F5.6
400 lx, F8 400 lx, F11 400 lx, F5.6
(γ= ON, 0 dB)
(γ= ON, 0 dB)
(γ= ON, 0 dB)
(γ= ON, 0 dB)
(γ= ON, 0 dB)
(γ= ON, 0 dB)
3CCD Colour
Video Camera
Jitter
Minimum illumination
0.3 lx 0.2 lx
0.3 lx
0.3 lx 0.2 lx
0.3 lx
(F1.4, AGC ON)
(F1.4, AGC ON) (F1.4, AGC ON)
(F1.4, AGC ON)
(F1.4, AGC ON) (F1.4, AGC ON)
60 dB
56 dB
58 dB
54 dB
AGC/Fixed/Manual (adjustable on the rear panel)
Gamma
ON/OFF (adjustable on the rear panel)
Normal shutter1/100 to 1/10,000 s1/120 to 1/10,000 s
External trigger shutter 1/4 to 1/10,000 s 1/4 to 1/8,000 s
Power requirementsDC12 V (+10.5 to 15 V)
Power consumption
2.1 W
2.0 W
Dimensions
2.1 W
105 g
110 g
105 g
Operating temperature/humidity
-5 ˚C to +45 ˚C / 20 to 80 % (no condensation)
Storage temperature/humidity
-30 ˚C to +60 ˚C / 20 to 95 % (no condensation)
Performance guarantee temperature
Vibration resistance
Shock resistance
MTBF
Regulatory compliance
Supplied accessories
2.0 W
1.9 W
110 g
0 to +40 ˚C
10 G (20 to 200 Hz 20 minutes for each direction – x,y,z)
70 G
70,600 hrs. (approx. 8.1 years)
UL6500, FCC/ICES-003 : ClassB, CE : EN61326, AS/NZ : EN61326
Color PTZ Model
Mass
1.9 W
44(W) x 29(H) x 57.5(D) mm
Color Camera Block
S/N ratio
Gain
Lens mount cap (1), Operating instructions (1)
* Automatic switching in response to the presence of an input signal when the switch on the rear panel is set to EXT.
1
XC-ST70/ST70CE/ST50/ST50CE/ST51/ST51CE/ST30/ST30CE
63
Intelligent
Rear Panel
Connector Pin Assignments
①
Rear panel
⑨
Digital Interface
IEEE1394b
③
⑧
⑤
⑦
Non-TV Format
Camera Link
④
⑥
① HD/VD signal input/output switch
Set the switch to INT to output HD/VD signals from the camera
module.Set the switch to EXT to input HD/VD signals from an
external unit. (Factory setting: EXT)
VIDEO OUT
(Video signal output) connector (BNC)
You can use this connector for video signal output from the
camera module.
B/W Model
Turn on this switch for g compensation. (Factory setting: OFF)
④ GAIN switch
This switch selects AGC (A), fixed gain (F), or manual gain
control (M). (Factory setting: F)
⑤ Manual gain control
Colour Model
Adjust the gain using this control. GAIN switch ④ must have been
set to M (Manual).
Accessories
TV Format
③ γ compensation ON/OFF switch
3CCD Colour
Video Camera
Color Camera Block
External mode
(VS)
Ground
Ground
External trigger
shutter
Ground
2
+12V DC
+12V DC
+12V DC
+12V DC
+12V DC
3
Video output (Ground)
Video output (Ground)
Video output (Ground)
Video output (Ground)
Video output (Ground)
4
Video output (Signal)
Video output (Signal)
Video output (Signal)
Video output (Signal)
Video output (Signal)
5
HD output (Ground)
HD input (Ground)
-
HD input (Ground)
HD input (Ground)
6
HD output (Signal)
HD input (Signal)
-
HD input (Signal)
HD input (Signal)
7
VD output (Signal)
VD input (Signal)
VS input (Signal)
Reset (Signal)
VD input (Signal)
8
-
-
-
-
-
9
-
-
-
-
-
10 -
-
-
-
WEN output (Signal)
11 -
-
-
-
Trigger pulse input (Signal)
12 VD output (Ground)
VD input (Ground)
VS input (Ground)
Restart/Reset
Reset (Ground)
Reset (Ground)*
* Common ground for pins 7, 10, and 11
About the Electronic Shutter
There are two shutter types: normal shutter and external trigger
shutter. Select them with the DIP switches on the rear panel.
DIP Switches on the Rear Panel
Rear panel
DIP switches
Set an appropriate shutter speed. (Factory setting: Shutter off)
w High-rate scan mode switch (bit 5)
Factory setting: FRAME
e Restart reset/External trigger shutter mode switch
(bits 6 to 8)
Factory setting: Normal
Note
• Do not use any other settings for Restart reset/External
trigger shutter mode except those shown in page 12. Using
other settings may cause the camera to malfunction.
• If you set the External trigger shutter mode, set 0 in bits 1 – 4.
Turn off if you do not terminate. (Factory setting: ON)
Color PTZ Model
External mode
(HD/VD)
Ground
⑥ Shutter speed/Mode setting DIP switch
q Shutter speed (bits 1 to 4)
⑦ 75 Ω termination switch
⑧ TRIG polarity switch
Select + or – according to the trigger pulse input from an
external unit. (Factory setting: +)
⑨ DC IN/SYNC (DC power input/sync signal I/O) connector
(12-pin)
Switches 1 to 4: Shutter speed
Switch 5:
Potential accumulation mode
Switches 6 to 8: Restart reset/External trigger shutter mode switch
Normal Shutter
This mode provides continuous video output with the electronic
shutter selected by switches to capture a high-speed moving
object clearly.
Normal shutter speed settings
Shutter
OFF
1/125
1/250
1/2000
1/4000
1/10000
1/500
1/1000
Connect a CCXC-12P05N camera cable to this connector the +12
V DC power supply and the video signal output from the camera
module. When a sync signal generator is connected to this
connector, the camera module is synchronized with the
external sync signals.
Factory Mode Settings of Rear Panel
No.
Switch
① HD/VD signal input/output switch
Factory setting
mode
EXT
③ γ compensation ON/OFF switch
OFF
④ GAIN switch
F
⑥ Shutter speed/Mode
Flickerless1)
1/100 (EIA)
1/120 (CCIR)
- 1)
⑤ Manual gain control
Shutter speed (bits 1 - 4)
Shutter OFF
setting DIP switches Potential accumulation mode (bit 5)
FRAME
Restart reset/External trigger shutter mode switch (bits 6 - 8)
Normal
⑦ 75 termination switch
ON
⑧ TRIG polarity switch
+
1)
64
Pin Camera sync
No. output
1 Ground
This unit is shipped from the factory with the GAIN switch being set to F (fix), so the Manual
gain control knob is not operative unless the switch setting is changed. When the GAIN
switch is set to M (manual), you can rotate this knob to adjust gain over the range 0 to 18 dB.
XC-ST70/ST70CE/ST50/ST50CE/ST51/ST51CE/ST30/ST30CE
(Unit: second)
* If you set the mode to flickerless, the positions of DIP switches 1 to 3 are optional.
Note
The DIP switch 5 position is optional. (The field setting is
recommended.) The field setting can obtain a sensitivity that is
twice that of the frame setting.
●When using a trigger pulse like shown below, set the TRIG
polarity selector switch on the rear panel to + :
2 to 5.0 V
0 to 0.6 V
●Mode 1 (Non-reset mode)
In this mode, a video signal synchronized with a VD signal is output after a trigger pulse is input.
– The video signal is synchronized with the external VD signal
when an external HD/VD signal is input.
– The video signal is synchronized with an internal VD signal
when no external HD/VD signal is input.
●When using a trigger pulse like shown below, set the TRIG
polarity selector switch on the rear panel to - :
4.0 to 5.0 V
In this mode, an internal VD is reset, then a video signal is
output a certain period of time after trigger pulse input.
0 to 2.0 V
To Set the External Trigger Shutter
There are two ways to set the shutter speed.
ºC Input impedance: 10 k or more.
●Using the DIP switches on the rear panel
ºC T
he voltage and pulse width used are measured at pin 11 of a 12-pin multi-connector on
the rear panel.
Non-TV Format
●Mode 2 (Reset mode)
Digital Interface
IEEE1394b
Camera Link
Inputting an external trigger pulse enables the camera to capture fastmoving objects clearly with precise timing.
Set DIP switches 6, 7, and 8 on the rear panel to Mode 1 or Mode 2.
When you set the trigger pulse width to 1/3 of a second or more, the
output signal changes to the normal VIDEO signal.
There are two modes for the timing in which video signals are
obtained.
Intelligent
Specifications of trigger pulse
External Trigger Shutter
For shutter speeds, see the following table.
1/1000
1/2000
1/250
1/4000
1/500
1/10000
(EIA)
1/8000
(CCIR)
1/100
(EIA)
1/120
(CCIR)
1/125
1/1000
1/2000
1/250
1/4000
1/500
1/10000
(EIA)
1/8000
(CCIR)
To Set Restart/Reset Mode
DIP switches
The information on one screen can be
extracted at any time by externally inputting
Restart/Reset signals (HD/VD). To enter this
mode, set the trigger shutter switches (6 to 8)
on the rear panel of the camera as shown in the
figure below.
The Reset/Restart mode is especially effective
for frame image output with long exposure or a
strobe light.
(Unit: second)
(Unit: second)
●Using trigger pulse width
Sample input timing chart 1
Set all DIP switches (1 to 4 on the rear panel) to 0.
You can obtain an arbitrary shutter speed by setting the trigger
pulse width within the range of 2 msec to 250 msec.
Mode 2 (Reset mode)
EXT HD
EXT VD
Continuous signal: 15.734 kHz (XC-ST51/ST50/ST30) Allowable frequency value ±1%,
15.625 kHz (XC-ST51CE/ST50CE/ST30CE) Allowable frequency value ±1%
VD interval (T): 262.5 H or more (XC-ST51/ST50/ST30) and less than 1 second (Recommended),
312.5 H or more (XC-ST51CE/ST50CE/ST30CE) and less than 1 second (Recommended)
Four or more VD pulses are required.
T
T
T
Exposure time for the Odd field
Exposure time for the Even field
Frame Accumulation (Factory setting)
• The DIP switch 5 position is optional. (The field setting is recomended.) The field setting can obtain a sensitivity that is twice
that of the frame setting.
Video output
Odd image
Invalid image
Even image
Valid frame image
Odd and even fields are determined by the phase of the EXT HD/VD signal input from the outside.
• If you input another trigger pulse before the video signal
output for the previous trigger pulse is completely output, an
incorrect video signal will be output.
XC-ST70/ST70CE/ST50/ST50CE/ST51/ST51CE/ST30/ST30CE
Color PTZ Model
Exposure time = Trigger pulse width + 97 μsec (EIA)
Trigger pulse width + 120 μsec (CCIR)
Note
Color Camera Block
Mode 1 (Non-reset mode)
The Restart/Reset function extends the CCD accumulation time,
resulting in highly sensitive image capture. This function is effective
when you cannot gain satisfactory sensitivity under normal
operating conditions, or when you want to observe the trail of a moving object. Extend the VD interval (T) between external VD pulses.
3CCD Colour
Video Camera
Note
The DIP switch 5 position is optional. (The field setting is
recommended.) The field setting can obtain a sensitivity that is
twice that of the frame setting.
Accessories
Long Exposure
TV Format
B/W Model
Colour Model
1/125
Restart/Reset
Mode 2 (Reset mode)
Mode 1 (Non-reset mode)
1/100
(EIA)
1/120
(CCIR)
65
XC-ES50/ES50CE
XC-ES51/ES51CE
XC-ES30/ES30CE
TV
*1
Format
Output
*2
1/3 Type 1/2 Type
CCD
Long Normal
Exposure Shutter
CCD
Mode 1
C
Lens Mount
VS
Output
HD VD
External Sync
Restart
Reset
Mode 2
(Non-Reset Mode)
(Non-Reset Mode)
External
Trigger Shutter
External
Trigger Shutter
*1 :XC-ES30/ES30CE
*2 :XC-ES50/ES50CE/ES51/ES51CE
P88
Dimensions
Outline
Camera body of all XC-E models
12
Features
Accessories
29
Ø27.6
Ø27.3
■XC-ES30/ES30CE :1/3 type IT CCD
■XC-ES50/ES50CE :1/2 type IT CCD
■XC-ES51/ES51CE :1/2 type IT CCD High sensitivity
■External trigger shutter function
XC-ES50/ES51/ES30 : 1/4 to 1/10,000 sec.
XC-ES50CE/ES51CE/ES30CE : 1/4 to 1/8,000 sec.
■Electronic shutter function
XC-ES50/ES51/ES30 : 1/100 to 1/10.000 sec.
XC-ES50CE/ES51CE/ES30CE : 1/120 to 1/10.000 sec.
■High S/N ratio: 60 dB
■2:1 Interlaced/non-interlaced
■Frame/field accumulation
■Restart/reset function
■Sync system: Internal/external (HD/VD)
■High shock and vibration resistance
14.5
2-M2 depth 3
5.1
(4.9)
30
12
15
23.7
4-M2 depth 3
3-M3 depth 3
Unit: mm
8
※1
12
The XC-ES series is a small-sized lightweight monochrome
camera module designed as an input device for image
processing, realized through the newest high-density
packaging.
The downsized the main body allows to set the XC-ES series
easily at the places where is difficult to set the existing
devices
20
B/W Model
Colour Model
3CCD Colour
Video Camera
Accessories
TV Format
Non-TV Format
Connection Diagram
29
Intelligent
Digital Interface
IEEE1394b
Camera Link
B/W VIDEO CAMERA MODULE
22 ※2
16.5
42
*1: M3 screw size
*2: M2 screw size
■ Compact camera adaptor
■ 12-pin camera cable (CE standard)
●CCXC-12P02N
●CCXC-12P05N
●CCXC-12P10N
●CCXC-12P25N
(2 m)
(5 m)
(10 m)
(25 m)
■ Tripod adaptor
●VCT-333I
Color PTZ Model
Color Camera Block
●DC-700/700CE
66
XC-ES50/ES50CE/ES51/ES51CE/ES30/ES30CE
Notice
From January 2005, the outside dimensions of XC-E series
consoles will be changed to the same dimensions of XC-HR
series consoles.
The outside dimensions will be changed from the following
serial numbers.
XC-ES50/XC-ES30: 250001~
XC-ES50CE/ES30CE: 550001~
XC-ES51:150001~
XC-ES51CE:450001~
Intelligent
Spectral Sensitivity Characteristics
●XC-ES50/XC-ES51/XC-ES30
●XC-ES50CE/XC-ES51CE/XC-ES30CE
(Typical Values)
(Typical Values)
Relative sensitivity
1.0
0.9
0.9
0.8
0.8
0.7
0.7
Relative Response
Relative Response
1.0
0.6
0.5
0.4
0.6
0.5
0.4
0.3
0.3
0.2
0.2
0.1
0.1
0.0
400
500
600
700
800
900
0.0
400
1000
500
600
700
800
900
1000
Wave Length [nm]
Wavelength
(nm)
Wave Length [nm]
Wavelength (nm)
●XC-ES50CE, XC-ES51CE/XC-ES30CE
(Comparison sensitivity)
(Comparison sensitivity)
Relative sensitivity
Relative sensitivity
2.00
2.00
1.80
1.60
1.60
1.40
1.40
Relative Response
1.80
1.20
XC-ES51
1.00
0.80
0.60
1.20
0.80
0.60
XC-ES50/ES30
0.40
0.40
0.20
0.20
500
600
XC-ES51CE
1.00
700
800
900
XC-ES50CE/ES30CE
0.0
400
1000
500
600
Wave Length [nm]
700
800
900
1000
Wave Length [nm]
Wavelength (nm)
Wavelength (nm)
(Lens characteristics and light source characteristics excluded.)
Specifications
XC-ES50
Image device
XC-ES51
XC-ES30
1/2 type IT CCD
XC-ES50CE
1/3 type IT CCD
XC-ES51CE
1/2 type IT CCD
EIA
Effective picture elements
768 (H) x 494 (V)
752 (H) x 582 (V)
Effective lines
752 (H) x 485 (V)
736 (H) x 575 (V)
Cell size (µm)
8.4 (H) x 9.8 (V)
6.35 (H) x 7.4 (V)
8.6 (H) x 8.3 (V)
Horizontal frequency
15.734 kHz
15.625 kHz
Vertical frequency
59.94 Hz
50 Hz
Lens mount
Sync system
Internal/External (auto)
HD/VD (HD/VD level: 2 to 5 Vp-p)
±1 % (in horizontal sync frequency)
Jitter
less than ±20 nsec
Scanning system
525 lines 2:1 Interlaced (Automatic switching according to input signal)
Video output
1.0 Vp-p, negative, 75 Ω unbalanced
Horizontal resolution
400 lx F5.6
570 TV lines
400 lx F8
400 lx F4
400 lx F5.6
560 TV lines
400 lx F8
400 lx F4
(γ=ON, MIN GAIN, No IR cut filter)
0.3 lx
0.2 lx
0.3 lx
Gain
0.3 lx
0.2 lx
0.3 lx
60 dB
AGC/Manual (Adjustable on the rear panel)
Gamma
ON/OFF (Adjustable on the rear panel)
Normal shutter 1/100 to 1/10,000 s 1/120 to 1/10,000 s
External trigger shutter*3
1/4 to 1/10,000 s
1/4 to 1/8,000 s
Power requirements DC 12 V (+9 to16 V)
Power consumtion
1.6 W
Dimension (W) x (H) x (D)
1.4 W
Mass
1.6 W
1.4 W
29 x 29 x 30mm
50 g
-5 ˚C to +45 ˚C / 20 to 80 % (no condensation)
Storage temperature/humidity
-20 ˚C to +60 ˚C / 20 to 95 % (no condensation)
Performance guarantee temperature
0 to +40 ˚C
Vibration resistance10 G (20 to 200 Hz 20 minutes for each direction – x,y,z)
Shock resistance
70 G
MTBF
126,469 hrs.
UL1492, FCC/ICES-003 : ClassB, CE : EN61326, AS/NZ : EN61326
Supplied accessoriesLens mount cap (1), Operating instructions (1)
Color PTZ Model
Operating temperature/humidity
Color Camera Block
S/N ratio
Regulatory compliance
3CCD Colour
Video Camera
External sync frequency
Minimum illumination*2
6.5 (H) x 6.25 (V)
C mount
External sync system input/output*1
Sensitivity 1/3 type IT CCD
CCIR
Accessories
Signal system
XC-ES30CE
TV Format
B/W Model
Colour Model
Relative Response
Non-TV Format
●XC-ES50, XC-ES51/XC-ES30
0.0
400
Digital Interface
IEEE1394b
Camera Link
Relative sensitivity
*1 Automatic switching in response to the presence of an input signal when the switch on the rear panel is set to EXT.
*2 (F1.4, AGC ON, without IR cut filter) *3 Using Dip switch on the rear panel or Using trigger pulse width
XC-ES50/ES50CE/ES51/ES51CE/ES30/ES30CE
67
Intelligent
① 12-pin multi-connector
Location and Function of Parts and Controls
DC IN/HD/VD (DC power/sync signal input) VIDEO OUT terminal.
Digital Interface
IEEE1394b
② 75Ω termination selector switch
① Lens mount (C-mount)
③ HD/VD input-output selector switch
Guide holes
④ Shutter speed/mode setting DIP switch
(at the bottom)
⑤ Volume control switch
This switch can be changed in the range of Switch 0 to 18 dB
when the GAIN switch is set to “M”.
Camera Link
*During factory setting, this switch is adjusted to the mechanical center.
Note
When setting DIP switch 5 to the frame integration, set the
volume control switch 8 to the MAX side from the mechanical
center (because of CCD characteristics).
③ Tripod screw holes
(at the bottom)
Reference holes
④ (at the bottom)
B/W Model
Colour Model
Attach any C-mount lens or other optical equipment.
Note
Be sure that the lens does not project more than 10 mm from the
lens mount.
Color Camera Block
Factory Mode Settings of Rear Panel
Guide holes
(at the top)
These screw holes help to lock the camera module.
These four screw holes on the bottom are for installing the
camera module on a tripod. To install on a tripod, you will need to
install the VCT-333I tripod adaptor using these holes on the bottom of the camera.
w
75 Ω termination selector switch
ON
e
HD/VD input-output selector switch
EXT
r
Shutter speed/mode setting DIP switch
Switches 1 to 4: Select the shutter speed.
These precision screw holes are for locking the camera module.
Locking the camera module using these holes secures the optical
axis alignment.
FRAME
Switches 6 to 8: Select the trigger shutter mode.
Normal
OFF
Switch 0: Selects the gain.
t
Manual
Volume control switch
Mechanical center
Connector Pin Assignments
Rear Panel
Rear panel
12-pin multi-connector
DIP switch
②
④
①
Switches 1 to 4:
Select the shutter speed.
Switch 5: Selects the frame or field
②
integration.
Switches 6 to 8:
Select the trigger shutter
mode.
Switch 9: Selects g correction on/off.
④
Switch 0: Selects the gain.
External HD/VD
synchronization
Pin No.
③
*
④
④
①
①
② ③
③
④
④
①
①
② ③
③
②
Internal HD/VD
synchronization
1
GND
GND
2
+12 V
+12 V
3
GND
GND
4
VIDEO output
VIDEO output
5
GND
GND
6
External HD input
Internal HD output
②
②
8
GND
9
–
⑤
⑤
⑤
⑤
* The rear panel is different for the serial numbers shown below.
XC-ES50/ES30
XC-ES50CE/ES30CE
OFF
Switch 5: Selects the frame or field integration.
Switch 9: Selects correction on/off.
④ Reference holes (at the bottom)
② ③
Factory-setting mode
Switch
No.
③ Tripod screw holes (at the bottom)
①
Color PTZ Model
Lens mount shoulder
10 mm or less
3CCD Colour
Video Camera
Accessories
TV Format
Non-TV Format
① Lens mount section (C mount)
Be sure to turn the power off before making switch settings.
As the variable controller for manual adjustment is a small
precise component, do not apply force more than required when
adjusting. Doing so will break the component. The controller is
not a 360-degree rotation type. Do not turn the controller
beyond the stopper of the component. The range of rotation is
about 260 degrees. For the adjustment of the variable controller,
use a flathead screwdriver. The sizes of a recommended
flathead screwdrivers are 1.9mm width, 0.5mm thickness and
more than 0.45mm length.
:200001~
:500001~
③
③
7
10
*1
External VD input
*2
WEN output
Internal VD output
GND
–
*2
WEN output
11
TRIG input
TRIG input
12
GND
GND
*1: An input VD signal is required when the restart/reset mode is used.
*2: A WEN output signal is valid only in the external trigger shutter mode.
68
XC-ES50/ES50CE/ES51/ES51CE/ES30/ES30CE
Shutter
OFF
1/125
1/250
1/500
Mode 1
(Non-reset mode)
Mode 2
(Reset mode)
1/1000
Exposure time = Trigger pulse width + 97 μsec (EIA)
120 μsec (CCIR)
1/2000
1/4000
Note
1. lt is recommended to set DIP switch 5 for field selection. (The field
selection is about two times in sensitivity as high as the frame
selection.)
2. After a trigger pulse is input, a new trigger pulse must not be
input before the video signal obtained by the trigger pulse has
been output.
Flickerless*
(EIA: 1/100
CCIR: 1/120)
Non-TV Format
1/10000
(EIA)
1/8000
(CCIR)
Digital Interface
IEEE1394b
Camera Link
This mode provides continuous video output with the electronic
shutter selected by switches to clearly capture a high-speed
moving object.
■ Setting of normal shutter speed
– Set DIP switches 1 to 4 on the rear panel to 0.
– An arbitrary shutter speed can be obtained by setting the
trigger pulse width to the range of 2 msec to 250 msec.
Intelligent
●Using trigger pulse width
Normal Shutter
■ Specifications of trigger pulse
(Unit: second)
A
B
Note
It is recommended to set DIP switch 5 for field selection. (The field selection is
about two times in sensitivity as high as the frame selection.)
External Trigger Shutter
These modes are used to capture one image (one field) per trigger
pulse. Set DIP switches 6, 7, and 8 on the rear panel to mode 1 or 2.
(Refer to the table below.) When the trigger pulse width is 1/3 sec or
more, the output signal is switched to a normal video signal.
There are two modes for timing in which a video signal is obtained.
●Mode 1 (Non-reset mode)
●Mode 2 (Reset mode)
In this mode, an internal video signal is output from a trigger
pulse after a certain period of time.
A: 4 to 5.0 V
B: 0 to 1.0 V
T: 2 μs to 1/4 s
T: 2 ms to 1/4 s, 100 μs to 1/4 s when setting the shutter speed using DIP switch
* Input impedance: 10 kW or more
* The voltage and pulse width used are measured at pin 11 of a 12-pin
multi-connector on the rear panel.
Restart/Reset
The information on one screen can be extracted at any time by
inputting a restart/reset signal (HD/VD) from the outside. To enter this
mode, set DIP switches 6, 7, and 8 on the rear panel of a
camera as shown in the table below. The setting is especially
effective for the following operation.
3CCD Colour
Video Camera
■ Setting of external trigger shutter speed
There are two ways to set the shutter speed.
Mode 1 (Non-reset mode)
1/125
1/250
1/1000
1/2000
1/4000
Mode 2 (Reset mode)
1/500
*1/100
(EIA)
1/120
(CCIR)
1/125
1/250
1/500
**1/10000
(EIA)
1/8000
(CCIR)
1/1000
1/2000
1/4000
**1/10000
(EIA)
1/8000
(CCIR)
Color Camera Block
*1/100
(EIA)
1/120
(CCIR)
Accessories
In this mode, a video signal synchronized with a VD signal is output after a trigger pulse is input.
– A video signal is synchronized with the external VD signal when
an external HD/VD signal is input.
– A video signal is synchronized with an internal VD signal when
no external HD/VD signal is input.
T
TV Format
B/W Model
Colour Model
* In the flickerless mode, the normal shutter speed is 1/100 sec for XC-ES50/ES30 and
XC-EI50/EI30 (EIA) and 1/120 sec for XC-ES50CE/ES30 CE and XC-EI50CE/EI30CE (CCIR).
Color PTZ Model
(Unit: second)
(Unit: second)
* The external trigger shutter speed is set to 1/100 sec for XC-ES50/ES30, XC-EI50/
EI30 (EIA) and 1/120 sec for XC-ES50CE/ES30CE, XC-EI50CE/EI30CE (CCIR).
** The external trigger shutter speed is set to 1/10000 sec for XC-ES50/ES30, XCEI50/EI30 (EIA) and 1/8000 sec for XC-ES50CE/ES30CE, XC-EI50CE/EI30CE (CCIR).
XC-ES50/ES50CE/ES51/ES51CE/ES30/ES30CE
69
*1
TV
Format
Output
*2
1/3 Type 1/2 Type
CCD
Long Normal
Exposure Shutter
CCD
Mode 1
C
Lens Mount
Mode 2
(Non-Reset Mode)
(Non-Reset Mode)
External
Trigger Shutter
External
Trigger Shutter
External Sync
Restart
Reset
*1:XC-EI30/EI30CE
*2:XC-EI50/EI50CE
Connection Diagram
P88
Dimensions
Outline
Camera body of all XC-E models
12
Features
29
Ø27.6
Ø27.3
■XC-EI50/EI50CE: 1/2 type interline CCD
■XC-EI30/EI30CE: 1/3 type interline CCD
■Near-IR sensitivity
■High sensitivity: F1.4
XC-EI50/EI50CE: 0.1 lx
XC-EI30/EI30CE: 0.2 lx
■High S/N ratio: 60 dB
■Electronic shutter function (1/100 to 1/10,000 sec.)
■External trigger shutter function (1/4 to 1/10,000 sec.)
■2:1 Interlaced/non-interlaced
■Frame/field accumulation
■Restart/reset function
■Sync system: Internal/external (HD/VD)
■High shock and vibration resistance
●DC-700/700CE
■ 12-pin camera cable (CE standard)
●CCXC-12P02N
●CCXC-12P05N
●CCXC-12P10N
●CCXC-12P25N
(2 m)
(5 m)
(10 m)
(25 m)
■ Tripod adaptor
●VCT-333I
XC-EI50/EI50CE/EI30/EI30CE
30
15
23.7
4-M2 depth 3
Unit: mm
■ Compact camera adaptor
5.1
(4.9)
12
3-M3 depth 3
Accessories
14.5
2-M2 depth 3
8
※1
12
Like the XC-EI50/EI50CE and XC-EI30/EI30CE, the XCES50/ES30 is compact and lightweight and offers
near-infrared sensitivity.
Extremely sharp images can be obtained when used under
red LED illumination or in near-infrared light, such as in funduscopes.
20
Non-TV Format
B/W Model
TV Format
Colour Model
Color Camera Block
Color PTZ Model
70
HD VD
Near-IR
Sensitivity
3CCD Colour
Video Camera
Accessories
VS
Output
29
Intelligent
XC-EI50/EI50CE
XC-EI30/EI30CE
Camera Link
Digital Interface
IEEE1394b
B/W VIDEO CAMERA MODULE
22 ※2
16.5
42
*1: M3 screw size
*2: M2 screw size
Intelligent
Spectral Sensitivity Characteristics
●XC-EI30
●XC-EI50
(Typical Values)
(Typical Values)
Relative sensitivity
0.9
0.8
0.8
0.7
0.7
Relative Response
Relative Response
1.0
0.9
0.6
0.5
0.4
0.6
0.5
0.4
0.3
0.3
0.2
0.2
0.1
0.1
0.0
400
Digital Interface
IEEE1394b
Camera Link
Relative sensitivity
1.0
500
600
700
800
900
0.0
400
1000
500
600
Wave Length [nm]
900
1000
900
1000
Non-TV Format
(Typical Values)
(Typical Values)
Relative sensitivity
Relative sensitivity
1.0
1.0
0.9
0.8
0.8
0.7
0.7
Relative Response
0.9
0.6
0.5
0.4
0.6
0.5
0.4
0.3
0.3
0.2
0.2
0.1
0.1
500
600
700
800
900
0.0
400
1000
500
600
700
800
Wave Length [nm]
Wave Length [nm]
Wavelength (nm)
Wavelength (nm)
(Lens characteristics and light source characteristics excluded.)
Specifications
XC-EI50
Image device
Signal system
XC-EI50CE
XC-EI30
1/2 type IT CCD
XC-EI30CE
1/3 type IT CCD
CCIR
EIA
CCIR
768 (H) x 494 (V)
752 (H) x 582 (V)
768 (H) x 494 (V)
752 (H) x 582 (V)
Effective lines
752 (H) x 485 (V)
736 (H) x 575 (V)
752 (H) x 485 (V)
736 (H) x 575 (V)
Cell size (µm)
8.4 (H) x 9.4 (V)
8.6 (H) x 8.3 (V)
6.35 (H) x 7.4 (V)
6.5 (H) x 6.25 (V)
15.734 kHz
15.625 kHz
15.734 kHz
15.625 kHz
59.94 Hz
50 Hz
59.94 Hz
50 Hz
Vertical frequency
Lens mount
C mount
Sync system
Internal/External (auto)
External sync system input/output*1
HD/VD (HD/VD level: 2 to 5 Vp-p)
±1 % (in horizontal sync frequency)
Jitter
less than ±20 nsec
Scanning system 525 lines 2:1 Interlaced (automatic switching according to input signal)
Video output
1.0 Vp-p, negative, 75 Ω unbalanced
570 TV lines
Sensitivity 560 TV lines
570 TV lines
400 lx F11
560 TV lines
400 lx F8
3CCD Colour
Video Camera
External sync frequency
Horizontal resolution
Accessories
EIA
Effective picture elements
Horizontal frequency
TV Format
B/W Model
Colour Model
Relative Response
800
●XC-EI50CE
●XC-EI30CE
0.0
400
700
Wave Length [nm]
Wavelength
(nm)
Wavelength (nm)
(γ=ON, MIN GAIN, without IR cut filter)(γ=ON, MIN GAIN, without IR cut filter)
Minimum illumination*2
0.1 lx0.2 lx
Gain
Gamma
Normal shutter
External trigger shutter*3
60 dB
AGC/Manual (adjustable on the rear panel)
ON/OFF (adjustable on the rear panel)
1/100 to 1/10,000 s
1/120 to 1/10,000 s
1/100 to 1/10,000 s
1/120 to 1/10,000 s
1/4 to 1/10,000 s
1/4 to 1/8,000 s
1/4 to 1/10,000 s
1/4 to 1/8,000 s
Power requirements DC 12 V (+9 to16 V)
Power consumtion
1.6 W
Dimension (W) x (H) x (D)
1.4 W
Mass
29 x 29 x 30 mm
50 g
-5 ˚C to +45 ˚C / 20 to 80 % (no condensation)
Storage temperature/humidity
-20 ˚C to +60 ˚C / 20 to 95 % (no condensation)
Performance guarantee temperature
Vibration resistance
0 to +40 ˚C
10 G (20 to 200 Hz 20 minutes for each direction – x,y,z)
Shock resistance
70 G
MTBF
126,469 hrs.
Regulatory compliance
Color PTZ Model
Operating temperature/humidity
Color Camera Block
S/N ratio
UL1492, FCC/ICES-003 : ClassB, CE : EN61326, AS/NZ : EN61326
Supplied accessoriesLens mount cap (1), Operating instructions (1)
*1 Automatic switching in response to the presence of an input signal when the VS switch on the rear panel is set to EXT.
*2 (F1.4, AGC ON, without IR cut filter) **3 Using Dip switch on the rear panel or Using trigger pulse width
XC-EI50/EI50CE/EI30/EI30CE
71
Intelligent
① 12-pin multi-connector
Location and Function of Parts and Controls
DC IN/HD/VD (DC power/sync signal input) VIDEO OUT terminal.
Digital Interface
IEEE1394b
② 75Ω termination selector switch
① Lens mount (C-mount)
③ HD/VD input-output selector switch
② Guide holes (at the top)
④ Shutter speed/mode setting DIP switch
⑤ Volume control switch
This switch can be changed in the range of Switch 0 to 18 dB
when the GAIN switch is set to “M”.
Camera Link
*During factory setting, this switch is adjusted to the mechanical center.
Note
When setting DIP switch 5 to the frame integration, set the
volume control switch 5 to the MAX side from the mechanical
center (because of CCD characteristics).
③ Tripod screw holes
(at the bottom)
Be sure to turn the power off before making switch settings.
As the variable controller for manual adjustment is a small
precise component, do not apply force more than required when
adjusting. Doing so will break the component. The controller is
not a 360-degree rotation type. Do not turn the controller
beyond the stopper of the component. The range of rotation is
about 260 degrees. For the adjustment of the variable controller,
use a flathead screwdriver. The sizes of a recommended
flathead screwdrivers are 1.9mm width, 0.5mm thickness and
more than 0.45mm length.
Reference holes
④ (at the bottom)
B/W Model
Colour Model
A commercial C-mount lens or other optical equipment.
Note
Be sure that the lens does not project more than 10 mm from the
lens mount.
Color Camera Block
Factory Mode Settings of Rear Panel
② Guide holes (at the top)
These screw holes help to lock the camera module.
These four screw holes on the bottom are for installing the
camera module on a tripod. To install on a tripod, you will need to
install the VCT-333I tripod adaptor using these holes on the bottom of the camera.
Factory-setting mode
Switch
No.
③ Tripod screw holes (at the bottom)
w
75 Ω termination selector switch
ON
e
HD/VD input-output selector switch
EXT
r
Shutter speed/mode setting DIP switch
Switches 1 to 4: Select the shutter speed.
④ Reference holes (at the bottom)
OFF
Switch 5: Selects the frame or field integration.
FRAME
Switches 6 to 8: Select the trigger shutter mode.
Normal
Switch 9: Selects correction on/off.
These precision screw holes are for locking the camera module.
Locking the camera module using these holes secures the optical
axis alignment.
OFF
Switch 0: Selects the gain.
t
Manual
Volume control switch
Mechanical center
Connector Pin Assignments
Rear Panel
12-pin multi-connector
Rear panel
DIP switch
Switches 1 to 4:
Select the shutter speed.
Switch 5: Selects the frame or field
②
integration.
Switches 6 to 8:
Select the trigger shutter
mode.
Switch 9: Selects g correction on/off.
④
Switch 0: Selects the gain.
②
①
Color PTZ Model
Lens mount shoulder
10 mm or less
3CCD Colour
Video Camera
Accessories
TV Format
Non-TV Format
① Lens mount section (C mount)
④
①
External HD/VD
synchronization
Pin No.
② ③
③
② ③
*
③
④
④
①
①
④
④
①
①
⑤
⑤
②
⑤ ⑤
③ ③
* The rear panel is different for the serial numbers shown below.
XC-ES50/ES30
XC-ES50CE/ES30CE
1
GND
GND
2
+12 V
+12 V
3
GND
GND
4
VIDEO output
VIDEO output
5
GND
GND
6
External HD input
Internal HD output
7
② ③
③
②
:200001~
:500001~
Internal HD/VD
synchronization
*1
External VD input
8
GND
9
–
10
*2
WEN output
Internal VD output
GND
–
*2
WEN output
11
TRIG input
TRIG input
12
GND
GND
*1: An input VD signal is required when the restart/reset mode is used.
*2: A WEN output signal is valid only in the external trigger shutter mode.
72
XC-EI50/EI50CE/EI30/EI30CE
Shutter
OFF
1/2000
1/125
1/4000
1/250
1/10000
(EIA)
1/8000
(CCIR)
1/500
Mode 1
(Non-reset mode)
Mode 2
(Reset mode)
1/1000
Exposure time = Trigger pulse width + 97 μsec (EIA)
120 μsec (CCIR)
*Flickerless
(EIA: 1/100
CCIR: 1/120)
(Unit: second)
* In the flickerless mode, the normal shutter speed is 1/100 sec for XC-ES50/ES30
and XC-EI50/EI30 (EIA) and 1/120 sec for XC-ES50CE/ES30 CE and XC-EI50CE/
EI30CE (CCIR).
■ Specifications of trigger pulse
A
B
T
A: 4 to 5.0 V
B: 0 to 1.0 V
T: 2 μs to 1/4 s
These modes are used to capture one image (one field) per trigger
pulse. Set DIP switches 6, 7, and 8 on the rear panel to mode 1 or 2.
(Refer to the table below.) When the trigger pulse width is 1/3 sec or
more, the output signal is switched to a normal video signal.
There are two modes for timing in which a video signal is obtained.
T: 2 μs to 1/4 s, 100 μs to 1/4 s when setting the shutter speed using DIP switch
* Input impedance: 10 kΩ or more
* The voltage and pulse width used are measured at pin 11 of a 12-pin
multi-connector on the rear panel.
TV Format
B/W Model
Colour Model
Note
It is recommended to set DIP switch 5 for field selection.
(The field selection is about two times in sensitivity as high as the
frame selection.)
External Trigger Shutter
Non-TV Format
Note
1. lt is recommended to set DIP switch 5 for field selection. (The field
selection is about two times in sensitivity as high as the frame
selection.)
2. After a trigger pulse is input, a new trigger pulse must not be
input before the video signal obtained by the trigger pulse has
been output.
Digital Interface
IEEE1394b
Camera Link
This mode provides continuous video output with the electronic
shutter selected by switches to clearly capture a high-speed
moving object.
■ Setting of normal shutter speed
– Set DIP switches 1 to 4 on the rear panel to 0.
– An arbitrary shutter speed can be obtained by setting the
trigger pulse width to the range of 2 msec to 250 msec.
Intelligent
●Using trigger pulse width
Normal Shutter
●Mode 1 (Non-reset mode)
●Mode 2 (Reset mode)
In this mode, an internal video signal is output from a trigger
pulse after a certain period of time.
Restart/Reset
The information on one screen can be extracted at any time by
inputting a restart/reset signal (HD/VD) from the outside. To enter this
mode, set DIP switches 6, 7, and 8 on the rear panel of a
camera as shown in the table below. The setting is especially
effective for the following operation.
3CCD Colour
Video Camera
■ Setting of external trigger shutter speed
There are two ways to set the shutter speed.
Mode 1 (Non-reset mode)
1/125
1/250
1/1000
1/2000
1/4000
Mode 2 (Reset mode)
1/500
*1/100
(EIA)
1/120
(CCIR)
1/125
1/250
1/500
**1/10000
(EIA)
1/8000
(CCIR)
1/1000
1/2000
1/4000
**1/10000
(EIA)
1/8000
(CCIR)
Color Camera Block
*1/100
(EIA)
1/120
(CCIR)
Accessories
In this mode, a video signal synchronized with a VD signal is output after a trigger pulse is input.
– A video signal is synchronized with the external VD signal when
an external HD/VD signal is input.
– A video signal is synchronized with an internal VD signal when
no external HD/VD signal is input.
Color PTZ Model
(Unit: second)
(Unit: second)
* The external trigger shutter speed is set to 1/100 sec for XC-ES50/ES30, XC-EI50/
EI30 (EIA) and 1/120 sec for XC-ES50CE/ES30CE, XC-EI50CE/EI30CE (CCIR).
** The external trigger shutter speed is set to 1/10000 sec for XC-ES50/ES30, XCEI50/EI30 (EIA) and 1/8000 sec for XC-ES50CE/ES30CE, XC-EI50CE/EI30CE (CCIR).
XC-EI50/EI50CE/EI30/EI30CE
73
C
Format
TV
1/2 Type
Output
CCD
Normal
Shutter
(Non-Reset Mode)
(Non-Reset Mode)
External
Trigger Shutter
External
Trigger Shutter
Mode 2
VS
Output
External Sync
Near-IR
Sensitivity
Connection Diagram
Color Camera Block
P88
Dimensions
Outline
Camera body of all XC-E models
14.5
2-M2 depth 3
12
The XC-EU50/EU50CE is a monochrome video camera module with a 1/2 type CCD for industrial use. With its
sensitivity around the near ultraviolet range (around 365 nm),
utilized the feature of the shorter wavelength range characteristics and very detailed data can be detected.
Small scratches, dust or blemishes hardly visible to the
naked eye can be captured as a clear image by combining the camera with a light source that has a wavelength of
about 360 nm.
This model inherited compact size, rear panel mode switches from the XC-E series and is ideal for use in
industrial applications.
29
Features
5.1
(4.9)
Accessories
●DC-700/700CE
■ 12-pin camera cable (CE standard)
●CCXC-12P02N
●CCXC-12P05N
●CCXC-12P10N
●CCXC-12P25N
■ Tripod adaptor
Color PTZ Model
●VCT-333I
XC-EU50/EU50CE
(2 m)
(5 m)
(10 m)
(25 m)
30
12
■XC-EU50/EU50CE: 1/2 type interline CCD
■Near-UV sensitivity
■High S/N ratio: 60 dB
■Electronic shutter function (1/100 to 1/10,000 sec.)
■External trigger shutter function (1/4 to 1/10,000 sec.)
■2:1 Interlaced/non-interlaced
■Sync system: Internal/external (HD/VD)
■Frame/field accumulation
■Restart/reset function
■High shock and vibration resistance
■ Compact camera adaptor
74
Restart Long
Reset Exposure
29
15
23.7
4-M2 depth 3
3-M3 depth 3
Unit: mm
8
※1
12
Non-TV Format
B/W Model
TV Format
Colour Model
Accessories
3CCD Colour
Video Camera
HD VD
Ø27.6
Ø27.3
Mode 1
Lens Mount
20
Intelligent
XC-EU50/EU50CE
Camera Link
Digital Interface
IEEE1394b
B/W VIDEO CAMERA MODULE
22 ※2
16.5
42
*1: M3 screw size
*2: M2 screw size
Notice
From January 2005, the outside dimensions of XC-E series
consoles will be changed to the same dimensions of XC-HR
series consoles.
The outside dimensions will be changed from the following
serial numbers.
XC-EU50: 250001~
XC-EU50CE: 550001~
Intelligent
Location and Function of Parts and Controls
Spectral Sensitivity Characteristics
●XC-EU50/XC-EU50CE
(Typical Values)
① Lens mount (C-mount)
② Guide holes (at the top)
1.0
0.9
0.8
0.7
0.6
0.5
0.4
0.3
0.2
③ Tripod screw holes
(at the bottom)
0.1
320
340
360
380
400
④ Reference holes
(at the bottom)
420
Wavelength (nm)
(Lens characteristics and light source characteristics excluded.)
① Lens mount (C-mount)
Attach any C-mount lens or other optical equipment for Near UV.
Note
Be sure that the lens does not project more than 10 mm from the
lens mount.
Lens mount shoulder
10 mm or less
These screw holes help to lock the camera module.
③ Tripod screw holes (at the bottom)
These four screw holes on the bottom are for installing the
camera module on a tripod. To install on a tripod, you will need to
install the VCT-333I tripod adaptor using these holes on the bottom of the camera.
④ Reference holes (at the bottom)
These precision screw holes are for locking the camera module.
Locking the camera module using these holes secures the optical
axis alignment.
XC-EU50
XC-EU50CE
Image device
1/2 type IT CCD
EIA
Effective picture elements
768 (H) x 494 (V)
752 (H) x 582 (V)
Effective lines
752 (H) x 485 (V)
736 (H) x 575 (V)
Cell size (µm)
8.4 (H) x 9.8 (V)
8.6 (H) x 8.3 (V)
Horizontal frequency
15.734 kHz
15.625 kHz
Vertical frequency
59.94 Hz
50 Hz
Lens mount
CCIR
3CCD Colour
Video Camera
Signal system
C mount
Sync system
Internal/External (auto)
External sync system input/output*1
HD/VD (HD/VD level: 2 to 5 Vp-p)
External sync frequency
±1 % (automatic switching)
Jitter
less than ±20 nsec (external horizontal frequency)
Scanning system
2:1 Interlaced
1.0 Vp-p, negative, 75 Ω unbalanced
570 TV lines
S/N ratio
Gain
Color Camera Block
Video output
Horizontal resolution
Accessories
Specifications
560 TV lines
60 dB
AGC/Manual (adjustable on the rear panel)
Gamma
ON/OFF (adjustable on the rear panel)
Normal shutter 1/100 to 1/10,000 s 1/120 to 1/10,000 s
External trigger shutter
1/4 to 1/10,000 s
1/4 to 1/8,000 s
Power requirements DC 12 V (+9 to16 V)
Power consumtion
1.6 W
Mass
29 x 29 x 30 mm
50 g
Operating temperature/humidity
-5 ˚C to +45 ˚C / 20 to 80 % (no condensation)
Storage temperature/humidity
-30 ˚C to +60 ˚C / 20 to 95 % (no condensation)
Performance guarantee temperature
0 to +40 ˚C
10 G (20 to 200 Hz 20 minutes for each direction – x,y,z)
Shock resistance
70 G
MTBF
126,469 hrs.
Regulatory compliance
Color PTZ Model
Dimension (W) x (H) x (D)
Vibration resistance
TV Format
B/W Model
Colour Model
② Guide holes (at the top)
Non-TV Format
0.0
300
Digital Interface
IEEE1394b
Camera Link
Relative sensitivity
UL1492, FCC/ICES-003 : ClassB, CE : EN61326, AS/NZ : EN61326
Supplied accessoriesLens mount cap (1), Operating instructions (1)
*1 Automatic switching in response to the presence of an input signal when the switch on the rear panel is set to EXT.
XC-EU50/EU50CE
75
Intelligent
Rear Panel
Connector Pin Assignments
Digital Interface
IEEE1394b
Rear panel
Switches 1 to 4:
Select the shutter speed.
Switch 5: Selects the frame or field
②
integration.
Switches 6 to 8:
Select the trigger shutter
mode.
Switch 9: Selects g correction on/off.
④
Switch 0: Selects the gain.
②
④
①
Camera Link
①
② ③
Non-TV Format
Rear panel
DIP switch
③
② ③
③
*
④
④
①
①
④
④
①
①
⑤
⑤
② ③
③
②
② ⑤
③
⑤ ③
②
B/W Model
Colour Model
TV Format
* The rear panel is different for the serial numbers shown below.
XC-EU50
XC-EU50CE
:200001~
:500001~
Pin Camera sync
No. output
1 Ground
External Sync
(HD/VD)
Ground
Ground
External trigger
shutter
Ground
2
+12V DC
+12V DC
+12V DC
+12V DC
3
Video output (Ground)
Video output (Ground)
Video output (Ground)
Video output (Ground)
4
Video output (Signal)
Video output (Signal)
Video output (Signal)
Video output (Signal)
5
HD output (Ground)
HD input (Ground)
HD input (Ground)
HD input (Ground)
6
HD output (Signal)
HD input (Signal)
HD input (Signal)
HD input (Signal)
7
VD output (Signal)
VD input (Signal)
Reset (Signal)
VD input (Signal)
8
-
-
-
-
9
-
-
-
-
10 -
-
-
WEN output (Signal)
11 -
-
-
Trigger pulse input (Signal)
12 VD output (Ground)
Note
Be sure to turn the power off before making switch settings.
As the variable controller for manual adjustment is a small
precise component, do not apply force more than required when
adjusting. Doing so will break the component. The controller is
not a 360-degree rotation type. Do not turn the controller
beyond the stopper of the component. The range of rotation is
about 260 degrees. For the adjustment of the variable controller,
use a flathead screwdriver. The sizes of a recommended
flathead screwdrivers are 1.9mm width, 0.5mm thickness and
more than 0.45mm length.
VD input (Ground)
Reset (Ground)
VD input (Ground)
Normal Shutter
This mode provides continuous video output with the electronic
shutter selected by switches to capture a high-speed moving
object clearly.
Setting of the Normal Shutter
●Using the DIP switches on the rear panel
① 12-pin multi-connector
Accessories
Restart/Reset
DC IN/HD/VD (DC power/sync signal input) VIDEO OUT terminal.
Shutter
OFF
1/125
1/250
1/2000
1/4000
1/10000
(EIA)
1/8000
(CCIR)
1/500
1/1000
② 75Ω termination selector switch
③ HD/VD input-output selector switch
④ Shutter speed/mode setting DIP switch
⑤ Volume control switch
Color PTZ Model
Color Camera Block
3CCD Colour
Video Camera
This switch can be changed in the range of Switch 0 to 18 dB
when the GAIN switch is set to “M”.
76
*During factory setting, this switch is adjusted to the mechanical center.
Note
When setting DIP switch 5 to the frame integration, set the
volume control switch 8 to the MAX side from the mechanical
center (because of CCD characteristics).
Flickerless*
(EIA: 1/100
CCIR: 1/120)
Factory Mode Settings of Rear Panel
Switch
No.
Factory-setting mode
w
75 Ω termination selector switch
ON
e
HD/VD input-output selector switch
EXT
r
Shutter speed/mode setting DIP switch
Switches 1 to 4: Select the shutter speed.
OFF
FRAME
Switches 6 to 8: Select the trigger shutter mode.
Normal
Switch 0: Selects the gain.
t
Note
Switch 5: Selects the frame or field integration.
Switch 9: Selects correction on/off.
Volume control switch
XC-EU50/EU50CE
(Unit: second)
* If you set the mode to flickerless, the positions of DIP switches 1 to 3 are optional.
OFF
Manual
Mechanical center
• The positions of DIP switches 6 and 7 are optional.
• The DIP switch 5 position is optional. (The field setting is
recommended.) The field setting can obtain a sensitivity that is
twice that of the frame setting.
Intelligent
●Specifications of the Trigger Pulse
External Trigger Shutter
4 to 5.0 V
●Mode 1 (Non-reset mode)
In this mode, a video signal synchronized with a VD signal is output after a trigger pulse is input.
– A video signal is synchronized with the external VD signal when
an external HD/VD signal is input.
– A video signal is synchronized with an internal VD signal when
no external HD/VD signal is input.
In this mode, an internal VD is reset, then an internal video
signal is output after trigger pulse input after a certain period of
time.
Setting of the External Trigger Shutter
T: 2 μsec to 1/4 sec
T: If you set the trigger pulse with the DIP switches, use the 100 μs to
1/4 sec pulse width.
• Input impedance; 10 kΩ or more.
• The voltage and pulse width used are measured at pin 11 of a
12-pin multi-connector on the rear panel.
Restart/Reset
To set Restart/Reset mode
The information on one screen can be extracted at any time by
externally inputting a restart/reset signal (HD/VD). To enter this mode,
set DIP switches 6, 7, and 8 on the rear panel of the camera as
shown in the figure below. The setting is especially effective for the
operation explained below.
You can set the shutter speed with the DIP switches or using the
trigger pulse width.
Non-TV Format
●Mode 2 (Reset mode)
0 to 1.0 V
Digital Interface
IEEE1394b
Camera Link
By inputting an external trigger pulse, the camera is able to capture
fast-moving objects clearly.
Set DIP switches 6, 7, and 8 on the rear panel to Mode 1 or Mode 2
(See the table below).
When you set the trigger pulse width to 1/3 of a second or more, the
output signal changes to the normal VIDEO signal.
There are two modes for timing in which a video signal is obtained.
●Using the DIP switches on the rear panel
1/125
1/250
1/500
Mode 2 (Reset mode)
1/100
(EIA)*
1/120
(CCIR)*
1/125
1/250
1/500
Long Exposure
1/1000
1/2000
1/4000
1/10000
(EIA)
1/8000
(CCIR)
1/1000
1/2000
1/4000
1/10000
(EIA)
1/8000
(CCIR)
Note
Some white spots may appear after a long exposure.
(Unit: second)
(Unit: second)
* If 1/100 (EIA) or 1/120 (CCIR) has been set, the positions of DIP switches 1 to 3 are optional.
●Setting the external shutter speed with the trigger pulse width
Set all DIP switches (1 to 4 on the rear panel) to 0.
You can obtain an arbitrary shutter speed by setting the trigger
pulse width to the range of 2 μsec to 250 msec.
Mode 2 (Reset mode)
Continuous signal: 15.734 kHz (XC-EU50) Allowable frequency value ±1%,
EXT HD 15.625 kHz (XC-EU50CE) Allowable frequency value ±1%
EXT VD VD interval (T): 262.5 H or more (XC-EU50) and less than 1 second (Recommended),
312.5 H or more (XC-EU50CE) and less than 1 second (Recommended)
Four or more VD pulses are required.
T
T
T
Exposure time for the Odd field
Exposure time for the Even field
Frame Accumulation (Factory setting)
Video output
Odd image
Invalid image
Even image
Video frame image
Odd and even fields are determined by the phase of the EXT HD/VD signal input from the outside.
Color Camera Block
Mode 1 (Non-reset mode)
Sample input timing chart 1
3CCD Colour
Video Camera
Note
The positions of DIP switches 5, 9 and 0 are optional.
Accessories
The Restart/Reset function extends the CCD accumulation time,
resulting in a highly sensitive image. This function is effective when
you cannot gain satisfactory sensitivity under normal operating conditions, or when you want to observe a moving object. Extend the
VD interval (T) period between external VD pulses.
TV Format
B/W Model
Colour Model
Mode 1 (Non-reset mode)
1/100
(EIA)*
1/120
(CCIR)*
Color PTZ Model
Exposure time = Trigger pulse width + 97 μsec (EIA)
Trigger pulse width + 120 μsec (CCIR)
Note
• The DIP switch 5 position is optional. (The field setting is
recommended.) The field setting can obtain a sensitivity that is
twice that of the frame setting.
• If you input a new trigger pulse before the video signal output
for the previous trigger pulse is output completely, an
incorrect video signal will be output.
XC-EU50/EU50CE
77
Intelligent
From January 2005, the outside dimensions of XC-E series consoles
will be changed to the same dimensions of XC-HR series consoles.
New Dimensions
14.5
14.5
2-M2 depth 3
2-M2 depth 3
15
12
15
(4.9)
(4.9)
5.1
5.1
30
30
(4.9)
23.730 ※1
23.7 ※1
0.
5
0.
5
C
C
29
29
29
29
10
6.5
10
5.5
32
6.5
32
8
※1
15
15 23.7
23.7
4-M2 depth 3
4-M2 depth 3
3-M3 depth 3
3-M3 depth 3
4-M2 depth 3
16.5
16.5
3-M3 depth 3
16.5
Unit: mm
42
42
22 ※2
22 ※2
Color PTZ Model
XC-EU50/EU50CE
4-M2 depth4-M2
2.5 depth 2.5
22 ※2
3-M3 depth3-M3
3
depth
3
16.5
42
*1: M3 screw size
*2: M2 screw size
The
outside
dimensions
will
be
from
the
following
serial
XC-ES50/ES30
: 250001~
XC-ES50CE/ES30CE
: 550001~
XC-ES51
: 150001~
XC-ES51CE
: 450001~
XC-EI50/EI30
: 250001~
XC-EI50CE/EI30CE : 550001~
XC-EU50
: 250001~
XC-EU50CE
: 550001~
20
12
20
12
12
20
2020
1212
23.7
8
8
5.1
29
29
Ø27.6
Ø27.6Ø27.6
Ø27.3
Ø27.3Ø27.3
2929
29
12
12
Colour Model
Accessories
5
0.
3CCD Colour
Video Camera
C
Color Camera Block
4.5
29
15
78
12
29
1212
12
Non-TV Format
4.5
29
29
5
0.
B/W Model
2-M2 depth2-M2
2.5 depth 2.5
14.5
2-M2 depth 3
C
TV Format
Old Dimensions
12
29
Camera Link
Digital Interface
IEEE1394b
Information of XC-E Series Console Modification
Unit: mm
changed
number.
16.5 22
42
22
42
5.5
Intelligent
Digital Interface
IEEE1394b
Camera Link
Non-TV Format
TV Format
B/W Model
Colour Model
Accessories
3CCD Colour
Video Camera
Color Camera Block
Color PTZ Model
79
XC-EU50/EU50CE
Intelligent
XC-ES50L/ES50LCE
Format
TV
1/2 Type
Output
CCD
Normal
Shutter
Mode 1
C
Lens Mount
Mode 2
(Non-Reset Mode)
(Non-Reset Mode)
External
Trigger Shutter
External
Trigger Shutter
VS
Output
Non-TV Format
B/W Model
TV Format
Colour Model
Accessories
HD VD
External Sync
Restart Long
Reset Exposure
L
Type
Camera Link
Digital Interface
IEEE1394b
B/W VIDEO CAMERA MODULE
Connection Diagram
P89
Outline
Dimensions
The XC-ES50L/ES50LCE is a monochrome video camera
module with a 1/2 type CCD for industrial use.
Like the XC-ES50/ES50CE, this model provides various
mode switches on the rear panel, making it ideal for use in
combination with other industrial equipment.
Features
■XC-ES50L/ES50LCE: 1/2 type interline CCD
■High S/N ratio: 60 dB
■Electronic shutter function (1/100 to 1/10,000 sec.)
■External trigger shutter function (1/4 to 1/10,000 sec.)
■2:1 Interlaced/non-interlaced
■Frame/field accumulation
■Restart/reset function
■IR cut filter
■Sync system: Internal/external (HD/VD)
■High shock and vibration resistance
CCD
XC-ES50L
Accessories
●DC-700/700CE
φ
■ 12-pin camera cable (CE standard)
●CCXC-12P02N
●CCXC-12P05N
●CCXC-12P10N
●CCXC-12P25N
(2 m)
(5 m)
(10 m)
(25 m)
Color PTZ Model
Color Camera Block
3CCD Colour
Video Camera
■ Compact camera adaptor
80
XC-ES50L/XC-ES50LCE
Unit: mm
Location and Function of Parts and Controls
Intelligent
Spectral Sensitivity Characteristics
●XC-ES50L/XC-ES50LCE
(Typical Values)
① Reference holes
Digital Interface
IEEE1394b
Camera Link
Relative sensitivity
1.0
0.9
CCD
0.8
相対感度
0.7
0.6
0.5
0.4
0.3
0.2
0.1
0.0
400
500
600
700
800
900
1000
② Lens mount (C-mount)
Wavelength (nm)
(Lens characteristics and light source characteristics excluded.)
① Reference holes
These precision screw holes are for locking the camera module.
② Lens mount (C-mount)
Non-TV Format
波長 (nm)
Attach any C-mount lens or other optical equipment.
Lens mount shoulder
10 mm or less
Specifications
XC-ES50L
XC-ES50LCE
Image device
1/2 type IT CCD
EIA
Effective picture elements
768 (H) x 494 (V)
752 (H) x 582 (V)
Effective lines
752 (H) x 485 (V)
736 (H) x 575 (V)
Cell size (µm)
8.4 (H) x 9.8 (V)
8.6 (H) x 8.3 (V)
Horizontal frequency
15.734 kHz
15.625 kHz
Vertical frequency
59.94 Hz
50 Hz
Lens mount
CCIR
C mount
Sync system
Internal/External (auto)
HD/VD (HD/VD level: 2 to 5 Vp-p)
External sync frequency
±1 % (in horizontal sync frequency)
H Jitter
less than ±20 nsec
525 lines 2:1 Interlaced (Automatic switching according to input signal)
Video output
Horizontal resolution
625 lines 2:1 Interlaced (Automatic switching according to input signal)
1.0 Vp-p, negative, 75 Ω unbalanced
570 TV lines
Sensitivity 560 TV lines
400 lx F4 (γ=ON, MIN GAIN, IR cut filter)
Minimum illumination
3.0 lx
Gain
60 dB
AGC/Manual (adjustable on the rear panel)
Gamma
ON/OFF (adjustable on the rear panel)
Normal shutter 1/100 to 1/10,000 s 1/120 to 1/10,000 s
1/4 to 1/10,000 s
1/4 to 1/8,000 s
Power requirements DC 12 V (+9 to16 V)
Power consumtion
Dimension (W) x (H) x (D)
1.6 W
29 x 42.5 x 43.8 mm
Mass
110 g
-5 ˚C to +45 ˚C / 20 to 80 % (no condensation)
Storage temperature/humidity
-20 ˚C to +60 ˚C / 20 to 95 % (no condensation)
Performance guarantee temperature
0 to +40 ˚C
10 G (20 to 200 Hz 20 minutes for each direction – x,y,z)
Shock resistance
70 G
MTBF
126,469 hrs.
Regulatory compliance
Color PTZ Model
Operating temperature/humidity
Color Camera Block
S/N ratio
External trigger shutter*2
3CCD Colour
Video Camera
External sync system input/output*1
Vibration resistance
Accessories
Signal system
Scanning system
TV Format
B/W Model
Colour Model
Note
The lens must not project more than 10 mm from the lens mount.
UL1492, FCC/ICES-003 : ClassB, CE : EN61326, AS/NZ : EN61326
Supplied accessoriesLens mount cap (1), Operating instructions (1)
*1 Automatic switching in response to the presence of an input signal when the switch on the rear panel is set to EXT.
*2 Using Dip switch on the rear panel or Using trigger pulse width
XC-ES50L/XC-ES50LCE
81
Intelligent
Rear Panel
Connector Pin Assignments
B/W Model
④
Rear panel
③
⑤
Note
Be sure to turn the power off before making switch settings.
As the variable controller for manual adjustment is a small
precise component, do not apply force more than required when
adjusting. Doing so will break the component. The controller is
not a 360-degree rotation type. Do not turn the controller
beyond the stopper of the component. The range of rotation is
about 260 degrees. For the adjustment of the variable controller,
use a flathead screwdriver. The sizes of a recommended
flathead screwdrivers are 1.9mm width, 0.5mm thickness and
more than 0.45mm length.
① Video out/DC IN/SYNC (video output/DC power input/
sync signal I/O) connector (12-pin)
Connect a CCXC-12P05N camera cable to this connector for the
+12V DC power supply and the video signal output from the camera module. When a sync signal generator is connected to this
connector, the camera module is synchronized with the
external sync signals (HD/VD signals).
Pin Camera sync
No. output
1 Ground
External mode
(HD/VD)
Ground
Ground
External trigger
shutter
Ground
2
+12V DC
+12V DC
+12V DC
+12V DC
3
Video output (Ground)
Video output (Ground)
Video output (Ground)
Video output (Ground)
4
Video output (Signal)
Video output (Signal)
Video output (Signal)
Video output (Signal)
5
HD output (Ground)
HD input (Ground)
HD input (Ground)
HD input (Ground)
6
HD output (Signal)
HD input (Signal)
HD input (Signal)
HD input (Signal)
7
VD output (Signal)
VD input (Signal)
Reset (Signal)
VD input (Signal)
8
-
-
-
-
9
-
-
-
-
10 -
-
-
WEN output (Signal)
11 -
-
-
Trigger pulse input (Signal)
12 VD output (Ground)
VD input (Ground)
Restart/Reset
Reset (Ground)
Reset (Ground)
Normal Shutter
② 75Ω termination switch
Colour Model
TV Format
Non-TV Format
Camera Link
Digital Interface
IEEE1394b
①
Turn this to OFF when not terminated. (Factory setting: ON)
③ HD/VD signal input/output switch
Set the switch to INT to output HD/VD signals from the camera
module.Set the switch to EXT to input HD/VD signals from an external unit. (Factory setting: EXT)
④ Shutter speed/Mode setting DIP switch
Shutter speed (bits 1 to 4)
Setting of the Normal Shutter
●Using the DIP switches on the rear panel
Set an appropriate shutter speed. (Factory setting: OFF)
Accessories
This mode provides continuous video output with the electronic
shutter selected by switches to capture a high-speed moving
object clearly.
Potential accumulation mode (bit 5):
Shutter
OFF
1/125
1/250
1/2000
1/4000
1/10000
1/500
1/1000
(Factory setting: FRAME)
Restart reset/External trigger shutter mode switch (bits 6–8):
(Factory setting: Normal)
γ compensation ON/OFF switch (bit 9):
Turn on this switch to enable the g compensation.
(Factory setting: OFF)
Color PTZ Model
Color Camera Block
3CCD Colour
Video Camera
GAIN switch (bit 0):
This switch selects MGC (manual adjustment) or AGC
(automatic adjustment). (Factory setting: MGC)
⑤ Manual GAIN (M GAIN) control knob
If you have selected MGC with the GAIN switch (DIP switch②), this
knob adjusts the gain. (Factory setting: twelve o’clock position)
Note
If you have selected FRAME using the Potential accumulation
mode (DIP switch ②), set this knob to MAX.
(This is due to requirement CCD.)
Factory Mode Settings of Rear Panel
Switch
No.
Factory-setting mode
w
75 Ω termination selector switch
ON
e
HD/VD input-output selector switch
EXT
r
Shutter speed/mode setting DIP switch
Switches 1 to 4: Select the shutter speed.
FRAME
Switches 6 to 8: Select the trigger shutter mode.
Normal
Switch 9: Selects correction on/off.
Switch 0: Selects the gain.
t
OFF
Switch 5: Selects the frame or field integration.
Volume control switch
OFF
Manual
Mechanical center
* When the GAIN switch is set to "MGC" (Manual), you can change the gain level in a range
from 0 to 18 dB.
82
Flickerless*
(EIA: 1/100
CCIR: 1/120)
XC-ES50L/XC-ES50LCE
(Unit: second)
* If you set the mode to flickerless, the positions of DIP switches 1 to 3 are optional.
Note
• The positions of DIP switches 6 and 7 are optional.
External Trigger Shutter
• The DIP switch 5 position is optional. (The field setting is
recommended.) The field setting can obtain a sensitivity that is
twice that of the frame setting.
• An image is not output correctly when the next trigger is input
before the image for the previous trigger is output.
●Specifications of the Trigger Pulse
By inputting an external trigger pulse, the camera is able to capture
fast-moving objects clearly.
Set DIP switches 6, 7, and 8 on the rear panel to Mode 1 or Mode 2
(See the table below).
When you set the trigger pulse width to 1/3 of a second or more, the
output signal changes to the normal VIDEO signal.
There are two modes for timing in which a video signal is obtained.
●Mode 1 (Non-reset mode)
0 to 1.0 V
T: 2 μsec to 1/4 sec
T: If you set the trigger pulse with the DIP switches, use the 100 μs
to 1/4 sec pulse width.
• Input impedance; 10 kΩ or more.
• The voltage and pulse width used are measured at pin 11 of a
12-pin multi-connector on the rear panel.
Restart/Reset
To set Restart/Reset mode
●Mode 2 (Reset mode)
Setting of the External Trigger Shutter
You can set the shutter speed with the DIP switches or using the
trigger pulse width.
The information on one screen can be extracted at any time by
externally inputting a restart/reset signal (HD/VD). To enter this mode,
set DIP switches 6, 7, and 8 on the rear panel of the camera as
shown in the figure below. The setting is especially effective for the
operation explained below.
●Using the DIP switches on the rear panel
Mode 1 (Non-reset mode)
1/125
1/250
1/1000
1/2000
1/4000
Mode 2 (Reset mode)
1/500
1/100
(EIA)*
1/120
(CCIR)*
1/125
1/250
1/500
1/10000
(EIA)
1/8000
(CCIR)
1/1000
1/2000
1/4000
1/10000
(EIA)
1/8000
(CCIR)
Long Exposure
The Restart/Reset function extends the CCD accumulation time,
resulting in a highly sensitive image. This function is effective when
you cannot gain satisfactory sensitivity under normal operating conditions, or when you want to observe a moving object. Extend the
VD interval (T) period between external VD pulses.
Note
Some white spots may appear after a long exposure.
3CCD Colour
Video Camera
(Unit: second)
(Unit: second)
Accessories
1/100
(EIA)*
1/120
(CCIR)*
TV Format
B/W Model
Colour Model
In this mode, an internal VD is reset, then an internal video
signal is output after trigger pulse input after a certain period of
time.
Non-TV Format
In this mode, a video signal synchronized with a VD signal is output after a trigger pulse is input.
– A video signal is synchronized with the external VD signal when
an external HD/VD signal is input.
– A video signal is synchronized with an internal VD signal when
no external HD/VD signal is input.
4 to 5.0 V
Digital Interface
IEEE1394b
Camera Link
• The DIP switch 5 position is optional. (The field setting is
recommended.) The field setting can obtain a sensitivity that is
twice that of the frame setting.
Intelligent
Note
* If 1/100 (EIA) or 1/120 (CCIR) has been set, the positions of DIP switches 1 to 3 are optional.
●Setting the external shutter speed with the trigger pulse width
Set all DIP switches (1 to 4 on the rear panel) to 0.
You can obtain an arbitrary shutter speed by setting the trigger
pulse width to the range of 2 μsec to 250 msec.
Mode 1 (Non-reset mode)
Sample input timing chart 1
EXT HD Continuous signal: 15.734 kHz (XC-ES50L) Allowable frequency value ±1%,
15.625 kHz (XC-ES50LCE) Allowable frequency value ±1%
EXT VD VD interval (T): 262.5 H or more (XC-ES50L) and less than 1 second (Recommended),
312.5 H or more (XC-ES50LCE) and less than 1 second (Recommended)
Four or more VD pulses are required.
T
T
T
Mode 2 (Reset mode)
Color Camera Block
Note
The positions of DIP switches 5, 9 and 0 are optional.
Exposure time for the Odd field
Frame Accumulation (Factory setting)
Video output
Odd image
Invalid image
Exposure time = Trigger pulse width + 97 μsec (EIA)
Trigger pulse width + 120 μsec (CCIR)
Even image
Video frame image
Color PTZ Model
Exposure time for the Even field
Odd and even fields are determined by the phase of the EXT HD/VD signal input from the outside.
XC-ES50L/XC-ES50LCE
83
Format
TV
1/2 Type
Output
CCD
NF
Lens Mount
VBS
Y/C
Output
Output
External Sync
Normal
Shutter
CCD ATW Fixed Manual RS232C
White
White
White
Control
Iris Balance
Balance
Balance
Connection Diagram
P89
Outline
Dimensions
Color Camera Block
2–φ2
*1 The RS-232C switch is set to OFF at the factory. For details on how to change this
setting. please refer to the Technical Manual.
Accessories
●DC-700/700CE
2
75
Rear
(2 m)
(5 m)
(10 m)
(25 m)
■ NF-mount LENS
●VCL-03S12XM
●VCL-06S12XM
●VCL-12S12XM
Front
1.2
22
φ 2.5
4
Unit: mm
Spectral Sensitivity Characteristics
●XC-555
(Typical Values)
Relative sensitivity
1.0
Cy
■ 12-pin camera cable (CE standard)
●CCXC-12P02N
●CCXC-12P05N
●CCXC-12P10N
●CCXC-12P25N
4 – φ 2.5 CBORE DEPTH 1
8
22
■1/2 type IT CCD
■Ultra-compact and light-weight:
22 (H) x 22 (W) x 75 (D) mm, 60g
■One piece camera - no bulky CCU
■Compact NF lens and lens mount
■CCD IRIS function
■VBS and Y/C outputs
■External synchronization
■RS-232C interface to control camera functions*1
17.4
6.5
4
Features
■ Compact camera adaptor
Color PTZ Model
34
The XC-555/555P is an ultra-compact, integrated 1/2 type
IT CCD Colour camera ideally suited for a wide variety of
applications such as machine vision, multimedia and remote
monitoring. The XC-555/555P is designed so that a video
output signal can be obtained by only providing a power
supply of 12 V DC. Its ultra-compact, one-piece design
eliminates the need for a bulky CCU (Camera Control Unit),
allowing the XC-555/555P cameras to be easily installed in
space-restricted areas. In addition, the XC-555/555P cameras use a unique, compact NF mount lens system that can
be converted into a flexible C mount lens.
1.2
Non-TV Format
TV Format
Colour Model
B/W Model
Accessories
3CCD Colour
Video Camera
HD VD
6.5
Intelligent
XC-555/555P
Camera Link
Digital Interface
IEEE1394b
Colour VIDEO CAMERA MODULE
0.8
Ye
G
0.6
0.4
Mg
0.2
■ C-mount adaptor
●LO-999CMT
* When a C-mount type lens is attached, a C-mount adaptor is required.
0
400
450
500
550
600
650
Wavelength (nm)
(Lens characteristics and light source characteristics excluded.)
84
XC-555/555P
700
Intelligent
Location and Function of Parts and Controls
① Dip switches for setting functions
② R control for manual white balance adjustment
This control is effective when the white balance switches are set
to MAN. Adjust the red Colour by turning the control.
③ B control for manual white balance adjustment
This control is effective when the white balance switches are set
to MAN. Adjust the blue Colour by turning the control.
④ Lens mount (special mount)
④
4
Lens mount shoulder
4.1 mm or less
• To attach a C-mount type lens, a C-mount adaptor
(LO- 999CMT) is required.
• This camera uses a 1/2-inch CCD. So the lens should be used
with this size of CCD. If used with a lens intended for a
2/3-inch CCD, the angle of view will be different.
• When connecting heavy lens, make sure that it is not subject to
shocks or vibration.
Specifications
XC-555
XC-555P
Image device
1/2 type IT CCD
Signal system
NTSC
Effective picture elements
768 (H) x 494 (V)
752 (H) x 582 (V)
PAL
Effective lines
756 (H) x 485 (V)
739 (H) x 575 (V)
Cell size8.4 μm (H) x 9.8 μm (V) 8.6 μm (H) x 9.3 μm (V)
Lens mount
NF mount (Flange back 12 mm)
Sync system
Internal/External (auto)
HD/VD (HD/VD level: 2 to 4 Vp-p), 75 Ω VS (1 Vp-p), 75 Ω
External sync frequency
VD/59.94 Hz ± 0.0009 Hz
VD/50 Hz ± 0.00075 Hz
HD/15734 Hz ± 0.016 Hz
HD/15625 Hz ± 0.0156 Hz
525 lines 2:1 Interlaced 30fps
625 lines 2:1 Interlaced 25fps
Colour filter
Complementary Colour mosaic
Video output
VBS, Y/C (selected with the switch), VBS: 1 Vp-p, 75 Ω, sync negative, Y: 1 Vp-p, 75 Ω
C: C level depends on the composite video out signal
Horizontal frequency
15.734 kHz
Vertical frequency
59.94 Hz
Horizontal resolution
470 TV lines
460 TV lines
Vertical resolution
485 TV lines
575 TV lines
Gain
Shutter speed
CCD IRIS
Output connector
3.0 lx (F1.2, AGC ON (18 dB))
48 dB (AGC OFF (0 dB))
46 dB (AGC OFF (0 dB))
ATW, 3200 K, 5600 K, MANUAL
AGC (0 to 18 dB)/FIX (0 dB)
ON/OFF Controlled by RS-232C
Auto: 1/60 to 1/4000 s RS-232C: 1/60 to 1/100 000 s
Power requirements
Storage humidity
Vibration resistance
Shock resistance
MTBF
*1
DC +10.5 to +15 V
60 g
0 to +40 ˚C
-30 to +60 ˚C
Color PTZ Model
Operating humidity
*1
22 x 22 x 75 mm
Mass
Performance guarantee temperature
Auto: 1/50 to 1/4000 s RS-232C: 1/50 to 1/100 000 s
2.4 W
Dimension (W) x (H) x (D)
Storage temperature
*1
DC IN, SYNC, VIDEO: multi 12-pin
Power consumtion
Operating temperature
*1
OFF, Flickerless, 1/1000 s, CCD IRIS
0 to +40 ˚C
20 to 80 % (no condensation)
20 to 90 % (no condensation)
10 G (20 to 200 Hz 20 minutes for each direction – x,y,z)
70 G
70,900 Hrs
Regulatory compliance
UL6500, FCC/ICES-003 : ClassB, CE : EN61326, AS/NZ : EN61326
Supplied accessories
Lens mount cap (1), Tripod adaptor (1 set), Operating Instructions (1)
Color Camera Block
Gamma
50 Hz
2000 lx F8 (γ=ON, MIN GAIN, AGC OFF (0 dB))
Minimum illumination*
White balance
15.625 kHz
3CCD Colour
Video Camera
Sensitivity S/N ratio
Accessories
External sync system input/output
Scanning system
TV Format
B/W Model
Colour Model
• When connecting a heavy lens, make sure that it is supported
properly.
Non-TV Format
Note
Digital Interface
IEEE1394b
Camera Link
This switches are used to adjust white balance and shutter speed;
and to flip AGC (ON/OFF) and output signals (Y/C/VBS).
①
1
②
2
③
3
The RS-232C switch is set to OFF at the factory. For details on how to change this setting. please refer to the Technical Manual.
XC-555/555P
85
Intelligent
Rear Panel
Mode Setting
Digital Interface
IEEE1394b
By flipping the DIP switches located on the side of this camera, you
can adjust the following functions.
Note
Each switch is assigned to a function. The switches that should be
set to adjust a certain function (white balance, shutter speed), to
switch the AGC (ON/OFF), or to switch the output signals
(Y/C/VBS) are specified and indicated by shading in the
illustrations of the corresponding descriptions of the function.
The switches that are not shaded are not related to these
functions.
Camera Link
①
5
① DC IN/SYNC/VIDEO connector (multi 12-pin)
Non-TV Format
This connector inputs DC 12V power and outputs the video
signal when the CCXC-12P02N/12P05N/12P10N/12P25N
camera cable is connected.
If the unit is connected to devices that originate a synchronized
signal, the external synchronous signal (VS, HD/VD) can be used
to move the Colour camera module.
TV Format
Colour Model
B/W Model
Connector Pin Assignments
■ To Adjust the white balance
Select the white balance setting according to the lighting
conditions.
Accessories
Lighting condition
Signal
Color PTZ Model
Color Camera Block
3CCD Colour
Video Camera
Pin No.
86
Sync signal types
External Sync signal
Internal Sync
HD,VD
VS Input
signal
Ground (Earth)
1
Ground (Earth)
Ground (Earth)
2
+12V
+12V
+12V
3
VBS/Y Output (Earth)
VBS/Y Output (Earth)
VBS/Y Output (Earth)
4
VBS/Y Output (signal)
VBS/Y Output (signal)
VBS/Y Output (signal)
5
HD Input (Earth)
–
–
6
HD Input (signal)
–
–
7
VD Input (signal)
VS Input (signal)
–
8
Ground (–/C)
Ground (–/C)
Ground (–/C)
9
–/C Output (signal)
–/C Output (signal)
–/C Output (signal)
10
RS-232C (TXD) *
11
RS-232C (RXD) *
12
VD Input (Earth)
VS Input (Earth)
Ground
RS-232C (Earth)
* RS-232C setting
Changing the setting of the RS-232C switch falls under the heading of
dismantling the camera, and is outside the scope of the warranty.
To change the setting, request assistance from the dealer from whom you
purchased your camera.
XC-555/555P
3200K
(fixed)
For indoor shooting under
incandescent light (factory
setting).
5600K
(fixed)
For outdoor shooting on
sunny days.
ATW
(auto tracing
white balance)
The white balance is
adjusted according to the
Colour temperature transition of the subject. This
mode is suitable for shooting
with variable lighting.
MAN
(manual)
Select this position when
you want to adjust the red
Colour with the R control
and the blue Colour with the
B control.
DIP switch setting
1 · · · · 6
1 · · · · 6
1 · · · · 6
1 · · · · 6
To adjust the white balance, use the shaded switches.
Intelligent
■ To adjust the shutter speed
Set the shutter speed switches to select the desired shutter
speed.
Using the CCD IRIS function, set the CCD IRIS mode.
OFF
1/1000
1/1000 sec.
CCD IRIS
Set the CCD IRIS mode.
FLICKERLESS
1/100 sec. (XC-555)
1/120 sec. (XC-555P)
Digital Interface
IEEE1394b
Camera Link
Shutter speed
(XC-555)
1/60 sec. (factory setting)
(XC-555P)
1/50 sec. (factory setting)
DIP switch setting
1 · · · · 6
1 · · · · 6
1 · · · · 6
Non-TV Format
1 · · · · 6
To adjust the shutter speed, use the shaded switches.
■ AGC (Auto Gain Control) ON/OFF
ON
Auto gain control
(factory setting)
OFF
0 dB
DIP switch setting
TV Format
B/W Model
Colour Model
Gain
1 · · · · 6
1 · · · · 6
To switch the AGC on or off, use the shaded switches.
■ Y/C/VBS
Output signal
Select this position to
output the Y/C separated
signal from the DC IN/VIDEO
connector.
VBS
Select this position to
output the VBS signal from
the DC IN/VIDEO (factory
setting).
DIP switch setting
1 · · · · 6
3CCD Colour
Video Camera
Y/C
Accessories
Select the camera output signal.
1 · · · · 6
To switch the output signals (Y/C/VBS), use the shaded switches.
Color Camera Block
Color PTZ Model
XC-555/555P
87
Intelligent
Digital Interface
IEEE1394b
Connection Diagram
Camera Link
XC-ST Series
AC
VIDEO
Non-TV Format
C-mount lens
XC-ST70/ST70CE
XC-ST50/ST50CE
XC-ST51/ST51CE
XC-ST30/ST30CE
12P(F)
DC12V
VIDEO OUT
HD/VD
TV Format
Color Model
B/W Model
Junction box
JB-77
○: Usable ×: Not usable
JB-77
XC-ST Series
Note
When using the JB-77, not all of the XC-ST series functions
can be used. See the table on the right.
Normal
Normal shutter
Restart/reset (R/R)
External trigger shutter
WEN OUT
○
○
○
×
×
Accessories
XC-E Series
C-mount lens
AC
XC-ES50/ES50CE
XC-ES51/ES51CE
XC-ES30/ES30CE
XC-EI50/EI50CE
XC-EI30/EI30CE
XC-EU50/EU50CE *
VIDEO
HD/VD
Camera adaptor
DC-700
12P(F)
Tripod adaptor
VCT-333 I
TRIG
WEN OUT
12P(M)
Camera cable
CCXC-12P02N
CCXC-12P05N
CCXC-12P10N
CCXC-12P25N
DC12V
VIDEO OUT
HD/VD
Junction box
JB-77
○: Usable ×: Not usable
Color PTZ Model
*Recomended lens for XC-EU/EU50CE : Near UV Lens
88
TRIG
WEN OUT
12P(M)
Camera cable
CCXC-12P02N
CCXC-12P05N
CCXC-12P10N
CCXC-12P25N
Tripod adaptor
VCT-ST70I
Color Camera Block
3CCD Colour
Video Camera
HD/VD
Camera adaptor
DC-700
Note
When using the JB-77, not all of the XC-E series functions
can be used. See the table on the right.
Connection Diagram
XC-E Series
Normal
Normal shutter
Restart/reset (R/R)
External trigger shutter
WEN OUT
JB-77
○
○
○
×
×
Intelligent
Connection Diagram
C-mount lens
XC-ES50L/ES50LCE
12P(F)
12P(M)
Camera adaptor
DC-700/700CE
AC
VIDEO OUT
HD/VD
Camera cable
CCXC-12P02N
CCXC-12P05N
CCXC-12P10N
CCXC-12P25N
WEN
TRIG
Digital Interface
IEEE1394b
Camera Link
XC-ES50L/XC-ES50LCE
Non-TV Format
TV Format
B/W Model
Color Model
DC12V
Accessories
XC-555/555P
VIDEO
NF-mount lens
12P(F)
XC-555/555P
CCXC-12P02N
CCXC-12P05N
CCXC-12P10N
CCXC-12P25N
12P(M)
Junction box
JB-77
DC12V
VIDEO
HD/VD
VCL-12S12XM
AC
VIDEO
Camera adaptor
DC-700
HD/VD
C-mount lens *
(manual iris)
* To use the C-mount lens, Screw the C-mount adaptor
into the lens mount of the camera.
Connection Diagram
Color PTZ Model
C-mount adaptor
LO-999CMT
Color Camera Block
VCL-06S12XM
Camera cable
3CCD Colour
Video Camera
VCL-03S12XM
89
Intelligent
CAMERA ADAPTOR
Outline
Dimensions
The DC-700/700CE is a compact, lightweight camera adaptor for XC series cameras. In line with the size reduction of
XC series cameras, it is smaller and lighter than the conventional power adaptors (DC77RR and
DC-777). It is compatible with all of the XC series cameras
and accessories, includes VIDEO OUT 2, TRIG IN, and WEN
OUT connections.
88
22
150
152
160
Features
12.7φ 10φ
16
TV Format
Colour Model
B/W Model
Non-TV Format
Camera Link
Digital Interface
IEEE1394b
DC-700/700CE
■ Compact, lightweight
3.8
■ External sync input/output
9
109.8
50
99
Unit: mm
■ Trigger input/WEN output
■ Built-in high-performance switching power supply
Rear Panel
Accessories
Specifications
DC-700 (J)
DC-700 (UC)
Japan
USA
Europe
Signal system
EIA/NTSC
EIA/NTSC
CCIR/PAL
Power requirements
AC 100 V
AC 100 to 120 V
AC 100 to 240 V
Region
50/60 Hz
Voltage
Output voltage
Color Camera Block
3CCD Colour
Video Camera
Power consumption
Operating temperature/
humidity
Storage temperature/
humidity
DC 13 V 1.3A
34 VA
22 W
22 W
0 to 40 °C/10 to 90% (no condensation)
-20 to 60 °C/10 to 90% (no condensation)
Input terminals WEN terminal
BNC type (1)
TRIG terminal
BNC type (1)
HD terminal
BNC type (1)
VD/SYNC terminal
BNC type (1)
VIDEO1 terminal
BNC type (1)
VIDEO2 terminal
BNC type (1)
CAMERA terminal
Supplied accessories
Regulatory
compliance
*2 Set the switch to 2 only when using XC-999. Connector Pin Assignments
Pin No.
1
GND
2
+13V
Power cord (1), Operating instructions (1),
3
GND
AC plug adaptor (1) (Included with DC-700(J))
4
VIDEO 1
5
GND
6
HD
7
VD/SYNC
8
GND
9
VIDEO 2 *
10
WEN
11
TRIG
12
GND
700 g
Dimensions (mm)
12-pin (1)
*1 Two video outputs may not be available for some types of cameras.
This becomes TRIG input terminal when using XC-55, XC-55BB, XC-56, XC-56BB.
110 (W) x 53 (H) x 160 (D)
Mass
Color PTZ Model
DC-700CE
Electrical
Appliance and
Material Safety Law
UL1310-1+CSAC22.2
No.223,
FCC/ICES-003:
ClassA
FCC Class A,
CE: EN61326 &
EN60065,
AS/NZ: EN61326,
Demko: EN60065
Note
The above products comply safety standards for each district. Select the product suitable to the district to use.
* This becomes TRIG input terminal
when using XC-55, XC-55BB, XC-56,
XC-56BB.
90
Accessories
Intelligent
Block Diagram
R
+13V
4
L
SWITCHING
3
2
FG
Regulator
1
1
2
3
1
2
3
G
N
D
2
GND
3
VIDEO 1
4
GND
5
HD
6
VD/SYNC
7
GND
8
9
3
3
VIDEO 2
2
2
WEN
10
1
1
TRIG
11
GND
GND
12
CN302
VIDEO 1
CN303
HD
L
E
D
CN304
VD/SYNC
13V
CN306
WEN
CN307
TRIG
700-LED
Comparative Tables
Comparison with DC-77RR and DC777 Camera AdaptorsXC Series Camera Input/Output Chart for DC-700
DC-700 DC-77RR DC-777
1 video
output
VIDEO 1
VIDEO 2
HD
VD/SYNC
WEN
TRIG
No.4
No.9
No.6
No.7
No.10
No.11
XCI-SX1/V3
×
×
TTL IN
TTL OUT Exposure OUT
O
S-video output
×
×
O
×
×
×
O
O
O
XCD-V60/V60CR/SX90/
SX90CR/U100/U100CR
×
External sync input
Loop-through output
×
O
×
XCL-5000/5005/5005CR
×
×
×
×
/Exposure
O
Clock output
×
O
×
XCL-U1000/U1000C
×
×
×
×
Exposure OUT
O
WEN output
O
×
×
O
TRIG input
O
×
×
*2 Video output from pin no. 4 is output from two BNC connectors via two buffer amps.
The above products do not support
connecting to RS-232C of XC-HR90
or XC-555.
XCL-X700/V500
×
×
HD
VD
O
XC-HR90
O
×
HD
VD
O
O
XC-HR70
O
×
HD
VD
O
O
XC-HR50/HR57
O
HD
VD
O
O
XC-HR58
O
×
HD
VD
O
O
XC-56/56BB
O
TRIG*
HD
VD
×
× *
XC-ST Series
O
×
HD
VD/VS
O
O
XC-E Series
O
×
HD
VD
O
O
VBS/Y*
C*
HD
VD/VS/VBS
×
×
XC-555
×
TRIG assigned to No.9
VBS, Y/C available
Color Camera Block
Note
GND/DVAL
O
3CCD Colour
Video Camera
*1 Separate video signals are output from pin no. 4 and pin
no. 9 (for XC-7500/8500CE).
×
Note
Accessories
2 video
2 video
Video output
outputs *2
outputs *1 (both
identical)
12-pin connector pin no.
TV Format
B/W Model
Colour Model
CN305
VIDEO 2
Non-TV Format
NL
1
+13V
Digital Interface
IEEE1394b
Camera Link
SW101
GND
Color PTZ Model
Accessories
91
Intelligent
NF-Mount Lens (Fixed Focus)
VCL-06S12XM
Focal length
Aperture (F-number)
Minimum object distance (MOD)
Mass
27 ( ∞ )
Focal length
Aperture (F-number)
Minimum object distance (MOD)
Mass
6 mm
F1.4 to F16
298 mm
25 g
F.B.12
M17 x 0.75
Ø25
[in air]
4
Unit: mm Unit: mm VCL-12S12XM
Focal length
Aperture (F-number)
12 mm
F1.4 to F16
298 mm
25 g
Minimum object distance (MOD)
Mass
27.8 (∞)
F.B.12
[in air]
Ø20
M17 x 0.75
4
Ø21
Non-TV Format
TV Format
Colour Model
B/W Model
3.5 mm
F1.8 to F16
300 mm
40 g
27.97
(0.97)
Ø25
Camera Link
Digital Interface
IEEE1394b
VCL-03S12XM
Accessories
Unit: mm MOD: Minimum object distance from the edge of the lens body to the photo subject.
3CCD Colour
Video Camera
Lens Accessories
■C-mount adaptor
When a C-mount type lens is attached, a C-mount
adaptor (LO-999CMT) is required.
5.526
M17x0.75
LO-999CMT
14Ø
92
Unit: mm 4
Be sure that the lens does not project more than 4.1 mm
from the lens mount.
4.1 mm or less
Color PTZ Model
Color Camera Block
Ø29
Ø17.4
1"-32UNC
Mass
Accessories
12 g
Lens mount shoulder
For setting the camera when using C-mount adaptor, fix the lens
mount (C-mount) instead of fixing the camera head in order to avoid
applying unnecessary forces to the camera head.
Avoid using C-mount adaptor in the places where vibrations or
shocks are applied often. Doing so will damage the equipment or
loosen the connection.
Intelligent
Cables
12P05N (5m)
(Aspect of connector: straight)
12P10N (10m)
(Aspect of connector: straight)
12P25N ( 25m) (Aspect of connector: straight)
(12M)
(12F)
15
6.5
(Aspect of connector: straight)
15
CCXC-12P02N (2m)
2m/5m/10m/25m
Unit: mm Non-TV Format
●Camera connection (12-pin/female) ⇔ DC-700 (JB-77) connection (12-pin/male)
●Shielded
TV Format
B/W Model
Colour Model
Connectors
■Connectors
PC-XC12
45.3
●12-pin/female
(12F)
Ø6
Ø14.2
Digital Interface
IEEE1394b
Camera Link
■Camera cable (for XC series)
This 12-pin camera cable is used for connecting an XC camera to a DC-700/700CE camera adaptor or JB-77 junction box.
Unit: mm Accessories
40
84
Unit: mm Accessories
Color PTZ Model
●Camera cable connection (12-pin x 1)
●Video OUT (BNC x 1)
●Clock OUT (BNC x 1)
●VD IN/OUT (BNC x 1)
●HD IN/OUT (BNC x 1)
76
JB-77
Color Camera Block
■Junction Box
This junction box enables simple conversion from 12-pin camera cable to BNC. Also, 12V DC can be supplied from general-purpose power supply to the junction box’s power terminal.
3CCD Colour
Video Camera
Junction Box
93
Intelligent
■Tripod Adaptor
Use these adaptors to mount a camera on a tripod. Use the included screws to attach the adaptor to the camera.
The adaptors are threaded for commercially available tripods.
VCT-333I
27
22
1/4-20 UNC
2.5
6
4-Ø2.4
VCT-55I
2-M3
2-Ø4.5
1/4-20 UNC
51.5
●Material: ABS resin
●Insulated type
20
6
3.1x4
2.5
VCT-ST70I
26
25
Unit: mm Ø3
Ø2
25
28
50
1/4-20 UNC
59
●Material: ABS resin
●Insulated type
2-Ø2.7
2x3
Ø6
2-Ø4
3x4
2.5
40
Color PTZ Model
Color Camera Block
3CCD Colour
Video Camera
Accessories
6
TV Format
Colour Model
B/W Model
2-Ø3.5
94
Unit: mm 27
44.5
42
28
Non-TV Format
18
12
●Material: ABS resin
●Insulated type
Camera Link
Digital Interface
IEEE1394b
Tripod Adaptor
Accessories
Unit: mm DXC-390 (NTSC)
DXC-390P (PAL)
DXC-390/390P
Outline
3-CCD COLOUR VIDEO CAMERAS
Features
• 1/3-type IT 3-CCD Colour video camera with Exwave
Non-TV Format
The Sony DXC-390P is a 1/3 type DSP 3-CCD colour video
DXC-990 (NTSC)
DXC-990P (PAL)
Digital Interface
IEEE1394b
Camera Link
3-CCD COLOUR VIDEO CAMERAS
Intelligent
3-CCD Colour Video Cameras
TV Format
B/W Model
Colour Model
� 1/3-type
IT 3-CCD
colour video
camera
withtechnology
Exwave HAD™
technologyHAD™�technology
1/2-type IT 3-CCD colour video camera with Exwave HAD technol
camera which
incorporates
Exwave
HAD™
–
for superior
picture quality
� 10
bit Digital
Signalthat
Processor
technology
powerful picture • 10 bit Digital
Signal Processor
(DSP) technology for
a Sony
technology
greatly(DSP)
improves
camerafor
sensitivity
powerful
picture
contrast
controls
contrast
controls
� 10
bit Digital
Signal
Processor (DSP) for powerful picture contrast
(F8 at 2000
lx) while reducing smear. Using a C-mount lens
• Horizontalcontrol
resolution – 800 TV lines
and providing
a resolution
TV lines and high S/N ratio,
� Horizontal
resolution
– 800ofTV800
lines
�
Horizontal
resolution – 850 TV lines
the
DXC-390P
is
ideal
for
applications
such
as
microscopy,
•
C
mount
� C mount
industrial inspection, and remote camera systems, where
�
Bayonet
mount
•
S
trobe
Trigger
Function
– Realizes full vertical resolution of
� Strobe Trigger Function – Realises full vertical resolution of fast-moving
picture accuracy and detail are important. Incorporating
fast
moving
objects
objects
� DynaLatitude™, DCC+, Black Stretch, Partial Enhance
new 10-bit DSP technology, a user- friendly on-screen
• Full control of functions accessible from the side panel or
� Full
control
of
functions
accessible
from
the
side
panel
or
through
the
� Scene File and User File
menu allows for simple control of various features including
through the optional RM-C950 remote control unit
optional RM-C950 remote control unit
�shading
Colour compensation
shading compensation
DynaLatitude™, Partial Enhance, and a wide selection of
• Colour
and flange back adjustment
� Colour
shading
compensation
andMoreover,
flange back
Automatic
Exposure
(AE) modes.
theadjustment
DXC-390P is
�
AE
function
(User defined
light(AE)
metering
Selectable AE spee
• Wide selection of Automatic
Exposure
modesarea,
– User
� Wide
selection[56
of Automatic
Exposure
(AE)
modes
– User defined lightdefined light
Wide
range)area, selectable AE speed, wide range
very compact
(W) x 50 (H)
x 128 (D)
mm]
and lightweight
metering
metering
area, selectable
speed, wide range
(370 g), making
it easy toAE
install.
Abundant
electronic shutter function
• Hyper�Gain
(+30 dB)
� Hyper Gain (+30 dB)
� Versatile
• Extended
Genlockwhite
(VBS balance
Genlock and HD/VD) – Allows
� Extended Genlock (VBS Genlock and HD/VD) – Allows synchronisation synchronization
frame grabber
boards
� Genlockwith
capability
(VBS, HD/VD)
with frame grabber boards
• Scene�files
and user
files Hyper
– Enables
userHD/VD
to setoutput,
two RGB sync
Strobe
function,
gain,the
WEN,
custom parameters in the menu for instant recall
� Scene files and user files enable the user to set two custom
� Flicker canceller
parameters in the menu for instant recall
• RS-232C interface
� RS-232C
interface dB (DXC-390P)
• S/N ratio:
62 dB (DXC-390)/61
� RS-232C interface
Video –Outputs
– RGB,
Y/C, component, composite
• Video�
Outputs
RGB, Y/C,
composite
� S/N ratio: 61 dB
�
On-screen
menu
• Ideal for point-of-view, microscopy and machine vision
� Video Outputs – RGB, Y/C, composite
applications
� S/N ratio – 62 dB
� Ideal for point-of-view, microscopy and machine vision applications
� High sensitivity – F11 (2000 lux)
Dimensions
� Ideal for semiconductor, print inspection, microscopy and remote
DIMENSIONS (mm)
monitoring applications
Accessories
3CCD Colour
Video Camera
DIMENSIONS (mm)
Color Camera Block
Color PTZ Model
Unit: mm
DXC-390/390P
95
Intelligent
Digital Interface
IEEE1394b
Camera Link
Specifications
DXC-390
DXC-390P
Signal System
NTSC
PAL
Image Device
1/3-type IT CCD with Exwave HAD technology
Effective Picture Elements
Sensing Area
Scanning System
Horizontal Frequency
Vertical Frequency
Approx. 380,000 pixels
2:1 interlaced, 525 lines
2:1 interlaced, 625 lines
15.734 kHz
15.625 kHz
60 Hz
Sync. System
H/SC phase control
Horizontal Resolution
850 TV lines 800 TV lines
TV Format
Colour Model
B/W Model
Non-TV Format
Sensitivity
Electronic Shutter
Lens Mount
AE Area
Accessories
3CCD Colour
Video Camera
OFF/ STEP/ VARIABLE/CCD IRIS selectable
C mount
Multi/Large/Medium/Spot/Slit/Manual
Variable
Fast/Mid/Slow selectable
AE Detect
Contrast Effect
Knee Point
Black Stretch
Average/Peak selectable
Manual/DynaLatitude/DCC+ selectable
High/ Normal/ Low selectable (Contrast Effect: Manual)
Variable (Contrast Effect: Manual)
Gamma
ON/ OFF Variable
Pedestal
Master, R/B Manual adjustable
Black Balance
ABB
White Balance
AWB/ATW NORMAL/ATW/ WIDE/MANUAL/3200 K/5600 K/selectable AWB or ATW R/B Paint, MANUAL R/B Gain
ATW Area
ATW Speed
Detail Frequency
Linear Matrix
Linear Matrix MODE
Partial Enhance
CCD Integration Mode
Trigger Polarity
Baud Rate
Sync
Strobe
User File
Scene File
Output Signal
Color Camera Block
61 dB
STEP/AGC/HYPER selectable
AE Speed
Shading Compensation
Color PTZ Model
4 lux (F2, GAIN: HYPER)
62 dB
AE Level
Detail Level
96
F11 (2000 lux) F8.0 at 2000 lux
Min. Illumination
Gain
50 Hz
Internal or external with VBS, HD/VD
Phase Control
S/N Ratio
Approx. 440,000 pixels
4.8 (H) x 3.6 (V) mm
Operating Temp.
Storage Temp.
Power Requirements
Power Consumption
Dimensions
Weight
NORMAL/ MANU selectable
SLOW/MID/FAST FAST/ NORMAL/ SLOW selectable
ON/ OFF (Variable at ON)
HIGH/ MID/ LOW selectable
ON/ OFF
STANDARD/R Enhance/G Enhance/B Enhance/Manual Selectable
All/In/Out selectable
Field/Frame selectable
ON/OFF (manual)
Positive edge trigger / Negative edge, trigger selectable
19200/9600/4800/2400/1200 selectable
RGB/G/OFF
ON/OFF
A/ B switchable (Two pattern memories)
Standard/Microscope/Full Auto/Strobe/File A or B
VBS / RGB / SYNC / Y / C
-5°C to +45°C (23°F to 113°F)
-20°C to +60°C (-4°F to +140°F)
DC 10.5 V ~ 15.0 V
Approx. 7.6 W
56 (W) x 50 (H) x 128 (D) mm (2 1/4 x 2 x 5 1/8 inches) (Excluding projecting parts)
Approx. 370 g
Connectors
Lens (6 pin) RGB / SYNC (9 pin D-sub) DC IN / VBS (12 pin) VIDEO OUT (BNC) TRIGGER IN (BNC) REMOTE (8
pin mini DIN)
Flange Back
—
Trigger
—
Serial
—
DXC-390/390P
Intelligent
Optional Accessories
Description
VCL-616WEA
1/3” 16x motorised lens
Mount adaptor
LO-32BMT
2/3-inch lens mount adaptor
CMA-D2
19-in rackable 12V power supply and video signal transmitter over CCMC 12
pin cable
CMA-D3
Power supply with maximum 100 m cable extension and camera
RM-C950
Control all camera functions including zoom/focus/iris through RS-232C
interface
CCDC-5/US
12 pin <> 4 pin DC cable (5m)
CCDC-10/US
12 pin <> 4 pin DC cable (10m)-
CCDC-25/US
12 pin <> 4 pin DC cable (25m)
CCDC-50A
12 pin <> 4 pin DC cable (50m)
CCDC-100A
12 pin <> 4 pin DC cable (100m)
CCMC-20P30
CHU to CCU cable (30m)
CCMC-3MZ
For connection of CMA-D3/CE, capable of connecting to the CCZ-/A5/A10/
A25/A50/A100 cables (3m)
AC Camera adaptor
Remote control unit
Cable
9 pin D-sub <> 5 BNC RGB Cable (5m)
CCMC-9DS/US
9 pin D-sub <> 4 BNC RGB Cable (5m)
CCMC-200
5m Cable — Composite Out
TV Format
B/W Model
Colour Model
CCXC-9DB/US
Non-TV Format
Reference
C mount zoom lens
Digital Interface
IEEE1394b
Camera Link
Accessory
Accessories
3CCD Colour
Video Camera
Color Camera Block
Color PTZ Model
DXC-390/390P
97
98
Color PTZ Model
Color Camera Block
3CCD Colour
Video Camera
Accessories
TV Format
Colour Model
B/W Model
Non-TV Format
Digital Interface
IEEE1394b
Camera Link
Intelligent
Applications
DXC-390/390P
tion
Accessories
s
� 1/2-type IT 3-CCD colour video camera with Exwave HAD technology
for superior picture quality
� 10 bit Digital Signal Processor (DSP) for powerful picture contrast
Outline
Features
control
�TheHorizontal
resolution – 850 TV lines
Sony DXC-990P is a 1/2 type DSP 3-CCD Colour video
• 1/2-type IT 3-CCD colour video camera with Exwave HAD
technology for superior picture quality
�camera
Bayonet
mount
which
incorporates ExwaveHAD™ technology – a
•
10 bit Digital Signal Processor (DSP) for powerful picture
Sony
technology
that
greatly
improves
camera
sensitivity
� DynaLatitude™, DCC+, Black Stretch, Partial Enhance
contrast control
(F11 at 2000 lx) while reducing smear. The DXC-990P not
�only
Scene
Filealland
User
File functions of its predecessor,
• Horizontal resolution – 850 TV lines
inherits
of the
advanced
DXC-950P,
but also
includes improved technology
�theColour
shading
compensation
• Bayonet mount
and innovative features for versatile operation in the same
DynaLatitude™, DCC+, Black Stretch, Partial Enhance
� AE function (User defined light metering area, Selectable AE• speed,
body size. Allowing use of a high quality Bayonet mount
• Scene File and User File
Wide range)
lens, and providing a resolution of 850 TV lines and high S/N
• Colour shading compensation
�ratio,
Abundant
electronic
shutter
function such as
the DXC-990P
is ideal
for applications
• AE function (User defined light metering area, Selectable
industrial
inspection and remote camera
�microscopy,
Versatile white
balance
AE speed, Wide range)
systems where picture accuracy and detail are important.
• Abundant electronic shutter function
�Incorporating
Genlock capability
(VBS,
HD/VD)
new 10-bit DSP technology, a userfriendly on�screen
Strobe
function,
Hyper
gain,
WEN,
output, RGB sync • Versatile white balance
menu
allows for
simple
control
of HD/VD
various features
• Genlock capability (VBS, HD/VD)
DynaLatitude™ function, Partial Enhance, and a
�including
Flickeracanceller
• Strobe function, Hyper gain, WEN, HD/VD output,
wide selection of Automatic Exposure (AE) modes.
� RS-232C interface
RGB sync
•
Flicker canceller
� Video Outputs – RGB, Y/C, component, composite
• RS-232C interface
� On-screen menu
• Video Outputs – RGB, Y/C, component, composite
� S/N ratio – 62 dB
• On-screen menu
� High sensitivity – F11 (2000 lux)
• S/N ratio – 62 dB
• High sensitivity – F11 (2000 lux)
� Ideal for semiconductor, print inspection, microscopy and remote
• Ideal for semiconductor, print inspection, microscopy and
monitoring applications
TV Format
B/W Model
Colour Model
ight
DXC-990/990P
Non-TV Format
the
3-CCD Colour Video Cameras
Digital Interface
IEEE1394b
Camera Link
oving
Intelligent
nology
re
3-CCD COLOUR VIDEO CAMERAS
remote monitoring applications
Dimensions
3CCD Colour
Video Camera
DIMENSIONS (mm)
Color Camera Block
Color PTZ Model
DXC-990/990P
99
Intelligent
Digital Interface
IEEE1394b
Camera Link
Specifications
DXC-990
DXC-990P
Signal System
NTSC
PAL
Image Device
1/2-type IT CCD with Exwave HAD technology
Effective Picture
Elements Approx. 380,000 pixels
Sensing Area
Scanning System
1/2-type interlined
Horizontal Frequency
15.734 kHz
Vertical Frequency
59.94 Hz
Sync. System
Internal or external with VBS, HD/VD
Phase Control
—
Non-TV Format
Horizontal Resolution
S/N Ratio
Gain
Electronic Shutter
Lens Mount
TV Format
Colour Model
B/W Model
Accessories
62 dB
STEP/AGC (0-24 dB)/HYPER
0.5 - 1/100,000 sec
Bayonet mount
Multi/Large/Medium/Spot/Slit/Manual
Variable
AE Speed
Fast/Mid/Slow selectable
AE Detect
Average/Peak selectable
Contrast Effect
Knee Point
Black Stretch
Manual/DynaLatitude/DCC+ selectable
High/Normal/Low selectable
Variable Variable (Contrast Effect: Manual)
Gamma
ON/OFF
Pedestal
Master, R/B
Black Balance
ABB
White Balance
AWB/ATW NORMAL/ATW/ WIDE/MANUAL/3200 K/5600 K/selectable AWB or ATW R/B Paint,
MANUAL R/B Gain
NORMAL/ MANUAL
ATW Speed
SLOW/MID/FAST
Detail Level
ON (Variable)/OFF
Detail Frequency
Linear Matrix
Linear Matrix MODE
CCD Integration Mode
3CCD Colour
Video Camera
1 lux (F1.4, GAIN: HYPER)
63 dB
AE Level
Partial Enhance
Shading Compensation
Trigger Polarity
Baud Rate
Sync
Strobe
User File
Color Camera Block
F11 (2000 lux)
Min. Illumination
ATW Area
Color PTZ Model
850 TV lines
Sensitivity
AE Area
100
Approx. 440,000
6.4 (H) x 4.8 (V) mm
Scene File
Output Signal
Operating Temp.
Storage Temp.
Power Requirements
Power Consumption
Dimensions
Weight
Connectors
Flange Back
Trigger
Serial Data
DXC-990/990P
HIGH/MID/LOW
ON/OFF
STANDARD/R Enhance/G Enhance/B Enhance/Manual Selectable
All/In/Out
Field/Frame Field/Frame selectable
ON/OFF (manual)
Positive edge trigger/Negative edge trigger selectable
19200/9600/4800/2400/1200 selectable
RGB/G/OFF
Slave
A/B
Standard/Microscope/Full Auto/Strobe/File A or B
VBS, RGB/SYNC, Y/C,Y/R-Y/B-Y
-5°C to +45°C (23°F to 113°F)
-20°C to +60°C (-4°F to +140°F)
DC 10.5 V ~ 15.0 V
Approx. 8.0 W
70 (W) x 72 (H) x 123.5 (D) mm
630 g
RGB/SYNC (9pin D-sub),DC IN/VBS (12pin),VIDEO OUT (BNC),TRIGGER IN (BNC),REMOTE (8 pin
mini DIN),GEN LOCK IN (BNC),LENS (6pin)
—
On/Off
RS-232C
Intelligent
Optional Accessories
Digital Interface
IEEE1394b
Camera Link
Non-TV Format
TV Format
B/W Model
Colour Model
Accessories
3CCD Colour
Video Camera
Color Camera Block
Color PTZ Model
101
DXC-990/990P
102
Color PTZ Model
Color Camera Block
3CCD Colour
Video Camera
Accessories
TV Format
Colour Model
B/W Model
Non-TV Format
Digital Interface
IEEE1394b
Camera Link
Intelligent
Applications
DXC-990/990P
Obsolete Models Last Production Date
Monochrome Camera
XCD-SX910UV
XCD-SX910
XCD-X710
XCD-V50
XC-55BB
XC-55
XCD-SX900UV
XC-HR300
XC-7500
XC-8500CE
XCD-X700
XCD-SX900
XC-73
XC-73CE
XC-73L
XC-75
XC-75CE
XC-75L
XCH-1125
XC-77
XC-77CE
XC-77BB
XC-77BBCE
XC-77RR
XC-77RRCE
XC-37
XC-38
XC-39
XC-57
XC-57CE
Card Camera (Monochrome/Colour)
‘08
‘08
‘08
‘08
‘04
‘04
‘04
‘04
‘04
‘04
‘04
‘04
‘01
‘01
‘01
‘01
‘01
‘01
‘99
‘99
‘99
‘99
‘99
‘99
‘99
‘93
‘93
‘93
‘93
‘93
Colour Camera
DFW-SX910
DFW-X710
XCD-SX910CR
XCD-X710CR
XCD-V50CR
DFW-X700
DFW-SX900
XC-003
XC-003P
DFW-V500
DFW-VL500
EVI-D30
EVI-D31
XC-777A
XC-777AP
XC-999
XC-999P
CCM-DS250
DFW-V300
EVI-G20
EVI-G21
EVI-R10
EVI-R11
EVI-R50
EVI-R51
XC-333
XC-333P
XC-711
XC-711P
XC-711RR
CCM-PC5
XC-009
XC-009P
XC-007
XC-007P
XC-117
XC-117P
‘08
‘08
‘08
‘08
‘08
‘04
‘04
‘04
‘04
‘04
‘04
‘04
‘04
‘02
‘02
‘02
‘02
‘01
‘01
‘01
‘01
‘01
‘01
‘01
‘01
‘00
‘00
‘00
‘00
‘00
‘99
‘99
‘99
‘98
‘98
‘93
‘93
CCB-M25
CCB-M27B
CCB-M35A
CCB-ME37
CCB-ME47
CCB-M25CE
CCB-M27BCE
CCB-M35ACE
CCB-M37
CCB-M37CE
CCB-ME37CE
CCB-MS37CE
CCB-GC7YC
CCB-ME47CE
CCB-GC7YCP
CCB-GL5
CCB-GL5P
CCB-GL5YC
CCB-GL5YCP
‘04
‘04
‘04
‘04
‘04
‘02
‘02
‘02
‘02
‘02
‘02
‘02
‘02
‘01
‘01
‘99
‘99
‘98
‘98
Camera Block
FCB-EX78B
FCB-EX78BP
FCB-EX780B
FCB-EX780BP
FCB-S3000
FCB-S3000P
FCB-IX45A
FCB-IX45AP
FCB-IX47A
FCB-IX47AP
FCB-EX45M
FCB-EX45MCE
FCB-EX45B
FCB-EX45BP
FCB-EX48B
FCB-EX48BP
FCB-EX480B
FCB-EX480BP
FCB-IX10A
FCB-IX10AP
FCB-EX45A
FCB-EX45AP
FCB-EX48A
FCB-EX48AP
FCB-EX480A
FCB-EX480AP
FCB-EX780S
FCB-EX780SP
FCB-IX10
FCB-IX10P
FCB-IX47
FCB-IX47P
FCB-EX48L
FCB-EX48LP
FCB-EX480L
FCB-EX480LP
FCB-EX480X
FCB-EX480XP
EVI-400
EVI-400DR
EVI-401
EVI-401DR
FCB-EX470L
FCB-EX470LP
EVI-330
EVI-330T
EVI-331
EVI-331T
EVI-370
EVI-370D
‘07
‘07
‘07
‘07
‘07
‘07
‘06
‘06
‘06
‘06
‘06
‘06
‘06
‘06
‘06
‘06
‘06
‘06
‘05
‘05
‘04
‘04
‘04
‘04
‘04
‘04
‘04
‘04
‘03
‘03
‘03
‘03
‘03
‘03
‘03
‘03
‘03
‘03
‘02
‘02
‘02
‘02
‘02
‘02
‘01
‘01
‘01
‘01
‘01
‘01
EVI-370DG
EVI-371
EVI-371D
EVI-371DG
CCB-EX37
CCB-EX37P
FCB-EX47L
FCB-EX47LP
FCB-IX470
FCB-IX470P
EVI-310
EVI-311
EVI-370G
EVI-371G
EVI-330V
EVI-331V
EVI-900
EVI-901
EVI-130
EVI-131
EVI-110
EVI-111
XCB-009
XCB-009P
EVI-100
EVI-101
EVI-1011
EVI-1011P
EVI-200
EVI-201
‘01
‘01
‘01
‘01
‘00
‘00
‘00
‘00
‘00
‘00
‘99
‘99
‘99
‘99
‘98
‘98
‘98
‘98
‘97
‘97
‘96
‘96
‘96
‘96
‘93
‘93
‘93
‘93
‘93
‘93
Cable
CCXC-T20P02
CCXC-6P05
CCXC-9DD
CCXC-9DB
CCE-50R
CCE-50M
CCE-150R
CCXC-12P02S
CCXC-12P05S
CCXC-12P05U
CCXC-12P05D
CCXC-12P05L
CCXC-12P05R
CCXC-12P10S
CCXC-12P25S
CCXC-T20P05
CCXC-T20P10
CCXC-20P20
CCXC-H12P05
CCXC-H20P05
CCXC-20P20
CCXC-12P02
CCXC-12P05
CCXC-12P10
CCXC-12P25
‘05
‘04
‘04
‘04
‘04
‘02
‘02
‘00
‘00
‘00
‘00
‘00
‘00
‘00
‘00
‘00
‘00
‘00
‘00
‘00
‘99
‘98
‘98
‘98
‘98
Lens
VCL-08YM
VCL-12YM
VCL-16Y-M
VCL-25Y-M
VCL-50Y-M
VCL-12SXM
LO-75D
VCL-08WM
VCL-16WM
VCL-25WM
50MM MACRO LENS
LO-77ERK
LO-999ERK
VCL-0637W
VCL-M45YM
‘08
‘08
‘08
‘08
‘08
‘06
‘05
‘05
‘05
‘05
‘05
‘05
‘05
‘04
‘02
25MM HD LENS
LO-37ND
LO-37IR
VCL-707BXM
VCL-714BXEA
CCL-06Z
CCL-M05XE
CCL-M07XE
CCL-C04XE
CCL-C08XE
CCL-M03XE
LO-C35
LO-G35
VCL-25BXM
VCL-08SBYA
VCL-16SBY
VCL-25BY
42MM Whole Mirror Lens
Variable Focusing Lens
LO-37CMT
LO-39CMT
‘02
‘02
‘02
‘99
‘99
‘99
‘99
‘99
‘98
‘98
‘98
‘98
‘98
‘97
‘93
‘93
‘93
‘93
‘93
‘93
‘93
Others
PC-XC04
DFWS-77
CMA-87
PC-XC06
VCT-37
VCT-75I
PSB-915IA
CMA-999
CMA-999P
PC-XC03
LO-GC7
XCK-L777
DFWA-400
MVA-15
DC-777
DC-777CE
DC-77RR
DC-77RRCE
FK-63
FK-69
IF-51
DVBK-1/A
LDI-100B
LDI-D100B
LDI-D50B
FK-57
LMD-1040XC
MSI-1125
MVA-40
MVA-41A
SEU-2092
VCT-77RR
YP-186XC
CBK-117
CBK-38GL
DC-37
DC-38
DC-39
VCT-57I
XCM-003
XCM-009
XCM-7500
XCM-7573
XCM-8500
XCM-37
XCM-38
XCM-39
XCM-57
XCM-117
VK-120A
‘07
‘04
‘04
‘04
‘04
‘04
‘04
‘02
‘02
‘02
‘02
‘02
‘01
‘01
‘00
‘00
‘00
‘00
‘00
‘00
‘00
‘00
‘00
‘00
‘00
‘99
‘99
‘99
‘99
‘99
‘99
‘99
‘95
‘93
‘93
‘93
‘93
‘93
‘93
‘00
‘00
‘00
‘00
‘00
‘93
‘93
‘93
‘93
‘93
This publication has been produced using Charterhouse’s CarbonNeutral Print Production programme and all emissions have been
neutralised through investments in renewable energy projects. Please recycle this product after use.
Distributed by:
©2008 Sony Corporation. All rights reserved. Reproduction in whole or in part without written permission is prohibited.
Design, features and specifications are subject to change without notice.
www.sony-vision.com
www.sony-vision.com