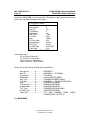
1
FS 900/925 MK II OPERATORS MANUAL 900-12007001 Issue 1.0 February 1999 KONGSBERG SIMRAD MESOTECH LTD. WARRANTY STATEMENT Kongsberg Simrad Mesotech Ltd. warrants that its products are free from defective materials and/or workmanship for a period of 12 months from the date of receipt of goods by the purchaser, or 18 months from date of product shipment from the manufacturing facility (which ever occurs first). Kongsberg Simrad Mesotech will - at no charge - repair or replace (at its option) any part(s) determined to be defective of workmanship or materials, provided the warranty claim is made to either the manufacturing facility, or its authorized repair centres within the warranty period. The purchaser is responsible for the examination of the product upon receipt. The purchaser is required to report any irregularity to received Kongsberg Simrad Mesotech goods to either the manufacturer - its Sister companies - or Agents, within 15 days of receipt of goods. Proof of date received may be required. The warranty is void if warranty labels are broken; Kongsberg Simrad Mesotech will not warrant any product which is physically damaged, abused, altered, subjected to accident or negligence or misuse, or is incorrectly installed or used by the purchaser - or purchaser's representative. Consumable items (including lamps, fuses, and worn O rings or shaft-seals) are excluded by the warranty. Kongsberg Simrad Mesotech cannot warrant that its products are suitable for any particular or intended purpose. No other warranty is expressed or implied; Kongsberg Simrad Mesotech accepts no liability of consequential damages. Consequential damages include, but are not limited to: loss of profit, property damage, personal injury. The maximum liability shall not, in any case, exceed the price of the product claimed to be defective. Kongsberg Simrad Mesotech Ltd. Port Coquitlam, BC - Canada FS 900/925 MK II Operators Manual List of Contents 900-12007001/1.0 Page 1 LIST OF CONTENTS Part 1 ............................................................................................. System Familiarization Part 2 ................................................................................................. Theory of Operation Part 3 ............................................................................... FS 900 Mk II System Operation ‘ Part 4 .................................................. FS 900 Mk II Installation, System set-up and Test Part 5 ............................................................................... FS 925 Mk II System Operation Part 6 .................................................. FS 925 Mk II Installation, System set-up and Test Part 7 ...........................................................................Troubleshooting and Maintenance Kongsberg Simrad Mesotech Ltd. Port Coquitlam, BC - Canada 900-12007001/1.0 Page 2 FS 900/925 MK II Operators Manual List of Contents Kongsberg Simrad Mesotech Ltd. Port Coquitlam, BC - Canada FS 900/925 MK II Operators Manual List of Contents 900-12007001/1.0 Page 3 MODIFICATION RECORD FS 900/925 MK II OPERATORS MANUAL 900-12007001 Issue: 1.0 February 1999 Issue No. Date 1.0 02.99 Initial Comments First Release To assist us in making improvements to the product and this document, Simrad Mesotech welcomes comments and constructive criticisms. Please send all such comments, in writing, to: Kongsberg Simrad Mesotech Ltd. Documentation Department 1598 Kebet Way Port Coquitlam, BC V3C 5M5 CANADA Kongsberg Simrad Mesotech Ltd. Port Coquitlam, BC - Canada 900-12007001/1.0 Page 4 FS 900/925 MK II Operators Manual List of Contents Kongsberg Simrad Mesotech Ltd. Port Coquitlam, BC - Canada FS900/925 MK II Operators Manual System Familiarization 900-12007001/1.0 Page 1.1 PART 1 SYSTEM FAMILIARIZATION 1. SYSTEM FAMILIARIZATION .............................................................................. 1.3 1.1 OVERVIEW .................................................................................................... 1.3 1.1.1 Equipment Configuration ......................................................................... 1.3 1.1.2 System Configuration .............................................................................. 1.4 1.1.3 Display Monitor ........................................................................................ 1.5 1.1.4 Processor Unit ......................................................................................... 1.5 1.1.5 Power Supply ........................................................................................... 1.5 1.1.6 Deployment Housing Unit ........................................................................ 1.5 1.1.7 Jointing Tool ............................................................................................ 1.6 1.1.8 Catch Sensors ......................................................................................... 1.6 1.1.9 Printer Option ........................................................................................... 1.6 1.1.10 Sounder Option ...................................................................................... 1.6 1.1.11 VCR Option ............................................................................................ 1.7 1.1.12 Trawl Cable, Winch and Block ............................................................... 1.7 Kongsberg Simrad Mesotech Ltd. Port Coquitlam, BC - Canada 900-12007001/1.0 Page 1.2 FS900/925 MK II Operators Manual System Familiarization Kongsberg Simrad Mesotech Ltd. Port Coquitlam, BC - Canada FS900/925 MK II Operators Manual System Familiarization 900-12007001/1.0 Page 1.3 1. SYSTEM FAMILIARIZATION 1.1 OVERVIEW The SIMRAD FS900/925 MK II Series is a third wire trawl monitoring system for pelagic and bottom fishing trawlers. The system provides real time images from the trawl sonar head and data from the sensors to the bridge, thus maximizing the quality of the catch and reducing sea time. The FS900 MK II vertical trawl sonar allows the operator to see the complete net opening and operation, by displaying individual fish targets in the vertical plane, the fish school location, bottom/net location and net geometry. In addition to the vertical monitoring, the FS925 MK II horizontal scanning trawl sonar allows the operator to see and display the fish behavior ahead of the trawl, around the trawl opening, and look at the cod end of the trawl. The FS925 MK II also allows the operator to measure the spread of the trawl door, view and skim banks to avoid reefs and locate boulders on the ocean floor that may damage the trawl net. The sonar beam can be horizontally trained 360°. The automatic search features and full 90° tilt capability ensures maximum control during the tow. The active motion compensation for pitch and roll comes as standard features. The addition of the trawl system’s sensor module will allow the operator to monitor trawl depth, water temperature and received information from up to 4 catch receivers indicating when the cod end fills up with fish. The FS MK II Series is a modular system. It is operated with ease through direct access push buttons and joystick operated menu. The major benefit of the third wire trawl sonar system is that it prevents the loss of communication with the trawl as the vessel is changing course. 1.1.1 Equipment Configuration A complete Trawl Monitoring System consists of: • VGA display monitor. • FS900 MK II and FS925 MK II Processor’s. • FS900/925 MK II Power Supply. • FS3300 1800m vertical 330kHz or 120 kHz Trawl sonar • FS Sensor Module 1800m • FS925 MK II 90 kHz Horizontal Scanning Sonar • Deployment Housing and Installation materials • Catch Sensor, Color Printer and VCR (optional) These components are described in the following sections. Kongsberg Simrad Mesotech Ltd. Port Coquitlam, BC - Canada 900-12007001/1.0 Page 1.4 FS900/925 MK II Operators Manual System Familiarization 1.1.2 System Configuration SYSTEM CONFIGURATION FS903 MK II & FS 925 MK II VGA MONITOR VGA MONITOR 436-0106000 Cable FS 900 MK II Processor Sync & Data FS 925 MK II Processor 900-12040000 900-12070000 436-00420000 Cable 436-00430000 Cable 436-00420000 Cable Test Cable 436-00410000 FS925 Sonar Deployment Package FS 900/925 MK II POWER SUPPLY FS3300 Sonar 974-80010000 971-60130000 110/220 vac Input FS Sensor Catch Rec. Kongsberg Simrad Mesotech Ltd. Port Coquitlam, BC - Canada FS900/925 MK II Operators Manual System Familiarization 900-12007001/1.0 Page 1.5 1.1.3 Display Monitor The display monitor for the FS900/925 MK II processor can be either a VGA “CRT” or LCD Simrad ruggedized monitor, but any commercially available monitor may be used. In order to have the full benefit of high resolution at a non-interlaced 60Hz at 1024 x 768 resolution @ 0.28mm Dot pitch available with the FS processors, you should used a Simrad SCVD35. 1.1.4 Processor Unit The FS900/925 MK II Series of processor is the control unit for the system. It is operated through direct access push buttons to enable the tilt, range and gain, cursor, and On/OFF control. The joystick is used to operate the menu system, move the cursors around the screen, and set the range and gain. The sector heading and sector width are rotary controls used to set the center of the area to be scanned and the width of the sector scan, up to 360° in the polar mode. The rear panel of the processor contains the connectors for AC power, cable and power supply to the trawl unit, VGA monitor, output for VCR recording, and NMEA output from the trawl unit to the Simrad echosounder. 1.1.5 Power Supply The FS900/925 MK II power supply provides the high voltage required by the trawl sonar. The DC output voltage is input into the processors where it is combined with the telemetry signals. The power supply assembly is made up of individual modules, along with a voltage and current meter. A toggle switch located below the voltage meter can be used to select the output voltage of the power supply required for the appropriate system configuration. Also, a separate on/off switch and fuse are located in the front panel cover. 1.1.6 Deployment Housing Unit The trawl deployment housing unit is made from polyurethane and designed for the harshest of environments, yet it is easy to handle. The FS900/925 MK II trawl unit contains the vertical sonar head, the horizontal scanning trawl sonar, the temperature and depth sensor module and the catch receiver. The mounting kit supplied contains the strain relief and other hardware for attaching the trawl cable to the trawl headrope. Kongsberg Simrad Mesotech Ltd. Port Coquitlam, BC - Canada 900-12007001/1.0 Page 1.6 FS900/925 MK II Operators Manual System Familiarization The trawl cable is connected to the trawl sonar by a watertight connector and a locking sleeve. Commands are sent down the cable from the processors to operate the sonar. The sonar image and sensor data are sent up the cable to the processors and displayed on the appropriate monitor 1.1.7 Jointing Tool The jointing tools and materials are required for splicing the trawl cable and attaching the trawl “pigtail” connector to the trawl sonar. Simrad supplies jointing tool kits especially designed for coaxial cable with a breaking point of 1500kg. The jointing kit will allow you to make 10 cable joints. 1.1.8 Catch Sensors The catch sensors “eggs” are wireless sensors mounted on the cod-end of the trawl net to detect the stretch of the net as it fills up with the catch. When sufficient stretch of the net occurs, the catch sensor sends an acoustic signal to the trawl sonar. This information is then sent to the processor and displayed on the monitor. The sensors are of a rugged construction in order to withstand the strain from winches and the power block. The operator can use up to four sensors simultaneously. The catch sensors are equipped with rechargeable batteries 1.1.9 Printer Option A parallel output port is available on the rear panel of the processor unit for connecting an HP PaintJet or HP DeskJet color printer, or a computer. This option allows hard copies of the display to be printed 1.1.10 Sounder Option The FS900/925 MK II is configured to output NMEA data information. When a sensor module is included in the system, the depth and temperature output are transmitted to the processor and displayed on the monitor. When interfaced to the Simrad EQ 55 color sounder, the headrope and the footrope information appears on the sounder, showing the location of the trawl in relation to the fish or bottom returns. Kongsberg Simrad Mesotech Ltd. Port Coquitlam, BC - Canada FS900/925 MK II Operators Manual System Familiarization 900-12007001/1.0 Page 1.7 1.1.11 VCR Option The FS900/925 MK II processors output NTSC or PAL composite video. The video output connected to a VCR will allow the operator to record the sonar picture. 1.1.12 Trawl Cable, Winch and Block The trawl cable is chosen for maximum mechanical strength, durability and maximum attenuation of the signals. Cables in common use are coaxial with breaking points of 1500 and 6000kg. Cable winches are delivered in different types and with different capacities; lowpressure hydraulic, high-pressure hydraulic and electrically driven. Choice of winch is dependent on prevailing conditions; type and length of cable and available source of power. Most types operate automatically - the cable is pulled out, kept tight during towing, and hauled in together with the trawl. Control of the winch is done remotely from the bridge. Any commercially available pulley block may be used to proper align the cable onto the winch. A snatch block has the advantage that it may be installed without having to thread the cable through it. A unit with two movable steering arms (one on each side of the pulley) is recommend to prevent the cable from coming off the pulley and causing damage to the cable. Kongsberg Simrad Mesotech Ltd. Port Coquitlam, BC - Canada 900-12007001/1.0 Page 1.8 FS900/925 MK II Operators Manual System Familiarization Kongsberg Simrad Mesotech Ltd. Port Coquitlam, BC - Canada FS900/925 MK II Operators Manual Theory of Operation 900-12007001/.0 Page 1.1 PART 2 THEORY OF OPERATION 1. THEORY OF OPERATION .................................................................................. 1.3 1.1 INTRODUCTION ............................................................................................ 1.3 1.1.1 Basic Principles ....................................................................................... 1.3 1.1.2 Determining Target Position .................................................................... 1.3 1.1.3 Forming an Image .................................................................................... 1.3 Kongsberg Simrad Mesotech Ltd. Port Coquitlam, BC - Canada 900-12007001/.0 Page 1.2 FS900/925 MK II Operators Manual Theory of Operation Kongsberg Simrad Mesotech Ltd. Port Coquitlam, BC - Canada FS900/925 MK II Operators Manual Theory of Operation 900-12007001/.0 Page 1.3 1. THEORY OF OPERATION 1.1 INTRODUCTION This section explains the theory of operation of the Vertical and Horizontal Scanning Trawl Monitoring Sonar System. 1.1.1 Basic Principles • Sound waves travel very efficiently through water. • A sound pulse can be projected through water in a controlled direction with the sonar transducer. • An object in the path of the projected sound pulse will reflect some sound pulse back toward the sonar transducer. • The speed of the sound pulse projected through the water can be predicted for given conditions. 1.1.2 Determining Target Position The trawl scanning sonar processor measures the time from the start of the sound pulsed projected through water, to the reception of the sound pulse reflected back to the sonar transducer. The measured time is then converted to distance by calculating the known time value of sound speed through water. Since the sound pulse is projected in a known direction, the bearing of the reflected object is also known. This makes it possible to locate the object with respect to the sonar transducer; the information will be used to plot the position of the reflected target on a video graphic display monitor. 1.1.3 Forming an Image The sound pulse projected will be attenuated as it travels through the water from the transducer to the target and back. Much of this attenuation is a predictable function of the total time or the distance the sound pulse traveled through water. Increasing the receiving gain with time can compensate this decrease in the signal level. This is done automatically in the sonar with a Time Varying Gain circuit. Kongsberg Simrad Mesotech Ltd. Port Coquitlam, BC - Canada 900-12007001/.0 Page 1.4 FS900/925 MK II Operators Manual Theory of Operation After the TVG correction, the absolute levels of the received signals will be determined by the acoustic response of the reflecting target. The sonar processor system repeatedly measures the TVG corrected target levels by digitizing a sequence of samples after each sound pulse transmission. Each sample is then plotted on the video display at the appropriate position according to its range and bearing. The level of the target strength sample determines the color used to plot each sample. The process can be repeated with the transducer pointed in different directions, forming an image of a large area of the bottom, (or the trawl net geometry) and displaying it on the video screen. Kongsberg Simrad Mesotech Ltd. Port Coquitlam, BC - Canada FS900/925 MK II Operators Manual FS 900 MK II System Operation 900-12007001/Iss1.0 Page 3.1 PART 3 FS 900 MK II SYSTEM OPERATION 3. FS 900 MK II SYSTEM OPERATION .................................................................. 3.5 3.1 INTRODUCTION ............................................................................................ 3.5 3.2 FRONT PANEL CONTROLS .......................................................................... 3.5 3.2.1 ON Button ................................................................................................ 3.6 3.2.2 OFF Button .............................................................................................. 3.6 3.2.3 MENU Button ........................................................................................... 3.6 3.2.4 CURSOR Button ...................................................................................... 3.7 3.2.5 RANGE/GAIN Button ............................................................................... 3.7 3.2.6 ZOOM Button ........................................................................................... 3.7 3.2.7 SECTOR HEADING Control .................................................................... 3.7 3.2.8 SECTOR WIDTH Control......................................................................... 3.7 3.2.9 Joystick .................................................................................................... 3.7 3.3 FS 900 MK II SYSTEM SETTINGS ................................................................. 3.7 3.4 MAIN MENU ................................................................................................... 3.8 3.5 SUB MENU 1 .................................................................................................. 3.9 3.6 TRANSCEIVER MENU ................................................................................. 3.11 3.7 CONFIGURATION MENU ............................................................................ 3.12 3.8 DISPLAY MENU ........................................................................................... 3.13 3.9 GRID MENU ................................................................................................. 3.14 3.10 USER PALETTE MENU.............................................................................. 3.15 3.11 PRINTER MENU......................................................................................... 3.18 3.11.1 Printing the Display .............................................................................. 3.19 3.11.2 The User Palette .................................................................................. 3.20 3.12 SUB MENU 2 .............................................................................................. 3.22 Kongsberg Simrad Mesotech Ltd. Port Coquitlam, BC - Canada 900-12007001/Iss1.0 Page 3.2 FS900/925 MK II Operators Manual FS 900 MK II System Operation 3.13 SENSOR MENU ......................................................................................... 3.23 3.14 TRANSDUCER MENU ............................................................................... 3.24 3.15 CONSTANTS MENU .................................................................................. 3.25 3.16 SELF -TEST MENU .................................................................................... 3.26 3.17 SUB MENU 3 .............................................................................................. 3.27 3.18 SERIAL I/O MENU ...................................................................................... 3.27 3.19 SERIAL PORT MENU ................................................................................ 3.28 3.20 CLOCK SET MENU .................................................................................... 3.29 3.21 FS 900 MENU STRUCTURE ...................................................................... 3.32 Kongsberg Simrad Mesotech Ltd. Port Coquitlam, BC - Canada FS900/925 MK II Operators Manual FS 900 MK II System Operation 900-12007001/Iss1.0 Page 3.3 LIST OF FIGURES Figure 3.1 FS 900 MK II Front Panel Control ......................................................... 3.6 Figure 3.2 SYSTEM SETTINGS Menu ................................................................... 3.8 Figure 3.3 MAIN Menu ............................................................................................ 3.8 Figure 3.4 SUB Menu 2......................................................................................... 3.10 Figure 3.5 TRANSCEIVER Menu .......................................................................... 3.11 Figure 3.6 GAIN Menu ........................................................................................... 3.11 Figure 3.7 CONFIGURATION Menu ..................................................................... 3.13 Figure 3.8 DISPLAY Menu ..................................................................................... 3.13 Figure 3.9 GRID Menu ........................................................................................... 3.14 Figure 3.10 USER PALETTE Menu ....................................................................... 3.15 Figure 3.11 PRINTER Menu .................................................................................. 3.18 Figure 3.12 The PRINTER Menu - Print Display................................................... 3.19 Figure 3.13 PRINTER Menu - User Palette .......................................................... 3.21 Figure 3.14 SUB Menu 2....................................................................................... 3.22 Figure 3.16 The SENSOR Menu........................................................................... 3.23 Figure 3.17 TRANSDUCER Menu ........................................................................ 3.24 Figure 3.18 CONSTANTS Menu ............................................................................ 3.25 Figure 3.19 SELF TEST Menu ............................................................................... 3.26 Figure 3.20 SUB Menu 3....................................................................................... 3.27 Figure 3.21 SERIAL I/O Menu .............................................................................. 3.27 Figure 3.22 SERIAL PORT Menu .......................................................................... 3.28 Figure 3.23 CLOCK SET....................................................................................... 3.29 Kongsberg Simrad Mesotech Ltd. Port Coquitlam, BC - Canada 900-12007001/Iss1.0 Page 3.4 FS900/925 MK II Operators Manual FS 900 MK II System Operation Kongsberg Simrad Mesotech Ltd. Port Coquitlam, BC - Canada FS900/925 MK II Operators Manual FS 900 MK II System Operation 900-12007001/Iss1.0 Page 3.5 3. FS 900 MK II SYSTEM OPERATION 3.1 INTRODUCTION The FS 900/925 MK II Sonar uses a combination of dedicated front panel controls for the most frequently needed adjustments and a software menu system for less frequently needed controls. This chapter describes the menu system and explains the adjustments to the menu settings that may be made to control the sonar operation. Refer to the FRONT PANEL CONTROLS section, for instructions on the front panel controls. The menu system allows adjustments to several system parameters without requiring a dedicated front panel control for each item. Items that lead to sub-menus are shown in upper case letters (e.g., “MAIN MENU”). All other items are system parameters that may be modified. To select a sub-menu or menu item, the joystick mode must be set to “MENU ACTIVE”. Moving the joystick up or down allows the selection of the desired item. Selected items are highlighted in reverse video colors. To activate the currently selected menu item, the joystick is pushed to the right. If the selected item is a sub-menu, then the items within that menu are displayed. If the selected item is a system parameter, then activating it will allow changing its value. When changing the value of a system parameter, if the parameter only has two values (e.g., On/Off), then activating the parameter will toggle its setting automatically. For parameters with more than two values, a selection menu will appear when the parameter is activated. To modify its setting, the joystick is moved up or down until the desired value is highlighted. The joystick is then pushed left to exit from the selection menu and activate the new setting. 3.2 FRONT PANEL CONTROLS As seen in Figure 3.1, all processor controls are located on the front panel, arranged in functional groupings. Kongsberg Simrad Mesotech Ltd. Port Coquitlam, BC - Canada 900-12007001/Iss1.0 Page 3.6 FS900/925 MK II Operators Manual FS 900 MK II System Operation Figure 3.1 FS 900 MK II Front Panel Control The POWER keypad buttons are used to turn the system power on and off. The CONTROL MODE keypad buttons are used to set the function of the joystick control. Their individual functions are as follows: 3.2.1 ON Button This button is used to turn the power to the sonar system ON. All six of the keypad buttons glow dimly to show power is on. Note that a built-in time delay requires that this button be held for approximately one second before the system power is applied. 3.2.2 OFF Button This button is used to turn the system OFF. Note that a built-in time delay requires that this button be held for approximately two seconds before the system power is removed. 3.2.3 MENU Button This button is used to enable the Joystick for control of the on-screen menu. Kongsberg Simrad Mesotech Ltd. Port Coquitlam, BC - Canada FS900/925 MK II Operators Manual FS 900 MK II System Operation 900-12007001/Iss1.0 Page 3.7 3.2.4 CURSOR Button This button is used to enable the Joystick for control of one of the display cursors. 3.2.5 RANGE/GAIN Button This button is used to enable the Joystick for control of RANGE or GAIN. Press once for Range control, again for Gain. Note: There is a built-in time delay of 15 seconds. If not activated, the range/gain button will revert to the main menu 3.2.6 ZOOM Button This button is used to select a zoomed display. 3.2.7 SECTOR HEADING Control This is a rotary control used to set the center of the sector to be scanned. 3.2.8 SECTOR WIDTH Control This is a rotary control used to set the width of the sector to be scanned. Sector width can be set up to 360 degrees in the Polar mode, but is automatically limited to 180 degrees in the Linear and Sector modes. 3.2.9 Joystick This is the main operating control for the sonar. It is used to operate the menu system, move the cursors around the display, and to set the Range, Gain and Tilt. 3.3 FS 900 MK II SYSTEM SETTINGS This is the default page after the FS 900 MK II is switched on. None of the entries Kongsberg Simrad Mesotech Ltd. Port Coquitlam, BC - Canada 900-12007001/Iss1.0 Page 3.8 FS900/925 MK II Operators Manual FS 900 MK II System Operation except the “MAIN MENU” can be selected. This page is merely a summary of some of the more important settings of the system. SYSTEM SETTINGS MAIN MENU Scan Speed Gain Rx bandwidth Rx Gain Type Cable Gain 8 Low Narrow None 6,26 Figure 3.2 SYSTEM SETTINGS Menu In the above menu, “Rx” is short for “Receiver” Each entry can be found in the sub-menus listed below: Scan Speed............... in ................SUB MENU 1 Gain ........................... in ................TRANSCEIVER MENU Rx Bandwidth ............ in ................TRANSCIEVER MENU Rx Gain Type ............ in ................TRANSCEIVER MENU Cable Gain ................ in ................THE GAIN NUMBER FROM CALIBRATION AT START UP CABLE 3.4 MAIN MENU MAIN MENU Sub Menu 1 Display Scan Reverse Magnifier Hold Clear Display Timer Off / On Off / On Figure 3.3 MAIN Menu The following provides a description of each menu item and where applicable, shows the selection menu. SUB MENU 1 The Sub-menu 1 is used to enable the next Sub menu Kongsberg Simrad Mesotech Ltd. Port Coquitlam, BC - Canada FS900/925 MK II Operators Manual FS 900 MK II System Operation 900-12007001/Iss1.0 Page 3.9 structure Display Display is used to select the display mode of the sonar. Polar Sector Linear Locked Sounder Temp. Depth The Sounder mode is similar to the Locked mode with the difference that the sonar picture will scroll from right to left. In this mode you can adjust the scroll speed by the menu entry “SCAN MENU”. SCAN REVERSE The Scan Reverse changes the direction of rotation of the sonar head. Magnifier X2 X3 X4 The Magnifier enlarges a small area of the existing sonar image into the Magnifier area of the display by a factor of 2, 3, or 4. When enabled, a box appears on the sonar display showing the region being magnified. To move the box around the sonar display, the joystick must be activated. HOLD When the Hold mode is used and set to ON, it freezes the display and the sonar head remains at the same angle until the Hold mode is set to Off. CLEAR DISPLAY When the Clear Display mode is activated the sonar image is erased from the screen. TIMER When the Timer mode is activated, the internal clock is displayed on the screen indicating the start of the trawl tow and the total time of the tow. The display Timer will enable a timer in the lower right hand corner of the display. This feature is useful for measuring trawl time and indicating the total time of the tow. 3.5 SUB MENU 1 Kongsberg Simrad Mesotech Ltd. Port Coquitlam, BC - Canada 900-12007001/Iss1.0 Page 3.10 FS900/925 MK II Operators Manual FS 900 MK II System Operation SUB MENU 2 Scan Menu Configuration Menu Printer Menu Figure 3.4 SUB Menu 1 This menu is used to access the sub-menus. A detailed description of each of the menus is provided in the following sections. SUB MENU 2 The Sub Menu 2 is used to enable the next Sub menu Structure SCAN MENU Scan Reverse Scan Speed Scroll Speed Figure 3.4 SUB Menu 2 SCAN MENU The Scan Menu is used to access the following sub-menus. SCAN REVERSE Scan Reverse changes the direction of rotation of the sonar head. This may be useful when tracking a moving target. SCAN SPEED X1 X2 X4 X8 X 16 X 32 The Scan Speed is used to set the scanning speed of the sonar head in all display modes except Vertical Mode. The setting of this entry determines the number of 0.225° steps for each acoustic ping. SCROLL SPEED The Scroll Speed is used to select the scanning speed of the sonar in the Sounder mode only. You my select from one of the following speeds; Slow, Normal, or Fast. Kongsberg Simrad Mesotech Ltd. Port Coquitlam, BC - Canada FS900/925 MK II Operators Manual FS 900 MK II System Operation 900-12007001/Iss1.0 Page 3.11 3.6 TRANSCEIVER MENU TRANSCEIVER MENU Gain Menu Receive Bandwidth Rx Gain Type Rx Gain Response Figure 3.5 TRANSCEIVER Menu The following provides a description of each menu item and where applicable, shows the selection menu. GAIN MENU GAIN MENU Gain Figure 3.6 GAIN Menu The following provides a description of each menu item and where applicable, shows the selection menu. Gain High Low ( 20dB) (-20dB) This menu entry provides the operator with a simple method of adjusting the receiver gain. Note that this setting acts as an offset on the TVG and is directly applied at the receive time in the sonar head. This is not merely a display gain. The advantage of adjusting the gain with this menu setting rather than the panel gain, is that here, the telemetry noise is not amplified. The actual gain offset is +/-20 dB (10/ times). The default setting leaves the TVG as is with no additional offset. Kongsberg Simrad Mesotech Ltd. Port Coquitlam, BC - Canada 900-12007001/Iss1.0 Page 3.12 FS900/925 MK II Operators Manual FS 900 MK II System Operation Receive Bandwidth Max Wide Medium Narrow This menu item enables the operator to reduce the receive bandwidth of the surface processor which in turn reduces the signal noise. Note that the narrower the bandwidth, the higher the signal removal and lower the intensities of the image. Rx Gain Type None AGC RCG RCG + AGC This menu item enables “Automatic Gain Control” (AGC) and/or “Reverberation Controlled Gain” (RCG). The AGC algorithm increases the gain during the low acoustic return and reduces the gain during strong returns. The speed with which the gain is adjusted is determined by the setting of “Rx Gain Response” as explained in the next paragraph. The AGC should be enabled for enhancing small targets in good, noiseless environments. The RCG on the other hand, is useful for noisy environment where there is a lot of surface/bottom returns. This algorithm reduces the strength of the returned signals by the overall average value and re-scales the results over the complete color range. The influence of the previous average values (from previous pings) is determined by the setting of “Rx Gain Response”. Rx Gain Response Slow Medium Fast The setting of this menu item determines the response of the filter algorithm as selected by the “Rx Gain Type”. For the AGC, this setting determines the SPEED by which the gain is adjusted. For RCG, this setting determines the influence of the previous ping average over the current ping. If set to Slow, the overall average is given by the sum of 20% current and 80% of previous average. In Medium this ratio is 50/50 and in Fast the ratio is changed to 80 to 20%. 3.7 CONFIGURATION MENU Kongsberg Simrad Mesotech Ltd. Port Coquitlam, BC - Canada FS900/925 MK II Operators Manual FS 900 MK II System Operation 900-12007001/Iss1.0 Page 3.13 CONFIGURATION MENU Display Menu Grid Menu Language Menu Synchronization On / Off Figure 3.7 CONFIGURATION Menu The following provides a description of each menu item and where applicable, shows the selection menu. 3.8 DISPLAY MENU DISPLAY MENU Grid Menu User Palette Menu Palette Threshold Text Size Scan marker Re-center Hor. Center Ver. Center Figure 3.8 DISPLAY Menu Kongsberg Simrad Mesotech Ltd. Port Coquitlam, BC - Canada 900-12007001/Iss1.0 Page 3.14 FS900/925 MK II Operators Manual FS 900 MK II System Operation The following provides a description of each menu item and where applicable, shows the selection menu. 3.9 GRID MENU GRID MENU Grid Grid Type On / Off Figure 3.9 GRID Menu The following provides a description of each menu item and where applicable, shows the selection menu. GRID MENU This is selected to access the menu entries associated with the grid type and display. GRID ON/OFF Grid when set to ON, overlays the calibrated grid on the sonar image. This is a set of range rings that are calculated based on the speed of sound and the current range setting. Grid Type Polar Rect. This is used to select either a polar or a rectangular grid overlay for all display modes except “Locked”. USER PALETTE MENU Color Red Green Blue This menu entry is used to set the colors that are used if the “Palette” is set to “USER”. Kongsberg Simrad Mesotech Ltd. Port Coquitlam, BC - Canada FS900/925 MK II Operators Manual FS 900 MK II System Operation 900-12007001/Iss1.0 Page 3.15 3.10 USER PALETTE MENU USER PALETTE MENU Color Red Green Blue Figure 3.10 USER PALETTE Menu The following provides a description of each menu item and where applicable, shows the selection menu. This is the color number to be adjusted. The palette is actually an interpolated version of these. 0 is the weakest sonar return and 7 is the strongest, or to grid. Color 0 represents the weakest sonar return and color 7 the strongest. NOTE: The magnifier area will be filled with the selected color to aid in adjustment. Color 0 1 2 3 4 5 6 7 GRID Red 15 ¿ This setting is used to adjust the intensity of the RED component of the selected color. 0 being darkest and 15 the lightest. 4 À 0 Green 15 ¿ This setting is used to adjust the intensity of the GREEN component of the selected color. 0 being darkest and 15 the lightest. 4 À 0 Kongsberg Simrad Mesotech Ltd. Port Coquitlam, BC - Canada 900-12007001/Iss1.0 Page 3.16 Blue 15 ¿ FS900/925 MK II Operators Manual FS 900 MK II System Operation This setting is used to adjust the intensity of the BLUE component of the selected color. 0 being darkest and 15 the lightest. 4 À 0 This menu entry is used to set the colors of the display. SIMRAD 1 is similar to the palette used in the Mesotech Model 971 sonar. SIMRAD 2 is similar to that used by the echo sounders produced by Simrad. The USER palette allows selection of the custom palette created using the settings within the “USER PALETTE MENU” as described below. Palette SIMRAD 1 SIMRAD 2 USER Threshold 15 ¿ 2 Threshold is used to set the minimum level in the sonar return that will be displayed on the screen. This is achieved by allowing removal of 1 to 15 of the weaker signal colors from the image to emphasize the strongest targets. À 1 Text Size Small Large Text Size allows the text to be displayed in either a Small or Large font. When using the NTSC or PAL video modes, it is recommended that the Large font be used to prevent flickering. SCAN MARKER Scan Marker enables a solid line marker on the screen at the current position of the transducer as it scans. Kongsberg Simrad Mesotech Ltd. Port Coquitlam, BC - Canada FS900/925 MK II Operators Manual FS 900 MK II System Operation 900-12007001/Iss1.0 Page 3.17 Re-Center On enables the re-centering of the scanned sector on a target. Normally, the Sector Heading control is used to set or change the sector heading. The Re-Center feature provides an alternate method for changing the scan heading. With Re-centering, each press on the Menu key will cause the Sector Heading to re-adjust itself to the current scan position, temporarily overriding the Sector Heading control. Any adjustment of the Sector Heading control will restore normal operation. Re-Center Hor. Center 30 This is used to adjust the horizontal position of the sonar display so it is centered on the video monitor. ¿ 4 À -30 Ver. Center 20 This is used to adjust the vertical position of the sonar display so it is centered on the video monitor. ¿ 4 À -20 Language Nederlands English Francais Deutsch Islenksa Norsk Russian Espanol This is used to select a menu text language other than the default language that is set in the power up configuration Kongsberg Simrad Mesotech Ltd. Port Coquitlam, BC - Canada 900-12007001/Iss1.0 Page 3.18 FS900/925 MK II Operators Manual FS 900 MK II System Operation This menu entry allows the operator to synchronize two or more sonar systems. If set to “input”, then this sonar head tries to synchronize with an other system (e.g., It only transmits if the other system is also transmitting). If set to “Output”, then this system is free running and only provides a signal for other systems to synchronize with it. If set to “I/O”, then all systems will ping at the same time. Synchronization None Input Output I/O 3.11 PRINTER MENU PRINTER MENU Printer Display Printer Palette Color Row Column Figure 3.11 PRINTER Menu The following provides a description of each menu item and where applicable, shows the selection menu. PRINT DISPLAY Print Display checks that a printer is attached and ready. It then prepares the processor for printing. Refer to Section “Printing the Display” to generate a printout. Printer HP_PJ HP_DJ BMP_I BMP_S This entry selects the type of printer attached. HP_PJ is the Hewlett Packard Paint Jet. HP_DJ is the Hewlett Packard Desk Jet 690 and 1200 series (no palette selection for this printer). Both BMP_I and BMP_S are used to transfer Bitmap images to a PC via the printer port. A corresponding DOS application software (produced by Mesotech) must be running on the PC to receive the Bitmap. Also a special printer cable (Interlink/Laplink Parallel DB25 F3D508-10) should be used for data transfer between the two processors. The resulting Bitmap can then be viewed using Paint or any Bitmap compatible applications. Kongsberg Simrad Mesotech Ltd. Port Coquitlam, BC - Canada FS900/925 MK II Operators Manual FS 900 MK II System Operation Palette SIMRAD 1 SIMRAD 2 USER 900-12007001/Iss1.0 Page 3.19 Provides selection of the color palette used for printing with the HP Paint Jet (HP_PJ) printer. SIMRAD 1 and 2 are similar to display palettes with the white and black colors reversed. The reason being that the display background is black whereas the paper is white. Excessive amount of ink would be required to change the background of the print out to black. Note! The palette entry is only available for the HP_PJ and not for any other printer type. The menus are automatically updated to take out the palette entry when all other printer types are selected. 3.11.1 Printing the Display When the Print Display item is activated the following message will appear in the PRINTER MENU: PRINTER MENU Print Display PRINTER READY ******************* Press TILT to Print -orPress MENU to Abort ******************* Figure 3.12 The PRINTER Menu - Print Display Kongsberg Simrad Mesotech Ltd. Port Coquitlam, BC - Canada 900-12007001/Iss1.0 Page 3.20 FS900/925 MK II Operators Manual FS 900 MK II System Operation Note! In addition, the Joystick Mode message in the upper right corner of the display will indicate --PRINTER-- to remind you that the printer is "armed" and ready to print. If no printer is connected, or if the printer is not turned on, the status message will be NO PRINTER! Similarly, if the printer is out of paper, the status message NO PAPER! will appear. In either case, the printer is not ready and the PRINTER MENU will not change. The sonar will continue to operate normally until the TILT button is pressed. This will freeze the display and print it on the printer. Printing time is about two minutes. The MENU button can be pressed anytime to cancel the printing operation either before or after printing is started. This scheme allows any of the displays to be printed, even the System Test display. Note that if you want to print a tilted display, it must be set up before arming the printer since the TILT button will start the printer. 3.11.2 The User Palette It is possible to select your own colors with the HP PaintJet printer. This is done by using the color spectrum printout from the printer. This spectrum is a table printout consisting of 33 rows and 10 columns that contains all 330 possible colors. Each color is referred to by a row and column number. For example: Row 15 Column 4 is bright yellow, Row 33 Column 10 is white, Row 33 Column 7 is black. Any of these colors can therefore be assigned to the nine display colors (8 sonar return colors and a grid color). Note! To print a color spectrum on a HP PaintJet printer: n Turn the printer Off. n Press the LF (Line Feed) button down and hold it down while pressing the ON/OFF button to turn the printer On. n Release the ON/OFF button first, then release the LF button. n The printer will print two pages. Discard the first page. The second page is the color spectrum you will need. Kongsberg Simrad Mesotech Ltd. Port Coquitlam, BC - Canada FS900/925 MK II Operators Manual FS 900 MK II System Operation 900-12007001/Iss1.0 Page 3.21 When the Printer Palette is set to USER, three additional menu items appear as shown below: PRINTER MENU Color Row Column Figure 3.13 PRINTER Menu - User Palette The following provides a description of each additional menu item and, where applicable, shows the selection menu. Color is the color number to be adjusted. It can be set from 0 to 7, or to Grid. Color 0 represents the weakest sonar return and color 7 the strongest. The Magnifier Area will be filled with the selected color to aid in adjustment. Color 0 1 2 3 4 5 6 7 Grid Row Row value selects the row of the color spectrum printout. 33 ¿ 3 À 1 Kongsberg Simrad Mesotech Ltd. Port Coquitlam, BC - Canada 900-12007001/Iss1.0 Page 3.22 Column 10 FS900/925 MK II Operators Manual FS 900 MK II System Operation Column value selects the column of the color spectrum printout. ¿ 4 À 1 To define your own printer palette, set the Row and Column values for each of the 9 Colors. All the settings will be saved in the non-volatile memory when the Joystick is pushed to the left to exit the PRINTER MENU. 3.12 SUB MENU 2 SUB MENU 3 Manual Input Menu Sensor Menu (Stand Alone System Only) Transducer Menu Constants Menu Self Test Figure 3.14 SUB Menu 2 The following provides a description of each menu item and where applicable, shows the selection menu Kongsberg Simrad Mesotech Ltd. Port Coquitlam, BC - Canada FS900/925 MK II Operators Manual FS 900 MK II System Operation 900-12007001/Iss1.0 Page 3.23 3.13 SENSOR MENU SENSOR MENU Temp. Sens. Depth Sens. Catch 1 Catch 2 Catch 3 Catch 4 Temp. Scale Depth Scale Graft Time Warnings On / Off On / Off On / Off On / Off On / Off On / Off On Figure 3.15 The SENSOR Menu The following provides a description of each menu item and where applicable, shows the selection menu. TEMPERATURE SENSOR The Temperature Sensor enables displaying of temperature at trawl unit. When activated, the temperature information is retrieved from the sensor module and displayed on the screen. DEPTH SENSOR The Depth Sensor enables displaying of depth of trawl unit. When activated, the depth information is retrieved from the sensor module and displayed on the screen. CATCH ? ON The Catch ? On enables displaying of catch sensor data. When activated, the catch information for the particular sensor (1, 2, 3 or 4) will be retrieved from the sensor module and displayed on the screen in graphic format. Kongsberg Simrad Mesotech Ltd. Port Coquitlam, BC - Canada 900-12007001/Iss1.0 Page 3.24 FS900/925 MK II Operators Manual FS 900 MK II System Operation Temp Scale 5° 10° 15° 20° 25° 30° The Temp Scale is used to select the units of temperature shown on the display and in the Temperature vs. Time graph in F° or in C°. The values are shown in the current selected scale for Celsius (C° ) Depth Scale 300 900 1200 1500 1800 The Depth Scale is used to set the maximum depth displayed on the Depth vs. Time and Temperature graphs. The values are shown in the units currently selected for range (meters, feet of fathoms). This diagram shows the scales in meters. Graph Time 1 Hour 2 Hours 4 Hours 8 Hours Test The Graph Time is used to set the length of time displayed in the Temperature and Depth vs. Time graph. The Test mode provides continuous output of the sensor data. While in test mode, the sonar head does not step or transmit. Warnings Enables screen warnings for catch sensors. If enabled, the screen flashes bright red when a catch sensor has been triggered 3.14 TRANSDUCER MENU TRANSDUCER MENU Aft Forward Figure 3.16 TRANSDUCER Menu The following provides a description of each menu item and where applicable, shows the selection menu. Kongsberg Simrad Mesotech Ltd. Port Coquitlam, BC - Canada FS900/925 MK II Operators Manual FS 900 MK II System Operation 900-12007001/Iss1.0 Page 3.25 Transducer selects the position of the transducer relative to the body of the sonar head. If this setting is incorrect, the sonar image will be reversed (a mirror image). For normal trawl applications, this should be set to Aft. Note, that each time this item is changed the system re-calibrates itself. Transducer Forward Aft 3.15 CONSTANTS MENU CONSTANTS MENU Range Units Sound Speed Temp Units Figure 3.17 CONSTANTS Menu The following provides a description of each menu item and where applicable, shows the selection menu. The unit selected is used for the range settings and the cursor readout as well as all other measurements. The abbreviation for these units are “f”, “Fa” and “m” respectively. Range Units Feet Fathom Meters Sound Speed 1600 ¿ 1478 This is the value used by the system for the speed of sound in water. It should be set to a value appropriate for the area in which the system is being used. The units of setting are meters per second or the equivalent feet or Fathoms per second. À 1400 Note! The accuracy of the sonar in determining target size and range is dependent upon the correct setting of the sound speed. The speed of sound in water varies with the temperature and salinity and can vary by several percent at different locations around the world. If there is no accurate value to use for your location, then you may use the following suggestions as rough estimates: Kongsberg Simrad Mesotech Ltd. Port Coquitlam, BC - Canada 900-12007001/Iss1.0 Page 3.26 FS900/925 MK II Operators Manual FS 900 MK II System Operation Cold Water (North Sea) 1475 m/s Warmer Water (Gulf of Mexico) 1510 m/x Very Warm Waters (Equatorial) 1540 m/s TEMP UNITS The Temp Units are used to select the temperature in Celsius (C°) or in Fahrenheit (F°) 3.16 SELF -TEST MENU SELF TEST MENU System Status System Test Telemetry Test Control Panel Test Serial I/O Test Figure 3.18 SELF TEST Menu The following provides a description of each menu item and where applicable, shows the selection menu. System Status System Status displays the “SYSTEM TEST RESULTS” without actually performing a system test. System Test System Test performs a power up system test including telemetry cable calibration, head communication test etc. The results are displayed in the “SYSTEM TEST RESULT”. Telemetry Test Telemetry Test will continuously interrogate the head for its ID and displays the errors in receiving the head ID. This can be used for troubleshooting the cable telemetry. Calibrate Calibrate will repeat a slower version of the power up head calibration. The results will be consequently used for stepping the head. Control Panel Test Control Panel Test allows the processor’s front panel buttons, rotary controls and joystick to be tested for proper operation. Kongsberg Simrad Mesotech Ltd. Port Coquitlam, BC - Canada FS900/925 MK II Operators Manual FS 900 MK II System Operation 900-12007001/Iss1.0 Page 3.27 Serial I/O Test allows a loop back test of the serial port. When selected, the entire ASCII character set is continuously output to serial port. It also continuously monitors the serial port for any incoming data. If pins 2 and 3 of the serial port are connected, then the output data is looped back and displayed for examination. Serial I/O Test 3.17 SUB MENU 3 SUB MENU 3 Serial I/O Menu Serial Port Menu Clock Menu Standard Settings Figure 3.19 SUB Menu 3 The following provides a description of each menu item and where applicable, shows the selection menu. 3.18 SERIAL I/O MENU SERIAL I/O MENU NMEA Format Depth Temp. On/Off On/Off Figure 3.20 SERIAL I/O Menu The following provides a description of each menu item and where applicable, shows the selection menu. Selects the output data format of the serial data. With “NMEA”, the output data is NMEA-0183 compatible and with “3300” the output data is the same format as was output by the FS3300 processor. Format NMEA 3300 DEPTH On / Off Depth, when set to ON, enables the output of DepthBelow-Surface data obtained from the sensor module, and displayed in the Icon on the monitor. Kongsberg Simrad Mesotech Ltd. Port Coquitlam, BC - Canada 900-12007001/Iss1.0 Page 3.28 TEMP On / Off FS900/925 MK II Operators Manual FS 900 MK II System Operation Temp, when set to ON, enables the output of the TempBelow-Surface data obtained from the sensor module, and is displayed in the Icon on the monitor 3.19 SERIAL PORT MENU SERIAL PORT MENU Baud Rate Parity Stop Bits Data Bits Depth Figure 3.21 SERIAL PORT Menu The following provides a description of each menu item and where applicable, shows the selection menu. Baud Rate 300 600 1200 2400 4800 9600 sets up the Baud rate of the RS232 serial I/O port. Parity None Even Odd Sets the Parity of the serial I/O port Stop Bits 1 2 Sets the number of Stop Bits for the serial I/O data Data Bits 7 8 Sets the number of Data Bits in the serial I/O data Kongsberg Simrad Mesotech Ltd. Port Coquitlam, BC - Canada FS900/925 MK II Operators Manual FS 900 MK II System Operation 900-12007001/Iss1.0 Page 3.29 3.20 CLOCK SET MENU The CLOCK SET MENU is used to set the correct time and date for the on-screen clock. CLOCK SET MENU Year Month Day Hour Minute Seconds Figure 3.22 CLOCK SET The following provides a description of each menu item and, where applicable, shows the selection menu. Year 2030 Year is used to set the current year. Possible settings are from 1990 to 2030. ¿ 1995 À 1990 Month Jan Month is used to set the current month. Possible settings are the twelve months from Jan to Dec. ¿ Feb À Dec Kongsberg Simrad Mesotech Ltd. Port Coquitlam, BC - Canada 900-12007001/Iss1.0 Page 3.30 Day 31 FS900/925 MK II Operators Manual FS 900 MK II System Operation Day is used to set the day of the month. Possible settings are 1 to 31. ¿ 28 À 1 Hour 23 Hour is used to set the current hour. The 24 hour format is used. Possible settings are from 0 to 23. ¿ 14 À 0 Minute 59 Minute is used to set the current minute. Possible settings are from 0 to 59. ¿ 30 À 0 Seconds 59 Seconds is used to set the current second. Possible settings are from 0 to 59. ¿ 10 À 0 Kongsberg Simrad Mesotech Ltd. Port Coquitlam, BC - Canada FS900/925 MK II Operators Manual FS 900 MK II System Operation STANDARD SETTINGS Factory Reset 900-12007001/Iss1.0 Page 3.31 This menu entry is used to reset a number of menu settings to a known state. Kongsberg Simrad Mesotech Ltd. Port Coquitlam, BC - Canada 900-12007001/Iss1.0 Page 3.32 FS900/925 MK II Operators Manual FS 900 MK II System Operation 3.21 FS 900 MENU STRUCTURE MAIN MENU Scan Speed Scan Speed Polar, Sector, Net Opening, Vertical, Locked 1,2,4,8,16,32 Scan Reverse Hold On / Off Auto Tilt On / Off Xdcr Stabilize Magnifier x2, x3, x4 Clear Display Timer SUB-MENUS On / Off CONFIGURATION Threshold Re-center Scan Marker 1 .. to .. 15 GRID MENU Grid Type Polar, Rect. Grid On / Off Transducer Type Fan, Cone CONSTANTS Range Units Feet, Fathom, Meter Sound Speed 1400 ... to ... 1600 Language Synchronization TRANSCEIVER GAIN MENU On / Off On / Off Netherland, English, Francais, Deutsch, Islenksa, Norsk, PYCCHH, Espanol None, Input, Output, I/O Transmit Power Transmit Pulse High, Low, Off Receiver Bandwidth Automatic, Wide, Medium, Narrow Rx Gain Type Rx Gain Response None, AGC, RCG, RCG+AGC Gain TVG Type Default, High, Low USER1 TVG MENU Spreading (A) Absorption (B) 20 ... to ... 40 Start Gain (C) -60 ... to ... 60 dB Max. Gain (L) 0 ... to ... 100 dB 5%, 10%, 25%, 50%, 100%, 200% Slow, Medium, Fast 20 log, 40 log, User1, User2, Test 0 ... to ... 80 USER2 TVG MENU TILT MENU DISPLAY MENU Tilt Step Size 1,2,4,8,16,32 Maximum Tilt -82.8 ... to ... 14.4 Degrees Minimum Tilt -90.0 ... to ... 7.2 Palette SIMRAD1, SIMRAD2, USER USER PALETTE Color Red 0 ... to ... 7, GRID Green 0 ... to ... 15 Blue 0 ... to ... 15 0 ... to ... 15 Horizontal Center Vertical Center -20 ... to ... 20 MANUAL INPUT Vessel Speed 0 ... to ... 15 Knot PRINTER MENU Print Display CLOCK SET MENU SELF TEST MENU Degrees -20 ... to ... 20 Printer HP_PJ, HP_DJ, BMP_I, BMP_S Palette SIMRAD1, SIMRAD2 USER Year Month 1990 ... to ... 2030 Day 1 ... to ... 31 Hour Minute 0 ... to ... 23 Seconds 0 ... to ... 59 Jan ... to ... Dec 0 ... to ... 59 System Test Serial I/O Test Calibrate Send Settings Telemetry Test Control Panel Test Receiver Test System Status STANDARD SETTINGS Factory Reset SENSOR MENU (Only on Stand Alone System) Kongsberg Simrad Mesotech Ltd. Port Coquitlam, BC - Canada FS900/925 MK II Operators Manual FS 900 MK II Installation, System Set-Up and Test 900-12007001/Iss1.0 Page 4.1 PART 4 FS 900 MK II INSTALLATION, SYSTEM SET-UP AND TEST 4. FS 900 MK II INSTALLATION, SYSTEM SET-UP AND TEST ........................... 4.5 4.1 INSTALLATION PROCEDURE ...................................................................... 4.5 4.2 SURFACE UNIT ELECTRONICS INSTALLATION ......................................... 4.5 4.2.1 Mounting of Units ..................................................................................... 4.5 4.2.2 Power Considerations .............................................................................. 4.6 4.2.3 Connecting a Display Unit........................................................................ 4.6 4.2.4 Connecting an FS 900/925 Power Supply ............................................... 4.8 4.2.4.1 Selecting AC Supply Voltage ............................................................ 4.8 4.2.4.2 Connecting Power Supply to the FS 900 MK II Processor ................ 4.8 4.2.4.3 Selecting Output Voltage and Relay Delay Time .............................. 4.8 4.2.4.4 Remote Mounting of Current and Voltage Meters ........................... 4.11 4.2.5 Connection to Cable Winch/Slip-Rings .................................................. 4.11 4.2.6 Interfacing to a SIMRAD Echosounder .................................................. 4.11 4.2.7 Connecting a Color Printer or a Computer............................................. 4.12 4.2.8 Connecting a VCR ................................................................................. 4.12 4.3 ASSEMBLING OF TRAWL UNIT .................................................................. 4.13 4.3.1 FS 901 MK II, FS 902 MK II or FS 903 MK II Configuration .................. 4.13 4.4 SYSTEM SET-UP AND TESTING USING TEST CABLE ............................. 4.14 4.4.1 Start Up .................................................................................................. 4.15 4.4.2 Setting Power-up Configuration ............................................................. 4.15 4.4.2.1 Selecting the Video Format ............................................................. 4.15 4.4.2.2 Selecting the Default Language ...................................................... 4.17 4.4.2.3 Selecting the Trawl Configuration ................................................... 4.18 4.4.3 Configuring Control Unit......................................................................... 4.18 4.4.4 Checking Sonar Head Orientation ......................................................... 4.19 4.4.5 Checking Catch Sensors and Sensor Module ....................................... 4.19 4.5 TRAWL CABLE AND WINCH INSTALLATION ............................................. 4.20 4.5.1 Control Unit to Cable Winch Connection ............................................... 4.20 4.5.2 Cable Winch........................................................................................... 4.21 4.5.2.1 Location ........................................................................................... 4.21 Kongsberg Simrad Mesotech Ltd. Port Coquitlam, BC - Canada 900-12007001/Iss1.0 Page 4.2 FS900/925 MK II Operators Manual FS 900 MK II Installation, System Set-Up and Test 4.5.2.2 Threading and Winding of the Cable ............................................... 4.21 4.5.3 Trawl Cable ............................................................................................ 4.22 4.6 MOUNTING TRAWL UNIT & COMPLETING FINAL TEST ........................... 4.22 4.6.1 Mounting Trawl Unit to Headrope .......................................................... 4.23 4.6.2 Preparing Trawl Cable ........................................................................... 4.23 4.6.3 Final System Test .................................................................................. 4.24 4.6.4 Completing Trawl Unit Assembly ........................................................... 4.24 4.7 MOUNTING CATCH SENSORS ................................................................... 4.25 Kongsberg Simrad Mesotech Ltd. Port Coquitlam, BC - Canada FS900/925 MK II Operators Manual FS 900 MK II Installation, System Set-Up and Test 900-12007001/Iss1.0 Page 4.3 LIST OF FIGURES Figure 4.1 Connection of FS 900/925 Power Supply to FS 900 MK II Processor . 4.10 Figure 4.2 Default Language Menu ....................................................................... 4.17 Figure 4.3 Trawl Unit Configuration Menu.............................................................. 4.18 Kongsberg Simrad Mesotech Ltd. Port Coquitlam, BC - Canada 900-12007001/Iss1.0 Page 4.4 FS900/925 MK II Operators Manual FS 900 MK II Installation, System Set-Up and Test Kongsberg Simrad Mesotech Ltd. Port Coquitlam, BC - Canada FS900/925 MK II Operators Manual FS 900 MK II Installation, System Set-Up and Test 900-12007001/Iss1.0 Page 4.5 4. FS 900 MK II INSTALLATION, SYSTEM SET-UP AND TEST 4.1 INSTALLATION PROCEDURE The installation of the FS 900 MK II Trawl Monitoring System involves the following steps: • Deciding on the locations in the wheel house for the surface units. • Mounting the surface units and making the connections between the FS 900 MK II Processor, the display unit, the FS 900/925 power supply, and other optional equipment being installed. • Assembling the trawl unit. • Running up the system on the test cable to verify proper installation, configure control unit, and perform initial system test. • Installing the cable winch, snatch block and trawl cable, and connecting the winch slip-rings to the control unit. • Mounting the trawl unit to the headrope and completing the final system test. • Mounting the catch sensors to the cod-end of the trawl. 4.2 SURFACE UNIT ELECTRONICS INSTALLATION 4.2.1 Mounting of Units The display unit should be located in the wheel house in a place that provides a good view of the screen and avoids direct sunlight, if possible. Depending on monitor that was selected, the unit may be mounted on or recessed into a cabinet. Simrad supplied display units include the necessary mounting brackets. The FS 900 MK II processor should be mounted in close vicinity to the operator's place in the wheel house and near the display unit. The unit may be mounted on top of, below or recessed into a cabinet. The unit can also be rack-mounted in a standard 19" rack module by using the rack-mount ears supplied with the system. Sufficient space Kongsberg Simrad Mesotech Ltd. Port Coquitlam, BC - Canada 900-12007001/Iss1.0 Page 4.6 FS900/925 MK II Operators Manual FS 900 MK II Installation, System Set-Up and Test should be left around the control unit for proper ventilation. The FS 900/925 power supply is affixed to a bulkhead with four screws. The location of the unit should be within 4.5 m/15 ft of the control unit (this is the length of interconnect cables), and at a place that allows operation of the power switch and easy reading of the current and voltage meters. The on/off switch and the meters may be removed from the power supply box and remotely mounted next to the control unit if so desired. Optional equipment for interface to the control unit may be mounted in any convenient location provided the user supplied interconnect cables are of sufficient length and the required power is available. 4.2.2 Power Considerations The display unit, generally, will require 110 VAC or 220 VAC. Depending on the capabilities of the unit chosen, it may automatically detect the supply voltage or the unit may have to be ordered for the correct voltage. The FS 900 MK II processor will operate from either 110 VAC or 220 VAC. Voltage selection is automatic and there are no jumpers or switches to set. The power supply can be operated with either 110 VAC or 220 VAC. Selection of the supply voltage is done by moving the jumpers on the screw terminal strip located behind the voltage meter inside the power supply. Details on selecting the jumper location are presented below in the section describing the connection of the FS 900/925 power supply (section 4.2.4.1). 4.2.3 Connecting a Display Unit Either a RGB monitor or a VGA monitor may be connected to the FS 900 MK II processor. An industry standard VGA monitor will connect directly to the miniature D-15 connector located on the rear panel of the control unit. Pin assignments for this connector are shown in following table. PIN # SIGNAL PIN # 1 R - Red analog video output 9 Kongsberg Simrad Mesotech Ltd. Port Coquitlam, BC - Canada SIGNAL N/C FS900/925 MK II Operators Manual FS 900 MK II Installation, System Set-Up and Test PIN # SIGNAL 900-12007001/Iss1.0 Page 4.7 PIN # SIGNAL 2 G - Green video output analog 10 GND 3 B - Blue analog video output 11 GND 4 GND 12 N/C 5 Red Shield 13 Horizontal Sync 6 GND 14 Vertical Sync 7 Green Shield 15 N/C 8 Blue Shield A RGB monitor is connected to the BNC connectors located on the rear panel of the FS 900 MK II processor. The labels on the BNC connectors have the following meaning: BNC SIGNAL R Red analog video output G Green analog output B Blue analog output S Sync output C Composite video output Four coaxial cables, supplied in processor accessory kit, should be used to connect the monitors red, green, blue, and vertical/comp. sync to the processor BNC connectors R, G, B and S, respectively. With some monitors, however, better results are obtained when the sync cable is connected to control unit BNC connector C. For RGB monitors that can input either analog or TTL signals, the selector switch should be set to "analog". Kongsberg Simrad Mesotech Ltd. Port Coquitlam, BC - Canada 900-12007001/Iss1.0 Page 4.8 FS900/925 MK II Operators Manual FS 900 MK II Installation, System Set-Up and Test Note! The FS 900 MK II processor does not output the vertical sync signal with the green video signal. A separate cable for the vertical sync must be used. Connection of this sync cable should be made to the control units BNC connector labelled C. 4.2.4 Connecting an FS 900/925 Power Supply The connection of the FS 900/925 power supply is shown in Figure 4.1. Caution! Insure that the AC supply is disconnected before any service or installation is done to this unit. There are AC and DC voltages within this box that are capable of delivering a lethal electric shock. 4.2.4.1 Selecting AC Supply Voltage Selecting an AC supply voltage of 110 VAC or 220 VAC is done by jumpers on screw terminals located behind the voltage meter (8). Figure 4.1 shows the placement of the yellow and blue wires for selecting the required supply voltage. 4.2.4.2 Connecting Power Supply to the FS 900 MK II Processor The power supply unit is normally supplied from the factory with the two interconnect cables (1,2), for connection to the control unit, and the power cord (4) already installed. If not, they should be fed through the strain reliefs at the bottom of the box and attached to the screw terminals as shown in Figure 4.1. Connection of the power supply to the control unit is done by hand tightening the 4-pin and 6-pin, MS connectors of the interconnect cables (1,2) to the DC POWER and 2/4 WIRE connectors, respectively, on the control unit rear panel. 4.2.4.3 Selecting Output Voltage and Relay Delay Time A toggle switch located below the voltage meter can be used to select the output voltage of the power supply. When set to 120/200 VDC, the output voltage is 200 VDC. Normally this switch should be set to 120/200 VDC when system is connected to the trawl cable. When connected to the test cable, this switch should be set to 60/120 VDC. Kongsberg Simrad Mesotech Ltd. Port Coquitlam, BC - Canada FS900/925 MK II Operators Manual FS 900 MK II Installation, System Set-Up and Test 900-12007001/Iss1.0 Page 4.9 The power supply contains a time delayed relay (5) that is switched on and off when the FS 900 MK II and/or FS 925 MK II processor power is switched on and off. In this way, the on/off switch of the power supply can remain on so that powering up of the entire system is accomplished when the processor is turned on. The relay time delay should be set to the minimum (fully counter clockwise). Kongsberg Simrad Mesotech Ltd. Port Coquitlam, BC - Canada 900-12007001/Iss1.0 Page 4.10 FS900/925 MK II Operators Manual FS 900 MK II Installation, System Set-Up and Test Figure 4.1 Connection of FS 900/925 Power Supply to FS 900 MK II Processor Kongsberg Simrad Mesotech Ltd. Port Coquitlam, BC - Canada FS900/925 MK II Operators Manual FS 900 MK II Installation, System Set-Up and Test 900-12007001/Iss1.0 Page 4.11 4.2.4.4 Remote Mounting of Current and Voltage Meters The current and voltage meters are sometimes used to evaluate performance of the cable, slip-ring and trawl unit electronics. For this reason, the meter assembly may be removed from the power supply box and mounted remotely on a cabinet next to the FS 900 MK II processor. The meter assembly is removed by undoing the four screws that hold it to the mounting posts, and removing the four wires (making note of their position) from the screw terminal strip located behind the current meter. The four wires are then extended using a 4-wire (18 GA., or heavier) cable that is passed through one of the strain reliefs located at bottom of the box. The on/off switch for the power supply may also be mounted remotely, but with the FS 900 MK II processor this is not required since turning the control unit power on or off also controls power to the trawl unit. The switch on the power supply only needs to be turned off when the unit is not being used for extended periods. 4.2.5 Connection to Cable Winch/Slip-Rings The connection between the FS 900 MK II processor and the cable winch/slip-rings should be made with a 18 GA., or heavier, shielded twisted pair cable. The connection to the control unit, as shown in Figure 4.1, is made using the 3-pin MS connector supplied in the processor accessory kit. To minimize noise interference on the cable, the shield of the cable should be attached to the connector. Note! The shield of the cable between the FS 900 MK II Processor and the slip-rings should be connected at the processor, but NOT at the sliprings. 4.2.6 Interfacing to a SIMRAD Echosounder The FS 900 MK II processor may be connected to a Simrad echosounder for display of the trawl unit depth on the sounder. This is made via the RS232 serial port on the rear panel of the control unit (D-25 connector labelled "RS-232"). Either NMEA 0183 or 20 mA current loop outputs are available. For a current loop output, the optional Current Loop Driver board (P/N 422-20220000) must be installed in the processor. Kongsberg Simrad Mesotech Ltd. Port Coquitlam, BC - Canada 900-12007001/Iss1.0 Page 4.12 FS900/925 MK II Operators Manual FS 900 MK II Installation, System Set-Up and Test The pin out for the RS232 serial port is shown in the following table. PIN # SIGNAL 3 NMEA - Output 7 NMEA - Ground 18 Current Loop - Output 19 Current Loop - Return To output the depth data via the serial port, the FS 900 MK II processor must be configured to do so. This is done through menu operations in submenu SERIAL I/O. Refer to chapter 3 for information to access the menu items and select the correct parameters. 4.2.7 Connecting a Color Printer or a Computer A standard parallel port is provided on the rear panel of the control unit (D-25 connector labelled "PRINTER") to allow printing of the display on a color printer. Either the HP PaintJet or one of the HP DeskJet printers may be used. The connection is made via a standard printer cable that should be supplied with the printer. An IBM® compatible computer can also be connected in order to transfer the sonar images in a .bmp format. Selection of the printer type and generating the plot is done through the submenu PRINTER. Refer to chapter 3 for correct procedure. 4.2.8 Connecting a VCR Either a NTSC or PAL VCR may be connected to the FS 900 MK II processor for recording of the display video signal. Connection is made via a coaxial cable (user supplied) between the VCR LINE input and the BNC connector labelled "C" on the rear panel of the control unit. To record an image, the FS 900 MK II processor video output format must be configured for that of the VCR. This is done by following the instructions in section 4.4.2, "Setting Power-up Configuration", and selecting a video format of either NTSC or PAL. Kongsberg Simrad Mesotech Ltd. Port Coquitlam, BC - Canada FS900/925 MK II Operators Manual FS 900 MK II Installation, System Set-Up and Test 900-12007001/Iss1.0 Page 4.13 Note! To record the sonar display, the processor must be configured for either the NTSC or PAL video format. A RGB monitor will therefore have to be used if display of the image is required during recording. To use the VGA monitor during recording, a user supplied VGA to NTSC/PAL video converter should be used. 4.3 ASSEMBLING OF TRAWL UNIT Assembling the trawl unit for the first time should be conducted in the wheel house where the surface unit electronics have been mounted. This will facilitate testing the trawl unit using the test cable as described in section 4.4, below. 4.3.1 FS 901 MK II, FS 902 MK II or FS 903 MK II Configuration The FS 901 MK II, FS 902 MK II and FS 903 MK II trawl configurations all consist of a FS 3300 sonar head, a FS 3300 polyurethane housing, mounting and assembling hardware, and a strain relief. For the FS 902 MK II and FS 903 MK II configurations, the trawl unit also contains a FS 3300 sensor module with interconnect cable, and a catch receive transducer. Assembly of the unit involves correctly locating the sonar head, attaching strain relief to trawl cable, proper routing and connection of cable to sonar head, and bolting polyurethane housing together. For the FS 902 and FS 903 configurations, assembling also includes connecting the catch receive transducer to the sensor module, connecting the sensor module to the sonar head, and placing the receive transducer and sensor module in the trawl unit housing. This section describes the connection and locating of the sonar head, the sensor module and catch receive transducer; final assembly is described in section 4.6. The FS 3300 sonar head should have been supplied from factory with two retaining rings (collars) and a locating pin already installed. If not, these parts will be included with the sonar head and should now be attached. A stainless steel locating pin threaded into one the tapped holes located in the connector end of the housing is used to prevent the sonar head from rotating. Only one pin is required and it can be placed into the positioning hole, as shown in Figure 3.4, of the bottom half of the trawl unit housing. The pin location should be such that the diaphragm housing that protrudes from the sonar head housing will be located to one side (normal convention has polyurethane housing half with metal serial number plate being used as the top). Correct location of pin will be determined during initial test of system in section 4.4, below. The first retaining ring is mounted on the sonar head housing flush with the transducer end of the housing, and the second retainer ring is mounted approximately 25 mm/1" Kongsberg Simrad Mesotech Ltd. Port Coquitlam, BC - Canada 900-12007001/Iss1.0 Page 4.14 FS900/925 MK II Operators Manual FS 900 MK II Installation, System Set-Up and Test from the first. Final position (see Chapter 8 - Drawings) is determined by placing the sonar head into one half of the trawl unit housing with the locating pin inserted into the correct hole. The first retaining ring is then moved in tight against the outside of the polyurethane housing and the second retaining ring is moved in tight against the inside of the polyurethane housing outside wall. Both are fastened into place to prevent the sonar head from moving back and forth. Note! Incorrect placement of the retaining rings and locating pin on the sonar head, or the failure to install these parts, may result in movement of the sonar head that could damage the transducer and/or drive shaft and result in water damage to the entire unit. For the FS 902 MK II and FS 903 MK II configurations, the sensor module is then placed in the polyurethane housing on the side of sonar head that is opposite the diaphragm housing. The catch receive transducer is placed in cradle on the opposite of sonar head from the sensor module and the cable is routed under the sonar head, as shown in Figure 3.4, and connected to the sensor module. Liberal amounts of Dow Corning #55 grease should be applied to the connector surfaces before mating so that a water tight seal is obtained. The locking sleeve should then be hand-tightened. Finally, the sensor module interconnect cable is plugged into the 6-pin connector on the sonar head, after grease is applied to mating surfaces, and the locking sleeve hand-tightened. Note! Dow Corning #55 grease must be applied to all mating surfaces of underwater connectors to insure proper sealing. Sufficient grease should be applied so that excess squeezes out with any air when the connectors are mated. RTV or any other sealant must NOT be used, and when tightening the locking sleeves do NOT use a wrench or pliers! See chapter 7, "Troubleshooting and Maintenance", for proper connector maintenance. 4.4 SYSTEM SET-UP AND TESTING USING TEST CABLE Initial power-up, set-up and test of system should be made with the trawl unit, in the wheel house, connected to the FS 900 MK II processor using the supplied test cable. The 3-pin MS connector of the test cable is attached to the connector labelled "2 WIRE" on the rear panel of the control unit. The other end of test cable is plugged into the 2-pin connector on the sonar head of the trawl unit. Kongsberg Simrad Mesotech Ltd. Port Coquitlam, BC - Canada FS900/925 MK II Operators Manual FS 900 MK II Installation, System Set-Up and Test 900-12007001/Iss1.0 Page 4.15 4.4.1 Start Up 1. Check that system has been properly installed and that all connections have been made to the control unit. 2. Turn on the display monitor. Follow the manufacturer's procedures for adjustment of contrast, brightness, etc. 3. Turn On the FS 900 external power supply box. The voltmeter should display approximately 112 volts if on HI setting and approximately 56 volts on LOW setting. The current meter should read zero until the FS 900 is turned On. 4. To turn on the FS 900 processor, insure the rear panel power switch is on and then press the front panel ON button. The relay inside the external power supply box will now be activated and the current meter will read approximately 0.2- 0.4 amps if everything is okay. 5. The calibration screen will now come up and the sonar system will locate the head position, calibrate the cable and adjust the cable gain, and restore all the settings that were set in the sonar when it was last turned off. 6. When calibration is complete, the main menu and sonar image display should appear, and the sonar head will begin scanning. If any errors occur, then the system status page will appear. Refer to chapter 7, TROUBLESHOOTING AND MAINTENANCE, for explanation of problem. 4.4.2 Setting Power-up Configuration For the system to operate properly, both the video format and the trawl unit configuration must be selected correctly. In addition, the menu text can be set to one of eight different languages. Modification of these power-up configuration parameters is done in a special mode selected during power-up of the processor. The following three sections describe the process of configuring these parameters. These steps must be followed when the system is powered-up for the first time or when changing either the video format, the default menu text language or the trawl configuration. 4.4.2.1 Selecting the Video Format The FS 900 Sonar can generate any of three different video formats: VGA (IBM computer standard) requires a colour VGA or multisync monitor. Kongsberg Simrad Mesotech Ltd. Port Coquitlam, BC - Canada 900-12007001/Iss1.0 Page 4.16 FS900/925 MK II Operators Manual FS 900 MK II Installation, System Set-Up and Test This is the preferred video format when video taping is not required (video taping can be done if an external VGA to video converter is used). It will produce the sharpest images and is flicker-free. NTSC (North American television standard) must be used when video taping directly from processor is required or when a VGA multisync monitor is not available. PAL (European television standard) must be used for video taping with European video equipment. The video format must be set to match the monitor being used. Normally, this will only need to be done when first installing the system or when changing monitors. To set the video format, proceed as follows: Press the POWER OFF button to be sure the sonar is off. Press and hold down the MENU button first, then press the POWER ON button while continuing to hold the MENU button for at least 5 seconds. Release the MENU button. Press and release the CURSOR button to set VGA -orPress and release the RANGE/GAIN button to set NTSC -orPress and release the ZOOM button to set PAL. The menu for language selection should now appear on the monitor (software version 3.0 or newer). The video format setting is saved in non-volatile memory and will be restored automatically when the unit is turned on. Kongsberg Simrad Mesotech Ltd. Port Coquitlam, BC - Canada FS900/925 MK II Operators Manual FS 900 MK II Installation, System Set-Up and Test 900-12007001/Iss1.0 Page 4.17 Note! Should the internal battery require replacing, it is possible that the video setting stored in the non-volatile memory could be lost. If this happens, the screen will remain blank until a button is pressed to set the video format as described above. 4.4.2.2 Selecting the Default Language The FS 900 MK II processor will display the menu text in multiple languages. The languages that are available are Dutch, English, French, German, Icelandic, Norwegian, Russian and Spanish. The selection of the default language is done during modification of the power-up configuration. After the video format has been selected, the following menu is displayed. LANGUAGE Nederlands English Francais Deutsch Islenksa Norsk Russian Spanish Figure 4.2 Default Language Menu The language is selected by using the joystick to highlight the desired language and then moving the joystick to the left to activate it. Note! This language selection is the default that the menu text appears in everytime the system is powered-up, irrespective of the language selected in the CONFIGURATION menu during operation. Kongsberg Simrad Mesotech Ltd. Port Coquitlam, BC - Canada 900-12007001/Iss1.0 Page 4.18 FS900/925 MK II Operators Manual FS 900 MK II Installation, System Set-Up and Test 4.4.2.3 Selecting the Trawl Configuration The following menu will appear after selecting the language. This menu is used to select the trawl configuration that is attached to the system. It is important that the correct trawl configuration be selected otherwise improper operation of the system will result. CONFIGURATION FS900 Trawl Unit FS901 Trawl Unit FS902 Trawl Unit FS903 Trawl Unit Figure 4.3 Trawl Unit Configuration Menu The four trawl configurations are defined as follows; FS900 - FS900 sonar head and deployment package FS901 - FS3300 sonar head and deployment package - no sensor module FS902 - FS3300 sonar head and deployment package - sensor module with catch indication only FS903 - FS3300 sonar head and deployment package - sensor module with catch indication, temperature and depth To make a selection, use the joystick to highlight the correct trawl configuration and then move the joystick to the left to activate it. This will end the system configuring and the sonar should now begin calibrating. If there are any errors during the calibration a status report page will appear containing the results that the control unit obtained from tests performed. The first step is to recheck installation instructions. If nothing is obvious, then refer to chapter 7, TROUBLESHOOTING AND MAINTENANCE, for possible solutions. 4.4.3 Configuring Control Unit The first step after a successful power up is to configure the FS 900 MK II processor for the desired operating mode and set-up, if not already done. To do this, use the joystick to move through the menus, selecting and modifying items as required. Kongsberg Simrad Mesotech Ltd. Port Coquitlam, BC - Canada FS900/925 MK II Operators Manual FS 900 MK II Installation, System Set-Up and Test 900-12007001/Iss1.0 Page 4.19 Refer to chapter 3, SYSTEM OPERATION, for operation of the control unit. As a minimum, the following menu items should be examined and modified if necessary: Menu Item Time and date Text size Display color palette Range units Sound speed Transducer orientation Serial data format (only if sensor module connected and interface to echosounder is used) Sensor data displayed and units used (only if sensor module connected) Menu SUB MENU 3 CONFIGURATION MENU CONFIGURATION MENU SUB MENU 2 SUB MENU 2 SUB MENU 2 SUB MENU 3 CLOCK TEXT DISPLAY CONSTANTS CONSTANTS TRANSDUCER SERIAL I/O SUB MENU 2 SENSOR 4.4.4 Checking Sonar Head Orientation With the system operating and configured properly, the trawl unit can now be checked for correct orientation of the sonar head. The locked display mode is used to do this. Using the joystick, select menu item "Display" in the MAIN menu and change its value to "Locked". Next, the sonar heading knob on front panel is rotated until the heading angle shows 000 degrees. In this mode, the transducer should stop scanning and re-position itself at the selected angle. If the sonar was installed correctly, the transducer face will be pointing straight up for a heading angle of 000 degrees. If it is not, then the locating pin will need to be moved so that the proper orientation of sonar head is obtained when installed in the trawl unit housing. 4.4.5 Checking Catch Sensors and Sensor Module Finally, the catch sensors and sensor module can be checked for proper operation. Once the display of sensor data has been enabled, values for the current temperature and depth should appear to indicate proper operation of the sensor module. With the sensor module in air or at water depths of less than 5 meters (15 feet), the depth value displayed will be "<5 m". Kongsberg Simrad Mesotech Ltd. Port Coquitlam, BC - Canada 900-12007001/Iss1.0 Page 4.20 FS900/925 MK II Operators Manual FS 900 MK II Installation, System Set-Up and Test Catch receivers should be delivered fully charged; however, if they are not then refer to chapter 7, TROUBLESHOOTING AND MAINTENANCE, for charging instructions. To test catch indication, place a charged catch sensor in front of the catch receive transducer at a distance of approximately one meter. The sensor should be oriented with its front towards the receive transducer and the end with the metal lid containing the catch sensor number furthest away from the receive transducer. Next, activate the catch sensor by attaching a 20 cm (8") piece of conducting wire between the fastening end marked ÷ and the metal lid. While this connection is maintained, the catch sensor will transmit every minute. The result should be the appearance of a yellow bar in the catch sensor area of the sonar display. The catch sensor that the yellow bar appears under should correspond to the catch sensor number stamped on the metal lid. While maintaining the electrical connection, trigger the catch sensor by pulling out plunger with feeler strap and inserting a small screwdriver in hole through plunger. Within one minute, a red bar should appear below the current yellow bar. This procedure should be repeated for the other catch sensors. 4.5 TRAWL CABLE AND WINCH INSTALLATION 4.5.1 Control Unit to Cable Winch Connection The connection between the control unit in the wheel house and the cable winch/slip-rings should be made with a 18 GA, or heavier, shielded twisted pair cable. In order to avoid electrical noise in the system, the cable should not be run parallel to other electrical cables. If this is unavoidable, the gap between the cables should be at least 30 cm. Grounding of the shield must only be done at the control unit as shown in Figure 3.1. The shield must be cut as close as possible to the connection at the slip-rings. The connection to the control unit is made with the 3-pin MS connector supplied with the processor accessory kit. Care must be taken to insure the correct polarity of connection, as shown in Figure 4.1. Note! The wire denoted with "+" must be connected to the core conductor of the trawl cable and the "-" wire connected to the trawl cable shield. The shield of the cable from the control unit must be attached at the control unit, but NOT at the slip-rings. The actual connection of the cable to the slip-rings is shown in drawing # 519-893 (Refer to chapter 8, DRAWINGS). Extra cable should be left both inside and outside the sliding contact unit, allowing for inspection without straining of the cable. Kongsberg Simrad Mesotech Ltd. Port Coquitlam, BC - Canada FS900/925 MK II Operators Manual FS 900 MK II Installation, System Set-Up and Test 900-12007001/Iss1.0 Page 4.21 4.5.2 Cable Winch Cable winches are delivered in different types and with different capacities; low pressure hydraulic, high pressure hydraulic and electrically driven. Choice of winch is dependent on prevailing conditions; type and length of cable and available source of power. 4.5.2.1 Location The winch should be located in such a way that the trawl cable can run with as few changes of directions as possible. Preferably, the cable should run directly from the winch, through the snatch block, to the trawl. The location of the winch will of course depend on the vessel's construction and the arrangement of the trawl equipment. However, the above guidelines should be taken into consideration before the location is defined. Simrad will assist with free guidance if needed. To avoid damage to the cable it should be kept separated from the trawl arrangement on the deck. It is recommended that the winch is located so that the drum and cable are clearly visible and accessible in emergency situations. 4.5.2.2 Threading and Winding of the Cable This section applies if the cable winch has been delivered without cable or if the cable is to be replaced. The method described is valid for most winches made for this purpose. 1. Threading: before threading, turn the winch drum by hand to bring the coiling gear to its extreme position at the same end as the packing box on the drum. Thread the cable through the coiling gear - over the small guide pulley and under the big one, then threaded through the packing box on the drum and the internal guide tube and pulled out through the packing box on the shaft end in the slip ring unit. The guide tube should be completely filled with grease. Apply the grease through the grease nipple located on winch shaft between the drum and the chain guard until the grease oozes out through the packing boxes. Place the sealing rings in the packing boxes towards the grease and tighten the packing glands. 2. Winding: Check that the cable is threaded correctly through the coiling gear - over the small guide pulley and below the big one. If not, pull out the bearing bolt and Kongsberg Simrad Mesotech Ltd. Port Coquitlam, BC - Canada 900-12007001/Iss1.0 Page 4.22 FS900/925 MK II Operators Manual FS 900 MK II Installation, System Set-Up and Test remove the big guide pulley while placing the cable in correct position. Apply brakes during winding in order to get the cable tight on the drum. The end of the cable must not slip through the coiling gear because this will disrupt the synchronization of drum and coiling gear. When the cable is run through the block arrangement, adjust the small guide pulley vertically, so that the cable is pressed gently against the big guide pulley. Note! Inspection, control and maintenance of winch must be done in accordance to the manufacturer's instructions. 4.5.3 Trawl Cable The trawl cable is chosen for maximum mechanical strength, durability, minimum attenuation of signals, and compatibility with the cable winch. Two cables in common use are coaxial with breaking points of 1500 kg and 6000 kg. See section 1.3, "Technical Specifications", for typical specifications of these cables. For whatever cable type and length that is used, the following specifications cannot be exceeded for operation with the FS 900 MK II Trawl Monitoring System: Cable Loop Resistance: 100 Ω max Signal Attenuation Through Cable: < 40 dB at 55 kHz < 20 dB at 12 kHz Note! Failure to meet these cable requirements may result in unpredictable operation or complete failure of the FS 900/925 MK II Trawl Monitoring System. Installation of the trawl cable on the winch is described above in section 3.5.2, "Cable Winch". For additional information, refer to the winch manufacturer's instructions. 4.6 MOUNTING TRAWL UNIT & COMPLETING FINAL TEST After the assembly and initial testing of the trawl unit in the wheel house is complete, the unit is ready for connection to the trawl cable. The steps involved to do this are: preparing the trawl cable for attaching to headrope, splicing a pigtail to the cable, Kongsberg Simrad Mesotech Ltd. Port Coquitlam, BC - Canada FS900/925 MK II Operators Manual FS 900 MK II Installation, System Set-Up and Test 900-12007001/Iss1.0 Page 4.23 performing a final system test, assembling the trawl unit and mounting it to the trawl headrope. 4.6.1 Mounting Trawl Unit to Headrope The mounting of the deployment package is an important part of the installation and should therefore be carried out with care. The drawings # 820-073231, 824-074095 and 820-073232 provide suggested installations, the choice of which is dependent on the type of trawl cable. The Simrad supplied mounting kit contains the strain relief and other mounting hardware shown in the above listed drawings. The strain relief and rubber hose should be installed on the trawl cable before splicing the connector (pigtail) for the trawl unit. 4.6.2 Preparing Trawl Cable Connection of the trawl cable is made via a "pigtail" - a connector and locking sleeve attached to a short length of cable - that is supplied in the FS 900 MK II processor accessory kit. The pigtail must be spliced to the trawl cable before the trawl unit can be connected. Correct splicing of the trawl cable is very important to insure a good electrical connection and to prevent water from damaging the cable. Caution! Insure that the FS 900 MK II processor and power supply are turned off before any service or installation is done to the trawl unit. There are DC voltages on the trawl cable that are capable of delivering a lethal electric shock. Simrad supplied jointing tools and materials for splicing coaxial cable with a breaking point of 1500 kg are available. For information on splicing the trawl cable, refer to the instruction sheet in chapter 8, DRAWINGS. Note! When splicing the pigtail, the large pin of the connector, which is common (Ground), should be connected to the shield of the trawl cable. Kongsberg Simrad Mesotech Ltd. Port Coquitlam, BC - Canada 900-12007001/Iss1.0 Page 4.24 FS900/925 MK II Operators Manual FS 900 MK II Installation, System Set-Up and Test 4.6.3 Final System Test After preparing the trawl cable and before final trawl unit assembly, a system test should be conducted to insure correct operation of FS 900 MK II Trawl Monitoring System over the trawl cable. As before, the start up procedures in section 4.2 should be followed to power up the system. Once the FS 900 MK II processor power has been turned on, the power supply voltage and current meters should be examined. Expected values are 112 volts (output voltage selection switch should be set to HI) and 0.2-0.4 amps. Voltage and current values differing significantly from these values indicate a problem with the trawl cable or its connections. If there are any errors during the calibration a status report page will appear containing the results that the control unit obtained from tests performed. Again, any errors will be due to the trawl cable or its connections. Check the connections again and insure that the signal polarity at the trawl unit is correct. A DC volt meter can be used to check that the positive voltage is on the small pin of the pigtail when the FS 900 processor is powered up. If all is okay, then the sonar image display will appear and the sonar head will begin scanning. 4.6.4 Completing Trawl Unit Assembly The final step in the installation is to complete the trawl unit assembly and mount it to the headrope as shown on drawings in Chapter 8. First, the plastic cable strain relief supplied with the trawl unit must be bolted to the trawl cable. The location should be at or very near the pigtail splice, but NOT on the pigtail itself. The rubber hose on the trawl cable, if used, must be slid down so that approximately 3-4 cm (1-2") of the hose is clamped inside the strain relief. Next, the trawl cable is connected to the sonar head. Liberal amounts of Dow Corning #55 grease are applied to the connector surfaces before mating so that a water tight seal is obtained. The locking sleeve is then hand-tightened. Note! Dow Corning #55 grease must be applied to all mating surfaces of underwater connectors to insure proper sealing. Sufficient grease should be applied so that excess squeezes out with any air when the connectors are mated. RTV or any other sealant must NOT be used, and when tightening the locking sleeves do NOT use a wrench or pliers! See chapter 6, "Troubleshooting and Maintenance", for proper connector maintenance. Kongsberg Simrad Mesotech Ltd. Port Coquitlam, BC - Canada FS900/925 MK II Operators Manual FS 900 MK II Installation, System Set-Up and Test 900-12007001/Iss1.0 Page 4.25 The plastic strain relief attached to the trawl cable is now placed in the trawl unit housing containing the electronics and the excess cable is routed in the housing as shown in either Figure 3.1 or 3.2. Care must be taken to insure that all cables within the trawl unit housing are properly placed to avoid from being pinched and possibly damaged. The top half of the trawl unit housing is then placed on top and the unit is secured together with the bolts supplied. Finally, the dome is secured over the sonar head transducer with four additional bolts. The fully assembled trawl unit is now ready for mounting to the trawl headrope in the chosen manner. 4.7 MOUNTING CATCH SENSORS Proper mounting of the catch sensors on the cod-end is shown in drawing # 830056482 (see chapter 8, DRAWINGS). The fill of the cod-end and the sensitivity of the sensors is dependent upon the number of mesh knots between the catch sensor and the rubber straps. Make sure that the sensor is mounted in the correct direction with the transducer pointing towards the trawl unit (the metal lid pointing aft). Caution! Make sure that the chains do not strain the net when the cod-end is being filled with fish. This is controlled by stretching the net to capacity in the direction which is relevant AFTER THE SENSORS HAVE BEEN MOUNTED TO THE TRAWL. The purpose of the chains is to prevent the sensor from turning, and as an insurance against loss should the rubber straps break. Mounting the chains too tight can result in the fastening ears being ripped off. If a system with four catch sensors has been ordered, sensors numbered 1 and 2 can be used on the trawl and the other two sensors kept for reserve. For deep trawling, and when fish is abundant, it can be advantageous to mount three or four catch indicators in such a way that cod-end filling can be monitored continuously to insure that the trawl is hauled back in time. Kongsberg Simrad Mesotech Ltd. Port Coquitlam, BC - Canada FS900/925 MK II Operators Manual FS 925 MK II System Operation 900-12007001/Iss1.0 Page 5.1 PART 5 FS 925 MK II SYSTEM OPERATION 5. FS 925 MK II SYSTEM OPERATION .................................................................. 5.5 5.1 INTRODUCTION ............................................................................................ 5.5 5.2 FRONT PANEL CONTROLS .......................................................................... 5.5 5.2.1 ON Button ................................................................................................ 5.6 5.2.2 OFF Button .............................................................................................. 5.6 5.2.3 MENU Button ........................................................................................... 5.6 5.2.4 CURSOR Button ...................................................................................... 5.7 5.2.5 RANGE/GAIN Button ............................................................................... 5.7 5.2.6 TILT Button .............................................................................................. 5.7 5.2.7 SECTOR HEADING Control .................................................................... 5.7 5.2.8 SECTOR WIDTH Control......................................................................... 5.7 5.2.9 Joystick .................................................................................................... 5.7 5.3 FS 925 MK II SYSTEM SETTINGS ................................................................. 5.7 5.4 MAIN MENU ................................................................................................... 5.8 5.5 SUB MENU 1 ................................................................................................ 5.10 5.6 TRANSCEIVER MENU ................................................................................. 5.13 5.7 USER1 TVG MENU ...................................................................................... 5.14 5.8 CONFIGURATION MENU ............................................................................ 5.17 5.9 DISPLAY MENU ........................................................................................... 5.18 5.10 GRID MENU ............................................................................................... 5.18 5.11 USER PALETTE MENU.............................................................................. 5.19 Kongsberg Simrad Mesotech Ltd. Port Coquitlam, BC - Canada 900-12007001/Iss1.0 Page 5.2 FS900/925 MK II Operators Manual FS 925 MK II System Operation 5.12 PRINTER MENU......................................................................................... 5.21 5.12.1 Printing the Display .............................................................................. 5.23 5.12.2 The User Palette .................................................................................. 5.23 5.13 SUB MENU 2 .............................................................................................. 5.25 5.14 MANUAL INPUT MENU .............................................................................. 5.26 5.15 SENSOR MENU ......................................................................................... 5.26 5.16 TRANSDUCER MENU ............................................................................... 5.28 5.17 CONSTANTS MENU .................................................................................. 5.29 5.18 SELF -TEST MENU .................................................................................... 5.30 5.19 SUB MENU 3 .............................................................................................. 5.31 5.20 SERIAL I/O MENU ...................................................................................... 5.32 5.21 SERIAL PORT MENU ................................................................................ 5.32 5.22 CLOCK SET MENU .................................................................................... 5.33 5.23 STANDARD SETTINGS ............................................................................. 5.36 5.24 FS 925 MENU STRUCTURE ...................................................................... 5.37 Kongsberg Simrad Mesotech Ltd. Port Coquitlam, BC - Canada FS900/925 MK II Operators Manual FS 925 MK II System Operation 900-12007001/Iss1.0 Page 5.3 LIST OF FIGURES Figure 4.1 FS 925 MK II Front Panel Control ......................................................... 5.6 Figure 4.2 SYSTEM SETTINGS Menu ................................................................... 5.8 Figure 4.3 MAIN Menu ............................................................................................ 5.9 Figure 4.4 SUB Menu 2......................................................................................... 5.11 Figure 4.5 TILT Menu............................................................................................ 5.11 Figure 4.6 TRANSCEIVER Menu .......................................................................... 5.13 Figure 4.7 GAIN Menu ........................................................................................... 5.13 Figure 4.8 USER1 TVG Menu................................................................................ 5.14 Figure 4.9 CONFIGURATION Menu ..................................................................... 5.17 Figure 4.10 DISPLAY Menu ................................................................................... 5.18 Figure 4.11 GRID Menu ......................................................................................... 5.18 Figure 4.12 USER PALETTE Menu ....................................................................... 5.19 Figure 4.13 PRINTER Menu .................................................................................. 5.22 Figure 4.14 The PRINTER Menu - Print Display................................................... 5.23 Figure 4.15 PRINTER Menu - User Palette .......................................................... 5.24 Figure 4.16 SUB Menu 2....................................................................................... 5.26 Figure 4.17 MANUAL INPUT Menu ....................................................................... 5.26 Figure 4.18 The SENSOR Menu........................................................................... 5.27 Figure 4.19 TRANSDUCER Menu ........................................................................ 5.28 Figure 4.20 CONSTANTS Menu ............................................................................ 5.29 Figure 4.21 SELF TEST Menu ............................................................................... 5.30 Figure 4.22 SUB Menu 3....................................................................................... 5.31 Figure 4.23 SERIAL I/O Menu .............................................................................. 5.32 Figure 4.24 SERIAL PORT Menu .......................................................................... 5.32 Figure 4.25 CLOCK SET....................................................................................... 5.34 Kongsberg Simrad Mesotech Ltd. Port Coquitlam, BC - Canada 900-12007001/Iss1.0 Page 5.4 FS900/925 MK II Operators Manual FS 925 MK II System Operation Kongsberg Simrad Mesotech Ltd. Port Coquitlam, BC - Canada FS900/925 MK II Operators Manual FS 925 MK II System Operation 900-12007001/Iss1.0 Page 5.5 5. FS 925 MK II SYSTEM OPERATION 5.1 INTRODUCTION The FS 900/925 MK II Sonar uses a combination of dedicated front panel controls for the most frequently needed adjustments and a software menu system for less frequently needed controls. This chapter describes the menu system and explains the adjustments to the menu settings that may be made to control the sonar operation. Refer to the FRONT PANEL CONTROLS section, for instructions on the front panel controls. The menu system allows adjustments to several system parameters without requiring a dedicated front panel control for each item. Items that lead to sub-menus are shown in upper case letters (e.g., “MAIN MENU”). All other items are system parameters that may be modified. To select a sub-menu or menu item, the joystick mode must be set to “MENU ACTIVE”. Moving the joystick up or down allows the selection of the desired item. Selected items are highlighted in reverse video colors. To activate the currently selected menu item, the joystick is pushed to the right. If the selected item is a sub-menu, then the items within that menu are displayed. If the selected item is a system parameter, then activating it will allow changing its value. When changing the value of a system parameter, if the parameter only has two values (e.g., On/Off) then activating the parameter will toggle its setting automatically. For parameters with more than two values, a selection menu will appear when the parameter is activated. To modify its setting, the joystick is moved up or down until the desired value is highlighted. The joystick is then pushed left to exit from the selection menu and activate the new setting. 5.2 FRONT PANEL CONTROLS As seen in Figure 5.1, all processor controls are located on the front panel, arranged in functional groupings. Kongsberg Simrad Mesotech Ltd. Port Coquitlam, BC - Canada 900-12007001/Iss1.0 Page 5.6 FS900/925 MK II Operators Manual FS 925 MK II System Operation Figure 5.1 FS 925 MK II Front Panel Control The POWER keypad buttons are used to turn the system power on and off. The CONTROL MODE keypad buttons are used to set the function of the joystick control. Their individual functions are as follows: 5.2.1 ON Button This button is used to turn the power to the sonar system ON. All six of the keypad buttons glow dimly to show power is on. Note that a built-in time delay requires that this button be held for approximately one second before the system power is applied. 5.2.2 OFF Button This button is used to turn the system OFF. Note that a built-in time delay requires that this button be held for approximately two seconds before the system power is removed. 5.2.3 MENU Button This button is used to enable the Joystick for control of the on-screen menu. Kongsberg Simrad Mesotech Ltd. Port Coquitlam, BC - Canada FS900/925 MK II Operators Manual FS 925 MK II System Operation 900-12007001/Iss1.0 Page 5.7 5.2.4 CURSOR Button This button is used to enable the Joystick for control of one of the display cursors. 5.2.5 RANGE/GAIN Button This button is used to enable the Joystick for control of RANGE or GAIN. Press once for Range control, again for Gain. Note: There is a built-in time delay of 15 seconds. If not activated, the range/gain button will revert to the main menu 5.2.6 TILT Button This button is used to adjust the tilt angle of the transducer. 5.2.7 SECTOR HEADING Control This is a rotary control used to set the center of the sector to be scanned. 5.2.8 SECTOR WIDTH Control This is a rotary control used to set the width of the sector to be scanned. Sector width can be set up to 360 degrees in the Polar mode, but is automatically limited to 180 degrees in the Linear and Sector modes. 5.2.9 Joystick This is the main operating control for the sonar. It is used to operate the menu system, move the cursors around the display, and to set the Range, Gain and Tilt. 5.3 FS 925 MK II SYSTEM SETTINGS This is the default page after the FS 925 MK II is switched on. None of the entries Kongsberg Simrad Mesotech Ltd. Port Coquitlam, BC - Canada 900-12007001/Iss1.0 Page 5.8 FS900/925 MK II Operators Manual FS 925 MK II System Operation except the “MAIN MENU” can be selected. This page is merely a summary of some of the more important settings of the system. SYSTEM SETTINGS MAIN MENU Scan Speed 8 Auto Tilt Off Tilt StepSize 4 Stabilization On Xdcr Type Cone Tx Power High Gain Default Tx Pulse Usec 250 Rx bandwidth Narrow TVG Type 20 log Rx Gain Type RCG+AGC Cable Gain 6,26 Figure 5.2 SYSTEM SETTINGS Menu In the above menu, “Rx” is short for “Receiver” “Tx” is short for “Transmitter” “Xdcr” is short for “Transducer” “Usec” is short for “Micro Seconds Each entry can be found in the sub-menus listed below: Scan Speed............... in ................SUB MENU 1 Auto Tilt ..................... in ................SUB MENU 1 - TILT MENU Tilt StepSize .............. in ................TILT MENU Stabilization ............... in ................CONFIGURATON MENU Xdcr Type .................. in ................TRANSDUCER MENU MENU Tx Power ................... in ................SUB MENU 1 - TRANSCEIVER MENU Gain ........................... in ................TRANSCEIVER MENU Tx Pulse Usec ........... in ................TRANSCIEVER MENU Rx Bandwidth ............ in ................TRANSCIEVER MENU TVG Type .................. in ................TRANSCEIVER/GAIN MENU Rx Gain Type ............ in ................TRANSCEIVER MENU Cable Gain ................ in ................THE GAIN NUMBER FROM CABLE CALIBRATION AT START UP 5.4 MAIN MENU Kongsberg Simrad Mesotech Ltd. Port Coquitlam, BC - Canada FS900/925 MK II Operators Manual FS 925 MK II System Operation MAIN MENU Sub Menu 1 Display Scan Reverse Magnifier Hold Clear Display Timer 900-12007001/Iss1.0 Page 5.9 Off / On Off / On Figure 5.3 MAIN Menu The following provides a description of each menu item and where applicable, shows the selection menu. SUB MENU 1 The Sub-menu 1 is used to enable the next Sub menu structure Display Display is used to select the display mode of the sonar. In the Net Opening mode the Azimuth is kept at +90° and/or -90° while the Tilt is stepped. This provides the user with a maximum of 180° view of the Trawl net. The Vertical mode is similar to Net Sector with the difference that the Azimuth angle is adjusted by the operator to provide a vertical view at the desired heading. The Net Polar is similar to the FS900 MK II Trawl opening sonar image. The step size is adjusted by the menu entry “Tilt Step Size” in “TILT MENU”. Also the scanning limits in this mode can be adjusted the menu entries “Maximum Tilt” and “Minimum Tilt” in the “TILT MENU”. In all other display modes, the azimuth is stepped at a constant Tilt angle. Polar Sector Net Sector Net Polar Vertical Locked Sounder The Sounder mode is similar to the Locked mode with the difference that the sonar picture will scroll from right to left. In this mode you can adjust the scroll speed by the menu entry “SCAN MENU”. SCAN REVERSE The Scan Reverse changes the direction of rotation of the sonar head. Kongsberg Simrad Mesotech Ltd. Port Coquitlam, BC - Canada 900-12007001/Iss1.0 Page 5.10 FS900/925 MK II Operators Manual FS 925 MK II System Operation Magnifier X2 X3 X4 The Magnifier enlarges a small area of the existing sonar image into the Magnifier area of the display by a factor of 2, 3, or 4. When enabled, a box appears on the sonar display showing the region being magnified. To move the box around the sonar display, the joystick must be activated. HOLD When the Hold mode is used and set to ON, it freezes the display and the sonar head remains at the same angle until the Hold mode is set to Off. CLEAR DISPLAY When the Clear Display mode is activated the sonar image is erased from the screen. TIMER When the Timer mode is activated, the internal clock is displayed on the screen indicating the start of the trawl tow and the total time of the tow. The display Timer will enable a timer in the lower right hand corner of the display. This feature is useful for measuring trawl time indicate the total time of the tow. 5.5 SUB MENU 1 SUB MENU 2 Scan Menu Tilt Menu Transceiver Menu Configuration Menu Printer Menu Figure 5.4 SUB Menu 1 This menu is used to access the sub-menus. A detailed description of each of the menus is provided in the following sections. The Sub Menu 2 is used to enable the next Sub menu SUB MENU 2 Structure Kongsberg Simrad Mesotech Ltd. Port Coquitlam, BC - Canada FS900/925 MK II Operators Manual FS 925 MK II System Operation 900-12007001/Iss1.0 Page 5.11 SCAN MENU Scan Reverse Scan Speed Scroll Speed Figure 5.4 SUB Menu 2 SCAN MENU The Scan Menu is used to access the following sub-menus. SCAN REVERSE Scan Reverse changes the direction of rotation of the sonar head. This may be useful when tracking a moving target SCAN SPEED X1 X2 X4 X8 X 16 X 32 The Scan Speed is used to set the scanning speed of the sonar head in all display modes except Vertical Mode. The setting of this entry determines the number of 0.225° steps for each acoustic ping. SCROLL SPEED The Scroll Speed is used to select the scanning speed of the sonar in the Sounder mode only. You my select from one of the following speed. Slow, Normal, or Fast. TILT MENU Auto Tilt Tilt Step Size Maximum Tilt Minimum Tilt Figure 5.5 TILT Menu On / Off The following provides a description of each menu item and where applicable, shows the selection menu. Kongsberg Simrad Mesotech Ltd. Port Coquitlam, BC - Canada 900-12007001/Iss1.0 Page 5.12 FS900/925 MK II Operators Manual FS 925 MK II System Operation AUTO TILT The Auto Tilt mode, when set to ON, will step the tilt axis by the setting of the “Tilt Step size” at the end of every azimuth sector sweep. The limits of the tilt sweep are given by the menu entries “Maximum Tilt” and the “Minimum Tilt”. The above parameters can be found in the “Max. & Min. Tilt” menu below. Tilt Step Size 1 2 4 8 16 32 This menu entry is used in conjunction with the “Vertical” display mode and determines the number of 0.225° steps for every acoustic ping. The setting is also used if the “Auto Tilt” is ON and determines the number of 0.225° steps taken after each sweep of the azimuth sector. Max. Tilt 14.4° ¿ 3.6 À This menu entry is used in conjunction with the “Vertical” display mode and determines the upper limit to which the tilt axis will be stepped before changing direction. This setting, along with the “Minimum Tilt”, determines the sector limits of the “Vertical” display mode. They also determine the sector limits of the tilt axis if the “Auto Tilt” is turned ON. -82.8 Minimum Tilt 7.2° ¿ -43.2 À This menu entry is used in conjunction with the “Vertical” display mode and determines the lower limit to which the tilt axis will be stepped before changing direction. This setting along with the “Maximum Tilt” determines the sector limits of the Vertical Display mode. They also determine the sector limits of the tilt axis if the “Auto Tilt” is turned ON. -90.0 Kongsberg Simrad Mesotech Ltd. Port Coquitlam, BC - Canada FS900/925 MK II Operators Manual FS 925 MK II System Operation 900-12007001/Iss1.0 Page 5.13 5.6 TRANSCEIVER MENU TRANSCEIVER MENU Gain Menu Transmit Pulse Transmit Power Receive Bandwidth Rx Gain Type Rx Gain Response Figure 5.6 TRANSCEIVER Menu The following provides a description of each menu item and where applicable, shows the selection menu. GAIN MENU GAIN MENU Gain TVG Type Figure 5.7 GAIN Menu The following provides a description of each menu item and where applicable, shows the selection menu. Gain Default High ( 20dB) Low (-20dB) This menu entry provides the operator with a simple method of adjusting the receiver gain. Note that this setting acts as an offset on the TVG and is directly applied at the receive time in the sonar head. This is not merely a display gain. The advantage of adjusting the gain with this menu setting rather than the panel gain, is that here, the telemetry noise is not amplified. The actual gain offset is +/-20 dB (10/ times). The default setting leaves the TVG as is with no additional offset. Kongsberg Simrad Mesotech Ltd. Port Coquitlam, BC - Canada 900-12007001/Iss1.0 Page 5.14 FS900/925 MK II Operators Manual FS 925 MK II System Operation This menu item selects particular TVG parameters and down loads the gain values to the head 20 Log Parameters are: A=20 B=30 C=0 Limit=94 30 Log Parameters are: A=20 B=30 C=0 Limit=94 40 Log Parameters are: A=40 B=30 C=0 Limit=94 Test Parameters are: A=0 B=500 C=1 Limit=100 If “Test” is selected, then a linear TVG is generated that increases to 100 meters and remains at 100 dB thereafter. This is used for measuring the system gain linearity. User1 Parameters are given by the “USER1 TVG MENU TVG Type 20 log 30 log 40 log Test User 1 Note! The TimeVaryingGain (TVG) is given by the following formula: Gain=[A x Log(range)] + [2 x B x (range - 1)] + C where B is in dB Km range is in Km The maximum value of Gain is given by Limit This menu enables the operator to construct any TVG curve by adjusting the parameters A, B, C, and L. Note that the gain curve is only applied if the menu item “TVG Type” is set to “User1” USER1 TVG MENU Spreading (A) Absorption (B) Start Gain (C) Max. Gain (L) 5.7 USER1 TVG MENU USER1 TVG MENU Spreading Gain Absorption Start Gain Max. Gain (A) (B) (C) (L) Figure 5.8 USER1 TVG Menu The following provides a description of each menu item and where applicable, shows the selection menu. Kongsberg Simrad Mesotech Ltd. Port Coquitlam, BC - Canada FS900/925 MK II Operators Manual FS 925 MK II System Operation 900-12007001/Iss1.0 Page 5.15 (A) The value of this menu entry determines the short range rise time of the gain curve. The higher the value of “A” factor, the faster the increase in gain during the first few hundred meters. Absorption (B) 80 dB/Km The value of this menu entry determines the long range rise time of the gain curve. The higher the value of “B” factor, the faster the increase in gain after the first few hundred meters. Spreading 40 ¿ 30 À 20 ¿ 30 À 0 Start Gain (C) 60 dB/Km ¿ 30 The value of this menu entry determines the starting point of the gain curve. This is merely an offset that is added to the curve. Note that the “Gain” entry in the “GAIN MENU” described above, is simply added to this to calculate the overall start gain. À -60 Max. Gain (L) 100 dB/Km ¿ The value of this menu entry determines the cut off point for the gain. All calculated gain values above this setting will be clipped. 90 À 0 Kongsberg Simrad Mesotech Ltd. Port Coquitlam, BC - Canada 900-12007001/Iss1.0 Page 5.16 FS900/925 MK II Operators Manual FS 925 MK II System Operation Transmit Pulse 5% 10% 25% 50% 100% 200% This menu entry enables the operator to change the transmit pulse length to some percentage of the default value. The default value is calculated by the system based on the operating range and display resolution. The actual pulse length is shown in units of Micro-Seconds in the “SYSTEM SETTINGS” menu. It is recommended to use the “100%” setting unless otherwise required. Transmit Power High Low Off This menu item provides a higher power during the long range operation of the sonar. Note that the high power output during the short range operation will cause the system to slow down to maintain an acceptable power duty cycle. The High power provides 10 dB (3 times) more power than the Low. If set to “OFF”, the transmitter is turned off and the sonar is put into “Listen” mode for noise analysis. Receive Bandwidth Max Wide Medium Narrow Automatic This menu item enables the operator to reduce the receive bandwidth of the surface processor which in turn reduces the signal noise. Note that the narrower the bandwidth, the higher the signal removal and lower the intensities of the image. It is recommended to set this entry to “Automatic” and let the system decide the appropriate bandwidth based on the current operating range and the setting of the "Transmit Pulse” length. Kongsberg Simrad Mesotech Ltd. Port Coquitlam, BC - Canada FS900/925 MK II Operators Manual FS 925 MK II System Operation 900-12007001/Iss1.0 Page 5.17 Rx Gain Type None AGC RCG RCG + AGC This menu item enables “Automatic Gain Control” (AGC) and/or “Reverberation Controlled Gain” (RCG). The AGC algorithm increases the gain during the low acoustic return and reduces the gain during strong returns. The speed with which the gain is adjusted is determined by the setting of “Rx Gain Response” as explained in the next paragraph. The AGC should be enabled for enhancing small targets in good, noiseless environments. The RCG on the other hand, is useful for noisy environment where there is a lot of surface/bottom returns. This algorithm reduces the strength of the returned signals by the overall average value and re-scales the results over the complete color range. The influence of the previous average values (from previous pings) is determined by the setting of “Rx Gain Response”. Rx Gain Response Slow Medium Fast The setting of this menu item determines the response of the filter algorithm as selected by the “Rx Gain Type”. For the AGC, this setting determines the SPEED by which the gain is adjusted. For RCG, this setting determines the influence of the previous ping average over the current ping. If set to Slow, the overall average is given by the sum of 20% current and 80% of previous average. In Medium this ratio is 50/50 and in Fast the ratio is changed to 80 to 20%. 5.8 CONFIGURATION MENU CONFIGURATION MENU Display Menu Grid Menu Language Menu Synchronization On / Off Figure 5.9 CONFIGURATION Menu The following provides a description of each menu item and where applicable, shows Kongsberg Simrad Mesotech Ltd. Port Coquitlam, BC - Canada 900-12007001/Iss1.0 Page 5.18 FS900/925 MK II Operators Manual FS 925 MK II System Operation the selection menu. 5.9 DISPLAY MENU DISPLAY MENU Grid menu User Palette Menu Threshold Scan marker Hor. Center Ver. Center Figure 5.10 DISPLAY Menu The following provides a description of each menu item and where applicable, shows the selection menu. 5.10 GRID MENU GRID MENU Grid Grid Type On / Off Figure 5.11 GRID Menu The following provides a description of each menu item and where applicable, shows the selection menu. GRID MENU This is selected to access the menu entries associated with the grid type and display. GRID ON/OFF Grid when set to ON, overlays the calibrated grid on the sonar image. This is a set of range rings that are calculated based on the speed of sound and the current range setting. Grid Type Polar Rect. This is used to select either a polar or a rectangular grid overlay for all display modes except “Locked”. Kongsberg Simrad Mesotech Ltd. Port Coquitlam, BC - Canada FS900/925 MK II Operators Manual FS 925 MK II System Operation USER PALETTE MENU Color Red Green Blue 900-12007001/Iss1.0 Page 5.19 This menu entry is used to set the colors that are used if the “Palette” is set to “USER”. 5.11 USER PALETTE MENU USER PALETTE MENU Color Red Green Blue Figure 5.12 USER PALETTE Menu The following provides a description of each menu item and where applicable, shows the selection menu. This is the color number to be adjusted. The palette is actually an interpolated version of these. 0 is the weakest sonar return and 7 is the strongest, or to grid. Color 0 represents the weakest sonar return and color 7 the strongest. NOTE: The magnifier area will be filled with the selected color to aid in adjustment. Color 0 1 2 3 4 5 6 7 GRID Red 15 ¿ This setting is used to adjust the intensity of the RED component of the selected color. 0 being darkest and 15 the lightest. 4 À 0 Kongsberg Simrad Mesotech Ltd. Port Coquitlam, BC - Canada 900-12007001/Iss1.0 Page 5.20 Green 15 ¿ FS900/925 MK II Operators Manual FS 925 MK II System Operation This setting is used to adjust the intensity of the GREEN component of the selected color. 0 being darkest and 15 the lightest. 4 À 0 Blue 15 ¿ This setting is used to adjust the intensity of the BLUE component of the selected color. 0 being darkest and 15 the lightest. 4 À 0 This menu entry is used to set the colors of the display. SIMRAD 1 is similar to the palette used in the Mesotech Model 971 sonar. SIMRAD 2 is similar to that used by the echo sounders produced by Simrad. The USER palette allows selection of the custom palette created using the settings within the “USER PALETTE MENU” as described below. Palette SIMRAD 1 SIMRAD 2 USER Threshold 15 ¿ 2 Threshold is used to set the minimum level in the sonar return that will be displayed on the screen. This is achieved by allowing removal of 1 to 15 of the weaker signal colors from the image to emphasize the strongest targets. À 1 SCAN MARKER Scan Marker enables a solid line marker on the screen at the current position of the transducer as it scans. Kongsberg Simrad Mesotech Ltd. Port Coquitlam, BC - Canada FS900/925 MK II Operators Manual FS 925 MK II System Operation Hor. Center 30 900-12007001/Iss1.0 Page 5.21 This is used to adjust the horizontal position of the sonar display so it is centered on the video monitor. ¿ 4 À -30 Ver. Center 20 This is used to adjust the vertical position of the sonar display so it is centered on the video monitor. ¿ 4 À -20 Language Nederlands English Francais Deutsch Islenksa Norsk Russian Espanol This is used to select a menu text language other than the default language that is set in the power up configuration Synchronization None Input Output I/O This menu entry provides the operator to synchronize two or more sonar systems. If set to “input”, then this sonar head tries to synchronize with an other system (e.g., It only transmits if the other system is also transmitting). If set to “Output”, then this system is free running and only provides a signal for other systems to synchronize with it. If set to “I/O”, then all systems will ping at the same time. 5.12 PRINTER MENU Kongsberg Simrad Mesotech Ltd. Port Coquitlam, BC - Canada 900-12007001/Iss1.0 Page 5.22 FS900/925 MK II Operators Manual FS 925 MK II System Operation PRINTER MENU Printer Display Printer Palette Color Row Column Figure 5.13 PRINTER Menu The following provides a description of each menu item and where applicable, shows the selection menu. PRINT DISPLAY Print Display checks that a printer is attached and ready. It then prepares the processor for printing. Refer to Section “Printing the Display” to generate a printout. Printer HP_PJ HP_DJ BMP_I BMP_S This entry selects the type of printer attached. HP_PJ is the Hewlett Packard Paint Jet. HP_DJ is the Hewlett Packard Desk Jet 690 and 1200 series (no palette selection for this printer). Both BMP_I and BMP_S are used to transfer Bitmap images to a PC via the printer port. A corresponding DOS application software (produced by Mesotech) must be running on the PC to receive the Bitmap. Also a special printer cable (Interlink/Laplink Parallel DB25 F3D508-10) should be used for data transfer between the two processors. The resulting Bitmap can then be viewed using Paint or any Bitmap compatible applications. Palette SIMRAD 1 SIMRAD 2 USER Provides selection of the color palette used for printing with the HP Paint Jet (HP_PJ) printer. SIMRAD 1 and 2 are similar to display palettes with the white and black colors reversed. The reason being that the display background is black whereas the paper is white. Excessive amount of ink would be required to change the background of the print out to black. Note! The palette entry is only available for the HP_PJ and not for any other printer type. The menus are automatically updated to take out the palette entry when all other printer types are selected. Kongsberg Simrad Mesotech Ltd. Port Coquitlam, BC - Canada FS900/925 MK II Operators Manual FS 925 MK II System Operation 900-12007001/Iss1.0 Page 5.23 5.12.1 Printing the Display When the Print Display item is activated the following message will appear in the PRINTER MENU: PRINTER MENU Print Display PRINTER READY ******************* Press TILT to Print -orPress MENU to Abort ******************* Figure 5.14 The PRINTER Menu - Print Display Note! In addition, the Joystick Mode message in the upper right corner of the display will indicate --PRINTER-- to remind you that the printer is "armed" and ready to print. If no printer is connected, or if the printer is not turned on, the status message will be NO PRINTER! Similarly, if the printer is out of paper, the status message NO PAPER! will appear. In either case, the printer is not ready and the PRINTER MENU will not change. The sonar will continue to operate normally until the TILT button is pressed. This will freeze the display and print it on the printer. Printing time is about two minutes. The MENU button can be pressed anytime to cancel the printing operation either before or after printing is started. This scheme allows any of the displays to be printed, even the System Test display. Note that if you want to print a tilted display, it must be set up before arming the printer since the TILT button will start the printer. 5.12.2 The User Palette It is possible to select your own colors with the HP PaintJet printer. This is done by using the color spectrum printout from the printer. This spectrum is a table printout consisting of 33 rows and 10 columns that contains all 330 possible colors. Each color Kongsberg Simrad Mesotech Ltd. Port Coquitlam, BC - Canada 900-12007001/Iss1.0 Page 5.24 FS900/925 MK II Operators Manual FS 925 MK II System Operation is referred to by a row and column number. For example: Row 15 Column 4 is bright yellow, Row 33 Column 10 is white, Row 33 Column 7 is black. Any of these colors can therefore be assigned to the nine display colors (8 sonar return colors and a grid color). Note! To print a color spectrum on a HP PaintJet printer: n Turn the printer Off. n Press the LF (Line Feed) button down and hold it down while pressing the ON/OFF button to turn the printer On. n Release the ON/OFF button first, then release the LF button. n The printer will print two pages. Discard the first page. The second page is the color spectrum you will need. When the Printer Palette is set to USER, three additional menu items appear as shown below: PRINTER MENU Color Row Column Figure 5.15 PRINTER Menu - User Palette The following provides a description of each additional menu item and, where applicable, shows the selection menu. Kongsberg Simrad Mesotech Ltd. Port Coquitlam, BC - Canada FS900/925 MK II Operators Manual FS 925 MK II System Operation 900-12007001/Iss1.0 Page 5.25 Color is the color number to be adjusted. It can be set from 0 to 7, or to Grid. Color 0 represents the weakest sonar return and color 7 the strongest. The Magnifier Area will be filled with the selected color to aid in adjustment. Color 0 1 2 3 4 5 6 7 Grid Row Row value selects the row of the color spectrum printout. 33 ¿ 3 À 1 Column 10 Column value selects the column of the color spectrum printout. ¿ 4 À 1 To define your own printer palette, set the Row and Column values for each of the 9 Colors. All the settings will be saved in the non-volatile memory when the Joystick is pushed to the left to exit the PRINTER MENU. 5.13 SUB MENU 2 Kongsberg Simrad Mesotech Ltd. Port Coquitlam, BC - Canada 900-12007001/Iss1.0 Page 5.26 FS900/925 MK II Operators Manual FS 925 MK II System Operation SUB MENU 3 Manual Input Menu Sensor Menu (Stand Alone System Only) Transducer Menu Constants Menu Self Test Figure 5.16 SUB Menu 2 The following provides a description of each menu item and where applicable, shows the selection menu 5.14 MANUAL INPUT MENU MANUAL INPUT MENU Vessel Speed Figure 5.17 MANUAL INPUT Menu The following provides a description of each menu item and where applicable, shows the selection menu. The setting of this menu entry is used in conjunction with the cursors to calculate the travel time and transverse distance to the target. Both the time and distance are displayed in the data boxes on the MS 925 screen and are abbreviated to “TrvlT” and “Tdist” respectively. Note that the calculated values take the Tilt angle into account. Therefore, assuming that the “Xdcr Stabilize” is ON, then the Travel time and Transverse distance to targets such as schools of fish would be reasonable estimates. Vessel Speed 15 Knot ¿ 4 À 0 Note: Stand Alone system Only This menu is not available if there is no sensor module connected to the head 5.15 SENSOR MENU Kongsberg Simrad Mesotech Ltd. Port Coquitlam, BC - Canada FS900/925 MK II Operators Manual FS 925 MK II System Operation 900-12007001/Iss1.0 Page 5.27 SENSOR MENU Temp. Sens. Depth Sens. Catch 1 Catch 2 Catch 3 Catch 4 Temp. Scale Depth Scale Graft Time Warnings On / Off On / Off On / Off On / Off On / Off On / Off On Figure 5.18 The SENSOR Menu The following provides a description of each menu item and where applicable, shows the selection menu. TEMPERATURE SENSOR The Temperature Sensor enables displaying of temperature at trawl unit. When activated, the temperature information is retrieved from the sensor module and displayed on the screen. DEPTH SENSOR The Depth Sensor enables displaying of depth of trawl unit. When activated, the depth information is retrieved from the sensor module and displayed on the screen. CATCH ? ON The Catch ? On enables displaying of catch sensor data. When activated, the catch information for the particular sensor (1, 2, 3 or 4) will be retrieved from the sensor module and displayed on the screen in graphic format. Temp Scale 5° 10° 15° 20° 25° 30° The Temp Scale is used to select the units of temperature shown on the display and in the Temperature vs. Time graph in F° or in C°. The values are shown in the current selected scale for Celsius (C° ) Kongsberg Simrad Mesotech Ltd. Port Coquitlam, BC - Canada 900-12007001/Iss1.0 Page 5.28 FS900/925 MK II Operators Manual FS 925 MK II System Operation Depth Scale 300 900 1200 1500 1800 The Depth Scale is used to set the maximum depth displayed on the Depth vs. Time and Temperature graphs. The values are shown in the units currently selected for range (meters, feet of fathoms). This diagram shows the scales in meters. Graph Time 1 Hour 2 Hours 4 Hours 8 Hours Test The Graft Time is used to set the length of time displayed in the Temperature and Depth vs. Time graph. The Test mode provides continuous output of the sensor data. While in test mode, the sonar head does not step or transmit. Warnings Enables screen warnings for catch sensors. If enabled, the screen flashes bright red when a catch sensor has been triggered . 5.16 TRANSDUCER MENU TRANSDUCER MENU Transducer Stabilization Transducer Type On/Off Cone/Fan Figure 5.19 TRANSDUCER Menu The following provides a description of each menu item and where applicable, shows the selection menu. Transducer Stab. Xdcr Stabilize, when set to ON, provides a stable tilt angle with respect to the pitch and roll of the sonar head (deployment package). This means that the ping direction remains very close to the operator’s desired angle. Kongsberg Simrad Mesotech Ltd. Port Coquitlam, BC - Canada FS900/925 MK II Operators Manual FS 925 MK II System Operation Transducer Type Fan Cone 900-12007001/Iss1.0 Page 5.29 This menu item enables the selection of two acoustical beam angles; Fan is approximately 30° x 7° Cone is approximately 7° x 7° 5.17 CONSTANTS MENU CONSTANTS MENU Range Units Sound Speed Temp Units ( Stand Alone Only) Figure 5.20 CONSTANTS Menu The following provides a description of each menu item and where applicable, shows the selection menu. The unit selected is used for the range settings and the cursor readout as well as all other measurements. The abbreviation for these units are “f”, “Fa” and “m” respectively. Range Units Feet Fathom Meters Sound Speed 1600 ¿ 1478 This is the value used by the system for the speed of sound in water. It should be set to a value appropriate for the area in which the system is being used. The units of setting are meters per second or the equivalent feet or Fathoms per second. À 1400 Note! The accuracy of the sonar in determining target size and range is dependent upon the correct setting of the sound speed. The speed of sound in water varies with the temperature and salinity and can vary by several percent at different locations around the world. If there is no accurate value to use for your location, then you may use the following suggestions as rough estimates: Cold Water (North Sea) 1475 m/s Warmer Water (Gulf of Mexico) 1510 m/x Very Warm Waters (Equatorial) 1540 m/s Kongsberg Simrad Mesotech Ltd. Port Coquitlam, BC - Canada 900-12007001/Iss1.0 Page 5.30 TEMP UNITS FS900/925 MK II Operators Manual FS 925 MK II System Operation The Temp Units are used to select the temperature in Celsius (C°) or in Fahrenheit (F°) 5.18 SELF -TEST MENU SELF TEST MENU System Status System Test Telemetry Test Calibrate Control Panel Test Serial I/O Test Receiver Test System Status Send Settings On /Off Figure 5.21 SELF TEST Menu The following provides a description of each menu item and where applicable, shows the selection menu. System Status System Status displays the “SYSTEM TEST RESULTS” without actually performing a system test. System Test System Test performs a power up system test including telemetry cable calibration, head communication test etc. The results are displayed in the “SYSTEM TEST RESULT”. Telemetry Test Telemetry Test will continuously interrogate the head for its ID and displays the errors in receiving the head ID. This can be used for troubleshooting the cable telemetry. Calibrate Calibrate will repeat a slower version of the power up head calibration. The results will be consequently used for stepping the head. Control Panel Test Control Panel Test allows the processor’s front panel buttons, rotary controls and joystick to be tested for proper operation. Kongsberg Simrad Mesotech Ltd. Port Coquitlam, BC - Canada FS900/925 MK II Operators Manual FS 925 MK II System Operation 900-12007001/Iss1.0 Page 5.31 Serial I/O Test Serial I/O Test allows a loop back test of the serial port. When selected, the entire ASCII character set is continuously output to serial port. It also continuously monitors the serial port for any incoming data. If pins 2 and 3 of the serial port are connected, then the output data is looped back and displayed for examination. Receiver Test If set to ON, the processor automatically changes the following menu settings: GAIN MENU → TVG Type = Test GAIN MENU → Gain = Default PANEL GAIN = 50% TRANSCEIVER MENU → Transmit Power = Off CONFIGURATION MENU → CONSTANTS MENU → Sound Speed = 1459 m/s CONFIGURATION MENU → Threshold = 1 DISPLAY MENU → Palette = SIMRAD1 Under these conditions the complete display palette should be seen in the sonar image area up to the range of 100 meters. The extent of the color spread is an indication of the system performance and gain linearity. The original settings are restored once the Receiver Test is turned OFF. Send Settings When activating this, the head temporarily moves both the Tilt and Azimuth axis to zero degree heading and back to the original orientation. It also downloads all the current operational settings of the head. This exercise is particularly useful if the sonar images indicate abnormal operation of the head. 5.19 SUB MENU 3 SUB MENU 3 Serial I/O Menu Serial Port Menu Clock Menu Standard Settings Figure 5.22 SUB Menu 3 Kongsberg Simrad Mesotech Ltd. Port Coquitlam, BC - Canada 900-12007001/Iss1.0 Page 5.32 FS900/925 MK II Operators Manual FS 925 MK II System Operation The following provides a description of each menu item and where applicable, shows the selection menu. 5.20 SERIAL I/O MENU SERIAL I/O MENU NMEA Format Depth Icon Temp. Icon On/Off On/Off Figure 5.23 SERIAL I/O Menu The following provides a description of each menu item and where applicable, shows the selection menu. Selects the output data format of the serial data. With “NMEA”, the output data is NMEA-0183 compatible and with “3300” the output data is the same format as was output by the FS3300 processor. Format NMEA 3300 DEPTH On / Off Depth, when set to ON, enables the output of DepthBelow-Surface data obtained from the sensor module, and displayed in the Icon on the monitor. TEMP On / Off Temp, when set to ON, enables the output of the TempBelow-Surface data obtained from the sensor module, and is displayed in the Icon on the monitor 5.21 SERIAL PORT MENU SERIAL PORT MENU Baud Rate Parity Stop Bits Data Bits Depth Figure 5.24 SERIAL PORT Menu Kongsberg Simrad Mesotech Ltd. Port Coquitlam, BC - Canada FS900/925 MK II Operators Manual FS 925 MK II System Operation 900-12007001/Iss1.0 Page 5.33 The following provides a description of each menu item and where applicable, shows the selection menu. Baud Rate 300 600 1200 2400 4800 9600 sets up the Baud rate of the RS232 serial I/O port. Parity None Even Odd Sets the Parity of the serial I/O port Stop Bits 1 2 Sets the number of Stop Bits for the serial I/O data Data Bits 7 8 Sets the number of Data Bits in the serial I/O data 5.22 CLOCK SET MENU The CLOCK SET MENU is used to set the correct time and date for the on-screen clock. CLOCK SET MENU Year Month Day Hour Minute Seconds Kongsberg Simrad Mesotech Ltd. Port Coquitlam, BC - Canada 900-12007001/Iss1.0 Page 5.34 FS900/925 MK II Operators Manual FS 925 MK II System Operation Figure 5.25 CLOCK SET The following provides a description of each menu item and, where applicable, shows the selection menu. Year 2030 Year is used to set the current year. Possible settings are from 1990 to 2030. ¿ 1995 À 1990 Month Jan Month is used to set the current month. Possible settings are the twelve months from Jan to Dec. ¿ Feb À Dec Day 31 Day is used to set the day of the month. Possible settings are 1 to 31. ¿ 28 À 1 Kongsberg Simrad Mesotech Ltd. Port Coquitlam, BC - Canada FS900/925 MK II Operators Manual FS 925 MK II System Operation Hour 23 900-12007001/Iss1.0 Page 5.35 Hour is used to set the current hour. The 24 hour format is used. Possible settings are from 0 to 23. ¿ 14 À 0 Minute 59 Minute is used to set the current minute. Possible settings are from 0 to 59. ¿ 30 À 0 Seconds 59 Seconds is used to set the current second. Possible settings are from 0 to 59. ¿ 10 À 0 STANDARD SETTINGS Factory Reset This menu entry is used to reset a number of menu settings to a known state. Kongsberg Simrad Mesotech Ltd. Port Coquitlam, BC - Canada 900-12007001/Iss1.0 Page 5.36 FS900/925 MK II Operators Manual FS 925 MK II System Operation 5.23 STANDARD SETTINGS Following is the list of all settings affected by this operation: • • • • • • • • • • • • • • • • • • • • • • • • • • Threshold Scan Speed Grids Grid Type Hold Speed of Sound Display Palette Panel Gain Display Mode Gain Scan Marker Bandwidth Transmit Power Rx Gain Type Rx Gain Response Synchronization TVG Type Auto Tilt Maximum Tilt Minimum Tilt Current Tilt Timer Transducer Type Receiver Test Stabilization Transmit 1 8 On Polar Off 1500 m/s SIMRAD1 45% Polar Default On Narrow High Off Medium I/O 20 Log Off 0° -45° 0° Off Cone Off On 100% Kongsberg Simrad Mesotech Ltd. Port Coquitlam, BC - Canada FS900/925 MK II Operators Manual FS 925 MK II System Operation 900-12007001/Iss1.0 Page 5.37 5.24 FS 925 MENU STRUCTURE MAIN MENU Scan Speed Scan Speed Polar, Sector, Net Opening, Vertical, Locked 1,2,4,8,16,32 Scan Reverse Hold On / Off Auto Tilt On / Off Xdcr Stabilize Magnifier x2, x3, x4 Clear Display Timer SUB-MENUS On / Off CONFIGURATION Threshold Re-center Scan Marker 1 .. to .. 15 GRID MENU Grid Type Polar, Rect. Grid On / Off Transducer Type Fan, Cone CONSTANTS Range Units Feet, Fathom, Meter Sound Speed 1400 ... to ... 1600 Language Synchronization TRANSCEIVER GAIN MENU On / Off On / Off Netherland, English, Francais, Deutsch, Islenksa, Norsk, PYCCHH, Espanol None, Input, Output, I/O Transmit Power Transmit Pulse High, Low, Off Receiver Bandwidth Automatic, Wide, Medium, Narrow Rx Gain Type Rx Gain Response None, AGC, RCG, RCG+AGC Gain TVG Type Default, High, Low USER1 TVG MENU Spreading (A) Absorption (B) 20 ... to ... 40 Start Gain (C) -60 ... to ... 60 dB Max. Gain (L) 0 ... to ... 100 dB 5%, 10%, 25%, 50%, 100%, 200% Slow, Medium, Fast 20 log, 40 log, User1, User2, Test 0 ... to ... 80 USER2 TVG MENU TILT MENU DISPLAY MENU Tilt Step Size 1,2,4,8,16,32 Maximum Tilt -82.8 ... to ... 14.4 Degrees Minimum Tilt -90.0 ... to ... 7.2 Palette SIMRAD1, SIMRAD2, USER USER PALETTE Color Red 0 ... to ... 7, GRID Green 0 ... to ... 15 Blue 0 ... to ... 15 0 ... to ... 15 Horizontal Center Vertical Center -20 ... to ... 20 MANUAL INPUT Vessel Speed 0 ... to ... 15 Knot PRINTER MENU Print Display CLOCK SET MENU SELF TEST MENU Degrees -20 ... to ... 20 Printer HP_PJ, HP_DJ, BMP_I, BMP_S Palette SIMRAD1, SIMRAD2 USER Year Month 1990 ... to ... 2030 Day 1 ... to ... 31 Hour Minute 0 ... to ... 23 Seconds 0 ... to ... 59 Jan ... to ... Dec 0 ... to ... 59 System Test Serial I/O Test Calibrate Send Settings Telemetry Test Control Panel Test Receiver Test System Status STANDARD SETTINGS Factory Reset SENSOR MENU (Only on Stand Alone System) Kongsberg Simrad Mesotech Ltd. Port Coquitlam, BC - Canada FS900/925 MK II Operators Manual FS 925 MK II Installation, System Set-Up and Test 900-12007001/Iss1.0 Page 6.1 PART 6 FS 925 MK II INSTALLATION, SYSTEM SET-UP AND TEST 6. FS 925 INSTALLATION, SYSTEM SET-UP AND TEST .................................... 6.3 6.1 INSTALLATION PROCEDURE ...................................................................... 6.3 6.2 SURFACE UNIT ELECTRONICS INSTALLATION ......................................... 6.4 6.2.1 Mounting of Units ..................................................................................... 6.4 6.2.2 Power Considerations .............................................................................. 6.4 6.2.3 Connecting A Display Unit ....................................................................... 6.5 6.2.4 Connecting an FS 900/925 Power Supply ............................................... 6.6 6.2.4.1 Selecting AC Supply Voltage ............................................................ 6.6 6.2.4.2 Connecting Power Supply to the FS 900 MK II and/or FS 925 MK II Processor ...................................................................................................... 6.6 6.2.4.3 Selecting Output Voltage and Relay Delay Time .............................. 6.6 6.2.4.4 Remote Mounting of Current and Voltage Meters ............................. 6.7 6.2.5 Connection to Cable Winch/Slip-Rings .................................................... 6.7 6.2.6 Interfacing to a SIMRAD Echosounder .................................................... 6.7 6.2.7 Connecting a Color Printer....................................................................... 6.8 6.2.8 Connecting a VCR ................................................................................... 6.8 6.3 ASSEMBLING OF TRAWL UNIT .................................................................... 6.9 6.3.1 FS 903/925 MK II Configuration............................................................... 6.9 6.4 SYSTEM SET-UP AND TESTING USING TEST CABLE ............................. 6.10 6.4.1 Start Up .................................................................................................. 6.10 6.4.2 Configuring Control Unit......................................................................... 6.11 6.4.3 Checking Catch Sensors and Sensor Module (Stand Alone Only) ........ 6.12 6.4.4 Cable Winch........................................................................................... 6.12 6.4.4.1 Location ........................................................................................... 6.12 6.4.4.2 Threading and Winding of the Cable ............................................... 6.13 6.4.5 Trawl Cable ............................................................................................ 6.13 6.5 MOUNTING TRAWL UNIT & COMPLETING FINAL TEST ........................... 6.14 6.5.1 Mounting Trawl Unit to Headrope .......................................................... 6.14 6.5.2 Preparing Trawl Cable ........................................................................... 6.15 6.5.3 Final System Test .................................................................................. 6.15 Kongsberg Simrad Mesotech Ltd. Port Coquitlam, BC - Canada 900-12007001/Iss1.0 Page 6.2 FS900/925 MK II Operators Manual FS 925 MK II Installation, System Set-Up and Test 6.5.4 Completing Trawl Unit Assembly ........................................................... 6.16 6.6 MOUNTING CATCH SENSORS ................................................................... 6.17 6.7 FS 900/925 MK II DRAWINGS ...................................................................... 6.18 Kongsberg Simrad Mesotech Ltd. Port Coquitlam, BC - Canada FS900/925 MK II Operators Manual FS 925 MK II Installation, System Set-Up and Test 900-12007001/Iss1.0 Page 6.3 6. FS 925 INSTALLATION, SYSTEM SET-UP AND TEST 6.1 INSTALLATION PROCEDURE The installation of the FS 900/925 MK II Trawl Monitoring System involves the following steps: • Deciding on the locations in the wheel house for the surface units. • Mounting the surface units and making the connections between the FS Processors, the display units, the FS 90/925 power supply, and other optional equipment being installed. • Assembling the trawl unit. • Running up the system on the test cable to verify proper installation, configure control unit, and perform initial system test. • Installing the cable winch, snatch block and trawl cable, and connecting the winch slip-rings to the control unit (this step not required if vessel already equipped with FS 3300 and/or FS 900 Trawl System). • Mounting the trawl unit to the headrope and completing the final system test. • Mounting the catch sensors to the cod-end of the trawl. Kongsberg Simrad Mesotech Ltd. Port Coquitlam, BC - Canada 900-12007001/Iss1.0 Page 6.4 FS900/925 MK II Operators Manual FS 925 MK II Installation, System Set-Up and Test 6.2 SURFACE UNIT ELECTRONICS INSTALLATION 6.2.1 Mounting of Units The display unit should be located in the wheel house in a place that provides a good view of the screen and avoids direct sunlight, if possible. Depending on monitor that was selected, the unit may be mounted on or recessed into a cabinet. Simrad supplied display units include the necessary mounting brackets. The FS 900 MK II and FS 925 MK II processors should be mounted in close vicinity to the operator's place in the wheel house and near the display unit. The unit may be mounted on top of, below or recessed into a cabinet. The unit can also be rackmounted in a standard 19" rack module by using the rack-mount ears supplied with the system. Sufficient space should be left around the control unit for proper ventilation. The FS 900/925 power supply is affixed to a bulkhead with screws. The location of the unit should be within 4.5 m/15 ft of the control unit (this is the length of interconnect cables), and at a place that allows operation of the power switch and easy reading of the current and voltage meters. The on/off switch and the meters may be removed from the power supply box and remotely mounted next to the control unit if so desired. Optional equipment for interface to the control unit may be mounted in any convenient location provided the user supplied interconnect cables are of sufficient length and the required power is available. 6.2.2 Power Considerations The display unit, generally, will require 110 VAC or 220 VAC. Depending on the capabilities of the unit chosen, it may automatically detect the supply voltage or the unit may have to be ordered for the correct voltage. The FS 900 MK II and FS 925 MK II processors will operate from either 110 VAC or 220 VAC. Voltage selection is automatic and there are no jumpers or switches to set. The power supply can be operated with either 110 VAC or 220 VAC. Selection of the supply voltage is done by moving the jumpers on the screw terminal strip located behind the voltage meter inside the power supply. Details on selecting the jumper location are indicted in Chapter 8, DRAWINGS. Kongsberg Simrad Mesotech Ltd. Port Coquitlam, BC - Canada FS900/925 MK II Operators Manual FS 925 MK II Installation, System Set-Up and Test 900-12007001/Iss1.0 Page 6.5 6.2.3 Connecting A Display Unit Either a RGB monitor or a VGA monitor may be connected to the FS 900 MK II and the FS 925 MK II processor. An industry standard VGA monitor will connect directly to the miniature D-15 connector located on the rear panel of the control unit. Pin assignments for this connector are shown in following table. PIN # SIGNAL PIN # SIGNAL 1 R - Red analog video output 9 N/C 2 G - Green video output analog 10 GND 3 B - Blue analog video output 11 GND 4 GND 12 N/C 5 Red Shield 13 Horizontal Sync 6 GND 14 Vertical Sync 7 Green Shield 15 N/C 8 Blue Shield A RGB monitor is connected to the BNC connectors located on the rear panel of the FS 900 MK II and FS 925 MK II processors. The labels on the BNC connectors have the following meaning: BNC SIGNAL R Red analog video output G Green analog output B Blue analog output S Sync output C Composite video output Four coaxial cables, supplied in processor accessory kit, should be used to connect the monitors red, green, blue, and vertical/comp. sync to the processor BNC Kongsberg Simrad Mesotech Ltd. Port Coquitlam, BC - Canada 900-12007001/Iss1.0 Page 6.6 FS900/925 MK II Operators Manual FS 925 MK II Installation, System Set-Up and Test connectors R, G, B and S, respectively. With some monitors, however, better results are obtained when the sync cable is connected to control unit BNC connector C. For RGB monitors that can input either analog or TTL signals, the selector switch should be set to "analog". Note! The FS 900 processor does not output the vertical sync signal with the green video signal. A separate cable for the vertical sync must be used. Connection of this sync cable should be made to the control units BNC connector labeled C. 6.2.4 Connecting an FS 900/925 Power Supply The connection of the FS 900/925 power supply is shown in the interconnecting drawing for FS 903/925 MK II System and in the drawing for the FS 925 MK II Stand Alone System, in chapter 8, DRAWINGS. Caution! Insure that the AC supply is disconnected before any service or installation is done to this unit. There are AC and DC voltages within this box that are capable of delivering a lethal electric shock. 6.2.4.1 Selecting AC Supply Voltage Selecting an AC supply voltage of 110 VAC or 220 VAC is done by jumpers on screw terminals located behind the voltage meter. 6.2.4.2 Connecting Power Supply to the FS 900 MK II and/or FS 925 MK II Processor The power supply unit is normally supplied from the factory with interconnect cables, for connecting the control unit, and the telemetry module already installed. If not, they should be fed through the strain reliefs at the bottom of the box and attached to the screw terminals. 6.2.4.3 Selecting Output Voltage and Relay Delay Time A toggle switch located below the voltage meter can be used to select the output Kongsberg Simrad Mesotech Ltd. Port Coquitlam, BC - Canada FS900/925 MK II Operators Manual FS 925 MK II Installation, System Set-Up and Test 900-12007001/Iss1.0 Page 6.7 voltage of the power supply. When set to 120/200 VDC, the output voltage is 200 VDC. Normally this switch should be set to 120/200 VDC when system is connected to the trawl cable. When connected to the test cable, this switch should be set to 60/120 VDC. The power supply contains a time delayed relay (5) that is switched on and off when the FS 900 MK II and/or FS 925 MK II processor power is switched on and off. In this way, the on/off switch of the power supply can remain on so that powering up of the entire system is accomplished when the processor is turned on. The relay time delay should be set to the minimum (fully counter clockwise). 6.2.4.4 Remote Mounting of Current and Voltage Meters The current and voltage meters are sometimes used to evaluate performance of the cable, slip-ring and trawl unit electronics. For this reason, the meter assembly may be removed from the power supply box and mounted remotely on a cabinet next to the FS processors. The meter assembly is removed by undoing the four screws that hold it to the mounting posts, and removing the four wires (making note of their position) from the screw terminal strip located behind the current meter. The four wires are then extended using a 4-wire (18 GA., or heavier) cable that is passed through one of the strain reliefs located at bottom of the box. 6.2.5 Connection to Cable Winch/Slip-Rings The connection between the FS power supply, telemetry and the cable winch/sliprings should be made with a 18 GA., or heavier, shielded twisted pair cable. To minimize noise interference on the cable, the shield of the cable should be attached to the connector as shown in the interconnection drawing. Note! The shield of the cable between the FS 925 MK II Power Supply and the slip-rings should be connected at the processor, but NOT at the slip-rings. 6.2.6 Interfacing to a SIMRAD Echosounder The FS 900 MK II processor in the stand alone configuration may be connected to a Simrad echosounder for display of the trawl unit depth on the sounder. This is made via the RS232 serial port on the rear panel of the control unit (D-25 connector labelled "RS-232"). Either NMEA 0183 or 20 mA current loop outputs are available. Kongsberg Simrad Mesotech Ltd. Port Coquitlam, BC - Canada 900-12007001/Iss1.0 Page 6.8 FS900/925 MK II Operators Manual FS 925 MK II Installation, System Set-Up and Test For a current loop output, the optional Current Loop Driver board (P/N 42220220000) must be installed in the processor. The pin out for the RS232 serial port is shown in the following table. PIN # SIGNAL 3 NMEA - Output 7 NMEA - Ground 18 Current Loop - Output 19 Current Loop - Return To output the depth data via the serial port, the FS 925 MK II processor must be configured to do so. This is done through menu operations in submenu SERIAL I/O. 6.2.7 Connecting a Color Printer A standard parallel port is provided on the rear panel of the control unit (D-25 connector labeled "PRINTER") to allow printing of the display on a color printer. Either the HP PaintJet or one of the HP DeskJet printers may be used. The connection is made via a standard printer cable that should be supplied with the printer. An IBM® compatible computer can also be connected in order to transfer the sonar images in a .bmp format. Selection of the printer type and generating the plot is done through the submenu PRINTER. Refer to chapter 5 in the FS 925 MK II Operators Manual for correct procedure. 6.2.8 Connecting a VCR Either a NTSC or PAL VCR may be connected to the FS 900 MK II or FS 925 MK II processor for recording of the display video signal. Connection is made via a coaxial cable (user supplied) between the VCR LINE input and the BNC connector labeled "C" on the rear panel of the control unit. To record an image, the FS 900 MK II or FS 925 MK II processor video output format must be configured for that of the VCR. This is done by following the instructions in section 5 of the FS 925 MK II Operators Manual, "Setting Power-up Configuration", and selecting a video format of either NTSC or PAL. Note! To record the sonar display, the processor must be configured for Kongsberg Simrad Mesotech Ltd. Port Coquitlam, BC - Canada FS900/925 MK II Operators Manual FS 925 MK II Installation, System Set-Up and Test 900-12007001/Iss1.0 Page 6.9 either the NTSC or PAL video format. A RGB monitor will therefore have to be used if display of the image is required during recording. To use the VGA monitor during recording, a user supplied VGA to NTSC/PAL video converter should be used. 6.3 ASSEMBLING OF TRAWL UNIT Assembling the trawl unit for the first time should be conducted in the wheel house where the surface unit electronics have been mounted. This will facilitate testing the trawl unit using the test cable. 6.3.1 FS 903/925 MK II Configuration The FS 903/925 MK II trawl configuration consists of an FS 925 90 kHz horizontal sonar head, an FS 3300 vertical 330 kHz or 120 kHz sonar head, an FS 300 sensor module with interconnecting cable, a catch receiver transducer, an FS 925 polyurethane housing and strain relief for the trawl cable. The FS 3300 sonar head should have been supplied from factory with two retaining rings (collars) and a locating pin already installed. If not, these parts will be included with the sonar head and should now be attached. A stainless steel locating pin threaded into one the tapped holes located in the connector end of the housing is used to prevent the sonar head from rotating. Only one pin is required and it can be placed into the positioning hole, of the bottom half of the trawl unit housing. The pin location should be such that the diaphragm housing that protrudes from the sonar head housing will be located to one side (normal convention has polyurethane housing half with metal serial number plate being used as the top). Correct location of pin will be determined during initial test of system. The first retaining ring is then moved in tight against the outside of the polyurethane housing and the second retaining ring is moved in tight against the inside of the polyurethane housing outside wall. Both are fastened into place to prevent the sonar head from moving back and forth. Note! Incorrect placement of the retaining rings and locating pin on the sonar head, or the failure to install these parts, may result in movement of the sonar head that could damage the transducer and/or drive shaft and result in water damage to the entire unit. The sensor module is then placed in the polyurethane housing on the side of sonar head that is opposite the diaphragm housing. The catch receive transducer is placed Kongsberg Simrad Mesotech Ltd. Port Coquitlam, BC - Canada 900-12007001/Iss1.0 Page 6.10 FS900/925 MK II Operators Manual FS 925 MK II Installation, System Set-Up and Test in cradle on the opposite of sonar head from the sensor module and the cable is routed under the sonar head, and connected to the sensor module. Liberal amounts of Dow Corning #55 grease should be applied to the connector surfaces before mating so that a water tight seal is obtained. The locking sleeve should then be hand-tightened. Finally, the sensor module interconnect cable is plugged into the 6-pin connector on the sonar head, after grease is applied to mating surfaces, and the locking sleeve hand-tightened. For the FS 925, the sonar head is placed at the center of the housing, as shown in the trawl unit housing drawing. Note! Dow Corning #55 grease must be applied to all mating surfaces of underwater connectors to insure proper sealing. Sufficient grease should be applied so that excess squeezes out with any air when the connectors are mated. RTV or any other sealant must NOT be used, and when tightening the locking sleeves do NOT use a wrench or pliers! See chapter 7, "Troubleshooting and Maintenance" in the FS 900/925 MK II Operators Manual, for proper connector maintenance. 6.4 SYSTEM SET-UP AND TESTING USING TEST CABLE Initial power-up, set-up and test of system should be made with the trawl unit, in the wheel house. 6.4.1 Start Up To power-up the system, follow the steps outlined in the FS 900 MK II Operators Manual in Section 3. Note that the start up procedure is the same for both the FS 900 MK II and the FS 925 MK II. After selecting the trawl unit configuration, the FS 900 MK II and the FS 925 MK II processors should begin calibrating. During this process, a small dial rotates on the screen to indicate the rotation of the sonar head. Check the sonar head transducer to insure that it is rotating correctly. Once the calibration is complete, the sonar image display will appear and the sonar will begin operation in the mode selected by the current system parameters. If there are any errors during the calibration a status report page will appear containing the results that the control unit obtained from tests performed. The first step is to recheck installation instructions. If nothing is obvious, then refer to chapter 7, TROUBLESHOOTING AND MAINTENANCE in the FS 900/925 MK II Operators Manual, for possible solutions. Kongsberg Simrad Mesotech Ltd. Port Coquitlam, BC - Canada FS900/925 MK II Operators Manual FS 925 MK II Installation, System Set-Up and Test 900-12007001/Iss1.0 Page 6.11 6.4.2 Configuring Control Unit The first step after a successful power up is to configure the FS 900 MK II and FS 925 MK II processors for the desired operating mode and set-up, if not already done. To do this, use the joystick to move through the menus, selecting and modifying items as required. Refer to chapter 5, SYSTEM OPERATION, for operation of the control unit and chapter 3, MENUS AND OPERATION in the FS 900/925 MK II Operators Manual, for a description of the menu items. As a minimum, the following menu items should be examined and modified if necessary: Menu Item Time and date Display color palette Range units Sound speed Serial data format (only if sensor module connected and interface to echosounder is used) Sensor data displayed and units used (only if sensor module connected) Menu SUB MENU 3 CONFIGURATION MENU SUB MENU 2 SUB MENU 2 SUB MENU 3 (Stand Alone Only) SUB MENU 2 (Stand Alone Only) Kongsberg Simrad Mesotech Ltd. Port Coquitlam, BC - Canada CLOCK DISPLAY CONSTANTS CONSTANTS SERIAL I/O SENSOR 900-12007001/Iss1.0 Page 6.12 FS900/925 MK II Operators Manual FS 925 MK II Installation, System Set-Up and Test 6.4.3 Checking Catch Sensors and Sensor Module (Stand Alone Only) Finally, the catch sensors and sensor module can be checked for proper operation. Once the display of sensor data has been enabled, values for the current temperature and depth should appear to indicate proper operation of the sensor module. With the sensor module in air or at water depths of less than 5 meters (15 feet), the depth value displayed will be "<5 m". Catch receivers should be delivered fully charged; however, if they are not then refer to chapter 7, TROUBLESHOOTING AND MAINTENANCE in the FS 900/925 MK II Operators Manual, for charging instructions. To test catch indication, place a charged catch sensor in front of the catch receive transducer at a distance of approximately one meter. The sensor should be oriented with its front towards the receive transducer and the end with the metal lid containing the catch sensor number furthest away from the receive transducer. Next, activate the catch sensor by attaching a 20 cm (8") piece of conducting wire between the fastening end marked ÷ and the metal lid. While this connection is maintained, the catch sensor will transmit every minute. The result should be the appearance of a yellow bar in the catch sensor area of the sonar display. The catch sensor that the yellow bar appears under should correspond to the catch sensor number stamped on the metal lid. While maintaining the electrical connection, trigger the catch sensor by pulling out plunger with feeler strap and inserting a small screwdriver in hole through plunger. Within one minute, a red bar should appear below the current yellow bar. This procedure should be repeated for the other catch sensors. 6.4.4 Cable Winch Cable winches are delivered in different types and with different capacities; low pressure hydraulic, high pressure hydraulic and electrically driven. Choice of winch is dependent on prevailing conditions; type and length of cable and available source of power. 6.4.4.1 Location The winch should be located in such a way that the trawl cable can run with as few changes of directions as possible. Preferably, the cable should run directly from the winch, through the snatch block, to the trawl. The location of the winch will of course depend on the vessel's construction and the arrangement of the trawl equipment. However, the above guidelines should be taken into consideration before the location is defined. Simrad will assist with free guidance if needed. Kongsberg Simrad Mesotech Ltd. Port Coquitlam, BC - Canada FS900/925 MK II Operators Manual FS 925 MK II Installation, System Set-Up and Test 900-12007001/Iss1.0 Page 6.13 To avoid damage to the cable it should be kept separated from the trawl arrangement on the deck. It is recommended that the winch is located so that the drum and cable are clearly visible and accessible in emergency situations. 6.4.4.2 Threading and Winding of the Cable This section applies if the cable winch has been delivered without cable or if the cable is to be replaced. The method described is valid for most winches made for this purpose. 1. Threading: before threading, turn the winch drum by hand to bring the coiling gear to its extreme position at the same end as the packing box on the drum. Thread the cable through the coiling gear - over the small guide pulley and under the big one, then threaded through the packing box on the drum and the internal guide tube and pulled out through the packing box on the shaft end in the slip ring unit. The guide tube should be completely filled with grease. Apply the grease through the grease nipple located on winch shaft between the drum and the chain guard until the grease oozes out through the packing boxes. Place the sealing rings in the packing boxes towards the grease and tighten the packing glands. 2. Winding: Check that the cable is threaded correctly through the coiling gear - over the small guide pulley and below the big one. If not, pull out the bearing bolt and remove the big guide pulley while placing the cable in correct position. Apply brakes during winding in order to get the cable tight on the drum. The end of the cable must not slip through the coiling gear because this will disrupt the synchronization of drum and coiling gear. When the cable is run through the block arrangement, adjust the small guide pulley vertically, so that the cable is pressed gently against the big guide pulley. Note! Inspection, control and maintenance of winch must be done in accordance to the manufacturer's instructions. 6.4.5 Trawl Cable The trawl cable is chosen for maximum mechanical strength, durability, minimum attenuation of signals, and compatibility with the cable winch. Two cables in common use are coaxial with breaking points of 1500 kg and 6000 kg. See section Kongsberg Simrad Mesotech Ltd. Port Coquitlam, BC - Canada 900-12007001/Iss1.0 Page 6.14 FS900/925 MK II Operators Manual FS 925 MK II Installation, System Set-Up and Test 1.3, "Technical Specifications", for typical specifications of these cables. For whatever cable type and length that is used, the following specifications cannot be exceeded for operation with the FS 925 MK II Trawl Monitoring System: Cable Loop Resistance: 100 Ω max Signal Attenuation Through Cable: < 40 dB at 55 kHz < 20 dB at 12 kHz Note! Failure to meet these cable requirements may result in unpredictable operation or complete failure of the FS 900/925 Trawl Monitoring System. 6.5 MOUNTING TRAWL UNIT & COMPLETING FINAL TEST After the assembly and initial testing of the trawl unit in the wheel house is complete, the unit is ready for connection to the trawl cable. The steps involved to do this are: preparing the trawl cable for attaching to headrope, splicing a pigtail to the cable, performing a final system test, assembling the trawl unit and mounting it to the trawl headrope. 6.5.1 Mounting Trawl Unit to Headrope The mounting of the deployment package is an important part of the installation and should therefore be carried out with care. The Mesotech supplied mounting kit contains the strain relief and other mounting hardware. The strain relief and rubber hose should be installed on the trawl cable before splicing the connector (pigtail) for the trawl unit. Kongsberg Simrad Mesotech Ltd. Port Coquitlam, BC - Canada FS900/925 MK II Operators Manual FS 925 MK II Installation, System Set-Up and Test 900-12007001/Iss1.0 Page 6.15 6.5.2 Preparing Trawl Cable Connection of the trawl cable is made via a "pigtail" - a connector and locking sleeve attached to a short length of cable - that is supplied in the accessory kit. The pigtail must be spliced to the trawl cable before the trawl unit can be connected. Correct splicing of the trawl cable is very important to insure a good electrical connection and to prevent water from damaging the cable. Caution! Insure that the FS 900 MK II and FS 925 MK II processors and power supply are turned off before any service or installation is done to the trawl unit. There are DC voltages on the trawl cable that are capable of delivering a lethal electric shock. Mesotech supplied jointing tools and materials for splicing coaxial cable with a breaking point of 1500 kg are available. For information on splicing the trawl cable, refer to the instruction sheet in chapter 8, DRAWINGS in the FS 900/925 MK II Operators Manual. Note! When splicing the pigtail, the large pin of the connector, which is common (Ground), should be connected to the shield of the trawl cable. 6.5.3 Final System Test After preparing the trawl cable and before final trawl unit assembly, a system test should be conducted to insure correct operation of FS 900/925 MK II Trawl Monitoring System over the trawl cable. As before, the start up procedures should be followed to power up the system. Once the FS 900 MK II and FS 925 MK II processors power has been turned on, the power supply voltage and current meters should be examined. Expected values are 200 volts and 0.7 amps. Voltage and current values differing significantly from these values indicate a problem with the trawl cable or its connections. If there are any errors during the calibration a status report page will appear containing the results that the control unit obtained from tests performed. Again, any errors will be due to the trawl cable or its connections. Check the connections again and insure that the signal polarity at the trawl unit is correct. A DC volt meter can be used to check that the positive voltage is on the small pin of the pigtail when the FS 900 MK II or FS 925 MK II processor is powered up. Kongsberg Simrad Mesotech Ltd. Port Coquitlam, BC - Canada 900-12007001/Iss1.0 Page 6.16 FS900/925 MK II Operators Manual FS 925 MK II Installation, System Set-Up and Test If all is okay, then the sonar image display will appear and the sonar head will begin scanning. 6.5.4 Completing Trawl Unit Assembly The final step in the installation is to complete the trawl unit assembly and mount it to the headrope. First, the plastic cable strain relief supplied with the trawl unit must be bolted to the trawl cable. The location should be at or very near the pigtail splice, but NOT on the pigtail itself. The rubber hose on the trawl cable, if used, must be slid down so that approximately 3-4 cm (1-2") of the hose is clamped inside the strain relief. Next, the trawl cable is connected to the sonar head. Liberal amounts of Dow Corning #55 grease are applied to the connector surfaces before mating so that a water tight seal is obtained. The locking sleeve is then hand-tightened. Note! Dow Corning #55 grease must be applied to all mating surfaces of underwater connectors to insure proper sealing. Sufficient grease should be applied so that excess squeezes out with any air when the connectors are mated. RTV or any other sealant must NOT be used, and when tightening the locking sleeves do NOT use a wrench or pliers! See chapter 7, "Troubleshooting and Maintenance" in the FS 900 Operators Manual, for proper connector maintenance. The plastic strain relief attached to the trawl cable is now placed in the trawl unit housing containing the electronics and the excess cable is routed in the housing. Care must be taken to insure that all cables within the trawl unit housing are properly placed to avoid from being pinched and possibly damaged. The top half of the trawl unit housing is then placed on top and the unit is secured together with the bolts supplied. Finally, the dome is secured over the sonar head transducer with four additional bolts. The fully assembled trawl unit is now ready for mounting to the trawl headrope in the chosen manner. Kongsberg Simrad Mesotech Ltd. Port Coquitlam, BC - Canada FS900/925 MK II Operators Manual FS 925 MK II Installation, System Set-Up and Test 900-12007001/Iss1.0 Page 6.17 6.6 MOUNTING CATCH SENSORS Proper mounting of the catch sensors on the cod-end is shown chapter 8, DRAWINGS. The fill of the cod-end and the sensitivity of the sensors is dependent upon the number of mesh knots between the catch sensor and the rubber straps. Make sure that the sensor is mounted in the correct direction with the transducer pointing towards the trawl unit (the metal lid pointing aft). Caution! Make sure that the chains do not strain the net when the cod-end is being filled with fish. This is controlled by stretching the net to capacity in the direction which is relevant AFTER THE SENSORS HAVE BEEN MOUNTED TO THE TRAWL. The purpose of the chains is to prevent the sensor from turning, and as an insurance against loss should the rubber straps break. Mounting the chains too tight can result in the fastening ears being ripped off. If a system with four catch sensors has been ordered, sensors numbered 1 and 2 can be used on the trawl and the other two sensors kept for reserve. For deep trawling, and when fish is abundant, it can be advantageous to mount three or four catch indicators in such a way that cod-end filling can be monitored continuously to insure that the trawl is hauled back in time. For the FS 925 MK II Stand Alone, the same installation procedure should be followed. Refer to the FS 925 MK II stand alone system wiring diagram in chapter 8, DRAWINGS. Kongsberg Simrad Mesotech Ltd. Port Coquitlam, BC - Canada 900-12007001/Iss1.0 Page 6.18 FS900/925 MK II Operators Manual FS 925 MK II Installation, System Set-Up and Test 6.7 FS 900/925 MK II DRAWINGS Attached drawings: Drawing Number Description Kongsberg Simrad Mesotech Ltd. Port Coquitlam, BC - Canada FS900/925 MK II Operators Manual FS 925 MK II Installation, System Set-Up and Test Kongsberg Simrad Mesotech Ltd. Port Coquitlam, BC - Canada 900-12007001/Iss1.0 Page 6.19 FS900/925 MK II Operators Manual Troubleshooting and Maintenance 900-12007001/Iss1.0 Page 7.1 PART 7 TROUBLESHOOTING AND MAINTENANCE 7. TROUBLESHOOTING AND MAINTENANCE .................................................... 7.3 7.1 INTRODUCTIONS .......................................................................................... 7.3 7.2 SYSTEM OVERVIEW ..................................................................................... 7.3 7.2.1 FS 900/925 MK II system......................................................................... 7.3 7.2.2 Trawl Cable Requirements ...................................................................... 7.3 7.3 HANDLING & MAINTENANCE ....................................................................... 7.4 7.3.1 Wheelhouse Electronics .......................................................................... 7.4 7.3.2 Trawl Unit ................................................................................................. 7.4 7.3.2.1 Handling Tips .................................................................................... 7.5 7.3.2.2 Maintenance Schedule ...................................................................... 7.5 7.3.2.3 Connector Maintenance .................................................................... 7.6 7.3.2.4 Excessive Impacts............................................................................. 7.6 7.3.2.5 Corrosion ........................................................................................... 7.7 7.3.2.6 Shaft or Transducer Damage ............................................................ 7.7 7.3.3 Catch Sensors ......................................................................................... 7.7 7.3.4 Winch Slip-Rings and Trawl Cable .......................................................... 7.7 7.4 MONITORING SYSTEM PERFORMANCE .................................................... 7.8 7.4.1 Test Cable................................................................................................ 7.8 7.4.2 Power Supply Meter Readings ................................................................ 7.9 7.4.3 Trawl Cable Gain ................................................................................... 7.10 7.4.4 Telemetry Errors .................................................................................... 7.10 7.5 TROUBLESHOOTING .................................................................................. 7.11 7.5.1 System Tools ......................................................................................... 7.11 7.5.2 Diagnosing Problem............................................................................... 7.12 7.5.3 Testing Trawl Cable ............................................................................... 7.14 7.5.3.1 Cable Impedance ............................................................................ 7.14 7.5.3.2 Closed Loop Resistance ................................................................. 7.14 7.5.3.3 Voltage and Current at Trawl Unit ................................................... 7.15 7.5.3.4 Test for Water In Cable ................................................................... 7.15 Kongsberg Simrad Mesotech Ltd. Port Coquitlam, BC - Canada 900-12007001/Iss1.0 Page 7.2 FS900/925 MK II Operators Manual Troubleshooting and Maintenance 7.6 SECTION 1 - CATCH SENSORS ................................................................. 7.16 7.7 SECTION 2 - WINCH SLIP-RINGS AND TRAWL CABLE ............................ 7.18 7.8 SECTION 3 - SYSTEM PERFORMANCE RECORDS .................................. 7.20 Kongsberg Simrad Mesotech Ltd. Port Coquitlam, BC - Canada FS900/925 MK II Operators Manual Troubleshooting and Maintenance 900-12007001/Iss1.0 Page 7.3 7. TROUBLESHOOTING AND MAINTENANCE 7.1 INTRODUCTIONS This document is provided to instruct in proper handling, maintenance and troubleshooting of the FS Trawl Monitoring System. The information is applicable to both the FS900 MK II and FS 925 MK II systems. 7.2 SYSTEM OVERVIEW The Simrad FS Trawl Monitoring System (both FS 900 MK II and FS 925 MK II) consists of wheelhouse electronics and a trawl unit. The wheelhouse electronics include the display unit, processor (control) unit and power supply unit. The wheelhouse electronics include the display unit, processor (control) unit and power supply unit. The trawl unit electronics includes the sonar head, sensor module, receive transducer and up to four catch sensors. In addition to the above equipment, but not supplied by Simrad, the system requires a winch with slip-rings and a trawl cable for connection of the FS trawl unit to the wheelhouse electronics. The system configurations for FS 900 MK II and FS 925 MK II are similar, but there are some important differences. These differences are discussed in the following sections. 7.2.1 FS 900/925 MK II system The FS 900/925 power supply unit is simpler than that of the FS 900 unit. It only contains the power modules to provide the 60/110 and 220 VDC @ 1 A maximum for powering the trawl unit electronics, and the voltage and ampere meters. The long cable amplifier and low-frequency telemetry adapter including the synchronization PCB is now incorporated into the processor. With the FS 900 MKII or the FS 925 MK II system, the trawl cable connects directly to the processor unit. Furthermore, the compensation for signal losses over the long trawl cable are one automatically within the processor unit each time it is powered up. In this way, changes to the cable losses do not affect the intensity of the sonar return displayed. 7.2.2 Trawl Cable Requirements For whatever cable type and length used, the following specifications must be met Kongsberg Simrad Mesotech Ltd. Port Coquitlam, BC - Canada 900-12007001/Iss1.0 Page 7.4 FS900/925 MK II Operators Manual Troubleshooting and Maintenance for operation with the Simrad FS trawl Monitoring system: Cable Closed Loop Resistance Signal Attenuation Through Cable: <100 ohms <40 dB (1/100 signal amplitude) @ 55 kHz <20 dB (1/10 signal amplitude) @ 12 kHz The cable closed loop resistance determines the maximum voltage drop along the trawl cable. For proper operation the trawl unit electronics require 55 - 140 VDC @ 1 A maximum. For typical operation, the current is approximately 300 mA with peaks to 500 mA. The equations for calculating the voltage drop along the trawl cable are: Maximum Cable Resistance = Maximum Voltage Drop Along Cable Maximum Current Through Cable Maximum Voltage Drop Along Cable = (Cable Resistance) x (Maximum Current) Hence, the cables maximum allowable closed loop resistance is 114 ohms. This results in a voltage drop of 57 V. 7.3 HANDLING & MAINTENANCE The most common causes of failures to the Simrad FS Trawl Monitoring system are: 1. trawl cable and/or winch slip-ring problems, 2. sonar head and sensor module connector and interconnect cable failures, or 3. excessive impacts and/or physical damage to trawl unit electronics. In all three of these cases, proper handling and maintenance can significantly reduce the frequency of FS failures. The following sections outline the recommended handling and maintenance for the FS system. 7.3.1 Wheelhouse Electronics Once installed, these units require little maintenance other than removing dust. A damp, lint-free cloth should be used for this purpose. 7.3.2 Trawl Unit The Trawl Unit is subjected to the harshest conditions, and therefore proper handling Kongsberg Simrad Mesotech Ltd. Port Coquitlam, BC - Canada FS900/925 MK II Operators Manual Troubleshooting and Maintenance 900-12007001/Iss1.0 Page 7.5 and maintenance is crucial to ensure trouble free operation. 7.3.2.1 Handling Tips • • • • • Thought the trawl unit electronics are ruggedized for the fishing environment, mishandling or repeated impacts may result in damage to, or failure of, the electronic components. Care should be taken at all times to avoid dropping or impacting the trawl unit or the individual components. Avoid scratching the surface of the sonar head and sensor module housings. The anodized surfaces (red coating) are there to protect the electronic housings from corrosion and any damage to these surfaces will increase the likelihood or corrosion. Ensure correct installation of the sonar head into the trawl housing to avoid improper operation or damage to the transducer and shaft. Both the retaining rings and the locating pin are required. Protect connector mating surfaces from corrosion and damage. At first sign of damage, connectors should be replaced! Pigtails must be properly attached to trawl cable, and the connector mating surface must be protected from moisture and dirt all times. Failure to do this may result in water damage to cable, causing improper operation of the sonar system. 7.3.2.2 Maintenance Schedule For optimum performance and trouble free operation, follow the maintenance schedule below. • Beginning of Fishing Season Service all connectors • Every Two Weeks of Continuous Use The trawl unit package should be opened and the components cleaned with fresh water. The sonar head and sensor module should be inspected for corrosion or damage. Service all connectors. The FS processor should be checked and cleaned if required. End of Fishing Season The trawl unit package should be opened and the components cleaned with fresh water. The sonar head and sensor module should be inspected for corrosion or damage. Service all connectors and cover them with plastic. Store unit in a dry, clean area. • • Every Twelve (12) Months Heavy usage or Every Two Years Return the sonar to a qualified Simrad service facility for inspection of Kongsberg Simrad Mesotech Ltd. Port Coquitlam, BC - Canada 900-12007001/Iss1.0 Page 7.6 FS900/925 MK II Operators Manual Troubleshooting and Maintenance connectors, seals and shaft assembly. Have parts replaced as required. • Every Four Years Both the sonar head and the sensor module should be returned to a qualified Simrad service facility for recalibration and upgrade to the latest specifications, and inspection of connectors and housings for damage. 7.3.2.3 Connector Maintenance Proper connector maintenance is crucial to the prevention of connector failure that may result in failure of the sonar system and possible water damage to the sonar head or sensor module. The following steps should be taken whenever the connectors are assembled, or at regular intervals as outlined in the “Maintenance Schedule” section above. 1. Wipe connectors clean of old grease and dirt with a lint free cloth. 2. Inspect the connector’s metal contacts and sealing surfaces for corrosion, wear or damage. If any found, return unit to a qualified Simrad service facility for replacement of the connector! 3. Apply liberal amounts of Dow Corning “55” grease to each of the connector prongs and to the sealing surfaces of the connectors. Do not use a silicone rubber adhesive sealant! 4. Press connectors together until fully seated. Excess grease should be squeezed out of the connector sockets. 5. Hand tighten the locking sleeve. Do not use a wrench or pliers! 6. When separating the connectors, avoid wrenching or bending connector. Caution! Failure to correctly maintain connectors may cause damage to the system and will void warranty. 7.3.2.4 Excessive Impacts Thought the FS Trawl Unit is designed for the harsh fishing environment, excessive impacts to the trawl unit or the individual components may damage them. With the older fiberglass trawl housing, excessive impacts to the trawl unit usually resulted in physical damage to this housing. However, with the newer, more durable urethane housing, excessive impacts to the trawl unit may NOT cause physical damage to either the trawl housing or the exterior of the individual electronic units, but may result in damage to the electronics. Note! As with all electronics, careful handling of the trawl unit will reduce the Kongsberg Simrad Mesotech Ltd. Port Coquitlam, BC - Canada FS900/925 MK II Operators Manual Troubleshooting and Maintenance 900-12007001/Iss1.0 Page 7.7 likelihood of FS failures. 7.3.2.5 Corrosion If on examination, corrosion has occurred to the sonar head or the sensor module’s metal parts, these areas should be cleaned well and the area sealed with paint or a sealant to prevent continuation of the corrosion in this area. Caution! If corrosion is allowed to continue, flooding of the unit may result. 7.3.2.6 Shaft or Transducer Damage The transducer and shaft should be inspected for damage. If the transducer has experienced an impact this could bend the shaft and eventually allow water into the housing. If the shaft is bent the unit should be returned to a qualified Simrad service facility for replacement of the shaft seal assembly. Note! If the sonar head and sensor module are correctly installed in the trawl unit, with proper placement of retaining rings and locating pins, then damage to the transducer and shaft should never occur. 7.3.3 Catch Sensors The catch sensors are relatively maintenance free except to charge the batteries. Section 1 provides information on both the charging of the catch sensors and the proper mounting of these sensors on the trawl. 7.3.4 Winch Slip-Rings and Trawl Cable The winch slip-rings and trawl cable are the umbilical cord between the processor unit and trawl unit electronics, and are critical to the proper operation of the Simrad FS Trawl Monitoring system. Damaged, worn or poorly maintained cable or sliprings will degrade the performance of the system and may cause or lead to a complete system failure. Worn, dirty or wet winch slip-rings may add noise, current spikes or additional losses to cable. Slip-ring assemblies should be checked regularly for wear and proper Kongsberg Simrad Mesotech Ltd. Port Coquitlam, BC - Canada 900-12007001/Iss1.0 Page 7.8 FS900/925 MK II Operators Manual Troubleshooting and Maintenance sealing against the weather. Slip-ring technology has improved considerably over past several years and sealed units from several supplies (such as IEC Corp.) have proven to be very reliable. Trawl cables, particularly the plastic jacketed type, are extremely susceptible to damage and wear that may adversely affect system operation. Proper maintenance is very important to ensure cable losses are minimized and adequate isolation between the cable conductors and the sea water are maintained. Common problems include poor splices, water damage, cracked or worn outer casing (insulating jacket), or severed cable. The trawl cable should be routinely checked for damage and affected sections removed, splices redone or the entire cable replaced as required. The pigtails spliced to the end of the trawl cable are susceptible to damage and corrosion and must be checked, and if necessary replaced, every time prior to connecting the trawl unit. When not in use, the pigtail should be wrapped in a plastic bag and stored, when possible, out of the weather and away from being stepped on or damaged in any other way. Polarity of the signals applied to the trawl cable (coax) may also be important in the proper operation of the system. To provide optimum shielding from noise, we recommend the positive signal be applied to the center conductor and the negative signal to the shield. For additional information on connecting to slip-rings and examples of splicing trawl cable, refer to Section 2. 7.4 MONITORING SYSTEM PERFORMANCE There are a number of tools available with the Simrad FS Trawl Monitoring system that allow its performance to be checked. When these tools are utilized as part of the regular maintenance, they provide information about the state of the system and allow it to be monitored. This can be valuable in detecting problems before they cause and FS system failure. 7.4.1 Test Cable With every FS Trawl Monitoring system, a 50’ test cable is supplied for testing the system without requiring the trawl cable. This provides a quick and simple way of verifying whether problems are due to the trawl cable or winch slip-rings. In addition, system performance values that are measured on the test cable provide a base for which performance values measured later (using either the test cable or trawl cable) can be compared to. For the FS 900 MK II system, the trawl cable and test cable are both connected to Kongsberg Simrad Mesotech Ltd. Port Coquitlam, BC - Canada FS900/925 MK II Operators Manual Troubleshooting and Maintenance 900-12007001/Iss1.0 Page 7.9 the 3-pin connector (“2-wire”) on the rear panel of the FS 900 MK II and/or FS 925 MK II processor unit. To install the test cable, disconnect the trawl cable and attach the test cable (see Appendix B for more information). When using the test cable the power supply voltage can be set to low (56 VDC) or to high (110 VDC). If the system is to be operated for extended periods on the test cable, then the power supply voltage should be set to low. 7.4.2 Power Supply Meter Readings The voltage and ampere meters located in the power supply unit are useful for monitoring the trawl unit power requirements. For the most benefit, these meters should be removed from the power supply unit and mounted remotely next to the processor unit for continuous monitoring. When the system is first installed or when the trawl cable is replaced, the power supply voltage (except when on the test cable, the voltage selection switch should be set to high) and current values should be recorded when unit is running in normal operating mode (i.e., with range and scan speed set to values normally used during fishing). Typical values are 110 VDC and 250 mA for sonar head only and 325 mA for both sonar head and sensor module. To facilitate monitoring of this information, these values should be recorded on the charts provided in Section 3. Any changes in the recorded meter values during normal operation may indicate a potential problem, even if the unit continues to operate properly. Common cases are: 1. Current Meter Jitters This is commonly due to dirty, wet or worn winch slip-rings that cause current spikes on the trawl cable when the winch is rotating. A test for slip-ring problems is to slow down the winch (at high winch speeds you will not see jitter on the current meters) and check if the current meter is jittering and whether the jitter rate changes with the winch speed. 2. Increase in Current Gradual increases in the trawl unit current may be due to either the trawl cable or the trawl unit electronics. A higher cable closed loop resistance, due to cable damage, poor splices, poor winch slip-rings, or water in cable, may reduce the voltage supplied to the sonar head below the required minimum of 55 VDC. This will result in the sonar head drawing more current. Alternatively, there may be a problem in the sonar head or sensor module that causes additional current draw. To diagnose this problem, a current reading should be made with the system Kongsberg Simrad Mesotech Ltd. Port Coquitlam, BC - Canada 900-12007001/Iss1.0 Page 7.10 FS900/925 MK II Operators Manual Troubleshooting and Maintenance running on the test cable, both with and without the sensor module. If the current reading, with both the sonar head and sensor module connected, is higher than a previous value obtained on the test cable, then the problem is likely with the trawl unit electronics. If the currents is higher with both, but the same as previously measured with only the sonar head, then the sensor module or interconnect cable may be faulty, otherwise problem is with sonar head. If the current readings are the same on test cable as previously obtained, then the trawl cable and winch slip-rings should be checked. 7.4.3 Trawl Cable Gain When signals pass through cables, the signal is attenuated a certain amount that is normally dependent on the type and length of cable used. For the FS Trawl Monitoring system to operate properly, it must apply gain to the signals to compensate for the cable losses. Monitoring of this required gain allows the trawl cable to be checked for additional losses due to damage, water, poor splices, bad connectors, etc. With the FS 900/925 MK II system, the cable compensation gain has been automated. Each time the system is powered up (or when a system calibration is performed) the gain is set in the processor unit by monitoring the transmit pulse from the sonar head and increasing the gain until the received signal is normalized to a standard level (that is why you hear the transducer pinging just after turning the system on). The resulting gain is displayed in the system test result page (see Section ???? for an example of this page) as two integer values separated by a comma. Each value is an integer from 0 to 255, with a larger value corresponding to higher gain. To check the cable compensation gain for an FS 900/925 MK II system, the “System Test” item in the SELF TEST MENU should be selected. By periodically checking the cable compensation gain obtained from the FS 900/925 MK II processor unit and comparing it to a previously recorded value, the condition of the trawl cable can be monitored. Acceptable cable gain values are less than 100. If one or both gain values are over 200, then there may be a problem with the trawl cable and the system should be checked on the test cable. To facilitate monitoring of the trawl cable, the cable gain values should be recorded on the charts provided in Appendix E. 7.4.4 Telemetry Errors In the normal operation of the FS Trawl Monitoring system, commands are sent from the processor unit down the trawl cable, to the trawl unit electronics and acknowledgments are then sent back up to the processor unit. Rudimentary error checking of these commands is performed to monitor the performance of the telemetry. Kongsberg Simrad Mesotech Ltd. Port Coquitlam, BC - Canada FS900/925 MK II Operators Manual Troubleshooting and Maintenance 900-12007001/Iss1.0 Page 7.11 Telemetry errors can result from noise induced on the trawl cable due to interference, or problems with the trawl cable or trawl unit electronics. Though a few telemetry errors is quite common and acceptable, an excessive number of errors will adversely affect the sonar operation and may indicate a problem that will eventually cause a system failure. Both the FS 900 MK II and FS 925 MK II processor units have calibration or system test routines that display the current status of telemetry errors. In addition, the FS 900/925 MK II processor unit has a “Telemetry Test” item in the SELF TEST MENU that, when selected, performs a continuous telemetry test while reporting the errors that occur in real-time. These test routines should be run when a system is first installed, or when the trawl cable or trawl unit electronics are changed, and the telemetry errors recorded for later comparison. The charts in Appendix E are provided to facilitate the monitoring of the telemetry. A common occurrence of telemetry errors is time-outs. This problem indicates the trawl unit electronics are not responding to the processor unit, or the sensor module is not responding to the sonar head. The causes of this are either with the electronic units themselves, or with the trawl cable or interconnect cable. Typically, if the problem is with the sensor module or interconnect cable, the time-outs occur in multiples of 15 (the sonar head may still operate correctly with the exception of periodic pauses). 7.5 TROUBLESHOOTING In the event the Simrad FS Trawl Monitoring system does not operate correctly, care must be taken to properly diagnose the cause of the failure. Quite often the failure is thought to be with the Fs electronics when the actual cause is due to the winch sliprings, the interconnect cable or the trawl cable. The following sections provide helpful advice on troubleshooting the FS system. 7.5.1 System Tools The system tools available for troubleshooting the Fs system are: 1. Test Cable Provided with every Fs Trawl Monitoring system, the test cable enables the Fs system to be tested without the winch slip-rings or test cable. This provides a quick and simple means of checking whether the problem is with the Fs electronics or not. 2. Power Supply Unit Voltage and Current Meters When remotely mounted next to the processor unit, the power supply unit meters allow the trawl cable voltage and current to be continuously Kongsberg Simrad Mesotech Ltd. Port Coquitlam, BC - Canada 900-12007001/Iss1.0 Page 7.12 FS900/925 MK II Operators Manual Troubleshooting and Maintenance monitored. When a fault is detected the meter values should be noted and current meter behavior observed. Jitter in the current meter may indicate current spikes due to the winch slip-rings. Higher or lower values than normal (typical values: 110 VDC, 250 - 350 mA) may indicate additional losses in the trawl cable due to physical or water damage, bad splice, etc., or problems with the trawl unit electronics. 3. Processor Unit Calibration or Self Test Routines Both the Fs 900 MK II and FS 925 MK II processor units have calibration or self test routines for checking system performance. The FS 900 MK II and FS 925 MK II unit’s SELF TEST MENU contains several items for checking the gain and then displays it along with the current status of the other system test value (see example of System Test Report page in section 3). Other useful selections include “Calibrate” for performing a complete system calibration, and “Telemetry Test” which repeatedly sends commands to the sonar head and reports all telemetry errors in real-time. Results obtained from these routines may indicate noise problems or additional losses in the trawl cable, or problems with the trawl unit electronics. Refer to the operators manual for information on running these routines. The usefulness of these tools is greatly enhanced when they are used on a regular basis to monitor system performance. Records of past system performance, when unit is operating properly, provide a basis for comparison that may assist in diagnosing the problem when a FS system fails. Refer to Section 4 above for further discussion of this. 7.5.2 Diagnosing Problem If the Fs system develops a problem, or if it fails completely, the steps below should be followed. 1. Check the power supply unit meters and record their values. If the failure was on power up, ensure the voltage selection switch is on high and that the power is on. If the system developed a problem or failed while operating, then note the voltage and current mete behaviors. If the current meter jitters, then stop the trawl winch, if rotating, and note any changes in the meter values or their behavior. 2. If the processor unit displays a system test result page, then record the values and make note of any failure (highlighted in red). If not, then implement a system test and record the results obtained. Use the charts in section 3 for reporting the results. 3. Disconnect the trawl unit from the trawl cable and re-connect to the Fs system using the test cable. Power up the system and repeat step 1 and 2. Note! If a Simrad FS unit is diagnosed as being faulty, then the unit(s) Kongsberg Simrad Mesotech Ltd. Port Coquitlam, BC - Canada FS900/925 MK II Operators Manual Troubleshooting and Maintenance 900-12007001/Iss1.0 Page 7.13 should be returned to an authorized Simrad service center. ALL system performance results and a complete description of the problem should be supplied with the defective unit to assist in its repair. The following list common problems and probable causes Problem Action/Possible Cause 1. Complete system and/or calibration − Check power supply unit voltage and failure - cable gain at max., telemetry current, ensure unit is on (voltage errors head id + 1, etc. meter at 110 VDC). If current okay, then sonar head needs replacing. − If no current, then check trawl unit on test cable. Trawl cable or slip-rings at fault if unit runs fine. If not, then replace sonar head. 1. Sonar head operates okay, but − Check for telemetry errors. If none, pauses periodically - may not heave then problem with sonar head or sensor module data processor unit. − If errors and they occur in multiples of 15, then sensor module or interconnect cable problem. Check by disconnecting sensor module and reconfiguring processor unit for FS 901. − If errors, check system using test cable. If errors go away, then problem with trawl cable or slip-rings, otherwise problem with sonar head. 1. Sonar head operates okay, but image − Check calibration for errors in sonar skewed or distorted. head positioning. If errors, then problem with sonar head, otherwise check that sonar head is properly mounted in trawl housing. 1. Sonar head operates okay, but cable − Check system on test cable. If gain gain higher than normal and possibly okay and errors go away, then trawl telemetry errors. cable or slip-rings faulty, otherwise problem with sonar head. 1. No sensor module data. − Ensure sensor module connected and display of sensor data is enabled. − Replace interconnect cable. If problem persists, then fault with sensor module. 1. No catch indication, but depth and − Ensure catch sensors are properly Kongsberg Simrad Mesotech Ltd. Port Coquitlam, BC - Canada 900-12007001/Iss1.0 Page 7.14 FS900/925 MK II Operators Manual Troubleshooting and Maintenance temp okay − charged and display of catch data is enabled. Check unit on deck with catch sensor placed 1 meter from receive transducer. Connect wire from “+” lug to metal lid on back of catch sensor, wait a couple minutes and verify display. If no indication or indication is wrong, then fault with sensor module. 7.5.3 Testing Trawl Cable If, after testing the FS system, the trawl cable is suspected to be faulty, then it needs to be troubleshooted to determine what and where the problem is. For problems that are not obvious, however, this can be quite difficult to do and may require someone experienced with testing trawl cable. This section provides some basic tips in troubleshooting trawl cable, but is in no way a complete and comprehensive guide. 7.5.3.1 Cable Impedance The use of a Meggar to check the impedance of the trawl cable may be the most useful test. It can be done with or without the slip-rings connected, and readings should be taken between the cable’s two conductors and also form each conductor to the fishing vessels hull. As a minimum, the impedance should be greater than 2 Mohms, and preferably over 6 Mohms. Caution! The Fs system MUST be disconnected from trawl cable during Meggar tests to prevent possible damage to the electronics! If the impedance between the cable’s two conductors is too low, then possible problems are bad splices, water in cable, moisture in slip-rings (if connected during test), or damaged cable. If the impedance between and cable’s conductors and the vessel’s hull is too low, then possible causes are damaged outer jacket on cable, bad splice, or bad slip-rings (if connected during test). 7.5.3.2 Closed Loop Resistance As previously mentioned, the closed loop resistance must be less than 100 ohms for proper operation of the FS system. This test should be done with the FS system disconnected, but with the winch slip-rings included. Kongsberg Simrad Mesotech Ltd. Port Coquitlam, BC - Canada FS900/925 MK II Operators Manual Troubleshooting and Maintenance 900-12007001/Iss1.0 Page 7.15 To do the test, the conductors at one end of cable should be jumpered together (shorted). An ohmmeter is then used at the other end of cable to measure the resistance between the conductors. 7.5.3.3 Voltage and Current at Trawl Unit A further check of the cable losses can be done by measuring the voltage and current at the trawl unit. This measurement requires the trawl unit electronics to be connected and the FS system powered up. This test is done where the trawl cable pigtail plugs into the sonar head. Jumpers will be required to breakout the signals for connection to voltage and ampere meters. Caution! There are DC voltages on the trawl cable that are capable of delivering a lethal electric shock! The minimum voltage at the trawl unit is 55 VDC and the current should be approximately 250 mA with sonar head only connected and 325 mA with both sonar head and sensor module (current readings will vary depending on operation mode i.e., scan speed and range, etc.). 7.5.3.4 Test for Water In Cable When a trawl cable is damaged or there is a poor splice, sea water can get into the cable. As a result, the cable may act as a battery - producing a small dc voltage across the conductors of the cable. This is detrimental to the operation of the FS system and all affected cable should be removed. To test for this, the trawl cable should be disconnected from the FS system and a voltage meter connected to the trawl unit end of the cable. If water is present, then there may be a reading of 2 - 3 volts dc. Kongsberg Simrad Mesotech Ltd. Port Coquitlam, BC - Canada 900-12007001/Iss1.0 Page 7.16 FS900/925 MK II Operators Manual Troubleshooting and Maintenance 7.6 SECTION 1 - CATCH SENSORS Kongsberg Simrad Mesotech Ltd. Port Coquitlam, BC - Canada FS900/925 MK II Operators Manual Troubleshooting and Maintenance Kongsberg Simrad Mesotech Ltd. Port Coquitlam, BC - Canada 900-12007001/Iss1.0 Page 7.17 900-12007001/Iss1.0 Page 7.18 FS900/925 MK II Operators Manual Troubleshooting and Maintenance 7.7 SECTION 2 - WINCH SLIP-RINGS AND TRAWL CABLE Kongsberg Simrad Mesotech Ltd. Port Coquitlam, BC - Canada FS900/925 MK II Operators Manual Troubleshooting and Maintenance Kongsberg Simrad Mesotech Ltd. Port Coquitlam, BC - Canada 900-12007001/Iss1.0 Page 7.19 900-12007001/Iss1.0 Page 7.20 FS900/925 MK II Operators Manual Troubleshooting and Maintenance 7.8 SECTION 3 - SYSTEM PERFORMANCE RECORDS Kongsberg Simrad Mesotech Ltd. Port Coquitlam, BC - Canada FS900/925 MK II Operators Manual Troubleshooting and Maintenance Kongsberg Simrad Mesotech Ltd. Port Coquitlam, BC - Canada 900-12007001/Iss1.0 Page 7.21