1
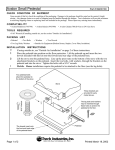
Avalon Ashpan Installation Instructions
Part # 99200125
CHECK CONDITION OF SHIPMENT
Upon receipt of this kit, check the condition of the packaging. Damage to the package should be noted on the carrier's freight
receipt. Any damage claims as a result of shipping must be handled through the shipper. Travis Industries will provide assistance
in resolving shipping claims or replacing items not included in the package. Please report any missing items immediately.
COMPATIBILITY
Avalon Rainier-90’s (990) with Serial Number 4076 or Larger
Avalon Olympics (1190) with Serial Number 9760 or Larger
TOOLS REQUIRED
• Large Screwdriver
• 9/16" Wrench
• 7/16" Wrench
PACKING LIST
• Pedestal
• Ashpan
• Four 3/8"x3/4" Bolts & Washers
• Four Bricks (only two are used - see the instructions below)
• Drop Chute
• Stove Gasket Cement
• Two Dowels
• Two Lag Bolts, Washers
• Drop Chute Gasket
• Outside Air Equipment (Rodent Screen, Staples, Cover Plate, Insulation)
INSTALLATION INSTRUCTIONS
? If using outside air, see "Outside Air Installation" on page 4 & 5 of these instructions.
1
Place the pedestal into position on the floor protection. Lift the pedestal up and insert the two
dowels included with this kit onto the forward and rear edge of the pedestal base. Lift the stove onto
the pedestal base (with the ashpan removed). Line up the press-nuts on the bottom of the stove with
the two attachment brackets on the pedestal. Insert the four bolts, with washers, through the brackets
on the pedestal and into the stove. Tighten the bolts with a 9/16" wrench.
9/16" Wrench
Use a 9/16" wrench to attach the four
pedestal bolts to the bottom of the stove.
Stove
The lag bolts and washers
may be inserted through
these holes to anchor the
pedestal to the floor.
The dowels insert onto the front and
back edge of the pedestal base.
Page 1 of 7
Pedestal
(without ashpan)
Printed September 4, 2008
Avalon Ashpan Installation Instructions
2
Part # 99200125
Pry out the drop chute knockout with a large screwdriver.
FRONT OF STOVE
Standard Pedestal
Outside Air Knock-Out
Drop Chute
Knock-Out
Ashpan Pedestal/Air Boot
Outside Air Knock-Out
NOTE: If using
outside air, remove
this knock-out.
Open the door to the stove and remove the floor firebricks on the left side. Locate the drop chute
cover on the floor of the firebox. Remove the four bolts that secure it with a 7/16" wrench. Remove
the cover and the gasket below it. Insert the drop chute gasket around the drop chute. Then insert
the drop chute through the hole in the firebox floor. Position the drop chute so the slots run side to
side. Replace the four bolts to secure the drop chute.
7/16" Wrench
3
Rear Blower Knock-Outs
Remove the four bolts
that hold the drop
chute in place.
Insert the Drop Chute into the hole. Secure it in place
with the four bolts that held the drop chute cover in
place.
Drop Chute Cover
Drop Chute
(Floor of Firebox)
Remove and discard
the drop chute cover.
Make sure the gasket
forms a seal around
the perimeter of the
drop chute.
Drop
Chute
Gasket
When installed the grates on the drop chute
should look like this when viewed from the side.
AAAAAA
AAAAAA
AAAAAA
FRONT
Page 2 of 7
Printed September 4, 2008
Avalon Ashpan Installation Instructions
ST
OV
CE E G
ME AS
NT KE
T
Seal the area around the knock-out for outside air on standard pedestals (the 2" x 7" forward center
knockout - see the illustration below) with stove gasket cement (knead the cement inside the tube
prior to applying). Smooth the cement so it is flush with the baseplate. Seal the area around the
drop chute in the same manner.
ST
OV
CE E G
ME AS
NT KE
T
4
Part # 99200125
Seal the gap around
this knock-out
Seal the gap around the
bottom of the drop chute
Do not seal this
knock-out.
5
5a
For the Rainier (990), follow step 5a. For the Olympic (1190), follow step 5b.
This kit includes four bricks. Locate the 6" x 2-1/8" and 2-7/8" x 8-1/4" bricks, they are used for the
Rainier (990). The other two bricks may be discarded. Use the bricks inside the firebox, along with
the two bricks for the Rainier (990), to form the brick pattern shown below (NOTE: you will have
two extra bricks - these bricks may be discarded).
Standard Rainier (990) Floor Brick Pattern
F
F
F
A
F
Ashpan Pedestal Rainier (990) Floor Brick Pattern
F
F
E
B
C
B
Brick
A
B
C
D (included with ashpan pedestal)
E (included with ashpan pedestal)
F
Page 3 of 7
F
A
D
C
B
Size
9" x 1-5/8"
9" x 3-15/16"
1-3/4" x 3-15/16"
6" x 2-1/8"
2-7/8" x 8-1/4"
Full (9" x 4-1/2")
Printed September 4, 2008
Avalon Ashpan Installation Instructions
5b
Part # 99200125
This kit includes four bricks. Locate the 9" x 3-3/4" and 4-1/2" x 2-5/8" bricks, they are used for the
Olympic (1190). The other two bricks may be discarded. Use the bricks inside the firebox, along
with the two bricks for the Olympic (1190), to form the brick pattern shown below (NOTE: you will
have two full-size bricks remaining - these bricks may be discarded).
Standard Olympic (1190) Floor Brick Pattern
A
A
F
F
Ashpan Pedestal Olympic (1190) Floor Brick Pattern
B
A
F
B
C
D
F
B
B
Brick
A
B
C (included with ashpan pedestal)
D (included with ashpan pedestal)
F
6
A
F
F
Size
8-1/4" x 4-1/2"
6-3/8" x 4-1/2"
9" x 3-3/4"
4-1/2" x 2-5/8"
Full (9" x 4-1/2")
Follow the directions titled "Avalon Ashpan Operating Instructions" (on pages 6 & 7 of these
instructions) for installing & removing the ashpan.
Outside Air Installation
This pedestal has an internal air duct that may be used to direct air to the combustion chamber. Follow
the directions below prior to installing the stove or attaching the pedestal.
! Outside air is required for mobile home installations and in certain localities.
+ Read the section "Outside Air Requirements" in the owner's manual prior to installing outside air.
1
Before placing the stove on pedestal, determine the location of the hole that is cut through the floor
protection and floor. The illustration on the following page details the location where this hole may
be cut in relation to the faceplate of the stove. Cut a hole at least 16 square inches in area that does
not interfere with structural members of the home.
26"
Top View
FRONT
The faceplate of the Rainier
(990) is 3/8" in front of the
forward edge of the pedestal
base. The Olympic (1190) is
7/8" in front.
Page 4 of 7
Outside air may be drawn from this
area underneath the pedestal
(min. 16 square inches)
16"
18-3/4"
Pedestal Base
(without dowels)
17"
Printed September 4, 2008
Avalon Ashpan Installation Instructions
2
Part # 99200125
Place the included screen (or other screen) over the hole to act as a rodent barrier. It may be attached
above or below the floor. Secure the screen with the included staples.
OUTSIDE AIR EQUIPMENT
Screen is used to prevent
rodents from entering.
Cover plate is used
to block off room air .
Staples are used to
attach the screen to
the floor.
Insulation is used to seal the
side edges of the pedestal .
3
Prop the front of the stove up 12" and pry out the ashpan pedestal knockout with a large screwdriver.
FRONT OF STOVE
Drop Chute
Knock-Out
Standard Pedestal
Outside Air Knock-Out
Ashpan Pedestal/Air Boot
Outside Air Knock-Out
NOTE: If using
outside air, remove
this knock-out.
4
5
Rear Blower Knock-Outs
Follow the instructions on pages 1 through 4 of this instruction sheet for installing the ashpan
pedestal. With the pedestal in place, tuck the insulation included with the pedestal underneath the
side edges of pedestal to seal off any air from entering underneath the pedestal.
The cover plate seals the area around the air control rod. Remove the two screws and bridge from
the cover plate. Slide the cover plate underneath the air control rod and re-attach the bridge.
Phillips
Screwdriver
Remove the two screws that hold the
bridge to the cover plate. Then replace
the bridge when the cover plate is in
place.
Bridge
Air Control
Rod
The cover plate has a clip which
attaches it underneath the air control.
Page 5 of 7
Printed September 4, 2008
Avalon Ashpan Operating Instructions
WARNINGS:
!
Do not remove the ashpan when the stove is hot or while it still has burning coals or wood.
!
Do not operate the stove when the ashpan is removed or loose.
!
Whenever the ashpan is removed, inspect the gasket on the ashpan to make sure it is intact.
!
Ashes must be completely cool before disposal. The ashpan, or other non-combustible container
with a sealing lid, may be used to contain the ashes until they are completely cool. The container
must be placed on a non-combustible surface while ashes are still warm. If burying the ashes,
dispose of them away from any structure in soil that does not contain flammable material (pine
needles, branches, etc.).
WHEN TO EMPTY THE ASHES
+
Ashes inside the firebox may be pushed into the drop chute whenever ashes start to pile up. Empty
the ashpan once the ashpan fills 3/4 full. Depending upon the wood used and how thoroughly the
wood is burned, you may burn 1/4 to 3/4 of a cord of wood before the ashpan requires emptying.
REMOVING THE ASHPAN
1
2
Stove
With the stove cool,
reach along both sides of
the ashpan and rotate the
two handles backwards.
Rotate the
handle on both
sides backwards
to release the
ashpan.
Ashpan
Slide the ashpan forward
and away from the stove.
Pedestal
3
Flip the ashpan cover
over the ashpan to seal
the ashes inside. All
ashes must be
completely cool before
disposal. The ashpan, or
other non-combustible
container, may be used
to contain the ashes until
they are completely cool.
If burying the ashes,
dispose of them away
from any structure in soil
that does not contain
flammable material (pine
needles, branches, etc.).
Page 6 of 7
AAAAAAAAAAA
AAAAAAAAAAA
AAAAAAAAAAA
AAAAAAAAAAA
AAAAAAAAAAA
AAAAAAAAAAA
AAAAAAAAAAA
Ashpan Cover
Hinge
Ashpan Gasket
Ashpan
10850 117th Place N.E. Kirkland, WA 98033
Printed September 4, 2008
Avalon Ashpan Operating Instructions
REPLACING THE ASHPAN
1
2
Inspect the gasket on top of the ashpan. It must be intact and in place. If it is not, contact your
dealer for a replacement gasket. Swing the ashpan cover so it is behind the ashpan.
Slide the ashpan with the lid towards the rear into its holder on the pedestal. The ashpan has a rail on
each side that slides over a rail on the pedestal. Slide the ashpan all the way in.
Faceplate of Stove
Rail on Pedestal
AAAAAA
AAAAAA
AAAAAA
AAAAAA
Ashpan
Rail on Ashpan
NOTE: make sure the
lid is facing to the rear.
Ashpan Gasket
3
Rotate the handles on both sides of the pedestal forward. The handles, when rotated, compress the
ashpan against the stove and create an air-tight seal between the ashpan and stove. If you do not feel
the handles compress, check alignment of the ashpan.
Page 7 of 7
10850 117th Place N.E. Kirkland, WA 98033
Printed September 4, 2008