1
Audio CD Recorder
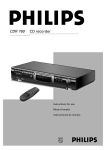
CDR950
• Instructions for use
• Mode d'emploi
• Instrucciones de manejo
• Bedienungsanleitung
IMPORTANT SAFETY INSTRUCTIONS
1. Read Instructions - All the safety and operating instructions
should be read before the appliance is operated.
2. Retain Instructions - The safety and operating instructions should
be retained for future reference.
3. Heed Warnings - All warnings on the appliance and in the
operating instructions should be adhered to.
4. Follow Instructions - All operating and use instructions should be
followed.
5. Water and Moisture - The appliance should not be used near
water - for example, near a bathtub, washbowl, kitchen sink,
laundry tub, in a wet basement, or near a swimming pool, and the
like.
6. Carts and Stands - The appliance should be used only with a cart
or stand that is recommended by the manufacturer.
6A.
An appliance and cart combination should be moved
with care. Quick stops, excessive force, and uneven
surfaces may cause the appliance and cart
combination to overturn.
7. Wall or Ceiling Mounting - The applicance should be mounted to
a wall or ceiling only as recommended by the manufacuter.
8. Ventilation - The appliance should be situated so that its location
or position does not interfere with its proper ventilation. For
example, the appliance should not be situated on a bed, sofa, rug, or
simular surface that may block the ventilation openings; or, placed
in a built-in instalation, such as a bookcase or cabinet that may
impede the flow of air trough the ventilation openings.
11. Grounding or Polarization - The precautions that should be
taken so that the grounding or polarization
means of an appliance is not defeated.
12. Power-Cord Protection - Power-Supply cords should be routed
so that they are not likely to be walked on or pinched by items
placed upon or against them, paying particular attention to cords at
plugs, convenience receptacles, and the point where they exit from
the appliance.
13. Cleaning - The appliance should be cleaned only as
recommended by the manufacturer.
14. Nonuse Periods - The power cord of the appliance should be
unplugged from the outlet when left unused for a long period of
time.
15. Object and Liquid Entry - Care should be taken so that objects
do not fall and liquids are not spilled into the enclosure through
openings.
16. Damage Requiring Service - The apliance should be seviced by
qualified service personnel when :
a. The power-supply cord or plug has been damaged; or
b. Objects have fallen, or liquid has been spilled into the
appliance; or
c. The appliance has been exposed to rain ; or
d. The appliance does not appear to operate normally or exhibits a
marked change in performance; or
e. The appliance has been dropped, or the enclosure damaged.
17 Servicing - The user should not attempt to service the appliance
beyond that described in the operating instructions. All other
servicing should be referred to qualified service personel.
9. Heat - The applicance should be situated away from heat sources
such as radiators, heat registers, stoves, or other appliances
(including amplifiers) that produce heat.
10. Power Sources - The appliance should be connected to a power
supply only of the type described in the operation instructions or as
marked on the appliance.
WARNING
TO REDUCE THE RISK OF FIRE OR ELECTRIC SHOCK ,
DO NOT EXPOSE THIS APPLIANCE TO RAIN OR MOISTURE.
RISK OF ELECTRIC SHOCK
DO NOT OPEN
CAUTION: TO REDUCE THE RISK OF ELECTRIC SHOCK, DO NOT
REMOVE COVER (OR BACK). NO USER-SERVICEABLE PARTS
INSIDE. REFER SERVICING TO QUALIFIED SERVICE PERSONNEL.
The lightning flash with arrowhead symbol, within
an equilateral triangle, is intended to alert the
user to the presence of uninsulated “dangerous
voltage” within the product’s enclosure that may
be of sufficient magnitude to constitute a risk of
electric shock to persons.
The exclamation point within an equilateral
triangle is intended to alert the user to the
presence of important operating and
maintenance (servicing) instructions in the
literature accompanying the appliance.
GENERAL INFORMATION
CAUTION
USE OF CONTROLS OR ADJUSTMENTS OR
PERFORMANCE OF PROCEDURES OTHER
THAN THOSE SPECIFIED HEREIN MAY
RESULT IN HAZARDOUS RADIATION
EXPOSURE.
CAUTION
TO PREVENT ELECTRIC SHOCK, MATCH
WIDE BLADE OF PLUG TO WIDE SLOT,
FULLY INSERTED.
ATTENTION
POUR EVITER LES CHOCS ELECTRIQUES,
INTRODUIRE LA LAME LA PLUS LARGE DE
LA FICHE DANS LA BORNE CORRESPONDANTE DE LA PRISE ET POUSSER
JUSQU’AU FOND.
The set complies with the FCC-Rules, Part 15
and with 21 CFR 1040.1
Canada
CDN
LASER
This digital apparatus does not exceed the Class B
limits for radio noise emissions from digital apparatus
as set out in the Radio Interference Regulations of the
Canadian Department of Communications.
Type
Wave lenght
Output Power
Semiconductor laser GaAlAs
775-795 nm (at 25°C)
2,5 mW (Read)
35 mW (Write)
Beam divergence 60 degree
Cet appareil numérique n’émet pas de bruits
radioélectriques dépassant les limites applicables dans
la règlement sur le brouillage radioélectriques édicté
par le ministère des communications du Canada.
This warning label is located on the rearside and inside this laser product.
CAUTION: INVISIBLE
LASER RADIATION
WHEN OPEN. DO NOT STARE INTO BEAM
DANGER:
VARO!
VARNING!
INVISIBLE LASER RADIATION WHEN OPEN.
AVOID DIRECT EXPOSURE TO BEAM.
AVATTAESSA JA SUOJALUKITUS OHITEJTAESSA OLET
ALTTIINANAKYMATTOMAALLE LASERSATEILYLLE.ALA
KATSO SATEESEEN.
OSYNLIG LASERSTRÅLNING NÄR DENNA DEL ÄR ÖPPNAD
OCH SPARREN AR URKOPPLAD. BETRAKTA EJ STRALEN
or
DANGER - Invisible laser radiation when open.
AVOID DIRECT EXPOSURE TO BEAM
THIS DEVICE COMPLIES WITH PART 15 OF THE FCC (U.S.A.) RULES.
OPERATION IS SUBJECT TO THE FOLLOWING TWO CONDITIONS : (1) THIS DEVICE MAY NOT CAUSE HARMFUL
INTERFERENCE, AND (2) THIS DEVICE MUST ACCEPT ANY INTERFERENCE RECEIVED, INCLUDING INTERFERENCE THAT MAY
CAUSE UNDESIRED OPERATION.
NOTE
This equipment has been tested and found to comply with
the limits for a Class B digital device, pursuant to part 15
of the FCC Rules. These limits are designed to provide
reasonable protection against harmful interference in a
residential installation. This equipment generates, uses and
can be used in accordance with the instructions, may
cause harmful interference to radio communications.
However, there is no guarantee that interference will not
occur in a particular installation.
If this equipment does cause harmful interference to radio
or television reception, which can be determined by
turning this equipment off and on, the user is encouraged
to try to correct the interference by one or more of the
following measures :
- reorient or relocate the receiving antenna.
- increase the separation between the equipment and
receiver.
- connect the equipment into an outlet on a circuit
different from that to which the receiver is connected.
- consult the dealer or an experienced radio/TV technician
for help.
IMPORTANT
THIS PRODUCT WAS FCC VERIFIED UNDER TEST CONDITIONS THAT INCLUDED USE OF SHIELDED CABLES AND
CONNECTORS BEWTEEN SYSTEM COMPONENTS. IT IS IMPORTANT THAT YOU USE SHIELDED CABLES TO REDUCE THE
POSSIBILITY OF CAUSING INTERFERENCE TO RADIOS, TELEVISION SETS AND OTHER ELECTRONIC DEVICES.
IF YOU HAVE ANY PROBLEMS CONTACT YOUR DEALER.
ANY CHANGE OR MODIFICATIONS TO THE EQUIPMENT BY THE USER NOT EXPRESSLY APPROVED BY THE
GRANTEE OR MANUFACTURER COULD VOID THE USER’S AUTHORITY TO OPERATE SUCH EQUIPMENT.
LIMITED WARRANTY
CD-R PLAYER
One Year Free Labor
One Year Exchange Warranty on Parts
This product must be carried in for repair.
WHO IS COVERED?
BEFORE REQUESTING SERVICE...
You must have proof of purchase to receive warranty service. A sales
receipt or other document showing that you purchased the product
is considered proof of purchase.
Please check your owner’s manual or our website at
WWW.ACDR.Philips.com before requesting service. Adjustments of
the controls discussed there may save you a service call.
WHAT IS COVERED?
TO GET WARRANTY SERVICE IN U.S.A.,
PUERTO RICO OR U.S.VIRGIN
ISLANDS...
Warranty coverage begins the day you buy your product. For one
year thereafter, all parts will be repaired or replaced, and labor is free.
After one year from the day of purchase, you pay for the replacement
or repair of all parts, and for all labor charges.
All parts, including repaired and replaced parts, are covered only for
the original warranty period. When the warranty on the product
expires, the warranty on all replaced and repaired parts also expires.
WHAT IS EXCLUDED?
Your warranty does not cover:
• labor charges for installation or setup of the product, adjustment
of customer controls on the product, and installation or repair of
antenna systems outside of the product.
• product repair and/or part replacement because of misuse,
accident, unauthorized repair or other cause not within the
control of Philips Consumer Electronics Company.
• reception problems caused by signal conditions or cable or
antenna systems outside the unit.
• a product that requires modification or adaptation to enable it to
operate in any country other than the country for which it was
designed, manufactured, approved and/or authorized, or repair of
products damaged by these modifications.
• incidental or consequential damages resulting from the product.
(Some states do not allow the exclusion of incidental or
consequential damages, so the above exclusion may not apply to
you. This includes, but is not limited to, prerecorded material,
whether copyrighted or not copyrighted.)
• a product that is used for commercial or institutional purposes
(including but not limited to rental purposes).
WHERE IS SERVICE AVAILABLE?
Warranty service is available in all countries where the product is
officially distributed by Philips Consumer Electronics Company. In
countries where Philips Consumer Electronics Company does not
distribute the product, the local Philips service organization will
attempt to provide service (although there may be a delay if the
appropriate spare parts and technical manual(s) are not readily
available).
MAKE SURE YOU KEEP ...
Please keep your sales receipt or other document showing proof of
purchase. Attach it to this owner’s manual and keep both nearby.
Also keep the original box and packing material in case you need to
return your product.
Take the product to a Philips factory service center (see enclosed
list) or authorized service center for repair.When the product has
been repaired, you must pick up the unit at the center. Centers may
keep defective parts.
(In U.S.A., Puerto Rico and U.S.Virgin Islands, all implied warranties,
including implied waarranties of merchantability and fitness for a
particular purpose, are limited in duration to the duration of this
express warranty. Because some states do not allow limitations on
how long an implied warranty may last, this limitation may not apply
to you.)
TO GET WARRANTY SERVICE IN
CANADA...
Take the product to a Philips consumer service center (listed below),
self-servicing dealer ar autorized service depot.
Philips Electronics Ltd.
601 Milner Avenue, Scarborough, Ontario, M1B 1M8
(416) 292-5161
4977 Levy Street, St. Laurent Québec, H4R 2N9
(514) 956-0120
1741 Boundary Road,Vancouver, B.C.VSM 3Y7
(604) 294-3441
(In Canada, this warranty is given in lieu of all other warranties. No
other warranties are expressed or implied, including any implied
warranties of merchantability or fitness for a particular purpose.
Philips is not liable under any circumstances for any direct, indirect,
special, incidental or consequential damages, howsoever incurred,
even if notified of the possibility of such damages.)
REMEMBER...
Please record the model and serial numbers found on the product
below. Also, please fill out and mail your warranty registration card
promptly. It will be easier for us to notify you if necessary.
MODEL #
SERIAL #
This warranty gives you specific legal rights. You may have other rights which vary from state/province to state/province.
Philips Service Company, P.O. Box 555, Jefferson City,Tennessee 37760,
(800) 531-0039
EL6191E001 / MAC 6058 / 10-96
IB7922E001
English
CONTENTS
Français
English ....................................................5
Español
Français.................................................29
Español .................................................53
5
NOTES
English
6
TABLE OF CONTENTS
English
Table of contents
GENERAL INFORMATION AND DISCS
Welcome ......................................................................8
About this manual........................................................8
Technical data ..............................................................8
Discs for recording.......................................................9
Discs for playback........................................................9
Maintenance ................................................................9
Accessories .................................................................9
OPERATING BUTTONS AND CONNECTIONS
Operating buttons on the front ..................................10
Connections at the back ............................................10
DISPLAY
DISPLAY indications...................................................11
DISPLAY messages ....................................................11
MENU messages........................................................12
INSTALLATION
Connections general ..................................................13
Analog connections ..................................................13
Digital coaxial connections .......................................14
Digital optical connections .......................................14
Power supply..............................................................15
Setup recommendations ............................................15
Inserting batteries in the remote control ..................15
REMOTE CONTROL
Remote control commands ........................................16
Inserting discs ............................................................16
RECORDING
Remarks about recording...........................................17
Recording modes........................................................17
Autostart recording ....................................................18
Manual recording.......................................................19
Microphone recording................................................20
Sample rate convertor (Monitor mode) .....................20
Finalizing CDR & CDRW discs ...................................21
Unfinalizing CDRW discs ...........................................21
Erasing CDRW discs ..................................................22
PLAYING
Playing a CD...............................................................23
Selecting a track ........................................................23
Search ........................................................................23
Shuffle (random order) play .......................................23
Repeat CD, track or program .....................................24
PROGRAMMING
Remarks about programming.....................................24
MENU MODE
Remarks about Menu mode.......................................25
Text settings...............................................................25
Recording settings .....................................................27
FIXING PROBLEMS
Troubleshooting..........................................................28
7
GENERAL INFORMATION
English
Welcome !
Thank you for buying this Philips Compact Disc Recorder.
In the 1980s Philips invented a new audio system - the CD.
The CD (compact disc) revealed the new dimensions of digital
sound and added to the pleasure of audio.
Compact-disc technology permits a high contrast in both loud
and soft passages, with perfect channel separation.
Philips has now further developed compact disc technology
and the result is the CD recorder.
With your Philips CD Recordable/ReWritable Recorder, you
can record, play and erase your own high-quality audio CDs,
subject to legal restrictions on copying. Naturally, you will
also be able to play all pre-recorded audio CDs.
It is forbidden to copy material protected by copyright,
including computer programs, films, television and audio
recordings. This appliance may not be used for such
applications.
About this manual
Technical data
This manual gives instructions for operating this CD recorder.
Please note:
- the digits (1) throughout the text indicate a sequence of
actions necessary to perform a certain operation;
- the arrows (➜) indicate the reaction from the recorder;
- the dots (•) indicate remarks, advice or special options
within a sequence of actions. The dot-marked instructions
are not necessary for operation.
Subject to modification without notice.
General
Power consumption ..........................................................15 W
Power consumption in Standby ..........................................6 W
Operating temperature ..................................................5-35° C
Weight..................................................................................4 kg
Dimensions ..................................................435 x 310 x 88 mm
Audio
Frequency response ............................................2Hz-22.050 Hz
Playback S/N (A-weighted) ............................................115 dB
Playback S/N ..................................................................110 dB
Playback dynamic range CDR............................................96 dB
Playback total harmonic distortion CDR........95 dB = 0.0017 %
Channel separation ........................................................115 dB
Recording S/N (A-weighted) ..........................................105 dB
Recording S/N digital without SRC ..................equal to source
Recording dynamic range..................................................95 dB
Recording total harmonic distortion + noise
........................................................................95 dB (0.0017%)
8
Discs for recording
Maintenance
For recording use, special audio discs must be used (for music
only). These discs bear one of the logos as shown below. The
text 'DIGITAL AUDIO' is present!
For recording, it is very important to use discs that are free of
dust and scratches.
Your recorder can use two types of discs for recording
purposes:
- CD-Audio Recordable (CDR) discs:
fully recorded and finalized, these discs
play on all CD players and recorders.
To clean a CD, wipe it in a straight
line from the center towards the
edge using a soft, lint-free cloth. A
cleaning agent may damage the
disc! Write only on the printed side
of a CDR or CDRW, and only with a
soft felt-tipped pen.
Recordable
- CD-Audio ReWritable (CDRW) discs:
can be recorded, erased and re-recorded
hundreds of times. When finalized, they
play on CDRW compatible CD players and ReWritable
recorders. In the course of 1999 most Philips CD players and
recorders will be CDRW compatible.
Clean the CD recorder with
a soft, slightly dampened lint-free
cloth. Do not use any cleaning
agents as they may have a corrosive
effect.
To ensure proper working of the set, we recommend the use
of Philips audio CDR and audio CDRW discs only.
Do not expose the CD recorder
batteries or CDs to humidity, rain,
sand or excessive heat (caused by
heating equipment or direct
sunlight).
Discs for playback
Your CD recorder is able to play:
- All pre-recorded audio CDs.
- All Audio CDR and Audio CDRW.
Note: CDR(W) discs recorded with a computer can only be
used when they are correctly treated according the
audio standard (IEC958: Consumer part). Single session
only!
RECORD
If the CD recorder cannot read CDs correctly, use a commonly
available cleaning CD to clean the lens before taking the CD
player to be repaired. Other cleaning methods may damage
the lens. Always keep the tray closed to avoid dust on the
lens.
The lens may cloud over when the CD recorder is suddenly
moved from cold to warm surroundings, making it impossible
to play a CD. Leave the CD recorder in the warm environment
until the moisture evaporates.
Accessories
- 2 Analog HQ audio cables (with red and white plugs)
- 1 Digital HQ coaxial cable (with black plugs)
- Power cord
- 2 Batteries
- Remote control
- Guarantee
9
English
GENERAL INFORMATION AND DISCS
OPERATING BUTTONS AND CONNECTIONS
English
3
4
5
6
7
8
9
10 11 12 13 14 15 16
2
1
RECORD
26 25 24 23
22 21 20 19 18 17
ANALOG
IN
L
R
R
1
Operating buttons on the front
1
2
3
4
5
6
7
8
9
0
!
@
#
$
%
^
&
*
10
ON/OFF ........................turns the CD recorder ON and OFF
Standby indicator
DISPLAY......................selects display information/text
SCROLL........................activates scrolling of text over the
display (once)
PROGRAM ..................opens/closes program memory
REPEAT........................repeats play (all, program or track)
SHUFFLE......................plays CD(RW) or program in
random order
Disc tray
Display..........................information screen
ERASE..........................selects erasing mode
FINALIZE ....................selects finalize mode
SOURCE ......................selects input source
PLAY/PAUSE 2 ; ......starts play/interrupts play or
recording
STOP 9........................stops/clears a program
¡ EASY JOG ™ ........- previous/next track (Play and
(rotate)
Program mode)
- recording level control (recording)
- selects settings (menu on)
ENTER (push) ..............- plays selected tracks
- selects settings in Menu mode
- programs track numbers
STORE/MENU ............- enters Menu mode
- stores Menu settings
CANCEL/DELETE ......- deletes tracks from a program
- deletes text in Menu mode
- returns to a higher level in the
menu
R ............................- searches forward
- cursor control in Menu/Prog.
review mode
OUT
L
IN1
DIGITAL
OUT
MAINS
IN2
OPTICAL
IN
OUT
2 3 4 5 6 7
8
( Q ............................- searches backward
- cursor control in Menu/Prog.
review mode
) OPEN/CLOSE /..........opens/closes disc tray
¡ RECORD ......................starts recording, finalising, erasing
™ REC(ord) TYPE ............selects recording modes
£ LEVEL ..........................headphone volume control
≤ PHONES ......................socket for headphones
∞ LEVEL (MIC)................microphone/mix level controller
§ MIC ..............................socket for (stereo) microphone
Note: Unless stated otherwise, all controls are on the front of
the CD recorder. When provided on the remote control,
you can also use the corresponding buttons, after
selecting the CD recorder or separate CD player by
pressing CDR or CD.
Connections at the back
1 ANALOG IN ................connects to the line output of an
amplifier (left and right)
2 ANALOG OUT ............connects to the line input of an
amplifier (left and right)
3 DIGITAL IN 1 ..............connects to the digital coaxial
output of an external CD player
4 DIGITAL OUT ..............connects to the digital coaxial
input of e.g. amplifier or recording
device
5 DIGITAL IN 2 ..............connects to the digital coaxial
output of an extra CD player
6 OPTICAL IN ................connects to the digital optical
output of an external CD player
7 OPTICAL OUT ............connects to the digital optical
input of e.g. amplifier or recording
device
8 Connection to mains
DISPLAY
1
REM
REC
2
DISPLAY messages
3
4
TOTAL REM
TIME TRACK
5
TRACK TIME
FADE
6
Messages, as listed and explained here, may appear on the
display for your guidance.
7
STEP
8
1
26
25
24
2 3 4
DIGITAL I I
OPTICAL I
ANALOG
5
CD
6
7
8
9 10 11 12 13 14 15 16 17 18 19 20 +
MANUAL SYNC
SCAN
SHUFFLE REPEAT TRACK ALL
PROGRAM
RW
23 22 21 20 19 18 17 16
15
14 13 12
English
DISPLAY indications
9
10
11
1 REM/REC TIME ..........indicates remaining recording
time/recording time
2 TRACK ........................track number
3 FE ......................balance (lights during balance
adjustment)
4 TOTAL REM
TRACK TIME ..............indicates total or remaining time
of disc or track
5 FADE ............................fade active
6 } ................................remote control active
7 STEP ............................indicates the number of tracks in a
program
8 Track bar ....................indicates:
- tracks on a disc or in a program
- track in play
9 + 20 ..............................disc or program contains more
than 20 tracks
0 SCAN ..........................lights up when the first 10 seconds
of each track are played
! REPEAT TRACK/ALL..lights up when a track/ complete
disc (or program) is repeated
@ SYNC ..........................synchronized recording active
# SHUFFLE ALL..............plays tracks in random order
$ MANUAL ....................manual recording active
% L/R ; ; ........................Record/play level bar, indicates
the audio signal level
^ PROGRAM ..................flashes during programming/ lights
in program mode
& ;....................................pause function active
* B ................................lights during play
( 0 ..................................lights during recording
) R(W) ............................unfinalized CDR(W) disc inserted
¡ CD ................................CD inserted (a pre-recorded CD or
finalized CDR or CDRW disc)
™ d ................................lights during recording
£ m ..................................microphone connected
≤ ANALOG a ..............analog input selected
∞ OPTICAL I p ............optical input I selected for
external recording
§ DIGITAL I d ..............digital input I selected for external
recording
DIGITAL I I d ............digital input I I selected for
external recording
General
READING..........................reading disc information
OPEN..................................during tray opening
CLOSE ..............................during tray closing
NO DISC ..........................no disc inserted, disc unreadable
or disc inserted upside down
PROG FULL ....................program full
INSERT DISC ..............insert disc or insert disc in correct
way
WRONG DISC ..................inserted disc is no audio CD
UNFINALIZED ..............unfinalized CDR(W) disc
MEMORY XX% ............indicates the amount of text
memory used for unfinalized discs
Recording
WAIT..................................- when STOP 9 is pressed during
recording
- when STOP 9 is pressed during
recording the first 4 seconds of a
track
UPDATE ..........................updating disc contents
DISC FULL ....................recording no longer possible
DIGITAL 1 ....................digital coaxial input 1 selected
DIGITAL 2 ....................digital coaxial input 2 selected
OPTICAL ........................digital optical input selected
ANALOG ............................analog input selected
MICROPHONE..................microphone input selected
COPY PROTECT ............no digital recording can be made
from the connected source
NOTFINALIZED ............when opening the tray with an
unfinalized disc inserted
MAKE CD ..........................start synchronized recording of a
complete disc and Auto Finalize
function selected
RECORD DISC ..............start synchronized recording of a
complete disc
RECORD TRACK ............start synchronized recording of a
single track
REC MANUAL ..................manual start of recording selected
_XX DB ............................level is being adjusted
ERASE TRACK ..............when erasing one or more tracks
ERASE DISC ..................when erasing a disc
FINALIZE ......................when finalizing a disc
FINALIZED ....................when trying to finalize an already
finalized disc
CHECK INPUT ..............when RECORD is pressed while no
digital source is detected
XX XX ERASE................time countdown when erasing a
track or a disc
XX XX FINAL................time countdown when finalizing a
disc
MONITOR MODE ............sample rate convertor active
PRESS RECORD ............to start manual recording,
finalizing or erasing
11
DISPLAY
English
START SOURCE ............to start synchronised recording
from a source
FINALIZED CD ............when trying to record on a
finalized CDR or a prerecorded CD
UNFINALIZE/ ................when trying to record on a
PRESS ENTER
finalized CDRW
PROF SOURCE ..............when a professional source is
connected
Play
PROGRAM..........................program mode selected
ALBUM TITLE ..............will be followed by album title
TRACK TITLE ..............will be followed by track title
ALBUM ARTIST ............will be followed by artist's name
TRACK ARTIST ............will be followed by track artist's
name
Others
NO AUDIO TR................when the recorder enters a data
track during recording
FINALIZE CD ..............laser power calibration performed
96 times, finalize disc
INITIALIZING ............during laser power calibration for
unfinalized discs
DISC RECOVER ............during disc recovery after power
failure
OPC ERROR ....................OPC failure during OPC procedure
(OPC = Optimum Power
Calibration)
RECORD ERROR ............recording error in menu mode
DISC ERROR ..................when trying to record on or finalize
a recovered disc
MEMORY FULL/ ..............when no more text can be stored
FINALIZE CD
for a certain disc. Another disc
must be finalized to obtain
memory space
12
MENU messages - See Menu mode
REM
1
REC
2 3 4
DIGITAL I I
OPTICAL I
ANALOG
TOTAL REM
TIME TRACK
5
CD
6
7
8
TRACK TIME
FADE
STEP
9 10 11
PROGRAM
RW
MANUAL SYNC
SCAN
SHUFFLE REPEAT TRACK ALL
Menu messages
NO TRACKS ....................when attempting to edit text for a
disc which has no tracks
TEXT EDIT ....................when entering Text Edit mode
CD ARTIST ....................when editing or erasing an artist's
name
CD TITLE ......................when editing or erasing a title
TR N ARTIST................when editing or erasing an artist's
name per track
TR N TITLE ..................when editing or erasing a title per
track
TEXT ERASE ..................when entering text erase mode
ALL TEXT ......................when entering all text mode
ERASE OK ......................when confirmation for erasing
must be given with ENTER key
ERASE ALL OK ............when confirmation for erasing
must be given with ENTER key
ERASE MEMORY ............when waiting for confirmation for
erasing a disc
MEMORY VIEW ..............when selecting text review per
unfinalized disc in memory
MEMORY EMPTY ............when REVIEW is selected while no
text is in memory
AUTO TRACK ..................when selecting auto track
increment ON or OFF
ON ......................................Auto Track increment or fade on
OFF ....................................Auto Track increment or fade off
SET BALANCE ..............when selecting BALANCE
SET FADE ......................when selecting FADE adjustment
FADE ON OFF................when switching FADE on or off
SET FADE IN................when setting the FADE IN time
SET FADE OUT ............when setting the FADE OUT time
NO TEXT ..........................no text stored for disc
NAME SOURCE ..............when renaming input sources
Connections general
Analog connections
For recording the following inputs are present:
- Digital optical input
- Digital coaxial input 1
- Digital coaxial input 2
- Analog input
Analog connection is required for playback of CDs
(use cable 2) and for recording from external analog sources
(use cable 1).
For playback the following outputs are present:
- Digital coaxial output
- Digital optical output
- Analog output
We advise you to connect these to the CD input on your
amplifier.
RECEIV
ER
L
L
R
IN
CD REC
R
OUT
TAPE
1
ORDER
2
ANALOG
The connections you make will depend upon the possibilities
your audio equipment offers. Please refer to the user manuals
for your other audio equipment first.
IN
L
OUT
L
R
IN1
DIGITA
L
OUT
IN2
R
IN
OPTIC
AL
OUT
Digital recordings (optical or coaxial) give the best
performance in audio and usability (e.g. auto-track).
(The digital optical connection is less sensitive to external
disturbances).
If your equipment does not offer digital connections, the high
quality Analog-Digital-Converter of your CD recorder will
ensure good audio performance when recordings are made
from the analog input.
Use the audio cables supplied. Connect the red plugs to the
R sockets, and the white plugs to the L sockets.
Playback via the digital coaxial output of the CD recorder
gives the best audio performance.
If your equipment does not offer digital connections, the high
quality Digital-Analog-Converter of the CD recorder ensures a
good sound quality via the analog output.
Note: For recording directly from a CD player, the ‘analog in’
sockets of the CD recorder should be connected to the
analog output of the CD player.
We advise you to always establish both digital and analog
connections. This will mean that analog recordings can
always be made when digital recording is not possible.
1 For recording, connect cable 1 between the ANALOG INsockets on the CD recorder and the CDR LINE- or TAPE OUTsockets of an amplifier.
2 For playback, connect cable 2 between the ANALOG OUT
sockets on the CD recorder and the input sockets of an
amplifier e.g. TAPE IN, CDR or AUX.
Note: Never use the PHONO input.
We have described the most common ways of connecting the
CD recorder. If you still have difficulties with the connections,
please contact the Philips Consumer Service desk in your
area.
13
English
INSTALLATION
INSTALLATION
English
Digital coaxial connections
Digital optical connections
Digital coaxial connection is only required when you wish to
record from a CD player with a digital coaxial output.
Digital optical connection is only required when you wish to
record from a CD player with a digital optical output.
RECEIV
RECEIV
ER
ER
L
L
L
R
L
R
IN
OUT
R
IN
MAINS
TAPE
R
OUT
TAPE
CD REC
CD REC
ORDER
ORDER
ANALOG
IN
OUT
ANALOG
IN
L
L
OUT
L
R
R
CD PLA
YER
IN1
DIGITA
L
OUT
IN1
DIGITA
L
OUT
IN2
R
IN2
IN
IN
OPTIC
AL
OUT
OPTIC
AL
MAINS
OUT
4
CD PLA
YER
3
L
MAINS
L
R
OUT
ANALOG
R
OUT
ANALOG
OUT
DIGITA
L
OUT
OUT
OPTIC
AL
DIGITA
L
Use the digital coaxial cable supplied.
1 For recording, connect cable 3 between the DIGITAL IN 1
socket on the CD recorder and the DIGITAL OUT socket of a
CD player.
• If required, you can connect an extra digital device (e.g.a
DAT or DCC recorder) to the DIGITAL IN 2 socket of the
recorder.
Note: Your CD recorder is equipped with a digital coaxial
output (DIGITAL OUT). This output can be used for
digital playback.
When connecting the Digital
Optical cable, make sure it
is fully inserted; you will
hear a click.
1 Remove the dust caps from the digital optical connection.
(We recommend that the cap be saved).
2 For recording, connect a fiber-optic cable 4 between the
digital OPTICAL input of the CD recorder and the digitaloptical output of a CD player.
Note: Your CD recorder is equipped with a digital OPTICAL
output. This output can be used for digital playback.
14
INSTALLATION
Inserting batteries in the remote control
English
Power supply
1 Plug the power cord supplied into the POWER SUPPLY
connector on the CD recorder, then into a wall socket.
2 Press ON/OFF.
➜ The recorder is now in Standby mode.
3 Press any key to activate the recorder.
Note:
- The CD recorder will automatically adjust to the local mains
voltage.
- When the CD recorder is in the “OFF” position, it is still
consuming some power. If you wish to disconnect your CD
recorder completely from the mains, withdraw the plug from
the AC Outlet.
1 Open the battery compartment cover.
2 Insert 2 batteries (“AA”, LR-6 or UM-3; as supplied) as
shown.
3 Replace the cover.
Note: We recommend that you use 2 batteries of the same
type and condition.
Batteries contain chemical substances; they should be
disposed of properly.
Setup recommendations
- Place the CD recorder on a solid, vibration-free surface.
- Do not place the CD recorder near a source of heat or in
direct sunlight.
- Do not use the CD recorder under extremely damp
conditions.
- If the CD recorder is placed in a cabinet, make sure that a
one-inch space remains free on all sides of the CD
recorder/player for proper ventilation.
15
REMOTE CONTROL
English
Remote control commands
SCAN
SHUFFLE
ABC
DEF
REPEAT
GHI
1
2
3
JKL
MN
OPQ
4
5
6
RST
Inserting discs
UVW
XYZ
7
8
9
TRACK INCR.
SPACE
SCROLL
0
CDR
CD
RECORD
2
J
K
9
5
6
;
MENU/
STORE
PROG.
ENTER
Recordable
CANCEL
1 Press OPEN/CLOSE to open the disc tray.
➜ OPEN lights up.
STANDBY..........................switches to Standby/On/Off
SCAN ................................plays the first 10 seconds of each
track
SHUFFLE............................plays CD(RW) or program in
random order
REPEAT ..............................repeat play
Number/alphabet keys 0 - 9
......................................- selects a track by number
- selects character for text input
TRACK INCR(ement) ........increases track numbers during
recording
SCROLL..............................activates scrolling of text over the
display
CDR ....................................selects CD recorder
CD ......................................selects CD player, can be used to
control a separate Philips CD player
2 ......................................starts CD(RW) play
O ......................................previous track (Play and Program
mode)
P ......................................next track (Play and Program mode)
9 ......................................stops CD(RW) and clears a program
Q....................................- searches backward
- cursor control in Menu/Prog.
review mode
R....................................- searches forward
- cursor control in Menu/Prog.
review mode
; ......................................interrupts CD(RW) play/recording
MENU/STORE ..................- enters Menu mode
- stores Menu settings
PROG.(ram) ........................opens/closes program memory
ENTER................................- selects settings in Menu mode
- programs track numbers
- starts playback of selected track
CANCEL ............................- deletes tracks from a program
- deletes text in Menu mode
- returns to a higher level in the
menu
2 Insert a CD, CDR or CDRW in the appropriate recess in the
tray, label side up.
3 Press OPEN/CLOSE to close the tray (see also Playing a CD).
➜ CLOSE lights up, followed by READING the display
will show the type of disc that has been inserted.
REM
REC
DIGITAL I I
OPTICAL I
ANALOG
FADE
STEP
MANUAL SYNC
SCAN
SHUFFLE REPEAT TRACK ALL
PROGRAM
RW
CD
TRACK TIME
• If a CDR(W) is finalized, CD will show on the display.
• If CD-text is available the TITLE/ARTIST will scroll by.
REM
1
REC
2 3 4
DIGITAL I I
OPTICAL I
ANALOG
TOTAL REM
TIME TRACK
5
CD
6
7
8
TRACK TIME
FADE
STEP
9 10 11
MANUAL SYNC
SCAN
SHUFFLE REPEAT TRACK ALL
PROGRAM
RW
Note:
- Only Audio CDs will be accepted. If a non-audio disc is
inserted, the display will show WRONG DISC.
- For recording, it is important that the blank disc be
completely free of dust particles or scratches. (see Disc
maintenance).
- If a blank or partly-recorded CDR or unfinalized CDRW is
inserted, the CD recorder will calibrate the disc for optimum
recording. During this process the display will first show
INITIALIZING and then the number of audio tracks.
Calibration can take up to 25 seconds.
REM
DIGITAL I I
OPTICAL I
ANALOG
16
TOTAL REM
TIME TRACK
REC
TIME TRACK
CD
PROGRAM
RW
TOTAL REM
TRACK TIME
FADE
STEP
MANUAL SYNC
SCAN
SHUFFLE REPEAT TRACK ALL
Remarks about recording
Recording modes
You will soon discover how easy it is to make your own CDs.
Nevertheless, it is advisable to use a CDRW disc for your first
try.
Your recorder offers several recording modes.
• If the disc is a CDRW and is already finalized, you must
unfinalize it first.
• The recording procedure is the same for CDRs and CDRWs.
• If the disc already contains recordings, the CD recorder will
automatically search for the end of the last track, so that
recording can start from there.
- RECORD DISC - to make a synchronized recording of the
complete disc or a program simply by starting the source.
- RECORD TRACK - to make an synchronized recording of a
single track simply by starting the source.
- REC(ord) MANUAL - to manually start a recording simply by
pressing the RECORD key.
- MAKE CD -to make a synchronized recording of the
complete disc or a program simply by starting the source.
Finalizing will be done automatically.
REM
• There must be at least 7 seconds of recording time left on
the disc, otherwise you will not be able to enter record
standby mode. DISC FULL will then show on the display.
• If the display indicates COPY PROTECT no digital
recording can be made of the source material. Recording
will not start.
• The Serial Copy Management System (SCMS) only
allows digital recording under specific conditions:
- This means that it is not possible to make a digital copy
from a digital copy.
- Analog recording is always possible !
- The number of recordings to be made from the original is
unlimited.
• A maximum of 99 tracks can be recorded on a disc.
Minimum allowable track length is 4 seconds.
English
RECORDING
DIGITAL I I
OPTICAL I
ANALOG
REC
TIME TRACK
CD
TOTAL REM
PROGRAM
RW
TRACK TIME
FADE
STEP
MANUAL SYNC
SCAN
SHUFFLE REPEAT TRACK ALL
Some remarks on recording:
- When AUTO TRACK is ON ( default setting), track numbers
will automatically be increased during recording.
- By programming the source first, a compilation can be
recorded.
- If a finalized CD recordable disc is inserted in the CD
recorder, FINALIZED CD will be displayed when REC
TYPE is pressed. Recording is not possible.
- If a finalized CD rewritable disc is inserted in the CD
recorder, UNFINALIZE and PRESS ENTER will be
displayed when the REC TYPE is pressed. If ENTER is
pressed, the disc will be unfinalized.
• Recordings from DAT or DCC players will not always stop
automatically.
Important:
If you want to play the recorded CDR disc on a regular
CD player, it must be finalized. See finalizing discs.
Finalized CDRW discs play only on CDRW compatible
CD players.
For recording from CD changers do not use REC
MANUAL.
17
RECORDING
Start recording
English
Autostart recording
1 To start recording, press Play on the selected source.
➜ The CD recorder automatically starts to record and d
lights continuously.
• If, however, you start the source during a track, recording
will start at the beginning of the next track or after 2.7
seconds of silence in analog recordings.
RECORD
This feature enables you to make fast and easy recordings of
a CD. Track increments are automatically detected from the
source material. Track increments cannot be added manually.
In analog source material a silence of 2.7 seconds or more is
automatically detected as a track increment.
Important:
- Recording from CD-changers should always be started in
the RECORD DISC, RECORD TRACK or MAKE CD mode.
Preparing for autostart recording
1 Make sure the disc is absolutely free of scratches and dust
particles.
2 Press Source repeatedly until (depending on the connection
used):
➜ DIGITAL I d, DIGITAL I I d, OPTICAL I p or ANALOG
a lights up and DIGITAL 1, DIGITAL 2,
OPTICAL or ANALOG will appear on the display.
• To check the elapsed recording time, press DISPLAY.
(This can also be done during recording.)
• The recorder stops automatically.
2 To stop recording manually, press STOP on the CD recorder.
➜ WAIT lights up and SYNC and d go out.
• If STOP 9 is pressed within 3 seconds after pressing PLAY,
no recording will take place.
• To interrupt recording, press PAUSE on the CD recorder.
➜ d starts to flash. To resume, press RECORD on the CD
recorder.
After recording the display will show UPDATE for several
seconds.
Note: Recordings from DAT, DCC or analog sources will only
stop after 20 seconds of silence.
Important:
REM
REC
DIGITAL I I
OPTICAL I
ANALOG
TIME TRACK
CD
TOTAL REM
TRACK TIME
FADE
STEP
MANUAL SYNC
SCAN
SHUFFLE REPEAT TRACK ALL
PROGRAM
RW
3 With the CD recorder stopped, press REC TYPE
once: to select 'RECORD DISC';
twice: to select 'RECORD TRACK';
four times: to select ‘MAKE CD'.
➜ d and SYNC start to flash and the display shows the
selection.
REM
DIGITAL I I
OPTICAL I
ANALOG
REC
TIME TRACK
CD
PROGRAM
RW
TOTAL REM
TRACK TIME
FADE
STEP
MANUAL SYNC
SCAN
SHUFFLE REPEAT TRACK ALL
• If CHECK INPUT message also flashes, the digital
connection is incorrect.
18
If you want to play the recorded CDR disc on a regular
CD player, it must be finalized. See finalizing discs.
Finalized CDRW discs play only on CDRW compatible
CD players.
RECORDING
REM
REC
TIME TRACK
TOTAL REM
TRACK TIME
FADE
English
3 With the recorder stopped, press REC TYPE three times to
enter the Manual Record standby mode.
➜ MANUAL starts to flash and the display shows REC
MANUAL.
Manual recording
STEP
RECORD
DIGITAL I I
OPTICAL I
ANALOG
Important:
- Recording from CD-changers should always be started in the
RECORD DISC, RECORD TRACK or MAKE CD mode.
- Only make analog recordings when digital recording is not
possible.
Preparing for manual recording
1 Make sure the disc is absolutely free of scratches and dust
particles.
2 Press SOURCE repeatedly until (depending on the
connection used):
➜ DIGITAL I d, DIGITAL I I d, OPTICAL I p or ANALOG
a lights up and DIGITAL 1, DIGITAL 2,
OPTICAL or ANALOG will appear on the display.
REM
DIGITAL I I
OPTICAL I
ANALOG
REC
TIME TRACK
CD
PROGRAM
RW
TOTAL REM
TRACK TIME
FADE
STEP
MANUAL SYNC
SCAN
SHUFFLE REPEAT TRACK ALL
•When Auto Track is On (default setting), track numbers will
automatically be increased during recording.
• To switch off the Auto Track function, you must enter
Menu mode.
If you wish to increase track numbers manually, press
TRACK INCR(ement) on the remote control. For further
instructions see Menu mode.
ON (AUTO): The track increments are automatically copied
from the digital source material or after 2.7
second silence during analog recording
OFF (MANUAL): Track numbers can be incremented manually
by pressing TRACK INCR(ement) on the
remote control. (Minimum track length is 4
sec.) (This can also be done in Auto mode.)
• Track numbers cannot be changed after recording.
Note: Auto track works only with Consumer Sources with a
digital output signal according to the IEC 958
(consumer part) audio standard.
CD
PROGRAM
RW
MANUAL SYNC
SCAN
SHUFFLE REPEAT TRACK ALL
• If CHECK INPUT message also flashes, the digital
connection is incorrect.
4 Play the source first to set the optimal recording level on
the CD recorder.
5 Rotate the EASY JOG/ENTER key until all the blue
segments are lighted on the Record/Play Level bar but the
red segments do not light continuously during the loudest
passages.
➜ Display shows _XX DB.
6 Stop the source.
Start recording
1 To start recording, press RECORD on the CD recorder and
immediately start the source (from stop-mode).
➜ d lights continuously. The track number and recording
time will appear on the display.
• To record a 3-second silence at the start of a track, press
PAUSE on the CD recorder before starting the source.
• To check the elapsed recording time, press DISPLAY on the
CD recorder. (This can also be done during the recording.)
2 To stop recording, press STOP on the CD recorder.
➜ WAIT lights up and d goes out.
• If STOP is pressed within 3 seconds after RECORD, no
recording will take place.
• To interrupt recording, press PAUSE on the CD recorder.
d starts to flash. Resume at step 1.
After recording the display will show UPDATE for several
seconds.
Note: With AUTO TRACK ON,, the recorder will stop and
go to REC STANDBY for 1 minute and then goes to stop
mode automatically. Recordings from DAT, DCC or
recordings made analogously will stop after 20 seconds
of silence. With AUTO TRACK OFF, the auto stop
mode is disabled.
19
RECORDING
English
If you want to play the recorded CDR disc on a regular
CD player, it must be finalized. See finalizing discs .
• Use the LEVEL (Mic) key to mix your voice with the sound
from the source.
• Use the EASY JOG key to set the recording level.
Finalized CDRW discs play only on CDRW compatible
CD players.
• For details about recording see the instructions in the
previous sections.
Microphone recording
Sample rate convertor (Monitor mode)
Karaoke recording
The sample rate convertor is used to convert input signals
into CD-standard digital output signals.
1 Connect a (stereo) microphone to the MIC socket.
➜ m lights up. The source active previously will be
selected automatically.
1 Connect the non-digital source to one of the input sockets
of the recorder.
Important:
• You can now mix your voice with the sound from the
selected source (DIGITAL I d, DIGITAL I I d, OPTICAL I
p or ANALOG a).
2 Use the REC TYPE key to select the required recording
mode: RECORD DISC, RECORD TRACK, REC
MANUAL or MAKE CD.
3 To start recording press PLAY on the selected source
(RECORD DISC, RECORD TRACK or MAKE CD
selected).
• Press RECORD on the recorder and PLAY on the selected
source (REC MANUAL selected).
• Use the LEVEL (Mic) key to mix your voice with the sound
from the source.
• Use the EASY JOG key to set the recording level.
• For details about recording see the instructions in the
previous sections.
Microphone recording
1 Connect a (stereo) microphone to the MIC socket.
➜ m lights up. The source active previously will be
selected automatically.
2 Press Source repeatedly until MICROPHONE is
displayed.
REM
DIGITAL I
OPTICAL I
ANALOG
REC
TIME TRACK
CD
TOTAL REM
PROGRAM
RW
TRACK TIME
FADE
MANUAL SYNC
SCAN
SHUFFLE REPEAT TRACK ALL
3 Use the REC TYPE key to select REC MANUAL.
4 Press RECORD to start recording.
20
STEP
2 Connect the optional recording device to the DIGITAL OUT
or OPTIONAL OUT output socket.
3 Press REC TYPE (without a disc inserted in the recorder).
➜ MONITOR MODE is displayed. The signal will now be
converted into a CD-standard digital output signal (44.1
kHz).
• Use the EASY JOG key to set the recording level.
Finalizing CDR & CDRW discs
Unfinalizing CDRW discs
Finalizing is a simple procedure that is necessary in order to:
- be able to play recordings on a CD PLAYER,
- avoid further unwanted recordings on a disc,
- avoid erasure of tracks on a CDRW.
For CDRW discs only.
If you want to make more recordings (or erase tracks) on a
finalized disc, you must unfinalize it first. The Table of
Contents (TOC) will be removed.
To unfinalize:
Auto finalizing
Auto finalizing is possible when using the MAKE CD recording
function .
English
RECORDING
1 With the CD recorder stopped, press REC TYPE or ERASE.
➜ UNFINALIZE and PRESS ENTER will appear on
the display.
Manual finalizing
REM
REC
TIME TRACK
TOTAL REM
TRACK TIME
FADE
STEP
1 Make sure the disc (in the CD recorder) is absolutely free of
scratches and dust particles.
DIGITAL I I
OPTICAL I
ANALOG
2 With the recorder stopped, press FINALIZE.
➜ The display will show FINALIZE and PRESS
RECORD.
REM
REC
TIME TRACK
TOTAL REM
TRACK TIME
FADE
REM
REC
TIME TRACK
REM
CD
REC
MANUAL SYNC
SCAN
SHUFFLE REPEAT TRACK ALL
PROGRAM
RW
TIME TRACK
TOTAL REM
TRACK TIME
FADE
CD
PROGRAM
RW
TRACK TIME
FADE
STEP
STEP
CD
MANUAL SYNC
SCAN
SHUFFLE REPEAT TRACK ALL
PROGRAM
RW
2 Press ENTER.
➜ The disc will now be unfinalized and can be used again
to record.
REM
DIGITAL I I
OPTICAL I
ANALOG
TOTAL REM
STEP
DIGITAL I I
OPTICAL I
ANALOG
DIGITAL I I
OPTICAL I
ANALOG
MANUAL SYNC
SCAN
SHUFFLE REPEAT TRACK ALL
PROGRAM
RW
CD
REC
TIME TRACK
TOTAL REM
TRACK TIME
FADE
STEP
MANUAL SYNC
SCAN
SHUFFLE REPEAT TRACK ALL
1
3 Press RECORD.
➜ XX XX FINAL and the approximate finalization time
is shown on the display.
The display counts down through the finalization.
Upon completion, the total number of tracks and the
total time recorded will appear on the display.
For CDR(W), CDR(W) changes to CD on display.
Finalizing will take at least 2- 4 minutes.
2 3 4
DIGITAL I I
OPTICAL I
ANALOG
5
CD
6
7
PROGRAM
RW
MANUAL SYNC
SCAN
SHUFFLE REPEAT TRACK ALL
Note:
- Unfinalizing will take approximately 2 minutes.
- When unfinalizing a CDRW disc with text available, this text
will be transferred to the CD recorder memory. However, if
the text memory is full, the message MEMORY
FULL/FINALIZE CD will be displayed. Text must be
erased, stored for other discs, or another disc must be
finalized in order to create space in the memory.
Note: During finalization, the CD recorder will not accept
operating commands.
21
RECORDING
To erase the entire disc:
English
Erasing CDRW discs
1 Press ERASE twice.
➜ The display will show the number of tracks and their
total playing time. ERASE DISC and PRESS
RECORD will light up.
• If the disc is finalized, CD will appear on the display after
inserting a CDRW in the recorder. The recorder will ask you
to confirm unfinalizing first. Confirm by pressing the EASY
JOG/ENTER key or ENTER on the remote control.
RECORD
For unfinalized CDRW discs only.
You can erase:
- one or more tracks from the end,
- the entire disc.
REM
1
1 Press ERASE once.
➜ The display will show the number of tracks and their
total playing time. ERASE TRACK and PRESS
RECORD will light up.
• If the disc is finalized, CD will appear on the display after
inserting a CDRW in the recorder. The recorder will ask you
to confirm unfinalizing first. Confirm by pressing the EASY
JOG/ENTER key or ENTER on the remote control.
2 Select the track(s) you wish to erase by turning the EASY
JOG/ENTER key to the left and confirm by pressing this key.
➜ The selected track numbers will start to blink on the
track bar.
➜ The display will show the remaining number of tracks
and the remaining playing time after erasing the
selected track(s).
1
REC
2 3 4
DIGITAL I I
OPTICAL I
ANALOG
REM
1
5
6
2 3 4
CD
6
TRACK TIME
FADE
STEP
7
TIME TRACK
5
TOTAL REM
MANUAL SYNC
SCAN
SHUFFLE REPEAT TRACK ALL
PROGRAM
RW
CD
REC
DIGITAL I I
OPTICAL I
ANALOG
TIME TRACK
TOTAL REM
TRACK TIME
FADE
STEP
7
PROGRAM
RW
MANUAL SYNC
SCAN
SHUFFLE REPEAT TRACK ALL
3 Press RECORD.
➜ The display will show the total countdown time and
ERASE.
➜ After the selected track(s) has/have been erased, the
display will show the number of remaining tracks and
their total playing time.
22
2 3 4
DIGITAL I I
OPTICAL I
ANALOG
To erase one or more tracks from the end:
REM
REC
REM
1
5
6
2 3 4
7
8
5
6
CD
7
8
FADE
STEP
MANUAL SYNC
SCAN
SHUFFLE REPEAT TRACK ALL
TOTAL REM
TIME TRACK
DIGITAL I I
OPTICAL I
ANALOG
TRACK TIME
9 10 11
PROGRAM
RW
CD
REC
TOTAL REM
TIME TRACK
TRACK TIME
FADE
STEP
9 10 11
MANUAL SYNC
SCAN
SHUFFLE REPEAT TRACK ALL
PROGRAM
RW
2 Press RECORD.
➜ The display will show the total countdown time and
ERASE. The entire disc will be erased.
REM
1
REC
2 3 4
DIGITAL I I
OPTICAL I
ANALOG
TIME TRACK
5
CD
TOTAL REM
TRACK TIME
FADE
STEP
6
PROGRAM
RW
MANUAL SYNC
SCAN
SHUFFLE REPEAT TRACK ALL
Erasing an entire disc may take up to 1.5 minutes.
PLAYING
English
Selecting a track when CD play is stopped
Playing a CD
1 Turn the EASY JOG/ENTER key until the required track
number appears on the display.
RECORD
1 Press PLAY/PAUSE 2 ; to start CD play.
➜ 2 will light up and the track number and track time of
the track in play will appear on the display.
2 Press Display once, twice or three times to see:
➜ Remaining track time, total remaining time, text
information (see Menu Mode).
2 Press EASY JOG/ENTER or ENTER on the remote control to
confirm or press PLAY/PAUSE 2 ; to start playing.
or
1 Enter the required track number using the numerical keys on
the remote control. For 2-digit track numbers, press the keys
in rapid succession. Play starts.
or
1 Briefly press ¡ or ™ one or more times.
2 Start playback by pressing PLAY/PAUSE 2 ;, EASY
JOG/ENTER or ENTER on the remote control.
Search
3 To interrupt play temporarily, press PLAY/PAUSE 2 ; again.
➜ ; will light on the display
4 To continue play, press PLAY/PAUSE 2 ; again.
5 To stop play, press STOP 9.
➜ The number of tracks and the total playing time will
appear on the display.
Selecting a track
RECORD
1 Press down 5 or 6.
➜ The player first searches backwards or forwards at 10
times normal speed with sound at low volume, then
goes to 50 times normal speed with sound muted.
2 Release the button at the desired passage.
➜ Play will start at the desired passage.
RECORD
Note: During Shuffle, Repeat Track or Programmed play,
search is restricted to within the track being played at
the time.
Selecting a track during play
1 Turn the EASY JOG/ENTER key until the required track
number appears on the display.
➜ Play will skip to the beginning of the selected track.
or
Enter the required track number using the numerical keys on
the remote control. For 2-digit track numbers, press the
keys in rapid succession.
➜ Play will skip to the beginning of the selected track.
or
Press ¡ or ™ on the remote control one or more times.
➜ Play will skip to the beginning of the present, previous or
following track.
Shuffle (random order) play
1 Press SHUFFLE before or during CD play to start shuffle
play.
➜ The tracks on the CD (or program if set) will play in
random order.
2 Press SHUFFLE again to return to normal CD play.
Note: Shuffle is also cleared when you open the disc tray.
23
PLAYING
PROGRAMMING
English
Repeat CD, track or program
1 Press REPEAT one or more times during CD play.
➜ When REPEAT TRACK lights up, the current track will play
repeatedly. When REPEAT ALL lights up, the entire disc or
program plays repeatedly.
REM
1
REC
2 3 4
DIGITAL I I
OPTICAL I
ANALOG
TOTAL REM
TIME TRACK
5
6
7
TRACK TIME
STEP
8
MANUAL SYNC
SCAN
SHUFFLE REPEAT TRACK ALL
PROGRAM
RW
CD
FADE
2 To return to normal play, press REPEAT one or more times
until:
➜ The REPEAT text disappears from the display.
Note:
- You can use shuffle in combination with REPEAT ALL or
programmed play.
- REPEAT is also cleared when you open the disc tray.
or:
Enter a track number with the number keys. For 2-digit
numbers, press the keys in rapid succession.
➜ The track will be stored in the program.
➜ The track number, total program time and the number of
programmed tracks (STEPS) are displayed.
3 Repeat step 2 for all tracks to be programmed.
4 Press STOP or PROGRAM to end programming.
➜ PROGRAM lights continuously.
5 Press PLAY/PAUSE 2 ; to start programmed play.
Note:
- To review the program, press PROGRAM, followed by 5 or
6 with the CD recorder in Stop mode.
- To add more tracks to the program, repeat steps 1 to 5.
- If you try to store more than 99 tracks, PROG FULL will
appear on the display.
Clearing a program
1 Press STOP 9 if necessary to stop programmed play.
Remarks about programming
• You can program up to 99 tracks to play in any desired
sequence.
• Tracks can be programmed more than once, but each time
counts as a track (STEP).
2 Press STOP 9 again to clear the program.
➜ PROGRAM will disappear from the display.
• The program is also cleared when you open the disc tray.
Erasing a track from a program
Programming
1 In Stop mode press PROGRAM to enter Program mode.
1 In Stop mode press PROGRAM to enter Program mode.
➜ PROGRAM flashes and PROGRAM will appear on the
display.
2 Use 5 or 6 to select the track from to be deleted.
➜ The track number and program step will be shown on
the display.
REM
1
REC
2 3 4
DIGITAL I I
OPTICAL I
ANALOG
TOTAL REM
TIME TRACK
5
6
CD
7
8
TRACK TIME
FADE
STEP
9 10 11
MANUAL SYNC
SCAN
SHUFFLE REPEAT TRACK ALL
PROGRAM
RW
2 Select the desired track numbers by turning the EASY
JOG/ENTER key left or right and store by pressing ENTER.
REM
REC
TIME TRACK
2
DIGITAL I I
OPTICAL I
ANALOG
24
7
CD
8
PROGRAM
RW
TOTAL REM
TRACK TIME
FADE
STEP
11
MANUAL SYNC
SCAN
SHUFFLE REPEAT TRACK ALL
3 Press CANCEL to erase the track from the program.
➜ The remaining program steps and the remaining playing
time on the program will be displayed.
MENU MODE
Text settings
English
Remarks about Menu mode
CD
Storing names
6
1 Select the TEXT EDIT submenu.
➜ TEXT EDIT will appear on the display.
CDR
2
J
K
9
5
;
MENU/
STORE
PROG.
ENTER
REM
1
REC
2 3 4
DIGITAL I I
OPTICAL I
ANALOG
2 Press EASY JOG/ENTER or ENTER on the remote control to
confirm.
CANCEL
TOTAL REM
TIME TRACK
5
CD
6
7
8
TRACK TIME
FADE
STEP
9 10 11
PROGRAM
RW
MANUAL SYNC
SCAN
SHUFFLE REPEAT TRACK ALL
• Menu mode gives you access to a number of features which
are not available using the regular keys (on the deck's front
and the remote control).
3 Rotate EASY JOG/ENTER to select the required option in
the submenu: CD Artist, CD Title, Track 1 Artist, Track 1
Title, etc.
4 Press EASY JOG/ENTER or ENTER on the remote control to
confirm.
5 Select the characters by rotating the EASY JOG/ENTER key
or by pressing the corresponding number/alphabet key on
the remote control.
REM
• The TEXT sub-menus allow you to assign names to discs,
tracks and input sources. The disc and track names will be
displayed during playback. The input source names will be
displayed when the source is selected.
1
REC
2 3 4
DIGITAL I I
OPTICAL I
ANALOG
TIME TRACK
TOTAL REM
TRACK TIME
FADE
STEP
5
CD
PROGRAM
RW
MANUAL SYNC
SCAN
SHUFFLE REPEAT TRACK ALL
• In the RECORDING sub-menus you can set Auto Track,
Balance and Fade.
6 Press EASY JOG/ENTER or ENTER on the remote control to
store the characters and move to the next cursor position.
• All settings (except Balance) made in Menu mode will be
stored in the deck's memory and can be displayed and
changed at any time.
7 Press STORE/MENU to store a name you have entered and
return to the submenu or STOP 9 to exit.
General Operation
1 In Stop mode, select CDR.
2 Press STORE/MENU on the deck or the remote control to
enter Menu mode.
➜ TEXT EDIT will appear on the display.
3 Rotate EASY JOG/ENTER to select the required submenus.
4 Press EASY JOG/ENTER or ENTER on the remote control to
confirm selections.
Note:
- A maximum of 60 characters can be stored per item.
- By pressing the EASY JOG/ENTER key or ENTER on the
remote control without selecting a character first, you can
insert a space between characters.
- With the 5 6 keys you can move to a required cursor
position.
- With the DELETE/CANCEL key you can delete a character.
- When an artist's name has been stored for a certain track,
the name will automatically be copied for the next track The
name can be confirmed by pressing STORE/MENU or a new
name can be entered as described above.
Erasing names
5 Rotate EASY JOG/ENTER to select options in the submenus.
6 Press EASY JOG/ENTER or ENTER on the remote control to
confirm selections.
7 Press STORE/MENU to store settings and return to the
submenu.
8 Press STOP 9 to store settings and exit Menu mode.
1 Select the TEXT ERASE submenu.
➜ TEXT ERASE will appear on the display.
2 Press EASY JOG/ENTER or ENTER on the remote control to
confirm.
3 Rotate EASY JOG/ENTER to select the required option in
the submenu: All Text, CD Title, CD Artist, Track 1 Title,
Track 1 Artist, etc.
Note: Text can only be edited for unfinalized discs. (finalized
CDRW discs must be unfinalizes first.)
25
MENU MODE
English
4 Press EASY JOG/ENTER or ENTER on the remote control to
confirm.
➜ The display will ask you to reconfirm your selection.
5 Press EASY JOG/ENTER or ENTER on the remote control to
reconfirm.
6 Press STORE/MENU to return to the submenu or STOP 9 to
exit.
Text Memory Review/Erase Text Memory
2 Press EASY JOG/ENTER or ENTER on the remote control to
confirm.
1
2 3 4
TIME TRACK
TOTAL REM
TRACK TIME
FADE
STEP
5
DIGITAL I I
OPTICAL I
ANALOG
CD
MANUAL SYNC
SCAN
SHUFFLE REPEAT TRACK ALL
PROGRAM
RW
4 Press EASY JOG/ENTER or ENTER on the remote control to
confirm.
➜ ERASE MEMORY will appear on the display.
REM
1
REC
2 3 4
DIGITAL I I
OPTICAL I
ANALOG
TIME TRACK
TOTAL REM
TRACK TIME
FADE
STEP
5
CD
PROGRAM
RW
MANUAL SYNC
SCAN
SHUFFLE REPEAT TRACK ALL
5 Press EASY JOG/ENTER or ENTER on the remote control to
reconfirm.
6 Press the EASY JOG/ENTER key or ENTER on the remote
control to confirm erasure of the text for that particular disc.
7 Press STORE/MENU to return to the submenu or STOP 9 to
exit.
Note:
- If there are no discs in the memory, the message MEMORY
EMPTY will appear on the display.
- When the text memory of your CDRecorder is full, the
message MEMORY FULL will appear, followed by
FINALIZE CD If you want to add a CD to the list of discs
for which text is stored, you must erase a disc from this list
or finalize another disc. ("for which text is stored")
- MEMORY FULL/FINALIZE CD may also appear when
unfinalizing a CDRW disc for which text was stored (see
'Unfinalizing CDRW discs'). The same action(s) should be
taken in order to obtain memory space.
26
2 Press EASY JOG/ENTER or enter on the remote control to
confirm.
3 Select the input source you wish to (re)name.
5 Select the characters by rotating the EASY JOG/ENTER key
or by pressing the corresponding numeric/alphabet key on
the remote control.
6 Press EASY JOG/ENTER or enter on the remote control to
store the characters and move to the next cursor position.
3 Select the disc you wish to erase.
REC
1 Select the NAME SOURCE sub-menu.
➜ NAME SOURCE will appear on the display.
4 Press EASY JOG/ENTER or enter on the remote control to
confirm.
1 Select the MEMORY VIEW submenu.
➜ MEMORY VIEW will appear on the display.
REM
Rename input source
7 Press STORE/MENU to store a name you have entered and
move to the next item in the sub-menu.
Recording settings
Fade
Auto track increment
1 Select the SET FADE sub-menu.
➜ SET FADE will appear on the display.
1 Select the AUTO TRACKING sub menu.
➜ AUTO TRACK will appear on the display.
REM
2 Press EASY JOG/ENTER or ENTER on the remote control to
confirm.
1
REC
2 3 4
DIGITAL I I
OPTICAL I
ANALOG
TIME TRACK
TOTAL REM
TRACK TIME
English
MENU MODE
FADE
STEP
5
CD
PROGRAM
RW
MANUAL SYNC
SCAN
SHUFFLE REPEAT TRACK ALL
3 Select TRACK ON or OFF.
2 Press EASY JOG/ENTER or enter on the remote control to
confirm.
REM
REC
TOTAL REM
TIME TRACK
TRACK TIME
FADE
STEP
E
REWIND
1
2 3 4
DIGITAL I I
OPTICAL I
ANALOG
FFWD
5
CD
PROGRAM
RW
3 Select FADE ON or OFF.
MANUAL SYNC
SCAN
SHUFFLE REPEAT TRACK ALL
4 Press EASY JOG/ENTER or ENTER on the remote control to
confirm.
➜ ON or OFF will appear on the display for 2 seconds.
• When ON is selected, track numbers will be automatically
incremented during recording.
4 Press EASY JOG/ENTER or enter on the remote control to
confirm.
➜ ON or OFF will appear on the display for 2 seconds.
5 Rotate EASY JOG/ENTER to select SET FADE IN or
SET FADE OUT.
• When OFF is selected, you can number the recorded tracks
yourself.
6 Press EASY JOG/ENTER or enter on the remote control to
confirm.
➜ 2000 MS will appear on the display.
5 Press STORE/MENU to store settings and return to the
submenu or STOP 9 to exit.
7 By turning the EASY JOG key you can set the FADE IN or
FADE OUT time.
Balance (Only active in Record/Standby mode)
• FADE IN starts automatically when you press RECORD to
start recording. Your recording will be faded out
automatically when you press the STOP 9 or PLAY/PAUSE
2 ; key.
1 Select the SET BALANCE submenu.
➜ SET BALANCE will appear on the display.
2 Press EASY JOG/ENTER or ENTER on the remote control to
confirm.
➜ FE and L-128 R-128 will appear on the
display.
REM
1
REC
2 3 4
DIGITAL I I
OPTICAL I
ANALOG
TIME TRACK
TOTAL REM
TRACK TIME
FADE
8 Press STORE/MENU to store settings and return to the submenu or STOP 9 to exit.
STEP
5
CD
PROGRAM
RW
MANUAL SYNC
SCAN
SHUFFLE REPEAT TRACK ALL
3 Adjust recording balance by turning the EASY JOG/ENTER
key.
• Turn left: the figure left (F) counts up, right counts down.
• Turn right: the figure right (E) counts up, left counts
down.
4 Press EASY JOG/ENTER or ENTER on the remote control to
confirm.
5 Press STORE/MENU to store settings and return to the
submenu or STOP 9 to exit.
Note: The balance setting will not be stored.
27
FIXING PROBLEMS
English
TROUBLESHOOTING
If your CD recorder is defective, it is wise to check this list
first. You may have forgotten a simple step.
Warning!
Under no circumstances should you attempt to repair
the CD recorder yourself because this will invalidate
the guarantee.
SYMPTOM •possible solution:
No power
• make sure that the ON/OFF button is on: the
CD Recorder is in standby mode, press any
key to activate it
• make sure that the power cable is plugged in
correctly
• switch the recorder OFF and then
immediately back ON
Auto track does not work
• check if auto track is selected
• check if there are 2.7 seconds of silence
between the tracks (analog recording only)
• check if the source is a consumer source with
digital output according to the IEC audio
standard
• source is DVD player (no track information)
No sound
• check the audio connections
• if using an amplifier, try using a different
source
Amplifier sound is distorted
• make sure that the CD recorder analog output
is not connected to the amplifier Phono input
Play will not start
• make sure that the label of the CD is facing
up
• clean the disc
• make sure that the disc is not defective by
trying another disc
Remote control does not work
• point the remote control directly at the CD
recorder
• check the batteries and replace if necessary
• select the right source first
28
Will not record
• clean the disc
• make sure that the CDR(W) is an unfinalized
disc
• make sure that the disc is recordable and
replace if necessary
• the disc is not an AUDIO disc (WRONG
DISC)
• wrong input source chosen. Input label
flashing (CHECK INPUT)
• text memory full (MEMORY FULL /
FINALIZE CD). When a CDRW has to be
unfinalized for recording. Erase text for other
disc(s) or finalize other disc(s) to obtain
memory space.
Recording is distorted
• make sure the recording level is correct
20 second pause between recordings
• see Autostart recording
Player does not react
• switch the ON/OFF button on the front of the
player off and back on
DISC RECOVER on display
• a power failure has occurred during
recording; the CD recorder is attempting to
repair the disc
• if DISC ERROR then appears on the
display, the disc cannot be recorded further,
and cannot be finalized. But it can still be
played on the CD recorder or another CD
recorder.
• on a CDRW disc, the track being recorded is
lost, but further recording and finalization can
still be done
The products and services described herein are not necessarily available in all contries.
The specifications and design of this product are subject of change without notice.
Printed in Belgium.
© PHILIPS 1999
http://www.philips.com
All trademarks acknowledged.
3104 125 2298.1