1
■
■
■
■
■
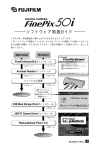
USB Mass Storage Driver
Exif Viewer
DP Editor
Exif Launcher
Audio Downloading Software
Quick Start Guide
Thank you for purchasing these FUJIFILM products.
This Quick Start Guide provides you with a simple summary of how connect your PC
and camera via the USB ports and how to install the software provided in this package
on your personal computer (PC). Read this guide carefully to ensure that you use the
software correctly.
For detailed information on how to use the Exif Viewer and DP Editor software, refer to
the User’s Guide on the enclosed CD-ROM.
BB11755-201(1)
E
IMPORTANT
Be sure to read this page before using the Software.
NOTICE
BEFORE OPENING THE PACKAGE OF CD-ROM PROVIDED BY FUJI PHOTO FILM CO., LTD.,
PLEASE READ THIS END USER LICENSE AGREEMENT CAREFULLY. ONLY IF YOU DO
AGREE TO THIS AGREEMENT, YOU WILL BE ABLE TO USE THE SOFTWARE RECORDED
ON THE CD-ROM. BY OPENING THE PACKAGE, YOU ACCEPT AND AGREE TO BE BOUND
BY THIS AGREEMENT.
End User License Agreement
This End User License Agreement (“Agreement”) is an agreement between Fuji Photo Film Co., Ltd.
(“Fuji”) and you, which sets forth the terms and conditions of the license granted for you to use the
software provided by Fuji.
The CD-ROM contains third party software. In case a separate agreement is provided by a third
party supplier for its software, the provisions of such separate agreement shall apply to the use of
such third party software, prevailing over those of this Agreement.
1. Definitions.
(a) “Media” means the CD-ROM titled “Utilities for FinePix40i” which is provided to you together with this
Agreement.
(b) “Software” means the software which is recorded on Media.
(c) “Documentation” means the operation manuals of Software and other related written materials which are
provided to you together with Media.
(d) “Product” means Media (including Software) and Documentation collectively.
2. Use of Software.
Fuji grants to you a nontransferable, nonexclusive license:
(a) to install one copy of Software onto one computer in binary machine executable form;
(b) to use Software on the computer onto which Software is installed; and
(c) to make one backup copy of Software.
3. Restrictions.
3.1 You shall not distribute, rent, lease or otherwise transfer all or any part of Software, Media or Documentation
to any third party without Fuji’s prior written consent. You also shall not sublicense, assign or otherwise
transfer all or any part of the rights granted to you by Fuji under this Agreement without Fuji’s prior written
consent.
3.2 Except as expressly granted by Fuji hereunder, you shall not copy or reproduce all or any part of Software or
Documentation.
3.3 You shall not modify, adapt or translate Software or Documentation. You also shall not alter or remove
copyright and other proprietary notices that appear on or in Software or Documentation.
3.4 You shall not, or shall not have any third party, reverse-engineer, decompile, or disassemble Software.
4. Ownership.
All copyrights and other proprietary rights to Software and Documentation are owned and retained by Fuji or the
third party suppliers as indicated on or in Software or Documentation. Nothing contained herein shall be
construed, expressly or implicitly, as transferring or granting any right, license, or title to you other than those
explicitly granted under this Agreement.
5. Limited Warranty.
Fuji warrants to you that Media is free from any defect in material and workmanship under normal use for ninety
(90) days from the date of your receipt of Media. Should Media not meet the foregoing warranty, Fuji shall replace
such defective Media with other Media bearing no defect. Fuji’s entire liability and your sole and exclusive remedy
with regard to any defect in Media shall be expressly limited to such Fuji’s replacement of Media as provided
herein.
6. DISCLAIMER OF WARRANTY.
EXCEPT AS PROVIDED IN SECTION 5 HEREIN, FUJI PROVIDES PRODUCT “AS IS” AND WITHOUT
WARRANTIES OF ANY KIND, EXPRESS OR IMPLIED. FUJI SHALL MAKE NO WARRANTY, EXPRESS,
IMPLIED OR STATUTORY, AS TO ANY OTHER MATTERS, INCLUDING, BUT NOT LIMITED TO NONINFRINGEMENT OF ANY COPYRIGHT, PATENT, TRADE SECRET, OR ANY OTHER PROPRIETARY
RIGHTS OF ANY THIRD PARTY, MARCHANTABILITY, OR FITNESS FOR ANY PARTICULAR PURPOSE.
2
7. LIMITATION OF LIABILITY.
IN NO EVENT SHALL FUJI HAVE ANY LIABILITY FOR ANY GENERAL, SPECIAL, DIRECT, INDIRECT,
CONSEQUENTIAL, INCIDENTAL, OR OTHER DAMAGES (INCLUDING DAMAGES FOR LOSS OF PROFITS
OR LOST SAVINGS) INCURRED FROM THE USE OF OR INABILITY TO USE PRODUCT EVEN IF FUJI HAS
BEEN ADVISED OF THE POSSIBILITY OF SUCH DAMAGES.
8. No export.
You acknowledge that neither Software nor any part thereof, will be transferred, or exported to any country or
used in any manner in violation of any export control laws and regulations to which Software is subject.
9. Termination.
In case you breach any of the terms and conditions hereof, Fuji may immediately terminate this Agreement
without any notice.
10. Term.
This Agreement is effective until the date when you cease to use Software, unless earlier terminated in
accordance with Section 9 hereof.
11. Obligation upon termination.
Upon termination or expiration of this Agreement, you shall, at your own responsibility and expense, delete or
destroy immediately all Software (including its copies), Media and Documentation.
12. Governing Law.
This Agreement shall be governed by and construed in accordance with laws of Japan.
13. Note.
Software includes “Audio Downloading Software”, application software having the function of transmitting music
data files. “Audio Downloading Software” contains the programs whose copyrights and other proprietary rights are
owned and retained by NIPPON TELEGRAPH AND TELEPHONE CORPORATION and/or NIPPON
TELEGRAPH AND TELEPHONE EAST CORPORATION (“NTT Programs”). Fuji grants to you the license of NTT
Programs hereunder under the terms and conditions of the license agreement between Fuji and NIPPON
TELEGRAPH AND TELEPHONE EAST CORPORATION.
You acknowledge and agree that:
(a) the license of NTT Programs granted to you by Fuji hereunder is subject to the license agreement between
Fuji and NIPPON TELEGRAPH AND TELEPHONE EAST CORPORATION; and
(b) upon expiration or termination of such license agreement, all the rights of Fuji relating to NTT Programs as a
licensor under this Agreement shall be reverted to NIPPON TELEGRAPH AND TELEPHONE EAST
CORPORATION and, thereafter, NIPPON TELEGRAPH AND TELEPHONE EAST CORPORATION grant to
you the license of NTT Programs and can directly exercise their rights under this Agreement against you
provided, however, that Fuji’s obligations under this Agreement shall remain unchanged.
a
Do not attempt to play the CD-ROM enclosed with this product on
an audio CD player. Doing so could damage your hearing or could
damage your speakers or headphones.
Please note that this Guide is written on the assumption that you already have a basic
understanding of how to use your PC (personal computer), Windows and Macintosh.
For basic information on using your PC, Windows and Macintosh, refer to the respective manuals
supplied with your PC.
• InfoBind is a copyright protection technology developed jointly by NTT, NTT East and Kobe Steel,
Ltd. This technology has been applied to recording media that have a proper ID. The ID of the
recording media encrypts data, preventing the playback of data that has been copied to another
media and protecting the copyright of the digital contents of the media.
• SVQ file is a file format used in InfoBind technology. The SmartMedia ID encrypts files, preventing
files from being copied to other media and thus preventing illegal copying.
• MP3 (MPEG1 Audio layer-3) is an MPEG (Motion Picture Experts Group) standard audio
compression mathod that compresses data to one-tenth of its actual size by eliminating audio
information that humans have difficulty perceiving.
• Microsoft and Windows are trademarks of the Microsoft Corporation of the U.S. registered in the
U.S. and other countries.
Windows is an abbreviated term referring to the Microsoft Windows Operating System.
• Macintosh, iMac, Mac OS and QuickTime™ are registered trademarks of Apple Computer, Inc.
• Adobe Acrobat and ActiveShare are trademarks of Adobe Systems Incorporated of the U.S.
• SmartMedia™ is a trademark of Toshiba Corporation.
• All other company or product names are trademarks or registered trademarks of the respective
companies.
3
Windows
Introduction
Contents
IMPORTANT ....................................................................................... 2
Contents ............................................................................................. 4
Introduction ........................................................................................ 5
Software Overview ...................................................................................... 5
Windows
Installation on a Windows PC........................................................... 6
Pre-installation Checklist ............................................................................. 6
Installing the Software ................................................................................. 7
Installing the USB Driver.......................................................................... 7
Windows 98 ............................................................................................. 8
Windows Millennium Edition .................................................................. 10
Windows 2000 Professional .................................................................. 11
Installing the Enclosed Applications ...................................................... 13
Using the User’s Guide ................................................................... 17
Installation of Acrobat Reader ............................................................... 17
Using the User’s Guide.......................................................................... 17
Using the Software on Windows .................................................... 18
Connecting the Camera and PC and Viewing Images .............................. 18
Connecting the Camera to Your PC and Downloading MP3 Files ............ 21
Updating the USB Driver on a Windows PC.................................. 23
Updating the USB Driver for Windows 98 and Windows Me ................. 23
Updating the Windows 2000 Professional USB Driver .......................... 23
Software Overview
This section briefly describes the software programs provided on the enclosed
CD-ROM.
USB Mass Storage Driver
The USB Mass Storage Driver (USB Driver)
software makes it possible for a digital
camera to operate as a USB-connected card
reader. Installing the driver allows you to
view and copy digital camera image files on
your personal computer (PC).
NOTE
The USB Driver does not provide remote
photography functions.
Exif Viewer
Allows you to list the images on a digital camera or PC, print indexes of the images,
view and print the images, and perform simple image processing operations.
DP Editor
Allows you to create print ordering information that can be used to obtain prints on
printers that support DPOF (Digital Print Order Format).
Uninstalling the Software on a Windows PC................................. 25
Uninstalling Exif Viewer, DP Editor, Exif Launcher and Audio
Downloading Software......................................................................... 25
QuickTime
Software used to play back video images shot using a digital camera.
Macintosh
Installation on a Macintosh............................................................. 26
Pre-installation Checklist ........................................................................... 26
Installing the Software ............................................................................... 27
Installing the USB Driver........................................................................ 27
Installing the Enclosed Applications ...................................................... 30
Exif Launcher (Windows only)
The Exif Launcher software starts up Exif Viewer and displays lists of images when a
digital camera equipped with a USB interface is connected to your PC.
Using the User’s Guide ................................................................... 31
Audio Downloading Software
You can use this software to download MP3 files stored on your PC to a SmartMedia
(card) with ID in your FinePix40i.
Installation of Acrobat Reader ............................................................... 31
Using the User’s Guide.......................................................................... 31
Using the Software on a Macintosh ............................................... 32
Connecting the Camera and Macintosh and Viewing Images................... 32
Connecting the Camera to Your Macintosh and Downloading MP3 Files ... 34
Uninstalling the Software on a Macintosh .................................... 36
Uninstalling the USB Driver ................................................................... 36
Uninstalling Exif Viewer, DP Editor and Audio Downloading Software.... 36
Troubleshooting .............................................................................. 37
Windows-specific Problems................................................................... 39
Macintosh-specific Problems ................................................................. 42
Acrobat Reader
Software used to read the User’s Guide provided on the enclosed CD-ROM.
RealJukebox Plus / MacMP3
These are software applications for creating MP3 files from audio CDs.
ActiveShare (Windows Only)
You can share photos over the Web with this software and special user site.
Troubleshooting Audio Downloading Software............................ 43
4
5
Windows
Installation on a Windows PC
Installing the Software
Pre-installation Checklist
Installing the USB Driver
Hardware and software requirements
To run this software, you must have the hardware and software described below. Check
your system before you begin the installation.
Compatible PCs
Operating System
CPU
RAM
Hard disk space
Monitor
: IBM PC/AT or compatible
(models with USB support as standard)
: Windows 98 (including the second edition)
Windows Millennium Edition (Windows Me)
Windows 2000 Professional
(Log on as an Administrator group.)
: 200 MHz Pentium or better
: 64 MB minimum
: Amount required for installation: 60 MB minimum
Amount required for operation: 110 MB minimum
: Screen resolution: 800 × 600 dots or better
Number of display colors: 65,536 or better
NOTE
• Connect the PC and digital camera directly using the USB cable. Connecting
via USB hub is not guaranteed.
• USB interface board is not guaranteed.
• Windows 95 cannot be used.
• Self-made PC is not guaranteed.
• Do not use USB drivers other than the USB Driver provided on the camera
software CD-ROM. You must update your software to the USB Driver provided
on the CD-ROM.
Attach the noise suppression core
Noise
suppression core
If a noise suppression core is enclosed,
fit the core to the communications cable
to reduce emissions of unwanted
electrical noise. If the cable is already
fitted with a noise suppression core, use
the cable as is.
Press until it clicks shut.
This section describes the setup procedure for using the USB Driver on Windows.
1. Switch on your PC and start up Windows.
(If you are using Windows 2000 Professional, log
on as an Administrator group.)
2. Double-click “My Computer”.
✽
3. Insert the enclosed CD-ROM into the CD-ROM drive.
4. Load a media containing photographed images
into your camera, switch the camera on and set the
Mode dial to “Playback” mode.
5. Use the USB cable to connect the camera to the
USB port on the PC.
NOTE
• Connect the cable to the USB port on
the PC. If the cable is connected via a
USB hub, the software may not
operate correctly. If the PC has 2 or
more USB ports, any USB port can be
used.
• Push the USB connector in fully to
ensure that the connection is secure.
If the cable is not securely connected,
the software will not operate correctly.
Refer to the Owner’s Manual supplied
with the camera for details.
• To avoid communication errors, use
the USB cable provided in this
package and do not use an extension
cable.
✽
✽
6
When installation is completed, a new removable disk is added.
See P.10, if you are using Windows Millennium Edition.
See P.11, if you are using Windows 2000 Professional.
7
Windows
Windows 98
6. The “Add New Hardware Wizard” dialog appears.
Click [Next >].
NOTE
If this Wizard doesn’t appear, update the
USB driver (See P.23).
9. Select the
\USBDRV\WIN98 folder
on the CD-ROM drive,
click the [OK] button,
and then click [Next >].
in the “Add New
Hardware Wizard”
dialog box.
TIP
When there is a plus mark “ + ” to the left of the Utilities folder, clicking the “ + ”
to the left of the folder name opens the folder and shows the folders inside.
7. Select “Search for the best driver for your device
(Recommended)” and click [Next >].
8. In the next window, tick “Specify a location” and
click the [Browse…] button.
✽
10. Check that
USBS04CB.INF has
been detected and then
click [Next >].
11. When driver installation
is completed, the
dialog shown at right is
appears. Click the
[Finish] button.
The dialog shown may differ slightly
on some types of PC.
12. Setup is completed when a new removable drive
icon (the connected camera) appears in the “My
Computer” window.
8
9
Windows
Windows Millennium Edition
6. The “Add New
Hardware Wizard”
window opens. Click
the [Next >] button.
NOTE
If this Wizard doesn’t appear, update the
USB driver (See P.23).
7. When the “Select Other
Driver” window opens,
select USB Mass
Storage in the \USBDRV
\WIN98\USBS04CB.INF
line on the CD-ROM
drive and then click the
[OK] button.
8. When driver installation
is completed, the
screen shown at right
appears. Click the
[Finish] button.
9. Setup is completed when a new removable drive
icon (the connected camera) appears in the “My
Computer” window.
10
Windows 2000 Professional
6. The “Found New
Hardware Wizard”
window opens. Click
the [Next >] button.
NOTE
If this Wizard doesn’t appear, update the
USB driver (See P.23).
7. Select “Search for a
suitable driver for my
device (recommended)”
and then click [Next >].
8. In “Optional search
locations”, tick
“Specify a location”
and then click [Next >].
✽
The screen shown may differ slightly depending on the type of computer.
9. The dialog box for
specifying the location
appears. Click the
[Browse…] button.
11
Windows
10. Select
\USBDRV\WIN2KPRO
on the CD-ROM drive
and click the [Open]
button.
TIP
Click one of the icons on the left to
simplify location selection.
11. Click the [OK] button in
the location
specification dialog
box.
12. Check that
UW2K04CB.INF has
been detected and then
click [Next >].
13. When driver installation
is completed, the
screen shown at right
appears. Click the
[Finish] button.
Installing the Enclosed Applications
1. Quit any other applications that are running.
Quit all other active applications until no
applications are shown in the taskbar.
<To quit an application>
Click the right mouse button on the
application icon in the taskbar.
Click “Close” in the menu that appears to
quit the application. Refer to the instructions
provided with your PC for details.
Applications that cannot be
closed from the taskbar.
2. Load the enclosed CD-ROM into the CD-ROM
drive.
Double-click “Utilities (D:)” in the “My
Computer” window.
✽ (Here, “D:” is the designation for the
CD-ROM drive.)
NOTE
If a “----.dll file not found.” message
appears during the installation, there is
an application (screen saver, etc.)
running in the background that was not
shut down in step 1. Forcibly quit the
application. Refer to your Windows
User’s Guide for information on how to
forcibly quit an application.
14. Setup is completed when a new removable drive
icon (the connected camera) appears in the “My
Computer” window.
12
13
Windows
Exif Viewer, DP Editor, QuickTime, Exif Launcher and Audio Downloading
Software are installed sequentially. To stop the installation process, click the
[Cancel] button. The current setup program stops and installation skips to the
next application program.
3. Double-click “Viewer” in the CD-ROM window.
6. When the DP Editor setup ends, the QuickTime
Setup program starts up.
Proceed with the installation as
directed by the on-screen instructions.
✽
When the “Viewer” window appears,
double-click “SETUP.EXE”.
In the “Enter Registration” window,
the software will still be installed if
you enter no information.
7. When the QuickTime setup ends, the Exif
Launcher Setup program starts up.
4. The Exif Viewer Setup program starts up.
Click the [Next >] button. When the
window for selecting the installation
destination appears, check the
destination and then click the [Next >]
button.
Proceed with the installation as
directed by the on-screen instructions.
When Exif Viewer installation ends,
the next setup program starts up.
Click the [Next >] button.
When the window for selecting the
installation destination appears, check
the destination and then click the
[Next >] button.
8. This completes the installation procedure up to
and including Exif Launcher.
5. When Exif Viewer setup ends, the DP Editor Setup
program starts up.
Click the [OK] button.
Click the [Next >] button. When the
window for selecting the installation
destination appears, check the
destination and then click the [Next >]
button.
✽
DP Editor is a software utility for creating new DPOF files and is based on DPOF
version 1.00. When you are using this software to edit DPOF files that were set
up on a digital camera, some functions may not be available depending on the
software version supported.
✽ Particularly with media containing DPOF settings specified on other brands of
digital camera, you should reset the DPOF settings using the selected digital
camera before using the DP Editor.
14
15
Windows
Using the User’s Guide
9. Double-click the “Audiodl” folder on the CD-ROM.
When the “Audiodl” folder window
appears, double-click “Setup.exe”.
To read the User’s Guide supplied on the CD-ROM, you must have Adobe
Systems’ Acrobat Reader installed.
Installation of Acrobat Reader
1. Switch on your PC and start up Windows.
2. Load the CD-ROM into the CD-ROM drive on your PC.
3. Quit any other applications that are running. See P.13 for information on how to
quit other applications.
NOTE
If another application is running, the “----.dll not found” message may appear and
the software may not be correctly installed.
10. The Audio Downloading Software setup program
starts up.
Click the [Next >] button.
When the window for selecting the
installation destination appears, check
the destination and then click the
[Next >] button.
Proceed with the installation as
directed by the on-screen instructions.
4. Double-click the “ar40eng.exe” setup program in the “\ACROREAD\ENGLISH”
folder on the CD-ROM.
5. Proceed with the installation as directed by the on-screen instructions.
Using the User’s Guide
1. Load the CD-ROM into the CD-ROM drive on your PC.
2. When you open the Manual folder in the Viewer folder on the CD-ROM, it
contains the following file. Use Acrobat Reader to view the file.
English.pdf: User’s Guide
✽
✽
For easier viewing, copy the English.pdf file onto the hard disk in your PC.
For information on how to use Acrobat Reader, refer to the online guide
provided in the Acrobat Reader Help menu.
11. Installation is now completed.
Click the [OK] button.
16
17
Windows
Using the Software on Windows
Connecting the Camera and PC and Viewing Images
✽
If Exif Viewer and Exif Launcher are
installed, Exif Viewer starts up and the
window shown here appears.
Refer to the Owner’s Manual for your camera for information on using the camera.
TIP
1. Start up your PC and double-click the “My
Computer” icon.
2. Load a media containing photographed images
into your camera, switch the camera on and set the
Mode dial to “Playback” mode.
NOTE
The media used should contain images shot using a FUJIFILM camera.
3. Connect the camera and PC using the USB cable.
When the “Removable Drive” icon appears in the
“My Computer” window, the camera and PC are
correctly connected.
• When you install Exif Launcher, it is
registered in the startup menu and is
launched automatically when
Windows starts up.
To quit Exif Launcher, click the right
mouse button on the [
] icon in the
taskbar and select “Exit” from the
Thumbnail display area
menu that appears. The icon will
disappear from the taskbar.
• If Exif Launcher does not run, the Exif Viewer will not start up. Launch Exif
Viewer from the Windows “Start” menu.
If the icon in the figure is shown in the
taskbar, Exif Launcher is running.
4. Thumbnail images for the image data recorded on
the SmartMedia are displayed in the thumbnail
display area.
5. If you double-click a thumbnail image, the image is
displayed in an Image window.
To close the image window, use the [Close] button
in the top right corner of the window.
You can also copy the image to your PC desktop
by dragging the thumbnail from the thumbnail
display area and dropping it onto the desktop.
NOTE
• Do not perform the operations listed below when a camera file is open and the
camera display indicates that data access is in progress. Performing any of these
operations could corrupt the data on the media or damage the media itself.
Switch the camera off/Touch any of the camera control buttons/Disconnect the
USB cable/Remove the media/Open the media cover/Remove the camera batteries
• Do not format the SmartMedia in the camera on your PC. Doing so may prevent
you from using this SmartMedia to take pictures.
18
19
Windows
Connecting the Camera to Your PC and Downloading MP3 Files
6. To exit Exif Viewer, select “Exit” from the “File”
menu or click the [Close] button in the main
window.
✽
For more information on using Exif Viewer or DP Editor, refer to the User’s Guide
(PDF document) on the CD-ROM.
7. Check that the camera display indicates that data
access is no longer in progress.
On Windows 2000 Professional, click the eject icon
[
] on the taskbar when the camera display
indicates that data access is no longer in progress
and remove “USB Mass Storage”.
8. Disconnect the USB cable and remove the
SmartMedia.
NOTE
• Always check that all camera files are closed and that the camera display
indicates that data access is no longer in progress.
Do not disconnect the USB cable or remove the SmartMedia immediately after
the “Copying” message has gone off.
If a large amount of data is being copied, camera access continues for a short
time after the message displayed on the PC has gone off.
• Refer to the camera Owner’s Manual for more information on the access
display on the camera.
• In Windows 2000 Professional, disconnecting the USB cable without
performing the “Unplug or Eject hardware” procedure can cause the computer
to hang.
1. Start up your PC and double-click the “My Computer”
icon to open the “My Computer” window.
2. Load a SmartMedia (card) with ID into the camera,
switch the camera on and set the Mode dial to
“Playback” mode.
3. Connect the camera and PC using the USB cable.
When the “Removable Drive” icon appears in the“My
Computer” window, the camera and PC are correctly
connected.
4. If Exif Viewer and Exif Launcher are installed, Exif
Viewer starts up and the Exif Viewer Main window
appears. Select “Exit” from the File menu or click the
[Close] button in the Main window to exit Exif Viewer.
If Exif Launcher is not installed or is not running, Exif Viewer does not
automatically start up. In this event, proceed to step 5.
5. Double-click the Audio Downloading Software
shortcut [ ] to start up the downloading software.
If the SmartMedia (card) with ID contains music (SVQ) files, the files are listed in
playback order.
File list display area
6. Registering MP3 files:
MP3 files✽ created using the enclosed software
(RealJukebox Plus) can be registered (singly or in
batches) in Audio Downloading Software by dragging
and dropping them into the file list display area.
To cancel the registration, select a registered MP3 file and click the
[Delete/Cancel] button.
✽ Refer to the “Audio Operations Guide” provided separately for information on
creating MP3 files.
20
21
Windows
Updating the USB Driver on a Windows PC
7. Downloading the MP3 files:
Click the [Transfer] button to download MP3 files
registered in Audio Downloading Software to a
SmartMedia (card) with ID.
8. Other functions:
• To delete music (SVQ) files on a SmartMedia (card)
with ID, select the music (SVQ) file from the file list
and click the [Delete/Cancel] button.
• To change the playback order, select the music
(SVQ) file on the SmartMedia (card) with ID and
then drag and drop the file to the desired playback
position in the list display area.
• If you have switched the camera off or changed the
SmartMedia (card) with ID, click the [Refresh]
button to update the information displayed.
9. Click the [Exit] button to exit the Audio Downloading
Software.
10. Check that the camera display indicates that data
access is no longer in progress.
On Windows 2000 Professional, click the eject icon [
] on the taskbar when the
camera display indicates that data access is no longer in progress and remove
“USB Mass Storage”.
11. Disconnect the USB cable and remove the SmartMedia.
NOTE
• Do not perform any of the following operations while the “Access in progress”
message is displayed on the camera. Doing so can corrupt data on the
SmartMedia and could damage the media itself.
Switch the camera off/Touch any of the camera control buttons/Disconnect the
USB cable/Remove the media/Open the media cover/Remove the camera batteries
• Do not format the SmartMedia in the camera on your PC. Doing so may prevent
you from using the SmartMedia to take pictures.
• Always check that the “Access in progress” message is no longer displayed on
your camera. Do not disconnect the USB cable or remove the SmartMedia
immediately after the progress bar displayed during MP3 file transfer
disappears. When large data files are transferred, camera access may continue
for some time after the progress bar is no longer displayed on your PC.
• Refer to the camera Owner’s Manual for more information on the access
display on the camera.
• In Windows 2000 Professional, disconnecting the USB cable without performing
the “Unplug or Eject hardware” procedure can cause the computer to hang.
22
Update the USB Driver in the following situations:
(1) When you want to upgrade the driver version
(2) When you have installed the driver but the software does not run
Updating the USB Driver for Windows 98 and Windows Me
1. Switch on your PC and launch Windows 98 or
Windows Me.
2. Insert the CD-ROM provided into the CD-ROM drive.
3. Open the “My Computer” window, double-click
“UNIN_FUM.EXE” in the “\USBDRV\WIN98\UNINST”
folder on the CD-ROM and remove the installed
driver.
NOTE
Close all files when removing drivers.
4. Install the new driver (See P.7).
Updating the Windows 2000 Professional USB Driver
1. Switch on your PC and launch Windows 2000
Professional.
2. Insert the CD-ROM provided into the CD-ROM drive.
3. Load a media containing photographed images
into your camera, switch the camera on and set the
Mode dial to “Playback” mode.
4. Connect the camera and PC using the USB cable.
5. Open the Control Panel, click “System” and open
the System Properties dialog box.
6. Select the “Hardware” tab and click the [Device
Manager] button.
7. Click “Universal Serial Bus Controller” in the
Device Manager window, then click the right
mouse button on “USB Mass Storage” and select
“Properties” in “Action” menu.
23
Windows
Uninstalling the Software on a Windows PC
NOTE
If you cannot find USB Mass Storage in the “USB Controller” list, look under
“Other devices”.
8. Select the “Driver” tab and click the [Update
driver…] button. This launches the Upgrade Device
Driver Wizard.
9. Select “Display a list of the known drivers for this
device so that I can choose a specific driver” as
the search method and click the [Next >] button.
NOTE
Uninstalling Exif Viewer, DP Editor, Exif Launcher and Audio Downloading Software
You can automatically uninstall these application programs using “Add/Remove
Programs” in the Control Panel.
NOTE
• Use this procedure only when the installed software is no longer required or
when software installation fails.
• Always quit Exif Viewer, DP Editor, Exif Launcher and Audio Downloading
Software before beginning uninstallation.
• Uninstall Exif Launcher before uninstalling Exif Viewer.
Connecting the camera to your PC with only Exif Launcher left installed could
cause problems.
1. Switch on your PC and start up Windows.
When the dialog box opens, “Search for a suitable driver for my device
(recommended)” is selected. Change this selection to “Display a list of the known
drivers for this device so that I can choose a specific driver.
2. Open the “My Computer” window and double-click
“Add/Remove Programs” in the Control Panel.
10. In the device driver selection window, select USB
Mass Storage in the “Models:” field and click the
[Have Disk…] button.
3. Select the application to be uninstalled.
11. The installation specification dialog box (Install
from floppy disk) dialog box appears. Select
\USBDRV\WIN2KPRO on the CD-ROM drive and
click [OK].
4. Confirm the deletion.
The “Add/Remove Programs Properties” window appears. Select the program to
be deleted (Exif Viewer, Exif Launcher, DP Editor or Audio Downloading Software)
and click the [Add/Remove] button.
A confirmation dialog box appears. Uninstallation cannot be cancelled once it has
been confirmed in this dialog box. Check the details carefully.
5. UninstallShield starts up.
When uninstallation ends, click the [OK] button.
TIP
Click the [Browse…] button to simplify the selection.
12. When the device driver selection window reappears,
click the [Next >] button.
13. When the Upgrade Device Driver Wizard reappears,
click the [Next >] button.
14. The Upgrade Device Driver Wizard completion
screen appears. Click the [Finish] button to
complete the driver upgrade.
24
25
Macintosh
Installation on a Macintosh
Installing the Software
Pre-installation Checklist
Installing the USB Driver
Hardware and software requirements
To run this software, you must have the hardware and software described below. Check
your system before you begin the installation.
Compatible Macs
Operating System
RAM
Hard disk space
: Power Macintosh G3✽, PowerBook G3✽, Power Macintosh G4,
iMac or iBook
(✽ Models with a USB port as a standard feature)
: Mac OS 8.5.1 to 9.0
: 64 MB minimum
: Amount required for installation: 60 MB minimum
Amount required for operation: 110 MB minimum
1. Switch on your Macintosh and start up Mac OS.
2. Version verification and updating for iMac.
If you are using an iMac, an update may be necessary to ensure that USB
operates stably. Updating is not required on other models. Use the procedure
below to check whether updating is required.
1 Select “Apple System Profiler” from the Apple menu.
2 Select the “Devices and Volumes” tab.
3 The circled part shows the USB Manager version.
NOTE
• Connect the Macintosh and digital camera directly using the USB cable.
Connecting via USB hub is not guaranteed.
• USB interface board is not guaranteed.
Attach the noise suppression core
Noise
suppression core
If a noise suppression core is enclosed,
fit the core to the communications cable
to reduce emissions of unwanted
electrical noise. If the cable is already
fitted with a noise suppression core, use
the cable as is.
Press until it clicks shut.
26
If you are using USB Manager 1.0.1, your iMac must be updated. If the version is
1.1, no update is needed.
● Updating iMacs
Update your iMac using the “iMac Firmware Update” or “iMac Update” iMac
updater files, which can be downloaded from the Apple Computer internet web
site (http://www.apple.com/support) or copied from the CDs commonly given away
with Macintosh computer magazines. Refer to the explanatory text files provided
with updater for instructions on how to update your iMac.
27
Macintosh
3. Check whether File Exchange is active.
To use a media that is supported by the camera, the File Exchange utility supplied
with Mac OS must be running. Select the Extensions Manager in the Control
Panels and check that the File Exchange check box is ticked. If not, click in the
box so that an [X] appears and then restart your Macintosh.
5. Connect the camera to your Macintosh.
1 Load the media into the camera, switch the camera on and set the Mode dial to
“Playback” mode.
NOTE
Use media that contain photographs shot on a FUJIFILM digital camera.
2 Use the USB cable to connect the camera to the USB port on your Macintosh.
NOTE
4. Copy the driver to the Extensions folder.
1 When you load the enclosed
CD-ROM into the CD-ROM drive,
the CD-ROM icon appears on the
desktop.
2 Double-click the CD-ROM icon,
open the “USB Mass Storage
Driver” folder and then the
“English” folder. The English folder
contains 2 files:
“USB04CB_StorageShim” and
“USB04CB_StorageDriver”. Copy
these 2 files to the Extensions
folder inside the System folder on
the startup disk.
3 Select “Restart” from the “Special”
menu to restart your Macintosh.
28
• Connect the cable to the USB port on
your Macintosh. If the cable is
connected via a USB hub, the software
may not operate correctly. If the PC
has 2 or more USB ports, any USB
port can be used.
• Push the USB connector in fully to
ensure that the connection is secure.
If the cable is not securely connected,
the software will not operate correctly.
Refer to the Owner’s Manual supplied
with the camera for details.
• To avoid communication errors, use
the USB cable provided in this
package and do not use an extension
cable.
3 Setup is complete when a new removable disk icon
(the connected camera) appears on the desktop.
29
Macintosh
Using the User’s Guide
Installing the Enclosed Applications
1. When you load the enclosed CD-ROM into the
CD-ROM drive and double-click the CD-ROM icon,
the “Exif Viewer” folder appears.
2. Copy the “Exif Viewer”
folder to your hard
disk.
✽
The “Exif Viewer” folder contains
“Exif Viewer” and “DP Editor”.
3. Copy the “Audio Downloading Software” folder to
your hard disk.
4. Open the English folder in
the QuickTime 4 folder and
double-click the
“QuickTime Installer” icon.
Installation begins.
✽
In the “Registration” window, the software
will still be installed if you enter no
information.
To read the User’s Guide supplied on the CD-ROM, you must have Adobe
Systems’ Acrobat Reader installed.
Installation of Acrobat Reader
1. Switch on your Macintosh.
2. Load the CD-ROM into the CD-ROM drive on your Macintosh.
3. Quit any other applications that are running. In the Applications menu, click on
any program other than the Finder and select “Quit” from the File menu.
4. Double-click the “English Reader Installer” setup program in the “English”
folder in the “Acrobat Reader 4” folder on the CD-ROM.
5. Proceed with the installation as directed by the on-screen instructions.
Using the User’s Guide
1. Load the CD-ROM into the CD-ROM drive on your Macintosh.
2. When you open the MANUAL folder in the Exif Viewer folder on the CD-ROM,
it contains the following file. Use Acrobat Reader to view the file.
English.pdf: User’s Guide
✽
For easier viewing, copy the English.pdf file onto the hard disk in your
Macintosh.
✽ For information on how to use Acrobat Reader, refer to the online guide
provided in the Acrobat Reader Help menu.
5. When installation is completed, restart your
Macintosh.
This completes the installation.
✽
DP Editor is a software utility for creating new DPOF files and is based on DPOF
version 1.00. When you are using this software to edit DPOF files that were set
up on a digital camera, some functions may not be available depending on the
software version supported.
✽ Particularly with media containing DPOF settings specified on other brands of
digital camera, you should reset the DPOF settings using the selected digital
camera before using the DP Editor.
30
31
Macintosh
Using the Software on a Macintosh
Connecting the Camera and Macintosh and Viewing Images
✽
Refer to the Owner’s Manual for your camera for information on using the camera.
1. Start up your Macintosh.
2. Load a media containing photographed images
into your camera, switch the camera on and set the
Mode dial to “Playback” mode.
NOTE
Use media that contain photographs shot on a FUJIFILM digital camera.
3. Use the USB cable to connect the
camera to your Macintosh. If a
removable disk icon appears on
the desktop, the camera and
Macintosh are correctly connected.
4. Double-click the Exif Viewer icon
to start up the software. The main
window shown below appears.
5. When you select (click)
“Untitled” disk →
“DCIM” → “100_FUJI”
from the list displayed
on the left side of the
main window,
thumbnails of the
images recorded on the
media are displayed in
the thumbnail display
area on the right side of
the main window.
32
<Main window>
6. When you double-click a thumbnail image directly,
the image is displayed in an Image window.
The Image window closes when the Close box in
the main window is clicked.
You can also copy an image to the hard disk by
selecting the thumbnail image dragging it onto the
desktop.
NOTE
• Do not use the camera while it is being accessed by the PC.
Do not perform any of the following operations during camera access as this
could result in damage to the data on the media or damage to the media itself:
Switch the camera off/Touch any of the camera operation buttons/Disconnect the
USB cable/Remove the media/Open the media cover/Remove the camera batteries
• Do not format the SmartMedia in the camera on your PC. Doing so may prevent
you from using this SmartMedia to take pictures.
7. Select “Quit” from the File menu or click the Close
box to exit Exif Viewer.
✽
For more information on using Exif Viewer or DP Editor, refer to the User’s Guide
(PDF document) on the CD-ROM.
8. Drag the removable disk icon on the desktop to the
Trash or select the icon and then select “Eject”
from the Special menu in the menu bar at the top
of the window.
9. When the remove allowance displayed, disconnect
the USB cable and remove the media.
NOTE
• Removing the media or switching off the camera without “ejecting” the
removable disk icon could damage the media or cause your Macintosh to hang.
• If you are using a media that was formatted on the camera and you replace a
folder on the media with a folder with the same name on your hard disk, the
files may be corrupted. Delete the folder on the media or change the folder
name before copying the data.
33
Macintosh
Connecting the Camera to Your Macintosh and Downloading MP3 Files
1. Start up your Macintosh.
2. Load a SmartMedia (card) with ID into the camera,
switch the camera on and set the Mode dial to
“Playback” mode.
3. Use the USB cable to connect the camera to your
Macintosh.
4. Double-click the Audio Downloading Software icon
[
] to start up the downloading software.
If the SmartMedia (card) with ID
contains music (SVQ) files, the files are
listed in playback order.
7. Other functions:
• To delete music (SVQ) files on a SmartMedia
(card) with ID, select the music (SVQ) file from the
file list and click the [Delete/Cancel] button.
• To change the playback order, select the music
(SVQ) file on the SmartMedia (card) with ID and
then drag and drop the file to the desired
playback position in the list display area.
• If you have switched the camera off or changed
the SmartMedia (card) with ID, click the [Refresh]
button to update the information displayed.
8. Select Exit from the File menu or click the [Exit]
button to exit the Audio Downloading Software.
9. Drag the removable disk icon on the desktop to the
Trash or select the icon and then select “Eject”
from the Special menu in the menu bar at the top
of the window.
5. Registering MP3 files:
MP3 files✽ created using the enclosed software
(MacMP3) can be registered (singly or in batches)
in Audio Downloading Software by dragging and
dropping them into the file list display area.
To cancel the registration, select a registered MP3 file and click the
[Delete/Cancel] button.
✽ Refer to the “Audio Operations Guide” provided separately for information on
creating MP3 files.
10. When the camera indicates that it is OK to remove
the SmartMedia card and disconnect the cable,
disconnect the USB cable and remove the media.
NOTE
If you remove the media or switch off the camera without using the correct
procedure to eject the media, you may damage the media or your Macintosh may
hang.
6. Downloading the MP3 files:
Click the [Transfer] button to download MP3 files
registered in Audio Downloading Software to a
SmartMedia (card) with ID.
34
35
Uninstalling the Software on a Macintosh
NOTE
Use this procedure only when the installed software is no longer required or
when software installation fails.
Uninstalling the USB Driver
First, check that the digital
camera is no longer
connected. Then open the
Extensions folder in the
System folder on the hard
disk and move the
“USB04CB_StorageShim”
and
“USB04CB_StorageDriver”
files to the Trash.
Then, restart your Macintosh and select “Empty
Trash” from the Special menu.
Uninstalling Exif Viewer, DP Editor and Audio Downloading Software
Quit Exif Viewer, DP Editor and Audio Downloading
Software and move the Exif Viewer, DP Editor and
Audio Downloading Software files to the Trash. Then
select “Empty Trash” from the Special menu.
Troubleshooting
If problems arise and the USB Driver is not running correctly, check the items
listed below.
The camera and PC are connected but no removable disk icon is
displayed.
■ Is the camera switched on?
Solution: Switch the camera on. Refer to the Owner’s Manual supplied with the
camera for details.
■ Is the media loaded in the camera?
Solution: Load a media into the camera. Refer to the Owner’s Manual supplied with
the camera for details.
■ Is the camera set to USB connection mode?
Solution: Some cameras have to be set to a particular mode (eg. Playback mode) for
USB connection. Refer to the Owner’s Manual supplied with the camera for
details.
■ Is the USB connector cable connected to the camera and the PC?
Solution: Check that one end of the cable is plugged into the camera and the other
end into the PC.
■ (Win) Are you using a compatible operating system?
Solution: Only use the USB Driver provided on the camera software CD-ROM with
compatible operating systems.
■ (Win) Is the USB Driver running?
Solution: Click “System” in the Control Panel, select the Device Manager tab and
check the USB Driver. If the driver is marked with a yellow “!” or a red “x”,
upgrade the USB Driver.
■ (Win) If you are using Windows 2000 Professional, are you logged on as an
Administrator group?
Solution: Log on as an Administrator group.
■ (Mac) Are you using Mac OS 8.5.1 or later?
Solution: Upgrade your system software to Mac OS 8.5.1 or later.
■ (Mac) If you are using an iMac, have you updated the iMac?
Solution: It may be necessary to update your iMac. (See P.27.)
36
37
■ (Mac) Is the USB Driver active?
Solution: Select “USB04CB_StorageShim” and “USB04CB_StorageDriver” in the
Extensions Manager and restart your Macintosh.
The PC hangs when I access the media.
■ (Win) When opening the Device Manager, there is a yellow “!” mark next to the
driver in “Universal Serial Bus controllers”.
Solution: You are using a driver or camera that prevents the driver for the Universal
Serial Bus controllers from operating. Check your PC setup.
Windows-specific Problems
The camera is connected to my PC but the driver installation will
not start.
■ Is the camera switched on?
Solution: Switch the camera on. Refer to the Owner’s Manual supplied with the
camera for details.
■ Is the camera set to USB connection mode?
Solution: Some cameras have to be set to a proper mode (eg. Playback mode) for
USB connection. Refer to the Owner’s Manual supplied with the camera for
details.
■ Is the USB cable connected to the camera and the PC?
Solution: Check that one end of the USB cable is connected to the camera and the
other end to the PC.
■ Are you using a compatible operating system?
Solution: The USB Driver is not supported by Windows 3.1 or earlier, Windows CE,
Windows 95 or Windows NT 4.0 or earlier. Use a compatible operating
system.
■ (Win) When opening the Device Manager, there is a yellow “!” mark next to USB
Driver.
Solution: You are using a driver or camera that prevents the USB Driver from
operating. Check your PC setup.
■ (Mac) If you are using an iMac, have you updated the iMac?
Solution: It may be necessary to update your iMac. (See P.27.)
■ (Mac) Is the USB Driver software installed?
Solution: Install the USB Driver software on your PC. For instructions on installing
the USB Driver, see P.27.
■ If you are using Windows 2000 Professional, are you logged on as an
Administrator group?
Solution: Log on as an Administrator group.
■ Are the USB functions active?
Check
: Click “System” in the Control Panel, select “Device Manager” and check
“Universal Serial Bus controllers”.
Solution 1: If “Universal Serial Bus controllers” is not displayed, the USB functions is
disabled. Refer to the User’s Manuals supplied with your PC for details of
how to enable the USB functions.
Solution 2: If the driver is marked with a yellow “!” or a red “x”, USB Driver is not
running. Upgrade the USB Driver.
My camera will no longer play back image files.
■ Did you rename any files or folders inside the DCIM folder?
Solution: Change the file or folder names in the DCIM folder back to the original
names.
■ Did you replace an image file inside the DCIM folder?
Solution: Do not replace image files in the DCIM folder.
38
39
When I install the driver, the “Could not find a driver for this
device” message appears.
My PC does not shut down correctly.
■ The installer cannot read the device driver due to a problem with your PC
setup.
Solution: Select “\USBDRV\WIN98” on the CD-ROM drive.
■ Some PCs will not shut down correctly while the FinePix40i is still connected to
the USB interface.
Solution: In future, use the correct procedure✽ to disconnect the USB cable
connecting the FinePix40i to your computer before quitting Windows.
✽ See page 20 if you are using Windows 2000 Professional.
When I install the driver, the “Could not find UMAS04CB.INF”
message appears.
I want to stop the Exif Viewer from launching automatically.
■ Did you specify the driver folder correctly?
Solution: For Windows 98 or Windows Me, specify \USBDRV\WIN98\USBS04CB.INF.
For Windows 2000 Professional, specify \USBDRV\WIN2KPRO\UW2K04CB.
INF.
When I connect the camera to my PC, the “Add New Hardware
Wizard” appears.
■ Is the USB Driver installed?
Solution: Install the USB Driver software as directed by the on-screen instructions.
■ If you use the procedure below to remove Exif Launcher, Exif Viewer will no
longer launch automatically.
Solution: Restart your PC and hold down the [Shift] key as soon as the wallpaper
appears.
Do not release the [Shift] key until the wallpaper and all your icons have
appeared to show that startup has finished.
Click the [Start] button and select [Programs]-[Startup]-[Exif Launcher] from
the “Start” menu. Click the right mouse button on [Exif Launcher] and
select “Remove” from the pop-up menu.
As of the next time you start up your PC, Exif Viewer will no longer launch
automatically.
When I double-click the removable disk icon, “The device is not
ready” error message appears.
■ Is the media loaded in the camera?
Solution: Load a media into the camera. Refer to the Owner’s Manual supplied with
the camera for details.
A warning message appeared when I removed the media from the
camera.
Solution: This procedure may corrupt the data on the media or damage the media
itself. Close all the camera files and wait until the camera display indicates
that data access is no longer in progress before removing the media.
When I disconnect the cable connecting the PC to the camera
and double-click the removable disk icon, a message appears
and the window does not open or the images on the media are
not displayed correctly.
■ Is another USB removable drive connected?
Solution: Some USB removable drives do not operate correctly if other USB
removable drives are being used at the same time. Disconnect all the
connected USB removable drives and then connect the camera.
40
41
Troubleshooting Audio Downloading Software
Macintosh-specific Problems
This message appeared when I connected the camera to my
Macintosh.
■ Does the operating system on your personal computer support Audio
Downloading Software?
Solution: Use an operating system that supports Audio Downloading Software.
■ Is the USB Driver installed?
Solution: Install the driver on your
Macintosh.
I get a message saying “Not enough memory. Process aborted.”
When I connected the USB cable, Mac OS displayed the “Initialize
disk?” message.
■ Is the media formatted?
Solution: Disconnect the USB cable from the camera, insert the media into the
camera and format the media. Refer to the Owner’s Manual supplied with
the camera for details.
■ The Macintosh cannot recognize the media because File Exchange is disabled.
Solution: Enable File Exchange. See P.28 for details.
■ The media size is not supported by File Exchange and cannot be used on the
Mac OS.
Solution: Use a different media.
A warning message appeared when I removed the media from the
camera.
Solution: This action can damage the data on the media or damage the media itself.
Before removing the media, select the disk and then select “Eject” from the
Special menu. Alternatively, drag the disk icon to the trash.
A warning message appeared when I disconnected the USB
cable from the camera.
Solution: This action can damage the data on the media or damage the media itself.
Before disconnecting the USB cable from the camera, select the disk and
then select “Eject” from the Special menu. Alternatively, drag the disk icon
to the trash.
42
I can’t start up Audio Downloading Software.
■ (Mac) Is enough memory allocated to the program?
Solution: Select the Audio Downloading Software icon (not the alias), select “Get
Info” / “Memory” from the File menu and increase the “Preferred Size”
setting in “Memory Requirements”.
I get a message saying “This file is corrupted or incompatible.”
■ Is this an MP3 file that cannot be played back on your camera?
Solution: Use the software provided (Windows: RealJukebox Plus, Macintosh:
MacMP3).
The FinePix40i can play back MP3 files with a sampling rate of 44.1 KHz
and a bitrate of 128, 112 or 96 Kbps.
■ Is the MP3 file corrupted?
Solution: Create the MP3 file again.
I get a message saying “<Filename> not found.”
■ Did you register a file on a removable disk and then remove the disk?
Solution: Re-insert the disk.
■ Did you delete or move a registered file?
Solution: Delete the registration for the missing file.
I get a message saying “Insufficient media capacity.”
■ Is there ample free space on the SmartMedia (card) with ID?
Solution: Delete any unwanted files on the SmartMedia (card) with ID or insert a new
SmartMedia (card) with ID.
■ Did you try to register a large number of MP3 files at the same time?
Solution: Decrease the number of MP3 files to be registered.
43
MEMO
I get a message saying “Cannot find SmartMedia with ID in any
drive.”
■ Is the camera switched on?
Solution: Switch the camera on.
■ Is the camera set to USB connection mode?
Solution: Some cameras have to be set to a particular mode (eg. Playback mode) for
USB connection. Refer to the Owner’s Manual supplied with the camera for
details.
■ Is the USB connector cable connected to the camera and the PC?
Solution: Check that one end of the cable is plugged into the camera and the other
end into the PC.
■ Is there a SmartMedia (card) with ID loaded in the camera?
Solution: Load a SmartMedia (card) with ID into the camera.
■ Is an old version of the USB Driver installed?
Solution: Update the USB Driver using the enclosed CD-ROM.
(Win): Update the USB Driver as explained on P.23.
(Mac): Uninstall the old USB Driver as explained on P.36 and then install
the USB Driver as explained on P.27.
I get a message saying “The media is write protected.”
■ Is there a write-protect sticker on the SmartMedia (card) with ID?
Solution: Peel the write-protect sticker off the SmartMedia (card) with ID.
I get a message saying “Media edit failed.”
■ Is the selected MP3 file being used by another application?
Solution: Quit the other application that is using the MP3 file.
■ Is the selected MP3 file write protected?
Solution (Win): Open the file properties window and click to clear the “Read-only”
checkbox.
Solution (Mac): Select “Get Info” from the File menu and click to clear the “Locked”
checkbox.
My camera will no longer play back audio files.
■ Did you rename any files or folders inside the DSAM folder?
Solution: Change the file or folder names in the DSAM folder back to the original
names.
44
MEMO
MEMO
This brochure uses recycled paper.
Printed in Japan
FGS-002110-FG