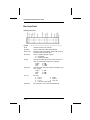
1
9'
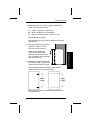
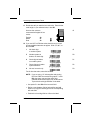
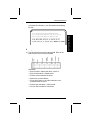
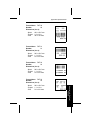
Monarch
Marking Systems
Monarch 9401@/ 9402@
Thermal Printers
System Administrator's
Guide
TC9401SA Rev.E 8/95
@1989-1995 Monarch Marking Systems, Inc. All rights reserved.
Each product and program carries a respective written
warranty, the only warranty on which the customer can rely.
Monarch reserves the right to make changes in the product
and the programs and their availability at any time and without
notice. Although Monarch has made every effort to provide
complete and accurate information in this manual, Monarch
shall not be liable for any omissions or inaccuracies. Any
update will be incorporated in a later edition of this manual.
r
WARNING
This equipment has been tested and found to comply with the limits for
a Class A digital device, pursuant to Part 15 of the FCC Rules. These
limits are designed to provide reasonable protection against harmful
interference when the equipment is operated in a commercial
environment. This equipment generates, uses, and can radiate radio
frequency energy and, if not installed and used in accordance with the
instruction manual, may cause harmful interference to radio
communications. Operation of this equipment in a residential area is
likely to cause harmful interference in which case the user will be
required to correct the interference at his own expense.
CANADIAN D.O.C. WARNING
This digital apparatus does not exceed the Class A limits for radio
noise emissions from digital apparatus set out in the Radio Interference
Regulations of the Canadian Department of Communications.
Le present appareil numerique n'emet pas de bruits radioelectriques
depassant les limites applicables aux appareils numeriques de la
classe A prescrites dans Ie Reglement sur Ie brouillage radioelectrique
edicte par Ie ministere des Communications du Canada.
WARNING
The power cord is intended to serve as the disconnect device. The
socket-outlet shall be near the equipment and shall be easily
accessible.
WARNUG
Der Stromversorgungskabel dient als abschaltvorrichtung. Die
Steckdose soli in der Nahe der Einheit und liecht zunganglich liegen.
Trademarks
Monarch, 9401 , 9402 and 2095 are registered trademarks of Monarch Marking
Systems, Inc.
MS-DOS is a registered trademark of Microsoft Corporation.
IBM-PC is a trademark of International Business Machines Corporation.
Table of Contents
Table of Contents
1. Introduction .....................................................................1-1
About this Manual ......................................................1-1
Equipment Requirements ..........................................1-2
What is a Format?......................................................1-2
Standard Formats ......................................................1-3
How to Use this Manual .............................................1-5
Checking for Optional Formats ..................................1-6
Setting the Administrator Password ...........................1-8
2. Designing a Format .........................................................2-1
Format Design Tools ..................................................2-1
Format Worksheet..........................................2-1
Supply Layout Grids.......................................2-2
Steps to Designing a Format .....................................2-2
Determining Format Contents....................................2-3
Fields..............................................................2-3
Text Fields ..........................................2-3
Non-Printable Text Fields ................... 2-3
Bar Code Fields .................................2-3
Overlays .........................................................2-4
Constant Text Overlays ...................... 2-4
Lines and Boxes.................................2-4
Graphics .............................................2-4
Field Options ..............................................................2-5
Fixed Characters............................................2-5
Price Fields.....................................................2-5
Sub-Fields ......................................................2-5
Merged Fields ................................................2-5
Operator Prompts...........................................2-5
Incrementing/Decrementing Fields ................ 2-6
Date/Time Fields ............................................2-6
Check Digits ...................................................2-6
The Print Area ............................................................2-7
Draw Rough Sketches ...............................................2-8
i
9401/9402 System Administrator’s Guide
Filling in the Format Worksheet .................................2-9
Defining the Format Header.....................................2-10
Defining Text Fields..................................................2-13
Defining Constant Text Overlays..............................2-23
Defining Bar Code Fields .........................................2-28
Defining Non-Printable Text Fields...........................2-34
Lines and Boxes.......................................................2-36
Defining Lines...............................................2-36
Defining Lines as Segments ............ 2-36
Defining Lines as Vectors.................2-39
Defining Boxes .............................................2-39
3. Applying Field Options....................................................3-1
Defining Fixed Data (Option 1) ..................................3-3
Entire Field Fixed Character Definition .......... 3-3
Partial Field Fixed Character Definition ......... 3-5
Restricting Data Types ...................................3-6
General Restrictions.......................................3-6
Detailed Character Restrictions .....................3-7
Example .............................................3-8
Restricting Data Types by Character
Position...........................................................3-9
Creating Date or Time Fields ....................... 3-11
Copying Data Into a Field (Option 4) .......................3-13
Merging Fields..............................................3-16
Sub-Fields ........................................3-16
Defining Data Entry Sources (Option 5) .................. 3-17
Eliminating the Operator Prompt.................. 3-17
Defining a Data Entry Prompt (Option 20) ............... 3-18
Adding Characters to Pad Fields (Option 30) .......... 3-19
Creating a Price Field (Option 42) ...........................3-20
Incrementing Fields (Option 60)...............................3-21
Entering data for incrementing fields ........... 3-22
Fixing the first number in the incrementing
sequence......................................................3-22
ii
4. Using Check Digits .........................................................4-1
Defining a Check Digit Scheme .................................4-2
Check Digit Record ............................4-3
Generating Check Digits ............................................4-3
Verifying Check Digits ................................................4-4
Check Digit Verification on Copied Fields .................. 4-4
Clearing a Check Digit Scheme .................................4-5
Sample Check Digit Calculation.................................4-5
Sum of Products.............................................4-5
Sum of Digits ..................................................4-6
5. Recording Batch Information ........................................5-1
Preparing Batches for Downloading ..........................5-2
Guidelines for Preparing Batch Data .........................5-5
Guideline 1 .....................................................5-5
Guideline 2 .....................................................5-5
6. Entering Data Streams ...................................................6-1
Creating Format Files.................................................6-2
Entering Text Fields............................6-3
Entering Non-Printable Text Fields .... 6-4
Entering Bar Code Fields ................... 6-5
Entering Constant Text Overlays ....... 6-6
Entering Lines ....................................6-7
Entering Boxes...................................6-8
Applying Field Options .......................6-9
Sample Format File......................................6-11
Sample Format Batch File ........................... 6-11
Creating Check Digit Files........................................6-13
Creating Batch Data Files ........................................6-14
iii
Table of Contents
Table of Contents
9401/9402 System Administrator’s Guide
7. Configuring the Printer....................................................7-1
Connecting the Printer ...............................................7-1
Online Communication Requirements .......................7-1
Communication Values - Definitions ..........................7-2
Setting Communication Values ..................................7-3
At the Printer ..................................................7-3
At the Computer .............................................7-5
Cable Interface...........................................................7-6
8. Printing..............................................................................8-1
Placing the Printer Online ..........................................8-1
Downloading ..............................................................8-2
Downloading from a MS-DOS System .......... 8-2
Downloading from Other Computer
Systems..........................................................8-3
Format Tracking .............................................8-3
Determining the Number of
Formats ..............................................8-4
Clearing Formats................................8-4
Printing Batches .........................................................8-5
Batch Downloading ........................................8-5
Keypad Batch Entry .......................................8-5
Printer Storage Capacity ............................................8-6
Formats ..........................................................8-6
Batches ..........................................................8-6
Check Digits ...................................................8-6
9. Editing and Reviewing Formats ....................................9-1
Modifying Formats......................................................9-1
Deleting a Format from the Printer.............................9-1
Using Printer Menus.......................................9-1
From a Host ..................................................9-2
iv
10. Establishing Daily Procedures ..................................10-1
Daily Startup Checklist .............................................10-1
Data Entry Instructions for Operators ......................10-1
Print Logs .................................................................10-2
Creating DOS Batch Files for Downloading............. 10-2
Backing up Format and Batch Files .........................10-3
11. Online Information .......................................................11-1
Data Stream Structure .............................................11-1
Example ...........................................11-2
Format Header .........................................................11-3
Text Field ..................................................................11-5
Bar Code Field .........................................................11-8
Non-Printable Text Record ......................................11-11
Constant Text Overlays ..........................................11-12
Line Records ..........................................................11-15
Box Records...........................................................11-17
Field Options ..........................................................11-19
Definitions...................................................11-20
Batch Packets ........................................................11-31
Batch Header Section ................................11-31
Batch Data Record.................................................11-33
Check Digits ...........................................................11-35
Transmitting Data ...................................................11-37
Sample Format Data Stream ..................... 11-38
Interactive Mode.....................................................11-40
Processing Overview .................................11-40
Exception Packets......................................11-41
Printer Status Codes ..................................11-41
Using a Scanner in Interactive Mode ......... 11-42
Example Printer/Host Dialog...................... 11-42
v
Table of Contents
Table of Contents
9401/9402 System Administrator’s Guide
12. Quick References........................................................12-1
Text Fonts.................................................................12-1
Character Height ......................................................12-3
Character Width .......................................................12-4
Bar Codes ................................................................12-5
Line Thickness .........................................................12-6
13. Diagnostics..................................................................13-1
Setting Passwords ...................................................13-1
5-Key Keypad...............................................13-1
21-Key Keypad.............................................13-2
Monarch Computer Keyboard......................13-3
Checking the Software Version................................13-4
Printing a Test Label.................................................13-5
Checking Supply Quality ..........................................13-7
Checking Printer Memory Usage .............................13-9
Testing Your Scanner .............................................13-11
Calling for Service ..................................................13-12
Appendix A. Optional Formats ..........................................A-1
Format Set A ..............................................................A-1
Format Set B ..............................................................A-6
Appendix B. Data Stream Examples .................................B-1
Standard Formats ......................................................B-1
Optional Format Set A................................................B-4
Optional Format Set B..............................................B-20
vi
Appendix C. Printable Characters.....................................C-1
Entering Special Characters in Data Streams ...........C-1
Code 128 Function Codes .............................C-1
Function Codes For Special Characters........C-2
Appendix D. Format Design Tools ....................................D-1
vii
Table of Contents
Table of Contents
9401/9402 System Administrator’s Guide
viii
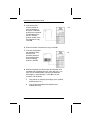
1. Introduction
Be sure you understand the information in the Operator’s
Handbook before you read this manual.
Introduction
Read this manual if you
• oversee the generation of labels or tags.
• design labels or tags.
• decide what to print on labels or tags.
Use this manual to design and print your own custom labels or
tags on a 9401® or 9402® printer.
About this Manual
This manual explains how to
• design a label or tag.
• convert your design to a format.
• build format files on a computer.
• prepare the printer to receive information for printing.
• send data to the printer from a computer.
• set up printing procedures for printer operators.
• run printer diagnostics.
You need a computer for many of the tasks in this manual.
You need not be a programmer, but you should know
commands used by your computer’s operating system. On
MS-DOS™ systems, for example, you should be familiar with
the COPY and MODE commands.
1-1
9401/9402 System Administrator’s Guide
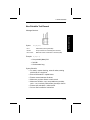
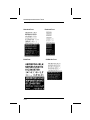
Equipment Requirements
If you plan to create your own label or tag designs, you need
• 9401 or 9402 printer
• MS-DOS computer or mainframe terminal
• 9-pin RS-232 interface cable.
9401 standard features
9402 standard features
5-key keypad for printer
control
21-key keypad for manual
data entry
2" x 6" print image for
industrial size supplies
2" x 4" print image for
retail size supplies
3 standard formats
3 standard formats
Label backing
take-up reel
16 sample formats
Ribbon provision
Ribbon provision on
some models
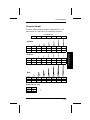
What is a Format?
A format is a set of dimensions, parameters, and instructions
defining where to place information on labels or tags. Labels
and tags are also called supplies.
The goal in designing a format is to map out your label or tag.
Later you will insert actual information, like a bar code, price,
or serial number. The format simply defines where to put this
information, and how to print it.
Each "slot" that will contain an item of information (bar code,
price, etc.) is called a field.
The actual information that fills this framework is called batch
data.
1-2
1. Introduction
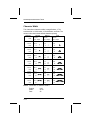
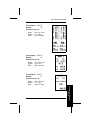
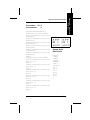
Standard Formats
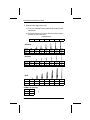
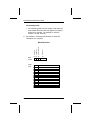
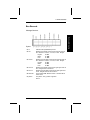
The printer comes with three standard formats.
Format Number
FMT-1
96
FMT-2
97
FMT-3
98
NOTE: Other formats may be available. See "Checking for
Optional Formats," later in this chapter to find out if
you have optional formats.
Format #1
Size:
English: 1-3/8" x 2"
Metric: 35mm x 50.8mm
Dots:
264 x 384 dots
Field #1, text, up to 18 characters
Field #2, UPC-A Bar Code
Field #3, text, up to 18 characters
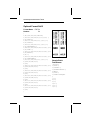
Format #2
Size:
English: 1-3/8" x 2"
Metric: 35mm x 50.8mm
Dots: 264 x 384 dots
Field #1, text, up to 10 characters
Field #2, text, up to 10 characters
Field #3, text, up to 10 characters
Field #4, text, up to 10 characters
Field #5, text, up to 10 characters
1-3
Introduction
Format Name
9401/9402 System Administrator’s Guide
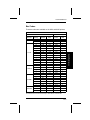
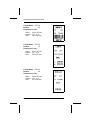
Format #3
Size:
English: 2-3/4" x 1-1/2"
Metric: 67mm x 38mm
Dots:
528x 288 dots
Field #2, text,
up to 10
characters
Field #1, text,
up to 5
characters
Field #3,
UPC-A Bar
Code
Constant text
Constant text
Field #4, text,
up to 8
characters
Constant text
Field #5, price
field
Constant text
Field #6, price
field
Constant text
1-4
1. Introduction
How to Use this Manual
The purpose of this manual is to help you create a system for
printing tags and labels on your 9401 or 9402 printer.
Complete these steps to print supplies.
Introduction
1. Select a format that fits your supply size. You can use
supplies equal to or larger than the format size. Select
formats from the following.
• Standard formats FMT-1, FMT-2, or FMT-3, shown
earlier.
• Optional formats numbered 54 to 69 or 70 to 85 (see
the steps on the next page to check for these formats).
• Design your own formats (read Chapters 2, 3, and 4).
2. Enter batch data to fill in the format. There are three ways
to enter batch data.
• Use the 21-key keypad on the printer, if available (see
your Operator’s Handbook).
• Use an optional Monarch® computer keyboard, if
available (see your Operator’s Handbook).
• Download data from a computer (read Chapters 5 and
6).
3. Print supplies. Read Chapters 7 and 8.
1-5
9401/9402 System Administrator’s Guide
Refer to the following chapters for other administrative
functions.
Chapter
Description
2
3
4
5
6
7
8
Designing formats
Applying optional formatting rules
Defining and using check digits
Recording batch information
Entering format and batch data on a computer
Configuring the printer for downloading
Downloading formats and batches,
printing supplies
Editing and reviewing formats
Establishing operator procedures
Online reference information
Reference charts for formats and character
codes
Printer diagnostics
9
10
11
12
13
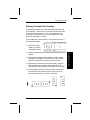
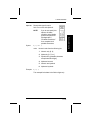
Checking for Optional Formats
If you are not sure whether you have optional formats, here is
how to check.
1. Turn the printer On and press
Menu.
8
to go to the Main
2 until you see Batch Entry.
3. Press 6 .
4. Press 1 or 2 until you see Permanent.
5. Press 6 .
2. Press
If you see
6
No formats!
Press Enter._
then your printer is not equipped with optional formats.
Press
to continue.
1-6
1. Introduction
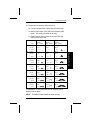
6. If you see
Select Format
Format Name
Press
##
1 or 2 to scroll through the formats.
Set A
Name
FMT 54
FMT 55
FMT 56
FMT 57
FMT 58
FMT 59
FMT 60
FMT 61
FMT 62
FMT 63
FMT 64
FMT 65
FMT 66
FMT 67
FMT 68
FMT 69
Set B
Format
Number
54
55
56
57
58
59
60
61
62
63
64
65
66
67
68
69
Name
FMT 70
FMT 71
FMT 72
FMT 73
FMT 74
FMT 75
FMT 76
FMT 77
FMT 78
FMT 79
FMT 80
FMT 81
FMT 82
FMT 83
FMT 84
FMT 85
Format
Number
70
71
72
73
74
75
76
77
78
79
80
81
82
83
84
85
These formats are illustrated in Appendix A.
7. Press and hold
8
to return to the Main menu.
1-7
Introduction
9402 printers have one of the following sets of 16 formats.
9401/9402 System Administrator’s Guide
Setting the Administrator Password
One of the first things the administrator should do is establish
a password for administrative and diagnostic functions.
See the section, "Changing Passwords" in Chapter 13 to set
the administrator password.
1-8
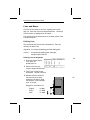
2. Designing a Format
If none of the standard formats fits your needs, you can design
your own formats.
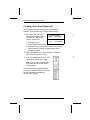
Format Design Tools
A Format Worksheet and Supply Layout Grids are supplied in
Appendix D. You will need them to design formats.
Make copies of the Format Worksheet and Supply Layout
Grid. Save the originals and work with the copies.
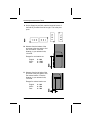
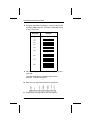
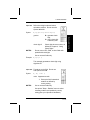
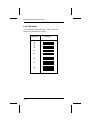
Format Worksheet
This worksheet will serve as a permanent record of your
format parameters. As you create formats, write parameter
values on the Format Worksheet. Later, you will use the
Format Worksheet when entering format data into a computer.
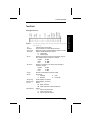
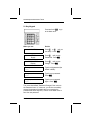
FORMAT WORKSHEET
2-1
Designing a Format
Make sure you have some paper for rough sketches.
9401/9402 System Administrator’s Guide
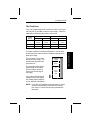
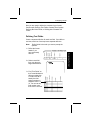
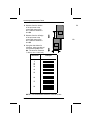
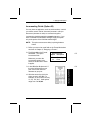
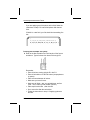
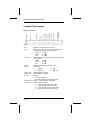
Supply Layout Grids
Supply Layout Grid
(English)
900
You should have three Supply
Layout Grids.
850
800
750
• English
• Metric
• Dots
700
650
600
550
500
450
The English grid, shown to the
right, is measured in 1/100
inches.
400
350
300
250
The Metric grid is measured in
1/10 mm.
200
150
100
50
This printer uses dots to print
images on a supply. The
printhead has 192 dots per
inch. Use the Dot Layout Grid if you prefer to design formats
according to dot measurement.
0
0
50 100 150 200 250
Decide whether you want to design formats using English,
Metric, or dot measurement. Use the corresponding Supply
Layout Grid to determine supply dimensions and measure field
locations.
Steps to Designing a Format
To design your own custom format
1. Determine format contents.
2. Define the format header.
3. Define text and bar code fields.
4. Define lines and boxes, if any.
5. Apply field options, if desired.
2-2
2. Designing a Format
Determining Format Contents
Decide what you want to print on the supply. Any information
should be in the form of text, bar codes, lines, boxes, or
graphics.
Each piece of information is either a field or an overlay. Here
are the field types and how each type might be used.
Fields
There are three types of fields: text, non-printable text, and
bar codes.
Text Fields
• Company name or
department number
• Serial number
• Shipping address
• Price.
Designing a Format
Text fields contain alphabetical, symbol, or numerical
characters. Here are some uses.
You can define up to
14 fields in a format.
The total can be any
combination of text,
non-printable text, or
bar code fields.
Non-Printable Text Fields
Use non-printable text fields if you want the operator to enter
data, but you do not want to print it as entered. For example,
you can enter city, state, and zip code in three non-printable
fields, then merge them to print as one field.
Bar Code Fields
Select from 7 bar codes: UPC-A, UPC-E, I 2 of 5, Code 39,
EAN-8, EAN-13, Code 128. Here are some uses.
• Item or serial number
• Merge information from multiple text fields.
2-3
9401/9402 System Administrator’s Guide
Overlays
Constant text, lines, boxes, and graphics are overlays.
Constant Text Overlays
A constant text overlay is a set of
fixed characters that prints on all
supplies using that format. You
cannot change the characters in
the overlay.
Overlays do not count in
field numbering from 1
to 14. Field Options do
not apply to overlays.
Lines and Boxes
Use lines or boxes to highlight or separate items. For example,
• border the supply with a box
• mark out the regular price on a sale tag
• highlight an item with a box or line.
Graphics
You can print graphics such as logos or symbols. This manual
does not discuss graphics. Contact Technical Support if you
want to use graphic images in your formats.
2-4
2. Designing a Format
Field Options
You can apply options to text, non-printable text, and bar code
fields. For example, you can format a field as a price. You
might also create a set of descriptive prompts to ask the
operator for the exact information for each field. Here are
some examples.
Fixed Characters
Fixed data prints automatically on every tag or supply, without
any input from the operator. You can specify fixed characters
for any text or bar code field.
Price Fields
Sub-Fields
You can copy part of a field to a new location. The new
location is called a sub-field. For example, you can extract
part of the data in a bar code, such as a price, and display it in
text form in a sub-field.
Merged Fields
Merging combines information from up to four fields into one
field. You can merge any combination of text, non-printable
text, or bar code fields.
Operator Prompts
The printer normally prompts the operator for batch
information by field number. For example, the printer prompts
"Field 1:" when it is ready to accept data for field 1. You can
substitute a more descriptive prompt by applying a field option.
For example, you can define a prompt that says "Enter Price:"
if field 1 is a price field.
2-5
Designing a Format
You can design a price field so the printer generates the
monetary symbols. The operator only needs to enter numbers.
9401/9402 System Administrator’s Guide
Incrementing/Decrementing Fields
You can specify numeric fields to increase or decrease in
value as you print. This applies to numeric data only. For
example, you could print a batch of labels with serial numbers
that increase with each label.
Date/Time Fields
You can print the date or time on your tag or label. The
operator only needs to enter the appropriate numbers. The
printer adds the punctuation automatically.
Check Digits
You can have the printer generate or verify check digits for text
or bar code fields. See Chapter 4, "Using Check Digits."
See Chapter 3, "Applying Field Options," for details on these
and other options.
2-6
2. Designing a Format
The Print Area
If you use supplies larger than 2 inches x 4 inches, your printer
may not print an area that covers the entire supply. Check the
table below to determine the maximum print area.
Unit of
Measure
Supply Size
Maximum Print Area
Maximum
Minimum
Model 9401
Model 9402
63.5mm x
228.6mm
19.05mm x
19.05mm
50.8mm x
152.4mm
50.8mm x
101.6mm
English
2.5" x 9"
0.75" x 0.75"
2" x 6"
2" x 4"
Dots
480 x 1728
144 x 144
384 x1152
384 x 768
Metric
The print area is in the lower
left region of the supply. The
bottom is the edge that exits
the printer first.
The actual print area begins
approximately 0.05 inches
from the bottom and 0.075
inches from the left edge of
the supply.
2.5" x 9"
supply
2" x 6"
or
2" x 4"
Print
Area
If you want to shift printing to
a different part of the supply,
see "Setting Supply Options"
in your Operator’s Handbook.
NOTE: If you have a format that covers the entire six inches
of the print area length, the printed area may vary
from 5.9 to 6.1 inches, due to supply and machine
tolerances.
2-7
Designing a Format
This table is based on standard configurations. Some 9402
printers may have optional memory installed, allowing for the
larger print image.
9401/9402 System Administrator’s Guide
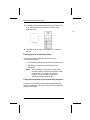
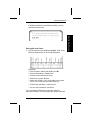
Draw Rough Sketches
When you decide what information
you want to print and how it will
appear on the supply, draw the
information where you want it to
appear. Note any areas that are
preprinted on the supply.
These sketches show a
department number, date, bar
code, and price.
Draw several sketches to
determine which layout works best
for you.
2-8
2. Designing a Format
Filling in the Format Worksheet
1. Once you decide on a layout, separate your format
contents into groups: text, non-printable text, bar codes,
text overlays, lines, and boxes.
2. Make a copy of the Format Worksheet. Copy to two
sheets, if necessary.
3. Define the format header. Follow the steps on the
following pages.
4. Refer to your rough sketch for the types of fields to include
in the format. Find the steps to define each field on the
pages listed below.
Designing a Format
Define all fields in the order in which you want to prompt
the operator for field data.
NOTE: If you are using non-printable text fields, define
them before defining the field that will print the
information.
Type
Examples
Text Fields
Order Number
Price
Company Name
Constant Text
Text to print on all supplies
Bar Code Fields
Serial Number
Merged Fields
Non-Printable
Text Fields
"Hold" data for later use
(such as a merged field)
Lines
Borders and Highlights
Strike through Original Price
(on Sale Tag)
Boxes
Borders and Highlights
2-9
9401/9402 System Administrator’s Guide
Defining the Format Header
The format header identifies the format and defines important
supply information.
Use your copies of the Format Worksheet and Supply Layout
Grid to complete these steps.
1. Find "Format Header" on the Format Worksheet. Assign a
number between 1 and 50 to the format you are about to
create. Write the format number in box F2.
NOTE: Do not use a number already assigned to another
format.
2. Decide how the printer will store the format. You have
three choices. The printer can
R
M
T
Store the format until the printer is turned off.
Store the format permanently on a memory card. (Use
only if you have memory card installed.)
Temporarily store the format. You must include a batch
with these formats.
Write R, M, or T in box F4.
2-10
2. Designing a Format
3. What system are you using to measure supplies and
fields? You have three choices.
E
M
G
English. Measure in 1/100 inches.
Metric. Measure in 1/10 millimeters.
Graphic. Measure in dots. 192 dots = 1 inch.
Write E, M, or G in box F5.
All field dimensions in the format must follow the system
selected here.
4. Tear off one label or tag from your
supply roll. Position it in the
lower-left corner of the grid.
Designing a Format
Make sure the bottom left
corner of the supply aligns
with the lower left corner of the
grid. (The bottom is the edge that
exits the printer first.)
5. Measure the length of the supply
from bottom to top, using the ruler
marks on the left side of the grid.
When measuring aperture and black mark supplies,
measure from top to top as shown below.
Supply
Length
Supply
Length
When measuring labels, use the black sensor marks on
the label backing.
2-11
9401/9402 System Administrator’s Guide
6. Write the length in box F6 on the Format Worksheet.
Remember to use your selected units.
System
Units
Example
English
Metric
Graphic
1/100 in
1/10 mm
Dots
1 in = 100 units
1 mm = 10 units
100 dots = 100 units
Ranges for supply length are
English
Metric
Dots
075 - 900
190 - 2290
144 - 1728
7. Measure the width of the supply
from left to right, using the ruler
marks at the bottom of the grid.
Write the width in box F7.
Ranges for supply width are
English
Metric
Dots
075 - 250
190 - 635
144 - 480
8. Move the supply to the field reference corner just outside
the grid. Trace an outline of the supply on the grid.
9. Assign a name (up to eight characters) to the format.
Write the name in box F8, with quotation marks, as follows:
"LABEL 1"
If you want the printer to assign a name to the format,
place quotation marks, with no characters or spaces
between them, in box F8. The printer will assign a name in
the form of AUTOnnnn, where nnnn is a unique number.
10. Make sure you have filled in boxes F1 through F8 on the
Format Worksheet.
2-12
2. Designing a Format
Now you are ready to define the contents of your format.
Continue with Defining Text Fields, Constant Text Overlays,
Defining Bar Code Fields, or Defining Non-Printable Text
Fields.
Defining Text Fields
Create a separate definition for each text field. If text falls on
two lines, each line of text requires a separate definition.
Note:
Define fields in the order you want to prompt the
operator.
Designing a Format
1. Define the format
header if you
have not already
done so.
2. Select a text field
from your layout to
begin field definition.
3. Find "Text Fields" on
the Format Worksheet.
Write a number from
1 to 14 in box T2 to
identify the field.
Assign numbers in
sequence from 1 to
14. Do not use any
field number more
than once in a format.
2-13
9401/9402 System Administrator’s Guide
4. In box T3, write the maximum number of characters, from
1 to 30, that will appear in the field. Include spaces, $, /, or
other symbols that may appear in price or fixed character
fields.
A date field, for example, may have a maximum of eight
characters (mm/dd/yy).
NOTE: If you are generating a check digit for this field,
allow an extra character for the check digit.
5. Write V or F in box T4 to indicate the following.
F
V
Fixed length. The field always has the same number
of characters.
Variable length. The number of characters in the field
may vary.
6. Refer to the samples on the next page to select a font style
for the field.
2-14
2. Designing a Format
Standard Font
Designing a Format
Bold Font
Reduced Font
OCRA -Like Font
NOTE: These tables do not show all available characters.
See Appendix C for a complete list of characters
available in each field.
2-15
9401/9402 System Administrator’s Guide
7. Determine the height of the field.
a. Find your selected font and the desired height from the
table below.
b. Draw two lines on your Layout Grid to show the bottom
and the top of the text field.
Font Magnification
1x
2x
3x
4x
5x
6x
7x
Standard
1/100 in.
11.4
22.8
34.2
45.6
57.0
68.4
79.8
1/10 mm
29.1
58.2
87.3
116.4
145.5
174.6
203.7
Dots
22
44
66
88
110
132
154
Reduced
1/100 in.
7.3
14.6
21.9
29.2
36.5
43.8
51.1
1/10 mm
18.5
37.0
55.5
74.0
92.5
110.0
129.5
Dots
14
28
42
56
70
84
98
Bold
1/100 in.
17.7
35.4
53.1
70.8
88.5
106.2
124
1/10 mm
44.9
89.8
134.7
179.6
224.5
269.4
314
Dots
34
68
102
136
170
204
238
OCRA-Like (1x only)
1/100 in.
12.5
1/10 mm
31.7
Dots
24
2-16
2. Designing a Format
8. Determine the maximum width of the field.
a. Find your selected font and the desired width below.
b. Multiply the number in box T3 by the character width
below. The result is the width of the field.
c. Draw two lines on the Layout Grid to show the right
and left sides of the field.
1x
2x
4x
5x
6x
7x
Standard
Units
Character
Width Sample
Reduced
Character
Width Sample
Bold
Character
Width Sample
1/100 in.
8.85
4.17
14.06
1/10 mm
22.49
10.58
33.72
Dots
17
8
27
1/100 in.
16.15
7.81
26.56
1/10 mm
41.01
19.84
67.47
Dots
31
15
51
1/100 in.
23.44
11.46
39.06
1/10 mm
59.53
29.10
99.22
Dots
45
22
75
1/100 in.
30.73
15.10
55.56
1/10 mm
78.05
38.36
130.97
Dots
59
29
99
1/100 in.
38.02
18.75
64.06
1/10 mm
96.57
47.63
162.72
Dots
73
36
123
1/100 in.
45.31
22.40
76.56
1/10 mm
115.09
56.89
194.47
Dots
87
43
147
1/100 in.
52.60
26.04
89.06
1/10 mm
133.61
66.15
226.22
Dots
101
50
171
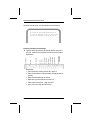
Designing a Format
3x
Width Mag.
The OCRA-like 1x character width is 8.32 (English), 29.10
(Metric), and 22 (Dots).
NOTE: This table includes default character spacing.
2-17
9401/9402 System Administrator’s Guide
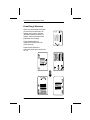
9. On the Supply Layout Grid, mark the lower-left corner of
the field as you read it from left to right. This is the pivot
point.
10. Measure from the bottom of the
print area to the pivot point to find
the row location. Write the
distance, in your selected units,
in box T5.
Ranges for row location are
English
Metric
Dots
0 - 600
0 - 1525
0 - 1152
11. Measure from the left edge of the
print area to the pivot point to find
the column location. Enter the
distance, in your selected units,
in box T6.
Ranges for column location are
English
Metric
Dots
2-18
0 - 200
0 - 559
0 - 384
2. Designing a Format
12. You can alter space between characters. This space is
measured in dots (1/192 inch). Write the number of dots
(0 to 99) in box T7. Enter 0 for default character spacing.
Any number other than 0 or the default number will affect
your field width.
Default spacing is
Standard
Reduced
Bold
OCRA-like
3 dots
1 dot
3 dots
3 dots
The character width chart earlier in this chapter reflects
default spacing.
1
2
3
4
Standard font
Reduced font
Bold font
OCRA-like font
14. Write a number from 1 to 7 in box T9 to indicate the
number of times to magnify character height. Refer to the
table on page 2-16. Enter 1 to use the standard size.
15. Write a number from 1 to 7 in box T10 to indicate the
number of times to magnify character width. Refer to the
table on page 2-17. Enter 1 to use the standard size.
2-19
Designing a Format
13. Write 1, 2, 3, or 4 in box T8 to indicate your font selection.
Refer to the table earlier in this chapter for samples.
9401/9402 System Administrator’s Guide
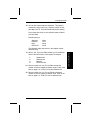
16. Decide how you want to display characters. Write B or W
in box T11.
B Black characters
on white
background
SAMPLE
W White characters
on black
background
SAMPLE
17. Decide whether you want text to align
on the Left side of the field,
on the Right side of the field, or
in the Center.
Write L, R, or C in box T12 on the Format Worksheet.
2-20
2. Designing a Format
18. You can print characters at various rotations within the
field. Character rotation indicates the position of the
characters with respect to the field, not with respect to the
supply.
Character rotation selections are
0 Tops of characters
point to top of field.
1 Tops of characters
point to left of field.
Designing a Format
2 Tops of characters
3 Tops of characters
point to bottom of field.
point to right of field.
Write 0, 1, 2, or 3 in box T13 on the Format Worksheet.
2-21
9401/9402 System Administrator’s Guide
19. Select the number for field rotation from the list below.
Write 0, 1, 2, or 3 in box T14. Field rotation indicates the
position of the field with respect to the supply.
0
Top of field
points to top
of supply.
1
Top of field
points to left
edge of
supply.
2
Top of field
points to
bottom of
supply.
3
Top of field
points to right
edge of supply.
20. Make sure you filled in boxes T1 through T14.
21. You may wish to apply options to this field. See Chapter 3,
"Applying Field Options."
22. Repeat steps 1 through 21 for each text field.
2-22
2. Designing a Format
Defining Constant Text Overlays
A constant text overlay is a set of fixed characters that prints
on all supplies. This overlay is not a field, and does not count
in the field numbering from 1 to 14. The characters in the
overlay are fixed, and the user cannot change them. Field
options do not apply to overlays.
The constant text overlay section is in the lower left corner of
the Format Worksheet.
1. Define the format
header if you have
not already done so.
3. Determine the height of the characters, using the table
provided in this chapter. Draw two lines on your Layout
Grid to show the bottom and the top of the overlay.
4. Determine the maximum width of the overlay, using the
table provided in this chapter. Draw two lines on the
Layout Grid to show the right and left sides of the overlay.
5. On the Supply Layout Grid, mark the lower left corner of
the overlay as you read it from left to right, just as you
would mark a text field. This is the pivot point.
2-23
Designing a Format
2. Select a font style from the samples provided earlier in this
chapter.
9401/9402 System Administrator’s Guide
6. Find "Constant Text" on the
Format Worksheet. Measure from
the bottom of the print area to
the pivot point. Write the distance,
in your selected units, in box C2.
Ranges for row location are
English
Metric
Dots
0 - 600
0 - 1525
0 - 1152
7. Measure from the left edge of the
print area to the pivot point.
Write the distance in box C3.
Ranges for column location are
English
Metric
Dots
0 - 200
0 - 559
0 - 384
8. You can alter space between characters. This gap is
measured in dots (1/192 inch). Write the number of dots
(0 to 99) in box C4. Enter 0 for default character spacing.
Any number other than 0 or the default number will affect
your field width.
Default spacing is
Standard
Reduced
Bold
OCR-like
3 dots
1 dot
3 dots
3 dots
The character width chart, provided in this chapter,
reflects default spacing.
2-24
2. Designing a Format
9. Write 1, 2, 3, or 4 in box C5 to indicate your font selection.
Refer to the table provided in this chapter.
1
2
3
4
Standard font
Reduced font
Bold font
OCRA-like font
10. Write a number from 1 to 7 in box C6 to indicate the
number of times to magnify character height. Refer to the
table provided in this chapter. Enter 1 to use the standard
size.
11. Write a number from 1 to 7 in box C7 to indicate the
number of times to magnify character width. Refer to the
table provided in this chapter. Enter 1 to use the standard
size.
B
Black characters
on white
background
SAMPLE
W White characters
on black
background
SAMPLE
13. Write L in box C9 to align text properly in the field.
2-25
Designing a Format
12. Decide how you want to display characters. Write B or W
in box C8.
9401/9402 System Administrator’s Guide
14. You can print characters at various rotations within the
field. Character rotation indicates the position of the
character with respect to the field, not with respect to the
supply.
Character rotation selections
0
Tops of characters
point to top of field.
1
Tops of characters
point to left of field.
2
Tops of characters
point to bottom of field.
3
Tops of characters
point to right of field.
Write 0, 1, 2, or 3 in box C10.
2-26
2. Designing a Format
15. Select the number for field rotation from the list below.
Write 0, 1, 2, or 3 in box C11.
Top of field
points to top
of supply.
1
Top of field
points to left
edge of
supply.
2
Top of field
points to
bottom of
supply.
3
Top of field
points to right
edge of supply.
16. Write the word or phrase you want to print in box C12.
Place quotation marks around the set of characters. The
phrase can be up to 100 characters.
17. Make sure you filled in boxes C1 through C12.
18. Repeat steps 1 through 17 for each constant text overlay.
2-27
Designing a Format
0
9401/9402 System Administrator’s Guide
Defining Bar Code Fields
Each bar code field requires a separate definition.
Define fields in the order in which you want to prompt the
operator.
f1
1. Define your format
header if you have not
already done so.
2. Select a bar code field
from your layout to
begin field definition.
3. Find "Bar Codes" on
the Format Worksheet.
Write a number from
1 to 14 in box B2 to
identify the field.
Number fields in
sequence from 1 to 14.
Do not use any field
number more than
once in a format.
2-28
f3
2. Designing a Format
4. In box B3, write the maximum number of characters, from
1 to 30, that will appear in the field. If the bar code uses a
check digit, allow an extra character for the check digit.
For UPC and EAN bar codes, use the numbers shown
below.
Bar Code
UPC-A
UPC-E
EAN-8
EAN-13
Number of
Characters
12
7
8
13
5. Write V or F in box B4 to indicate the following.
Fixed length. The field will always contain the same
number of characters.
V
Variable length. The number of characters in the
field may vary.
Enter F if using UPC-A, UPC-E, EAN-8, or EAN-13
codes.
Designing a Format
F
6. Mark the corner that is located in the lower left as you read
the field from left to right. This is the pivot point.
NOTE: When marking the lower left corner of the field, do
not include text or numbers that may appear with
the bar code.
f4
2-29
9401/9402 System Administrator’s Guide
7. Measure from the bottom of the
print area to the pivot point on the
field. Write the distance, in your
selected numbering system units,
in box B5.
f5
Ranges for the row location:
English
Metric
Dots
0 - 600
0 - 1525
0 - 1152
8. Measure from the left edge
of the print area to the pivot
point. Write the distance,
in your selected numbering
system units, in box B6.
NOTE: Allow a minimum
of 1/10 inch between the
bar code and the edges of
the print area.
Ranges for the column
location:
English
Metric
Dots
0 - 200
0 - 559
0 - 384
9. Write the number of the bar code
you want to use in box B7.
Number
Bar Code
1
2
3
4
6
7
8
UPC-A
UPC-E
Interleaved 2 of 5
Code 39
EAN-8
EAN-13
Code 128
2-30
f6
f7
2. Designing a Format
10. Write the density selector for your bar code in box B8.
Refer to the following tables for the appropriate density
selector for your specific bar code.
Barcode
Type
6
8
Narrow Data
to Wide Length
Ratio
N/A
11 or 12
Char
Set
N/A
Appearance
Codes
Available
1,5,6
7 or 8
6 or 7
1,5,6
7 or 8
7 or 8
1,5,6
7 or 8
12 or 13 1,5,6
7 or 8
0 to
8
302
0 to 9
0 to
303
8
0 to
302
8
SPACE
$%*+-./
0 to 9
A to Z
00H to
7FH1
N/A
N/A
1:3.0
1:2.5
1:3.0
1:2.5
1:3.0
1:2.5
1:3.0
1:2.3
1:2.0
1:3.0
1:3.0
1:2.5
1:2.0
1:2.5
1:3.0
1:3.0
1:2.5
0 to 9
0 to 9
0 to 9
0 to 9
Designing a Format
Density Density Narrow
Selector (% or cpi) Element
(dots/mils)
UPCA
2
80%
2/10.4
4
120%
3/15.6
UPCE
2
80%
2/10.4
4
120%
3/15.6
EAN8
2
80%
2/10.4
4
120%
3/15.6
EAN13
2
80%
2/10.4
4
120%
3/15.6
Interleaved 1
1.0
21/109.9
2 of 5
2
2.0
12/62.8
3
3.0
7/36.6
4
4.0
6/31.4
5
5.3
4/20.9
6
6.0
4/20.9
7
6.9
3/15.6
8
8.4
3/15.7
9
9.2
3/15.7
10
10.7
2/10.4
11
10.7
2/10.4
12
12.0
2/10.4
13
13.7
2/10.4
Code 39
3
3.3
4/20.9
4
4.0
3/15.6
6
6.0
2/10.4
7
6.6
2/10.4
Code 128 4
4.3/8.7
4/20.8
5.8/11.7 3/15.6
8.7/17.5 2/10.4
Default values are shown in bold.
(1)
201 - Function Code 1
202 - Function Code 2
203 - Function Code 3
204 - Function Code 4
(2)
Actual maximum number of characters is limited by the supply size and
density combination which enable the bar code to be totally imaged on the
tag or label.
2-31
9401/9402 System Administrator’s Guide
11. Decide how tall you want the bar code to be. Enter the bar
code height, in your selected units, in box B9.
Here are the minimum
recommended heights for bar
codes:
English
Metric
Dots
f8
20
51
39
12. If you use UPC or EAN bar codes, decide how you want
human readable characters to appear. Write 1, 5, 6, 7, or
8 in box B10.
1
No check digit
or number system
f9
5
Number system at
bottom, no check digit
f10
6
Check digit at bottom,
no number system
f11
7
Check digit and number
system at bottom
f12
8
No text, bar code only
f13
For all other bar codes, enter 8 in box B10.
NOTE: If you are using 1.2" wide supplies and printing
UPCA or EAN13 bar codes using option 7 in box
B10, the printer may omit the check digit
character because the supply may be too narrow.
To print the check digit character on the label:
• Use option 5 in box B10 of the bar code field.
• Define a one-character field of reduced font and add
Option 4 to copy the check digit from the corresponding
bar code field.
• Position the check digit field so it fits on the label.
2-32
2. Designing a Format
13. Decide whether you want the bar code to align
on the Left side of the field,
on the Right side of the field, or
in the Center.
Write L, R, or C in box B11.
14. Select the number for field rotation from the list below.
Write 0, 1, 2, or 3 in box B12.
Top of field
points to top of
supply.
1
Top of field
points to left
edge.
2
Top of field
points to
bottom of
supply.
3
Top of field
points to right
edge.
f14
Designing a Format
0
15. Make sure you filled in boxes B1 through B12.
16. You may wish to apply options to this field. If so, see
Chapter 3, "Applying Field Options."
17. Repeat steps 1 through 16 for each bar code.
2-33
9401/9402 System Administrator’s Guide
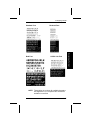
Defining Non-Printable Text Fields
Non-printable text fields enable you to enter data without
printing it in its entered form. Typically, non-printable fields
"hold" data that will combine with other fields to form a merged
field.
NOTE: Define non-printable text fields before you define
the field that will print the information in these
fields.
In the following example, the operator enters data into four
non-printable fields. The format merges data from these fields
to form field #5, then prints it as a bar code. Chapter 3,
"Applying Field Options," tells how to merge fields.
Field #
1
2
3
4
5
Prompt
Data
Field Type
SKU:
DEPT:
SIZE:
COLOR:
none
20374
339
8
15
20374339815
Non-printable
Non-printable
Non-printable
Non-printable
Bar Code
Each non-printable text field requires a separate definition.
Define the fields in the order you want to prompt the operator.
1. Define your format header if you have not already done so.
2. Find "Non-Printable Text Fields" on the Format Worksheet.
Write a number between 1 and 14 to identify this field in
box D2. Number fields in sequence from 1 to 14.
NOTE: Do not use any field number more than once in a
format.
2-34
2. Designing a Format
3. Write the maximum number of characters to be entered in
this field (1-30) in box D3.
NOTE: If you will later copy this field into another field,
remember the maximum number of characters for
the final field is 30. Allow only as many
characters as you need. Also, if you are copying
into a bar code field, the maximum number of
characters in the destination bar code is
determined by the bar code type (UPCA-12,
EAN-13, etc.).
4. You need to apply field options to manipulate the text
entered in this field. You will most likely copy data from
this field into another field. Follow instructions in Chapter
3, "Applying Field Options."
Designing a Format
5. Make sure you filled in boxes D1 through D3.
6. Repeat steps 1 through 5 for all
non-printable fields.
2-35
9401/9402 System Administrator’s Guide
Lines and Boxes
Use lines to form borders, mark out original prices on sale
tags, etc. Each line requires a separate definition. Use boxes
to form borders or highlight items of interest.
The sections for lines and boxes are in the lower portion of the
Format Worksheet.
Defining Lines
Only horizontal and vertical lines are supported. There are
two ways to define lines.
Segments You choose the starting point and ending point.
Vectors
You choose the starting point, the angle,
and the length of the line.
Defining Lines as Segments
f15
1. Define the format header
if you have not
already done so.
2. Select a line from your
layout to begin field definition.
3. Find "Lines" on the Format
Worksheet. Write S in box L2.
4. Measure from the bottom of
the print area to the point
where the line begins. Write
the distance, in your selected
units, in box L3.
Ranges for row location are
English
Metric
Dots
2-36
0 - 600
0 - 1525
0 - 1152
f16
2. Designing a Format
5. Measure from the left edge of
the print area to the point
where the line begins. Write
the distance, in your selected
units, in box L4.
f17
Ranges are
English
Metric
Dots
0 - 200
0 - 559
0 - 384
6. Measure from the bottom of the print area to the point
where the line ends. Write the distance in box L5.
NOTE: For horizontal lines, the number in box L5 must
match box L3.
NOTE: For vertical lines, the number in box L6 must
match box L4.
2-37
Designing a Format
7. Measure from the left edge of the print area to the point
where the line ends. Write the distance in box L6.
9401/9402 System Administrator’s Guide
8. Using the chart below for reference, write your desired line
thickness (1-99) in box L7. Thickness is measured in dots
(1 dot = 1/192 inch).
Thickness
Example
1
5
10
20
30
40
50
60
75
90
9. Place a set of quotation marks, with nothing in the quotes,
in box L8.
This step completes the necessary syntax for line
definition. It should look like this:
""
10. Make sure you have filled in boxes L1 through L8.
11. Repeat steps 1 through 10 for each line segment.
2-38
2. Designing a Format
Defining Lines as Vectors
1. Follow the steps to define lines as segments with the
exception of boxes L2, L5, and L6.
2. Write V in box L2.
3. In box L5, write the direction the line travels from its origin:
0, 90, 180, or 270 (in degrees).
4. Write the length of the line, in your specified units, in box L6.
Defining Boxes
f18
1. Define the format header
if you have not
already done so.
Designing a Format
2. Find "Boxes" on the
Format Worksheet.
Measure from the bottom
of the print area to the
lower-left corner of the box.
Write the distance, in the
units selected for your
format, in box Q2.
f19
f20
3. Measure from the left edge of the
print area to the lower-left corner of
the box. Write the distance, in
your selected units, in box Q3.
2-39
9401/9402 System Administrator’s Guide
f19
4. Measure from the bottom
of the print area to the
upper-right corner of the
box. Write the distance in
box Q4.
5. Measure from the left edge
of the print area to the
upper-right corner of the
box. Write the distance in
box Q5.
f20
6. Using the chart below for
reference, write your desired
line thickness (1-99) in box
Q6. Thickness is measured
in dots (1 dot = 1/192 inch).
Thickness
Example
1
5
10
20
30
40
50
60
75
90
NOTE: Line thickness fills toward the center of the box.
2-40
2. Designing a Format
7. Place a set of quotation marks, with nothing in the quotes,
in box Q7.
This step completes the necessary syntax for box
definition. It should look like this:
""
8. Make sure you have filled in boxes Q1 through Q7.
9. Repeat steps 1 through 8 for each box.
Designing a Format
2-41
9401/9402 System Administrator’s Guide
2-42
3. Applying Field Options
Field options enable you to manipulate fields to display
information correctly with minimal effort by the operator.
You can apply options to most text, non-printable text, or bar
code fields. Field options are not required for any format, but
you can use them to simplify batch entry and add flexibility to
formats.
You can format a text field to display as a price, for example.
You can also create a set of prompts so the operator knows
what information to enter.
Certain combinations are not recommended. For example, it
is not recommended to format a bar code as a price field.
This chapter tells how to accomplish various tasks with field
options. See Chapter 11, "Online Information," for a complete
functional listing of the field options available for 9401 and
9402 printers.
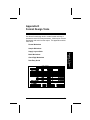
"Field Options" is in the upper-right section of the Format
Worksheet. See the example that follows.
Applying Field Options
3-1
9401/9402 System Administrator’s Guide
FIELD OPTIONS
FIELD OPTIONS
FORMAT WORKSHEET
Option
1
2
3
4
5
20
30
31
42
60
Description
Define fixed characters
General data type restrictions
Detailed data type restrictions
Copy data from another field
Define data entry source
Define data entry prompt
Pad data to left or right
Define check digit mode,
select algorithm
Format as a price field
Define incrementing/
decrementing field
You can apply more than one option to most fields. For
example, you can format a field as a price, then define a
prompt for the field.
Also, you cannot use certain options together on a field. For
example, you cannot increment a price field. These limitations
will be noted with each option.
NOTE: Due to more rigid syntax checks, be aware that data
streams that run successfully with older versions of
the software may now produce errors on the field
options.
3-2
3. Applying Field Options
Defining Fixed Data (Option 1)
You may want some information in your format to print on all
labels or tags. A company name or a store number is an
example of fixed data.
Since this information is always printed, there is no need for
the operator to enter it in every batch. You can apply an option
so this information is printed automatically.
You use Option 1 with Option 3 to print a field as a date or
time. See "Creating Date or Time Fields," later in this chapter.
You can use option 1 only once per field.
When using option 1 to place fixed characters in part of the
field, make sure you place an underscore (_) in each position
in the field that is not a fixed character. This modification won’t
change the length of the field.
In the following example, the field has six characters, but only
the characters in positions 1, 2, and 3 are fixed.
{F,20,A,R,E,100,200,"Fix Char"
T,2,6,V,061,010,2,2,2,1,B,L,0,0
R,1,"ABC___"
. . .}
p
p
p
max. 6 characters
pos. 4, 5, 6 open
There are two ways to define an entire fixed field. The best
way to do this is to define a Constant Text Overlay as shown in
Chapter 2. Constant Text Overlays are not counted as fields,
allowing more fields in a format. Overlays can improve printer
performance, because they require less memory than
standard fields.
3-3
Applying Field Options
Entire Field Fixed Character Definition
9401/9402 System Administrator’s Guide
However, if you want to define a
fixed field that can be copied into
another field, use Option 1.
1. Define your text or bar code
field on the Format Worksheet
as shown in Chapter 2,
"Designing a Format."
Remember:
i1
Use only with Option
5 when defining fixed
characters for the
entire field.
• Write F in box T4 to specify a fixed field length.
• Make sure the maximum length in box T3 is the same
as the number of characters you will place in the field.
2. Find Option 1 on the Format Worksheet. This option
specifies fixed characters. For information on how Option
1 works, see "Defining Fixed Data."
3. Write the exact characters for this field in box R3, after 1.
Place quotation marks around the phrase, like this:
"MONARCH MARKING"
Notice that spaces in the phrase
are fixed characters.
Make sure you enter the fixed
characters in the same row as
the text or bar code field to which
they apply.
4. Find Option 5 in the same row on the Format Worksheet.
5. Write N in box R3, after 5, so the printer will not prompt the
operator for this field.
3-4
3. Applying Field Options
Partial Field Fixed Character Definition
1. Define your field as shown in Chapter 2,
"Designing a Format."
2. Find Option 1 on the Format Worksheet.
See "Defining Fixed Data" for information on
how Option 1 works.
Use
with
any
option
3. In box R3, after 1, write the fixed characters as you want
them to appear in the field. Make sure you write the
characters in the same row as the text or bar code field
definition.
Place an underscore (_) in
positions where you do not want
fixed characters.
This character string defines fixed
characters for positions 1 and 2,
but allows user entry in positions 3
and 4:
"AB_ _"
3-5
Applying Field Options
4. Apply Option 20 to define a data entry prompt for this field
OR apply Option 4 to copy data into the non-fixed
character positions. To copy data into a field, refer to that
section later in this chapter.
9401/9402 System Administrator’s Guide
Data Type Restrictions and Data Entry
Templates (Options 2 and 3)
You can use Options 2 or 3 only once per field.
If you do batch entry only in the data stream, you do not need
to apply Options 2 and 3. Use these options only for offline
batch entry.
Restricting Data Types
Normally, you can print all characters (letters, numbers, and
symbols) in text fields. You may want to restrict text in a field
to certain character types, such as letters or numbers only.
You can use detailed restrictions to further limit these
character sets.
General Restrictions
This procedure defines a character set for the entire field. You
can limit acceptable characters to
• letters only
• numbers only
• symbols only
• any combination of two of the above.
NOTE: See Appendix C, "Printable Characters," for a
complete list of printable characters.
1. Define your text or bar code field
on the Format Worksheet as
shown in Chapter 2,
"Designing a Format."
2. Find Option 2 on the Format
Worksheet. This is the option for
general character restrictions.
3-6
Do not use with:
Option
3
Description
Detailed
Character
Restrictions
f4
3. Applying Field Options
3. In box R3, write the number from the following list to
choose the character type for this field.
Number
1
2
3
4
5
6
Character Type
Numeric only (0..9)
Letters only (A..Z,a..z)
Symbols only (printable
characters other than
letters or numbers)
Letters and numbers only
Numbers and symbols only
Letters and symbols only
Spaces are permitted in all categories.
Enter this number in the same row as
the field to which it applies.
f5
A use for this option is a quantity field.
A quantity field should allow the
operator to enter only numbers. The
code to allow numbers only is 1. Fill in
box R3 as shown to the right.
This option provides more specific restrictions than in "General
Restrictions." Use this option to use only parts of a character
set, such as the letters A through F or the numbers 1 through 4.
NOTE: See Appendix C for a complete list of printable
characters.
3-7
Applying Field Options
Detailed Character Restrictions
9401/9402 System Administrator’s Guide
These steps let you assign character restrictions not available
with Option 2.
1. Define your text or bar code field
as shown in Chapter 2.
2. Find Option 3 on the Format
Worksheet. Use this option for
detailed character restrictions.
3. Write S in box R3 after 3. Write
the S in the same row as the
field to which you are applying
restrictions.
Do not use with:
Option Description
2
f6
General
Character
Restrictions
4. In box R4, list the characters you wish to accept for this
field. For example, to allow only digits 1 through 5, write
12345. To allow only letters A through F, write ABCDEF.
You can list a maximum of 30 characters.
Place all of the characters that apply in box R4 after S.
Place quotation marks around the entire list, like this:
"123ABC"
A sample use for this option
is a field on a patient record
containing a patient’s blood
type. Acceptable characters
would be A, B, O, +, or -.
List them this way:
"ABO+-"
Example
Consider the example for Option 1. If you use Option 4 to
copy data into the non-fixed positions (4, 5, 6), make sure that
the number of characters copied is 3 and the start position in
the destination field is 4.
NOTE: If you set the start position in the destination field
to 1, the copied data will overwrite the fixed
positions.
3-8
f7
3. Applying Field Options
Restricting Data Types by Character Position
You can create a template to accept only certain types of data
in each character position.
1. Define your text or bar code field on the Format Worksheet
as shown in Chapter 2, "Designing a Format."
When determining the number of characters, allow for
fixed characters, plus all characters to be entered by the
operator.
2. Find Option 3 on the Format Worksheet.
3. Write T in box R3, after 3. Make sure you write the T in
the same row as the text or bar code field to which it
applies.
4. In box R4, after T, define the type of character for each
character position. Use the character indicators below.
Indicator
*
#
@
_
Data Type
any printable character
any digit 0-9
any letter a-z, A-Z
no user input for this position
Place quotes around the string of characters, like this:
"***###@@"
This template defines
- any character in positions 1-3
- digits only in positions 4-6
- letters in positions 7 and 8.
3-9
Applying Field Options
Use the underscore in positions that are fixed with Option
1 or copied into the field with Option 4.
9401/9402 System Administrator’s Guide
The following template allows digits only in positions 1-4.
In positions 5-8, data is either fixed using Option 1 or copied in
using Option 4.
"####_ _ _ _"
The operator will see the standard or defined prompt on the
printer when ready to enter data for this field
Field 1:
________
The printer will beep or an error will result if the operator tries
to enter an incorrect data type in a character position.
NOTES:
You can define a template up to 30 characters
long, but the printer will only display 16 characters
at one time.
The character template must contain the same
number of characters as the field.
See Appendix C, "Printable Characters," for a complete list of
printable characters.
3-10
3. Applying Field Options
Creating Date or Time Fields
You must apply Options 1 and 3 to print a date or time field.
For information about how Option 1, see "Defining Fixed Data."
NOTE: The printer has no built-in clock. The operator must
enter the correct time or date.
1. Define your text field on the
Format Worksheet as shown in
Chapter 2, "Designing a
Format." Remember
Do not use with:
Option Description
2
• Write 8 in box T3 to allow for
a maximum of eight
characters.
General
Character
Restrictions
• Write F in box T4 to specify a
fixed length field.
2. Find Option 1 on the Format Worksheet. This option will
fix the slashes or colons in the date or time field.
4. Find Option 3 on the same row of the Format Worksheet.
This option creates a data template.
5. Write T in box R3, after 3.
6. In box R4, after T, write the pound
sign (#) in positions to be filled by
numbers. Place underscores (_) in
the fixed character positions defined
by option 1. Place quotes around the
string of characters, like this:
"##_##_##"
3-11
Applying Field Options
3. In box R3, after 1, write the
fixed characters (/, :, or ;) in
their respective character positions
and underscores in all other
positions. Put quotation marks
around the character string, like this:
"_ _/_ _/_ _"
9401/9402 System Administrator’s Guide
Here is an example of a template for a date field.
This template places fixed slashes (/) in positions 3 and 6, and
accepts only digits in the other positions.
Here is an example of a template for a time field.
This template places fixed colons (:) in positions 3 and 6, and
accepts only digits in the other positions.
3-12
3. Applying Field Options
Copying Data Into a Field (Option 4)
You can use this option up to 4 times on one field.
This option is the only one you can apply more than
once to a field.
You can create a field that uses data from another
field. This is useful for creating merged fields or
sub-fields. You can copy the information from
multiple fields into one field, by applying the copy
procedure more than once.
Use
with
any
option
f8
1. Define all fields from which data will be copied, as shown
in Chapter 2, "Designing a Format."
• Make sure the fields have field numbers lower than the
field into which data will be copied (box T2 , D2, or B2).
2. Define a text or bar code field to hold the copied
information. Remember:
• Make sure the maximum length in box T3 or B3 allows
for the number of characters you will place in the field,
including any price or fixed characters inserted by the
printer.
• The maximum number of characters in the field into
Applying Field Options
which data is copied cannot exceed 30.
3. Find Option 4 on the Format Worksheet. This option
copies data from a previous field.
Stay in the same row on the
worksheet as the field that will
contain the copied data.
4. Find the text or bar code field
where the data originates. This
is the source field. Write the
field number (from box T2, D2,
or B2) in box R3, after 4.
3-13
f9
9401/9402 System Administrator’s Guide
5. In the source field,
note the position of
the first character to
be copied. Character
positions are numbered
1 to 30, starting from
the left. Write the
position number of the
first character to copy
in box R4.
f10
6. Write the number of characters to copy in box R5.
7. In the new field (called
the destination field),
select the first
character position to
receive copied data.
Write the starting
position in box R6.
8. Determine whether you want to copy all information in its
formatted state (formatted as price, check digit, etc.) or to
copy only the unaltered data, without price characters,
check digits, or pad characters. In box R7, write the
number 1 or 2 as follows.
1
Copy field as is (including check digits, price symbols,
pad characters, etc.)
2
Copy unformatted data (fixed characters and
entered data only).
3-14
f11
3. Applying Field Options
9. Make sure you enter the copy information in the same row
as the field to contain copied data.
10. If you want to copy data from more than one field, repeat
steps 1 through 9 for each field to copy. Continue with
rows just below the boxes you just completed.
3-15
Applying Field Options
11. Go to Option 5 on the same row of the worksheet. In box
R3, after 5, write N to eliminate the operator prompt for this
field. See "Defining Data Entry Sources" for information
on Option 5.
9401/9402 System Administrator’s Guide
Merging Fields
You can copy data to merge the contents of up to four fields.
Follow the steps under "Copying Data" as many times as
necessary to copy the appropriate fields into the merged field.
In the following example, the operator will enter data into two
text and two non-printable fields. Data from these fields is
merged to form field #5, then printed as a bar code.
Field #
Prompt
Data
Field Type
1
2
3
4
5
SKU:
DEPT:
SIZE:
COLOR:
none
203
339
8
BLUE
2033398BLUE
Non-printable
Non-printable
Text
Text
Bar Code
To create this sequence
f12
1. Define fields 1, 2, 3, and 4.
2. Apply Option 20 to each text and
non-printable field to create the
prompts. See "Defining a Data
Entry Prompt" for information on
Option 20.
3. Define field #5 as a bar code. Allow enough characters in
the bar code field to hold all the copied characters.
4. Apply Option 4 to field #5 once for each
source field (a total of 4 times).
5. Write N in Option 5 for field #5.
Sub-Fields
You can copy a segment of data from one field into a new
location, called a sub-field. For example, extract part of the
data in a bar code and display it in text form in a sub-field.
Follow the steps under "Copying Data."
3-16
f13
3. Applying Field Options
Defining Data Entry Sources (Option 5)
You can use Option 5 only once per field. When you use it,
place it in the data stream after all other options on the field.
You can define how data is entered into a field. For example,
some fields may be entered by the operator at a keyboard, or
from a host. If the field holds all fixed characters or copied
data only, you can eliminate the operator prompt.
1. Define the text or bar code field on the Format Worksheet
as shown in Chapter 2, "Designing a Format."
2. Find Option 5 on the Format Worksheet. This option
defines the data input source.
3. In box R3 after 5, write the code letter from the
list below to indicate how to enter data in the
field.
Make sure you write the code letter in the same
row as the field to which it applies.
Code
Data Source
Default (computer if online, keypad if offline)
Keypad or computer keyboard
Host
Scanner
No user input for this field.
NOTE: Do not use this code when using
Option 20.
Eliminating the Operator Prompt
The printer normally prompts the user for data for text,
non-printable text, and bar code fields. If the field holds all
fixed characters or copied data only, you can eliminate the
prompt using Option 5.
To eliminate the prompt, follow the steps above to define the
data entry source. Write N in box R3.
3-17
Applying Field Options
D
K
H
S
N
Use
with
any
option
9401/9402 System Administrator’s Guide
Defining a Data Entry Prompt (Option 20)
The printer normally prompts the user for batch data by field
number, like this:
Field 1:
________
You can write a more descriptive prompt that asks the user for
the exact information for the field.
NOTE: This option is not recommended on fields filled
entirely by fixed characters or copied data.
1. Define your text or bar code field on the Format
Worksheet as shown in Chapter 2,
"Designing a Format."
2. Find Option 20 on the Format Worksheet. This
option creates a prompt.
Use
with
any
option
3. In box R3 after 20, write the exact
phrase you want to use to
prompt the operator.
Make sure you write the prompt
in the same row as the field to
which it applies.
Place quotation marks around
the phrase, like this:
"Order Number:"
NOTE: The prompt should be 15 characters or fewer.
The operator will see this screen when ready to enter batch
data for this field.
Order Number:
________
3-18
3. Applying Field Options
Adding Characters to Pad Fields (Option 30)
You can add characters to one side of a field to pad the field.
Padding lets you fill in remaining spaces when the data does
not fill an entire field.
1. Define your text or bar code field on the Format Worksheet
as instructed in Chapter 2, "Designing a Format."
Remember
• Write V in box T4 or B4 to
ensure this is a variable
length field.
NOTE: Do not use this option
to pad a UPC or EAN
bar code.
f14
Do not use with:
Option Description
42
Price
2. Find Option 30 on the Format Worksheet. This option
defines a pad character for a field.
Make sure you write the pad character in the same row as
the field to be padded.
3. Decide whether to place pad characters on the Right or
the Left side of the field. Write L or R in box R3, after 30.
"0"
Check Chapter 12, "Quick References" to make sure the
character is printable in the font used in this field. See
Appendix C, "Printable Characters," to use special
characters as the pad character.
Padding is especially useful when printing variable length bar
codes in a fixed space. If the maximum number of characters
in the bar code is 15, but the operator only enters 10
characters, the padding option fills the remainder of the field
with pad characters.
3-19
Applying Field Options
4. In box R4, write the character to use as a pad character.
Place quotation marks around the character, like this:
9401/9402 System Administrator’s Guide
Creating a Price Field (Option 42)
You can apply options to automatically insert monetary
symbols, so the operator only needs to enter numbers.
1. Define your text field on the
Format Worksheet as shown
in Chapter 2, "Designing a
Format." Remember
Do not use with:
Option Description
• This option is not
31
60
f1
Check digit
Incrementing
recommended for bar codes.
• When determining the maximum number of characters,
add the maximum number of digits and the proper
monetary symbols.
2. Find Option 42 on the Format Worksheet. This option
turns a text field into a price field.
3. Write 1 in box R3 after 42. This is an
appearance code for price fields.
Make sure you enter the price code
in the same row as the text field to
which it applies.
The printer prints price symbols based
on country settings selected on the printer.
See your Operator’s Handbook to
select country settings.
3-20
f2
3. Applying Field Options
Incrementing Fields (Option 60)
You may have an application, such as serial numbers, in which
you need a numeric field to increment (increase in value) or
decrement (decrease in value) on successive supplies.
Incrementing should be applied to numeric data only. If you
have a field that includes letters and digits, apply this option
only to the portion of the field that contains digits.
NOTE: This option causes some delay in printing between
tickets.
1. Define your text or bar code field on the Format Worksheet
as shown in Chapter 2, "Designing a Format."
2. Find Option 60 on the Format
Worksheet. This option
increments fields.
Make sure you enter the
incrementing option in the
same row as the field to which
it applies.
f15
Do not use with:
Option Description
31
42
Check Digit
Price
f16
Applying Field Options
3. In box R3, after 60, place an I if
the value will increase as you
print or a D if the value will
decrease as you print.
4. Write the amount by which the
printer counts in box R4. For
example, do you want to count by
1’s, 2’s, 10’s, etc.? Valid options
range from 1 to 32,000.
3-21
9401/9402 System Administrator’s Guide
5. In box R5, write the left-most position to be counted in the
field. Field positions are numbered from left to right,
beginning with 1.
f17
6. In box R6, enter the right-most position to be counted in
the field.
Entering data for incrementing fields
There are two ways to enter the first number in the
incrementing sequence.
• The operator enters the first number during batch entry
• Use Option 1 to define the first number as fixed
characters.
NOTE: The first number in the sequence must contain
the same number of digits as the highest number
to be counted. For example, to count the
numbers 1 to 999, the first number in the
sequence must be entered as 001.
Fixing the first number in the incrementing sequence
To enter the first number in the sequence automatically, use
Option 1 to define the first number. See "Defining Fixed Data"
earlier in this chapter.
3-22
4. Using Check Digits
Check digits are typically used to verify that a field is scanned
correctly. You can use check digits on text or bar code fields.
Do not use check digits on price fields or incrementing fields.
Perform check digit calculations only on numeric data only.
You can choose whether the check digit is
• generated by the printer or
• entered by the operator and verified by the printer.
You can apply field Option 31 to generate or verify the check
digit. Option 31 is explained in this chapter.
You can define your own check digit calculation scheme for
other bar codes and numeric text fields. Some sample
calculations are shown in this chapter.
UPC and EAN bar codes have predefined check digits. Do not
define check digits for these bar codes.
Using Check Digits
4-1
9401/9402 System Administrator’s Guide
Defining a Check Digit Scheme
See "Sample Check Digit Calculation" later in this chapter if
you need help defining the Check Digit Scheme.
1. Make a copy of the Check Digit Record template on the
following page, or the check digit worksheet in Appendix D.
Use the copy for steps 2 through 7.
2. Assign a number from 1 to 9 to identify this calculation
scheme. Write the number in box A2 in the Check Digit
Record.
3. Decide whether to add or clear the check digit.
A - Add
C - Clear.
4. Decide how the printer will store the Check Digit Record.
R - Printer Memory
M - Memory Card.
Write R or M in Box A4.
5. Assign a number from 2 to 10 to use as a modulus in the
check digit calculation. Write the number in box A5.
6. Determine how many characters will be in the fields that
use this scheme, not including the check digit. Write the
number in box A6. The maximum number is 29.
7. Determine how the check digit be calculated. Write D for
"sum of digits," or P for "sum of products" in box A7.
8. Determine what numbers to use as weights for check digit
calculation. Do not include a weight for the check digit.
You need a string of numbers equal in length to the
number in box A6. Enter the string of numbers in box A8.
NOTE: Use zero as a weight digit in positions containing
non-numeric characters.
4-2
4. Using Check Digits
Place quotation marks around the string of numbers, like
this
"65432"
HEADER
SELECTOR #
ACTION
DEVICE
MODULUS
LENGTH
ALGORITHM
Check Digit Record
WEIGHTS
A1
A2
A3
A4
A5
A6
A7
A8
A
A
Generating Check Digits
You can make the printer generate a check digit. This option
is not necessary for UPC or EAN bar codes. The printer
automatically generates a check digit for these codes.
1. Define the text or bar code field
on the Format Worksheet, as
shown in Chapter 2, "Designing
a Format."
2. Find Option 31 on the Format
Worksheet. This option is for
check digits.
Do not use with:
Option Description
42
60
Price
Incrementing
3. Write G in box R3, after 31. This tells the printer to
generate a check digit. The check digit will be the last digit
in the field.
NOTE: To allow for the check digit, the maximum number
of characters accepted in the field will be one
fewer than the maximum number in the field.
4-3
Using Check Digits
4. Write the selector number of the check digit scheme (box
A2 above) in box R4.
9401/9402 System Administrator’s Guide
Verifying Check Digits
You can make the printer verify a check digit entered by the
operator.
1. Define the text or bar code field
on the Format Worksheet, as
shown in Chapter 2,
"Designing a Format."
Do not use with:
Option Description
42
60
Price
Incrementing
2. Find Option 31 on the Format Worksheet. This value is
the option for check digits.
3. Write V in box R3, after 31. This value tells the printer to
verify a check digit. The check digit is the last digit in the
field.
4. Write the selector number of the check digit scheme (box
A2 ) after G.
Check Digit Verification on Copied Fields
The 9401/9402 printer does not verify a check digit on numeric
text fields that have been copied from a previous field.
For example, a text field with field Option 4 followed by field
Option 31 with the Verify option (as shown below) does not
work.
T,2,6,V,061,010,2,2,2,1,B,L,0,0
R,4,1,1,6,2
R,31,V,5
p
p
p
Instead, use the following procedure:
1. Place the Verify option on the operator-entered field.
2. Copy the verified field (including formatted data) into the
destination field.
4-4
4. Using Check Digits
Clearing a Check Digit Scheme
You can clear a check digit scheme from printer memory.
1. In the check digit record created on earlier, replace the A
in box A3 with a C.
2. Follow the instructions in Chapter 6, "Entering Data
Streams," to create a file on your computer.
3. Type the values from the Check Digit Record in the file.
Make sure you have a C in item 3.
4. Save the file.
5. Set the print mode on the printer to "Ready" (see Chapter
7, "Configuring The Printer").
6. Download the file to the printer (see Chapter 8, "Printing").
Sample Check Digit Calculation
There are two types of check digit calculations.
Sum of Products
used for bar codes such as UPC-A,
EAN-8, and EAN-13.
Sum of Digits
an alternative to Sum of Products.
Sum of Products
1. Place numeric data in a field. Leave the check digit slot
empty.
4
3
8
2
7
C
4-5
Using Check Digits
2. Starting with the last digit before the check digit, assign
weights, working right to left. Weights are a sequence of
numbers the same length as the field. Digits in the field
are multiplied by the weight digits to determine addends
for the check digit calculation.
9401/9402 System Administrator’s Guide
When assigning weights, do not use the same number
throughout. Also, do not assign a weight to the check digit.
4
6
3
5
8
4
2
3
7
2
C
3. Assign a number from 2 to 10 as the modulus. The
modulus will be used in the check digit calculation.
Modulus = 10
4. Multiply each digit in the field by its corresponding weight
digit.
4
6
3
5
8
4
24 15 32
2
3
7
2
C
6 14
5. Find the sum of all the products.
24 + 15 + 32 + 6 + 14 = 91
6. Calculate the first multiple of the modulus that is greater
than the sum of the products.
10 x 10 = 100 ( >91)
7. Subtract the sum of the products from this number.
100 - 91 = 9
8. The resulting number is the check digit.
Check digit = 9
Bar code data = 438279
Sum of Digits
1. Place numeric data in a field. Leave the check digit slot
empty.
4
4-6
3
8
2
7
C
4. Using Check Digits
2. Starting with the last digit before the check digit, assign
weights, working right to left. Weights are a sequence of
numbers the same length as the field. Digits in the field
are multiplied by the weight digits to find addends for the
check digit calculation.
When assigning weights, do not use the same number
throughout. Do not assign a weight to the check digit.
4
6
3
5
8
4
2
3
7
2
C
3. Assign a number from 2 to 10 as the modulus. The
modulus will be used in the check digit calculation.
Modulus = 10
4. Multiply each digit in the field by its corresponding weight
digit.
4
6
3
5
8
4
24 15 32
2
3
7
2
C
6 14
5. Find the sum of all the digits in the products. Treat 2-digit
numbers as two separate numbers. For example, add the
digits in the number 24 separately as 2 and 4.
2 + 4 + 1 + 5 + 3 + 2 + 6 + 1 + 4 = 28
6. Calculate the first multiple of the modulus that is greater
than the sum of the digits.
10 x 3 = 30 ( >28)
7. Subtract the sum of the digits from this number.
30 - 28 = 2
Check digit = 2
Bar code data = 438272
4-7
Using Check Digits
8. The resulting number is the check digit.
9401/9402 System Administrator’s Guide
4-8
4. Using Check Digits
Check digits are typically used to verify that a field is scanned
correctly. You can use check digits on text or bar code fields.
Do not use check digits on price fields or incrementing fields.
Perform check digit calculations only on numeric data only.
You can choose whether the check digit is
• generated by the printer or
• entered by the operator and verified by the printer.
You can apply field Option 31 to generate or verify the check
digit. Option 31 is explained in this chapter.
You can define your own check digit calculation scheme for
other bar codes and numeric text fields. Some sample
calculations are shown in this chapter.
UPC and EAN bar codes have predefined check digits. Do not
define check digits for these bar codes.
Using Check Digits
4-1
9401/9402 System Administrator’s Guide
Defining a Check Digit Scheme
See "Sample Check Digit Calculation" later in this chapter if
you need help defining the Check Digit Scheme.
1. Make a copy of the Check Digit Record template on the
following page, or the check digit worksheet in Appendix D.
Use the copy for steps 2 through 7.
2. Assign a number from 1 to 9 to identify this calculation
scheme. Write the number in box A2 in the Check Digit
Record.
3. Decide whether to add or clear the check digit.
A - Add
C - Clear.
4. Decide how the printer will store the Check Digit Record.
R - Printer Memory
M - Memory Card.
Write R or M in Box A4.
5. Assign a number from 2 to 10 to use as a modulus in the
check digit calculation. Write the number in box A5.
6. Determine how many characters will be in the fields that
use this scheme, not including the check digit. Write the
number in box A6. The maximum number is 29.
7. Determine how the check digit be calculated. Write D for
"sum of digits," or P for "sum of products" in box A7.
8. Determine what numbers to use as weights for check digit
calculation. Do not include a weight for the check digit.
You need a string of numbers equal in length to the
number in box A6. Enter the string of numbers in box A8.
NOTE: Use zero as a weight digit in positions containing
non-numeric characters.
4-2
4. Using Check Digits
Place quotation marks around the string of numbers, like
this
"65432"
HEADER
SELECTOR #
ACTION
DEVICE
MODULUS
LENGTH
ALGORITHM
Check Digit Record
WEIGHTS
A1
A2
A3
A4
A5
A6
A7
A8
A
A
Generating Check Digits
You can make the printer generate a check digit. This option
is not necessary for UPC or EAN bar codes. The printer
automatically generates a check digit for these codes.
1. Define the text or bar code field
on the Format Worksheet, as
shown in Chapter 2, "Designing
a Format."
2. Find Option 31 on the Format
Worksheet. This option is for
check digits.
Do not use with:
Option Description
42
60
Price
Incrementing
3. Write G in box R3, after 31. This tells the printer to
generate a check digit. The check digit will be the last digit
in the field.
NOTE: To allow for the check digit, the maximum number
of characters accepted in the field will be one
fewer than the maximum number in the field.
4-3
Using Check Digits
4. Write the selector number of the check digit scheme (box
A2 above) in box R4.
9401/9402 System Administrator’s Guide
Verifying Check Digits
You can make the printer verify a check digit entered by the
operator.
1. Define the text or bar code field
on the Format Worksheet, as
shown in Chapter 2,
"Designing a Format."
Do not use with:
Option Description
42
60
Price
Incrementing
2. Find Option 31 on the Format Worksheet. This value is
the option for check digits.
3. Write V in box R3, after 31. This value tells the printer to
verify a check digit. The check digit is the last digit in the
field.
4. Write the selector number of the check digit scheme (box
A2 ) after G.
Check Digit Verification on Copied Fields
The 9401/9402 printer does not verify a check digit on numeric
text fields that have been copied from a previous field.
For example, a text field with field Option 4 followed by field
Option 31 with the Verify option (as shown below) does not
work.
T,2,6,V,061,010,2,2,2,1,B,L,0,0
R,4,1,1,6,2
R,31,V,5
p
p
p
Instead, use the following procedure:
1. Place the Verify option on the operator-entered field.
2. Copy the verified field (including formatted data) into the
destination field.
4-4
4. Using Check Digits
Clearing a Check Digit Scheme
You can clear a check digit scheme from printer memory.
1. In the check digit record created on earlier, replace the A
in box A3 with a C.
2. Follow the instructions in Chapter 6, "Entering Data
Streams," to create a file on your computer.
3. Type the values from the Check Digit Record in the file.
Make sure you have a C in item 3.
4. Save the file.
5. Set the print mode on the printer to "Ready" (see Chapter
7, "Configuring The Printer").
6. Download the file to the printer (see Chapter 8, "Printing").
Sample Check Digit Calculation
There are two types of check digit calculations.
Sum of Products
used for bar codes such as UPC-A,
EAN-8, and EAN-13.
Sum of Digits
an alternative to Sum of Products.
Sum of Products
1. Place numeric data in a field. Leave the check digit slot
empty.
4
3
8
2
7
C
4-5
Using Check Digits
2. Starting with the last digit before the check digit, assign
weights, working right to left. Weights are a sequence of
numbers the same length as the field. Digits in the field
are multiplied by the weight digits to determine addends
for the check digit calculation.
9401/9402 System Administrator’s Guide
When assigning weights, do not use the same number
throughout. Also, do not assign a weight to the check digit.
4
6
3
5
8
4
2
3
7
2
C
3. Assign a number from 2 to 10 as the modulus. The
modulus will be used in the check digit calculation.
Modulus = 10
4. Multiply each digit in the field by its corresponding weight
digit.
4
6
3
5
8
4
24 15 32
2
3
7
2
C
6 14
5. Find the sum of all the products.
24 + 15 + 32 + 6 + 14 = 91
6. Calculate the first multiple of the modulus that is greater
than the sum of the products.
10 x 10 = 100 ( >91)
7. Subtract the sum of the products from this number.
100 - 91 = 9
8. The resulting number is the check digit.
Check digit = 9
Bar code data = 438279
Sum of Digits
1. Place numeric data in a field. Leave the check digit slot
empty.
4
4-6
3
8
2
7
C
4. Using Check Digits
2. Starting with the last digit before the check digit, assign
weights, working right to left. Weights are a sequence of
numbers the same length as the field. Digits in the field
are multiplied by the weight digits to find addends for the
check digit calculation.
When assigning weights, do not use the same number
throughout. Do not assign a weight to the check digit.
4
6
3
5
8
4
2
3
7
2
C
3. Assign a number from 2 to 10 as the modulus. The
modulus will be used in the check digit calculation.
Modulus = 10
4. Multiply each digit in the field by its corresponding weight
digit.
4
6
3
5
8
4
24 15 32
2
3
7
2
C
6 14
5. Find the sum of all the digits in the products. Treat 2-digit
numbers as two separate numbers. For example, add the
digits in the number 24 separately as 2 and 4.
2 + 4 + 1 + 5 + 3 + 2 + 6 + 1 + 4 = 28
6. Calculate the first multiple of the modulus that is greater
than the sum of the digits.
10 x 3 = 30 ( >28)
7. Subtract the sum of the digits from this number.
30 - 28 = 2
Check digit = 2
Bar code data = 438272
4-7
Using Check Digits
8. The resulting number is the check digit.
9401/9402 System Administrator’s Guide
4-8
Recording Batch
Information
5. Recording Batch Information
Batch data is the actual information printed on the supply. The
operator fills in the "slots" in the format with the information to
be printed, such as a price or a serial number.
There are three ways to enter batch data into the printer.
• using the 21-key keypad
• using an optional computer keyboard plugged into the
printer
• downloading from a computer.
To enter batch data from the 21-key keypad or an optional
computer keyboard, follow instructions in the Operator’s
Handbook for entering batch data.
If you want to send batch data to the printer from a computer,
read this chapter.
5-1
9401/9402 System Administrator’s Guide
Preparing Batches for Downloading
A batch to be downloaded consists of two parts.
• Batch Header
Identifies the format to use for the
batch and how many supplies to print.
• Batch Data
The actual information to print on the
supply.
Make a copy of the batch worksheet in Appendix D, "Format
Design Tools." Use the copy to record batch information.
1. Fill in the Batch Header section.
• All formats have a number (see box F2 on the Format
Worksheet). Select the number of the format to use for
this batch. Enter the format number in box B2 in the
Batch Header section.
If you want to use one of the standard formats, the format
numbers are
NOTE:
5-2
Format
Number
FMT - 1
FMT - 2
FMT - 3
96
97
98
If you have optional formats, see Appendix A,
"Optional Formats," for format numbers.
• You can select how you want to fill in printed fields.
Choose N or U from the list below, and write it in box
B3 in the Batch Header section.
N
New. When selecting this option, enter the printing
information for all fields.
U
Update. If you printed a batch just before this
batch, and many fields are the same, you may
want to use this option. Only fill in the fields
that changed from the last printed batch to
this one.
• Decide how many supplies you want to print in each
batch. Write a number from 1 to 9999 in box B4 in the
Batch Header section.
2. Fill in the Batch Data section.
• The Field # boxes list field numbers, from 1 to 14. In
the Data box, write the information you want printed in
that field. If using the N option in the Batch Header, you
must list all fields, including fixed and copied fields, in
sequence.
Fields with Fixed Characters
• If a field contains only fixed characters, place quotation
marks, with no space in the quotes, in the second box,
like this:
""
• If a field has some, but not all fixed characters, send
data only for characters that are not fixed.
Merged or sub-fields
• If a field is completely filled by data copied from other
fields, place quotation marks in the Data box, as shown
above.
5-3
Recording Batch
Information
5. Recording Batch Information
9401/9402 System Administrator’s Guide
Incrementing fields
• In incrementing fields, the first number in the sequence
must contain the same number of digits as the highest
number to be counted. For example, to count the
numbers 1 to 999, enter 001.
3. See Chapter 6, "Entering Data Streams," to enter this
information on a computer.
Batch
Header
QUANTITY
B4
Batch
Data
B
Field # Data
1
2
3
4
5
6
7
8
9
10
11
12
13
14
5-4
FORMAT #
B1 B2 B3
HEADER
NEW / UPDATE
Batch Worksheet
Guidelines for Preparing Batch Data
When entering batch data, keep in mind the following
guidelines.
Guideline 1
When creating batch packets for downloading, be sure each
batch data record conforms with its field definition.
For example, the following field is defined with a maximum of
four characters. The batch record contains six characters.
{F,20,A,R,E,100,200,"SAMPLE"
T,1,4,V,061,010,2,2,2,1,B,L,0,0
. . .}
{B,20,N,10
1,"ABCDEF"
p
p
max. 4 characters
p
6 char. batch data
p
In this case, only the first four characters will print.
Guideline 2
Be aware of how field options impact the field.
For example, the following field has a price field option. The
field has a maximum of five characters. The batch record
contains six characters.
{F,21,A,R,E,100,200,"PRICE"
T,1,5,V,061,010,2,2,2,1,B,L,0,0
R,42,1
. . .}
{B,21,N,10
1,"129999"
p
p
p
max. 5 characters
price option
p
p
6 char. batch data
Since the price option adds 2 characters, this field will print as
$129., dropping the last 3 characters of data and cutting the
price from $1299.99 to $129.
5-5
Recording Batch
Information
5. Recording Batch Information
9401/9402 System Administrator’s Guide
5-6
6. Entering Data Streams
Chapter 11, "Online Information," provides syntax and online
information for this printer. Programmers may wish to refer to
Chapter 11 to create and transmit data streams.
You will need these items.
• a completed Format Worksheet
• a computer terminal
• an ASCII line editor or word processor.*
NOTE: If you use a word processor to create this file, be
sure to create the file in "non-document" or
unformatted ASCII mode.
*
You can use Monarch 2095™ Printing System software to
create formats for your 9401/9402 printer. Contact your
Monarch representative for more information.
The examples shown in this chapter use a MS-DOS computer
system.
6-1
Entering Data Streams
You must use a computer to enter formats into the printer.
This chapter explains how to transfer the format information
from your Format Worksheet to a computer file. Later, you will
learn how to send formats to the printer from the computer
(see Chapter 8, "Printing").
9401/9402 System Administrator’s Guide
Creating Format Files
Format files contain these types of records.
•
•
•
•
•
•
•
Format header
Text fields
Non-printable text fields
Bar code fields
Field options
Constant text overlays
Lines and/or boxes.
1. Using an ASCII text editor, create a file to hold your format
information.
2. Place a left brace { on line 1. Go to the next line. Do not
put a space after the brace.
3. Find the Format Header on the Format Worksheet.
Type all values from boxes F1 through F8 on line 2 in your
file as follows.
• Place the F from box F1 at the very beginning of the
•
•
•
•
•
6-2
line. Do not place a space or any other character
before the F.
Enter all information in capital letters (except phrases in
quotes).
Place commas between all values.
Make sure you have 8 items in line 2.
Do not forget the double quotes around item 8.
Place a split vertical bar at the end of line 2.
p
6. Entering Data Streams
• Go to the next line after the split vertical bar.
• So far, your file should look something like this.
p
4. Find the text, non-printable text, or bar code field with field
number 1 (box T2, D2, or B2).
Use step 5, 6, or 7 (that follow) to type your field definitions
in the computer file. Enter all records in the computer file
in order by field number, regardless of the field type.
Entering Text Fields
5. Type all values from boxes T1 through T14 on one line in
your file. Refer to the Text Field section of the Format
Worksheet.
Remember
• Enter all values, starting with the T in box T1.
• Enter all information in capital letters (except phrases in
quotes).
• Place commas between all values.
• Make sure you have 14 items on the line.
• Make sure all fields -- text, non-printable text, and bar
code -- are in order by field number (item #2).
• Place a split vertical bar after item #14.
• Go to a new line after the vertical bar.
p
6-3
Entering Data Streams
{
F,1,A,R,E,375,200,"Textiles"
9401/9402 System Administrator’s Guide
If you are applying any field options to this field, follow the
instructions in step 11 to insert field options after the text
field.
If field #1 is a text field, your file should look something like
this.
{
F,1,A,R,E,300,200,"Textiles"
T,1,10,V,250,50,0,1,1,1,B,C,0,0
p
p
Entering Non-Printable Text Fields
6. Refer to the Non-Printable Text Field section of the format
worksheet. Type all values from boxes D1 through D3.
Remember
• Enter all values, starting with the D in box D1.
• Enter all information in CAPITAL letters (except phrases
in quotes).
• Place a comma between all values.
• Make sure you have 3 items.
• Make sure all fields -- text, non-printable text, and bar
code -- are in order by field number (item #2).
• Place a split vertical bar after item #3.
• Go to a new line after the vertical bar.
• Follow the instructions in step 11 if applying options to
the field.
p
6-4
6. Entering Data Streams
If fields #2 and #3 are non-printable text fields, your file
should now look like this.
p
p
p
p
Entering Bar Code Fields
7. Type all values from boxes B1 through B12. Refer to the
Bar Code Fields section of the Format Worksheet.
Remember
• Enter all values, starting with the B in box B1.
• Enter all information in capital letters
• Place a comma between all values.
• Make sure you have 12 items.
• Make sure all fields -- text, non-printable text, and bar
code -- are in order by field number (item #2).
• Place a split vertical bar
p
after item #12.
• Go to a new line after the vertical bar.
If you are applying field options to this field, follow the
instructions in step 11 to insert options after the bar code field.
6-5
Entering Data Streams
{
F,1,A,R,E,300,200,"Textiles"
T,10,V,250,50,0,1,1,1,B,C,0,0
D,2,16
D,3,2
9401/9402 System Administrator’s Guide
If field #4 is a bar code, your file should now look like this.
{
F,1,A,R,E,300,200,"Textiles"
T,1,10,V,250,50,0,1,1,1,B,C,0,0
B,2,12,F,150,40,1,2,80,4,L,0
p
p
p
Entering Constant Text Overlays
8. Type all values from boxes C1 through C12 on one line in
your file. Refer to the Constant Text section of the Format
Worksheet.
Remember
• Enter all values, starting with the C in box C1.
• Enter all information in capital letters (except phrases in
quotes).
• Place a comma between all values.
• Make sure you have 12 items on the line.
• Place a split vertical bar after item #12.
• Go to a new line after the vertical bar.
p
6-6
6. Entering Data Streams
A Constant Text Overlay in your file would look something
like this.
{
F,1,A,R,E,300,200,"Textiles"
T,1,10,V,250,50,0,1,1,1,B,C,0,0
B,2,12,F,150,40,1,2,80,4,L,0
T,3,20,V,80,10,0,1,1,1,B,L,0,0
T,4,20,V,65,10,0,1,1,1,B,L,0,0
C,30,10,0,1,1,1,B,L,0,0,"Made In USA"
p
p
p
p
p
Entering Lines
9. Type all values from boxes L1 through L8. Refer to the
Lines section of the Format Worksheet.
Remember
• Enter all values, starting with the L in box L1.
• Enter all information in capital letters.
• Place a comma between all values.
• Make sure you have 8 items.
• Do not put a space or any other character in the
quotation marks in item 8.
• Place a split vertical bar after item #8.
• Go to a new line after the vertical bar.
p
6-7
Entering Data Streams
p
9401/9402 System Administrator’s Guide
A line record should look something like this.
{
F,1,A,R,E,300,200,"Textiles"
T,1,10,V,250,50,0,1,1,1,B,C,0,0
B,2,12,F,150,40,1,2,80,4,L,0
T,3,20,V,80,10,0,1,1,1,B,L,0,0
T,4,20,V,65,10,0,1,1,1,B,L,0,0
C,30,10,0,1,1,1,B,L,0,0,"Made In USA"
L,S,110,30,110,150,10,""
p
p
p
p
p
p
Entering Boxes
10. Type all values from boxes Q1 through Q7. Refer to the
Boxes section of the Format Worksheet.
Remember
• Enter all values, starting with the Q in box Q1.
• Enter all information in capital letters.
• Place a comma between all values.
• Make sure you have 7 items.
• Do not put a space or any other character in the
quotation marks in item #7.
• Place a split vertical bar after item #7.
• Go to a new line after the vertical bar.
p
6-8
p
6. Entering Data Streams
Your file should look something like this.
{
F,1,A,R,E,300,200,"Textiles"
T,1,10,V,250,50,0,1,1,1,B,C,0,0
B,2,12,F,150,40,1,2,80,4,L,0
T,3,20,V,80,10,0,1,1,1,B,L,0,0
T,4,20,V,65,10,0,1,1,1,B,L,0,0
C,30,10,0,1,1,1,B,L,0,0,"Made In USA"
L,S,110,30,110,150,10,""
Q,240,30,270,150,3,""
p
p
p
p
p
p
p
Applying Field Options
11. If you are applying options to any field, remember the
following:
• Insert a line directly after the text or
•
•
•
•
•
•
bar code field to which the option
applies. Options must
immediately follow the field to
which they apply.
Find all options on the same row of
the worksheet as the field.
Type the values for each option on
separate lines following the text or
bar code field. For example, begin with the first box R1
on the first line after the field. The next applicable box
R1 would go on a new line.
Enter all information in capital letters (except phrases in
quotes).
Make sure all items are separated by commas.
Make sure the number of items on each line matches
the number of items shown on the Format Worksheet
for each option.
Place a split vertical bar at the end of each line.
p
6-9
Entering Data Streams
p
9401/9402 System Administrator’s Guide
Refer to the Field Options section of the Format Worksheet
and Chapter 3, "Applying Field Options."
Your file should look something like this
{
F,1,A,R,E,300,200,"Textiles"
T,1,10,V,250,50,0,1,1,1,B,C,0,0
B,2,12,F,150,40,1,2,80,4,L,0
T,3,20,V,80,10,0,1,1,1,B,L,0,0
T,4,20,V,65,10,0,1,1,1,B,L,0,0
C,30,10,0,1,1,1,B,L,0,0,"Made In USA"
L,S,110,30,110,150,10,""
Q,240,30,270,150,3,""
p
p
p
p
p
p
p
p
12. Place a right brace } at the end of the file.
Your file should look something like this.
{
F,1,A,R,E,300,200,"Textiles"
T,1,10,V,250,50,0,1,1,1,B,C,0,0
B,2,12,F,150,40,1,2,80,4,L,0
T,3,20,V,80,10,0,1,1,1,B,L,0,0
T,4,20,V,65,10,0,1,1,1,B,L,0,0
C,30,10,0,1,1,1,B,L,0,0,"Made In USA"
L,S,110,30,110,150,10,""
Q,240,30,270,150,3,""
}
p
p
p
p
p
p
p
A sample format file is shown on the next page.
6-10
p
6. Entering Data Streams
Sample Format File
p
p
p
p
p
p
p
p
p
p
p
p
p
p
p
p
p
p
p
p
p
p
p
p
p
p
Format Header
Field #1, text field
Prompt for field #1
Field #2, UPC bar code
Prompt for field #2
Field #3, non-printable text field
Prompt for field #3
Field #4, non-printable text field
Prompt for field #4
Field #5, text, merge fields 3 and 4
Fixes character "%" in position 3
Copies field #4 into position 1
Copies field #3 into position 5
Eliminates user prompt
Field #6, non-printable text field
Prompt for field #6
Field #7, non printable text field
Prompt for field #7
Field #8, text, merge fields 6 and 7
Fixes character "%" in position 3
Copies field #7 into position 1
Copies field #6 into position 5
Eliminates user prompt
Fixes text "Made In USA"
Line between bar code and text
Box around field #1
Sample Format Batch File
{
B,1,N,5
1, "2754185285"
2, "74185245768"
3, "65"
4, "DACRON POLYESTER"
6, "35"
7, "COTTON"
}
p
p
p
p
p
p
p
6-11
Entering Data Streams
{
F,1,A,R,E,300,200,"Textiles"
T,1,10,V,250,50,0,1,1,1,B,C,0,0
R,20,"Part Number:"
B,2,12,F,150,40,1,2,80,4,L,0
R,20,"UPC Number:"
D,3,20
R,20,"Fiber #1:"
D,4,2
R,20,"Percentage:"
T,5,24,V,80,0,1,1,1,B,L,0,0
R,1,"--% --------------------"
R,4,4,1,2,1,1
R,4,3,1,20,5,1
R,5,N
D,6,20
R,20,"Fiber #2:"
D,7,2
R,20,"Percentage:"
T,8,24,V,65,10,0,1,1,1,B,L,0,0
R,1,"--% -------------------R,4,7,1,2,1,1
R,4,6,1,20,5,1
R,5,N
C,30,10,0,1,1,1,B,L,0,0,"Made In USA"
L,S,110,30,110,150,10,""
Q,240,30,270,150,3,""
}
9401/9402 System Administrator’s Guide
The sample Format Worksheet in Appendix D shows the
format file as it appears on the worksheet.
This sample tag was created with these formats.
6-12
6. Entering Data Streams
Creating Check Digit Files
1. Using an ASCII text editor, create a file to hold your check
digit calculation scheme.
2. Place a left brace { on line 1. Go to the next line.
4. Type all values from boxes A1 through A8 on line 2 in your
file as follows.
• Place the A from box A1 at the very beginning of the
•
•
•
•
•
line. Do not place a space or any other character
before the A.
Enter all information in capital letters (except phrases in
quotes).
Place a comma between all values.
Make sure you have 8 items in line 2.
Do not forget the quotation marks around item #8.
Place a split vertical bar at the end of line 2.
p
5. Go to the next line after the split vertical bar. Place a right
brace } on that line to end the check digit file.
Your file should look something like this.
{
A,1,A,M,10,5,D,"65432"
p
}
6-13
Entering Data Streams
3. Find the Check Digit record you created in Chapter 4.
9401/9402 System Administrator’s Guide
Creating Batch Data Files
1. Using an ASCII text editor, create a file to hold your batch
information.
2. Place a left brace { on line 1. Go to the next line.
3. Refer to the Batch Header section of the Batch Worksheet.
4. Type all values from boxes B1 through B4 on line 2 in your
file as follows.
• Place the B from box B1 at the very beginning of the
•
•
•
•
•
6-14
line. Do not place a space or any other character
before the B.
Enter all information in capital letters.
Place a comma between all values.
Make sure you have 4 items in line 2.
|
Place a split vertical bar | at the end of line 2.
Go to the next line after the split vertical bar.
6. Entering Data Streams
5. Refer to the Batch Data section of the Batch Worksheet.
{
B,1,N,2
p
Entering Data Streams
6. Enter each Batch Data record on a separate line, as
follows.
• Type the field number, followed by a comma.
• Type the field data. Place quotation marks around the
word or phrase.
• Type a line for all fields for fixed or copied fields. Enter
only quotation marks.
• Place a split vertical bar after the field data.
• Go to a new line and enter the next field the same way.
p
Your file should look something like this.
{
B,1,N,2
1,"0435419970"
2,"12345678901"
3,"65% DACRON
POLYESTER"
4,"35% COTTON"
p
p
p
p
p
6-15
9401/9402 System Administrator’s Guide
7. After entering the last field, go to the next line. Place a
right brace } on that line to end the Batch Data file.
{
B,1,N,2
1,"0435419970"
2,"12345678901"
3,"65% DACRON
POLYESTER"
4,"35% COTTON"
}
p
p
p
p
p
The printed label looks like this.
8. The format, check digit, and batch data are now ready to
send to the printer. Continue with Chapter 7, "Configuring
the Printer," to set up the printer, then with Chapter 8,
"Printing," to print batches.
6-16
7. Configuring the Printer
The printer must be properly configured before you can print.
Connecting the Printer
Consult your Equipment Manual to connect your printer to a
computer.
Online Communication Requirements
You need to set the printer’s communication values to match
the values at the host.
You must define five values to ensure reliable communication
between the printer and the host. The values and selectable
options are listed below.
Option
Baud rate
Word length
Stop bits
Parity
Flow control
Values
9600, 4800, 2400, 1200
Seven (7), eight (8)
One (1), two (2)
None, Odd, Even
None, Xon/Xoff, DTR
Default
2400
Eight (8)
One (1)
(None)
DTR
Refer to the definitions on the next page if you need
assistance determining communication settings.
7-1
Configuring the Printer
The 9401 and 9402 printers come equipped with a 9-pin
RS-232 communications port for online operation. See "Cable
Interface" at the end of this chapter for pin assignments.
9401/9402 System Administrator’s Guide
Communication Values - Definitions
Baud Rate
The baud rate is the speed, measured in bits per second, at
which the printer sends or receives data. A commonly used
baud rate for RS-232 communications is 2400 bits per second.
Word Length
Word Length specifies the number of bits the printer uses to
define a character. The 9401 and 9402 printers accept a
setting of 7 or 8 bit data, but do not use the high-order bit for
data.
Stop Bits
A stop bit follows the data and parity bits to signal the end of a
character.
Parity
Parity is a means of checking the validity of data entering the
printer. The parity bit immediately follows the last data bit for a
character. The computer adjusts the parity bit according to the
parity so the data bits in the character, combined with the
parity bit, form an odd or even number of high bits.
Data Flow Control
Data flow control is the means by which the printer tells the
computer whether it is ready to accept data. DTR (Data
Terminal Ready) flow control is most commonly used with an
IBM-PC™ unless the PC has a special Xon-Xoff program.
In DTR mode, the printer activates DTR when it is ready to
accept data from the host and deactivates DTR when its
receive buffer is nearly full.
In Xon-Xoff mode, the printer sends the Xon character when it
is ready to receive data and sends the Xoff character when its
buffer is nearly full. The Xon character is 17. The Xoff
character is 19.
7-2
7. Configuring the Printer
Setting Communication Values
Set communication values at the printer and the computer.
At the Printer
2
1
6
First, turn the printer On and go to the Main menu. Press
or
until SETUP appears. Press
. Continue with the
steps below to set communication values.
When you see
SETUP
Supply
USER COMM
Baud Rate
BAUD RATE
2400
USER COMM
Baud Rate
USER COMM
Word Length
WORD LENGTH
8
USER COMM
Word Length
2
6
Press
until you see Port
Settings. Press
.
6
Press
. You will see
the first communication value.
Press
rate.
6 to set the baud
1 2
6
Press 2 until Word Length
Press
or
until your
desired baud rate appears.
Press
.
appears.
Press
length.
6 to set the word
1 2
6
Press 2 to display Stop
Press
or
until
desired word length appears.
Press
.
Bits.
7-3
Configuring the Printer
PORT SETTINGS
User Comm
Do this
9401/9402 System Administrator’s Guide
USER COMM
Stop Bits
STOP BITS
1
Press
6 to set stop bits.
1
2
Press
or
until
desired stop bits setting
appears. Press
.
6
USER COMM
Stop Bits
Press
2 to display Parity.
USER COMM
Parity
Press
6 to set the parity.
PARITY
None
USER COMM
Parity
USER COMM
Flow Control
FLOW CONTROL
DTR
1 2
6
Press 2 to display Flow
Press
or
until
desired parity appears.
Press
.
Control.
6 to set flow
Press
control.
1 2
6
Press
or
until
desired flow control appears.
Press
.
NOTE: Flow control must be
set to DTR for IBM
PC-compatible equipment.
USER COMM
Flow Control
7-4
8
Press and hold
to
return to the Main menu.
7. Configuring the Printer
At the Computer
On IBM-PC/MS-DOS computers, use the Mode command to
set communication values.
Example:
MODE COM1:2400,N,8,1,P
This command sets these communication values for a printer
connected to COM port 1.
• 2400 baud
• No parity
• 8 bit word length
• 1 stop bit
large files will be sent in entirety.
Consult your DOS manual for more information on setting
communication values on a PC system.
Consult your operating system manual or a system
administrator to set communications values on other systems.
7-5
Configuring the Printer
• P means to ignore the timeout signal, ensuring that
9401/9402 System Administrator’s Guide
Cable Interface
This printer is equipped with a 9-pin RS-232 connector. The
printer accepts standard RS-232C electrical signal
transmissions when it is connected to a DB-9S connector.
Here are the pin assignments for the connector.
Pin
2
8
6
1
Received data
Clear to send
Data set ready
Data carrier detect
3
7
4
Transmitted data
Request to send
Data terminal ready
Output
Protective ground
Signal ground
N/C
Ground
Shield
5
9
7-6
Description
Input
8. Printing
Complete these tasks before you print.
• Be sure your desired format exists (Chapters 2,
"Designing a Format" and Chapter 3, "Applying Field
Options").
• Make sure you have the correct batch data (Chapter 5,
"Recording Batch Information").
• Make sure format, check digit, and batch data are
correctly entered in ASCII format (Chapter 6, "Entering
Data Streams").
• Make sure the printer and computer are connected
(Chapter 7, "Configuring the Printer").
• Check the communication values at the computer and
the printer (Chapter 7, "Configuring the Printer").
Placing the Printer Online
1. Turn the printer On.
2. Press and hold
8
to go to the Main menu.
Printing
1 or 2 until you see Print Mode.
4. Press 6 when you see Print Mode. The printer
3. Press
displays
PRINT MODE
Ready
You are now ready to download data to the printer.
8-1
9401/9402 System Administrator’s Guide
Downloading
When downloading data, always place information in this order.
1.
2.
3.
Check digit files
Format files
Batch data files
You need to send only a check digit file if a format following it
uses the check digit scheme. Once you send a check digit file,
it stays in the printer until you turn the printer Off.
The maximum number of formats that you can download to the
printer at one time is six. This number is also the maximum
that you can store in RAM at one time.
Also, the printer can hold no more than 16 packets. When the
printer receives its sixteenth packet, you will not be able to use
any of the first fifteen packets. If this happens, you will have to
restart the printer and download the packets again, following
the storage restrictions.
Downloading from a MS-DOS System
1. Find out which computer port the printer is connected to.
2. Make sure the printer display says "Print Mode - Ready."
3. Run a Mode command, if necessary, to set communication
values. For example, if the printer is connected to COM1,
this command matches the printer’s default settings.
MODE COM1:2400,N,8,1,P
4. If you are downloading to a memory card, make sure the
correct card is inserted in the printer and the write protect
is Off. Refer to your memory card instructions.
8-2
8. Printing
5. Use a standard DOS command to transmit data to the
printer. For example
COPY LABEL1.FMT COM1
This command transmits a file called "LABEL1.FMT" to
COM1.
Downloading from Other Computer Systems
Consult your system Operations Manual or administrator for
procedures to transmit data from your computer system.
Format Tracking
You create formats on your PC and download them to your
printer when you are ready to use them. The 9401 printer
stores formats in RAM, its receive buffer, and on memory
cards.
Restrictions Each format has a number. This number
enables the printer to track it. However, there are restrictions
on the duplication of these numbers.
Download Duplications. If you download a format with a
number that is the same as an already-stored format, the
printer erases the already-stored format.
To avoid the erasure, either remove the memory card before
downloading the new format or change the number of the new
format.
8-3
Printing
This erasure occurs no matter what device the format exists
on. For example, if the memory card contains format 20, and
you download another format 20 to RAM, the printer still
erases the memory card’s format.
9401/9402 System Administrator’s Guide
Memory Card Duplications. Before you insert a memory
card, ensure that the format numbers on the card do not
duplicate any format numbers in RAM.
A duplicate condition will cause you to be unable to use the
duplicate format on the memory card.
To avoid this occurrence, check the formats in RAM before
inserting the memory card. If a format in RAM has the same
number, clear the format from RAM before inserting the
memory card.
Determining the Number of Formats
To determine the number of formats currently stored in the
printer, follow this procedure
8 to go to the Main menu.
2. Press 1 or 2 until you see Format.
3. Press 6 .
4. Press 1 or 2 until you see Temporary.
5. Press 6 .
1. Press and hold
6. At this point, one of two items appears on the printer
display
No formats!
Press Enter.
- OR -
1
2
You will see a format name. If you see a format name, press
or
to scroll through the formats. If there are six or more
formats, clear one or more of them before downloading any
more formats.
Clearing Formats
To clear a format, send the printer a packet in the form of
{F,#,C,R }, where # is the number of the format to clear.
p
8-4
8. Printing
Printing Batches
In order to print a batch, the format must be in the printer.
You can download batch data files from a computer, or you
can enter batch data directly at the printer, if you have the
21-key keypad or optional computer keyboard.
Batch Downloading
If you are printing a batch using one of the standard formats
supplied with the printer, transmit the batch data file like this.
COPY LABEL1.BCH COM1
If you are printing a batch using a format you defined, send the
format data first, followed by the batch data.
COPY LABEL1.FMT COM1
COPY LABEL1.BCH COM1
Keypad Batch Entry
If you are using the keypad or optional computer keyboard to
enter batch data for one of the standard formats supplied with
the printer, follow the instructions in the Operator’s Handbook.
Perform the following steps, using the keypad and a
downloaded format
Printing
1. Download the format file, using procedures on the
previous page.
2. Enter batch data, using instructions in the Operator’s
Handbook.
8-5
9401/9402 System Administrator’s Guide
Printer Storage Capacity
The printer has 12K of memory to hold downloaded data. This
includes
• formats
• batches
• check digits
• graphics.
Formats
The printer can store up to six moderate size downloaded
formats in RAM. A moderate size format is about 800
characters.
However, sometimes you may receive error code 500,
meaning that the format sent to the printer does not fit in
the current format buffer (2000 bytes). If you receive this
error code, reduce the size of the format and send it again.
Some printers are equipped with optional formats.
Optional ROM can contain up to 16 packets.
Batches
The printer can store up to three batches at one time.
Batches are printed in the order in which they are received
and deleted after printing.
Check Digits
The printer will store up to six check digit files. Check
digits and formats in RAM are stored until
• the printer is turned Off
• the check digit or format is deleted by the operator
• the check digit or format packet is overwritten by a new
packet with the same number.
8-6
8. Printing
You can determine the amount of memory available at any
time with the Device Memory Usage diagnostic function. See
Chapter 13, "Diagnostics," for instructions.
Printing
8-7
9401/9402 System Administrator’s Guide
8-8
9. Editing and Reviewing Formats
You may need to edit formats after you have created them.
You cannot modify or delete formats supplied with the printer.
Modifying Formats
You cannot modify a format while it is stored in the printer.
Store your formats on your computer and modify them as
necessary with your text editor or word processor.
Send the format to the printer again if you modify it.
NOTE: If using a word processor, be sure to edit all formats
in unformatted ASCII or non-document mode.
If you delete fields or add fields to a format,
remember to renumber all fields.
Deleting a Format from the Printer
You can delete a downloaded or memory card format using
printer menus or a host. Memory card formats are available
only on printers equipped with an optional memory card.
Using Printer Menus
Refer to your Operator’s Handbook to delete a format using
printer menus.
Editing and Reviewing
Formats
9-1
9401/9402 System Administrator’s Guide
From a Host
1. Verify the format number you want to delete.
2. Follow the instructions in Chapter 6, "Entering Data
Streams," to create a file on your computer. The file
should look like this.
{
F,#,C,device
}
p
F
A constant indicating the packet is a format
header.
#
The number of the format to delete.
C
A constant indicating to clear the format.
device
The code for the device where the format
is stored.
R Stored until the printer is turned Off
M Memory card
T Temporary.
3. Send the file to the printer using a DOS Copy command.
9-2
This chapter provides some suggestions for setting up
procedures for your operators.
Daily Startup Checklist
You may wish to design a check list for operators to follow
each day. Here are some suggested check list items.
_____
Turn the printer On.
_____
Make sure ribbon and supplies are loaded.
_____
Download formats from the computer to the printer
(include instructions, if necessary).
Data Entry Instructions for Operators
Find the Data Entry Guide in Appendix D, "Format Design
Tools." Use this form to tell the operator what data to enter
when printing supplies. Here is how to fill out the form.
1. Make copies of the form and work from the copies.
2. Write the format name and number on the first line of the
form and the blank space in step 6.
3. Write the supply size on the second line. Include any other
information the operator needs to know about the supply
(i.e., needs ribbon, etc.).
4. Write the type of format (Temporary, Standard, Memory
card, or Permanent) in the blank space on step 5.
5. Write the first prompt in the box in step 7. On the lines to
the right, tell the operator how to respond.
6. Continue through all prompts in the same manner.
10-1
Establishing Daily
Procedures
10. Establishing Daily Procedures
9401/9402 System Administrator’s Guide
7. Attach a print sample to the form, if desired.
Appendix D, "Format Design Tools," includes a filled-out
sample form.
Print Logs
You may wish to keep records of supplies printed. A good way
to do this is to design a print log for operators to complete at
the end of the day.
Here are some suggestions for types of information to include
on a print log.
Date
Operator’s Name
Format Name
Supply size
Quantity printed
Evaluation of print quality
Note any problems encountered
Creating DOS Batch Files for Downloading
The printer erases online formats from memory whenever you
turn it Off. If you created your own formats, you need to
download them to the printer when you want to print supplies.
Formats stored on a memory card remain on the memory card
until you delete them or overwrite them with a new format
identified by the same number. There is no need to download
memory card formats every day.
If downloading from an MS-DOS system, you can create batch
files to set communication values and download formats. It is
a good idea to create a subdirectory to hold your format files
for this printer.
10-2
Here is a DOS batch file that sets a serial port, changes to a
subdirectory, and downloads a check digit file, format file, and
batch data file.
MODE COM1:2400,N,8,1,P
CD\MONARCH
COPY LABEL1.CDS COM1
COPY LABEL1.FMT COM1
COPY LABEL1.BCH COM1
Refer to your DOS manual for more information on creating
batch files.
Backing up Format and Batch Files
Keep backup copies of your format and batch files.
Contact your Monarch Sales or Customer Support
Representative for further suggestions.
10-3
Establishing Daily
Procedures
10. Establishing Daily Procedures
9401/9402 System Administrator’s Guide
10-4
11. Online Information
Data Stream Structure
The computer sends data to the printer in packets. A packet is
a string of ASCII characters consisting of
• a starting token: {
• a sequence of characters and instructions
• an ending token: }
There are four types of packets: check digit packets, format
packets, batch packets, and exception packets.
A data stream is made up of a series of records. A text field
definition is an example of a record. Records are constructed
with a set of parameters, which are separated by commas. A
format can contain up to 14 text, non-printable text, and bar
code records. Additionally, a format may contain lines, boxes,
and constant text overlays. Use only uppercase characters,
except in character strings enclosed in quotation marks.
11-1
Online Information
MPCL is a standard printer control language developed for
Monarch printers. It is designed to work in ASCII (MS-DOS) or
EBCDIC (mainframe) environments. This chapter describes
MPCL structure and syntax.
9401/9402 System Administrator’s Guide
The following symbols punctuate packets.
Symbol
{
}
p
,
"ABC"
‘comment‘
Description
Left brace starts a packet.
Right brace ends a packet.
Split vertical bar ends a record.
Comma separates items within records.
Enclose character strings in quotation marks.
Empty quotes ("") identify null strings or unused
fields. The printer ignores spaces, except
within these character strings. Do not embed
comments within a quoted string. To represent
non-printing characters in the string, use a
tilde ( ~ ) followed by a 3-digit ASCII code in
a quoted string.
Grave accents enclose comments. Any data
enclosed in grave accents will be ignored.
Do not put comments in a character string.
You can also used this convention to reject
mainframe data.
Example
{Begin packet record 1, parameter, parameter
record 2, parameter, parameter
record 3, parameter, parameter
record 4, parameter, parameter }
p
p
p
p
NOTE: You should break packets longer than 130
characters into multiple lines, each less than 130
characters.
11-2
11. Online Information
Format Header
A Format Header begins a format data stream. The Format
Header is followed by a series of records, which determine
text, non-printable text, bar code, constant text, line, or box
definitions.
Syntax
{F1,F2,F3,F4,F5,F6,F7,"F8"
F1. F
F2. format#
F3. action
F4. device
F5. measure
F6. length
F7. width
F8. "name"
Online Information
Message Structure
p
Format header. Enter F.
Unique number from 1-50 to identify the format.
Options:
A Add a new format to the printer.
C Clear an existing format.
Format storage device.
R Volatile RAM
M Optional memory card
T The format is temporary. You must include
a batch with these formats.
Unit of measure. Options:
E English. Measured in 1/100 inches.
M Metric. Measured in 1/10 mm.
G Graphic. Measured in dots.
Supply length, in units selected above. Measure supply
top to bottom. The bottom is the edge that exits the printer
first. Ranges:
English
075 - 900
Metric
190 - 2290
Dots
144 - 1728
Supply width, from left to right, in units selected above.
Ranges:
English
075 - 250
Metric
190 - 635
Dots
144 - 480
Assign a name to the format, if desired. 1-8 characters.
Enclose it in quotation marks. Enter "" to let the printer
assign a name.
11-3
9401/9402 System Administrator’s Guide
Example
•
•
•
•
•
•
•
•
{F,1,A,R,E,300,200,"Textiles"
p
Format Header
format #1
format being added
stored in printer RAM
measured in 1/100 inches (English)
3 inch long supply
2 inch wide supply
named "Textiles."
Syntax Checklist
• The format header must be the first record in a format
packet.
• Place the F immediately after the { or on the next line.
•
•
•
•
•
•
•
11-4
Do not place a space or any other character before the
F.
Enter all information in capital letters (except phrases in
quotes).
Place a comma between all values.
Make sure the supply size is noted in the correct units
of measure.
Make sure you have 8 items in the format record.
Do not forget the quotation marks around item #8.
Place a split vertical bar at the end of the record.
All text, non-printable text, bar code, constant text, line,
and box records must follow the Format Header.
p
11. Online Information
Text Field
Message Structure
T1,T2,T3,T4,T5,T6,T7,T8,T9,T10,T11,T12,
T13,T14
p
T1.T
T2.field #
T3.# of char
T4.Fix/Var
T5.row
T6.column
T7.gap
T8.font
T9.hgt. mag.
T10.wid. mag.
T11.color
T12.alignment
Indicates record is a text field.
Unique number from 1-14 to identify this field.
Maximum number of printed characters (1-30) in the field.
Fixed or variable length field. Options:
F Fixed length
V Variable length
Distance from bottom of print area to lower-left corner of
field. (Bottom exits the printer first.) Ranges:
English
0 - 600
Metric
0 - 1525
Dots
0 - 1152
Distance to lower-left corner of field, from left edge of
print area. Ranges:
English
0 - 200
Metric
0 - 559
Dots
0 - 384
Number of dots between characters. 0-99.
Style of font.
1 Standard
3 Bold
2 Reduced
4 OCRA-like
Height magnifier, 1-7 (times).
Width magnifier, 1-7 (times).
Options:
B Black characters
W White characters on black background
Options:
L Align on left side of field
C Center text within field
R Align on right side of field
11-5
Online Information
Syntax
9401/9402 System Administrator’s Guide
T13.char rot.
T14.field rot.
Character rotation. Options:
0 Top of character points to top of field
1 Top of character points to left of field
2 Top of character points to bottom of field
3 Top of character points to right of field
Field rotation. Lower-left corner of field is the pivot point.
0 Top of field points to top of supply
1 Top of field points to left of supply
2 Top of field points to bottom of supply
3 Top of field points to right of supply
Example
T,1,10,V,250,50,0,1,1,1,B,C,0,0
•
•
•
•
•
•
•
•
•
•
•
•
•
•
Text field
Field #1
10 characters long
variable length
lower left corner of field at row = 2.5 inches
column = 0.5 inches
default spacing
standard font
height magnification 1x
width magnification 1x
black characters
characters centered in field
no character rotation
no field rotation.
11-6
p
11. Online Information
Syntax Checklist
• For ease in syntax checking, enter all values, starting
•
•
•
p
11-7
Online Information
•
•
•
with the T, on a single line.
Enter all information in capital letters (except phrases in
quotes).
Place a comma between all values.
Make sure you have 14 items in each record.
Make sure all fields -- text, non-printable text, and bar
code -- are in order by field number (item #2) in the file.
Place a split vertical bar after item #14.
Go to a new line after the vertical bar.
9401/9402 System Administrator’s Guide
Bar Code Field
Message Structure
Syntax
B1.B
B2.field #
B3.# of char
B4.Fix/Var
B5.row
B6.column
B7. font
B8.density
11-8
B1,B2,B3,B4,B5,B6,B7,B8,B9,B10,B11,B12
p
Indicates record is a bar code field.
Unique number from 1-14 to identify this field.
Maximum number of characters. Range 1-30, except as
specified for UPC and EAN codes.
Fixed or variable length field. Options:
F Fixed length
V Variable length field.
Distance from bottom of print area to lower left corner of
field. (The bottom exits the printer first.) Ranges:
English
0 - 600
Metric
0 - 1525
Dots
0 - 1152
Distance to lower-left corner of field from left edge of print
area. Ranges:
English
0 - 200
Metric
0 - 559
Dots
0 - 384
Bar code.
1 UPC-A
6 EAN-8
2 UPC-E
7 EAN-13
3 I 2 of 5
8 Code 128
4 Code 39 (no check digit)
Bar code density. See chart in Quick References.
11. Online Information
B9.height
B10.text
B12.field rot.
Example
•
•
•
•
•
•
•
•
•
•
•
•
B,4,12,F,150,40,1,2,80,7,L,0
p
Bar code
field #4
12 characters long
fixed length
lower-left corner located at row = 1.5 inches
column = 0.4 inches
use UPC-A font
density = 80% magnification
height 0.8 inches
number system and check digit at bottom
left-justified
no field rotation.
11-9
Online Information
B11.align.
Bar code height, in 1/100 inches, 1/10 mm, or dots.
Minimum values:
English
20
Metric
51
Dots
39
Appearance of text with bar code. UPC & EAN only.
1 No check digit or number system.
5 Number system at bottom, no check digit.
6 Check digit at bottom, no number system.
7 Check digit and number system at bottom.
8 No text, bar code only
Alignment of bar code within field. Options:
L Align bar code on left margin of field.
C Bar code centered in field.
R Align bar code on right margin of field.
Field rotation. Lower left corner of field is the pivot point.
0 Top of field points to top of supply
1 Top of field points to left of supply
2 Top of field points to bottom of supply
3 Top of field points to right of supply
9401/9402 System Administrator’s Guide
Syntax Checklist
• For ease in syntax checking, enter all values, starting
•
•
•
•
•
•
11-10
with the B, on a single line.
Enter all information in capital letters.
Place a comma between all values.
Make sure you have 12 items in each bar code record.
Make sure all fields -- text, non-printable text, and bar
code -- are in order by field number (item #2) in the file.
Place a split vertical bar after item #12.
Go to a new line after the vertical bar.
p
11. Online Information
Non-Printable Text Record
Message Structure
D1,D2,D3
D1.D
D2.fld#
D3.# of char
Example
Online Information
Syntax
p
Field header (meaning data field).
Unique number from 1-14 assigned to this field.
Maximum number of characters in this field (1-30).
D,6,12
p
• Non-printable (data) field
• field #6
• 12 characters long.
Syntax Checklist
• For ease in syntax checking, enter all values, starting
•
•
•
•
•
•
with the D, on a single line.
Enter all information in capital letters.
Place a comma between all values.
Make sure you have 3 items in each record.
Make sure all fields -- text, non-printable text, and bar
code -- are in order by field number (item #2) in the file.
Place a split vertical bar after item #3.
Go to a new line after the vertical bar.
p
11-11
9401/9402 System Administrator’s Guide
Constant Text Overlays
Message Structure
Syntax
C1,C2,C3,C4,C5,C6,C7,C8,C9,C10,C11,"C12"
C1.C
C2.row
C3.column
C4.gap
C5.font
C6.hgt. mag.
C7.wid. mag.
C8.color
C9.alignment
C10.char rot.
11-12
p
Indicates a constant text overlay record.
Distance from bottom of print area to lower left corner of
field. (Bottom exits the printer first.) Ranges:
English
0 - 600
Metric
0 - 1525
Dots
0 - 1152
Distance to lower left corner of field, from left edge of print
area. Ranges:
English
0 - 200
Metric
0 - 559
Dots
0 - 384
Number of dots between characters. 1-99.
Style of font.
1 Standard
3 Bold
2 Reduced
4 OCRA-like
Height magnifier, 1-7 (times).
Width magnifier, 1-7 (times).
Options:
B Black characters
W White characters on black background
Enter L. Only left alignment is supported.
Character rotation. Options:
0 Top of character points to top of field
1 Top of character points to left of field
2 Top of character points to bottom of field
3 Top of character points to right of field
11. Online Information
C11.field rot.
C12.fixed char.
C,350,40,0,1,1,1,B,L,0,0,"Dry Clean
Only"
Constant text overlay
Lower left corner of field at row = 3.5 inches
Column = 0.4 inches
Default spacing
Standard font
Height magnification 1x
Width magnification 1x
Black characters
Characters aligned left
No character rotation
No field rotation
"Dry Clean Only" prints on all tags.
p
•
•
•
•
•
•
•
•
•
•
•
•
11-13
Online Information
Example
Field rotation. Lower left corner of overlay is the pivot point.
0 Top of overlay points to top of supply
1 Top of overlay points to left of supply
2 Top of overlay points to bottom of supply
3 Top of overlay points to right of supply
Fixed characters to appear in the field. Maximum 100
characters. Surround with quotation marks.
9401/9402 System Administrator’s Guide
Syntax Checklist
• For ease in syntax checking, enter all values, starting
•
•
•
•
•
•
11-14
with the C, on a single line.
Enter all information in capital letters (except phrase in
quotes).
Place a comma between all values.
Do not forget the quotation marks around item #12.
Place a split vertical bar after item #12.
Go to a new line after the vertical bar.
Make sure you have 12 items in the constant text
overlay record.
p
11. Online Information
Line Records
Message Structure
L1.L
L2.type
L3.row
L4.column
L5.end row
angle
L6.end col.
length
L1,L2,L3,L4,L5,L6,L7,L8
p
Indicates a line record.
Type of line. Only vertical and horizontal lines are
supported. Options:
S Segment. You choose the starting point and
ending point.
V Vector. You choose the starting point, the
angle, and length.
Distance from bottom of print area to line origin. Measure
in 1/100 in., 1/10 mm, or dots. Ranges:
English
0 - 600
Metric
0 - 1525
Dots
0 - 1152
Distance from left edge of the print area to line origin.
Measure in 1/100 in., 1/10 mm, or dots. Ranges:
English
0 - 200
Metric
0 - 559
Dots
0 - 384
If using Segments
Row location of end point. Measure from bottom of print
area. Ranges same as above. On horizontal lines, this
value must match item L3.
If using Vectors
Angle of line. 0, 90, 180, or 270.
If using Segments
Column location of end point. Measure from left edge of
print area. Ranges same as above. On vertical lines,
this value must match item L4.
If using Vectors
Length of the line in selected units. Ranges same as above.
11-15
Online Information
Syntax
9401/9402 System Administrator’s Guide
L7.thickness
L8.pattern
Example
•
•
•
•
•
•
•
•
Line thickness 0-99. Measure in dots.
Line pattern. Only 1 pattern supported.
Enter "" in this parameter.
L,S,110,30,110,150,10,""
p
Line
Line defined as a segment
Origin row = 1.1 inches
Origin column = 0.3 inches
End point at row = 1.1 inches (horizontal line)
End point at column = 1.5 inches
10 dots thick
Solid line.
Syntax Checklist
• For ease in syntax checking, enter all values, starting
•
•
•
•
•
•
•
11-16
with the L, on a single line.
Place a comma between all values.
Make sure you have 8 items in each line record.
Check the coordinates in items 3, 4, 5, and 6. Item #3
must equal item #5 OR item #4 must equal item #6.
Compare coordinates to supply dimensions. Make sure
the line does not run off the supply.
Do not put a space or any other character in the
quotation marks in item #8.
Place a split vertical bar after item #8.
Go to a new line after the vertical bar.
p
11. Online Information
Box Records
Message Structure
Q1,Q2,Q3,Q4,Q5,Q6,Q7
Q1.Q
Q2.row
Q3.column
Q4.end row
Q5.end col.
Q6.thickness
Q7.pattern
p
Indicates a box (Quadrilateral) record.
Distance from bottom of print area to lower-left corner of
box. Measure in 1/100 in., 1/10 mm, or dots. Ranges:
English
0 - 600
Metric
0 - 1525
Dots
0 - 1152
Distance from left edge of print area to lower-left corner of
box. Measure in 1/100 in., 1/10 mm, or dots. Ranges:
English
0 - 200
Metric
0 - 559
Dots
0 - 384
Distance from bottom of print area to upper-right corner of
box. Ranges same as row above.
Distance from left edge of print area to upper-right corner
of box. Ranges same as column above.
Line thickness 0-99. Measure in dots. Thickness fills to
center of box.
Line pattern. Only 1 pattern supported.
Enter "" .
11-17
Online Information
Syntax
9401/9402 System Administrator’s Guide
Example
•
•
•
•
•
•
•
Q,240,30,270,150,3,""
p
Box (Quadrilateral)
Lower-left corner row 2.4 inches
Lower-left corner column 0.3 inches
Upper-right corner row 2.7 inches
Upper-right corner column 1.5 inches
3 dots thick
Solid line.
Syntax Checklist
• For ease in syntax checking, enter all values, starting
•
•
•
•
•
•
•
11-18
with the Q, on a single line.
Enter all information in capital letters.
Place a comma between all values.
Make sure you have 7 items in each box record.
Compare coordinates to supply dimensions. Make sure
the box does not run off the supply.
Do not put a space or any other character in the
quotation marks in item #7.
Place a split vertical bar after item #7.
Go to a new line after the vertical bar.
p
11. Online Information
Field Options
Syntax
R,option#,argument(s)........
p
Field option header.
Option number:
1 Define fixed characters.
2 General data type restrictions.
3 Detailed data type restrictions.
4 Copy data from previous field.
5 Define input source.
20 Define data entry prompt.
30 Pad data to left or right with specified character.
31 Define check digit mode and select algorithm.
42 Format as a price field.
60 Define incrementing or decrementing field.
argument(s)
Varies per option. See following definitions.
You can apply field options to text, non-printable text, or bar
code fields. You can use multiple options with most fields, and
in any combination except as noted with each definition.
Options must immediately follow the text, non-printable text
(data), or bar code fields to which they apply.
11-19
Online Information
R
option#
9401/9402 System Administrator’s Guide
Definitions
Option #1
Syntax
Define characters that
are always printed.
R,1,"fixed
characters"
p
a. Defining fixed
characters for entire
field
• Recommend using
constant text overlays
instead.
• Use with Option 5 to
eliminate prompt.
• Character string must be enclosed in quotation
marks.
Example
R,1,"Made in USA"
p
This example defines the fixed phrase "Made in
USA" to print in all batches.
b. Defining fixed characters for part of field
• Place underscores (_) in non-fixed positions.
• Non-fixed positions can be filled by user or
copied data (Option 4).
• Character string must be enclosed in quotation
marks.
Example
R,1,"Inspected by _ _ _ _"
R,20,"Inspector #:"
p
p
This example fixes the characters "Inspected by"
and prompts the user to enter his or her inspector
number.
11-20
11. Online Information
Option #2
Restrict data type for entire
field. Do not use with Option 3.
NOTE:
R,2,code
code
Example
R,2,1
Online Information
Syntax
If you do not specify this
options, all letters,
numbers, and printable
symbols are permitted.
See Appendix C,
"Printable Characters,"
for a complete list of
printable characters.
p
Numeric code from the following list.
1
Numeric only [0..9]
2
Alpha only [A..Z,a..z]
3
Symbols only [printable characters
except letters and digits]
4
Alpha and numeric
5
Numeric and symbols
6
Alpha and symbols
p
This example limits data in the field to digits only.
11-21
9401/9402 System Administrator’s Guide
Option #3
Detailed data type
restrictions or template
of character types. Do
not use with Option 2.
NOTE: See Appendix C,
"Printable
Characters,"
for a complete
list of printable
characters.
Syntax
R,3,[S/T],"string"
p
a. Detailed data type restrictions
• Use "S" option in parameter #3. Defines a
specific set of characters for the entire field.
You can limit input to some, but not all letters or
digits.
• The string length does not have to match the
field length. Maximum string length is 30
letters, and must be enclosed in quotation
marks.
Example
R,3,S,"ABC1234567890"
p
This example limits input in this field to the
letters A, B, and C, and all digits.
11-22
11. Online Information
b. Template of allowable data types
• Use "T" option in parameter #3. Create a
*
#
@
_
Example
Any printable character.
Any digit [0..9].
Any letter [A..Z,a..z].
Reserved position for a fixed or copied
character.
R,3,T,"***#_ _ _ _"
p
This example allows any printable character
in positions 1, 2, and 3, digits in position 4, and
reserves positions 5 through 8 for fixed or
copied data.
11-23
Online Information
template of allowable data types by placing
character indicators in each character position.
• The number of characters in the string must
match the length of the field, enclosed in
quotation marks.
• Indicators of allowable data types are
9401/9402 System Administrator’s Guide
Option #4
Copy data from a previously-defined field.
You can use it with any option (multiple times,
if needed).
When copying from more than 1 field, copy into
destination field left to right.
Syntax
R,4,src fld,src start,# to copy,dest
start,copy code
p
src fld
The field number
where the data
originates.
src start
The position number
of the first character
in src fld.
# to copy Number of characters
to copy.
dest start Starting character
position in destination
field.
copy code Type of copy.
Example
1
Copy the field as is (including price
symbols, pad characters, check
digits, etc.).
2
Copy unformatted data (without price
characters, pad characters, etc.).
R,4,2,1,4,3,2
p
This example copies data from field 2, starting with
the first character, copies 4 characters into the field
beginning at position 3 in the destination field, and
drops any price or pad characters that may have
been added to the field.
11-24
11. Online Information
Option #5
Syntax
Define how data will be entered. When using with
other options, place this option after all other options
for the field.
R,5,code
code
p
Online Information
Input code from the
following list.
D Default (computer, if
on-line; keyboard,if
off-line)
K Keypad or computer
keyboard connected
to printer.
H Host
N No user input. Data is inserted by Option
4 (copy) or Option 1 (fixed characters).
Eliminates user prompt. Do not use this
code when using Option 20.
S Scanner
Example
R,5,N
p
This example eliminates the user prompt for this
field. Data is copied into the field using Option 4.
11-25
9401/9402 System Administrator’s Guide
Option #20
Syntax
Defines the operator
prompt. Can be used
with any option.
R,20,"prompt in
quotes"
• Do not use on fields
filled entirely by fixed
characters or copied
data.
• The prompt should be 15 characters or less,
enclosed in quotation marks.
• Do not use this option with the Option 5 "N"
listing.
p
Example
R,20,"Enter Part #:"
p
The printer will display "Enter Part #:" for the
operator to enter data in this field.
Option #30
Syntax
Pad data to left or right with
specified character. Can be used
with any option except Option 42.
R,30,L/R,"character"
L/R
p
L = Pad field on left side
R = Pad field on right side.
"character" Pad character (must be printable).
Character must be enclosed in
quotation marks.
NOTE: Do not use on fixed length fields.
Example
R,30,L,"X"
p
If a variable length field is not completely filled with
batch data, this option fills in the remaining positions
in the field with the character X.
11-26
11. Online Information
Option #31
Syntax
R,31,gen/ver,check digit
p
gen/ver
G = generate check
digit
V = verify check digit
entered by user
check digit #
Check digit scheme number, as
defined in Chapter 4, "Using
Check Digits."
Do not use on UPC, EAN, or other fields with
predefined check digits.
Use on numeric fields only.
Example
R,31,G,5
p
This example generates a check digit using
algorithm #5.
Option #42
Syntax
Format as a price field. Do not use
with Options 31 or 60.
R, 42, code
p
code Appearance code.
1
NOTES:
Prints price field in standard
notation as defined by
country setting.
Use on numeric fields only.
Use printer "Setup - Defaults" menu to select
monetary notation and symbols by country
setting (See your Operator’s Handbook).
11-27
Online Information
NOTES:
Define check digit mode and select
calculation scheme. Do not use with
Options 42 or 60.
9401/9402 System Administrator’s Guide
Example
R,42,1
p
This example turns a text field into
a price field.
Option #60
Syntax
Define the incrementing or
decrementing portion of data. Do
not use it with Options 31 or 42.
R,60,I/D,amount,l pos,r
pos
p
I/D
I = incrementing field
D = decrementing field.
NOTES:
amount
The value
increases or decreases.
l pos
Left-most position in inc/dec portion of
field.
r pos
Right-most position in inc/dec portion of
field.
Use on numeric data only.
When entering batch data for the field, enter the
first number in the sequence. The first number
must have the same number of digits as the
highest number. For example, to count from 1
to 999, the first number must be entered as 001.
Example
R,60,I,5,1,6
p
This example causes numeric data in the field to
increase by 5 with each ticket printed. Incrementing
data is in positions 1 through 6.
11-28
11. Online Information
Example
T,5,20,V,80,10,1,1,1,1,B,L,0,0
R,4,3,1,2,1,2
R,4,2,1,18,3,1
p
p
p
• Text field #5 has 20 characters.
• The first option does the following.
Syntax Checklist
• Insert a line directly after the text or bar code field to
which the option applies. Place each option on a new
line following the field to which it applies.
• Enter values for each field option on separate lines
following the text or bar code field. For example, begin
with the first R on the first line after the field. The next
applicable R would go on a new line.
•
•
•
•
NOTE: Place Option 5 last, if used.
Enter all information in capital letters (except phrases in
quotes and comments).
Make sure all values are separated by commas.
Make sure the number of items on each line matches
the number of items shown on the Format Worksheet
for each option.
Place a split vertical bar at the end of each line.
p
11-29
Online Information
- copies data into field 5 from field 3
- copies 2 characters, starting at position 1,
from field 3
- places the characters, beginning at position 1,
in field 5
- removes formatted characters from copied data.
• The second option does the following.
- copies data into field 5 from field 2
- copies 18 characters, starting at position 1
from field 2
- places the characters, beginning at position 3,
in field 5
- retains formatted characters in copied data
9401/9402 System Administrator’s Guide
Format Syntax Checklist
When you finish the format, check the overall syntax in the
format packet.
• The format must begin with { and end with }.
• Make sure you have no more than 14 fields in the
•
•
•
•
11-30
format packet.
Make sure all fields are in order by the desired user
prompt.
Make sure all field numbers are in ascending sequence.
Make sure all items are separated by commas.
Make sure each record ends with a split vertical bar
p
11. Online Information
Batch Packets
Batches are sent as a series of batch packets. A batch packet
may contain two types of records.
a batch header
one or more batch data records.
Batch Header Section
A batch header begins the batch data stream. It tells which
format the batch uses and how many supplies to print.
QUANTITY
B4
FORMAT #
B1 B2 B3
HEADER
NEW / UPDATE
Message Structure
B
Syntax
B1.B
B2.format#
B3.N/U
B4.quantity
{B1,B2,B3,B4
p
Batch message header.
Format number (1-99) to use.
Controls how image is generated.
N New. Fill all fields with new data. Any missing
fields will be blank.
U Update last image with 1 or more batch data
fields. All other fields remain same as last
queued batch.
Quantity to print (1-9999)
11-31
Online Information
1)
2)
9401/9402 System Administrator’s Guide
Example
{B,3,N,100
•
•
•
•
p
Begin Batch packet
Use format #3
Sending new batch data for all fields
Print 100 supplies.
Syntax Checklist
• The packet must begin with {.
• Do not place a space or any other character
between the { and B.
• Make sure there are 4 items in the batch
header record.
• Make sure all items are separated by commas.
• Make sure the batch header ends with a split
vertical bar .
p
11-32
11. Online Information
Batch Data Record
Batch data records follow the batch header. Batch data
records should be sent in order by field number.
Message Structure
field#,"data string"
1. field#
2. "data string"
Example
Online Information
Syntax
p
Tells the printer which text, bar code, or non-printable text
field in which to insert the following data.
Provides the actual information to print in the selected
field. Always enclose in double quotes.
1,"Size 12"
2,""
3,"Blue" }
p
p
p
• Print the phrase "Size 12" in field 1.
• Print field 2 with fixed characters as applied by
option 1.
• Print the word "Blue" in field 3.
11-33
9401/9402 System Administrator’s Guide
Syntax Checklist
• Make sure there are 2 items in each batch data record.
• Each field must end with a split vertical bar .
• Enter a batch data record for each field, including fields
p
with all fixed characters and all copied data.
• To enter data for fixed or copied data, send a null string
(a set of quotation marks with no data, like this: "").
• The number must contain the same number of digits as
the highest number in the sequence. For example, to
count the numbers 1 to 9999, the first number entered
must be "0001" .
• The last batch data record must be followed by a split
vertical bar and right brace }.
p
11-34
11. Online Information
Check Digits
Check digit algorithms are pre-defined for UPC and EAN bar
codes. If you wish to apply a check digit algorithm to a
numeric text field or a bar code that has no pre-defined
algorithm, use the syntax below to define a check digit packet.
HEADER
SELECTOR #
ACTION
DEVICE
MODULUS
LENGTH
ALGORITHM
WEIGHTS
A1
A2
A3
A4
A5
A6
A7
A8
A
Syntax
A4.device
A5.modulus
A6.fld-length
A7.[D/P]
A8."weights"
}
A
{A1,A2,A3,A4,A5,A6,A7,"A8"
{
A1.A
A2.selector
A3.action
Online Information
Message Structure
p
Starting token.
Indicates a check digit data stream.
Assign a number from 1-9 to this check digit formula.
Options:
A = add check digit
C = clear check digit
Printer storage device. Options:
R = Printer RAM
M = Memory card
Number from 2-10. Modulus used in calculation.
Number of weighting digits used. Should equal the
number of digits in the field, minus the check digit. This
number must equal the length of weights.
Maximum 29.
Algorithm.
D=sum of digits.
P=sum of products.
String of digits used for calculation. Note that the string
must be in double quotes. The number of digits
in this string should equal the number in parameter #5 (fld-length).
Ending token.
11-35
9401/9402 System Administrator’s Guide
Example
•
•
•
•
•
•
•
•
{A,1,A,M,10,5,P,"65432"
p
}
Check digit algorithm header
Assign number 1 to the algorithm
Being added
Store on a memory card
Use a modulus of 10
Field length 5 characters
Use sum of products algorithm
Use "65432" as weights.
Syntax Checklist
•
•
•
•
11-36
Make sure the packet begins with { and ends with }.
The field must end with a split vertical bar .
Make sure there are 8 items in the record.
Do not forget the quotation marks around the character
string in item #8.
p
11. Online Information
Transmitting Data
Send packets in this order.
Check digit packets
Format packets
Batch packets
Check digit packets are stored until the printer is turned Off.
The data stream would appear in an order similar to this.
{ Check digit packet }
{ Format header field1 option option field2 option
field3 }
{ Batch header batch data batch data batch data }
p
p
p
p
p
p
p
p
p
p
p
p
On an MS-DOS system, a standard DOS command is used to
transmit the data stream to the printer. For example, the
following commands could be used to transmit an ASCII file
called FRMT1.FMT to a 9401 or 9402 printer connected to
COM port 1.
MODE COM1:2400,N,8,1,P
COPY FRMT1.FMT COM1
If the printer is connected to COM2, simply change "COM1" to
"COM2" in the above statements.
11-37
Online Information
1.
2.
3.
9401/9402 System Administrator’s Guide
Sample Format Data Stream
Here is a sample format data stream.
{F,6,A,R,M,350,508,"TEST2"
C,250,80,0,1,2,1,W,C,0,0
"MONARCH MARKING"
B,1,12,F,110,115,1,1,120,5,L,0
T,2,18,V,30,30,1,1,1,1,B, L,0,0
p
p
p
p
p
Begins definition for Format #6.
Prints "MONARCH MARKING"
on all labels.
Definition for field #1, bar code.
Definition for field #2, text field.
This data stream results in the following format.
11-38
11. Online Information
Use the following batch information with the format shown
above.
{B,6,N,10
1,"12345678901" ,"
2,"DAYTON, OHIO "
p
p
p
Header, uses format 6, prints 10 labels.
Enters 12345678901 in field #1.
Enters DAYTON, OHIO in field #2.
See Appendix B, "Data Stream Examples," for more data
stream examples.
11-39
Online Information
The following label results from sending this batch with the
format shown above.
9401/9402 System Administrator’s Guide
Interactive Mode
Interactive mode enables two-way communication between a
9401 printer and a host. With interactive mode, a host can
• send a message to the printer operator.
• request and receive information from the printer
operator.
• use the printer as a data collection device.
NOTE: You cannot use protocol converter models 2071,
2072, 2073, and 2074 in interactive mode.
Processing Overview
The following procedure summarizes one transaction between
the host and printer in interactive mode
1. The operator sets the printer in Print mode.
2. The host sends the printer a data stream in the form of an
exception packet (see "Exception Packets"). If it uses
XON\XOFF flow control, the host must precede the
datastream with an initial XON.
3. When the printer receives the packet, it returns a status
message (see "Printer Status Codes"). It also enters
interactive mode and is ready to transmit data to the host
after the host sends a prompt.
4. If the host requests a response from the printer, the
operator enters the response at the printer (up to 30
characters) and presses one of the following keys:
•
•
68
(to send entered data)
(to respond with no data).
NOTE: The printer appends a carriage return to the end
of the reponse (even if the operator enters no
data).
11-40
11. Online Information
The host should wait for any reponse before sending further
data. If the host sends data to the printer before the printer
responds to a request, the printer will cancel the reponse by
sending a carriage return with no data to the host. It then
processes the new data.
Exception Packets
Syntax
E
#
{E,"#,[message]"
p
}
is a constant, indicating that the data stream is an
exception packet.
A code indicating what the printer should do. Values are
as follows:
0
1
2
3
4
5
6
message
Example
Print message on line 1 of the display.
Provide input.
Print message on line 1 of the display and provide input.
Sound a tone.
Print message on line 1 of the display and sound a tone.
Sound a tone and provide input.
Print message on line 1 of the display, sound a tone,
and provide input.
A message used to perform the action specified in #. It
cannot be more than 15 characters long. Use message
only with actions 0, 2, 4, and 6. If you specify message
with actions 1, 3, or 5, the printer will ignore it.
{E,"2,Scan bar code"
p
}
This example displays Scan bar code on line 1 of the printer
display and enables the printer operator to provide input to the
host.
Printer Status Codes
The printer sends one of the following return codes to the host
after receiving a packet
11-41
Online Information
This section describes exception packets, including their
syntax.
9401/9402 System Administrator’s Guide
Code
Description
CAN
The printer detected an error such as an open
print head, and cannot process the request.
EOT
The printer received a 9401 MPCL packet
from the host.
ESC
The printer operator pressed
ETX
The printer operator pressed
entering any data.
8
6
.
without
Using a Scanner in Interactive Mode
You must set the Auto Enter option depending on how you
enter data, as follows
Set Auto Enter to...
Automatically
Only after you press
To send scanned data...
6
Yes
No
See the Operator’s Handbook for information on how to set
Auto Enter.
Example Printer/Host Dialog
Following is an example of what might happen during a dialog
between the printer and the host in the case of an employee
marking goods in a store.
HOST:
Sends an exception packet ({E, "6, Scan
Shelf ID" }).
p
PRINTER:
The operator scans the shelf label.
The printer sends the information back
to the host.
HOST:
Searches a database for the item number
and retrieves the label format for the item.
Then, it sends an exception packet
({E, "6, Enter Quantity" }).
p
11-42
11. Online Information
6
The operator enters the quantity of items
and presses
.
HOST:
Enters the quantity into an inventory
database and batch data stream. Then,
it sends the format and batch data stream
to the printer.
PRINTER:
Prints labels for the number of items
counted.
Online Information
PRINTER:
11-43
9401/9402 System Administrator’s Guide
11-44
12. Quick References
This chapter repeats the character and line charts from
Chapter 2, "Designing a Format," as a convenient reference.
Text Fonts
The table on the following page shows the character sets
available for each text font supported by this printer.
NOTES:
Use ~155 in the data stream For example, to
download data to print 59¢ in field 1, place the
following sequence in the batch data stream:
p
Use a dollar sign ( $ ) in the data stream to print
monetary symbols. The monetary symbol printed
is determined by the country setting on the printer.
Special characters are available for Standard and
Reduced fonts, in addition to the characters
shown on the next page. See Appendix C,
"Printable Characters."
12-1
Quick References
1,"59~155"
9401/9402 System Administrator’s Guide
Standard Font
Bold Font
12-2
Reduced Font
OCRA-like Font
12. Quick References
Character Height
This chart shows character heights in magnifications 1-7 for
each text font in 1/100 inches, 1/10 millimeters, and Dots.
Font Magnification
1x
2x
3x
4x
5x
6x
7x
Standard
1/100 in.
11.4
22.9
34.3
45.8
57.2
68.7
80.1
1/10 mm
29.1
58.1
87.2
116.2
145.3
174.3
203
Dots
22
44
66
88
110
132
154
1/100 in.
7.3
14.6
21.8
29.1
36.4
43.7
51
1/10 mm
18.5
37.0
55.5
74.0
92.5
110.9
129
Dots
14
28
42
56
70
84
98
Bold
1/100 in.
17.7
35.4
53.1
70.8
88.5
106.2
124
1/10 mm
44.9
89.8
134.7
179.6
224.5
269.4
314
Dots
34
68
102
136
170
204
238
OCRA-Like (1x only)
1/100 in.
12.5
1/10 mm
31.7
Dots
24
12-3
Quick References
Reduced
9401/9402 System Administrator’s Guide
Character Width
This chart shows character widths in magnifications 1-7 for
each text font in 1/100 inches, 1/10 millimeters, and Dots. The
values in this chart include default character spacing.
Width Mag.
Standard
Units
Character
Width Sample
1x
2x
3x
4x
5x
6x
7x
Reduced
Character
Width Sample
Character
Width Sample
1/100 in.
8.85
4.17
14.06
1/10 mm
22.49
10.58
33.72
Dots
17
8
27
1/100 in.
16.15
7.81
26.56
1/10 mm
41.01
19.84
67.47
Dots
31
15
51
1/100 in.
23.44
11.46
39.06
1/10 mm
59.53
29.10
99.22
Dots
45
22
75
1/100 in.
30.73
15.10
55.56
1/10 mm
78.05
38.36
130.97
Dots
59
29
99
1/100 in.
38.02
18.75
64.06
1/10 mm
96.57
47.63
162.72
Dots
73
36
123
1/100 in.
45.31
22.40
76.56
1/10 mm
115.09
56.89
194.47
Dots
87
43
147
1/100 in.
52.60
26.04
89.06
1/10 mm
133.61
66.15
226.22
Dots
101
50
171
NOTE: OCRA-like 1x character width is
English
Metric
Dots
12-4
Bold
8.32
29.10
22
12. Quick References
Bar Codes
These bar codes are available on the 9401 and 9402 printers.
Model 9401/9402 Barcodes
Nominal Width(X)
Barcode
UPC/EAN
I 2 of 5
Codabar
Code 128
Char/Inch
Ratio
Inches
Dots
2
80%
4
120%
N/A
.0104
2
N/A
.0157
13
3
13.74
2:1
.0104
12
2
12.02
1:2.5
.0104
2
11
10.68
1:3
.0104
2
10
10.68
1:3
.0104
2
9
9.16
1:2
.0157
3
8
8.36
1:2.33
.0157
3
7
6.87
1:2
.0209
4
6
6.01
1:2.5
.0209
4
5
5.34
1:3
.0209
4
4
4.01
1:2.5
.0314
6
3
3.05
1:3
.0366
7
2
2.00
1:2.5
.0628
12
1
1.02
1:3
.1099
21
+7
6.63
1:2.5
.0104
2
6
6.01
1:3
.0104
2
5
N/A
4
4.01
1:3
.0156
3
3
3.32
1:2.5
.0209
4
+8
8.74
1:2.5
.0104
2
7
8.01
1:3
.0104
2
6
N/A
5
4.81
1:2
.0209
4
4
4.37
1:2.5
.0209
4
3
2.91
1:2.5
.0314
6
2
2.00
1:3
.0419
8
8
8.74/17.48
.0104
2
6
5.83/11.66
.0156
3
4
4.37/8.74
.0208
4
The densities are for the data only and don’t include start/stop characters and check digits.
The default values are in bold. Second density on Code 128 is for all numeric data.
12-5
Quick References
Code 39
MCPL
Density
9401/9402 System Administrator’s Guide
Line Thickness
Line thickness is measured in dots. 1 dot = 1/192 inch.
Maximum line thickness is 99 dots.
Thickness
1
5
10
20
30
40
50
60
75
90
12-6
Example
13. Diagnostics
This chapter contains simple tracking and diagnostic
procedures. This information will be helpful if you need to
contact Technical Support.
Setting Passwords
One of the first things the administrator should do is establish
a password for administrative and diagnostic functions. You
need a password for access to diagnostic functions.
5-Key Keypad
The password is preset for printers
with the basic keypad. You cannot
change it without a computer
keyboard connected to it. See
instructions for the computer
keyboard in this chapter.
7
7
7
6
The factory-set password is
Diagnostics
This password can also be used on
the 21-key keypad.
NOTE: If you change the password using the computer
keyboard, you will need the keyboard or 21-key
keypad to access any function requiring the new
password.
13-1
9401/9402 System Administrator’s Guide
21-Key Keypad
8
Press and hold
to the Main menu.
When you see
MAIN MENU
SETUP
Supply
PASSWORDS
Display
to go
Do this
1
2
6
Press
or
until you
see Setup. Press
.
2
6
Press
until you see
Passwords. Press
.
2
6
Press
until you see
Change. Press
.
Enter password:
-------
Type the old password (the
default is MGR).
New passwd:
-------
Type the new password.
Press
.
Retype passwd:
-------
Type the new password
again. Press
.
6
6
The menu should flash "Password Changed," then return to
the Password menu. If it does not, you did not successfully
change the password (probably due to not entering the
password the same way twice). Return to the Main menu to
save the new password.
13-2
13. Diagnostics
Monarch Computer Keyboard
Turn off the NumLock on the keyboard and use the left and
right cursor arrows.
Press and hold
8
to go to the Main Menu.
When you see
MAIN MENU
SETUP
Supply
PASSWORDS
Display
Do this
1
2
6
Press
or
until you
see Setup. Press
.
2
6
Press
until you see
Passwords. Press
.
2
6
Press
until you see
Change. Press
.
Type the old password (the
default is MGR).
New passwd:
-------
Type the new password.
Press
.
Retype passwd:
-------
Type the new password
again. Press
. Return
to the Main menu to save the
password.
6
6
13-3
Diagnostics
Enter password:
-------
9401/9402 System Administrator’s Guide
Checking the Software Version
Press and hold
8 to go to the Main Menu.
When you see
Do this
MAIN MENU
Enter password:
------DIAGNOSTICS
Version
2
6
Press
until you see
Diagnostics. Press
.
6
Type your password. Press
.
Press
6.
You will see
M9401/02
SN00000000
#098292
Line one lists the printer
model number (M9401/02)
and the part number for the
printer ROM.
Line two lists the serial
number of the printer. Press
again.
6
You will see
VERSION 3.X
Line one is the version of
software in the printer.
Line two of this display says
"Extended Memory" on
printers with extra memory
installed.
13-4
13. Diagnostics
Printing a Test Label
Press and hold
8 to go to the Main Menu.
When you see
MAIN MENU
Enter password:
-------
Do this
2
6
Press
until you see
Diagnostics. Press
.
6
Type your password. Press
.
2
6
DIAGNOSTICS
Version
Press
until you see User
Diag. Press
.
USER DIAG
Supply Quality
Press
until you see Test
Label. Press
.
TEST LABEL
Test Pattern
You have three selections:
2
6
Test Pattern
checks print head quality
Test Label 1
checks print quality
6
Select Test Pattern or Test
Label 1. Press
.
Quantity?
1-
Type the quantity of test
labels you want to print.
Press
.
6
13-5
Diagnostics
Test Label 2
gives critical service data
9401/9402 System Administrator’s Guide
The test label should look like this.
Test Pattern
Test Label 1
Test Label 2
13-6
13. Diagnostics
Checking Supply Quality
The printer continuously stores data from the last 16 supplies
printed. This data reflects the quality of the sensor marks on
the supply.
1. Print a batch of supplies or test labels.
2. Press and hold
8 to go to the Main Menu.
When you see
MAIN MENU
Enter password:
-------
Do this
2
6
Press
until you see
Diagnostics. Press
.
6
Type your password. Press
.
2
6
DIAGNOSTICS
Version
Press
until you see
User Diag. Press
.
USER DIAG
Supply Quality
Press
6.
If you have not printed any labels, you will see a message
saying "No data."
Diagnostics
13-7
9401/9402 System Administrator’s Guide
If you have printed labels since turning the printer on, you will
see
Len
Min Max
0290 036 188
OK
Y
• The first listing, Len, is the length of the supply in dots.
• The Min and Max listings measure reflectivity of the
sensor mark on the supply. The Min listing typically
reads below 50, and the Max listing typically reads
between 150 and 255. Under normal conditions, these
listings should not fluctuate more than 20 units between
readings.
• The OK listing tells whether the sensor mark on the
supply passed a detection test.
2
Press
to see other readings. The printer stores readings
on the last 16 tags or labels printed.
13-8
13. Diagnostics
Checking Printer Memory Usage
You can run a test to see how much memory is used by
formats and other data on each device. This test is for online
users who need to know whether they can download new data
to the printer.
Press and hold
8 to go to the Main menu.
When you see
MAIN MENU
Enter password:
-------
Do this
2
6
Press
until you see
Diagnostics. Press
.
6
Type your password. Press
.
2
6
DIAGNOSTICS
Version
Press
until you see
User Diag. Press
.
USER DIAG
Supply Quality
Press
until you see
Device Usage. Press
FORMAT TYPE
Temporary
2
6.
Select the device you want
to check.
Selection
Volatile RAM
Memory Card
Custom ROM
Fixed ROM
Temporary
Memory Card
Permanent
Standard
6 to select the
Press
device.
13-9
Diagnostics
Device
9401/9402 System Administrator’s Guide
6
If the device contains no formats, you will see
Device Empty.
Press Enter.
Press
to continue.
If the device contains formats, you will see
Memory Usage:
001505/001505
The number on the left is the
amount of memory used by
formats in that device.
The number on the right is
the total amount of memory
in the device.
To find the amount of
memory remaining, subtract
the number on the left from
the number on the right.
6
Press
again to view
the format names and the
amount of memory used by
each format.
13-10
13. Diagnostics
Testing Your Scanner
This test verifies that your scanner is reading correctly. Make
sure you have selected a scanner from the Port Settings Scanner Comm menu before running this test.
Press and hold
8
to go to the Main menu.
When you see
Do this
2
MAIN MENU
6
Press
until you see
Diagnostics. Press
.
6
Enter password:
________
Type your password. Press
.
2
6
DIAGNOSTICS
Version
Press
until you see User
Diag. Press
.
USER DIAG
Supply Quality
Press
until you see
Scanner Test. Press
2
6.
The printer pauses
momentarily to initialize the
scanner.
1
Scan your data.
2
If the scanner reads correctly, the data appears on the printer
display. Press
or
to view data more than 16
characters long.
13-11
Diagnostics
SCAN:
________
9401/9402 System Administrator’s Guide
If you see
No scanner.
one of the following conditions exists
• No scanner from the the Port Settings - Scanner Comm
menu
• The scanner is not connected properly.
8
You can run this test as many times as necessary to check the
scanner or data. Press
to exit the scanner test.
Calling for Service
Before you call service, follow the steps under "Printing a Test
Label" to print Test Label 2.
The test label displays the following information, which may be
helpful to service representatives.
Printer Model Number
Serial Number
Software Version Number
Number of inches printed to date
Communication settings:
User COM Port
Service Diagnostic Port
Scanner Port
Options installed in this printer
13-12
Appendix A
Optional Formats
Some printers have 16 optional formats, in addition to the
three standard formats. This appendix describes these
formats.
Printers with optional formats have either Format Set A or
Format Set B, but not both. Sets A and B are shown in this
appendix.
Format Set A
Format Name: FMT 70
Number:
70
Dimensions (h x w):
Metric
English
Dots
69.8 x 38.1 mm
2.75 x 1.5 in
528 x 288 dots
Appendix A: Optional
Formats
A-1
9401/9402 System Administrator’s Guide
Format Name: FMT 71
Number:
71
Dimensions (h x w):
Metric
English
Dots
68.6 x 38.1 mm
2.7 x 1.5 in
519 x 288 dots
Format Name: FMT 72
Number:
72
Dimensions (h x w):
Metric
English
Dots
A-2
68.6 x 30.4 mm
2.7 x 1.2 in
519 x 230 dots
Appendix A: Optional Formats
Format Name: FMT 73
Number:
73
Dimensions (h x w):
Metric
English
Dots
69.8 x 38.3 mm
2.75 x 1.5 in
528 x 288 dots
Format Name: FMT 74
Number:
74
Dimensions (h x w):
Metric
English
Dots
30.5 x 55.9 mm
1.2 x 2.2 in
231 x 423 dots
Format Name: FMT 75
Number:
75
Dimensions (h x w):
Metric
English
Dots
30.5 x 55.9 mm
1.2 x 2.2 in
231 x 423 dots
Metric
English
Dots
30.5 x 55.9 mm
1.2 x 2.2 in
231 x 423 dots
A-3
Appendix A: Optional
Formats
Format Name: FMT 76
Number:
76
Dimensions (h x w):
9401/9402 System Administrator’s Guide
Format Name: FMT 77
Number:
77
Dimensions (h x w):
Metric
English
Dots
55.9 x 30.5 mm
2.2 x 1.2 in
423 x 231 dots
Format Name: FMT 78
Number:
78
Dimensions (h x w):
Metric
English
Dots
55.9 x 30.5 mm
2.2 x 1.2 in
423 x 231 dots
Format Name: FMT 79
Number:
79
Dimensions (h x w):
Metric
English
Dots
A-4
40.6 x 30.5 mm
1.6 x 1.2 in
307 x 231 dots
Appendix A: Optional Formats
Format Name: FMT 80
Number:
80
Dimensions (h x w):
Metric
English
Dots
40.6 x 30.5 mm
1.6 x 1.2 in
307 x 231 dots
Format Name: FMT 81
Number:
81
Dimensions (h x w):
Metric
English
Dots
28.0 x 30.5 mm
1.1 x 1.2 in
211 x 231 dots
Format Name: FMT 82
Number:
82
Dimensions (h x w):
Metric
English
Dots
28.0 x 30.5 mm
1.1 x 1.2 in
211 x 231 dots
Format Name: FMT 83
Number:
83
Dimensions (h x w):
28.0 x 30.5 mm
1.1 x 1.2 in
211 x 231 dots
A-5
Appendix A: Optional
Formats
Metric
English
Dots
9401/9402 System Administrator’s Guide
Format Name: FMT 84
Number:
84
Dimensions (h x w):
Metric
English
Dots
28.0 x 38.1 mm
1.1 x 1.5 in
211 x 288 dots
Format Name: FMT 85
Number:
85
Dimensions (h x w):
Metric
English
Dots
25.4 x 50.8 mm
1 x 2 in
192 x 384 dots
Format Set B
Format Name: FMT 54
Number:
54
Dimensions (h x w):
Metric
English
Dots
A-6
68.6 x 38.1 mm
2.7 x 1.5 in
519 x 288 dots
Appendix A: Optional Formats
Format Name: FMT 55
Number:
55
Dimensions (h x w):
Metric
English
Dots
68.6 x 38.1 mm
2.7 x 1.5 in
519 x 288 dots
Format Name: FMT 56
Number:
56
Dimensions (h x w):
Metric
English
Dots
40.6 x 30.5 mm
1.6 x 1.2 in
308 x 231 dots
Format Name: FMT 57
Number:
57
Dimensions (h x w):
Metric
English
Dots
40.6 x 30.5 mm
1.6 x 1.2 in
308 x 231 dots
Appendix A: Optional
Formats
A-7
9401/9402 System Administrator’s Guide
Format Name: FMT 58
Number:
58
Dimensions (h x w):
Metric
English
Dots
40.6 x 30.5 mm
1.6 x 1.2 in
308 x 231 dots
Format Name: FMT 59
Number:
59
Dimensions (h x w):
Metric
English
Dots
55.9 x 30.5 mm
2.2 x 1.2 in
423 x 231 dots
Format Name: FMT 60
Number:
60
Dimensions (h x w):
Metric
English
Dots
A-8
55.9 x 30.5 mm
2.2 x 1.2 in
423 x 231 dots
Appendix A: Optional Formats
Format Name: FMT 61
Number:
61
Dimensions (h x w):
Metric
English
Dots
30.5 x 55.9 mm
1.2 x 2.2 in
231 x 423 dots
Format Name: FMT 62
Number:
62
Dimensions (h x w):
Metric
English
Dots
69.9 x 30.5 mm
2.75 x 1.2 in
528 x 231 dots
Appendix A: Optional
Formats
A-9
9401/9402 System Administrator’s Guide
Format Name: FMT 63
Number:
63
Dimensions (h x w):
Metric
English
Dots
69.9 x 30.5 mm
2.75 x 1.2 in
528 x 231 dots
Format Name: FMT 64
Number:
64
Dimensions (h x w):
Metric
English
Dots
A-10
68.6 x 30.5 mm
2.7 x 1.2 in
519 x 231 dots
Appendix A: Optional Formats
Format Name: FMT 65
Number:
65
Dimensions (h x w):
Metric
English
Dots
25.4 x 20.3 mm
1.0 x 0.8 in
192 x 154 dots
Format Name: FMT 66
Number:
66
Dimensions (h x w):
Metric
English
Dots
27.9 x 30.5 mm
1.1 x 1.2 in
212 x 231 dots
Format Name: FMT 67
Number:
67
Dimensions (h x w):
Metric
English
Dots
27.9 x 30.5 mm
1.1 x 1.2 in
212 x 231 dots
Format Name: FMT 68
Number:
68
Dimensions (h x w):
Metric
English
Dots
27.9 x 30.5 mm
1.1 x 1.2 in
212 x 231 dots
Appendix A: Optional
Formats
A-11
9401/9402 System Administrator’s Guide
Format Name: FMT 69
Number:
69
Dimensions (h x w):
Metric
English
Dots
A-12
27.9 x 30.5 mm
1.1 x 1.2 in
212 x 231 dots
Appendix B: Data Stream
Examples
Appendix B
Data Stream Examples
This appendix lists the data streams for the three standard
formats, and the optional formats shown in Appendix A.
Use these data streams as examples when you create your
own data streams.
Standard Formats
Format Name:
FMT-1
Format Number:
96
{
F,96,A,R,E,138,200,"FMT-1"
T,1,18,V,094,008,0,1,1,1,B,L,0,0
R,20,"Line1:"
B,2,12,F,039,037,1,2,043,4,L,0
R,20,"UPCA Barcode:"
R,2,1
T,3,18,V,008,008,0,1,1,1,B,L,0,0
R,20,"Line2:"
}
p
p
p
p
p
p
p
p
Sample Batch Data Stream
{
B,96,N,10
1,"ABC123DEF456GHI789"
2,"12345678901"
3,"ABC123DEF456GHI789"
}
p
p
Dimensions (h x w):
Metric
English
Dots
35 x 50.8
1.38 x 2.0
265 x 384
p
p
B-1
9401/9402 System Administrator’s Guide
Format Name:
FMT-2
Format Number:
97
{
F,97,A,R,E,138,200,"FMT-2"
T,1,10,V,108,050,0,2,2,2,B,L,0,0
R,20,"Line1:"
T,2,10,V,083,050,0,2,2,2,B,L,0,0
R,20,"Line2:"
T,3,10,V,057,050,0,2,2,2,B,L,0,0
R,20,"Line3:"
T,4,10,V,031,050,0,2,2,2,B,L,0,0
R,20,"Line4:"
T,5,10,V,006,050,0,2,2,2,B,L,0,0
R,20,"Line5:"
}
p
p
p
p
p
p
p
p
p
p
Sample Batch Data Stream
{
B,97,N,10
1,"12345ABCDE"
2,"12345ABCDE"
3,"12345ABCDE"
4,"12345ABCDE"
5,"12345ABCDE"
}
p
B-2
p
p
p
p
p
p
Dimensions (h x w):
Metric
English
Dots
35 x 50.8
1.38 x 2.0
265 x 384
Format Name:
FMT-3
Format Number:
98
{
F,98,A,R,E,264,150,"FMT-3"
T,1,5,V,240,012,0,2,1,1,B,L,0,0
R,20,"Number:"
R,2,1
T,2,10,V,240,047,0,1,1,1,B,L,0,0
R,20,"Color:"
B,3,12,F,114,012,1,4,100,4,L,0
R,20,"UPCA Barcode:"
R,2,1
C,067,012,0,1,1,1,B,L,0,0,"Size:"
T,4,8,V,066,047,0,1,2,1,B,R,0,0
R,20,"Size:"
C,051,012,0,2,1,1,B,L,0,0,"Retail"
C,043,012,0,2,1,1,B,L,0,0,"Price"
C,028,012,0,2,1,1,B,L,0,0,"Our"
C,020,012,0,2,1,1,B,L,0,0,"Price"
T,5,8,V,043,047,0,1,1,1,B,R,0,0
R,42,1
R,20,"Retail Price:"
T,6,8,V,020,047,0,1,1,1,B,R,0,0
R,42,1
R,20,"Our Price:"
}
p
p
p
p
p
p
p
p
p
p
p
p
p
p
p
p
p
p
p
Dimensions (h x w):
Metric
English
Dots
67 x 38.1
2.64 x 1.5
507 x 288
p
p
p
Sample Batch Data Stream
{
B,98,N,10
1,"12345"
2,"ABCDEFGHIJ"
3,"12345678901"
4,"12AB34CD"
5,"123456"
6,"123456"
}
p
p
p
p
p
p
p
B-3
Appendix B: Data Stream
Examples
Appendix B: Data Stream Examples
9401/9402 System Administrator’s Guide
Optional Format Set A
Format Name: FMT 70
Format Number:
70
{
F,70,A,R,M,0956,0381,"Fmt 70"
T,001,03,V,0178,0046,0,1,1,1,B,L,0,1
R,20,"Class"
T,002,06,V,0300,0046,0,1,1,1,B,L,0,1
R,20,"Style"
T,003,03,V,0520,0046,0,1,1,1,B,L,0,1
R,20,"Vendor"
T,004,08,V,0178,0124,0,1,1,1,B,L,0,1
R,20,"Color"
T,005,06,V,0431,0124,0,1,1,1,B,L,0,1
R,20,"Size"
T,006,07,V,0008,0008,0,1,1,1,B,L,0,0
R,20,"Price"
R,42,1
T,007,03,V,0178,0243,0,1,1,1,B,L,0,1
R,4,1,1,3,1,2
R,5,N
T,008,06,V,0300,0243,0,1,1,1,B,L,0,1
R,4,2,1,6,1,2
R,5,N
T,009,03,V,0520,0243,0,1,1,1,B,L,0,1
R,4,3,1,3,1,2
R,5,N
T,010,08,V,0178,0313,0,1,1,1,B,L,0,1
R,4,4,1,8,1,2
R,5,N
T,011,06,V,0431,0313,0,1,1,1,B,L,0,1
R,4,5,1,6,1,2
R,5,N
T,012,07,V,0008,0193,0,1,1,1,B,L,0,0
R,4,6,1,7,1,1
R,5,N
}
p
p
p
p
p
p
p
p
p
p
p
p
p
p
p
p
p
p
p
p
p
p
p
p
p
p
p
p
p
p
p
p
p
p
p
{
B,70,N,3
1,"12A"
2,"MISSES"
3,"456"
4,"Lt. Blue"
5,"10"
6,"2999"
7,""
8,""
9,""
10,""
11,""
12,""
}
p
p
p
Sample Batch
Data Stream
p
p
p
p
p
p
B-4
p
Format Name: FMT 71
Format Number:
71
{
F,71,A,R,M,0686,0381,"Fmt 71"
C,0513,0050,0,2,1,1,B,L,0,0,"DEPT"
C,0513,0172,0,2,1,1,B,L,0,0,"CL"
C,0513,0266,0,2,1,1,B,L,0,0,"VEND"
C,0409,0088,0,2,1,1,B,L,0,0,"STYLE"
C,0409,0226,0,2,1,1,B,L,0,0,"SE"
C,0333,0050,0,2,1,1,B,L,0,0,"SIZE"
T,001,03,V,0541,0048,0,1,1,1,B,C,0,0
R,20,"Dept"
T,002,03,V,0541,0155,0,1,1,1,B,C,0,0
R,20,"Class"
T,003,03,V,0541,0263,0,1,1,1,B,C,0,0
R,20,"Vendor"
T,004,06,V,0437,050,0,1,1,1,B,C,0,0
R,20,"Style"
T,005,02,V,0437,0217,0,1,1,1,B,C,0,0
R,20,"Season"
T,006,06,V,0330,0140,0,1,1,1,B,C,0,0
R,20,"Size"
B,007,11,F,0218,0050,1,0,0076,7,L,0
R,20,"Barcode"
T,008,07,V,0097,0174,0,1,1,1,B,L,0,0
R,20,"Price"
R,42,1
}
p
p
p
p
p
p
p
p
p
p
p
p
p
p
p
p
p
p
Sample Batch
Data Stream
p
p
p
p
p
p
{
B,71,N,3
1,"123"
2,"ABC"
3,"951"
4,"INFANT"
5,"05"
6,"24 MOS"
7,"40012345678"
8,"1299"
}
p
p
p
p
p
p
p
p
p
B-5
Appendix B: Data Stream
Examples
Appendix B: Data Stream Examples
9401/9402 System Administrator’s Guide
Format Name: FMT 72
Format Number:
72
{
F,72,A,R,M,0686,0304,"Fmt 72"
C,0513,0035,0,2,1,1,B,L,0,0,"DEPT"
C,0513,0137,0,2,1,1,B,L,0,0,"CL"
C,0513,0222,0,2,1,1,B,L,0,0,"SE"
C,0409,0035,0,2,1,1,B,L,0,0,"VEND"
C,0409,0163,0,2,1,1,B,L,0,0,"STYLE"
C,0333,0035,0,2,1,1,B,L,0,0,"SIZE"
T,1,3,V,0541,0030,0,1,1,1,B,C,0,0
R,20,"Dept"
T,2,3,V,0541,0115,0,1,1,1,B,C,0,0
R,20,"Class"
T,3,2,V,0541,0215,0,1,1,1,B,C,0,0
R,20,"Season"
T,4,3,V,0437,0030,0,1,1,1,B,C,0,0
R,20,"Vendor"
T,5,6,V,0437,0135,0,1,1,1,B,C,0,0
R,20,"Style"
T,6,6,V,0328,0127,0,1,1,1,B,L,0,0
R,20,"Size"
B,7,11,F,0216,0015,1,0,0076,8,L,0
R,20,"Barcode"
T,8,7,V,0097,0095,0,1,1,1,B,L,0,0
R,20,"Price"
R,42,1
}
p
p
p
p
p
p
p
p
p
p
p
p
p
p
p
p
p
Sample Batch
Data Stream
p
p
p
p
p
p
p
{
B,72,N,2
1,"123"
2,"123"
3,"12"
4,"123"
5,"123456"
6,"123456"
7,"12345678901"
8,"99999"
}
p
p
p
p
p
p
p
p
B-6
p
Format Name: FMT 73
Format Number:
73
{
F,73,A,R,M,0698,0383,"Fmt 73"
C,0513,0035,0,2,1,1,B,L,0,0,"DEPT"
C,0513,0137,0,2,1,1,B,L,0,0,"CL"
C,0513,0222,0,2,1,1,B,L,0,0,"SE"
C,0409,0035,0,2,1,1,B,L,0,0,"VEND"
C,0409,0163,0,2,1,1,B,L,0,0,"STYLE"
C,0333,0035,0,2,1,1,B,L,0,0,"SIZE"
T,1,03,V,0541,0030,0,1,1,1,B,C,0,0
R,20,"Dept"
T,2,03,V,0541,0115,0,1,1,1,B,C,0,0
R,20,"Class"
T,3,02,V,0541,0215,0,1,1,1,B,C,0,0
R,20,"Season"
T,4,03,V,0437,0030,0,1,1,1,B,C,0,0
R,20,"Vendor"
T,5,06,V,0437,0135,0,1,1,1,B,C,0,0
R,20,"Style"
T,6,06,V,0318,0107,0,1,2,1,B,L,0,0
R,20,"Size"
T,7,10,V,0236,0033,0,1,1,1,B,L,0,0
R,20,"Description"
T,8,07,V,0097,0095,0,1,1,1,B,L,0,0
R,20,"Price"
R,42,1
}
p
p
p
p
p
p
p
p
p
p
p
p
p
p
p
p
p
p
p
p
p
p
p
p
Sample Batch
Data Stream
{
B,73,N,3
1,"001"
2,"2"
3,"SP"
4,"KMT"
5,"SPRTWR"
6,"Medium"
7,"Jumpsuit"
8,"2999"
}
p
p
p
p
p
p
p
p
p
B-7
Appendix B: Data Stream
Examples
Appendix B: Data Stream Examples
9401/9402 System Administrator’s Guide
Format Name: FMT 74
Format Number:
74
{
F,74,A,R,M,0305,0559,"Fmt 74"
T,001,03,V,0275,0437,0,1,1,1,B,L,0,3
R,20,"Dept"
T,002,03,V,0200,0437,0,1,1,1,B,L,0,3
R,20,"Class"
T,003,03,V,0100,0437,0,1,1,1,B,L,0,3
R,20,"Vendor"
T,004,06,V,0259,0373,0,1,1,1,B,L,0,3
R,20,"Style"
T,005,02,V,0089,0373,0,1,1,1,B,L,0,3
R,20,"Color"
B,006,11,F,0233,0355,1,0,190,7,L,2
R,20,"Barcode"
T,007,07,V,0200,0030,0,1,1,1,B,L,0,3
R,20,"Price"
R,42,1
}
p
p
p
p
p
p
p
p
p
p
p
p
p
p
p
Sample Batch Data
Stream
{
B,74,N,3
1,"123"
2,"123"
3,"123"
4,"123456"
5,"12"
6,"40000123456"
7,"99999"
}
p
p
p
p
p
p
p
B-8
p
p
Format Name: FMT 75
Format Number:
75
{
F,75,A,R,M,0305,0559,"Fmt 75"
T,001,03,V,048,0470,0,1,1,1,B,L,0,2
R,20,"Dept"
T,002,03,V,048,0325,0,1,1,1,B,L,0,2
R,20,"Class"
T,003,03,V,048,0180,0,1,1,1,B,L,0,2
R,20,"Vendor"
B,004,11,F,0163,0423,1,0,0076,7,L,2
R,20,"Barcode"
T,005,06,V,0252,0447,0,1,1,1,B,L,0,2
R,20,"Style"
T,006,06,V,0252,0264,0,1,1,1,B,L,0,2
R,20,"Size"
T,007,07,V,0221,0020,0,1,1,1,B,C,0,3
R,20,"Price"
R,42,1
}
p
p
p
p
p
p
p
p
p
p
p
p
p
p
p
p
Sample Batch Data
Stream
{
B,75,N,3
1,"123"
2,"123"
3,"123"
4,"12345678910"
5,"123456"
6,"Large"
7,"99999"
}
p
p
p
p
p
p
p
p
B-9
Appendix B: Data Stream
Examples
Appendix B: Data Stream Examples
9401/9402 System Administrator’s Guide
Format Name: FMT 76
Format Number:
76
{
F,76,A,R,M,0305,0559,"Fmt 76"
C,0280,0175,0,1,1,1,B,L,0,3,"SIZE"
T,001,03,V,0275,0427,0,1,1,1,B,L,0,3
R,20,"Dept"
T,002,03,V,0175,0427,0,1,1,1,B,L,0,3
R,20,"Class"
T,003,03,V,0075,0427,0,1,1,1,B,L,0,3
R,20,"Vendor"
T,004,06,V,0259,0338,0,1,1,1,B,L,0,3
R,20,"Style"
T,005,02,V,0069,0338,0,1,1,1,B,L,0,3
R,20,"Color"
T,006,10,V,0000,0257,0,1,1,1,B,L,0,3
R,20,"Description"
T,007,06,V,0175,0175,0,1,1,1,B,L,0,3
R,20,"Size"
T,008,07,V,0200,0101,0,1,1,1,B,L,0,3
R,20,"Price"
R,42,1
}
p
p
p
p
p
p
p
p
p
p
p
p
p
p
p
p
p
p
Sample Batch Data
Stream
{
B,76,N,3
1,"076"
2,"2"
3,"LAZ"
4,"CASUAL"
5,"BL"
6,"Jumpsuit"
7,"Small"
8,"9999"
}
p
p
p
p
p
p
p
p
B-10
p
p
Format Name: FMT 77
Format Number:
77
{
F,77,A,R,M,0559,0305,"Fmt 77"
T,001,03,V,0401,0035,0,1,1,1,B,L,0,0
R,20,"Dept"
T,002,03,V,0401,0185,0,1,1,1,B,L,0,0
R,20,"Class"
T,003,03,V,0325,0035,0,1,1,1,B,L,0,0
R,20,"Vendor"
T,004,06,V,0325,0142,0,1,1,1,B,L,0,0
R,20,"Style"
B,005,11,F,0216,0018,1,0,063,1,L,0
R,20,"Barcode"
T,006,1,F,0178,0020,0,2,1,1,B,L,0,0
R,4,005,1,1,1,1
R,5,N
T,007,1,F,0178,0250,0,2,1,1,B,L,0,0
R,4,005,12,1,1,1
R,5,N
T,008,07,V,0120,0112,0,1,1,1,B,L,0,0
R,20,"Price"
R,42,1
}
p
p
p
p
p
p
p
p
p
p
p
p
p
p
p
p
p
p
p
p
Sample Batch Data Stream
{
B,77,N,3
1,"123"
2,"123"
3,"123"
4,"123456"
5,"01234567890"
6,""
7,""
8,"99999"
}
p
p
p
p
p
p
p
p
p
B-11
Appendix B: Data Stream
Examples
Appendix B: Data Stream Examples
9401/9402 System Administrator’s Guide
Format Name: FMT 78
Format Number:
78
{
F,78,A,R,M,0559,0305,"Fmt 78"
C,0236,0038,0,2,1,1,B,L,0,0,"SIZE"
C,0132,0038,0,2,1,1,B,L,0,0,"WAS"
C,0078,0038,0,2,1,1,B,L,0,0,"NOW"
T,001,03,V,0401,0038,0,1,1,1,B,L,0,0
R,20,"Dept"
T,002,03,V,0401,0175,0,1,1,1,B,L,0,0
R,20,"Class"
T,003,03,V,0317,0038,0,1,1,1,B,L,0,0
R,20,"Vendor"
T,004,06,V,0317,0125,0,1,1,1,B,L,0,0
R,20,"Style"
T,005,06,V,0233,0125,0,1,1,1,B,L,0,0
R,20,"Size"
T,006,07,V,0129,0116,0,1,1,1,B,L,0,0
R,20,"Was Price"
R,42,1
T,007,07,V,0075,0114,0,1,1,1,B,L,0,0
R,20,"Now Price"
R,42,1
}
p
p
p
p
p
p
p
p
p
p
p
p
p
p
p
p
p
p
p
Sample Batch Data Stream
{
B,78,N,3
1,"123"
2,"123"
3,"123"
4,"123456"
5,"123456"
6,"99999"
7,"99999"
}
p
p
p
p
B-12
p
p
p
p
p
Format Name: FMT 79
Format Number:
79
{
F,79,A,R,M,0406,0305,"Fmt 79"
C,0128,0020,0,2,1,1,B,L,0,0,"SIZE"
T,001,03,V,0275,0020,0,1,1,1,B,L,0,0
R,20,"Dept"
T,002,03,V,0275,0175,0,1,1,1,B,L,0,0
R,20,"Class"
T,003,03,V,0199,0020,0,1,1,1,B,L,0,0
R,20,"Vendor"
T,004,06,V,0199,0130,0,1,1,1,B,L,0,0
R,20,"Style"
T,005,06,V,0128,0130,0,1,1,1,B,L,0,0
R,20,"Size"
T,006,07,V,0034,0112,0,1,1,1,B,L,0,0
R,20,"Price"
R,42,1
}
p
p
p
p
p
p
p
p
p
p
p
p
p
p
p
Sample Batch Data Stream
{
B,79,N,3
1,"123"
2,"123"
3,"123"
4,"123456"
5,"XLARGE"
6,"99999"
}
p
p
p
p
p
p
p
B-13
Appendix B: Data Stream
Examples
Appendix B: Data Stream Examples
9401/9402 System Administrator’s Guide
Format Name: FMT 80
Format Number:
80
{
F,80,A,R,M,0406,0305,"Fmt 80"
T,001,03,V,0291,0020,0,1,1,1,B,L,0,0
R,20,"Dept"
T,002,03,V,0291,0190,0,1,1,1,B,L,0,0
R,20,"Class"
T,003,03,V,0232,0020,0,1,1,1,B,L,0,0
R,20,"Vendor"
T,004,06,V,0232,0132,0,1,1,1,B,L,0,0
R,20,"Style"
B,005,11,F,0122,0010,1,0,78,1,L,0
R,20,"Barcode"
T,006,1,F,082,010,0,2,1,1,B,L,0,0
R,4,005,1,1,1,1
R,5,N
T,007,1,F,082,0240,0,2,1,1,B,L,0,0
R,4,005,12,1,1,1
R,5,N
T,008,07,V,0042,0120,0,1,1,1,B,L,0,0
R,20,"Price"
R,42,1
}
p
p
p
p
p
p
p
p
p
p
p
p
p
p
p
p
p
p
p
Sample Batch Data Stream
{
B,80,N,3
1,"111"
2,"222"
3,"333"
4,"444444"
5,"55555555555"
6,""
7,""
8,"99999"
}
p
p
p
p
p
p
p
p
B-14
p
p
Format Name: FMT 81
Format Number:
81
{
F,81,A,R,M,0280,0305,"Fmt 81"
B,001,11,F,0120,0020,1,0,0076,8,L,0
R,20,"Barcode"
T,002,03,V,0064,0027,0,1,1,1,B,L,0,0
R,20,"Dept"
T,003,06,V,0064,0136,0,1,1,1,B,L,0,0
R,20,"Style"
T,004,07,V,0018,0086,0,1,1,1,B,L,0,0
R,20,"Price"
R,42,1
}
p
p
p
p
p
p
p
p
p
p
Sample Batch Data Stream
{
B,81,N,3
1,"11111111111"
2,"222"
3,"333333"
4,"99999"
}
p
p
p
p
p
B-15
Appendix B: Data Stream
Examples
Appendix B: Data Stream Examples
9401/9402 System Administrator’s Guide
Format Name: FMT 82
Format Number:
82
{
F,82,A,R,M,0280,0305,"Fmt 82"
C,0080,0025,0,2,1,1,B,L,0,0,"REG. PRICE"
C,0027,0025,0,2,1,1,B,L,0,0,"SALE PRICE"
B,001,11,F,0140,0017,1,0,0076,8,L,0
R,20,"Barcode"
T,002,07,V,0079,0135,0,1,1,1,B,L,0,0
R,20,"Reg. Price"
R,42,1
T,003,07,V,0026,0135,0,1,1,1,B,L,0,0
R,20,"Sale Price"
R,42,1
}
p
p
p
p
p
p
p
p
p
Sample Batch Data Stream
{
B,82,N,3
1,"12345678901"
2,"99999"
3,"99999"
}
p
p
p
B-16
p
p
p
Format Name: FMT 83
Format Number:
83
{
F,83,A,R,M,0280,0305,"Fmt 83"
C,0188,0030,0,2,1,1,B,L,0,0,"DEPT"
C,0188,0116,0,2,1,1,B,L,0,0,"CLASS"
C,0188,0218,0,2,1,1,B,L,0,0,"SEA"
C,0086,0157,0,2,1,1,B,L,0,0,"STYLE"
C,0089,0033,0,2,1,1,B,L,0,0,"VEND"
T,001,03,V,0213,0022,0,1,1,1,B,C,0,0
R,20,"Dept"
T,002,03,V,0213,0119,0,1,1,1,B,C,0,0
R,20,"Class"
T,003,02,V,0213,0215,0,1,1,1,B,C,0,0
R,20,"Season"
T,004,03,V,0117,0025,0,1,1,1,B,C,0,0
R,20,"Vendor"
T,005,06,V,0117,0144,0,1,1,1,B,C,0,0
R,20,"Style"
T,006,07,V,0028,0122,0,1,1,1,B,L,0,0
R,20,"Price"
R,42,1
}
p
p
p
p
p
p
p
p
p
p
p
p
p
p
p
p
p
p
p
Sample Batch Data Stream
{
B,83,N,3
1,"123"
2,"123"
3,"12"
4,"123"
5,"123456"
6,"99999"
}
p
p
p
p
p
p
p
B-17
Appendix B: Data Stream
Examples
Appendix B: Data Stream Examples
9401/9402 System Administrator’s Guide
Format Name: FMT 84
Format Number:
84
{
F,84,A,R,M,0280,0381,"Fmt 84"
C,0173,0020,0,2,1,1,B,C,0,0,"DEPT"
C,0173,0111,0,2,1,1,B,C,0,0,"CLASS"
C,0173,0235,0,2,1,1,B,C,0,0,"STYLE"
T,001,03,V,0198,0012,0,1,1,1,B,C,0,0
R,20,"Dept"
T,002,03,V,0198,0111,0,1,1,1,B,C,0,0
R,20,"Class"
T,003,06,V,0198,0202,0,1,1,1,B,C,0,0
R,20,"Style"
B,004,11,F,0087,0057,1,0,0076,7,L,0
R,20,"Barcode"
T,005,07,V,0013,0111,0,1,1,1,B,C,0,0
R,20,"Price"
R,42,1
}
p
p
p
p
p
p
p
p
p
p
p
p
p
p
Sample Batch Data Stream
{
B,84,N,3
1,"111"
2,"222"
3,"33333"
4,"77777777777"
5,"99999"
}
p
p
p
p
p
B-18
p
p
Format Name: FMT 85
Format Number:
85
{
F,85,A,R,M,0254,0508,"Fmt 85"
C,0018,0025,0,2,1,1,B,L,0,0,"NOW"
T,001,03,V,0155,0025,2,2,2,1,B,L,0,0
R,20,"Dept"
T,002,03,V,0155,0085,2,2,2,1,B,L,0,0
R,20,"Class"
T,003,03,V,0155,0142,2,2,2,1,B,L,0,0
R,20,"Vendor"
T,004,06,V,0092,0025,2,2,2,1,B,L,0,0
R,20,"Style"
T,005,02,V,0092,0148,2,2,2,1,B,L,0,0
R,20,"Season"
T,006,07,V,0018,0070,0,1,1,1,B,L,0,0
R,20,"Price"
R,42,1
C,0018,0279,0,2,1,1,B,L,0,0,"NOW"
T,007,03,V,0155,0279,2,2,2,1,B,L,0,0
R,4,1,1,3,1,2
R,5,N
T,008,03,V,0155,0339,2,2,2,1,B,L,0,0
R,4,2,1,3,1,2
R,5,N
T,009,03,V,0155,0396,2,2,2,1,B,L,0,0
R,4,3,1,3,1,2
R,5,N
T,010,06,V,0092,0279,2,2,2,1,B,L,0,0
R,4,4,1,6,1,2
R,5,N
T,011,02,V,0092,0402,2,2,2,1,B,L,0,0
R,4,5,1,2,1,1
R,5,N
T,012,07,V,0018,0324,0,1,1,1,B,L,0,0
R,4,6,1,7,1,1
R,5,N
}
p
p
p
p
p
p
p
p
p
p
p
p
p
p
Sample Batch
Data Stream
{
B,85,N,3
1,"JWL"
2,"24K"
3,"159"
4,"WATCH"
5,"01"
6,"22999"
7,""
8,""
9,""
10,""
11,""
12,""
}
p
p
p
p
p
p
p
p
p
p
p
p
p
p
p
p
p
p
p
p
p
p
p
p
p
p
p
p
p
p
p
p
p
B-19
Appendix B: Data Stream
Examples
Appendix B: Data Stream Examples
9401/9402 System Administrator’s Guide
Optional Format Set B
Format Name:
Number:
FMT 54
54
{
F,54,A,R,E,0270,0150,"FMT 54"
T,001,04,V,0110,0018,00,1,1,1,B,L,0,1
R,20,"CLASS:"
T,002,07,V,0170,0018,0,1,1,1,B,L,0,1
R,20,"STYLE:"
T,003,15,V,0110,0065,0,1,1,1,B,L,0,1
R,20,"DESCRIPTION:"
T,004,04,V,0070,0005,00,003,01,01,B,C,0,0
R,20,"SIZE:"
T,005,07,V,0010,0003,00,002,02,02,B,C,0,0
R,20,"PRICE:"
R,42,1
T,006,16,V,0110,0040,00,002,02,02,B,C,0,1
R,20,"STORE NAME:"
T,007,04,V,0110,0096,0,1,1,1,B,L,0,1
R,4,001,001,004,001,1
R,5,N
T,008,07,V,0170,0096,00,001,01,01,B,L,0,1
R,4,002,001,007,001,1
R,5,N
T,009,15,V,0110,0140,00,001,01,01,B,L,0,1
R,4,003,001,015,001,1
R,5,N
T,010,04,V,0070,0080,00,003,01,01,B,C,0,0
R,4,004,001,004,001,1
R,5,N
T,011,07,V,0010,0076,00,002,02,02,B,C,0,0
R,4,005,001,007,001,1
R,5,N
T,012,16,V,0110,0118,00,002,02,02,B,C,0,1
R,4,006,001,016,001,1
R,5,N
}
p
p
p
p
p
p
p
p
p
p
p
p
p
p
Sample Batch
Data Stream
p
p
p
p
p
p
p
p
p
p
p
p
p
p
p
p
p
p
p
p
p
p
B-20
7,""
8,""
9,""
10,""
11,""
12,""
p
p
p
{B,54,N,1
1,"8978"
2,"6384685"
3,"TODDLER PLAYTOG"
4,"MED"
5,"1999"
6,"LINDA’S BOUTIQUE"
p
p
p
p
p
p
Appendix C
Printable Characters
You can also use codes to enter function codes for Code 128
bar codes.
Entering Special Characters in Data Streams
When creating data streams for downloading, place the
character code in the data stream by entering a tilde (~)
followed by the 3-digit code.
For example, the character é is represented by ~130.
This appendix lists supported character codes and their
corresponding characters.
Code 128 Function Codes
Online
Code
Offline
Code
Function
Code
~201
Pause 201
F1
~202
Pause 202
F2
~203
Pause 203
F3
~204
Pause 203
F4
C-1
Appendix C: Extended
Character Sets
You can use character codes to enter characters other than
those shown in the font samples for Standard and Reduced
fonts.
9401/9402 System Administrator’s Guide
Function Codes For Special Characters
Char.
Online
Code
Ç
~128
ü
~129
é
~130
â
~131
ä
~132
à
~133
å
~134
ç
~135
ê
~136
ë
~137
è
~138
ï
~139
î
~140
ì
~141
Ä
~142
Å
~143
É
~144
æ
~145
Æ
~146
ô
~147
ö
~148
ò
~149
û
~150
ù
~151
ÿ
~152
α
~224
C-2
7
7
7
7
7
77
7
7
7
7
7
7
77
77
7
77
7
7
7
7
7
7
Offline
Code
Char.
Online
Code
128
Ö
~153
129
Ü
~154
130
¢
~155
131
L.
~156
132
¥
~157
133
Pt
~158
134
ƒ
~159
135
á
~160
136
í
~161
137
ó
~162
138
ú
~163
139
ñ
~164
140
Ñ
~165
141
ª
~166
142
º
~167
143
¿
~168
144
~169
145
¬
~170
146
1⁄2
~171
147
1⁄4
~172
148
¡
~173
149
«
~174
150
»
~175
151
Ø
~210
152
ø
~214
224
ß
~225
7
7
7
7
77
7
7
7
7
7
7
7
7
7
7
77
77
7
7
7
7
7
7
Offline
Code
153
154
155
156
157
158
159
160
161
162
163
164
165
166
167
168
169
170
171
172
173
174
175
210
214
225
Appendix D
Format Design Tools
Use these format design tools to create formats and keep a
permanent record of format parameters. Make copies of these
worksheets and work from the copies. This appendix contains
these tools.
Format Worksheet
Sample Worksheet
Supply Layout Grids
Appendix D: Format
Design Tools
Batch Worksheet
Check Digit Worksheet
Data Entry Guide
FORMAT WORKSHEET
D-1
9401/9402 System Administrator’s Guide
Batch
Header
QUANTITY
B4
Batch
Data
B
Field # Data
1
2
3
4
5
6
7
8
9
10
11
12
13
14
D-2
FORMAT #
B1 B2 B3
HEADER
NEW / UPDATE
Batch Worksheet
A
ACTION
DEVICE
MODULUS
LENGTH
ALGORITHM
A1
SELECTOR #
HEADER
SELECTOR #
ACTION
DEVICE
MODULUS
LENGTH
ALGORITHM
HEADER
SELECTOR #
ACTION
DEVICE
MODULUS
LENGTH
ALGORITHM
HEADER
SELECTOR #
ACTION
DEVICE
MODULUS
LENGTH
ALGORITHM
WEIGHTS
A1
A2
A3
A4
A5
A6
A7
A8
A
WEIGHTS
A1
A2
A3
A4
A5
A6
A7
A8
A
A
WEIGHTS
A1
A2
A3
A4
A5
A6
A7
A8
A
WEIGHTS
A2
A3
A4
A5
A6
A7
A8
Appendix D: Format
Design Tools
HEADER
Appendix D: Format Design Tools
Check Digit Worksheet
A
A
A
D-3
9401/9402 System Administrator’s Guide
D-4
Data Entry Guide
Use this sheet to print supplies using Format: _____________.
The supply size is: __________w x ___________h.
Follow the steps below to print supplies.
1. Turn on the printer. Press and hold
8
until you see Main Menu.
2. When you see each prompt below, follow the instruction to the right of the box.
3.
Press
MAIN MENU
<
>
1 or 2
until you see Batch Entry.
4.
MAIN MENU
< Batch Entry >
Press
6.
5.
FORMAT TYPE
< Standard
Press
1 or 2
until you see
6.
SELECT FORMAT:
format name
Press
1 or 2
until you see
7.
8.
9.
10.
11.
12.
, then press
6.
, then press
6.
13.
14.
15.
16.
17.
18.
19.
20.
21.
22.
23.
24.
25.
26.
Index
A
applying field options 3-1
B
cable interface 7-6
calling for service 13-12
capacity, printer 8-6
character rotation 2-26
character sets
syntax 11-22
characters
fixed 2-5
check digits 2-6
clearing schemes 4-5
description 4-1
files 6-13
generating 4-3
in copied fields 4-4
maximum stored 8-6
samples 4-5
scheme 4-2
structure 11-35
sum of products 4-5
syntax 11-27, 11-35
syntax checklist 11-36
verifying 4-4
worksheet D-3
check list
bar codes 11-10
batch data 11-34
batches 11-32
boxes 11-18
check digits 11-36
constant text overlays 11-14
field options 11-29
format 11-30
format header 11-4
lines 11-16
non-printable text 11-11
printing 8-1
text fields 11-7
checking
print 13-5
scanner 13-11
software version 13-4
supply quality 13-7
printer memory 13-9
Index 1
Index
backing up
formats 10-3
bar code
defining 2-29 - 2-32
density 2-31
height 2-32
human readable 2-32
type 2-30
bar codes 2-3, 2-28
list of 12-5
structure 11-8
syntax 11-8
syntax checklist 11-10
batch data 5-1, 6-14
guidelines 5-5
preparing 5-2
structure 11-33
syntax 11-33
batch header 5-2, 11-31
syntax 11-31
batches
backing up 10-3
creating 10-2
downloading 8-5
keypad entry 8-5
maximum stored 8-6
printing 8-5
syntax checklist 11-32
worksheet D-2
batcking up
batches 10-3
baud rate 7-2
boxes 2-4, 2-39
structure 11-17
syntax 11-17
syntax checklist 11-18
thickness 2-40
C
9401/9402 System Administrator’s Guide
clearing formats 8-4
column location
bar code 2-30
communication
requirements 7-1
values 7-2 - 7-3
configuring the printer 7-1
constant text overlay 2-23
constant text overlays 2-4, 3-3
structure 11-12
syntax 11-12
syntax check list 11-14
copy fields 2-5, 3-13, 3-16
syntax 11-24
creating
batch data files 6-14
batch files 10-2
check digit files 6-13
D
daily procedures 10-1
data entry
instructions 10-1
guide D-1
data entry prompts 3-18
data entry sources 3-17
data entry templates 3-6
data flow control 7-2
data stream structure 11-1
data streams 6-1
and special characters 12-1
downloading 11-37
data type restriction
dates 3-11
data type restrictions 3-6, 3-9
date fields 3-11
decrementing fields 2-6
defining
bar codes 2-29 - 2-32
bar codes 2-28
boxes 2-39
character sets 3-6
check digits 4-2
constant text overlay 2-23
data entry prompts 3-18
data entry sources 3-17
date fields 3-11
fixed characters 3-3
fixed data 3-3
Index 2
lines 2-36
merged fields 3-16
non-printable text 2-34
partial fixed characters 3-5
passwords 1-8
price fields 3-20
prompts 2-5
restrictions 3-6, 3-9
templates 3-9
text fields 2-13
time fields 3-11
deleting
formats 9-1 - 9-2
density selector 2-31
designing
format header 2-10
formats 2-1 - 2-2, 6-2
destination fields 3-14
dimensions, field 2-29
downloading
batch files 10-2
batches 8-5
duplications 8-3
formats 8-2
from MS-DOS 8-2
from other computers 8-3
packets 11-37
duplicate downloads 8-3
duplicate memory card 8-4
E
equipment requirements 1-2
exception packets
structure 11-41
syntax 11-41
F
field
bar code 2-29 - 2-32
bottom 2-30
field options 3-1
structure 11-19
syntax 11-19
syntax checklist 11-29
fixed characters 2-5, 3-5, 5-3
pad fields 3-19
syntax 11-20
Index
fixed data 3-3
font
bar code 2-30
format
bar codes 2-29 - 2-32
syntax check list 11-30
format header 2-10
structure 11-3
syntax 11-3
syntax check list 11-4
format tracking 8-3
formats
backing up 10-3
clearing 8-4
creating 6-2
deleting 9-1
description of 1-2
design tools D-1
downloading 8-2
maximum stored 8-6
memory card duplication 8-4
modifying 9-1
number of 8-4
optional 1-6
samples A-1 - A-12
standard 1-3
transferring to printers 6-1
G
graphics 2-4
grids 2-2, 2-17, D-1
process 11-40
using scanners 11-42
K
keypad entry 8-5
L
labels
test print 13-5
layout grids D-1
lines 2-4, 2-36
structure 11-15
syntax 11-15
syntax check list 11-16
thickness 2-38, 12-6
logos 2-4
M
maximum print area 2-7
measurement
of field 2-29
memory card
duplications 8-4
memory usage
checking 13-9
merged fields 2-5, 3-16
mergied fields 5-3
mode command 7-5
monetary symbol 2-5
H
I
incrementing fields 2-6, 3-2, 3-21,
5-4
entering data 3-22
fixed starting number 3-22
syntax 11-28
interactive mode 11-40
N
Index
height
bar code 2-32
defining 2-32
human readable characters 2-32
non-printable text 2-3, 2-34
structure 11-11
syntax 11-11
syntax check list 11-11
numeric fields 2-6
incrementing 3-21
O
on-line communication 7-1
option numbers 11-19
optional formats A-1 - A-12
Index 3
9401/9402 System Administrator’s Guide
P
packet
bar codes 2-29 - 2-32
packets 11-1
downloading 11-37
pad data
syntax 11-26
pad fields 3-19
parity 7-2
partial fixed characters 3-5
password entry
21-key keypad 13-2
5-key keypad 13-1
computer keyboard 13-3
passwords 1-8
setting 13-1 - 13-2
pin assignments 7-6
pivot point 2-29
price fields 3-20
prices 2-5
syntax 11-27
print area 2-7
print logs 10-2
printer configuration 7-1
printer memory usage
checking 13-9
printer status codes 11-41
printer storage capacity 8-6
printing
check list 8-1
products, sum of 4-5
prompts 2-5
eliminating 3-17
syntax 11-26
Q
quality of supply 13-7
R
requirements 1-2
communication 7-1
restricted data type
syntax 11-21
restrictions
character position 3-9
data type 3-6
Index 4
field 3-6
general 3-6
of format tracking 8-3
valid dates 3-11
return codes 11-41
row location
bar code 2-30
S
sample formats A-1 - A-12
scanner
in interactive mode 11-42
testing 13-11
segments 2-36
sending
batch data 5-1
packets 11-37
service, calling for 13-12
setting
communication values 7-3
setup 7-3
sofware version 13-4
special characters
in data streams 12-1
status codes 11-41
stop bits 7-2
sub-fields 2-5, 3-16, 5-3
sum of products 4-5
supply layout 2-2, 2-17
grids D-1
supply quality
checking 13-7
syntax
bar codes 11-8
batch header 11-31
boxes 11-17
character sets 11-22
check digits 11-27, 11-35
constant text overlays 11-12
copy fields 11-24
exception packets 11-41
field options 11-19
fixed characters 11-20
format header 11-3
incrementing fields 11-28
lines 11-15
non-printable text 11-11
pad data 11-26
prices 11-27
Index
prompts 11-26
restricted data type 11-21
templates 11-22
text fields 11-5
T
templates 3-6
syntax 11-22
test labels
printing 13-5
text fields 2-13
character height 12-3
character width 12-4
fonts 2-14, 12-1
height 2-16
rotation 2-21
structure 11-5
syntax 11-5
syntax check list 11-7
width 2-17
time fields 3-11
transmitting data 11-37
V
vectors 2-39
version of software 13-4
W
Index
word length 7-2
worksheet 2-1, D-1
batch D-1
check digit D-1
format header 2-10
sketches 2-8
text fields 2-13
Index 5
9401/9402 System Administrator’s Guide
Index 6
For supplies, service, or assistance call:
TOLL FREE:
1-800-543-6650 (Inthe U.S.A.)
1-800-263-4650 (In Canada)
Published by Technical Communications Department.
Printed in the U.S.A.