1
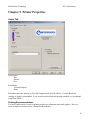
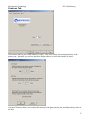
PF-2 PrintFactory
Users Manual
Microboards Technology LLC
www.microboards.com
Version 1.1
Microboards Technology
PF-2 PrintFactory
2
Microboards Technology
PF-2 PrintFactory
Table of Contents
Chapter 1 Introduction............................................................................................................................ 4
Chapter 2 Printer Description .................................................................................................................. 5
Front Panel Indicators and Buttons....................................................................................................... 5
What’s Included.................................................................................................................................... 5
Chapter 3 Installation............................................................................................................................... 6
Installing Ink Cartridges ....................................................................................................................... 6
Supported Ink Cartridges.................................................................................................................. 6
Ink cartridge troubleshooting............................................................................................................ 6
Loading / Replacing Ink Cartridges.................................................................................................. 6
Installing Disc Guide and Output Bin .................................................................................................. 7
Connecting to a Computer .................................................................................................................... 7
Parallel Port ...................................................................................................................................... 7
USB Port........................................................................................................................................... 7
Installing the Printer Driver .................................................................................................................. 8
USB Port and Parallel Port ............................................................................................................... 8
Windows 2000 install procedures:.................................................................................................... 8
Windows XP install procedures: .................................................................................................... 11
Multiple Printers ............................................................................................................................. 14
Installing SureThing CD Labeler Software ........................................................................................ 15
Chapter 4 Using the Printer ................................................................................................................... 19
Test and Alignment............................................................................................................................. 19
Print Test Disc ................................................................................................................................ 19
Align Disc....................................................................................................................................... 20
Loading Discs ..................................................................................................................................... 23
Printing Discs...................................................................................................................................... 24
Printing on Verbatim Vinyl CD-R discs............................................................................................. 28
Chapter 5 Printer Properties................................................................................................................... 30
Setup Tab ............................................................................................................................................ 30
Printing Recommendations............................................................................................................. 30
Features Tab........................................................................................................................................ 33
Color Tab ............................................................................................................................................ 34
Utility Tab........................................................................................................................................... 34
Print test CD ................................................................................................................................... 35
Print Alignment CD........................................................................................................................ 36
Clean Cartridge............................................................................................................................... 37
Ink Level......................................................................................................................................... 38
Chapter 6 Solve a Problem .................................................................................................................... 39
Chapter 7 Product Specifications........................................................................................................... 40
Chapter 8 Contact Information .............................................................................................................. 41
3
Microboards Technology
PF-2 PrintFactory
Chapter 1 Introduction
PF-2 PrintFactory is an automated CD-R and DVD-R printing solution. PF-2 PrintFactory
combines Microboards' patented autoloading system with Hewlett Packard's inkjet printer
engine, giving the highest output possible. PF-2 PrintFactory has a 100-disc capacity, making
the task of printing large numbers of discs fast, easy and hands-free.
Fully Integrated Automation
Microboards combined their patented autoloading system with HP's new inkjet printer engine
to give users the highest output possible, both in image resolution and print speed. Since PF2 PrintFactory is an autoloading printer, no calibration of robotics or manual feeding of discs
is required. PF-2 PrintFactory connects by USB or Parallel interface to the computer, and
comes with label design software.
Flexibility and Speed for Any Application
While the PF-2 PrintFactory was designed to fill a need in the high-volume arena, it also has
the ability to print at 4800 x 1200 dpi on both DVD and CD media. With the included design
software, users can enjoy its benefits whether making a few discs or a few hundred. The PF2 PrintFactory is capable of producing up to 200 discs per hour.
4
Microboards Technology
PF-2 PrintFactory
Chapter 2 Printer Description
Front Panel Indicators and Buttons
1) Cancel Button – Pressing the Cancel button cancels the current print job.
2) Print Cartridge Status Light – The light inside the Print Cartridge Status symbol flashes when a
print cartridge is low on ink or incorrectly installed, or the printer’s cover is open.
3) Resume Button and Light – The Resume light flashes when an action is required, such as
loading a disc or clearing a jam. When the action is completed, press the resume button to
continue printing.
4) Power Button and Light – The Power button turns the printer on and off. It may take a few
seconds for the printer to turn on after you press the Power button. The green light next to the
Power button flashes when the printer is processing.
NOTE: The AC power switch located on the back of the printer must be turned on first, in
order to supply power to the Front Panel.
What’s Included
When unpacking your PF-2 PrintFactory system, the following items should be included:
PF-2 PrintFactory printing system
Power Cord
Alignment CD’s
Blank Printable CD’s
Users Manual (This document)
Microboards PF-2 PrintFactory CD (Includes Windows 2000/XP drivers and SureThing Label
software)
Black Ink cartridge (HP C8842A)
Color Ink cartridge (Microboards PRF19ML)
USB Printer Cable
100 Disc output guide and 100 disc spindle
If any of these items are missing, please contact your distributor or Microboards Technology Technical
Support department at 952-556-1639.
5
Microboards Technology
PF-2 PrintFactory
Chapter 3 Installation
Once your PF-2 PrintFactory system is unpacked and you have verified that everything is included,
you are ready to install the printer.
Installing Ink Cartridges
Supported Ink Cartridges
The PF-2 PrintFactory uses a color and black ink cartridge. The color ink cartridge comes in two sizes,
38 ml and 19 ml. The 38 ml cartridge is a Microboards PRF38ML. The 19 ml cartridge is a
Microboards PRF19ML. These cartridges are available from any Microboards reseller.
The black ink that comes with the system is HP part number C8842A, Versatile Black Ink. This is a
fast drying black ink, designed for coated surfaces, like an inkjet printable CD or DVD.
Standard black ink cartridges, are also supported, but can take longer to dry. The HP 45 black ink
cartridge is used. The HP part number is 51645A. It is recommended to run in Photo mode only when
using the standard black ink cartridge. Running a standard black at Normal or fast Normal can cause
the text to not print evenly.
*Refill kits or non-Microboards ink cartridges are not recommended for use in the PF-2 PrintFactory
system. Use of these types of cartridges will cause the printer to fail. Use of these types of cartridges
will void the warranty.
Changing these settings is done in the Printer Preferences, described in Chapter 5.
Ink cartridge troubleshooting
If the PF-2 PrintFactory system stops printing and the red LED indicator is lit on the front of the
system, the printer does not recognize the color ink cartridge. This can be caused by using an
unsupported ink cartridge. The color ink cartridge must be a Microboards PRF19ML or PRF38ML.
Loading / Replacing Ink Cartridges
The PF-2 PrintFactory system ships with a Microboards PRF19ML color cartridge and a C8842A
black ink cartridge. The black ink cartridge is specifically designed for fast drying applications. We
highly recommend using the C8842A black cartridge for printing on CD or DVD discs. The HP
51645A black cartridge is supported with the printer, but should only be used in PHOTO mode. It can
take longer for the black ink to dry when using the HP 45 cartridge.
1) Plug in the AC power cord to the back of the printer and into a power source.
2) Turn on the power switch located on the back of the printer.
6
Microboards Technology
PF-2 PrintFactory
3) Press the Power button to turn on the printer.
4) Open the top cover. The print cartridge cradle moves to the center of the printer.
5) Raise the cradle latch.
6) If replacing an ink cartridge, lift the old cartridge out of the cradle.
7) Remove the new print cartridge from its packaging and carefully remove the plastic tape.
Hold the print cartridge so that the copper strip is at the bottom.
Black Cartridge
Color Cartridge
Pull tab to remove the plastic tape.
8) Push the print cartridge firmly into the cradle.
9) Secure the cradle latch.
Installing Disc Guide and Output Bin
•
•
•
•
•
To install the output bin, slide the output bin in place.
Align the two holes in the output bin with the holes on the
Front of the printer (numbers 1 and 2).
Secure the output bin with the two thumb screws.
1
The output bin should now be securely in place.
Next, slide in the 100 disc output spindle into place
(number 3).
The unit is now ready for operation.
Connecting to a Computer
2
3
You have two options when connecting to a computer, USB and Parallel. You will need to decide
which method is available on your computer. Follow the instructions listed below.
Parallel Port
Confirm that your PC is turned off.
Plug the printer cable into the back of the printer.
Use the locking clips to secure the connection.
Plug the other end of the cable into the parallel port on the back of the PC.
Secure the connection by screwing in the two posts.
Proceed to “Installing the printer driver” to complete the installation.
USB Port
Confirm the PC is turned off.
Plug the small end of the USB cable into the back of the printer.
Install the larger end of the USB cable into an available USB port on the PC.
Confirm that both ends are securely in place.
Proceed to “Installing the printer driver” to complete the installation.
7
Microboards Technology
PF-2 PrintFactory
Installing the Printer Driver
USB Port and Parallel Port
The install procedure is the same for both the Parallel and USB port connections. Windows 2000 and
Windows XP will find the new hardware at boot up and step you through the installation process.
1. Once you have the printer connected to your PC, as described on the previous page, in the
Connecting to a Computer USB Port or Parallel Port, turn on the power to the printer and then
to your computer.
2. When the system boots up, the computer will state that it has found new hardware.
Windows 2000 install procedures:
3. Click the Next button.
8
Microboards Technology
PF-2 PrintFactory
4. Place the PF-2 PrintFactory driver CD into your CD/DVDROM drive.
5. Select the Search for a suitable driver for my device option and click Next.
6. Check the CD-ROM drives box and click Next.
9
Microboards Technology
PF-2 PrintFactory
7. The install file will be found on the CDROM drive. Click Next.
8. The Digital Signature screen will appear. Click Yes at the bottom of the screen.
9. The driver files will now be copied to the hard drive.
10
Microboards Technology
PF-2 PrintFactory
10. Once installation is complete, click on Finish.
Windows XP install procedures:
1. Place the PF-2 PrintFactory driver CD into your CD/DVDROM drive.
2. Select the Install from a list or specific location option and click Next.
11
Microboards Technology
PF-2 PrintFactory
3. Check the Search removable media box and click Next.
4. The Digital Signature screen will appear. Click Continue Anyway at the bottom of the screen.
5. The driver files will now be copied to the hard drive.
12
Microboards Technology
PF-2 PrintFactory
6. Once installation is complete, click on Finish.
7. The printer is now installed and ready for use. To confirm installation, you can Click on Start,
and select Settings and then Printers.
8. You should see the new printer now installed.
13
Microboards Technology
PF-2 PrintFactory
Multiple Printers
When installing multiple printers, Windows will recognize the new printer and install the driver.
Windows 2000 does this automatically. Windows XP may ask for the driver CD again.
Once the printer is installed, you will see the additional printer labeled MB PrintFactory Series
(Copy 1).
Before using the newly installed printer, you must first go into the printer preferences and set the
offset values for that printer in Windows. To do this, right click on the MB PrintFactory Series
(Copy 1) and select Printer Preferences. Go to the utility tab. Change the TOP or LEFT value
from zero to some other number and then back to zero again.
14
Microboards Technology
PF-2 PrintFactory
The Apply button should now be active. Click the Apply button.
The additional printer is now ready for use.
Installing SureThing CD Labeler Software
SureThing Labeler software is an easy to use application, designed to work with the Microboards PF-2
PrintFactory printer. To install the software:
1. Place the PF-2 PrintFactory driver CD into your CD/DVD ROM reader drive.
2. Installation should begin automatically.
3. If your system does not automatically start the setup program, click on the Start button and
select RUN. Click the browse button and go to your CD/DVDROM drive. Select the
surething.exe file and click OK.
15
Microboards Technology
PF-2 PrintFactory
4. Please read the Software License and Warranty screen and click on I Accept.
5. At the Welcome screen, click Next.
16
Microboards Technology
PF-2 PrintFactory
6. To install the software in the default directory, click Next at the Select Destination Directory
screen. If you wish to use a different directory, select it now and then click Next.
7. At the Add to Desktop / Start Menu screen uncheck the boxes for Add to Desktop and/or Add
to Start Menu, if you do not want this option. Click Next.
17
Microboards Technology
PF-2 PrintFactory
8. Click Start at the Ready to Install screen.
9. The software will now be installed.
10. Click Finish to complete the installation. At this screen, you also have the option to register
online.
18
Microboards Technology
PF-2 PrintFactory
11. The system must be restarted for the software to run correctly. If you can restart your system
now, click on OK. Otherwise click on Cancel and restart your system later on. Remember,
your system must be restarted in order for the software to work correctly.
Chapter 4 Using the Printer
The first step in using your PF-2 PrintFactory is to confirm the printer is communicating correctly with
the computer and the information printed on the discs will be aligned properly.
Test and Alignment
Print Test Disc
To confirm the computer is communicating with the printer, print a Test Disc. This can be done with
one of the inkjet printable CD’s included with your printer, or an inkjet compatible disc you may
already have.
To print the Test Disc:
• Click on the Start Button.
• Select Settings and then Printers.
• Right click on the Microboards Printer icon.
• Select Printer Preferences.
• Select the Utility Tab.
19
Microboards Technology
•
•
•
PF-2 PrintFactory
Press Print Test Disc
The Test Disc should now be printed.
If no disc is printed, check the connection between the printer and PC.
Align Disc
There are factory default numbers for the TOP and LEFT values for your printer. These can be found
on a label, under the printer cover. You may need to adjust the values, depending on the images you
are printing. To run the alignment utility, please follow these steps:
In Utilities Tab, select Print Align Disc.
20
Microboards Technology
PF-2 PrintFactory
21
Microboards Technology
PF-2 PrintFactory
Place an Alignment CD into the printer.
Press Print.
The disc will be printed.
Confirm the numbers that cross the circle.
22
Microboards Technology
PF-2 PrintFactory
If the circle does not cross the circle at the zero’s, enter the vertical and horizontal numbers in
the Utility Tab.
Once the new numbers are entered, click Apply.
The Alignment CD pattern is also included on the PF-2 PrintFactory CD, so you can print
additional Alignment patterns with your printer, once it is aligned. The alignment circle is 8
cm in diameter and is 2 cm from the outer edge of the CD.
Loading Discs
The next step is to load your PF-2 PrintFactory with discs. The system will accept CD or DVD 12 cm
inkjet printable discs. If the disc does not have an inkjet printable surface, the ink will not adhere to
the surface of the disc. The PF-2 PrintFactory will only accept 12 cm discs. Business card or 8 cm
discs are not supported by this system.
Figure 1
Figure 2
Load the first 5 or 6 discs flat, as seen in figure 1.
Load the rest of the discs at an angle, as seen in figure 2.
The PF-2 PrintFactory will hold a maximum of 100 discs. DO NOT load more than 100 discs in the
system, as this will cause the discs to feed incorrectly.
23
Microboards Technology
PF-2 PrintFactory
Printing Discs
The next step is to design your CD label. The PF-2 PrintFactory comes with SureThing CD Labeler
software. However, you can use any design software that is made to work with CD and DVD discs.
The following is an example of designing and printing a label with SureThing.
Open SureThing software.
Select the template you wish to use. There are three choices:
1) 12 CM disc with an inkjet printable hub.
2) 12 CM disc without an inkjet printable hub (36mm).
3) 12 CM disc by Verbatim called “Vinyl CD”.**
** See page 27 for important information when using the Vinyl CD template
Click Next
Click Next
24
Microboards Technology
PF-2 PrintFactory
At the SmartDesign screen, you can select one of three default layouts. If you wish to start with a
blank layout, uncheck the User SmartDesigns box. After making your selection, click Next.
Click Finish.
25
Microboards Technology
PF-2 PrintFactory
You can now design your label, adding text, graphics, backgrounds, etc.
For complete details on the options and operation of SureThing software, please refer to the Help
topics.
Once your label is designed, click on File and select Print .
The Print screen appears:
Select number of copies you wish to print and press OK.
26
Microboards Technology
The system will now start printing your discs.
The completed discs are placed in the output bin.
They can be removed from the output bin at any time.
PF-2 PrintFactory
You may wish to make changes to the way a disc
is printed, such as resolution, color, saturation, etc.
This is done in the Printer Preferences.
There are two ways to open the Printer Preferences.
1. One is from the Print screen in SureThing CD Labeler:
Press the Options button and the Printer Properties will appear.
*NOTE: Changes made this way will apply to this print job only. The changes are NOT permanent.
2. The other way is to go to click on Start, go to Settings and select Printers.
Right click on the Microboards printer and select Printer Preferences.
For a complete description of the Printer Preferences, go to Chapter 5.
27
Microboards Technology
PF-2 PrintFactory
Printing on Verbatim Vinyl CD-R discs
** Before printing a Verbatim Vinyl CD-R discs, you must first change the inner and outer diameters
of the printable area, in the Utility Menu. Please follow these steps:
1) Double click on Printers in the control panel.
2) Right click on the Microboards PrintFactory printer and select Printing Preferences.
3) Click on the Utility tab.
28
Microboards Technology
PF-2 PrintFactory
4) Change the Outer diameter to 70 and the inner diameter to 38. If you have the resolution set to
.1mm, the outer diameter will be 700 and the inner diameter will be 380.
5) Uncheck the Print on hub checkbox.
4
5
6
6)
7)
8)
9)
Click on the Apply box.
Click OK.
The printer is now ready for use with the Verbatim Vinyl CD-R discs.
When you want to go back to printing on standard CD-R discs, you will need to change the
inner and outer diameters back to the default values. The default outer diameter is 118 and the
default inner diameter is 36. Again, if you are in the .1mm resolution, the numbers would be
1180 and 360.
29
Microboards Technology
PF-2 PrintFactory
Chapter 5 Printer Properties
Setup Tab
Print Quality
Best
Normal
Fast
Print Modes
Text and Graphics
Photo
Remember that when printing in Text and Graphics mode, the HP C8842A, Versatile Black Ink
cartridge is highly recommended. If you do not have this black ink cartridge installed, we recommend
using Photo Mode.
Printing Recommendations
Text and Graphics mode is used for printing mainly text information and small graphics. Here are
some examples for images in Fast, Normal and Best Modes:
30
Microboards Technology
PF-2 PrintFactory
Text and Graphics – Fast
Text and Graphics – Normal
31
Microboards Technology
PF-2 PrintFactory
Text and Graphics – Best
Photo Mode will be used when printing on the entire disc. Here is an example:
Photo – Normal, Best and 4800x1200 Modes
32
Microboards Technology
PF-2 PrintFactory
Features Tab
The Features tab lets you set the number of copies. This is used only when printing directly to the
printer port. Normally you will use the label design software to select the number of copies.
Advanced Features allows you to adjust the amount of ink placed on the disc and adjust the dry time of
the disc.
33
Microboards Technology
PF-2 PrintFactory
Color Tab
Print in Grayscale – This allows you print in grayscale only. The High Quality setting will print the
disc using the Color ink cartridge. The Black Only selection will use the Black ink cartridge only.
Saturation, Brightness and Color Tone allow you to fine tune your print image.
Factory Settings will set the above values back to the factory defaults.
Utility Tab
34
Microboards Technology
PF-2 PrintFactory
Print test CD
35
Microboards Technology
PF-2 PrintFactory
Print Alignment CD
Place an alignment CD into the printer and click on the Print Alignment CD button
Click Print
Once the disc is printed, check where the circle is located on the horizontal and vertical lines. If either
of the numbers are not zero, adjust the top or left amounts by those shown on the vertical or horizontal
guides, respectively, and click Apply.
NOTE: If alignment is required in the future, after using the printer for some time, make sure and click
on the Factory Defaults button, to reset the alignment numbers, before running the Align Disc
procedure.
36
Microboards Technology
PF-2 PrintFactory
Clean Cartridge
If your image looks like this example, it may be necessary to clean the ink cartridges. Click on the
Clean button. The printer will clean the cartridges and print out the following image:
37
Microboards Technology
PF-2 PrintFactory
If one cleaning does not fix the issue, repeat the process. If after multiple cleanings, the problem still
exists, it may be a defective ink cartridge. Try another cartridge and print again.
Ink Level
This button will give an estimate of how much ink is left in the color and black cartridges. Please note
that the printer assumes that when a cartridge is replaced, it is replaced with a new, full cartridge. If a
used cartridge is used as a replacement, the ink levels may not be correct.
38
Microboards Technology
PF-2 PrintFactory
Chapter 6 Solve a Problem
Printer not printing:
Confirm the printer is plugged into a power source and is turned on. The ON/OFF switch is located at
the back of the unit, above the power cable connector.
Confirm the green light is lit on the three button front panel. If AC power is on and the green light is
off, press the O button on the front panel. If the light still does not come on, contact Microboards
technical support.
Confirm the printer is connected to the computer, with a parallel or USB cable. This can be checked
by clicking on Start, going to Settings and selecting Printers. Confirm the printer is listed and is active.
If the icon is not active, make sure the Use Printer Offline is not selected. Also check to make sure the
correct printer port is selected.
Out of Paper indication:
If the Out of Paper indicator is blinking confirm there are discs in the input bin. If the input bin is
empty, add more discs and press the out of paper button.
If there are discs in the input bin, the disc may not have dropped correctly on the belt. Press the out of
paper button on the interface and the system will attempt to load another disc. If that does not fix the
problem, proceed to Disc Loading Error.
Disk Loading error:
If a disc is not loaded correctly, it could cause the out of paper indicator to come on. Press the out of
paper button on the interface. The printer will attempt to load another disc. If this does not clear the
error, remove the discs from the input bin. Check to see if there are any discs on the belt. Remove any
discs that are left on the belt.
Lift the cover and check for any discs on the front part of the printer. Remove any discs found on the
belts. Close the cover.
Next, reload the input bin and press the out of paper button. The system will load the next disc and
continue printing the remaining discs for that job.
39
Microboards Technology
PF-2 PrintFactory
Low Ink indication:
When an ink cartridge is low on ink, the Ink indicator on the front panel will come on.
Once you notice poor ink quality or a missing color in your prints, replace the ink cartridge.
Chapter 7 Product Specifications
Print Speed:
Depends upon percentage of coverage and print mode selected
About 108 seconds for 100%, full-color coverage, Photo Normal Mode
About 20 seconds for 100%, full-color coverage Text & Graphics Best Mode
About 12 seconds for 20% coverage Text & Graphics, Normal Mode
Ink Types:
3-Color Microboards PRF19ML
3-Color Microboards PRF38ML
Black monochrome HP C8842a Fast Dry Black (recommended)
HP C6615d Photo Mode Only
HP 51645a Photo Mode Only
Media Types:
Printable-surface 120mm CD-R or DVD-R
Label Editing Software:
SureThing™ First Edition Software for Windows included
Maximum Print Width:
4.72” (120mm)
Power Supply:
Auto Detect AC Power:
90VAC – 240VAC, 47Hz – 63Hz
Warranty:
One Year
40
Microboards Technology
PF-2 PrintFactory
Print Technology: HP Thermal Inkjet
Print Quality, Black: 600 x 600 dpi, with HP PhotoREt III
Print Quality, Color: 4800 x 1200 optimized dpi, with HP PhotoREt III
Color Technology: HP PhotoREt III
Memory: 8MB
Connectivity: USB or Parallel
Supported Operating Systems: Windows 2000, Windows XP
System requirements: Pentium 233 MHz, 128 MB RAM, 40 MB hard disk space
Chapter 8 Contact Information
For technical questions or support issues, please contact Microboards Technology technical support at
PH: 952-556-1639, FAX: 952-556-1628, by email at [email protected] or on the web at
http://www.microboards.net.
41