1
User’s Manual of
Network Video
Surveillance System
CONTENT
1. Introduction ............................................................................................ 4
1.1 Intention ........................................................................................... 4
2. Terms and abbreviations .......................................................................... 4
3. Instruction .............................................................................................. 4
3.1 Software application ........................................................................... 4
3.2 Operation .......................................................................................... 4
3.3 Operation system ............................................................................... 4
4. Software Installation and Uninstallation ...................................................... 5
4.1 Software Installation ........................................................................... 5
4.2 Software Uninstallation...................................................................... 10
5. Login and setup .................................................................................... 13
5.1 Login .............................................................................................. 13
5.2 Setup .............................................................................................. 14
6. Device management .............................................................................. 22
6.1 Device management ......................................................................... 22
6.2 User Management ............................................................................. 38
6.3 Storage ........................................................................................... 41
6.4 Decode device setup ......................................................................... 44
6.5 Cruise ............................................................................................. 51
6.6 Event .............................................................................................. 54
6.7 System Settings Instruction ............................................................... 68
6.8 Device Parameter setting ................................................................... 71
6.9 Keyboard Configuration ..................................................................... 72
7. Operational control instructions ............................................................... 73
7.1 Preview ........................................................................................... 73
7.2 Playback .......................................................................................... 88
7.3 E-map ............................................................................................. 96
7.4 Storage Status ............................................................................... 102
7.5 Alarm information ........................................................................... 104
7.6 Log management ............................................................................ 104
7.7 TV Wall ......................................................................................... 108
7.8 Keyboard Management .................................................................... 111
7.9 Player ........................................................................................... 112
1. Introduction
1.1 Intention
This Manual based on Net video monitoring system CS client code to provide briefly
explanation, helping the users to learn the operation process.
2. Terms and abbreviations
None
3. Instruction
3.1 Software application
This software can be used as a subsystem of Net Video monitoring platform, also
can be installed and used independently.
3.2 Operation
1 NetVideo System Smart Client Express V7.9.EXE.
It can operation independently, with maximum ability of connection with 128
channels. And it support whole series of Tiandy NVR and network video devices,
2 NetVideo System Smart Client Professional V7.9.
It can operation independently and support whole series of NVR and network video
devices and PC digital video recording systemV6.9, Hikvision mainstream
embedded host, Hikvision HD IPC device, Hikvision behavior analyzing device,
Dahua Embedded Host. With Maximum ability of connection with 400 channels.
Operation requires encryption dog, no encryption dog software can only run 60
minutes.
3.3 Operation system
Support Microsoft Windows XP SP3 and Windows 7/8 system.
4. Software Installation and Uninstallation
4.1 Software Installation
Take example of “Net Video System Client Express V7.9.EXE” installation in
Microsoft Windows 7 system. The operation is the same for the other two versions.
1 Find setup file in the disk of “NetVideo Smart Client Professional V7.9T.EXE”
Pic 4.1.1
2 Double Click to enter setup process.
Pic 4.1.2
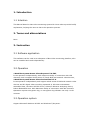
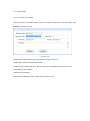
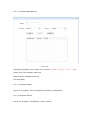
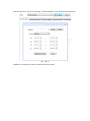
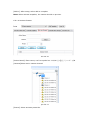
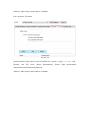
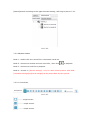
3 Select language, click “Next”.
Pic 4.1.3
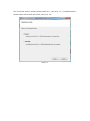
Default setup folder is in Disk C, it is available for customized setup folder, click
“Next” to the end.
Pic 4.1.4
Pic 4.1.5
Pic 4.1.6
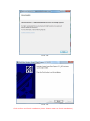
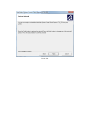
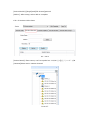
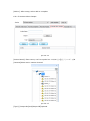
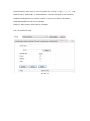
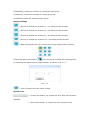
If it is the first time to install, please install C++, like pic 4.1.7; if installed before,
please select cancel and click finish, like pic 4.1.8
Pic4.1.7
Pic 4.1.8
Pic 4.1.9
Click confirm and finish installation.(Note: Please restart to finish installation.)
Pic 4.1.10
4.2 Software Uninstallation
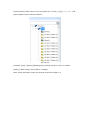
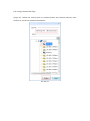
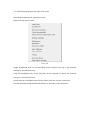
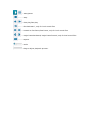
1 Select “start”.> “All Program”.> “Security” . > “NetVideo System Smart Client
Professional V7.9”.>”Uninstallation”
Pic 4.2.1
2 Click “OK”, the uninstallation program will terminate the running software of all
related Net Video programs to continue the uninstallation process.
Pic 4.2.2
3 Click “Next”-> “Finish” according to the instruction to finish the uninstallation .
Pic 4.2.3
Pic 4.2.4
5. Login and setup
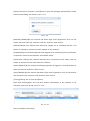
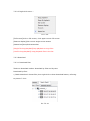
5.1 Login
Double click
entry to login interface, like pic5.1.1
Pic 5.1.1
Note: The default user’s name and password is: admin 1111
[Entry to system setup]Input correct user’s name and password.
[Advance]Click advance to modify password.
[Cancel]Click cancel to close NetVideo login interface.
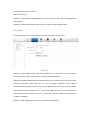
5.2 Setup
Input correct user’s name and password, click
to entry NetVideo interface.
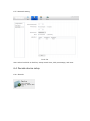
Pic 5.1.2
Function include: preview, playback, storage status, alarm, log, device, user,
storage, system, cruise, information, event and keyboard.
User can divide group according to demand and click
5.1.3
Pic 5.1.3
entry to interface like pic
Add information of modify group according to user’s demand. Eg. Remove group
and add wall group. Like pic 5.1.4 and 5.1.5
Pic 5.1.4
Pic 5.1.5
In the left select TV wall group and in the right select needed function to group. Like
pic 5.1.6
Pic 5.1.6
Save setup like pic 5.1.7
Pic 5.1.7
Add different group according to function, and modify or cancel group, click save like
5.1.8 and 5.1.9.
Pic 5.1.8
Pic 5.1.9
6. Device management
6.1 Device management
6.1.1 Encode device
Pic 6.1.1
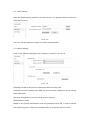
6.1.1.1 Add Device
There are two ways to add device, manual add and auto add.
Pic 6.1.2
Manual Add
Click [Add Device] to show you following window.
Pic 6.1.3
[Off-line Add] Check it to add off-line device.
[Device Name] Give a name to device. Following characters are restricted, such as,
~!#$%^()=[]{},":;'<>?*`+/\&
[Device Type] Normally choose IP Series to add Myvideo device.
[User Name] Add device’s user name.
[Password] Add device’s password.
[Video Channel] Add total channels under the device.
[Alarm Input] Add total channels of alarm input ports.
[Alarm Output] Add total channels of alarm output ports.
[Import to group] System will automatically add the device into customized list and
distribute a group with same name as device.
Various mode settings
IP mode
[Device IP] Add device IP
[IP segment] Allow you to batch add device IP. For example, if you enter 1.1.1.1 in
[Device IP] and enter 1.1.1.20 in [IP segment], then the system will add 20 devices
IP from 1.1.1.1 to 1.1.1.20.
[Port] Add device communication port.
Proxy information
[Proxy type] includes [General Proxy] and [Middleware Proxy]
[General Proxy] includes information such as [Device Address] device IP, [Device ID]
null, [Proxy ID] Proxy server IP, [Proxy Port] Proxy server port. See pic 6.1.4
Pic 6.1.4
[Middleware Proxy] includes [Device ID] device ID on the middleware server, [Client
MS ID] [Client MS IP] [Client MS Port] [Server MS ID] [Server MS IP] see Pic 6.1.5
Note
[Device ID] must be filled in manually and ensure it is same as ID in the middleware.
Pic 6.1.5
DNS Information
There are 4 types of DNS, including [Standard DNS] [Special DNS] [Own Device
DNS] [Active]
[Standard DNS] Device use standard DDNS. It needs to fill in DNS name and device
port. See Pic 6.1.6
Pic 6.1.6
[Special DNS] see Pic 6.1.7
Pic 6.1.7
[Myvideo DNS] Same settings as special DNS. But it doesn’t need to set DNS IP and
DNS port. There are default specifications in the system.
[Active] It must fill in [Device ID] [Directory Host IP] [Director Host Port] [DNS User
Name] and [DNS Password]. See Pic 6.1.8
Pic 6.1.8
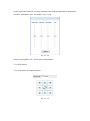
Auto-add
Pic 6.1.9
If it shows “Enable-NO” in the device list, it means this device is not added yet.
Check not added more than one devices, and click “Add Selected Device”, then it will
pop-up a mini window where you can enter user name and password (suggest to
use same password once several devices). See Pic 6.1.10
Note
If there are wrong information including user name, password or port, it would lead
to fail to batch add.
Pic 6.1.10
When you success to add, the system will show you a tips which tell you which ones
are failed to add. See Pic 6.1.11
Pic 6.1.11
6.1.1.2 Modify device information
Check the devices you want to choose and then click [Modify]. See Pic 6.1.12
Pic 6.1.12
It shows the modify interface. See Pic 6.1.13
Pic 6.1.13
It shows all device information, modify the information you want and then click
[Modify]
6.1.1.3 Delete device
Check the devices and click [Delete]. See Pic 6.1.14
Pic 6.1.14
6.1.1.4 Search Device
Select [Group] and enter device name at the left device list to find location of device.
See Pic 6.1.15
Pic 6.1.15
6.1.2 Video Channel
6.1.2.1 Check and modify
Select [Group], and check device channels in the device list and click [Modify]. See
Pic 6.1.16
Pic 6.1.16
[Channel] Enter channel name.
[Control Type] Protocol and transparent channel for choice. If use Myvideo device it
suggests to select transparent channel.
[Protocol] There are 6 types of protocol, including PTZ_PELCO_P, PTZ_PELCO_D,
PTZ_TC615_P, DOME_PELCO_P, DOME_PELCO_D, DOME_PLUS. Ensure the protocol
in the software should be same as what you set in the PTZ.
[Serial Port] There are 5 ports for choice, including 232, 485-1, 485-2, 485-3,
485-4.
Ensure the serial port in the software should be same as what you set in the PTZ.
[Baud Rate] Ensure the baud rate in the software should be same as what you set in
the PTZ.
[PTZ address] Enter any pic from 1-256. Ensure the address in the software should
be same as what you set in the PTZ.
[Decryption] The user can choose if decrypt the video which it is encrypted in IE
setting.
[Set Decryption Key] Set content of decryption key.
6.1.2.2 Add and Delete
6.1.2.3 Get device name
Select the device or channel in the list and click [Get device name]. See Pic 6.1.17
Pic 6.1.17
6.1.3 Alarm Port
6.1.3.1 Check and modify
Select [Group] and check alarm input or output of device in the list, then click
[Modify]. See Pic 6.1.18
Pic 6.1.18
[Alarm port type] Alarm input and alarm output for choice.
[Alarm port name] Customized name.
[Alarm Port] Customized port. But it cannot be duplicated as the port in use.
[Host Name] Irreversible.
[Host IP] Irreversible.
[Description] Remark some words for this alarm port.
6.1.3.2 Alarm port add and delete
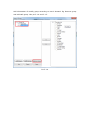
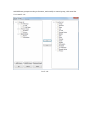
6.1.4 Group Management
Pic 6.1.19
Device list at the left displays all added device information. Customized list at the
right displays the customized group information. It allows the user to add device
from device list at left to group list at right to make it easier for management.
For example, there is a 10.30.20.192 device in the left list, the steps are as below.
Check 10.30.20.192 channel in the left list.
Check the customized group in the right list.
Click
to add.
Or use mouse to drag 10.30.20.192 channel into right list. See Pic 6.1.20
Pic 6.1.20
It is in the same way to click
or drag the device out of the customized list to
delete it.
Note: The customized group information is loaded in the device list in the client. If
you want to see a channel in the client, you have to add it into the group.
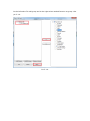
6.1.5 Remote Control
Click a device and click [Remote Configuration] to go to IE configuration page. See
Pic 6.1.21
Pic 6.1.21
6.1.6 Auto-search Device
See device list Pic 6.1.22
Pic 6.1.22
[Add Selected Device] Check device an click add selected device to auto-add in
device list.
[Modify Net Info] Modify device network information, including IP address and port.
See Pic 6.1.23
[Refresh] Refresh device information.
Pic 6.1.23
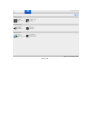
6.2 User Management
Show all user information (admin user only can modify password, can’t be deleted)
Pic 6.2.1
6.2.1 Add User
Click [Add] into add user page
Pic 6.2.2
[User Type]Administrator or operator
[User]User name(not include ~!#$%^()=[]{},":;'<>?*`+/\&)
[Password]input password
[Pwd Confirm]confirm password
Notice: It can setup authority of current user to control single or multiple device
6.2.2 Edit User
Select one user, double click the user or click[Edit] into edit page
Pic 6.2.3
Administrator can edit name, password and authority.
6.2.3 Delete User
Select one or multiple users, click[Delete] to delete user account.
6.3 Storage
6.3.1 Recording and Template setting
[Storage] - [Template management]
Pic 6.3.1
6.3.1.1 Template Management
Pic 6.3.2
[Template] template name (name can’t contains ~!#$%^()=[]{},":;'<>?*`+/\&)
[Start time] The template start time
[End time]The template end time
And click[Add].
6.3.1.2 Template Modify
Select one template, edit the template information, and[Modify]
6.3.1.3 Template Delete
Select one template, click[Delete], confirm delete.
6.3.1.4
Template Application
[Record type] provides 5 kinds of alarm include timing record, motion detection
alarm record, port alarm record,
lost alarm record and other alarm record.
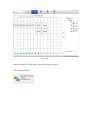
6.3.2 Record time list setup
Left side shows all templates, right side shows the template chosen.
Pic 6.3.3
User can select template in left side and choose certain date in[Date], and thenclick
.
6.3.3 General setting
Pic 6.3.4
User select local disk in disk list, setup record time, dish percentage, and save.
6.4 Decode device setup
6.4.1 Decode
Pic 6.4.1
[Device name]User name(not include ~!#$%^()=[]{},":;'<>?*`+/\&)
[Device IP] add decoder IP。
[Port]decoder port。
[decode output]decoder output number
Intelligent Add
Search decoder in LAN
Pic 6.4.2
[Modify] modify decoder information
[Delete] delete decoder
[Remote configuration] login IE of decoder
6.4.2 TV Wall Setup
Pic 6.4.3
[Add] click and add one TV wall
[Modify] Modify the chosen TV wall name
[Delete] delete chosen TV wall
Pic 6.4.4
Select screen numbers (1/4/9/16/customerized); select one piece or select multiple
pieces by pressing Ctrl and click[Delete] to delete the screens, click[clear] to delete
all screens.
[upload background picture] user can add or replace background picture.
[delete background picture] user can delete current background picture.
User can setup screen position by [Left], [Right],[Up],[Down],[Same size] (select
one TV wall as standard, and then select other TV wall to become same size),
[horizontal Equidistant] and[Vertical Equidistant]
[Save] to save current display solution.
Pic 6.4.5
Select one piece TV wall screen, link with decoder channel.
6.4.3 Decoder Setup
Pic 6.4.6
1) Step
of
setting
output:
first
add
[decoder],
channel],[display mode] and setup[cruise interval].
(Notice: all device must be with IP address)
select[decode
output
Pic 6.4.7
2)modify cruise interval time and[save].
Pic 6.4.8
Offline switch and stop: click right button, select [offline cruising]
Pic 6.4.9
Setup [display mode] to modify decode output screen numbers.
Pic 6.4.10
6.5 Cruise
6.5.1 Video Liveview
Pic 6.5.1
[Cruise] user can setup switch method.
[Cruise schedule] setup name and click[add].
[screen]same as NetVideo[Video liveview]window number.
Click right button on the cruise schedule to edit it.
Pic 6.5.2
[add time schedule] user can edit time
Pic 6.5.3
Pic 6.5.4
And input the video dwell time
Pic 6.5.5
6.5.2 TV Wall Preview
TV wall preview interface
Pic 6.5.2
6.6 Event
[Event]: Set alarm and activate configuration
Pic 6.6.1
Select channel and event type
Pic 6.6.2
Add arming time: 24 hours arming, or edit template to set week and time period
Pic 6.6.3
Applied to everyday or save to active the arming time
6.6.1 Add Alarm Type
6.6.1.1 Activate Video
Pic 6.6.4
[Action Name]: Enter name, can’t be symbol as ~!#$%^()=[]{},":;'<>?*`+/\&
[Camera]Select active camera channel
Pic 6.6.5
[Active Module]:[Single]and[Full Screen]optional
[Add to]: After setup, select add to complete
6.6.1.2 Activate Video Start
Pic 6.6.6
[Action Name]: Enter name, can’t be symbol as ~!#$%^()=[]{},":;'<>?*`+/\&
[Camera]Select active camera channel
Pic 6.6.7
[Recording]: Set recording time, 5~7200s optional and default is 60s
[Add to]: After setup, select add to complete
6.6.1.3 Activate Snapshot
Pic 6.6.8
[Action Name]: Enter name, can’t be symbol as ~!#$%^()=[]{},":;'<>?*`+/\&
[Camera]Select active camera channel
Pic 6.6.9
[Add to]: After setup, select add to complete
Note: When activate snapshot, the camera should on preview.
6.6.1.4 Activate Presets
Pic 6.6.10
[Action Name]: Enter name, can’t be symbol as ~!#$%^()=[]{},":;'<>?*`+/\&
[Camera]Select active camera channel
pic 6.6.11
[Preset]: Select activate preset No.
[Add to]: After setup, select add to complete
6.6.1.5 Activate Alarm Output
pic 6.6.12
[Action Name]: Enter name, can’t be symbol as ~!#$%^()=[]{},":;'<>?*`+/\&
[Camera]Select active camera channel
pic 6.6.13
[Type]: [Output On]and[Output Off]optional
[Add to]: After setup, select add to complete
6.6.1.6 Active TTS Voice
pic 6.6.14
[Action Name]: Enter name, can’t be symbol as ~!#$%^()=[]{},":;'<>?*`+/\&
[Event]:
Set
TTS
voice,
[Event
Information],
and[Customized Information]optional
[Add to]: After setup, select add to complete
[Event
Type
Information]
6.6.1.7 Activate Voice
pic 6.6.15
[Action Name]: Enter name, can’t be symbol as ~!#$%^()=[]{},":;'<>?*`+/\&
[Audio Files]: Select the audio file of wav format
[Add to]: After setup, select add to complete
6.6.1.8 Activate SMS
Pic 6.6.16
[Action Name]: Enter name, can’t be symbol as ~!#$%^()=[]{},":;'<>?*`+/\&
[SMS Center]: Default No. is 13800220500, it can be changed as real situation
[Mobile Number]Enter the mobile number to receive the alarm information
[SMS Message]Enter the short message
[Add to]: After setup, select add to complete
6.6.1.9 Activate E-map
pic 6.6.17
[Action Name]: Enter name, can’t be symbol as ~!#$%^()=[]{},":;'<>?*`+/\&
[Device]Select active camera channel
pic 6.6.18
[Activate Type]: [Center],[Flashing] and [Video] optional, check to enable.
[Add to]: After setup, select add to complete
Note: When activate E-map, the camera should be added in it.
6.6.1.10 Related Configuration
[Record Type]: [Timing Recording], [Motion Alarm Recording], [Port Alarm
Recording], [Lost Alarm Recording] and [Other Alarm Recording] are optional.
Pic 6.1.19
Note: when [Setup Host], there are seven alarm type optional: [Disk Defection
Aarm], [Disk Detection Alarm Clear], [Disk Full Alarm], [Disk Full Alarm Clear],
[Illegal Log-on], [Offline] and [Online], the setup method is the same as above.
pic 6.6.20
6.6.2 Activate Type Modify
[Modify]: Select the action name in the list, and modify the information needed,
select the [Modify] to complete.
6.6.3 Activate Type Delete
[Delete]: Select the action name in the list need to delete, and the tips will pop-up,
select yes or no to confirm delete or not.
Pic 6.6.20
6.6.4 Copy the Activate Type
[Copy to]: Select the arming time or activate action and camera channel, then
confirm to check the detailed information.
Pic 6.6.21
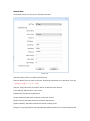
6.7 System Settings Instruction
6.7.1 General setting
System configuration button
Click[General setting]enter the setting interface, as shown in pic 6.7.1.
6.7.1
[Auto delete]The user can set the log retention days, the log information will be
automatically deleted when information reaches the specified days.
[Event]User can set up the Event processing
[Login]after checked, user fills in the [user name] and [password], the NetVideo will
be activated automatically when the operating system started.
[Timing]User can choose“on-line Synchronization Time “with PC, or “Regular
synchronization time” with PC .
Then click [Save].
[System Configuration Backup]Export system devices and related configuration
information.
[System Configuration Restore]to restore a system configuration state.
6.7.2 Video
Click[Video]enter the video related interface, as shown in pic 6.7.2.
Pic 6.7.2
[Recover Video Status From Last Shut Off]Check it, next time it will automatic
connection last closed Video preview when start the software.
[Main/Sub-Stream Switch]Set the switch split screen number, when the client video
browsing interface more than set no., the connected channels video default
connection sub (deputy) stream. Such as the split screen can be set up to 4, but the
client video browsing window for 3 * 3, more than split screen no., it will connect the
video to Sub stream default in the 3 * 3 windows. .Check to make the split screen
numbers available.
[Restore Default]Restore the user's last saved configuration.
6.7.3 Path Setting
Enter the [path Setting] interface, as shown in pic 6.7.3 (please make sure the save
path folder exists).
Pic 6.7.3
User can set the captured images and video download path.
6.7.4 Other Setting
Click on the [Other Setting]into the interface, as shown in pic 6.7.4.
Pic 6.7.4
[Message cat baud rate]choose appropriate SMS cat baud rate.
[Message cat serial port]choose SMS cat serial number, implement event linkage
SMS notification.
[Pre-play time]before a period of time to start playing.
[Identification Code]
Based on the system identification code can generate license file, is used to extend
the monitoring point. Restart the software after a successful import license.
6.8 Device Parameter setting
Device parameter configuration display button, display the device parameter
configuration page.
Enter into the device parameter settings page, all the added devices information
showed as pic 6.8.1
Pic 6.8.1
Select one of the devices, click on the lower right corner [parameters
configuration]can enter the device's built-in IE interface.(Double click on the
individual records can also jump to device built-in IE interface)
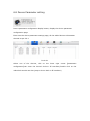
6.9 Keyboard Configuration
Keyboard configuration button
Click [keyboard] enter the keyboard management settings interface, as shown in
pic 6.9.1
6.9.1
The system will list all the current devices that added to a custom group, encoding
devices and their access information. Double click the channel line, the number of
channels can be modified.
7. Operational control instructions
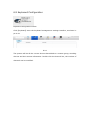
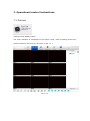
7.1 Preview
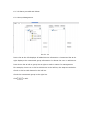
Video preview display button
The main interface is composed of four parts, tools, video encoding device list,
preview window, PTZ control, as shown in pic 7.1.1.
Pic 7.1.1
7.1.1 Video preview window
Video preview small window, middle show the video, left bottom is the video
connection status, voice, video state. Double click the video window can
be maximized, double click again to restore, as shown in pic 7.1.2.
Pic 7.1.2
During the video preview, the left bottom state bar (dark) can be displayed
respectively, current channel is connected, open the voice preview, start the
channel video record function. The right bottom corner can display the channel
name, as shown in pic 7.1.3.
Pic 7.1.3
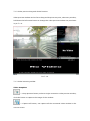
7.1.2 Video preview drag and divide function
Video preview window can be free to drag and drop into any size, select any window,
hold down the left mouse button to change the video preview window size, as shown
in pic 7.1.4.
Pic 7.1.4
7.1.3 Video browsing toolbar
Video Snapshot
——Snap pictures button, select a single connection video preview window,
click this button to capture the image of the window.
——Capture all button, can capture all the connected video window in the
current screen.
——Capture path button, click to open capture file storage folder.
Video Recording
——Start video button, mouse over a single connection video preview
window, click on the button, start the record of this window
——Stop recording button, select the recording preview window, click it to
stop the corresponding channel video.
——Start all video button, record all connected video of the current screen.
——Stop all video button, click to stop the current video of all channels.
Cruise Group Set
——Group switch start button, open the video window, click this button to
switch group.
——Group switch stop button, click it to stop the switch group.
——Cruise group list button, click to display the list of switch groups. As
shown in pic 7.1.5. Note: Need right-click custom equipment list and add the
selected device group to[added to the switch group], the list will have equipment.
Pic 7.1.5
Set the switch time interval of [Cruise Group Interval(seconds)], then click
[Confirm] .
[Cruising Group], check the user added group, double-click the added group, the
pop-up customized split screen dialog box, users can set the switch number of split
screens. As shown in pic 7.1.6.
Pic 7.1.6
Click[Modify], modify the number of customized split screen
Click[Invert], uncheck the groups of cruising group list.
Click[Delect],delete the selected switch group.
Display settings
——Screen is divided into a total of 1- 1X1 video preview window.
——Screen is divided into a total of 4- 2X2 video preview window.
——Screen is divided into a total of 9- 3X3 video preview window.
——Screen is divided into a total of 16- 4X4 video preview window.
——After clicking the user can choose more screen segmentation method.
Customized split screens button
,click on the pop-up dialog box, allowing users
to customize the split screen for segmentation, as shown in pic 7.1.7.
Pic 7.1.7
——Click to show full screen video window.
System lock
——system lock button, the system can lock, after unlock can be
operated.
——Skin switch button, to change the color interface style
7.1.4 Encoding equipment list right click menu
[Encoding equipment list right key menu]:
Right click the device node:
Pic 7.1.8
[Login Host]Right click on the encoding device channel can log in the channel
belongs to encoding devices.
[Log off host]Right click in the encoding device channel to cancel the channel
belongs to encoding devices.
[Disconnect all video]Disconnect all the video from the current connection.
[Cruise automatically]Automatically switch on all online video channels.
[Setup interval of auomatic cruise]Click to open the settings automatically switch
time interval dialog, as shown in pic 7.1.9.
Pic 7.1.9
[Bothway talkback]In the channel has been login code equipment. Click on the
button will start two-way intercom with the channel video source.
[Mainstream]In the channel that has been logged on to encoding devices, the
button is clicked to connect the main stream of the channel.
[Substream]In the channel that has been logged on to encoding devices, the button
is clicked to connect the channel's sub stream video.
[Disconnect video]In the channel that has been connected to the video, click the
button to disconnect the video from the channel.
[Start Talkback]In the channel encoding equipment is logged in, click the button to
start the channel intercom video source.
[Stop Talkback]In the channel has been login code equipment. Click on the button
will disconnect the intercom with channel video source.
[Timing]Timing the on-line equipment.
[Arm and disarm]Query the arm and disarm information of the channel or all
channels under this group, as pic 7.1.10.
Pic 7.1.10
[Arm and disarm manually]
Select the corresponding channel in the arm and disarm state list, select the alarm
type, click arm or disarm can set by manual.
[Clear alarm manually]Click to clear the channel alarm information by manual.
Right Click Group:
Pic 7.1.11
[Disconnect all video]Disconnect all the connected preview in the group.
[Cruise automatically]Automatically cruise all online devices in the group.
[Setup interval of automatic cruise],[Arm and disarm],[Clear alarm manually]same
as above.
[Timing]Timing the group on-line equipment.
[Start Talkback]Start talkback with the group logged encoding devices.
[Stop Talkback]Stop talkback with the group logged encoding devices.
[Add to cruise group list] Add the selected encoding devices group list to auto cruise
group list.
7.1.5 Video preview window right click menu
Right click the video preview window, pop up the menu as shown in pic 7.1.12.
Pic 7.1.12
[Close the video]Click on the connected video will disconnect its video.
[Audio liveview]Click on the connected video ,users can hear the sound of the this
channel.
[Full Screen]Preview window will be full screen.
[Restore display]When the video window has been dragged, click restore to
recovery the original size.[Status bar] Click to hide / show the status bar, the effect
comparison chart shown in pic 7.1.13.
Pic 7.1.13
[Cruise]Click to select a setting already template, it will cruise according to the
template.(Please add[Cruise plan])
[Cruise all] Users can choose the existing template, cruise all according to the
selected templates (Please add[Cruise plan])
[Customize display split]Pop-up a dialog box after clicking, allowing users to
customize the split screen.
[3D control for PTZ]Click to turn on / off the PTZ 3D control.
[Digital Pan-Tilt]Click to turn on / off the Digital Pan-Tilt.
[E-zoom]Zoom in window.
[Delete alarm information]Clear the alarm channel.
[Instant Relay]There must have record in cameras’ storage. Video will replay
according to the pre-play time[6.7.4 other setting]and jump to replay interface.
[Video parameter] Set the currently selected video display parameters: Brightness,
Contrast, Saturation, Hue. As shown in pic 7.1.14.
Pic 7.1.14
[Cruise setup] Refer 6.5.1 Cruise plan configuration.
7.1.6 PTZ Control
7.1.6.1 Direction and speed control
Pic 7.1.15
PTZ direction control as pic 7.1.15
Set PTZ speed, “
“
”means speed up the speed ,
” means slow down the speed.
Pic 7.1.16
Preset call and set as pic 7.1.16:
[Set]Select the target preset number and control the PTZ direction until move to the
target position. Then click [set] to save it.
[Call]Select the saved preset, click [call]jump to the preset position.
7.1.6.2 Light, power and wiper
From left to right button: light, power, wiper.
[Light]Turn on /off light (limited for the camera with light function).
[Power]Turn on /off power(limited for the camera with power function).
[Wiper]Turn on /off power(limited the camera has a wiper)
7.1.6.3 Lens Control
Adjust the PTZ zoom
Click “-” zoom out, click “+” zoom in.
Adjust the PTZ focus
Click“-” make the PTZ lens focus near, click“+” make PTZ lens focus far.
Adjust the PTZ aperture.
Click“-” make PTZ aperture smaller, click “+” make the aperture wider.
7.1.6.4 Video Parameter Control
Pic 7.1.6.4
7.1.6.5 Other Control
[Advance]Preset setting (limited the current channel protocol is the DOME protocol)
[Voice]Adjusting the volume of the current selected video.
From left to right button, Defog, HLC (High light control), WDR (wide dynamic
range), Manual tracking.
[Defog]Turn on /off defog(Only for device with defog function)
[HLC]Turn on/off high light control
[WDR]Turn on/off WDR
[Manual tracking]Turn on/off manual tracking( only for the device with tracking
function) The rear progress bar can adjust the track parameters manually.
7.1.7 E-zoom
7.1.7.1 E-zoom operation
Click the video window: to keep the cursor in the original video window, sliding the
mouse wheel up to zoom in, sliding down to zoom out. As shown in pic 7.1.17.
Pic 7.1.17
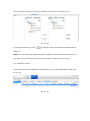
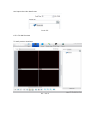
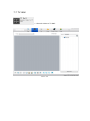
7.2 Playback
Pic 7.2.1
This interface include:device list, playback windows, playback bar, record search
and download.
7.2.1 Record Query
Choose [Location]:device storage,centralized storage and local storage are optional,
Referring to picture 7.2.2.
Pic 7.2.2
[Host]is only available when you choose centralized storage.
Two ways to choose channels: by device list and windows on the left.
[Group name]group info in device list
[Channel name]show the device info
[File Type]Manual recording, Time recording and Alarm recording are optional.
[Start Time]starting time for search. Time can be set manually or by dropdown list.
[End Time]ending time for search.
[Search]search according to the upper demand setting, referring to picture 7.2.3
Pic 7.2.3
7.2.2 Playback Modes
Mode 1:double click one record file in the search result list.
Mode 2:choose one window and one record file , then click
to playback.
Mode 3:choose one local file to playback.
Mode 4:records in [Device storage](only for same brand product with NVR)
、
[Centralize storage]and[Local storage]can be played back by time period.
7.2.2.1 Control Bar
Pic 7.2.7
---------single screen.
----------4 split screen.
----------9 split screen.
---start/pause
----------stop
----slow play/fast play
--------- fast backward , only for local record files
----located to first frame/last frame, only for local record files
----single frame backward/ single frame forward, only for local record files
---------capture
----audio
---drag to adjust playback process.
7.2.2.2 E-zoom
In playback process, right click to show the following list:
Choose [E-zoom]to show the following result like 7.2.8:
Pic 7.2.8
7.2.2.3 Right click menu :
Pic 7.2.9
[Full screen]click to full screen, click again to exit full screen
[Restore display]click to exit single screen status
[Status bar]show/hide status bar
[Single file loop playback]loop playback a singe files
[List file loop playback] loop playback files in the list
7.2.3 Download
7.2.3.1 Download files
Total two download modes: download by files and by time
Download by files:
1, Batch download: choose files, then right click to show download button, referring
to picture 7.2.10.
Pic 7.2.10
Click
to open download list referring to picture 7.2.11.
Pic 7.2.11
Note:in[Centralized Storage], one device support up to 10 channels downloading;
in [Device Storage], one device support up to 1 channels downloading
2, Stop Download: Click to stop downloading status, referring to picture 7.2.12
Pic 7.2.12
3. Reload: click to download again files in
[Downloading]and [Wait for
download]status, referring to picture 7.2.13
Pic 7.2.13
Download by time: this function is available for [Centralized Storage]and [Device
Storage]. Download after choosing channels and time.
7.2.3.2 Right click menu in download list :
For[Centralized Storage]and [Device Storage]
Pic 7.2.14
[Reload]Download a file from starting.
[Clear Record]clear chosen download info.
[Clear all]clear all download records.
For[Local Storage]
[Save as]copy the chosen file to another file
7.2.4 Playback history
7.2.4.1 Recently Viewed
Pic 7.2.15
[Recently Viewed] show the files that have already been played back.
Choose one file then right click to show operation:[Delete],[Empty],[Download]
7.2.4.2 Instant playback
In Preview interface, choose one channel that has records, then right click to choose
“instant playback” to start playback.
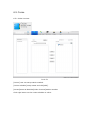
7.3 E-map
[Edit Mode]
Pic 7.3.1
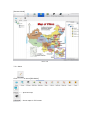
[Browse Mode]
Pic7.3.2
7.3.1 Menu
Click
to enter[Edit Mode]
----- preview map
----show maps in full screen
--- modify map name and map layer
--- delete chosen map
----- delete chosen device
------link another map with current map
---modify linked map
----delete hotlink
------import map
-----export current map
----- switch interface between original map and hotlink map
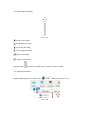
7.3.2 Direction and Scale
Pic 7.3.3
move up the map
move down the map
move left the map
move right the map
zoom in the map
zoom out the map
Drag this bar
and move up and down to zoom in/out the map
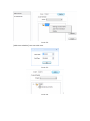
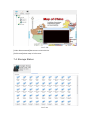
7.3.3 Right Click Menu
In[Edit Mode]right click on this icon
to add map like pic 7.3.4
Pic 7.3.4
In[Edit Mode],right click on this icon
to choose map navigation (pic 7.3.5 ).
Then it will show the map linked with this icon(pic 7.3.6 )
[Add device on the map]Drag the device icon directly from device list to the map
Pic 7.3.5
Pic 7.3.6
Right click on the device icon:
Pic 7.3.7
[Video Preview]enter preview interface, referring to Pic 7.3.8
Pic 7.3.8
[Video Disconnected]disconnect current device
[Full Screen]show map in full screen
7.4 Storage Status
Pic 7.4.1
7.4.1 Recording status
——Offline
——On-line
——Timing recording
——Alarm recording
——Manual recording
7.4.2 Hard disk status
——Record
——Backup
7.5 Alarm information
Pic 7.5.1
Double click alarm information to preview video.
Pic 7.5.2
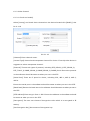
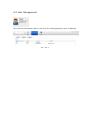
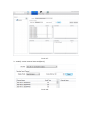
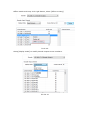
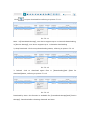
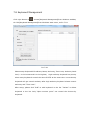
7.6 Log management
——Search log information
Pic 7.6.1
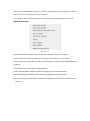
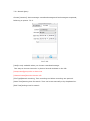
[Operation]setup log’s type, include “Log on”, “Port Input Alarm”, ”Video Loss Alarm”
etc type, as Pic 7.6.2:
Pic 7.6.2
[Host Name]Search host’s log according to host name.
[Channel Name]Search log information according to channel name.
[Delete current page]Delete all log information in current page.
[Delete all logs]Delete all log information.
[Export logs]Export and save log information.
[Total X page]Display total quantity of pages.
[The X page]Choose page number, jump to that page.
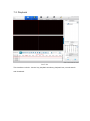
Search alarm linkage recording log information, for example motion detection
alarm recording log. Double click corresponding log, display “log recording ”
interface:
Pic 7.6.3
Double click alarm recording information, display Player:
Pic 7.6.4
7.7 TV Wall
——Decode video to TV Wall
Pic 7.7.1
1. Refer to 6.4.1 and 6.4.2 chapter to add devices.
Pic 7.7.2
2.Please click right button on the TV wall, see the menu as below:
Pic 7.7.3
[Decoder offline cruise]Enable, it can’t connect to video; To connect video, please
disable “Decoder offline cruise”, then choose IP camera channel.
[Close
the
audio],[Full
video],[Audio
screen],[Restore
liveview],[Open
display],[Status
decoder
audio],[Close
bar],[Cruise],[Cruise
decoder
all],[Stop
cruising],[3D control for PTZ],[Video parameter]Please refer to 7.1.5 “Video
preview right button menu”.
7.8 Keyboard Management
Click right button on
, choose[Keyboard Management]from Windows taskbar;
Or Click[Keyboard Management]from Windows start menu, as Pic 7.8.1
Pic 7.8.1
Please setup keyboard’s IP address, Name, Authority, Time Limit; Authority has 8
level, 1 is the lowest and 8 is the highest;
High authority keyboard has priority
when many keyboards control the same IP PTZ at the same time. Low authority
keyboard will get control authority after high authority keyboard release control
authority and “Time Limit”.
After setup, please click “Add” to add keyboard in the list. “Delete” is delete
keyboard in the list. Only “Open monitor point” can control the devices by
keyboard.
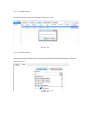
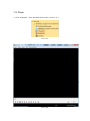
7.9 Player
1. Click “Playback ” from Windows start menu, as Pic 7.9.1:
Pic 7.9.1
Pic 7.9.2
2. Drag recording file on the player, as Pic 7.9.3:
Pic 7.9.3