1
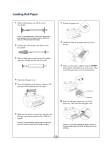
1
JetPlate 7600
Setup Guide
JetPlate Systems LLC
34 Franklin ST
Nashua, NH 03064
(603) 882-5919
(877) 747-2372
All Trademarks used in this document are the properties of their respective owners.
Rev. 1.3 4/6/2004
2
Contents
CONTENTSCHAPTER 1: OVERVIEW ------------------------------------------------------------------- 2
CHAPTER 1: OVERVIEW ----------------------------------------------------------------------------------- 4
Space Requirements for JetPlate & Proofer --------------------------------------------------------- 4
UV Light restrictions----------------------------------------------------------------------------------------- 5
CHAPTER 2: SETTING UP THE JETPLATE 7600 --------------------------------------------------- 6
Unpacking and Assembling the Optional Stand---------------------------------------------------- 6
Unpacking the Printer --------------------------------------------------------------------------------------- 7
Mounting the Printer on the Optional Stand --------------------------------------------------------- 8
Attaching the Paper Basket ------------------------------------------------------------------------------- 9
Connecting the Power Cord ----------------------------------------------------------------------------- 10
Installing the Ink Cartridges ----------------------------------------------------------------------------- 11
Loading Roll Paper ----------------------------------------------------------------------------------------- 12
Installing the JetPlate Rip 8.0.4 ------------------------------------------------------------------------ 14
Connecting the Printer to Your Computer---------------------------------------------------------- 14
Connecting to the USB Port ------------------------------------------------------------------------- 14
Connecting to the Parallel Port (Windows Only)------------------------------------------------ 15
Nozzle Check and Alignment --------------------------------------------------------------------------- 15
Printing a Nozzle Check Pattern -------------------------------------------------------------------- 15
Cleaning the Print Head from the Control Panel------------------------------------------------ 16
Performing a Power Cleaning ----------------------------------------------------------------------- 16
Aligning the Print Head-------------------------------------------------------------------------------- 16
Examining the UNI-D ALL Alignment Pattern --------------------------------------------------- 17
Examining the BI-D BLACK Alignment Pattern ------------------------------------------------- 18
Examining the BI-D ALL Alignment Pattern------------------------------------------------------ 18
CHAPTER 3: PLATEN AND COVER INSTALLATION -------------------------------------------- 20
CHAPTER 4: FLUSHING AND CHARGING---------------------------------------------------------- 21
Draining The JetPlate --------------------------------------------------------------------------------- 21
Enter Override mode ---------------------------------------------------------------------------------- 21
Exit Override Mode------------------------------------------------------------------------------------- 22
Charge with Plate Marker Fluid --------------------------------------------------------------------- 22
All Trademarks used in this document are the properties of their respective owners.
Rev. 1.3 4/6/2004
3
CHAPTER 5: JETPROOF (OPTIONAL) --------------------------------------------------------------- 23
CHAPTER 6: JETPLATE 7600 TROUBLESHOOTING FAQS ---------------------------------- 24
JetPlate Faqs ------------------------------------------------------------------------------------------------- 24
How do I check the alignment of the print head on the JetPlate 7600 and JetProof 7600?
----------------------------------------------------------------------------------------------------------------- 24
Printing the Alignment Pattern ---------------------------------------------------------------------- 24
Examining the UNI-D ALL Alignment Pattern.--------------------------------------------------- 25
Examining the BI-D BLACK Alignment Pattern. ------------------------------------------------ 26
Examining the BI-D ALL Alignment Pattern------------------------------------------------------ 26
My Plates have white lines or extra lines in text, how do I fix this? --------------------------- 28
Printing the Nozzle Check Pattern ----------------------------------------------------------------- 28
Cleaning the Print Head From the Control Panel----------------------------------------------- 28
Performing a Power Cleaning From the Control Panel ------------------------------------------ 29
All Trademarks used in this document are the properties of their respective owners.
Rev. 1.3 4/6/2004
4
Chapter 1: Overview
This manual covers the assembly and initial adjustments of the JetPlate 7600 and JetProof
7600.
•
Space requirements for Jetplate & Proofer (optional)
•
UV Light restrictions
•
Setup JetPlate
1.
2.
3.
4.
5.
Assembling the JetPlate
Nozzle Check and Alignment
Installing PrintPlate
Platen and Cover Installation
Flushing and Charging Process
•
Setup the Proofer (optional)
•
Installing the JetPlate Rip 8.0.4
Space Requirements for JetPlate & Proofer
•
The JetPlate requires
a sturdy table surface
at least 4' by 2.5' with
a height of 30”.
•
You will need to have
enough free floor
space to the right of
the table so that you
can stand there while
positioning the input
platen.
•
The Epson 7600
Proofer Printer has an
optional stand,
recommended.
•
Both units should be
close enough to your
computer to connect
the JetPlate 7600
and/or Proofer with
the twelve-foot cables
that are shipped with
your JetPlate system.
All Trademarks used in this document are the properties of their respective owners.
Rev. 1.3 4/6/2004
5
UV Light restrictions
•
The printing plates used with the JetPlate System are UV-sensitive.
Therefore, a yellow or low tungsten light environment is required for the
JetPlate.
All Trademarks used in this document are the properties of their respective owners.
Rev. 1.3 4/6/2004
6
Chapter 2: Setting up the JetPlate 7600
Unpacking and Assembling the Optional Stand
The JetPlate is shipped in two boxes: the JetPlate box and the Platen box.
If you ordered the optional stand, you will have a third box.
Skip this step if you did not order the optional stand.
1. Unpack the optional stand if ordered, and make sure you have all these items. You
will also need a Phillips screwdriver.
Parts:
A: Base, right and left (1 each)
B: Leg, right and left (1 each)
C: Bottom support bar (1)
D: Top support bar (1)
E: Basket hooks (4)
F: Basket (1)
Accessories:
G: Allen wrench (1)
H: Bolts (4)
I: Bolts (2)
J: Collars (2)
K: Phillips screws with washers (4)
L: Wing screws (2)
M: Washers (2)
for attaching lower bar to legs
for attaching legs to base
for attaching lower bar to legs
for attaching top support bar to legs
for attaching printer to stand
for attaching printer to stand
2. Insert one of the legs into the base as
shown. (The bolt holes line up only if the
leg is matched with the correct base.) Use
the included Allen wrench to fasten the
leg with two bolts (H).
All Trademarks used in this document are the properties of their respective owners.
Rev. 1.3 4/6/2004
7
3. Assemble the other leg and base in the same way.
4. Attach the bottom support bar as shown. Fasten the bar with one collar U) and one
bolt (I) at each end.
5. Attach the top support bar as shown. Use a Phillips screwdriver to fasten the four
small screws (K).
6. Make sure each part of the stand is tightened securely.
Unpacking the Printer
1. Open the JetPlate box.
2. Carefully remove all the small pieces including software, manuals, trays, cables,
and set them out of the way. Use the packing list to confirm receipt of all parts.
3. Remove the roll paper, polystyrene foam, and cardboard cushions.
4. Remove the handles from the sides of the box as shown.
5. Lift the box up and away from the printer. Remove the ink cartridges and other
accessories from the side as shown below. Remove ink cartridges and accessories
All Trademarks used in this document are the properties of their respective owners.
Rev. 1.3 4/6/2004
8
6. Remove the cardboard panels from around the printer.
7. Take out the foam supports from under the printer.
8. Remove any packing tape. Check these areas:
• front cover
• ink compartment cover (in front on the left)
• maintenance tank (on the right side near the bottom)
9. Open the front cover. Then unscrew the bolt and remove the bracket securing the
print head. Save the bolt and bracket in case you need to ship the printer.
10. If you want to set the printer on a desk, use at least two people to hold it as shown.
11. Otherwise, follow the instructions in the next section to mount it on the optional
stand.
Mounting the Printer on the Optional Stand
If you have an optional stand, follow these steps to mount the printer:
1. Lock the casters and lower the stabilizer knobs to keep the stand from rolling.
All Trademarks used in this document are the properties of their respective owners.
Rev. 1.3 4/6/2004
9
2. Using two people, hold the printer at the indicated locations. Then set it on the stand
as shown.
3. Fasten the printer to the stand with wing screws Q and washers (M).
Attaching the Paper
Basket
This section is for the Optional Proofer ONLY!
1. Attach the metal rods as shown. The free
ends of the rods should point outward.
2. Snap the basket's plastic connectors onto the metal rods at the rear of the stand.
(The rear connectors are labeled with an R.)
All Trademarks used in this document are the properties of their respective owners.
Rev. 1.3 4/6/2004
10
3. Rotate the front bar once as shown, so the fabric folds around the bar.
4. Snap the connectors onto the front metal
rods.
5. Check underneath the printer for packing tape.
6. Raise the stabilizer knobs and unlock the casters. Then move the printer to the place
of use. (The casters are meant for moving the printer for only a short distance.) Lock
the casters and extend the stabilizer knobs after moving.
Connecting the Power Cord
Do not use an outlet that is controlled by an automatic timer or wall
switch. Otherwise, you may accidentally shut off the printer and
cause damage.
1. Connect the power cord to the AC inlet on the back of the
printer.
2. Route the power cord through one of the hooks on the left or right side as shown.
3. Plug the power cord into a properly grounded electrical outlet.
All Trademarks used in this document are the properties of their respective owners.
Rev. 1.3 4/6/2004
11
Installing the Ink Cartridges
Make sure you've removed the shipping bracket before installing ink cartridges.
Make sure the first ink cartridges you install are the correct type for your printer: EPSON
UltraChrome" ink or EPSON Photographic Dye'" ink. The chips on the cartridges are
programmed to initialize the printer as the correct ink model. This determines the type of ink
your printer will use for its entire lifetime.
The JetPlate 7600 uses only the ink cartridges supplied by JetPlate Systems, Inc. (do not
use any other cartridges than the ones supplied by JetPlate Systems Inc. or damage may
occur to the JetPlate 7600).
Before you begin, make sure the printer is plugged into a grounded outlet.
Follow these steps to install the cartridges:
1. Press the Power button on the control
panel to turn the printer on.
2. Open the ink compartment cover.
3. Raise the ink lever to the unlocked position.
4. Locate the ink cartridges that came with the printer. If ink gets on your hands, wash
them thoroughly with soap and water. If ink gets in your eyes,
flush them immediately with water. If you can't insert the cartridge
smoothly, you may have the wrong cartridge.
5. Remove each cartridge from its packaging. If you're using
EPSON UltraChrome ink, gently shake each cartridge before
installing it.
All Trademarks used in this document are the properties of their respective owners.
Rev. 1.3 4/6/2004
12
6. Install the ink cartridges in the printer. Hold each cartridge with the arrow mark
pointing toward the printer. Insert it until the corresponding Ink Out light turns off on
the control panel. Photographic Dye ink users: insert the black ink cartridges in the
first two slots on the left. UltraChrome ink users: if you're installing the included
cartridges, insert the Photo Black cartridge in the first slot on the left, then insert the
Light Black cartridge in the second slot.
7. After installing all the cartridges, lower the ink lever to the locked position and close
the ink compartment cover.
Never turn off the printer or change the position of the ink lever while the Pause light is
flashing.
The printer begins charging the ink delivery system and the Pause light flashes. This takes
about 10 minutes. Do not turn off the printer or interrupt this process, or you'll use more ink
than necessary. When the Pause light stops flashing and Paper Out appears on the control
panel, you're ready to load the roll paper.
Loading Roll Paper
Before you begin, locate the roll paper that came with your printer and remove it from its
protective packaging. The paper may already be loaded on the spindle. (If it isn't, see
"Loading the Paper onto the Spindle" in the EPSON 7600/9600 User Manual).
Follow these steps to place the paper in the printer:
1. Open the roll paper cover.
2. To avoid feeding excess paper, make sure you don't select Sheet when you're using
roll paper. Place the roll paper in the printer as shown. (The white end of the spindle
goes on the right.)
All Trademarks used in this document are the properties of their respective owners.
Rev. 1.3 4/6/2004
13
3. Make sure the printer is turned on. Press the Paper Source button until the Roll Auto
Cut light comes on.
4. Move the paper lever back to the released position.
5. Feed the paper into the slot.
6. Pull the paper down so it extends all the
way through the slot.
7. Turn the roll back to remove any slack.
Then align the bottom edge of the paper
with the horizontal row of holes, as
shown. (Do not extend the paper past the
row of holes).
8. Pull the paper lever forward to the locked
position, close the roll paper cover.
All Trademarks used in this document are the properties of their respective owners.
Rev. 1.3 4/6/2004
14
9. Press the Pause button (or wait for 5 seconds). The paper feeds into printing
position automatically and READY appears on the control panel.
Installing the JetPlate Rip 8.0.4
Now is the time to install the JetPlate Rip 8.0.4.
Follow the instructions in the JetPlate Rip Manual (this must be done before connecting
the printers to the computer. The Rip installer also installs the printer drivers).
Connecting the Printer to Your Computer
Depending on your system, you can connect the printer to your computer using any of the
following:
USB interface for 2000 and XP.
Parallel interface-for Windows.
Optional IEEE 1394 FireWire interface card-for Windows 2000 and XP. The optional
FireWire card allows multiple printers to be daisy-chained to your system, and can keep
them all running at the full speed of the print engine (see the EPSON 7600/9600 User
Manual for installation instructions).
Optional 10/100 BaseT Ethernet interface card-network connectivity for all systems.
EPSON's optional Ethernet card keeps your printer running at full speed, limited only by the
bandwidth of your network. To provide adequate bandwidth, you need a switched 100 Mbit
hub on your network (see the EPSON 7600/9600 User Manual for installation instructions).
In some cases, it may be to your advantage to use an optional interface card instead of the
built-in port. If you choose to purchase an optional interface card, see the EPSON
7600/9600 User Manual for ordering information.
Connecting to the USB Port
To connect the printer to a USB port, you need a standard shielded USB cable.
Follow the steps below to connect the printer to your computer:
1. Make sure both the printer and your computer
are turned off.
2. If the printer doesn't work when you attach it to
a first tier USB hub port, connect it directly to
the USB port on your computer. Connect the
square end of the USB cable
to the
USB port on the back of your printer.
All Trademarks used in this document are the properties of their respective owners.
Rev. 1.3 4/6/2004
15
3. Connect the
tier USB hub port.
flat end of the USB cable to your computer's USB port or a first
Connecting to the Parallel Port (Windows Only)
To use the printer's built-in parallel interface, you need a shielded, bidirectional, parallel
cable.
Follow the steps below to connect the printer to your computer:
1. Make sure both the printer and your computer are
turned off.
2. Plug the cable connector securely into the
printer's interface. Then squeeze the wire clips
together until they lock into place on both sides.
3. Plug the other end of the cable into the computer's parallel port.
Nozzle Check and Alignment
Run a nozzle check to insure the print head is printing correctly; also do an alignment of the
printhead to insure proper printing. These two steps must be done!!!
Printing a Nozzle Check Pattern
1. Load a letter-size sheet of paper in the printer, following the instructions on page 77.
(You can print the nozzle check on larger sheets or on roll paper, but you will use
more paper.)
2. Press the SelecType button on the control
panel. You see PRINTER SETUP.
3. Press
until you see TEST PRINT, then
press . You see NOZZLE CHECK.
until you see PRINT, then press
4. Press
Enter. The nozzle check sheet prints.
Use the eye loupe that came with the printer to examine the pattern. Even if all the dots
printed, you may be able to see misaligned or "deflected" dots. Deflected dots, like missing
ones, indicate that you should clean the print head.
5. Examine the nozzle check pattern. Each staggered horizontal and straight vertical
line should be complete, with no gaps in the pattern:
All Trademarks used in this document are the properties of their respective owners.
Rev. 1.3 4/6/2004
16
If dots are missing from the pattern, as shown below, clean the print head as described
in the next section.
Cleaning the Print Head from the Control Panel
1. Make sure all of the 7 Ink Out lights on the printer's control panel are off. If an Ink
Out light is flashing or on, you need to replace the corresponding ink cartridge.
2. Press the Cleaning button and hold it for at least 3 seconds. The Pause light flashes
as the printer cleans its print head. The cleaning cycle takes about 60 seconds and
does not use any paper.
3. When the Pause light goes off, print the nozzle check pattern again to confirm that
the head is clean. You may need to run the cleaning cycle several times to get a
clean nozzle check pattern. For effective cleaning, always run a nozzle check
between cycles.
Performing a Power Cleaning
If you're unable to clean the print head fully as described above, you can perform a power
cleaning. You should not perform a power cleaning more often than necessary, since it
consumes additional ink.
1. Press the SelecType button on the control panel. You see PRINTER SETUP.
2. Press
until you see MAINTENANCE, then press . You see PWR CLEANING.
3. Press
until EXEC appears on the display, then press Enter.
The printer performs the power cleaning. Do not turn off the printer or interrupt this process
until it is complete.
If the lines on the pattern are still missing dots after running a power cleaning, leave it
overnight, then clean the print head again the following morning. If you still see no
improvement, contact JetPlate Systems Inc.
Aligning the Print Head
Before using the printer, you should align the print head to ensure clean, accurate printouts.
To do the alignment, you have to print a set of alignment patterns. Make sure you've run a
nozzle check, as described above, before you begin. If the print head nozzles are clogged,
the patterns won't print correctly and your print head alignment won't be accurate.
Although you can align the print head using the printer software, it's best to do this from the
control panel. This aligns the print head for all modes and resolutions.
All Trademarks used in this document are the properties of their respective owners.
Rev. 1.3 4/6/2004
17
When performing the BI-D adjustments, always do them in this order: UNI-D ALL, then BI-D
BLACK, and then BI-D ALL. Do not repeat the BI-D BLACK (K1) adjustment afterward.
1. Make sure the printer is turned on, then load roll paper that is at least 24 inches
wide. For best results, use EPSON Doubleweight Matte paper (this is the type of
paper that came with your printer). If you are realigning the JetPlate 7600, use the
largest plate you can, process normally, and use a loupe to check the pattern on
plate.
2. Press the SelecType button on the control panel. You see PRINTER SETUP.
3. Press
until you see HEAD ALIGNMENT, then press . You see PAPER THKNS.
until *STD appears on the display. This is the correct thickness setting for
4. Press
most EPSON papers (also for JetPlate plates).
5. Press Enter.
6. Press the
or
button to select the desired alignment mode (UNI-D ALL, BI-D
BLACK, or BI-D ALL), then press Enter to start printing the alignment patterns.
After they print, see the appropriate section on the following pages, depending on the
selected mode.
Examining the UNI-D ALL Alignment Pattern
1. Depending on the width of the paper
(or plate) loaded in the printer, more
than one set of patterns may be
printed. Locate the patterns in the
middle of your printout. In the steps
that follow, refer to those patterns to
make your adjustment instead of the
ones printed toward the left or right.
2. Look at the display screen on the
printer. Notice that it is prompting
you to choose the best line in the
group labeled K2 in row #1.
3. Use your own eye loupe or the one that
came with the printer to determine which
line is the straightest. In this example, the
middle line (numbered 5) is the best
choice.
All Trademarks used in this document are the properties of their respective owners.
Rev. 1.3 4/6/2004
18
4. Use the
or
button to select the number of the straightest line. Note that 5 is
always the default selection.
5. Press Enter to accept your selection and go to the next group of lines.
6. Repeat this process to examine each of the other color groups in row # 1: C, M, Lc,
Lm, and Y. In each case, select the number of the straightest line, then press Enter.
7. Repeat this process to examine the groups of lines in rows #2 and #3.
8. When done, press Pause to exit the head alignment.
Examining the BI-D BLACK Alignment Pattern
1. Depending on the width of the paper (or
plate) loaded in the printer, more than one
set of patterns may be printed. Locate the
patterns in the middle of your printout. In
the steps that follow, refer to those patterns
to make your adjustments, instead of the
ones printed toward the left or right.
2. Look at the display screen on the printer.
Notice that It is prompting you to choose the
best line in the group labeled K1 in row #1.
3. Use your own eye loupe or the one that came with the
printer to determine which line is the straightest. In this
example, the middle line (numbered 5) is the best
choice.
4. Use the
or
button to select the number of the straightest line. Note that 5 is
always the default selection.
5. Press Enter to accept your selection and go to the next group of lines.
6. Repeat this process to examine the lines in rows #2 and #3. In each case, select the
number of the straightest line, then press Enter.
7. When done, press Pause to exit the head alignment.
Examining the BI-D ALL Alignment Pattern
Be sure to perform the BI-D BLACK adjustment before running this one.
IMPORTANT: Do not enter an adjustment value for K1
when prompted, or your color adjustments won't be
accurate.
1. Depending on the width of the paper loaded in the
printer, more than one set of patterns may be
printed. Locate the patterns in the middle of your
printout. In the steps that follow, refer to those
All Trademarks used in this document are the properties of their respective owners.
Rev. 1.3 4/6/2004
19
patterns to make your adjustments, instead of the ones printed toward the left or
right.
2. Look at the display screen on the printer. It shows #1 K1. Do not change the
adjustment value for K1. Press Enter and continue with the following steps.
3. The printer is now prompting you to choose the best block in the group labeled K2 in
row #1.
4. Use your own eye loupe or the one that came with the printer to determine which
block has the least visible vertical line. In this example, the middle block (numbered
5) is the best choice.
5. Use the
or
button to select the number of the best block. Note that 5 is always
the default selection.
6. Press Enter to accept your selection and go to the next group of blocks. Repeat this
process to examine the remaining blocks in row #1: C, M, Lc, Lm, and Y (if this is a
realignment, K1 and Y are most important). In each case, select the number of the
best block, then press Enter.
7. Repeat this process to examine the groups of blocks in rows #2 and #3.
IMPORTANT: Do not enter an adjustment value for K1 when prompted, or your color
adjustments won't be accurate. When done, press Pause to exit the head alignment.
All Trademarks used in this document are the properties of their respective owners.
Rev. 1.3 4/6/2004
20
Chapter 3: Platen and Cover Installation
•
The JetPlate 7600 is now ready for the Platen.
1. Remove the roll of paper
from the JetPlate 7600.
2. Open the roll cover.
3. Remove the 2 screws
securing the black (left)
spindle support and
remove the support (1
upper (rear) and 1 lower (front)).
4. Remove the 3 screws from the white (right) spindle support and remove the spindle
support (1 upper (rear), 1 lower (front), and 1 middle).
5. In the hardware kit, you will find four large headed screws two thick and two thinner.
6. Screw the two thinner screws into the two holes closest to the front of the printer (the
lower holes from the spindle supports)(leave these screws fairly loose as the Platen
brackets have to slide over these screws).
7. Screw the thicker two
screws into the upper
holes from the spindle
supports, and tighten
them down.
8. Attach the top cover to
the Platen with the
screws provided.
9. Place the Platen on the
JetPlate by sliding the Platen brackets down over the lower 2 screws from the
spindle supports.
10. Place a large washer on each of the long screws and screw into the large holes in
the Platen brackets.
11. Tighten ALL the Platen screws.
12. Slide the lower catch tray cover assembly into the brackets protruding from the lower
front of the JetPlate, and secure with the
screws provided.
13. Align the paper guide cover with the paper
guide and remove the screws from the paper
guide that line up with the cover.
14. Attach the paper guide cover with the screws
you removed from the paper guide.
All Trademarks used in this document are the properties of their respective owners.
Rev. 1.3 4/6/2004
21
Chapter 4: Flushing and Charging
Now it is time to charge the JetPlate with Plate Marker.
Draining The JetPlate
1.
2.
3.
4.
Turn off your JetPlate 7600.
Raise the ink locking lever.
Remove ALL the ink cartridges.
Insert draining cartridges into all seven channels. Each cartridge is keyed to a specific ink
channel. Lower the ink locking lever.
Enter Override mode
1. Enter the service mode by pressing Paper
Source + Paper Feed Down + Cut/Eject on
the control panel, while turning on the
printer.
2. Press Paper Feed Down x2 to Service
Config, then hit Select Type.
3. Press Paper Feed Down x5 to ED Mode,
then hit Select Type.
4. Press Paper Feed Down until O is present.
5. Hit Enter, Confirm that an Asterisk is next to O.
•
Perform and Initial Fill, described below. The initial fill will take approximately 10 minutes.
1. Enter the service mode by pressing Paper
Feed Up + Paper Feed Down + Enter on
the control panel, while turning on the
printer.
2. Press Paper Feed Down x2 to Cleaning,
then hit Select Type.
3. Press Paper Feed Down x3 to Init Fill, then
hit Enter.
4. The printer will begin to drain the system of ink. This procedure will take about 10
minutes.
•
•
Flushing The JetPlate
Now it is time to flush the ink out of the JetPlate to get the system ready for Plate
Marker (see chart below for proper sequence).
1.
2.
3.
4.
Turn off your JetPlate 7600.
Raise the ink locking lever.
Remove all the ink cartridges.
Insert maintenance cartridges into all seven channels. Each cartridge is keyed to a
specific ink channel. Lower the ink locking lever.
All Trademarks used in this document are the properties of their respective owners.
Rev. 1.3 4/6/2004
22
5. Perform an initial fill as described above. This procedure will take about 10 minutes.
6. The printer will begin to charge the system with the maintenance fluid. This procedure
will take about 10 minutes.
7. Remove the LK, C, M, LC, and LM cartridges and replace with blocking cartridges.
8. Perform two initial fills as described above, with blocking in all but the black and yellow.
9. Remove the maintenance cartridges from the black and yellow and replace with
draining cartridges.
10. Perform an initial fill as described above. This procedure will take about 10 minutes.
Exit Override Mode
•
After flushing the JetPlate, the printer needs to be returned to normal mode.
1. Turn the JetPlate off’
2. Enter the service mode by pressing Paper
Source + Paper Feed Down + Cut/Eject
while turning on the printer.
3. Press Paper Feed Down x2 to Service
Config, and then hit Select Type.
4. Press Paper Feed Down x5 to ED Mode,
then hit Select Type.
5. Press Paper Feed Down until X is present.
6. Hit Enter, Confirm that an Asterisk is next to X.
7. Turn off the JetPlate.
Charge with Plate Marker Fluid
•
The last step is to charge the JetPlate 7600 with PlateMarker.
1.
2.
3.
4.
Remove ALL the cartridges from the JetPlate.
Load Plate Marker Fluid into the Yellow and Black Channel.
Load Maintenance fluid into the remaining Channels.
Perform an initial Fill as described above. This procedure will take about 10 minutes.
All Trademarks used in this document are the properties of their respective owners.
Rev. 1.3 4/6/2004
23
The JetPlate 7600 is now ready to make plates (see the JetPlate Rip Manual
for instructions).
Chapter 5: JetProof (optional)
The optional JetProof 7600 is shipped in one box (two if the optional stand is purchased
too).
1.
2.
3.
4.
Follow the instructions above to assemble the optional stand.
Follow the steps above for attaching the basket.
Follow the instructions above to setup the JetProof.
Follow the instructions in Nozzle Check and Alignment.
The JetProof 7600 is now ready for use. See the JetPlate User Manual for
instructions.
All Trademarks used in this document are the properties of their respective owners.
Rev. 1.3 4/6/2004
24
Chapter 6: JetPlate 7600 Troubleshooting Faqs
JetPlate Faqs
How do I check the alignment of the print head on the JetPlate 7600 and
JetProof 7600?
If banding appears on your prints, or vertical lines are not straight, you need to align the
print head. Although you can align the print head using the printer software, it's best to do
this from the control panel. This aligns the print head for all modes and resolutions.
If you haven't already done so, make sure you've run a nozzle check, as described on the
nozzle check page JetPlate 7600 Nozzle Check Faq, before you begin. This ensures that
the nozzles are clean and the print head alignment patterns will print correctly.
Printing the Alignment Pattern
To check alignment, load a plate into the JetPlate 7600 (load the largest plate possible,
using the widest possible side not to exceed 24 inches. As an example, if you have a
13"x19" plate load it landscape) or paper into the JetProof 7600. Caution: When performing
the BI-D adjustments, always do them in this order: UNI-D ALL, then BI-D BLACK, and
then Bl-D ALL. Do not repeat the BI-D BLACK (K1) adjustment afterward.
1. Press the SelecType button on the control panel. You see PRINTER SETUP.
2. Press Paper Feed up until you see HEAD ALIGNMENT, then press SelecType, you
will see PAPER THKNS.
3. Press SelecType until *STD appears on the display. This is the correct thickness
setting for most EPSON papers. Press Enter.
4. Press the Paper Feed up or down button to select the desired alignment mode (UNID ALL, BI-D BLACK, or BI-D ALL), and then press Enter to start printing the
alignment patterns.
After they print, see the appropriate section on the following pages, depending on the
selected mode. In general, you should perform all three types of alignments. If you plan to
print only uni-directionally, you may only need to adjust UNI-D ALL. If you plan to print bidirectionally, perform the UNI-D ALL alignment first, then BI-D BLACK, then BI-D ALL.
If the print head cannot be realigned, call JetPlate Systems.
All Trademarks used in this document are the properties of their respective owners.
Rev. 1.3 4/6/2004
25
Examining the UNI-D ALL Alignment Pattern.
Follow these steps when the UNI-D ALL patterns finish printing:
1. Depending on the width of the plate or paper loaded in the printer, more than one set
of patterns may be printed. Locate the patterns in the middle of your printout. In the
steps that follow, refer to those patterns to make your adjustments, instead of the
ones printed toward the left or right.
2. Look at the
the printer.
prompting you to
line in the group
#1.
display screen on
Notice that it is
choose the best
labeled K2 in row
3. Use your own eye loupe or the one that came with the printer to determine which
line is the straightest. In this example, the middle line (numbered 5) is the best
choice (If number 5 is the straightest line in each group, the print head is
already properly aligned. Press Pause to exit the head alignment early).
4. Use the Paper Feed
up or down button to
select the number of the straightest line. Note that 5 is always the default selection.
5. Press Enter to accept your selection and go to the next group of lines.
6. Repeat this process to examine each of the other color groups in row # 1: C, M, Lc,
Lm, and Y. In each case, select the number of the straightest line, then press Enter.
7. Repeat this process to examine the groups of lines in rows #2 and #3.
8. When done, press Pause to exit the head alignment.
All Trademarks used in this document are the properties of their respective owners.
Rev. 1.3 4/6/2004
26
Examining the BI-D BLACK Alignment Pattern.
Follow these steps when the BI-D BLACK patterns finish printing:
1. Depending on the width of the plate or paper loaded in the printer, more than one set
of patterns may be printed. Locate the patterns in the middle of your printout. In the
steps that follow, refer to those patterns to make your adjustments, instead of the
ones printed toward the left or right.
2. Look at the display screen on the printer. Notice that it is prompting you to choose
the best line in the group labeled K1 in row #1.
3. Use your own eye loupe or the one that came with the printer to determine which
line is the straightest. In this example, the middle line (numbered 5) is the best
choice (If number 5 is the straightest line in each group, the print head is
already properly
aligned. Press Pause to
exit the head
alignment early).
4. Use the Paper Feed up or down button to select the number of the straightest line.
Note that 5 is always the default selection.
5. Press Enter to accept your selection and go to the next group of lines.
6. Repeat this process to examine the lines in rows #2 and #3. In each case, select the
number of the straightest line, then press Enter.
7. When done, press Pause to exit the head alignment.
Examining the BI-D ALL Alignment Pattern
Be sure to perform the BI-D BLACK adjustment before running this one.
All Trademarks used in this document are the properties of their respective owners.
Rev. 1.3 4/6/2004
27
Follow the steps below when the BI-D ALL patterns finish printing.
IMPORTANT: Do not enter an adjustment value for K1 when prompted, or your color
adjustments won't be accurate.
1. Depending on the width of the paper loaded in the printer, more than one set of
patterns may be printed. Locate the patterns in the middle of your printout. In the
steps that follow, refer to those patterns to make your adjustments, instead of the
ones printed toward the left or right. Look at the display screen on the printer. It
shows #1 K1. Do not change the adjustment value for K1. Press Enter and continue
with the following steps.
2. The printer is now prompting you to choose the best block in the group labeled K2 in
row #1.
3. Use your own eye loupe or the one that came with the printer to determine which
block has the least visible vertical line. In this example, the middle block (numbered
5) is the best choice. If number 5 is the best block in each group, the print head is
already properly aligned. Press Pause to exit the head alignment early.
4. Use the
Paper Feed up or
down button to select the number of the best block. Note that 5 is always the default
selection.
5. Press Enter to accept your selection and go to the next group of blocks.
All Trademarks used in this document are the properties of their respective owners.
Rev. 1.3 4/6/2004
28
6. Repeat this process to examine the remaining blocks in row #1: C, M, Lc, Lm, and Y.
In each case, select the number of the best block, then press Enter.
7. Repeat this process to examine the groups of blocks in rows #2 and #3.
IMPORTANT: Do not enter an adjustment value for K1 when prompted, or your color
adjustments won't be accurate.
8. When done, press Pause to exit the head alignment.
My Plates have white lines or extra lines in text, how do I fix this?
From time to time, the JetPlate 7600 nozzles become clogged. This can also affect the
JetProof 7600. If the nozzles in the head become clogged you can experience trailing lines
running horizontally across the plate (this means the lines run the direction the print head
travels). The plates may also have white bands running horizontally across the plate). To
correct this problem, run the cleaning cycle described below, and check the JetPlate 7600
head alignment.
Printing the Nozzle Check Pattern
1. To run a nozzle check, load a plate into the JetPlate 7600 or paper into the JetProof
7600.
2. Press the SelecType button on the control panel you will see PRINTER SETUP.
3. Press the Paper Feed down button until you see TEST PRINT, and then press the
SelecType button. You will see NOZZLE CHECK.
4. Press the SelecType button until you see PRINT, then press Enter.
The nozzle check pattern prints. If you are using a plate, process the plate as usual.
Examine the nozzle check pattern. Each staggered horizontal and straight vertical line
should be complete, with no gaps in the pattern:(a sign of a plugged nozzle). If dots are
missing from the pattern, as shown below, clean the print head as described below.
Cleaning the Print Head From the Control Panel
Follow these steps to run the cleaning cycle from the printers control panel:
Make sure all of the Ink Out lights on the control panel are OFF.
If an Ink Out light IS flashing or on, you need to replace the corresponding ink cartridge.
All Trademarks used in this document are the properties of their respective owners.
Rev. 1.3 4/6/2004
29
1. Press the Cleaning button and hold it for 3 seconds. The Pause light flashes as the
printer cleans its print head. The cleaning cycle takes about 60 seconds and does
not use any plates or paper.
2. When the Pause light goes off, print the nozzle check again to confirm that the head
is clean. You may need to run the cleaning 3-4 times to get a clean nozzle check
pattern. For effective cleaning, ALWAYS run a nozzle check between cleaning
cycles.
3. If after 3-4 cleanings, the nozzle check pattern still has missing dots, perform a
Power Cleaning as described below. You should not perform a power cleaning more
often than necessary, since it consumes amounts of ink.
Performing a Power Cleaning From the Control Panel
1. Press the SelecType button on the control panel. You will see PRINTER SETUP.
2. Press the Paper Feed up button until you see MAINTENANCE, then press
SelecType. You will see PWR CLEANING.
3. Press SelecType until EXEC appears on the display, then press enter.
The printer performs the power cleaning. Do not turn off the printer or interrupt this process
until it is complete.
If the lines on the pattern are still missing dots after running a power cleaning, contact
JetPlate Systems.
All Trademarks used in this document are the properties of their respective owners.
Rev. 1.3 4/6/2004