1
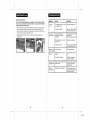
Operator's Manual
I;RRFTSMRN+I
7-in. Tile Wet Saw
with LASER TRAC
TM
Model No.
118.22000
A
z-_CAUTION:
Read, understand and follow
all Safety Rules and Operating Instructions in
this Manual before using this product.
•
•
•
•
•
WARRANTY
SAFETY
ASSEMBLY
OPERATION
MAINTENANCE
Sears, Roebuck and Co., Hoffman Estates, IL 60179 U.S.A.
Visit our Craftsman web site: www.sears.com/craftsman
1-19-06
I
I
I
I
Warranty ....................................................................
Safety Symbols ..................................................
Safety Instructions ...............................................
Description ........................................................
Unpacking ..................................................................
Assembly .........................................................
Operation ..............................................................
Maintenance ..............................................................
Troubleshooting .........................................................
Accessories ...............................................................
Repair Parts ..............................................................
Sears Repair Parts Phone Numbers .........................
ONE YEAR FULL WARRANTY
ON CRAFTSMAN
Page 2
Page 3
Pages 3-11
Page 12
Pages 13-14
Pages 15-16
Pages 17-18
Pages 18-20
Page 21
Page 21
Pages
Back Cover
The purpose of safety symbols is to attract your attention to possible dangers.
The safety symbols, and the explanations with them, deserve your careful
attention and understanding.
The symbol warnings DO NOT by themselves
eliminate any danger. The instructions and warnings they give are no substitutes
for proper accident prevention measures.
z_ WARNING: BE SURE to read and understand all safety instructions in
this manual, including all safety alert symbols such as "DANGER", "WARNING"
and "CAUTION", BEFORE using this saw. Failure to follow all instructions
listed below may result in electric shock, fire and/or serious personal injury.
SYMBOL MEANING
CAUTION.
May
be used
in conjunction
with other
symbols
or
SAFETY
ALERT
SYMBOL:
Indicates
DANGER,
WARNING,
OR
pictographs
Failure to obey this safety warning WILL result in death or
serious injury to yourself or to others. Always follow the
safety precautions to reduce the risk of fire, electric shock
and personal injury.
PRODUCT
If this Craftsman product fails due to a defect in material or workmanship
within one year from the date of purchase, RETURN IT TO THE NEAREST
SEARS STORE OR PARTS AND REPAIR CENTER OR OTHER
CRAFTSMAN
OUTLET IN THE UNITED STATES FOR FREE REPAIR.
This warranty does not include expendable
bits or blades.
( Z_WARNING]
parts such as lamps, batteries,
i
If this Craftsman Tool is used for commercial or rental purposes,
warranty applies for only 90 days from the date of purchase.
CAUTION
this
This warranty gives you specific legal rights, and you may also have other
rights which vary from state to state.
Sears, Roebuck and Co., Hoffman Estates,
Failure
obeytothis
safetyorwarning
CAN
result follow
in death
serious to
injury
yourself
to others.
Always
theor
safety precautions to reduce the risk of fire, electric shock
and personal injury.
obey this
MAYdamage.
result inAlways
personal
Ji Failure
injury totoyourself
or safety
others warning
or property
follow the safety precautions to reduce the risk of fire,
electric shock and personal injury.
DAMAGE PREVENTION AND iNFORMATiON MESSAGES
These inform user of important information and/or instructions that could lead to
equipment or other property damage if not followed. Each message is preceded by the
word "NOTE:" as in the example below:
IL 60179
SAVE THESE iNSTRUCTiONS!
i
NOTE:
not
followed.
Equipment and/or property damage may result if these instructions are
J
I
READ ALL iNSTRUCTiONS!
WEARYOUR
2
_WARNING:
The operation of any tool with a circular
blade can result in foreign objects being thrown into
your eyes, which can result in severe eye damage.
Before beginning power tool operation, ALWAYS wear
safety goggles or safety glasses with side shield and a
full-face shield when needed. We recommend a Wide
Vision Safety Mask for use over eyeglasses or standard
safety glasses with side shield, available at Sears
Stores or other Craftsman Outlets.
3
I
I
I
I
2-2-06
I
I
I
I
HAZARD SYMBOLS
SAFETY PRECAUTIONS FOR LASERS cont.
1. The laser beam system is mounted to the blade guard. Never remove from blade
guard to use on another tool or use for other purposes.
2. The laser beam can be harmful to the eyes. ALWAYS avoid direct eye exposure.
DO NOT look directly into the laser beam output aperture during operation.
3. The laser on the tile saw is not a toy. ALWAYS keep out of the reach of children.
The laser light emitted from this device SHOULD NEVER be directed towards
any person for any reason.
4. Be aware that laser light reflected off of a mirror or any other reflective surfaces
can also be dangerous.
Someof the followingsymbols may be usedon thistool.Pleasestudy themand learntheir
meaning.Proper interpretation
of these symbolswill allowyou to operatethe tool better and safer.
SYMBOL
NAME
DESIGNATION / EXPLANATION
Q
No Hands Symbol
Failure intoserious
result
keep your
personal
handsinjury.
away from the blade will
Q
No Hands Symbol
Failure intoserious
result
keep your
personal
handsinjury.
away from the blade will
Q
Eye Protection
Always and
shields
weara safety
full face
goggles
shield or
when
safety
operating
glasses this
withproduct.
side
O
Hearing Protection
Always
wear hearing protection when operating
this product.
WORK AREA SAFETY
Hand Protection
SAFETY PRECAUTIONS
1. Keep your work area clean and well lit. DO NOT leave tools or tile pieces on
on the saw while it is in operation. Cluttered work benches and dark areas
invite accidents.
2. DO NOT operate power tools in explosive atmospheres,
such as in the
presence of flammable liquids, gases, or dust. Power tools create sparks
which may ignite the dust or fumes.
3. Keep bystanders, children and visitors away while operating a power tool.
Distractions can cause you to lose control.
4. Make your workshop childproof
with padlocks and master switches, or by
removing tab in the middle of starter switch (See Fig. 26 on page 16).
5. MAKE SURE the work area has ample lighting so you can see the work and
that there are no obstructions that will interfere with safe operation BEFORE
using your saw.
Always
this
product.
wear work gloves when operating
FOR LASERS
This CRAFTSMAN 7-in. Tile Wet Saw has a built-in laser light. The laser is a
Class Ilia and emits output power of a maximum 2.5mW and 650nm wavelengths.
These lasers do not normally present an optical hazard.
However, DO NOT stare at the beam as this can cause
flash blindness.
AVOID
CAUTION: The following label is on your tool. It indicates
where the laser light is emitted by the saw. ALWAYS MAKE
SURE that any bystanders in the vicinity of use are made
aware of the dangers of looking directly into the laser.
EXPOSURE-Laser
emitted
DO NOT
_
radiation
through
STARE
this
INTO
PERSONAL
is
aperture
2. STAY ALERT, watch what you are doing and use common sense when operating
a power tool.
3. DO NOT use tool while tired or under the influence of drugs, alcohol or
medication. A moment of inattention while operating power tools may result in
serious personal injury.
BEAM
650nm
Output:_2,SmW
RADIATION
Class LASER
Ilia Laser
Product
Complies
with 21CFR
1040.10 and 1040.11
Sears
Roebuck
and Co.
parts
Made in China
Model:
118.00000
/KWARNING:
LASER LIGHT. LASER RADIATION. Avoid Direct Eye
Exposure. DO NOT stare into beam. Only turn laser beam on when using
the tile saw.
4. DRESS properly. DO NOT wear loose clothing or jewelry. Pull back long hair.
Keep your hair, clothing, and gloves away from moving parts. Loose clothing or
long hair can be caught in moving parts. Air vents often cover moving parts and
should also be avoided.
5. AVOID accidental starting. BE SURE switch is in the "OFF" position before
plugging in.
6. REMOVE adjusting keys or wrenches before turning the tool "ON". A wrench or
a key that is left attached to a rotating part of the tool may result in personal injury.
7. DO NOT overreach. KEEP proper footing and balance at all times. Proper
footing and balance enables better control of the tool in unexpected situations.
8. USE SAFETY EQUIPMENT. ALWAYS wear eye protection. Dust mask, non-skid
safety shoes, hard hat, or hearing protection must be used for appropriate
conditions.
_WARNING:Use
of controls, adjustments or performance of procedures
other than those specified in this manual may result in hazardous radiation
exposure.
AWARNING:
telescopes
SAFETY
1. KNOW your power tool. Read the operator's manual carefully. Learn the saw's
applications and limitations, as well as the specific potential hazards related to
this tool.
The use of optical instruments such as, but not limited to,
or transits to view the laser beam will increase eye hazard.
9. NEVER stand on tool. Serious injury could occur if the tool is tipped or if the
blade is accidentally contacted.
5
4
I
I
I
I
2-2-06
I
I
I
I
TOOL USE AND CARE SAFETY
ELECTRICAL
2. Grounded corded tools are
intended for use on supply circuits
having a nominal rating of less
than 150 volts. The plug may not
fit your outlet.
or
. In the event of a malfunction
z:_WARNING:
operating
in electric
BE SURE to read and understand all instructions before
this saw. Failure to follow all instructions
listed below may result
shock, fire and/or serious personal injury.
1. BE SURE the splash guard is intact and in good condition.
2. DO NOT wash or allow water to come in direct contact with the bottom of the motor.
.
SAFETY AND GROUNDING
Gru_
lUe_
dBedx \Grounding
_
Cover of
Metal Screw
__"
[_-_
I
This tool is equipped with an
(B)
Means
"I
II
electric cord having an
equipment-grounding
conductor and a grounding plug
(Fig.1-A). The plug must be
GFCI-protected
Adapter
plugged into a GFCl protected
matching outlet that is properly
installed and grounded in accordance with all local codes and ordinances.
9. If repair or replacement of the electric cord or plug is necessary, DO NOT connect
the equipment grounding adapter to a live terminal.
10. Repair or replace damaged or worn cord immediately.
NOTE: If you do not fully understand
the grounding instructions or if you
are in doubt as to whether the tool is properly grounded, check with a
qualified electrician or service person.
for use with
INSTRUCTIONS
z_ WARNING"
Do not permit fingers to touch the terminal or plug when
installing or removing the plug from an outlet.
CAUTION:
ALWAYS use a GFCI (Ground Fault Circuit Interrupter)
protected receptacle since the blade of this saw is used in close proximity
to water.
.
(A)
cont.
5. Your local electrical code may require a slightly different plug connection. IF these
differences exist, refer to and make the proper adjustments per your local code
BEFORE your tool is plugged in and turned on.
6. A temporary GFCI protected adapter may be used to connect this plug to a
2-prong outlet if a properly grounded 3-prong outlet is not available (Fig.1 -B).
7. The temporary equipment grounding adapter SHOULD ONLY BE used until a
properly grounded 3-prong outlet can be installed by a qualified electrician.
8. The green colored rigid ear or lug extending from the adapter (Fig. l-B) is the
equipment grounding conductor and MUST be connected to a permanent
ground, such as a properly grounded outlet box.
11. BEFORE using this saw, CHECK for damaged parts, including guards for
proper operation and performance,
misalignment
or binding of moving
parts, breakage of parts, or and any other condition that may affect the tool's
operation. If damaged, have the tool serviced before using. Many accidents are
caused by poorly maintained tools.
12. USE ONLY accessories that are recommended
for this tool. Accessories that
may be suitable for one tool may become hazardous when used on another tool.
ELECTRICAL
INSTRUCTIONS
breakdown, grounding provides a
path of least resistance for electric
current to reduce the risk of
electric shock.
3. NEVER leave the tool running unattended. ALWAYS turn it off. DO NOT leave
until the tool comes to a complete stop.
4. DO NOT force the tool. Slowly and smoothly pull the blade assembly as you cut
through the tile. Use the correct tool for your application. The correct tool will
do the job better, safer, and at the rate for which it is designed.
5. DO NOT use the tool if the switch does not turn it "ON" or "OFF". Any tool that
cannot be controlled with the switch is dangerous and must be repaired.
6. DISCONNECT the plug from the power source before making any
adjustments,
changing accessories or storing the tool. Such preventive safety
measures reduce the risk of starting the tool accidentally.
7. KEEP blade guards in place and in good working order.
8. DO NOT use in dangerous environments. DO NOT use in damp or wet locations,
or expose to rain.
9. STORE idle tools out of the reach of children and other untrained persons.
Tools are dangerous in the hands of untrained users.
10. MAINTAIN tools with care. Keep cutting tools sharp and clean. Properly
maintained tools with sharp cutting edges are less likely to bind and are easier
to control.
Z_
Use aofhazardous
accessoriescondition.
that are not recommended
this CAUTION"
tool may create
SAFETY AND GROUNDING
A WARNING"
If not properly grounded and GFCI protected, this tool can
cause an electrical shock, particularly when used in damp locations, in
proximity to plumbing, or out of doors. If an electrical shock occurs there
is the potential of a secondary hazard, such as your hands contacting the
saw blade.
This tool is equipped with an electrical cord having a 3-prong electrical plug
(Fig. 1-A). DO NOT alter the plug or use in a 2-prong receptacle. DO NOT modify
the plug provided. If it will not fit the outlet, have the proper outlet installed by a
qualified electrician.
6
7
I
I
I
I
2-2-06
I
I
I
I
EXTENSION CORDS
The label on your tool may include the
V .................................................................
A ................................................................
Hz ..............................................................
W ................................................................
min ............................................................
,-_ ..............................................................
...........................................................
no ..............................................................
[] ................................................................
.../min ........................................................
,,_ ...............................................................
1. USE ONLY 3-wire extension cords that have 3-prong grounding plugs and 3-pole
receptacles that will accept the tool's plug.
2. Use a proper extension cord. ONLY use cords listed by Underwriters
Laboratories (UL). Other extension cords can cause a drop in line voltage,
resulting in a loss of power and overheating of tool. For this tool, an AWG
(American Wire Gauge) size of a least 14-gauge is recommended for an extension
cord of 25- ft. or less in length. Use 12-gauge for extension cords of 50-ft.
Extension cords 100=ft. or longer are not recommended.
Remember, a smaller
wire gauge size has greater capacity than a larger number (12-gauge wire has
more capacity than 14-gauge). When in doubt use the smaller number. When
operating a power tool outdoors, use an outdoor extension cord marked "W-A" or
"W". These cords are rated for outdoor use and reduce the risk of electric shock.
following symbols.
Volts
Amps
Hertz
Watts
Minutes
Alternating current
Direct current
No-load speed
Class II construction
Revolutions or Strokes per minute
Indicates danger, warning caution.
It means attention! Your safety is involved.
3. AVOID the possibility of getting the plug or receptacle wet (Fig. 2.)
4. Have damaged tool cords repaired at Sears Service Center.
Z_ WARNING:
Check extension cords before each use. If damaged
replace immediately.
Never use tool with a damaged cord since touching
the damaged area could cause electrical shock, resulting in serious injury.
SERVICE SAFETY
1. If any part of this saw is missing or should break, bend, or fail in any way;
or should any electrical component fail to perform properly: SHUT OFF the
power switch and remove the saw plug from the power source and have the
missing, damaged or failed parts replaced BEFORE resuming operation.
A CAUTION:
DO NOT ABUSE the cord. NEVER use the cord to pull the
plug from the outlet. Keep cord away from heat, oil, sharp edges or moving
parts. Replace damaged cords immediately.
Damaged cords increase the
risk of electric shock.
i
A WARNING:
always
When plugging your tile saw into an electrical outlet,
arrange a drip loop on the power cord.
2. Tool service must be performed only at a Sears Parts and Repair Center.
Service or maintenance performed by unqualified personnel could result in a risk
of injury.
3. When servicing a tool, use only identical replacement parts. Follow
instructions
in the maintenance section of this manual. Use of unauthorized
parts or failure to follow maintenance instructions may create a risk of electric
shock or injury.
i
1. To avoid the possibility of the appliance
plug or receptacle getting wet, place the
tile saw near a wall-mounted receptacle.
.
.
.
SAFETY RULES FOR TILE WET SAWS
i_
Arrange a drip loop (Fig. 2) so that part of
the cord is below the receptacle, or the
connector if an extension cord is used.
Water will drip from the low point of the
loop. This will prevent water from traveling
along the cord to the receptacle or
connector.
Keep hands away from cutting
area and blade.
i
1. KNOW your power tool. Read operator's manual carefully. Learn the
applications
and limitations,
as well as the specific potential hazards related
to this tool. Following this rule will reduce the risk of electric shock, fire or serious
injury.
2. CHECK for damaged parts before using tool. Check moving parts for proper
alignment or binding. Check for broken parts and mountings and all other
conditions that may affect the operation of the power tool.
If the plug or receptacle does get wet, DO
NOT un-plug the cord. Disconnect the fuse
or circuit breaker that is supplying power to the tool. Then unplug and examine to
see if water is present in the receptacle. Receptacle MUST be dry to use.
3. KEEP your body positioned to either side of the saw blade and not in direct
line with the saw blade.
4. LET the blade reach full speed before beginning the cut.
If the plug or receptacle does get wet, DISCONNECT THE FUSE OR CIRCUIT
BREAKER that is supplying power to the tool BEFORE unplugging the cord.
AFTER DiSCONNECTiNG
THE CIRCUIT BREAKER, you can then unplug the cord.
5. DO NOT reach underneath the work. The guard cannot protect you from the
blade beneath the work.
8
I
I
I
I
1-19-06
I
I
I
I
SAFETY RULES FOR TILE WET SAWS cont.
6. NEVER
against
7. NEVER
leaving
8. NEVER
ADDITIONAL
try to cut freehand. Make sure that the tile to be cut is pressed firmly
the rip fence.
cut pieces too small to be held securely against the fence without
enough space for your hand to be a safe distance from the blade.
cut more than one tile at a time.
cont.
8. DO NOT abuse the cord, NEVER use the cord to carry the tool or pull the
plug from the outlet. Keep cord away from heat, oil, sharp edges or moving
parts. Replace damaged cord immediately. Damaged cords increase the risk of
electric shock.
9. SAVE THESE iNSTRUCTIONS. Refer to them frequently and use them to instruct
others who may use this tool. If someone borrows this tool be sure to provide
them with this owner's manual.
9. KEEP the saw table free of clutter with the exception of the tile you are cutting.
10. MAKE SURE that the work piece that will be cut off has enough room to move
sideways. Failure to do so may result in the off-cut binding against the blade.
11. BEFORE cutting a tile piece, let the saw blade run freely for a few seconds.
If it makes an unfamiliar sound or vibrates excessively, switch it off immediately
and disconnect from the power supply.
AWARNING:
Some dust particles created by power sanding, sawing,
grinding, drilling and other construction jobs contain chemicals known to
cause cancer, birth defects or other reproductive harm. Some examples of
these chemicals are:
• Lead from lead-based paints.
• Crystalline silica from bricks and cement and other masonry products.
• Arsenic and chromium from chemically-treated
lumber.
Your risk from these exposures varies, depending upon how often you do
this type of work. To reduce your exposure to these chemicals:
• Work in a well-ventilated area.
• Work with approved safety equipment, such as those dust masks that are
specially designed to filter out microscopic particles.
12. PULL blade/cutting
assembly slowly and smoothly through the tile being
cut. NEVER leave the tool running unattended. Turn power off.
13. LET the blade come to a complete stop before removing any jammed or off-cut
material from around the blade area.
14. KEEP the water tray topped off with water at the correct level. Allowing the blade
to run dry may cause the diamond blade to overheat.
15. ALWAYS wear protective gloves when handling the blade or any accessories.
Blades and accessories may be hot after prolonged use.
ADDITIONAL
RULES FOR SAFE OPERATION
RULES FOR SAFE OPERATION
Z_WARNJNG:
BE SURE to read and understand all instructions. Failure to
follow all instructions listed below may result in electric shock, fire and/or serious
personal injury.
='0|
1. KNOW your power tool. Read the operator's manual carefully. Learn the
applications and limitations, as well as the specific potential hazards related to this
tool. Following this rule will reduce the risk of electric shock, fire or serious injury.
2. WEAR SAFETY glasses or eye shields when using this saw. Everyday
eyeglasses have only impact-resistant lenses; they ARE NOT safety glasses.
=
e
120V, 60 Hz
Input
6.7 Amps
11/15-Peak HP
Output
3. PROTECT your lungs. Wear a face mask or dust mask if the operation is dusty
4. PROTECT your hearing. Wear appropriate personal hearing protection during
use. Under some conditions and duration of use, noise from this product may
contribute to hearing loss.
5. ALL VlSTORS AND BYSTANDERS MUST wear the same safety equipment that
the operator of the saw wears.
6. INSPECT the tool cords periodically and if damaged have them repaired at
your nearest Sears Service Center or other Authorized Service Facility.
7. ALWAYS check the tool for damaged parts. Before further use of the tool, a
guard or other part that is damaged should be carefully checked to determine if it
will operate properly and perform its intended function.
- =
Rating
No-Load Speed
Blade Diameter
3550 rpm
Depth Of Cut
Outer Dimensions
1-in.
Net Weight
76 LBS.
AC
7-in. (33 mm)
(LWH) 379/10-in. X 171/2-in. X 441/2-in.
i
the
NOTE:
operating
Before features
attemptingandtosafety
use any
instructions.
tool, be sure to familiarize
J
Z_WARNING:
yourself with all|
DO NOT let familiarity with your saw make you careless.
Remember that a careless fraction of a second is sufficient to cause severe injury.
10
J
J
11
I
I
I
I
1-19-06
I
I
I
I
KNOW YOUR SAW (Fig. 3)
KNOW YOUR SAW ( Fig. 3) cont.
Your tile wet saw has a precision-built electric motor and it should only be connected
to a 120-volt, 60Hz AC ONLY power supply (normal household currant). DO NOT
operate on direct current (DC). The large voltage drop would cause a loss of power
and the motor would overheat. If the saw does not operate when plugged into the
correct 120-volt, 60-Hz AC ONLY outlet, check the power supply.
|
Water and Electric
"On/Off" Switch
Supply Hose
Laser System
This Tile Wet Saw has the following features:
Blade Assembly Handle
Blade/Cutting
Assembly
1.6.7 Amp, 3550 RPM (no-load speed) motor. Provides power and torque for fast,
smooth 90 rip cuts and 0 to 45 miter cuts. The bridge adjusts to allow for 0 to
45 bevel cuts.
/
Bridge adjusts with
bevel gauge
Splash Guard
2. Easy-to-read bevel and miter scales. Bevel scales on each end of the
adjustable pivoting bridge for 0 to 45 angle adjustments in 5 increments.
Rip/Miter Guide allows 90 rip cuts and 0 to 45 miter cuts. Durable plastic has
embossed 0 to 45 angle adjustments in single degree increments. Clear
window in metal part of rip/miter guide shows ruler on fence to allow accurate
measuring of workpiece.
Bevel adjust knob
Cutting Slot
Rip/Miter Guide
Bevel Gauge
Blade
3. Ergonomically
designed handle with sort comfort grip for maximum control and
comfortable hand support when cutting.
Fence
4. Includes a 7-in. diameter continuous
rim diamond blade for fast, efficient
cutting of ceramic, marble, slate or limestone wall or floor tile. Cuts tiles up to 1-in.
(25.4mm) thick.
5. Blade/Cutting
Assembly glides on permanently
bearings for long tool life and smooth operation.
lubricated
Water Pump
igle Padded
Table Handle
Water Tray
100% ball
Knob
Leg adjust
knobs
7. Dual Spray Water Feeder System keeps blade evenly wet for maximum blade
performance.
8. Easy-to-use knobs for quick miter, bevel and compound miter adjustments,
tools needed.
Retracting
Wheel Assembly
6. Metal upper blade guard, table base, legs, bridge supports and motor
housing for long-lasting dependable strength. Aluminum bridge and fence.
no
Leg adjust knobs
9. Project ruler on right fence for quick reference; 1 to 9-inches in 1/8-in increments
10. Laser On/Off Switch
- To turn on laser system, push switch to "On"
11. On/Off Starter Switch with safety tab in the middle - Remove tab when
finished with saw to prevent accidental starting.
Set screw to
level saw
12. Splash Guard - Keeps water from splashing so work area stays clean.
Bevel adjust knob
13. Leg Adjust Knobs - To change height of table quickly and easily. One leg has
set screw to level saw in work place.
Bevel Gauge
14. Sturdy Plastic Water Tray
Hook
15. Fold-up Wheels for easy transporting
- wheels pop down effortlessly by pulling
the handle on their axle. You can easily move the folded-up saw from place to
place as your tiling needs dictate.
Double Handle for
moving folded saw
Wheel Assembly
16. Double Handles on retractable pull for easily moving the folded-up saw, with its
wheels down, to the next job site.
12
I
I
I
I
2-2-06
I
I
I
I
LOOSE PARTS LIST cont.
1. Place carton on the floor in an area with sufficient space to inspect your saw.
2. Remove carton and packing materials from around tool.
3. Inspect the saw for loose or damaged parts. If any parts are damaged or missing,
return the saw to your nearest Sears Store to have it replaced.
8. To stabilize and level the tile saw, adjust the leveling "set screw" located on the
bottom of the left front leg (Fig. 10).
9. Attach blade/cutting assembly handle with screws provided. Put one of each
washer between screw and blade and tighten screws (Fig. 11 ).
LOOSE PARTS LIST
10. The cutting unit is locked into place during shipment.
Loosen the butterfly knob located on one end of the
bridge (Fig. 12) before using tool. When not in use,
keep cutting unit locked in place to prevent its rolling
back and forth along bridge. There is also a second
locking mechanism on the blade/cutting assembly
that can also be used to lock the blade cutting
assembly anywhere along the bridge of the saw
(Fig. 13).
The following items are included with your tile wet saw:
A-7-in. Blade
B-Blade Assembly
B
G
Handle
C-Blade Assembly
Handle Screws (2)
D-Blade Assembly Handle
Washers (4)
2 reg. & 2 locking
E-Hexagonal
Blade Wrench
F-Laser Light System
A
G-Motor Shaft Holding
Wrench
H-Rip Miter Guide
I-Water Pump Foam Filters
(2 additional)
H
J-Phillips
Head Screwdriver
_WARNING:If
any parts are missing, DO NOT operate this saw until
the missing parts are replaced. Failure to do so could result in serious
personal injury.
z_CAUTION:
Follow all of the assembly and installation instructions in
this manual before connecting the tile saw to a power source or turning
it on.
4. Lay tool on a level surface (Fig. 4).
5. To release saw table legs, pull out hook from latch and attach to peg on table base
(fig. 5 and fig. 6). Grab and pull the single padded table handle on one end of tile
saw and lift to unfold the first set of legs (Fig.7).
6. Slide peg on leg into notch on table base (Fig. 8). Lock legs into place by tightening
butterfly knobs; repeat on other side.
7. Once legs are securely locked in place, note that telescoping legs can be adjusted
to 3 different heights by loosening "screw knobs" and selecting the appropriate
pinhole for desired height. To adjust height, loosen knobs on telescoping legs and
realign screw knobs to desired operating height; tighten knobs to secure in place.
(Fig. 9)
14
15
I
I
I
I
1-19-06
I
I
I
I
MOUNTING
LASER SYSTEM
1. Locate laser package and find the
following parts as shown in (Fig. 14):
a) Laser light system.
b) Two 6/32 screws with washers.
2. Loosen bolt and remove cover. Install two AAA
batteries (Fig.15), making sure both terminals are
positioned correctly as the marks on the cover show, then replace cover.
INSTALLING
THE BLADE cont.
5. REPLACE
blade guard with the two securing screws.
6. RE-ATTACH
water supply tube to the inlet connection.
3. Screw laser system onto blade guard (Fig. 16).
4. Mark a cut line on a piece of scrap tile. Turn on the laser and align the laser with
the cut mark by loosening the bottom screw on the laser system (Fig. 17).
5. Cut the tile, paying attention to the position of the blade relative to the laser beam.
6. Laser beam can be adjusted to the cut line.
RIP/MITER GUIDE INSTALLATION
1. To install the rip/miter guide, slide aluminum arm of
rip/miter guide into the groove in the fence on saw
table (Fig 21).
2. The rip miter/guide can be made stationary by
tightening the screw and butterfly knob located on
the arm of the rip/miter guide.
7. Repeat Steps 4 through 6 until laser is properly adjusted, then tighten bottom
screw.
i
OTE: used,
To avoid corrosion, remove the batteries when laser system is not
being
J
i
WATER PUMP SETUP AND CONNECTION
|
]
[ must
Z_WARNING:To
the possibility
electrical shock, the tile saw
be unplugged prevent
when connecting
water ofpump.
.
.
INSTALLING
THE BLADE
i adjustments
_WARNING:Disconnect
to the blade.
the power supply before installing or making
i
J
|
Check to be certain that the water supply tube is
connected to the inlet connection on the blade guard
(Fig. 18).
To connect the water pump power cord, locate the
black cover box under the table. Loosen butterfly
knob and remove black cover box (Fig. 21 a). Plug in
water pump cord, making sure fit is secure. (Fig. 22)
Replace black cover box and re-tighten butterfly knob.
. Connect
tube under table to water pump discharge fitting (Fig. 23).
4. Fit water pump into housing in water tray, making certain pump discharge fitting
aligns with cutout in tray housing (Fig. 24)
1. FIRST, to disconnect the water supply, press the blue ring and pull out the water
supply tube from the inlet connection on the blade guard (Fig. 18).
2. NEXT, remove the blade guard by removing the two securing screws, (Fig. 19).
3. REMOVE blade securing nut and outer flange from shaft. Place blade onto shaft.
Directional arrows on blade MUST line up with
directional arrow on blade guard, so that material
to be cut is against the direction of rotation.
Re-install outer flange and nut (Fig. 20).
4. TIGHTEN by using the hexagonal wrench to turn the
blade-securing nut counter clockwise, and the motor
shaft securing wrench to hold the shaft stationary
(Fig. 20a).
]
i qualified
z_CAUTION"
To prevent
replacement
parts.the possibility of electric shock, use only Sears
16
l
|
17
I
I
I
I
2-2-06
I
I
I
I
MAKING A MITER CUT
z_WARNiNG:Turn
off the saw and remove the plug from the outlet
BEFORE adding or removing accessories and making adjustments. Failure
to unplug the saw could result in accidental starting causing possible
serious injury
1. Loosen the knob and position the rip/miter guide so
that the correct angle you want, 0 to 45 , is lined up
with the notch (Fig. 28). Tighten knob at that position.
2. Align tile with rip!miter guide and hold firmly against
guide. Turn on laser switch. Note that laser will show
cutting line. As in above straight cut, Slowly and
smoothly pull blade assembly handle towards you to
begin cutting.
ACAUTION:
This tile saw is designed to work with water. Before any
cutting operation, make sure that the water level inside the water pan is
between minimum and maximum level marks so that the water reaches the
pump.
MAKING A BEVEL CUT
1. Loosen knobs on each end
of saw bridge (Fig 29). Tilt
the bridge to the desired
bevel angle, 0 to 45 . Be
sure to line up the bevel
angle number markings on
each end of the bridge
(Fig. 30). Tighten knobs on both ends.
FILLING THE WATER TRAY
1. Fill the tray with water. Do not add chemicals or
detergents to the water.
2. Be sure that the water level is always between the
MAX and MIN levels shown inside the tray, so that
the saw blade turns through the right amount of
water and allows the saw blade to be properly cooled
(Fig. 25). DO NOT let the saw run dry.
3. To remove the water from the tray, take out the plug
and drain (Fig. 25). You can also carefully remove the tray with the water in it and
pour the water out of the tray.
2. Loosen the knob of rip/miter guide and position the rip/miter guide so that it is in a
straight line, with the zero aligned with the notch. This indicates "no angle", or a
straight cut.The rip/miter guide will be at a 90 angle to the fence. Tighten knob to
keep guide in position.
3. Make a cut line on the tile. Turn on the laser. Place tile on saw table. Line up the
cut mark with the laser (Fig. 27).
4. Slide the rip miter guide against the tile and lock the guide by turning the knob.
TO START THE SAW
1. Plug power cord into a GFCl (GROUND FAULT
CIRCUIT INTERRUPTER) protected outlet.
2. To start the saw push the switch to the "ON"
(Fig.26)
5. Keeping the tile firmly against the fence and rip/miter guide, slowly and smoothly
pull blade assembly handle towards you to begin cutting. DO NOT force the motor
to cut too quickly.
position
NOTE: CHECK the blade for cracks or damage
BEFORE each use. ALWAYS let the blade cut at
its own speed. DO NOT force the blade into the
material being cut.
MOVING THE SAW
This step requires two people.
1. Work on the set of legs by the single padded handle and the wheel assembly first,
since they need to be folded in first.
MAKING STRAIGHT, MITERED AND BEVELED CUTS
MAKING A STRAIGHT CUT
2. Loosen butterfly knobs that hold the first set of legs in place. The knobs are located
on table base (Fig. 31 ). Pull legs out of notches on table base and fold up. The legs
should be folded so that the knobs are tightened in the uppermost part of their
track.
1. Loosen the knob of rip/miter guide and position the
rip/miter guide so that it is in a straight line, with the
zero aligned with the notch. This indicates "no angle",
or a straight cut. The rip/miter guide will be at a 90
angle to the fence. Tighten knob to keep guide in
position.
2. Make a cut line on the tile. Turn on laser. Place tile on
saw table. Line up the cut mark with the laser.
3. Now repeat on other legs. The knob for this set of legs will be slightly lower in its
track, and the legs will fold up on top of the other legs. Once the legs are folded up,
remove hook from peg on table and push down on the tension-mounted hook
assembly to fit it into the latch on the bottom set of legs (Fig. 31a).
NOTE: The hook is spring tensioned to stay in the latch. Be sure hook is
placed completely in the latch. Placing the hook in the latch only part way
could cause the hook to come undone, causing possible injury.
3. Slide the rip miter guide against the tile and lock the guide by turning the knob.
4. Keeping the tile firmly against the fence and rip/miter guide, slowly and smoothly
pull blade assembly handle towards you to begin cutting. DO NOT force the motor
to cut too quickly.
18
19
I
I
I
I
2-2-06
I
I
I
I
MOVING THE SAW cont.
REPLACING
4. Your tile wet saw has been equipped with a set of wheels for easy transporting.
They are to be used when the legs of the saw table are in the closed, or folded up
position. To use wheels, simply pull out and down on the black handle located on
the wheels' axle (Fig. 32). When not using the wheels, and to set up the saw in a
new location, retract the wheels by pulling out the knob located on the table base
directly above the wheels (Fig. 32a).
THE BLADE (See page 14, Figs. 18, 19, 20 and 20a)
z_WARNING:
replacing
MAKE SURE that you disconnect
the blade.
the power supply before
J
NOTE: ONLY USE diamond saw blades with a diameter of 7=in. minimum
and 8=in. maximum. The bore of the blade must be 5/8=in.
5. Once your saw is folded up,
you can easily move your
saw with the double handle.
To use the double handle,
loosen the knob holding it
in place (Fig. 33), and
extend it to its full length
by pulling it from the saw
table base.
1
]
1. FIRST, to disconnect the water supply; press the blue ring and pull out the water
supply tube from the inlet connection on the blade guard (see Fig. 18 on page 15).
2. NEXT, remove the blade guard by removing the two securing screws
(see Fig. 19 on page 16).
3. LOOSEN the nut by using the hexagonal wrench to turn the blade-securing nut
clockwise while using the motor shaft securing wrench to hold shaft stationary
(see Fig. 20 on page 16). Remove nut and front flange, then blade.
4. BE SURE that the shaft and flanges are clean; then, paying attention to the
directional arrows on the blade, mount new blade and replace outer flange and
blade-securing nut. Adjust blade and tighten (see Fig. 20a on page 16).
PUMP MAINTENANCE
]
WARNING: MAKE SURE that you have disconnected the power
supply before performing maintenance on or replacing the pump.
CLEANING
1. To clean the pump, remove from housing in
water tray. Take off the intake cover (Fig. 34).
2. Take out the pump filter and impeller cover.
3. Use a small brush or stream of water to
remove any debris on the pump filter and
impeller cover (Fig. 34).
z_WARNING:To
avoid accidents, ALWAYS disconnect the tool from the
power source BEFORE making adjustments,
cleaning or performing any
maintenance.
NOTE: All parts represent an important part of the double
should be serviced ONLY at a Sears Service Center.
THE PUMP
insulation and
Intake
cover
Foam
filter
\
Motor
head
Impeller
cover
NOTE: Always clean the pump after each
use. Dried debris may stick to the filter
foam and the impeller, requiring
replacement of the pump filter and/or
pump.
NOTE: DO NOT at any time allow solvents, such as brake fluid, gasoline,
petroleum=based products, penetrating oils, etc. to come in contact with
plastic parts. They contain chemicals that can damage, weaken or destroy
plastic.
REPLACING THE PUMP FILTER
1. Remove the intake cover.
. BEFORE each use check blade for cracks or damage.
2. The tile saw MUST BE cleaned and dried after each use and stored in a dry
location. Use clean cloths to remove dirt, carbon dust, etc.
2. Take out pump filter and replace with the new one, (Fig. 34).
3. If after replacing the filter the pump is still not working, replace the pump.
3. WIPE OFF all exterior surfaces and keep the cutting table clean and free of
all debris.
4. KEEP the ventilation slots of the tile saw clean to prevent overheating of the motor.
20
21
I
I
I
I
2-2-06
I
I
I
I
REPLACING
THE PUMP
Only use identical replacement parts, available at your Sears Parts and Repair
Center. To locate a Sears Parts and Repair Store near you, call the 800 number
located on the back of this manual.
1. Remove the water tray from the saw table. Remove pump from housing in water
tray. Set tray aside. Loosen knob on black cover box under saw table (Fig. 35).
Remove cover box and disconnect pump plug from the socket (Fig. 36). Remove
tube from water pump discharge fitting (Fig. 37).
PROBLEM
CAUSE
SOLUTION
The motor
is hot.
The ventilation slots in the motor
are clogged with dirt
Clean the ventilation slots
The motor is defective
Have your machine repaired
at a Sears Service Center
The power supply cord is
damaged or not properly
connected.
Press the plug firmly into the
power socket.
Check the power supply cord.
No voltage in socket, or circuit
breaker is off.
Reset the circuit breaker.
The switch is broken.
Have your machine repaired
at a Sears Service Center.
Check water level
Add water if needed.
Water tube from pump may be
clogged
Disconnect tube and clean
out.
The sprayer is clogged.
Dismantle the sprayer and
remove any residuals.
Motor gives off
unpleasant odor.
Water may have seeped through
inside of motor.
Unplug the power cable and
consult your local Sears
Service Center.
Machine is
difficult to start.
Motor bearings are damaged.
Unplug the power supply
cable and consult your local
Sears Service Center.
The machine
does not work.
2. Replace the old pump with the new one, carrying out the above operation in
reverse order.
Water does not
flow at the blade
with the pump
running.
22
23
I
I
I
I
1-19-06
I
I
I
I
oJ
\
0
0
0
_.
o
0
6
cO
oooo
0.
•
e,l
o
oJ
oJ
o
oJ
oJ
rn
03
o oooooo
o oooooo
o oooooo
oJ
oJ
_O__
I_
00 O3 o
OOOOOOOO
OOOOOOOO
OOOOOOOO
o
o
o
oJ
0J
o
o
o
oJ
0J
o
o
o
oJ
oJ
o
o
o
oJ
oJ
o
o
o
oJ
oJ
e,l
o3
o
o
o
oJ
oJ
o
o
o
oJ
oJ
0
C
0__
W
o
(D
O
(D
0;0;
5_
O
._o
_zc
.__
F,
C
_=_
__<
__*_=
O0
5
a
o
0
_II
__o
O.
Z
coo
r_
©
>-
•-
o
_
rt _
n
I.Li
°
r¢-
O
I
ON--
C
re-
6
oooo
_z-_
/
O.
o
oJ
oJ
o
oJ
oJ
mO
O_
T _,
03
TT
TTTT
o
o
o
oJ
0J
o
o
o
oJ
0J
o
o
o
oJ
0J
O
OJ
CO
OJ
OJ
O
O
O
OJ
OJ
o
o
o
oJ
oJ
o
o
o
oJ
oJ
o
o
o
oJ
0J
OOOO
OOOO
OOOO
C_ W
03
o
o
o
oJ
0J
•_o
o
o
o
o
o
TT
o
o
o
oJ
0J
u'3 qD b..
o
o
o
oJ
0J
T TT
o
o
o
oJ
oJ
o
o
o
oJ
oJ
_0
o
o
o
oJ
oJ
0"3 o
T _1 _,
o
o
o
oJ
oJ
o
o
o
oJ
oJ
o
o
oN
O
i.L!
o
rn
O
__1
E
i0
_5
"6
(D
o
5
ii
o
_e
o')
c
O
o
0.
o
(D
C
0
|
c
._o E
(D
_
O
Oo
C
(D
oO_-(3 LL
o
T
g
_- (I)
O -(3
(D -(3
o
(D
•
rr"
E_
o')
oo
.__
$
o
o
_
_
rn
o
_
O
x
O
(D rr
_
o
_
C
N.___
m©
r_
(D
O
On
32
mrr
rr
x," rr
b.,
25
24
I
I
I
I
1-18-06
NOTES
NOTES
26
27
Your Home
For repair-in
your home-of all major brand appliances,
lawn and garden equipment, or heating and cooling system,
no matter who made it, no matter who sold it!
For the replacement parts, accessories and
owner's manuals that you need to do-it-yourself.
For Sears professional installation of home appliances
and items like garage door openers and water heaters.
1-800-4-MY-HOME
®
(1-800-469-4663)
Call anytime, day or night (U.S.A. and Canada)
www.sears.com
www.sears.ca
Our Home
For repair of carry-in
and electronic,
items like vacuums,
lawn equipment,
call or go on-line for the location of your nearest
Sears Parts & Repair Center.
1-800-488-1222
Call anytime, day or night (U.S.A. only)
www.sears.com
To purchase a protection agreement (U.S.A.)
or maintenance agreement (Canada) on a product serviced by Sears:
1-800-827-6655
(U.S.A.)
1-800-361-6665
Para pedir servicio de reparaci6n
a domicilio, y para ordenar piezas:
1-888-SU-HOGAR
®
(Canada)
Au Canada pour service en franqais:
1-800-LE-FOYER
Mc
(1-800-533-6937)
www.sears.ca
(1-888-784-6427)
Se Es
©Sears Brands, LLC
® Registered Trademark / TMTrademark / SMService Mark of Sears Brands, LLC
® Marca Registrada / TM Marca de F.brica / SMMarca de Servicio de Sears Brands, LLC
MCMarque de commerce / MDMarque d6posee de Sears Brands, LLC