1
OPERATING
FELLING
•
•
•
•
CHAIN SAW
A TREE (cutting Down a Tree
WARNING:
Avoid kickback. Kickback can result
in severe injury or death. See Kickback
to avoid risk of kickback.
Do not fell a tree without ample skill
or expert help.
Keep children, animals, and bystanders away from area when felling a
tree.
If two or more persons perform
bucking and felling operations
at
the same time, provide ample distance between operations. Provide
distance of at least twice the height
of tree being felled.
A WARNING: When felling a tree, be
aware of your surroundings. Do not
endanger any person, strike utility
lines, or cause property damage, if
tree strikes utility lines, contact utility
company at once.
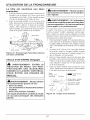
Felling is the process of cutting down a tree. Make
sure your footing is firm. Keep feet apart. Divide
your weight evenly on both feet. Follow directions
below to fell a tree.
Before Felling a Tree
1. Before telling, inspect tree. Make sure there
are no dead limbs or branches that may tidl
on you. Study natural lean of tree, location of
larger branches, and wind direction. This will
help you judge which way tree will fall.
2. Clear work area around tree.
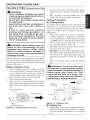
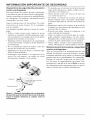
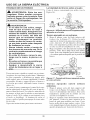
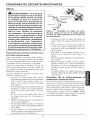
3. Plan and clear a retreat path before %lling.
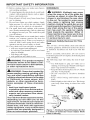
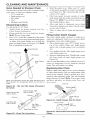
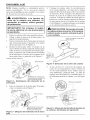
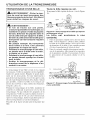
Make retreat path opposite to planned direction of fall of tree and at 45 ° angle (see Figure
_3).
"_eat
Pat
4. Remove dirt, stones, loose bark, nails, staples,
and wire from tree where you will make telling
cuts.
5. Stay on uphill side when felling tree. Tree
could roll or slide downhill after fidfing.
Felling Procedure
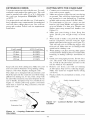
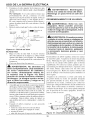
A) Felling Notch
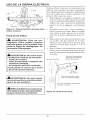
A properly placed felling notch will determine
direction tree will fall. Place %lling notch on
side of tree in direction you want tree to fall (see
Figure 14). Follow directions below to create a
telling notch.
1. Make lower notch cut as close to ground as
possible. Hold saw so guide bar is horizontal.
Cut 113the diameter of tree trunk (see Figure
14). Note: Always make this horizontal lower
notch cut first. If you make this cut second,
tree can pinch chain or guide bar.
2. Stalt upper notch cut the same distance above
first cut as first cut is deep.
Example: If lowernotch cut is eight inches deep,
start upper notch cut eight inches above it. Cut
downward at 45° angle. The upper notch cut
should meet end of lower notch cut (see Figure
_4).
3. Remove tree trunk wedge created by notching
cuts.
,_ WARNING: Do not cut aHthe way
through tree. Leave about two inches
of tree diameter uncut directly behind
felling notch (see Figure 14). This
uncut portion acts as a hinge. The
hinge helps keep tree from twisting
and falling in wrong direction.
3rd Cut
-
Felling
\
Oi
13 - Retreat
Path
From
\
q[
Direction of Fall
2"(5
Figure
\
cm)
Hinge
2rid Cut ....Upper Notch Cut
Lower Notch
Cut
Figure 14 - Felling A Tree
B) Felling Cut
1. Make telling cut two inches higher than lower
notch cut and on opposite side of tree (see Figure
14). Keep telling cut parallel to lower notch
cut.
Tree
15