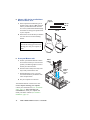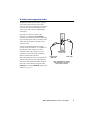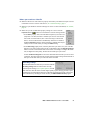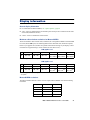
1
ENGLISH
Rainbow Runner G-Series
• User Guide •
10619-301-0110
1998.09.04
Contents
Using this guide
4
More information................................................................................................................ 4
Overview
5
Hardware supplied .............................................................................................................. 5
Software supplied ............................................................................................................... 5
System requirements........................................................................................................... 6
Technical features ............................................................................................................... 6
Installation overview........................................................................................................... 6
Hardware installation
Connection setup
7
11
Quick connection setup..................................................................................................... 11
S-video and composite video............................................................................................ 15
SCART connector information ......................................................................................... 16
Rainbow Runner G-Series input ....................................................................................... 17
Software installation
18
Rainbow Runner G-Series Installation CD-ROM ............................................................ 18
MediaStudio CD-ROM..................................................................................................... 19
Photo Express CD-ROM................................................................................................... 19
Matrox PC-VCR Remote program
20
Input setting ...................................................................................................................... 21
Video file input ................................................................................................................. 21
TV tuner input................................................................................................................... 22
Video line input................................................................................................................. 22
Mini remote....................................................................................................................... 24
More features .................................................................................................................... 25
2
Matrox Rainbow Runner G-Series – User Guide
Matrox VidCap driver
27
Video source settings........................................................................................................ 27
Video format settings........................................................................................................ 28
Ulead MediaStudio software
29
Step 1 – Getting files for clips.......................................................................................... 29
Step 2 – Adding clips ....................................................................................................... 30
Step 3 – Editing clips........................................................................................................ 32
Step 4 – Adding effects .................................................................................................... 34
Step 5 – Saving your video............................................................................................... 35
More information ............................................................................................................. 36
Ulead Photo Express program
37
VDOnet Internet VDOPhone program
38
Requirements.................................................................................................................... 38
Network setup................................................................................................................... 38
VDOPhone setup .............................................................................................................. 38
Connecting with other VDOPhone users ......................................................................... 39
More information ............................................................................................................. 40
Troubleshooting
41
Video editing .................................................................................................................... 41
Sound................................................................................................................................ 47
Display information
49
Customer support
51
Warranty
54
Index
56
Matrox Rainbow Runner G-Series – User Guide
3
Using this guide
This guide assumes you’re familiar with basic functions like click, right-click and double-click,
and that you’re familiar with the basics of the operating system you’re using. Also, we use the
following conventions:
Bold for text that appears on-screen, subheadings and labels.
Italics for file names, paths, publication titles, and new terms.
Bold Italics for emphasis.
Keyboard keys in square brackets, with a plus sign separating keys that you press
simultaneously. For example: press [Ctrl]+[Alt]+[Del] to restart your computer.
Arrows (“”) to separate ordered directions. For example, “click OK Close OK” is the
same as “click OK, then click Close, then click OK”.
When viewing online, green for cross-references and underlined green for links to Web pages.
Click green text to jump to what is being referenced. (To jump to Web pages, your system first
needs to have full Internet access.)
Note: This guide makes references to labels on external video devices. The actual labels on
your video devices may not be worded exactly the same. Different manufacturers sometimes
use different labels for the same type of controls and connectors. For example, the VIDEO IN
connector on your TV may be labeled VIDEO 1 (or VIDEO 2). To match labels, see the
documentation for your video devices.
More information
We provide important additional information in online documentation, including Help files,
readme files, and Adobe Acrobat PDF (Portable Document Format) files. Use the Acrobat Reader
program, which you can install from your “Rainbow Runner G-Series Installation” CD-ROM
(Guides\English\ar32e301), to view or print PDF files.
This guide is available on the CD-ROM as a PDF file (Guides\English\rrg_eng.pdf). The online
version of this guide includes “Software license agreement”, “Customer support” and “Warranty”
information. For more information on the types of documentation provided, see each software
section in this guide.
Also, be sure to check for any last-minute release notes at the end of this manual and in the Matrox
CD-ROM readme file.
4
Matrox Rainbow Runner G-Series – User Guide
Overview
Thank you for purchasing Matrox Rainbow Runner G-Series. With Rainbow Runner G-Series, you
can view, record and edit video on your computer. That video can come from a video camera, VCR,
videodisc player, antenna or cable TV. With a video camera and a connection to the Internet, you
can video conference. With a direct connection to an antenna or cable TV, you can change channels
on your computer or preview up to 30 channels simultaneously. Rainbow Runner G-Series turns
your computer into a home entertainment center and digital video editing studio.
Hardware supplied
Rainbow Runner
G-Series card
2 ribbon cables
Composite (RCA)
video cable
2 audio cables
Software supplied
Matrox drivers – to use the Rainbow Runner G-Series hardware
Matrox PC-VCR Remote – to view and record digital video
Ulead MediaStudio – to edit digital video
Ulead Photo Express – to edit digital images
VDOnet Internet VDOPhone (trial version) – to use your Internet-connected computer as
a video phone
Other software – see the CD-ROM readme file
Matrox Rainbow Runner G-Series – User Guide
5
System requirements
Requirement
Minimum
Recommended
166 MHz
P2, 233 MHz or faster
32 MB
32 MB or more
4× with 256 KB cache, or better
14.4 Kbps
28.8 Kbps
300 MB
2 GB
with IDE mode4 or SCSI drive
Video camera
(for video conferencing)
TV output support on your graphics
card, and a TV and video recorder
(for video viewing and recording)
Matrox “G” series graphics card, for example*:
Productiva G100, Mystique G200,
Millennium G200, Millennium G200 SD,
Millennium G200 SE or MGA-G200 SD
Pentium processor or compatible
System memory (RAM)
CD-ROM for video file
playback†
Sound card for audio capture and playback
(with a Windows–compatible WAV driver)
Modem for video conferencing
(with Internet connection)
Free hard disk space for video capturing
Video equipment
Matrox Rainbow Runner must be used with Windows 95/98.
* Some “G” series graphics cards can’t be used with Rainbow Runner G-Series. For example: Marvel G200,
Marvel G200-TV, Productiva G100 MMS with a TV tuner.
† For MPEG1-encoded video files (*.mpg).
(The data transfer rate needed for the playback of most MJPEG-encoded AVI video files is too high for most CD-ROMs.)
Technical features
NTSC, PAL and SECAM video input (composite and S-video connectors)
Built-in TV tuner for TV antenna or cable TV input
Full-resolution, hardware MJPEG (Motion-JPEG) video compression/decompression
Installation overview
To install Rainbow Runner G-Series:
1
Install the Rainbow Runner G-Series card – see “Hardware installation”, page 7.
2
Connect your video input – see “Connection setup”, page 11.
3
Install the software – see “Software installation”, page 18.
6
Matrox Rainbow Runner G-Series – User Guide
Hardware installation
WARNING: Static electricity can severely damage electronic parts. Before touching any
electronic parts, drain the static electricity from your body. You can do this by touching the
metal frame of your computer. When handling a card, hold it by its edges, and avoid touching
its circuitry.
This section describes how to install your Matrox Rainbow Runner G-Series card. To install, you’ll
need a Phillips screwdriver (star-shaped head). For information specific to your computer, like how
to remove its cover, see your system manual. If your Matrox graphics card is not already installed
in your computer, skip to step 2.
1
Remove the Matrox graphics card
from your computer *
a
Turn off your computer.
b
Note how and where devices are
connected to your computer, then
disconnect them.
c
Remove your computer cover. This
usually involves removing several screws.
d
Remove the screw fastening the bracket of
the Matrox graphics card to your computer
rear panel.
e
Remove the Matrox graphics card from
your computer. Save the card’s fastening
screw and note which slot the card was in.
Matrox
graphics
card
* If you have a Matrox TV output add-on (sold separately) attached to your Matrox graphics card, you should remove
the TV output add-on before you remove your graphics card.
Matrox Rainbow Runner G-Series – User Guide
7
2
If a DVD add-on card is attached to
your Matrox graphics card:
DVD add-on
card
Move the DVD add-on to your
Rainbow Runner G-Series card
a
Support pin
Carefully remove the DVD add-on from
your Matrox graphics card.
WARNING: If the cards are not
separated carefully, they could be
damaged.
Matrox graphics
card
b
Position the DVD add-on card over the
Rainbow Runner G-Series card so the
connectors and the support pin line up.
WARNING: If the cards are not
properly aligned, they could be
damaged when combined.
c
Press the two cards together slowly and
evenly until the connectors are fully joined
and the plastic support pin snaps into
place.
Support pin
Rainbow Runner
G-Series card
8
Matrox Rainbow Runner G-Series – User Guide
3
Attach the first ribbon cable
Use one of the two ribbon cables included
with Rainbow Runner G-Series – the one
with connector pins on one end.
a
Attach the end with the pins to the
connector near the top edge of your
Matrox graphics card – the connector
closer to the bracket.
b
Attach the other end to the corresponding
connector near the top edge of your
Rainbow Runner G-Series card.
Rainbow Runner
G-Series card
Matrox
graphics
card
WARNING: Pressing together incorrectly aligned connectors can damage them. The
connectors on the ends of the ribbon cables and the connectors on the Matrox cards are made
so they attach to each other only one way. Before pressing connectors together, make sure all
pins and holes are correctly aligned. After pins and holes are aligned, make sure connectors are
firmly pressed together.
4
Attach the second ribbon cable
Use the second ribbon cable included with
Rainbow Runner G-Series.
a
Attach one end to the second connector
near the top edge of your Matrox
graphics card.
b
Attach the other end to the second
connector near the top edge of your
Rainbow Runner G-Series card.
Rainbow Runner
G-Series card
Matrox
graphics
card
Matrox Rainbow Runner G-Series – User Guide
9
5
Choose a PCI slot for your Rainbow
Runner G-Series card
a
b
(Back of
computer)
Most computers have different types of
expansion slots. Choose a PCI expansion
slot for your Rainbow Runner G-Series
card. Your system manual should identify
the location of each type of expansion slot
in your computer.
AGP slot
PCI slot
ISA slot
Remove the cover for the slot you intend to
use. Save the screw for the mounting
bracket.
WARNING: Inserting your Matrox
card into the wrong type of slot could
damage your card, your computer, or
both.
Plastic
tab
PCI card
6
Insert your Matrox cards
a
Position your Rainbow Runner G-Series
card over the PCI slot you’ve chosen and
position your Matrox graphics card over
the slot you removed it from.
b
Push the cards in firmly and evenly until
they’re fully seated in their slots.
c
With the fastening screws you saved,
secure the brackets of your Matrox cards
to the computer frame.
d
Put your computer cover back on.
Your Rainbow Runner G-Series card is now
installed. Before restarting your computer,
connect your external devices (see “Connection
setup”, page 11). After connecting your
external devices, restart your computer and
install your Matrox software (see “Software
installation”, page 18).
10
AGP card
Matrox Rainbow Runner G-Series – User Guide
Matrox
graphics
card
Rainbow
Runner
G-Series
card
Connection setup
After the Rainbow Runner G-Series card is installed, you need to connect your external video
devices (TVs, VCRs, and so on), then install the Matrox video software. This section describes
how to connect video devices to your computer.
Quick connection setup
1
Reconnect devices
Reconnect any device previously connected to
your computer – for example, your computer
monitor. For more information, see the
documentation for each device.
If your graphics card has TV output support
and your card wasn’t previously connected to
a TV or video recorder, see your Matrox
graphics card manual for instructions on how
to connect TV output.
If your graphics card doesn’t have TV output
support, a TV output add-on is available. For
more information, see the Matrox Web site
(www.matrox.com/mga).
Matrox Rainbow Runner G-Series – User Guide
11
Connect video input
2
Use the composite video (RCA) cable
supplied with Rainbow Runner G-Series.
a
Plug one end into VIDEO IN on your
Rainbow Runner G-Series card.
b
Plug the other end into the VIDEO OUT
connector (usually yellow) on your video
camera or video player.*
Composite video
camera or composite
video player
For more information on video input devices,
see “Rainbow Runner G-Series input”,
page 17.
SCART connectors: If your VCR or TV only uses a SCART audio/video
connector (see picture), you may need to purchase a SCART video
connector. For more information, see “SCART connector information”,
page 16.
* A video player can be any device that generates a video signal. For example, a VCR, videodisc player or DVD
player.
12
Matrox Rainbow Runner G-Series – User Guide
3
Connect audio input
Use the long audio cable included with
Rainbow Runner G-Series.
a
Plug the stereo-jack end into AUDIO IN on
your Rainbow Runner G-Series card.
b
Plug the other end into left (L) and right
(R) AUDIO OUT on the video device you
connected to in step 2. (On the audio
cable, white is for “left” and red is for
“right”. If your video device has only one
audio connector, use the left audio
connector on the cable.)
Video camera or
video player
For more information on audio input types, see
“Rainbow Runner G-Series input”, page 17.
4
Connect audio output
Use the short audio cable included with
Rainbow Runner G-Series.
a
Plug one end into AUDIO OUT on your
Rainbow Runner G-Series card.
b
Plug the other end into LINE IN on your
sound card.
Rainbow Runner
G-Series card
Matrox Rainbow Runner G-Series – User Guide
Sound
card
13
5
Connect your TV antenna
or cable TV
Connect a TV antenna or cable TV to
ANT/CABLE on your Rainbow Runner
G-Series card.
If the cable from your antenna is flat and
ends with twin leads, you need a
300-to-75-ohm adapter to connect to the
Rainbow Runner G-Series card (see below).
You can find this type of adapter at most
electronics stores.
300-to-75-ohm adapter
14
Matrox Rainbow Runner G-Series – User Guide
S-video and composite video
The Rainbow Runner G-Series has a composite
video input connector and an S-video input
connector. Most video equipment uses composite
video, but some devices (for example, S-VHS
VCRs) use S-video, which is a higher-quality
video signal.
If you have a video device with S-video
connectors, you should use the S-VIDEO IN
connector on your Rainbow Runner G-Series card.
If your S-video device didn’t come with S-video
cables, this type of cable is available at most
electronics stores.
You can use the Rainbow Runner G-Series
S-video connector instead of – or in addition to –
the composite video connector. If you use
composite and S-video connectors, you can
connect two video input devices to Rainbow
Runner G-Series at the same time.
Both video input types may be connected at the
same time, but only one video input signal at a
time can be used by Rainbow Runner G-Series.
You need to select either the composite video
(VIDEO IN) or S-video (S-VIDEO IN) signal in the
software (see page 23).
Rainbow Runner
G-Series card
Composite video
(RCA) cable
S-video cable
(Note: Using the Matrox composite
video and S-video connectors at
the same time is optional.)
Matrox Rainbow Runner G-Series – User Guide
15
SCART connector information
Some video devices in Europe only have SCART connectors. This type of connector includes
video and audio, whereas composite or S-video connectors include only video.
If your TV or VCR only has a SCART connector, you need a SCART cable adapter to connect to
Rainbow Runner G-Series. If you don’t already have a SCART adapter, you should be able to
purchase one from your local electronics store.
To connect your VCR to both Matrox
input and output*, you need a SCART
adapter with 6 connectors – 2 audio
inputs, 1 video input, 2 audio outputs,
1 video output.
There are different SCART adapters for
composite and S-video. If you’re not sure
which your TV or VCR supports, see its
manual. If your TV or VCR uses S-video,
the video connectors on your SCART
adapter should be for S-video cables
instead of composite (RCA) video cables.
To use a SCART adapter, connect your audio
and video cables to the SCART adapter, then
connect the adapter to your TV or VCR.
Depending on the type of SCART adapter
you’re using, you may need male-to-male
adapters to attach your audio/video cables
to it. For more information on connecting to a
TV or VCR, see “Quick connection setup”,
steps 1–4.
Composite SCART adapter
with 6 connectors
S-video SCART adapter
with 6 connectors
Male-to-male adapter (RCA)
* Some Matrox graphics cards support TV output. For more information, see your Matrox graphics card manual.
16
Matrox Rainbow Runner G-Series – User Guide
Rainbow Runner G-Series input
Copyright information: Unauthorized recording or use of broadcast television programming,
video tape or other copyrighted material may violate copyright laws. Matrox assumes no
responsibility for the illegal duplication, use or other acts which infringe on the rights of
copyright owners. Your Matrox product may not let you record from a copy-protected video
source.
VCR as input
If you connect the output of your VCR to your
computer, you can view, record and edit the
video from your VCR on your computer. To
connect, see steps 2, 3 and 4 starting on page 12.
For more information, see your VCR manual.
VCR
Video camera as input
If you connect a video camera to your computer,
you can view, record and edit live video on your
computer. You can also video conference. To
connect, see steps 2, 3 and 4 starting on page 12.
For more information, see your video camera
manual.
Video camera
TV antenna or cable TV as input
You can connect a TV antenna or cable TV
directly to your Rainbow Runner G-Series card.
With this setup, you can use software to watch
TV, change channels and record TV programs
like a VCR. To connect, see steps 3, 4 and 5
starting on page 13.*
TV antenna
or cable TV
* You can also use a VCR as a TV tuner for your computer by connecting your TV antenna or cable TV to your VCR
(see your VCR manual), and connecting your VCR to your computer.
Matrox Rainbow Runner G-Series – User Guide
17
Software installation
After installing the Rainbow Runner G-Series hardware and connecting it to your external video
devices (TV, VCR, and so on), you need to install software. This section describes how to install
the software that comes with your Rainbow Runner G-Series card.
Rainbow Runner G-Series Installation CD-ROM
1
After your computer has restarted, insert the
“Rainbow Runner G-Series Installation”
CD-ROM in your CD-ROM drive – the setup
program automatically starts.*
Select the language you want to use, click Next
to continue, then follow the on-screen
instructions.
2
If the following software is not already installed on your computer, the setup program prompts
you to install it:
Matrox PowerDesk utilities and display drivers
Microsoft DirectX and DirectX Media software
Matrox video software (PC-VCR Remote, VidCap, Quick Connect, HD Benchmark)
Follow the on-screen instructions.
3
The setup program prompts you to restart your computer. Leave the CD-ROM in your
CD-ROM drive and click Restart Computer to continue. You must restart your computer for
changes to take effect.
4
If this is a first-time installation, the Matrox Quick Connect program automatically starts. This
program lets you interactively test your computer’s connections to external video devices.
Follow the on-screen instructions and when you’re done, exit this program to continue.
5
If a hard disk in your computer hasn’t been tested before by Matrox software, the Matrox
HD Benchmark program starts. This program tests the speed of hard disks and reports the
results. The results are saved and affect the maximum settings you can select with the Matrox
PC-VCR Remote program (see page 23). Disk speed affects the quality of video file recording
and playback. After the test is finished, click OK to continue.
6
The setup program prompts you to install VDOnet Internet VDOPhone for video conferencing.
Click Yes to install, then follow the on-screen instructions.
* If Windows doesn’t start the setup program automatically, you can start it manually from the root folder of the
CD-ROM.
18
Matrox Rainbow Runner G-Series – User Guide
For more information on software installed from the “Rainbow Runner G-Series Installation”
CD-ROM, see the following sections:
“Matrox PC-VCR Remote program”, page 20
“Matrox VidCap driver”, page 27
“VDOnet Internet VDOPhone program”, page 38
MediaStudio CD-ROM
To install Ulead MediaStudio, insert the MediaStudio CD-ROM in your CD-ROM drive – its main
setup program automatically starts. To install the software, follow the on-screen instructions. For
more information on MediaStudio, see “Ulead MediaStudio software”, page 29.
Note: An MPEG1 video file converter is included within MediaStudio’s Video Editor program.
For more information, see “Creating a video file”, page 35.
Photo Express CD-ROM
To install Ulead Photo Express, insert the Photo Express CD-ROM in your CD-ROM drive – its
main setup program automatically starts. To install the software, follow the on-screen instructions.
For more information on Photo Express, see “Ulead Photo Express program”, page 37.
Matrox Rainbow Runner G-Series – User Guide
19
Matrox PC-VCR Remote program
With the Matrox PC-VCR Remote program, you can use your computer like you would a TV or
VCR. To start, double-click the PC-VCR Remote icon ( ) on the Windows desktop background.
The first time you start PC-VCR Remote, you see the PC-VCR Remote and its video window. Use
the PC-VCR Remote to control what you see in the video window and what you record to file.
PC-VCR Remote interface
Exit PC-VCR Remote
Turn sound on or off
Matrox TV tuner input
Raise volume
Video file input
Matrox
video line input
Lower volume
TV channel up
TV channel
selection buttons
TV channel down
Closed Captioning
Jump to previous channel
Turn “favorite” channel
selection on or off
Menu window
Skip to previous
video file in playlist
Skip to next
video file in playlist
Pause video file or
freeze live video image
Record to video file
Open video files
Play video file
20
Matrox Rainbow Runner G-Series – User Guide
Take video snapshot
Stop and rewind
video file
PC-VCR Remote menu window
(with video file playback)
Shuffle playlist
Video file loop
Mode
indicators
(click to
toggle)
Timer event
Sleep mode
Volume gauge
Elapsed time
Name of current video file
Playback status bar
(click to ‘seek’)
Open PC-VCR Remote
Properties dialog box
Change menu window
Increase setting value
Decrease setting value
Input setting
After you’ve made sure your external video devices are properly connected, click
an INPUT button on the PC-VCR Remote to select a video source for the video
window.* This input setting affects many PC-VCR Remote controls. Select a
button based on what kind of input you want to use:
FILE – for video file playback.
TV – to use your Matrox TV tuner.
LINE – to use a device connected to your Matrox VIDEO IN or S-VIDEO IN connector. This can
be a video camera or video player.
Video file input
With PC-VCR Remote, you can play AVI, MOV, MPG, MPS and DAT video files, including the
video files you record with PC-VCR Remote (AVI files).
To view a video file
1
On the PC-VCR Remote, click the FILE button.
2
Click Open Video Files (
3
Click Play (
), then select a video file in the resulting dialog box.
).
* Depending on your graphics card and display settings, there are maximum video window resolutions (sizes). We
recommend you use a 16-bit color palette setting for your display. For more information, see page 49.
Matrox Rainbow Runner G-Series – User Guide
21
TV tuner input
You can view, record and edit TV programs on your computer, like you would with a VCR.
However, instead of using the controls on your VCR, you can use the PC-VCR Remote software
controls.
TV tuner software setup
To make sure PC-VCR Remote is set up to use your Matrox TV tuner:
1
Click the TV input button on the PC-VCR Remote.
2
Click Properties (
3
Click a TV input button to indicate what your Matrox TV tuner is connected to:
) TV Setup.
Air – for an antenna.
Cable – for cable TV.
4
Click Advanced, select the country you’re in, then click OK.
5
Click the Video tab, then make sure the Automatic check box (in the Input
standard group box) is enabled.
6
Click the TV Setup tab Auto Scan button for PC-VCR Remote to
automatically search all channels and keep in memory only the ones that can be tuned.
7
Adjust any other settings you want, then click OK to save settings and close the dialog box.
TV channel preview
To see the TV channel preview window, right-click the PC-VCR Remote, then click the TV
Preview menu item. By resizing this window, you can preview up to 30 channels at a time. Use the
scroll bar to preview different channels. If PC-VCR Remote FAVORITES feature is enabled, only
the channels defined as your “favorites” are visible in the preview window.
The video window and the TV channel preview window can’t be viewed at the same time. To view
a particular channel in the video window and close the preview window, double-click a channel in
the preview window.
Video line input
When the PC-VCR Remote LINE button is selected, the video window displays the signals coming
from a device connected to your Matrox VIDEO IN or S-VIDEO IN connector. This can be a video
camera or video player (see “Rainbow Runner G-Series input”, page 17).
You can record from your video camera or video player to a digital video file. You can then play
back this video file with PC-VCR Remote, or edit it with another program (see “Ulead
MediaStudio software”, page 29).
22
Matrox Rainbow Runner G-Series – User Guide
Before you record to a video file
Make sure the VCR or video camera is properly connected to your Matrox line input. For more
information on how to connect video devices, see “Connection setup”, page 11.
Make sure your Windows sound card settings are correct. For more information, see “Sound”,
page 47.
Make sure your PC-VCR Remote property settings are correct. Click the
Properties button (
) on the PC-VCR Remote to access its setting controls:
On the Video property sheet, select the Matrox input line you want to use
(composite or S-video) and the TV standard your VCR or video camera
uses (NTSC in North America; PAL in most of Europe; or SECAM in
France). For PC-VCR Remote to automatically detect the TV standard,
enable the Automatic check box. If this check box is enabled, there may be
a delay of a few seconds when you change the INPUT setting.
On the Recording property sheet, select the path where you want to save your video file
and select your video capture options for PC-VCR Remote. Move the Recording settings
slider to increase or decrease the frame size and rate of recordings. The higher the frame
size, the higher the video quality, but also the more disk space you’ll need.
Look at the Max recording time box to see the maximum amount of time you can record to
a video file. This time is based on the currently selected capture settings and the amount of
free space on the disk where your video file will be recorded.
Recording settings
The maximum frame size and rates you can select with the
Recording settings slider are based on the currently
selected capture settings (see “Capture options”) and the
disk where the video file will be created. Higher-quality capture settings generally require
a disk that can store information faster. PC-VCR Remote determines how fast your disk can
store information by checking the results saved by the Matrox HD Benchmark program.
Matrox Rainbow Runner G-Series – User Guide
23
Capture options
On the Recording property sheet, click the Capture Options button to select your video
capture type:
MJPEG – Click this button to use hardware-based Matrox MJPEG (Motion-JPEG) video
compression. Video files you create with this button selected are smaller, and as a result,
your disk can store longer videos and handle more video at a time. When your disk can
handle more video at a time, you get higher-quality video file recording and playback.
Video files you create with this button selected are still Audio Video Interleaved files
(*.avi), but only someone with a Matrox video editing card and its software drivers can use
them. This is because Matrox video editing cards have special hardware to decompress
MJPEG-encoded video files. You can adjust the image quality of Matrox MJPEG digital
video by moving the MJPEG quality slider in the same dialog box.
RGB * – Click one of these buttons to record uncompressed video files.
* With PC-VCR Remote, RGB digital video is always in overlay mode. For more information on overlay mode, see
“Overlay and preview modes”, page 28.
For more information on PC-VCR Remote property settings, click “
dialog box, then click a dialog box item.
” on the title bar of the
Recording to a video file
1
Click the LINE button on the PC-VCR Remote. You should see video in the PC-VCR Remote
video window; if not, see “Before you record to a video file”, page 23.
2
Click Record (
).
If you click Record once, PC-VCR Remote will record to video file until you click Stop
(
) or run out of disk space. If you click Record again, PC-VCR Remote will record for
2 minutes; click again and PC-VCR Remote will record for 4 minutes; and so on.
Mini remote
If you don’t want to use the full-sized PC-VCR Remote, you
can use the “mini remote”. The mini remote is a toolbar
Mini remote toolbar (FILE input)
added to the PC-VCR Remote video window. The mini
remote replaces the “full remote”. To use the mini remote, right-click the PC-VCR Remote, then
click Use Mini Remote on the resulting pop-up menu.
Pause your mouse pointer over each mini remote button to see a pop-up tooltip identifying it. There
are different buttons on the mini remote depending on the type of input selected.
To return to using the full remote again, right-click the PC-VCR Remote video window, then click
Full Remote on the resulting pop-up menu.
24
Matrox Rainbow Runner G-Series – User Guide
More features
To access more features, click the Properties button (
) on the PC-VCR Remote. You can also
right-click PC-VCR Remote or its video window to quickly access some features. Here’s a partial
list of what else you can do with PC-VCR Remote:
Full-screen video window Double-click the PC-VCR Remote video window to make
its video image fill your entire computer display.* Double-click again to restore the video
window to its original size.
TV program timer ( ) You can program the PC-VCR Remote like you would a VCR.
You can schedule weekly, daily or one-time-only TV program events which do one of three
things:
Make the PC-VCR Remote video window appear.
Save Closed Captioning text to a file (North America only).
Record video and audio input to a file.
Closed Captioning (
) Save Closed Captioning text to a file. If the current
PC-VCR Remote video input signal supports the Closed Captioning service used in
North America, click the Closed Captioning button to show or hide text information
encoded in the video signal. (This feature does not work with the Teletext service used in
Europe.)
Keyword detection Create lists of words that PC-VCR Remote automatically searches
for in the Closed Captioning information of a video signal. Depending on how you set it up,
PC-VCR Remote will make the video window appear, save Closed Captioning text to a file, or
record the video and audio input to a file when it finds a keyword. (This feature does not work
with the Teletext service used in Europe.)
Sleep mode (
) Have PC-VCR Remote close automatically after a certain amount of
time.
Shuffle playlist (
) Shuffle the video files in the current playlist into random order. (To
use this feature, enable Use Playlist first.)
Loop video files (
) Play video files continuously.
* If your display area setting is too large, TV and LINE input and playback from Matrox MJPEG-encoded AVI video
files may appear centered on a black screen when viewed “full-screen”. Playback from other types of AVI files
may appear blocky when viewed full-screen because of the way the video is encoded.
Matrox Rainbow Runner G-Series – User Guide
25
Video snapshots Click the Video Snapshot button (
) on the PC-VCR Remote to
save a digital still image (“frame capture”) of the current PC-VCR Remote video window.
Video snapshots can be saved as bitmap (*.bmp) or JPEG (*.jpg) files. You can adjust the
quality, and as a result the file size of JPEG video snapshots.
Video window cropping If the PC-VCR Remote LINE or TV button is selected, hold
down the [Shift] key, then click the video window display area. This opens a dialog box that
lets you trim the edges of the video window display. This is useful for hiding information along
the edges of a video image or if you just want to see part of your video window display. You
can also hold down the [Ctrl] key, then drag in the video window to crop. To restore cropping
settings, right-click the video window, then click the Reset Cropping menu item.
Note: In a video window with no cropping, the edges of video images may appear
distorted. You normally don’t see this distortion on a TV because most TVs crop the edges
of video images. Professional video equipment doesn’t produce this distortion but
consumer-quality video equipment may. You can use the cropping feature of PC-VCR
Remote to hide this distortion.
Hot keys
Assign keyboard shortcuts to many PC-VCR Remote controls.
Audio
With a sound card installed in your computer, you can adjust your computer’s sound
output with the PC-VCR Remote.
TV tuner With the TV tuner built into your Rainbow Runner G-Series card, you can:
Simultaneously preview up to 30 channels in a single window.
Change channels with PC-VCR Remote controls.
Schedule TV program timer events for different channels.
Password-protect certain TV channels (“parental lock”).
Auto Scan for tunable TV channels.
Define certain channels as your favorites and quickly skip to those channels with the
PC-VCR Remote channel up and down buttons.
To turn some features on or off, click the PC-VCR Remote mode indicators ( ,
,
,
,
). For more information on PC-VCR Remote features and controls, see its context-sensitive
Help. Click “
” on the title bar of a dialog box, then click a dialog box item.
26
Matrox Rainbow Runner G-Series – User Guide
Matrox VidCap driver
Video capture programs (other than Matrox PC-VCR) use the Matrox VidCap driver interface. For
example, when you use Ulead Photo Express or VDOnet VDOPhone, you see the Matrox VidCap
driver interface when you adjust video settings. This section describes VidCap source and format
setting controls.
Video source settings
Video channel – Click a button in this group box to select a
source:
S-video – to capture video from a video camera or video
player connected to your Matrox S-VIDEO IN connector.
Composite video – to capture video from a video camera
or video player connected to your Matrox VIDEO IN
connector.
TV tuner – to capture video from your Matrox TV tuner.
Depending on what’s connected to the ANT/CABLE connector on your Rainbow Runner
G-Series card, click one of these buttons:
Air band
– for a TV antenna.
Cable band
– for cable TV.
With the Channel box, select the channel you want to use. Click Set to apply your selection.
For more information, see “Connection setup”, page 11.
Standard – Click a button in this group box to identify the TV standard used by your video source:
NTSC – for most North American video devices.
PAL – for most European video devices.
SECAM – for video devices using the TV video standard from France.
The VidCap driver automatically assigns the correct standard used by your current video source.
VidCap won’t let you select a TV standard it doesn’t detect.
Matrox Rainbow Runner G-Series – User Guide
27
Video format settings
RGB – Click an RGB button to select an uncompressed video file
format. Use an RGB format to video conference with VDOPhone and
to capture still images with Photo Express. The bit values represent
how many bits of information are used for color palette information;
the larger the bit value, the more colors can be used, but the larger the
file size.
8-bit – 256 shades of gray
16-bit – 65,536 colors
24-bit – 16,777,216 colors
MJPEG – For more information, see “Capture options”, page 24.
Set Video Size – Click this button to adjust the video
image size (resolution) settings for the currently selected
format (RGB or MJPEG). For MJPEG, you can also
select its quality setting.
Also, with MJPEG you can compare the speed of your
hard disks (HD Benchmark results box) with the speed
required by the selected settings (Data rate box). (The
data rate estimate doesn’t take audio into account.) If the
hard disk you’re using is too slow, video files you capture
may appear jerky.
Overlay and preview modes
The video capture program you’re using may give you a choice of overlay or preview modes.
If the MJPEG video format is selected, overlay and preview settings have no effect. If an RGB
video format is selected, overlay and preview settings affect how video is viewed or captured:
With overlay mode, everything on the video window is captured. For example, any part of
a dialog box overlapping the video window appears in the captured video.
With preview mode, you will get a lower frame rate (resulting in jerky video) and you may
not be able to view or capture video if there isn’t enough graphics memory available. The
amount of graphics memory available depends on how much memory is on your graphics
card, the size of the video window, and the resolution and color palette settings of your
display.
28
Matrox Rainbow Runner G-Series – User Guide
Ulead MediaStudio software
Ulead MediaStudio software, together with Rainbow Runner, turns your computer into a digital
video editing studio. With it, you can create and edit video projects including text, images, sound,
animation and video that you create yourself or record (capture) from a variety of sources.
MediaStudio is a collection of programs you can use to work with video projects. To access
MediaStudio, click
Programs Ulead MediaStudio. The most important of the
MediaStudio programs is Video Editor. With this program you arrange and edit your various media
“clips” (text, images, sound, animations or video). With Rainbow Runner, you can capture your
own video files to use as clips in Video Editor.
After you complete your video project, you can save it as a video file, then play it back or distribute
it. You can also transfer that video file to video tape.
This section shows you how to use MediaStudio to create a video production by:
Step 1 – Getting files for clips
Step 4 – Adding effects
Step 2 – Adding clips
Step 5 – Saving your video
Step 3 – Editing clips
For a simplified way to get started with MediaStudio Pro, you can start Video Wizard, then follow
the on-screen instructions. Video Wizard guides you through some of the steps of creating a video
project.
Step 1 – Getting files for clips
To make your own video production, you first need media files to use as clips.
For video clips, you can capture to file from a variety of sources: VCR, video camera or videodisc
player. To do this, you can use the Matrox PC-VCR Remote program (see “Matrox PC-VCR
Remote program”, page 20). With the TV tuner built into your Rainbow Runner G-Series card, you
can also use PC-VCR Remote to record video from cable TV or from a TV antenna connected
directly to your computer. For best results, make sure all the video files you plan to use together in
a video project are captured with the same settings.
Alternately, you can use the Ulead Video Capture program to record video files. For information
on how to use the Ulead video capture program, see its online Help.
You can also get video, sound and still image files from CD-ROMs, the Internet or from friends,
to name a few sources. MediaStudio provides sample video files in its Samples folder, which you
can use to get started.
Matrox Rainbow Runner G-Series – User Guide
29
Tips for capturing video
Before capturing video, prepare your video source so that you don’t capture more
information than necessary. For example, if you’re capturing from a video cassette, pause
your VCR at a point just before where you want to start the capture. A few seconds before
beginning a video capture on your computer, release the pause button on your VCR.
Use the same capture settings for all video files you’re going to use in the same project.
Specifically, use the same resolution (size) for each video file within a project. Different
settings could result in noticeable changes in image quality between video clips.
If you intend to transfer your video production to video tape, use Matrox MJPEG video
compression.
For more information on capture options, see “Before you record to a video file”, page 23, and
“Matrox VidCap driver”, page 27.
Step 2 – Adding clips
Video Editor overview
Start Video Editor to open the Video Editor main window. When you see the New dialog box, select
a project template with the same settings as video clips you plan to use, then click OK. Take note
of the video template you select and its settings. Take a moment to familiarize yourself with the
interface. Pause your mouse pointer over each control to see a pop-up tooltip identifying it and a
longer description on the status bar.
Toolbars
Ruler
Video track ‘a’
Timeline
Effects track
Video track ‘b’
Video overlay
track
Audio track ‘a’
Navigator
Production
Library
Status bar
30
Matrox Rainbow Runner G-Series – User Guide
The main areas of the Video Editor window are the tracks. Tracks are where you place clips.
Separate tracks make it easier to organize and manipulate clips. Track lengths, as measured by the
ruler, represent time and all tracks use the same timeline. Clips can be video, audio or images.
Adding a video, audio or image clip
1
Click the type of file you want to insert:
Insert Video File – to put AVI, MOV, FLC, FLI and FLX video files in your video project.
With this button, you can insert AVI video files you captured with PC-VCR Remote (see
“Step 1 – Getting files for clips”).
Insert Audio File – to put WAV sound files or the audio portion of AVI or MOV video files
in your video project.
Insert Image File – to put BMP, EPS, JPG, PCD, PCT, PCX, PIC, PNG, PSD, TGA, TIF or
WMF picture files in your video project.
2
Using the resulting dialog box, select a file.
3
After choosing a file, click a track to place the clip.
Placing clips If the mouse pointer appears as a circle with a slash through it, you can’t
place the clip at that location. When placing a clip, black means the entire clip will fit on
the current location on the track, red means the clip will be trimmed at the end to fit. After
a clip is placed, you can move it within a track or to a different track by dragging it.
If a video file includes sound, clips are synchronously placed on both the video and audio
tracks. You can use just the audio portion of a video file by placing its video clip on an audio
track.
Adding a title, color or silence clip
1
Click the type of clip you want to insert:
Insert Title Clip – to put text in your video project.
Insert Color Clip – for solid color fills (as a background, for example).
Insert Silence Clip – to mute part of your audio track.
2
Use the resulting dialog box to adjust the settings, then click OK.
3
Click a track to place the clip (see “Placing clips”).
Matrox Rainbow Runner G-Series – User Guide
31
Step 3 – Editing clips
First, click the Clip Selection ( ) button on the toolbar. Note that editing clips in Video Editor
does not affect the original source files, only the current video project. Here are some ways you
can work with clips:
To move a clip within a track or to a different track, drag it.
Arrange your clips so that the end time of one clip overlaps or immediately follows the start
time of another – otherwise, there are blank areas in your video production.
To preview or edit a clip, double-click it.
To remove a clip from a track, click it, then press [Delete].
To trim a clip, move your mouse pointer over a clip’s left or right edge, then drag horizontally.
For context-sensitive information, right-click a clip.
For a context-sensitive menu, click a clip to select it, then right-click it.
Previewing your work
You can preview your video project at any time. Video project previews give you a quick
approximation of what your final video project will look like.
Frame previews To see one frame from your
project, click the ruler. To see several frames at a time,
click and drag on the ruler. The mouse pointer turns
into a star ( ) when it’s in the correct place over the
ruler to do this. You can also move the slider on the Navigator window.
Motion previews To see how your video project will play in real-time, click View Preview. This creates a preview video file and then opens a video playback window. You can
also click Preview (
) on the Navigator window.
To see a motion preview of just part of your video project, select a time frame by dragging
along the top part of the timeline. The mouse pointer turns into a film strip ( ) when it’s over
the top part of the timeline. To clear a selected time frame, right-click the top part of the
timeline.
Dialog box previews
Some dialog boxes have their own previews so you can see an
approximation of how the currently selected dialog box settings will appear. To play the
preview, click Play ( ). For the preview to be closer to what the selected settings will look
like, click Actual Image ( ).
32
Matrox Rainbow Runner G-Series – User Guide
Preview settings – Using the cutlist feature
Before you can view your video project, Video Editor has to process it. The cutlist feature reduces
the need for Video Editor to recreate a complete video file after every edit. Video clips and effects
are processed once and only changes are processed thereafter. Using cutlist saves disk space and
time.
Preview and video file settings determine whether the cutlist feature is in effect. Some preview
settings are determined by the video template you selected when you started your project. If you
selected a Matrox MJPEG video template, your settings are correct.
To check your preview settings:
1
Click Preview Options (
).
2
Click the Video Editor tab. Make sure Preview method Best preview is selected.
3
Click the General tab. Make sure the Frame size matches that of your video clips (see “Tip 2”).
(The frame size must be one of the resolutions listed under “Matrox MJPEG resolutions”,
page 49.)
4
Click the Compression tab. Make sure Compression Matrox MJPEG is selected.
5
Click OK.
Tip 1: With cutlist, you can avoid creating a video file by recording your video project directly
to a VCR from Video Editor. For more information, see “Transferring a video file to video
tape”, page 36.
Tip 2: If you want to save time and maintain video quality when you create a video, make sure
all preview settings are the same as the video files in your project. Specifically, video files
should be Matrox MJPEG-encoded and have the same resolution (frame size). You should also
make sure the frame rate and audio settings match. For your audio to stay synchronized with
your video, enable the Interleave audio and video check box on the Advanced property sheet.
Matrox Rainbow Runner G-Series – User Guide
33
Step 4 – Adding effects
Video Editor special effects fall into these categories:
Transition effects – Applied between video clips; for example, fades or wipes.
Video filters – Applied on video clips; for example, blur or whirlpool effects.
Audio filters – Applied on sound clips; for example, echoes or amplification.
Overlays – To make clips appear “on top of” other clips. The underlying clip shows through
the transparent parts of the overlay clip. For example, to make titles appear over your video
clips.
Moving paths – To move clips within the video frame. For example, to make title clips scroll
across your frame, or to zoom in on a video clip.
Adding a transition effect
1
Make sure the end time of a clip on the Va or Vb track overlaps the start time
of a clip on the other track (Vb or Va). The amount they overlap will be the
length of time of the transition effect.
2
Double-click the Fx track to open the Production Library Transition Effect
window.
3
Drag the effect you want over the Fx track, then click where the Va and Vb
clips vertically overlap.
4
Adjust the settings in the resulting dialog box, then click OK;
If the Va clip starts before the Vb clip, select the From Va to Vb option button.
If the Vb clip starts before the Va clip, select the From Vb to Va option button.
For more information, click Help in the dialog box.
Adding filters or overlays
1
Click the clip you want to apply an effect to.
2
Click the type of effect you want to apply:
Video Filters
Audio Filters
Overlay Options (tracks V1, V2 …)
3
34
Overlapping clips
with a transition
effect
Adjust the settings in the resulting dialog box, then click OK.
For more information, click Help in the dialog box.
Matrox Rainbow Runner G-Series – User Guide
Adding moving paths
1
Click Moving Path (
).
2
From the Production Library Moving Path window, drag the effect you want over the tracks,
then click a video clip.
3
Adjust the settings in the resulting dialog box, then click OK.
For more information, click Help in the dialog box.
Step 5 – Saving your video
After you complete your video project, you can create a video file from it, which you can play back
or distribute. You can also transfer that video file to video tape.
Creating a video project
To save your work, click Save ( ) – this creates a Digital Video Project (DVP). If saving your
work for the first time, you’re prompted for a file name. A DVP saves your work without
modifying or making copies of your source files and without making a video file of your whole
project. You can open a saved DVP by clicking Open ( ).
Creating a video file
To save your video project as a video file which can be viewed with other software:
1
Click File Create Video File.
2
Make sure “Microsoft AVI File (*.avi)” is selected in the Save as type box, then type a file name.
Note: If you want to distribute your video file on disk or through the Internet, you can
select “MPEG1 Files (*.mpg)”. This uses the MPEG1 converter built into Video Editor.
3
Click the Options button to adjust your file creation options.
For better image quality, use the same settings used to capture each video file in your project.
Specifically, make sure the frame size (General tab) and compression type (Compression tab)
are the same. If you use the Matrox MJPEG compression type, make sure a supported resolution
is selected (see “Matrox MJPEG resolutions”, page 49).
Note: Some default file creation settings are determined by the video template you selected
when you started your project. As a result, you may not need to change some settings.
For more information, click Help in the dialog box. Click OK to close this dialog box.
4
Click OK to begin file creation.
Matrox Rainbow Runner G-Series – User Guide
35
Depending on the options selected, the size of your video project, and the speed of your computer
system, creating a video file may take a long time. Also, video files can be very large – make sure
you have enough disk space available before creating a video file.
Transferring a video file to video tape
If your Matrox graphics card supports TV output, you can transfer video files to video tape.
To do so:
1
Connect the output from your graphics card to the input of your VCR. For more information,
see your Matrox graphics card manual.
2
Prepare your VCR (turn it on, set up a video cassette).
3
Start playing the video file at the same time you start recording on your VCR. For more
information on video file playback, see “To view a video file”, page 21.
If the video file is not encoded with Matrox MJPEG, enable TV output (see your Matrox
graphics card manual), and play the file full-screen (see “Full-screen video window”, page 25).
Tip: If your video project was created using the cutlist feature (see “Preview settings –
Using the cutlist feature”, page 33), you can play it back directly from Video Editor. Simply
click View Preview.
4
Stop the recording on your VCR when the video file is finished playing.
More information
To learn more about MediaStudio, see the extensive online documentation. To access online Help,
use the Help menu. For context-sensitive Help on a control in a main program window, move your
mouse pointer over a control, then press [F1]. Also, most dialog boxes have a Help button.
To access online tutorials:
1
Insert the MediaStudio CD-ROM in your CD-ROM drive.
2
Click
Programs Ulead MediaStudio Tutorial.
For more documentation, see the English\Manual\Ms5ve.pdf file on the MediaStudio CD-ROM.
This is the online version of the printed manual that comes with the retail version of MediaStudio.
Use the Acrobat Reader program to read this file.
36
Matrox Rainbow Runner G-Series – User Guide
Ulead Photo Express program
With Photo Express, you can easily turn your digital photos into cards, calendars, posters, screen
savers, slide shows and more. You can use photos from any source, including scanner, digital or
video camera, VCR, file copy, or another program. With a sound card, you can even add audio to
your photo projects.
When you start Photo Express, the first thing you see is its distinctive, easy-to-use interface. Pause
your mouse pointer over an item to see a pop-up tooltip identifying it.
Toolbar
Command
panel
To see how easy it is to create projects using predefined templates, try clicking Project. Then when
you’re ready to create a project from scratch, click Photo.
Each command panel item has an associated toolbar. When you click a new item on the command
panel, the toolbar changes.
For more information on how to use Photo Express, see the online Help. There are interactive
tutorials and a Screenbook which you can access through the Photo Express CD-ROM (the path to
the Screenbook is Manual\English\pe2.pdf).
Matrox Rainbow Runner G-Series – User Guide
37
VDOnet Internet VDOPhone program
With VDOPhone and your Matrox video editing card, you can use your computer as a video phone.
You can send and receive live video, high-quality sound, and text over the Internet.
Requirements
To send and receive any information:
Internet connection – through a network, or a 14.4 Kbps (or faster) modem
To send sound:
Microphone or video camera
Sound card and supporting drivers
Sound card and supporting drivers
To receive sound:
Earphones or speakers
To send and receive sound at the same time:
Sound card and drivers that support full-duplex (two-way) information transfer
To send video:
Video camera to send live video
VCR to send taped video or TV signals
Network setup
Before starting VDOPhone, you need an Internet connection. If you have full Internet access (you
can send and receive e-mail and browse the World Wide Web), you can begin the VDOPhone
setup. If you don’t have full Internet access, contact your local Internet service provider or network
administrator. See also “More information”, page 40.
VDOPhone setup
To start the VDOPhone program, double-click the VDOPhone icon (
) on the Windows desktop
background. The first time you start VDOPhone, it asks if you want to start the setup wizard. If
you click Yes, this program guides you through some of the setup options for VDOPhone. For
more information, see the online Help.
38
Matrox Rainbow Runner G-Series – User Guide
Menus
Call/Hang-up button
Error indicator
Message bar
Online directory button
VDOPhone setup for Rainbow Runner G-Series
1
Click Tools Options Video.
2
Click the Source button to select the video source you want to send out.
Typically, you would select Composite video or S-video, and connect a video camera to the
appropriate Matrox input line. This setup lets you send out live video of yourself. However,
your video source could also be a video player or your Matrox TV tuner. For more information,
see “Rainbow Runner G-Series input”, page 17.
For more information on the Video Source dialog box, see “Video source settings”, page 27.
3
Click the Format button to select the type of video you send out.
a
Click RGB (8-bit) for black and white output, or RGB (16-bit) or RGB (24-bit) for color
output. Do not use Matrox MJPEG compression with VDOPhone.
b
Click the Set Video Size button to select the size of the video image you send out.
QCIF is recommended for most Internet connections. In general, the larger the image size,
the slower the frame rate.
c
Click OK OK to confirm your selections.
For more information, see “Video format settings”, page 28.
4
Select Self View through the drop-down menu to open a window where you can see yourself as
the person you’re connecting with will see you. Now you’re ready to connect with another
VDOPhone user.
Connecting with other VDOPhone users
Before you begin, the person you’re calling needs to be ready to receive your call with their copy
of the VDOPhone program.
1
Click the Call button in the main window of VDOPhone.
2
In the resulting dialog box, type the e-mail, IP, or host address of the person you want to call.
3
Click the Dial button.
Matrox Rainbow Runner G-Series – User Guide
39
For two-way video communication, both parties must have properly installed video capture cards
and must be sending video. If you don’t get two-way sound with your connection, see “Sound”,
page 47.
If you have full Internet access, click Go “Who’s online?” to see a list of VDOPhone users
currently on the Internet.
If other users can’t connect to you using your e-mail address, they should try using your IP address.
To see your own IP address (and later communicate it to other users), run the winipcfg program:
Run.
1
Click
2
Type winipcfg in the Run text box, then click OK.
3
In the resulting dialog box, take note of your IP Address, then click OK to close the dialog
box.
More information
For online Help for VDOPhone, click
Programs VDOPhone VDOPhone Help. See
also ReadMe and VDOPhone Manual in the VDOPhone folder. For frequently asked questions and
troubleshooting information, see VDOPhone’s Web site at www.clubvdo.net.
40
Matrox Rainbow Runner G-Series – User Guide
Troubleshooting
Video editing
The following troubleshooting items address problems related to video editing.
For a list of notes, problems and limitations, click
Programs Matrox Video Tools Read Me.
Problem
Cause
Can’t use Rainbow Runner G-Series
Your computer may have not given an interrupt request (IRQ) to your Matrox
graphics card or may have given one used by another device in your computer. This
may be because your computer’s “Plug-and-Play” feature is turned off.
To check the display adapter’s IRQ:
Solution
1
Right-click the My Computer icon on the Windows desktop background, then
click Properties Device Manager.
2
Click the plus sign to the left of the Display adapters. An “X” through an icon
means the hardware has been disabled. A circled exclamation point through the
icon means the hardware has a problem.
3
Double-click the name of your Matrox
display adapter to open a properties dialog
box. The type of problem is displayed in
the General tab Device Status area.
Check also the Resource tab Resource
Settings list for an Interrupt Request.
Change settings in your computer’s CMOS setup utility.
If your computer has the options of enabling Plug-and-Play detection, or assigning
an IRQ to a VGA adapter, make sure they’re enabled. If your computer doesn’t
have these options, you may be able to manually assign an IRQ to your graphics
card using the CMOS setup utility.
For more information on your computer’s CMOS setup utility, see your system
manual or contact your system manufacturer.
Matrox Rainbow Runner G-Series – User Guide
41
Solution
Cause
Solution
Problem
PCI graphics cards only: You may have to manually assign an IRQ to your
Matrox card with the irqset program in the C:\Program Files\Matrox MGA
PowerDesk folder. For instructions on how to use irqset, click
Programs Matrox PowerDesk Readme.
Matrox hardware may not be properly installed.
Make sure the Matrox hardware is properly installed. Specifically, make sure your
Matrox graphics and Rainbow Runner G-Series cards are firmly in place. For more
information, see “Hardware installation”, page 7.
Can’t use a video program
(video capture, playback, editing or conferencing programs)
Cause
Solution
Cause
Another program may be using your Matrox video editing hardware. Only one
program at a time can use Matrox video editing hardware.
Close any other program that may use video editing hardware, then restart the
program you’re using.
Files may be missing or corrupted.
Solution
Uninstall then reinstall Matrox video software. To uninstall, click
Settings Control Panel Add/Remove Programs (double-click) Matrox Video
Tools Add/Remove Yes. To reinstall, insert the “Rainbow Runner G-Series
Installation” CD-ROM in your CD-ROM drive – the setup program automatically
starts.*
Solution
Uninstall then reinstall the program you’re having problems with. For more
information, see its documentation.
Problem
Cause
Solution
Can’t record video from a video player
The video source may be copy protected. Your Matrox product doesn’t let you
make copies of copy-protected video. (Some video sources let you make a copy of
a video, but you may not be able to make a copy of that copy.)
To get copies of a copy-protected video, contact the vendor of the video.
* If Windows doesn’t start the setup program automatically, you can start it manually from the root folder of the
CD-ROM.
42
Matrox Rainbow Runner G-Series – User Guide
Problem
Cause
No picture in PC-VCR Remote video window
One or more of your cable connections may be loose or incorrect.
Solution
Make sure all your computer connections are firmly plugged in.
Solution
Make sure connections are correct (see “Connection setup”, page 11). To test your
connection setup, click
Programs Matrox Video Tools Matrox Quick
Connect.
Solution
Make sure the PC-VCR Remote input settings are correct (see “Matrox PC-VCR
Remote program”, page 20).
Cause
Solution
Problem
PC-VCR Remote video tuning settings may be set too low.
Reset the video tuning settings to default values: On the PC-VCR Remote, click
Properties (
) Video Default Tuning OK.
Can’t create Matrox MJPEG video files
(with video editing, video capture or 2D/3D animation programs)
Cause
Solution
An unsupported video file resolution (size) may be selected.
In the video file creation settings of the program you’re using, make sure an
MJPEG resolution supported by Rainbow Runner is selected (see “Matrox MJPEG
resolutions”, page 49).
For information on how to select the video file creation resolution, see the
documentation of the program you’re using. If you’re using Ulead MediaStudio,
see “Creating a video file”, page 35.
Problem
Cause
Solution
Video file playback is jerky (skipping frames)
Your hard disk may be too slow.
Try recapturing and playing back video files after defragmenting your hard disk.
Click
Programs Accessories System Tools Disk Defragmenter.
If this program isn’t installed:
Settings Control Panel.
1
Click
2
Double-click Add/Remove Programs.
3
Click Windows Setup.
4
Double-click Disk Tools.
Matrox Rainbow Runner G-Series – User Guide
43
Solution
5
Enable the Disk Defragmenter check box.
6
Click OK OK. (You may be prompted to insert the Windows 95/98 CD-ROM
in your CD-ROM drive.)
If your hard disk supports DMA transfers, enable this feature, then try recapturing
and playing back video files. To enable DMA for a hard disk:
1
Right-click the My Computer icon on your Windows desktop background, then
click Properties Device Manager.
2
Double-click the Disk drives list item to expand it, then double-click the name
of the hard disk you’re using.
3
Click Settings, then enable the DMA check box.
4
Click OK OK Yes to restart your computer and for changes to take effect.
Note: Not all hard disks support DMA well. For more information, see the
documentation that came with your hard disk.
Solution
If possible, try recapturing and playing back video files with a faster disk. To test
and compare disk speeds, click
Programs Matrox Video Tools Matrox
HD Benchmark.
Tip: If your computer has more than one hard disk, you may get better results
if you play back or capture video files with a disk other than the one where the
Windows swap file is stored. (The Windows swap file is usually stored on drive
“C:”.) In Ulead Video Editor, to change the disk where temporary video files are
played back from, click File Preferences, then type a new path in the
Temporary folder box.
Solution
Cause
Solution
Solution
44
If possible, recapture the video file using settings that require less disk use. For
more information, see “Capture options”, page 24.
If you’re using the PC-VCR program for video file playback, tooltips may be
interfering with its video window display.
For PC-VCR Remote, disable tooltips.
) General.
1
On the PC-VCR Remote, click Properties (
2
Clear the Use tooltips check box.
3
Click OK to apply changes and close the dialog box.
For other programs, avoid pausing your mouse pointer over controls.
Matrox Rainbow Runner G-Series – User Guide
Cause
Solution
Too many programs may be running (using up computer resources).
Close other programs, including memory resident programs like System Agent.
Cause
The video file you’re playing may not be encoded with Matrox MJPEG. Playback
of video files not encoded with Matrox MJPEG isn’t accelerated by Matrox video
editing hardware.
Solution
Capture your video files with Matrox MJPEG. For more information, see “Capture
options”, page 24.
Solution
If you created your video file with Ulead Video Editor, you can recreate it as a
Matrox MJPEG or MPEG1 video file. For more information, see “Creating a video
file”, page 35.
Cause
Solution
Cause
If the problem is specific to Matrox MJPEG video files, Microsoft DirectVideo
may be enabled. Matrox MJPEG uses DirectShow, not DirectVideo.
Disable DirectVideo. With the Notepad program, open the system.ini file in your
Windows folder and disable the “VIDS.DRAW=dvideo.dll” line in the “[drivers32]”
section. Disable it by placing a semicolon at the beginning of the line. Save your
changes, close the file, then restart your computer.
Your Matrox graphics card may be sharing an IRQ (interrupt
request) with another PCI card in your computer (for
example, a network card). To see if your graphics card is
sharing an IRQ:
1
Right-click the My Computer icon on your Windows
desktop background, then click Properties Device
Manager Properties.
2
Look in the list box to see if your Matrox graphics card
is assigned the same IRQ number as another PCI card in
your computer.
Solution
Try moving the PCI card to another PCI slot in your computer. For more
information, see the documentation for this card or see your system manual.
Solution
PCI graphics cards only: Try moving your Matrox graphics card to another PCI
slot in your computer.
Solution
PCI graphics cards only: Use the irqset program to manually assign a different
IRQ number to your Matrox graphics card. For instructions on how to use irqset,
click
Programs Matrox PowerDesk Readme.
Matrox Rainbow Runner G-Series – User Guide
45
Problem
Cause
The settings a video file was created with may not be optimal.
Solution
If possible, recreate the video file with more optimal settings. If you’re using
PC-VCR Remote, see “Before you record to a video file”, page 23. If you’re using
Ulead Video Editor, see “Creating a video file”, page 35.
Cause
There may be too many video devices between your video source and destination,
or one or more of the video devices may be degrading the quality of the video
signal. Demodulators, long cables, cable extensions and improper connections can
all affect video signal quality.
Solution
If your video equipment supports it, use S-video connections. For more
information, see “S-video and composite video”, page 15.
Solution
Try changing one or more video devices.
Solution
If possible, try using fewer connections. For example, don’t use cable extensions.
Problem
Cause
Solution
Problem
Cause
46
Poor video capture quality
Mouse pointer flickers or disappears when it’s over
a video window
You may be using a customized mouse pointer; Windows draws customized mouse
pointers in a way that may cause them to flicker or disappear while they’re over a
video window.
Use default Windows mouse pointers.
Settings Control Panel.
1
Click
2
Double-click the Mouse icon, then click the Pointers tab.
3
In the Scheme box, select (or reselect) “(None)”, then click OK.
PC-VCR Remote reports that it doesn’t detect the TV tuner or
there’s no TV in the video window when ‘TV’ input is selected
The video signal coming from your antenna or cable TV may have problems. To
test it, temporarily connect it directly to a TV. (If it works okay with your TV, it
should work for your Matrox TV tuner.)
Solution
Make sure your antenna or cable TV connection to your TV tuner is okay. See
“Connect your TV antenna or cable TV”, page 14.
Solution
If you’re using an antenna, try adjusting it, checking all the connections to it, or
using a different antenna.
Matrox Rainbow Runner G-Series – User Guide
Solution
Cause
Solution
If you’re using cable TV, contact your cable company.
Software settings may be incorrect.
See “TV tuner software setup”, page 22.
Sound
The following troubleshooting items address problems related to sound cards.
Problem
Cause
Solution
Cause
Sound doesn’t record, video files play back with no sound, or
sound output is distorted or too loud
If the sound problem is with a particular device (for example, TV or speaker), the
volume control on the device itself may need adjusting.
Adjust the volume control on the device itself.
Audio cables may be loose or incorrectly wired.
Solution
Make sure your sound card cables are properly connected (see steps 3 and 4 starting
on page 13).
Cause
Your sound card’s Windows software settings may be incorrect. Specifically, input
or output may be disabled, or volume levels may be too low or too high.
Solution
Make sure your sound card’s Windows software settings are correct:
1
Double-click the speaker icon (
) on the Windows taskbar.
If you don’t see the speaker icon:
Click
Settings Control Panel.
Double-click the Multimedia icon.
c Enable the “Show volume control on the taskbar” check box.
d Click OK.
e Double-click the speaker icon on the taskbar.
a
b
2
Click Options Properties.
3
Click the Recording button, enable all check boxes in the list box, then click
OK.
Matrox Rainbow Runner G-Series – User Guide
47
4
For the Line-In and/or Microphone controls, make sure the Volume
slider levels are okay (if you’re not sure, try half level), and the
Select check boxes are enabled.
Note: To access the recording settings of your sound card with
) Recording Matrox PC-VCR Remote, click Properties (
Audio Levels.
Cause
Solution
48
5
Click Options Properties.
6
Click the Playback button, enable all check boxes in the list box, then click OK.
7
For the Master, Line and/or Wave controls, make sure the Volume sliders are at
one-quarter to one-half levels (if you’re not sure, try half level), and the Mute
check boxes are cleared.
8
Close the dialog box.
The problem may be specific to the sound card you have.
For more information, see your sound card manual.
Matrox Rainbow Runner G-Series – User Guide
Display information
General display information
For information on Matrox MJPEG, see “Capture options”, page 24.
“PAL” is the TV standard for the UK and other parts of Europe. PAL resolutions are the same
as SECAM (standard for France).
“NTSC” is the TV standard for North America.
Maximum video window resolutions for Matrox MJPEG
There are maximum video window sizes (resolutions) for viewing Matrox MJPEG video files and
live video (TV or LINE input). The following tables list the maximum sizes (measured in pixels)
based on your graphics card, and the color palette and resolution settings of your display. (These
resolutions are supported using a vertical refresh rate of 85 Hz or lower.)
G100 graphics card
b/p*
16
640 × 480
640 × 480
800 × 600
800 × 600
1024 × 768
1024 × 768
1152 × 864
668 ×
668 ×
570PAL
474 NTSC
1280 × 1024
668 ×
668 ×
570 PAL
474 NTSC
1600 × 1200
668 × 570 PAL
668 × 474 NTSC
* With G100 graphics cards, the viewing of MJPEG video files or live video is supported only with a 16-bit color palette.
G200 graphics card
b/p*
640 × 480
800 × 600
1024 × 768
1152 × 864
1280 × 1024
1600 × 1200
16
640 × 480
800 × 600
1024 × 768
1152 × 864
1280 × 1024
1600 × 1200
32
640 × 480
800 × 600
1024 × 768
668 ×
668 ×
570 PAL
474 NTSC
668 ×
668 ×
570 PAL
474 NTSC
668 × 570 PAL
668 × 474 NTSC
* With G200 graphics cards, the viewing of MJPEG video files or live video is supported only with a 16- or 32-bit
color palette.
Matrox MJPEG resolutions
The Matrox Rainbow Runner G-Series card can capture Matrox MJPEG video at the following
resolutions:
Resolution
NTSC
PAL/SECAM
Full
704 × 480
704 × 576
1/2
352 × 480
352 × 576
1/4
352 × 240
352 × 288
1/16
176 × 120
176 × 144
Matrox Rainbow Runner G-Series – User Guide
49
Disk space for captured video
The disk space required to store digital video files depends on the frame size (resolution), frame
rate, and compression ratio they’re captured with. The following table shows the estimated disk
space (MB / min) required with different capture settings (with no audio):
Resolution
Frame rate
Compression ratio
MB / min
1/16
1/2
3.4:1
11
1/16
Full
3.4:1
21
1/4
Full
6.9:1
42
1/2
Full
6.9:1
84
Full
Full
13.4:1
86
Full
Full
8.0:1
144
Supported sound quality settings (video file recording)
50
Setting
Bits per sample
Stereo or Mono
Sample rate
MB / min
CD-quality
16
Stereo
44.100 kHz
10.3
TV-quality
16
Stereo
22.050 kHz
5.2
Low-quality
8
Mono
11.025 kHz
0.6
Matrox Rainbow Runner G-Series – User Guide
Customer support
Matrox Web and FTP sites
Matrox is on the Internet with a World Wide Web (WWW) and File Transfer Protocol (FTP) site.
Our Web site has product literature, press releases, technical material, a sales office list, trade show
information, and other relevant material. Our FTP site contains current drivers for Matrox
products. You can download drivers using the Internet FTP site, in addition to our BBS. You can
access our FTP server independently, or from the Matrox Web site.
Our address for Matrox Graphics Inc. is:
WWW;
www.matrox.com/mga
FTP;
ftp.matrox.com/pub/mga/
Send questions or comments regarding the site to:
e-mail;
[email protected]
If you have a problem
If you have a problem, we recommend that you follow the procedure below for the quickest results.
1
Contact your dealer – This is usually the quickest and most effective method of technical
assistance. Your dealer is local and may be familiar with your complete system. In the case of
hardware warranty assistance, the product must be returned to the dealer, who will return it to
Matrox.
2
CompuServe – If you have a modem and an account on CompuServe, you can get technical
assistance and driver updates directly from Matrox by typing GO MATROX at the “!” prompt.
3
Matrox BBS – You can download driver updates (which may eliminate a particular bug),
utilities, and other information from our 24-hour Bulletin Board Service (BBS). The phone
number is 514-685-6008. The communication parameters are 8 data bits, 1 stop bit, and no
parity. You’ll be prompted to enter your first and last name and a password. If you don’t have
an account, it’s created when you enter your name for the first time. See also “Matrox Web and
FTP sites”.
4
MATFAX instant fax – Call our dial-up Matrox fax service at 514-685-0174. Using a touchtone phone, you can have faxes sent to you automatically 24 hours a day. Available documents
include common installation problems, available drivers and updates, and product data sheets.
Matrox Rainbow Runner G-Series – User Guide
51
Direct Matrox Technical Assistance – If you still can’t resolve a problem, you can get direct
technical assistance four ways:
5
Call Technical Support (Canada) at 514-685-0270. For residents of Quebec only, call
514-822-6330.
Send a FAX to 514-822-6363, Att: Graphics Technical Assistance.
Send e-mail to [email protected].
Write a letter to Graphics Customer Support at our Corporate Headquarters. The address
is: Matrox Graphics Inc., 1055 St. Regis Blvd., Dorval, QC, Canada, H9P 2T4.
Information we need
Please give a complete description of the problem, and include:
Matrox card serial number, model number, revision number, BIOS number, driver type and
version, and memory address at which the Matrox card is installed.
Computer brand name, system BIOS manufacturer and version number or date, bus type,
model, processor speed, and amount of memory.
Monitor brand and model name.
Operating system and version – if you’re using a memory manager, its brand and version. Also,
list any memory-resident programs in use.
If you’re using a network, its brand and version.
Brand and model of any other cards and devices installed on your system.
Program Specific Problems
If a problem appears with a specific program, please give us the following information:
Display settings (color palette, display resolution, and so on) applied when the problem occurs.
Program name and version. Name any add-on packages you’re using.
If possible, take note of the file and segment address that caused the problem.
Detailed steps known to cause the bug, so we can reproduce it.
Where to get information
For display information, click
Programs Matrox PowerDesk Matrox Display
Properties Information.
52
For system information, right-click the My Computer icon on your Windows desktop
background, then click Properties.
Matrox Rainbow Runner G-Series – User Guide
Free CompuServe introductory membership offer
As a Matrox customer, you are entitled to a free Introductory Membership to CompuServe
including:
free access to CompuServe’s Basic Services for one month
$15 introductory usage credit to explore the Matrox section on the Graphics B Vendor Forum
and CompuServe’s other Extended and Premium service offerings
a personal User ID Number and Password
a complimentary subscription to CompuServe’s monthly magazine, CompuServe Magazine
To receive your free CompuServe introductory membership
Call toll-free 1-800-524-3388 and ask for Representative 229.
In the United Kingdom, call 0800 289 378.
In Germany, call 0130 37 32.
In the rest of Europe, call 44 117 976 0681.
Outside of the U.S., Canada, and Europe, call 614-529-1349.
Contact Matrox on CompuServe to receive answers to questions you may have about our graphics
accelerators and video products. You can receive:
assistance on technical questions
information on the latest products and upgrades
tips on using Matrox products
Through CompuServe, you can directly contact Matrox technical representatives or other Matrox
users. You can also take advantage of the many services CompuServe offers.
Matrox Rainbow Runner G-Series – User Guide
53
Warranty
A. Limited Warranty Statement
1. Matrox Graphics Inc. (“Matrox”) warrants to the end-user customer, who provides adequate proof of purchase
that Matrox hardware products purchased from Matrox authorized dealers will be free from defects in materials
and workmanship for a period of three (3) years from the date of purchase. This warranty applies only to the
original end-user purchaser and is non-transferable. Conditions and limitations of Matrox’s warranty are stated
below.
2. Matrox’s limited warranty covers only those defects which arise as a result of normal use of the hardware and
does not apply to any:
a. improper or inadequate maintenance;
b. incompatibilities due to the user’s hardware or software applications with or in which the Matrox product
interfaces;
c. product of a special or custom-made nature;
d. unauthorized modification or misuse;
e. improper installation, misapplication or negligence;
f. operation outside the product’s environmental specifications;
g. improper site preparation or maintenance;
h. software;
i. other causes that do not relate to a product defect;
j. defects or damage suffered as a result of force majeure (including theft);
k. defects or damage suffered as a result of normal wear and tear; and/or
l. stolen goods.
3. If Matrox receives, during the applicable warranty period, notice of a defect in a warranted hardware product
and the defective Matrox product in question, Matrox shall at its sole option, either repair or replace the product,
and shall return the repaired product or a replacement product within a reasonable delay. The replacement
product may not be new, provided that it has functionality at least equal to that of the product being replaced.
4. This warranty is valid in any country where Matrox hardware products are distributed by Matrox or its
authorized dealers.
5. This Limited Warranty Statement gives the customer specific legal rights. The customer may also have other
rights which vary from state to state in the United States, from province to province in Canada, and from
country to country elsewhere in the world.
B. Limitations of Warranty
1. NEITHER MATROX NOR ANY OF ITS THIRD PARTY SUPPLIERS MAKES ANY OTHER WARRANTY OF
ANY KIND, WHETHER EXPRESSED OR IMPLIED, WITH RESPECT TO MATROX PRODUCTS. MATROX
SPECIFICALLY DISCLAIMS (and the customer, by accepting the Matrox product, specifically accepts such
disclaimer and waives) ALL OTHER WARRANTIES, EITHER EXPRESSED OR IMPLIED, INCLUDING BUT
NOT LIMITED TO THE IMPLIED WARRANTIES OF MERCHANTABILITY AND FITNESS FOR A
PARTICULAR OR INTENDED PURPOSE OR USE AND THE WARRANTY AGAINST LATENT DEFECTS,
WITH RESPECT TO THE HARDWARE AND/OR SOFTWARE.
2. To the extent that this Limited Warranty Statement is inconsistent with the law of the locality where the customer
purchases the Matrox product, this Limited Warranty Statement shall be deemed modified to be consistent with
such local law. Under such local law, certain limitations of this Limited Warranty Statement may not apply to
the consumer.
3. To the extent allowed by local law, the remedies provided in this Limited Warranty Statement are the customer’s
sole and exclusive remedies.
54
Matrox Rainbow Runner G-Series – User Guide
C. Limitations of Liability
1. EXCEPT FOR THE OBLIGATIONS SPECIFICALLY SET FORTH IN THE LIMITED WARRANTY STATEMENT,
IN NO EVENT SHALL MATROX BE LIABLE FOR:
a. any direct, indirect, special, incidental, consequential, foreseeable or unforeseeable, or punitive damages,
whether based on contract, tort, delict or any other legal theory and whether advised of the possibility of
such damages; and/or
b. damages arising from the loss of use, data, production revenue and/or profit of in connection with the Matrox
product or any business interruption.
2. Without prejudice to the foregoing, any liability of Matrox for any breach of warranty shall be limited to the
amount paid by the customer for the defective hardware in question.
3. To the extent allowed by local law, Matrox’s entire liability and the customer’s exclusive remedy shall be the
repair or replacement of any defective product during the warranty period. Matrox does not offer any other
warranty with respect to Matrox hardware or software or any other hardware or software.
4. Customer shall be responsible for all applicable taxes, duties and customs fees on any replacement unit, as
well as all transport, insurance, storage and other charges incurred on all returned products.
D. Obtaining Service
1. Verify that your Matrox product was installed and configured according to the information in its accompanying
documentation.
2. Read the “Troubleshooting” information included with the Matrox product to see if you can solve the problem
yourself.
3. If you are still experiencing difficulties, please contact your dealer where you purchased your Matrox product.
4. If you must return a Matrox product, leave the configuration as it was when you were using it, and leave all
identification stickers on the product. Pack the product in its original box and return to your Matrox dealer where
the product was purchased, together with your proof of purchase. Your Matrox dealer will return the product for
you. Alternatively, if this first option is unavailable to you, you may contact the Matrox Technical Support group
who will issue an Return Merchandise Authorization (RMA) number, upon receipt of adequate proof of
purchase, and inform you of shipping instructions. DO NOT RETURN THE PRODUCT TO MATROX WITHOUT
MATROX’S RMA NUMBER AND EXPRESS AUTHORIZATION.
E. General
This limited warranty shall be governed by the laws of the Province of Quebec, Canada and the federal laws of
Canada applicable therein and the courts of the Province of Quebec shall have exclusive jurisdiction to hear and
decide any dispute instituted by the customer in connection with this limited warranty; the customer waives, by
accepting the product, its rights to institute proceedings in connection with this warranty against Matrox in any
jurisdiction other than Quebec.
Matrox Rainbow Runner G-Series – User Guide
55
Index
A
M
display information 49
document conventions 4
address, Matrox 52
Adobe Acrobat 4, 36
audio
adjusting 26
input 13
output 13
problem 47–48
quality 33, 50
AVI
MJPEG compression
video file 31, 35
MediaStudio 29–36
memory requirements 6
Millennium G200 49
MJPEG
capture options 24, 28, 30
compression 6, 33, 35
resolutions 49
video format setting 28
video quality 24
MPEG1 19, 35
Mystique G200 49
E
editing clips 32
e-mail, Matrox 52
F
24
FAX, Matrox 51
frame capture 20, 26
FTP, Matrox 51
G
B
BBS, Matrox
51
graphics cards
N
6
NTSC
C
H
capture settings 23, 24, 30
CD-ROM
MediaStudio 19, 36
Photo Express 19, 37
Rainbow Runner G-Series 4,
hardware
acceleration 24, 45
information 5–6
installation 7–10
requirements 6
HD Benchmark 18, 23, 28, 44
18, 19
requirements 6
Closed Captioning 25
color palette 28, 49
composite video
connection setup 15
connector 5, 12
SCART 16
software setup 23, 27
CompuServe 51, 53
connection setup 11–16
customer support 51–53, 54
cutlist 33
D
disk
space
speed
56
O
I
input
audio 13
TV tuner 14, 17
VCR 12, 17
video camera 17
installation
hardware 7–10
overview 6
software 18–19
IRQ (interrupt request)
settings 41
labels (on video devices)
Matrox Rainbow Runner G-Series – User Guide
online documentation
Matrox Video Tools 41
MediaStudio 36
PC-VCR Remote 26
Photo Express 37
Rainbow Runner G-Series
VDOPhone 40
output
audio 13
TV 11
video 11
overlay mode 28
P
L
6, 23, 24, 50
18, 24, 43
6, 23, 27, 49
4
PAL 6, 23, 27, 49
PC-VCR Remote 20–26
PDF 4, 36
Photo Express 37
Plug-and-Play 41
preview mode 28
Productiva G100 49
4
Q
quality
audio 33, 50
MJPEG 24
video files 23, 33, 35, 46
Quick Connect 18, 43
R
RCA connectors 5, 12, 15, 16
requirements, system 6
resolution
MJPEG 49
video 30
RGB 24, 28, 39
S
SCART 12, 16
SECAM 6, 23, 27, 49
software installation 18–19
sound
quality 33, 50
troubleshooting 47–48
S-video
connection setup 15, 46
SCART 16
software setup 23, 27
video
input 12, 17, 22, 24
output 11
video camera 12, 17, 22
Video Capture 29
video editing
troubleshooting 41–47
Video Editor 30–36
video files
capturing 24, 29
creating 23, 35
file types 21
MJPEG 24
playback 21, 32
quality 23, 33, 35, 46
settings 23–24, 30, 45
video snapshot 20, 26
W
warning 7, 8, 9, 10
warranty 54
Web, Matrox 51
T
technical assistance 52
Teletext 25
troubleshooting 41–46
TV output 11
TV tuner 6
connection setup 14
input 17
software setup 22, 26, 27
V
VCR 12, 17
VDOPhone 38–40
VidCap driver 27–28
Matrox Rainbow Runner G-Series – User Guide
57
Software license agreement
Single User Products This Matrox software (the “Software”) is copyrighted by Matrox Graphics Inc. All rights
are reserved. The purchaser is granted a license to use the software only, subject to the following restrictions and
limitations.
1. The license is for the original purchaser only, and is not transferable without written permission of Matrox.
2. The original purchaser may use the Software on a single computer owned or leased by the original purchaser.
You may not use the Software on more than a single machine, even if you own or lease more than one machine,
without written consent of Matrox.
3. The original purchaser may make back-up copies of the Software for his or her own use only, subject to the
use limitations of this license.
4. The original purchaser may not engage in, nor permit third parties to engage in, any of the following:
• Providing or disclosing the Software to third parties.
• Providing use of the Software in a computer service business, network, time-sharing, multiple CPU or
multi-user arrangement to users who are not individually licensed by Matrox.
• Making alterations or copies of any kind in the Software (except as specifically permitted above).
• Attempting to unassemble, de-compile or reverse engineer the Software in any way.
• Granting sublicenses, leases, or other rights in the Software to others.
• Making copies, or verbal or media translations, of the user’s guide.
• Making telecommunication data transmissions of the Software.
Matrox reserves the right to terminate this license if there is a violation of its term or default by the Original
Purchaser. Upon termination, for any reason, all copies of the Software must be immediately returned to Matrox,
and the Original Purchaser shall be liable to Matrox for any and all damages suffered as a result of the violation
or default.
Limited warranty Matrox warrants to you, for a period of ninety (90) days normal use from your date of
purchase, that:
1. The CD/disks on which the software is furnished and the documentation are not defective.
2. The Software is properly recorded upon the CD/disks included.
3. The documentation is substantially complete and contains all the information Matrox deems necessary to use
the software.
4. The Software functions substantially as described in the documentation.
Matrox’s entire liability and your exclusive remedy shall be the replacement of any CD/Disks or documentation
not meeting these warranties, which is returned to Matrox or an authorized dealer, together with a copy of your
paid receipt. The above is the only warranty of any kind, either express or implied, including, but not limited to the
implied warranties of merchantability and fitness for a particular use that is made by Matrox on this Licensed
Software. In no event shall Matrox be liable to you or to any third party for consequential, special, indirect or
incidental damages which you may incur as a result of using the licensed software, including, but not limited to,
loss of data, or information of any kind which you may experience.
58
Matrox Rainbow Runner G-Series – User Guide
Thank you for choosing Matrox
Please register online (www.matrox.com/register) to be eligible for customer support,
new product announcements, and information on special offers and upcoming
events.
Copyright © 1998 Matrox Graphics Inc. • (English) All rights reserved. • (Français) Tous droits réservés.
• (Deutsch) Alle Rechte vorbehalten. • (Italiano) Tutti i diritti riservati. • (Español) Reservados todos los derechos.
Trademarks • Marques déposées • Warenzeichen
• Marchi registrati • Marcas registradas
Matrox Electronic Systems Ltd. ....................................Matrox®, Matrox Mystique®
Matrox Graphics Inc......................................................CenterWINDOW™, DeskNav™, Desktop Navigator™,
DynaView™, Matrox m3D™, Matrox HD Benchmark™,
Matrox Impression™, Matrox Marvel™,
Matrox Media XL™, Matrox Millennium™,
Matrox PowerDesk™, Matrox Quick Connect™,
MaxVIEW™, MGA™, MGA-G100™, MGA-G200™,
Productiva™, QuickDesk™, Rainbow Runner™,
MGA PowerDesk™, ModeSWITCH™, PanEND™,
PanHOME™, PanLOCK™, PC-VCR Remote™,
PixelTOUCH™, PowerDoc™, QCDP™, QuickAccess™,
ResSwitch™
Adobe Systems Inc. .....................................................Acrobat®, Adobe®
Apple Computer, Inc. ....................................................Apple®, QuickTime®
Avid Technology, Inc. ....................................................Avid®, Avid Cinema™, Cecil B. DeMovie™
CompuServe Inc. ..........................................................CompuServe®
Dolby Laboratories, Inc. ................................................Dolby®, Dolby Digital®
Eastman Kodak Company ............................................Kodak Precision™
Intel Corporation ...........................................................Intel®, Indeo®, MMX™, Pentium®
International Business Machines Corporation ..............IBM®, OS/2®, PowerPC®, VGA®
Microsoft Corporation ...................................................ActiveMovie™, ActiveX™, Direct3D®, DirectDraw®,
DirectShow™, DirectVideo™, DirectX™, Microsoft®,
MS-DOS®, Windows®, Windows 95™, Windows 98™,
Windows for Workgroups™, Windows NT™
Radius Inc. ....................................................................Cinepak®
Silicon Graphics, Inc. ....................................................OpenGL®
Ulead Systems, Inc. ......................................................Ulead®, MediaStudio™, Photo Express™
U.S. Environmental Protection Agency .........................Energy Star™
VDOnet Corporation Limited.........................................VDOnet®, VDOPhone™
Zoran Corporation.........................................................Zoran®, SoftDVD®
• (English) All other nationally and internationally recognized trademarks and tradenames are hereby
acknowledged. • (Français) Toutes les autres marques et tous les autres noms déposés reconnus nationalement
ou internationalement sont également reconnus par les présentes. • (Deutsch) Alle sonstigen national und
international bekannten Warenzeichen und Produktnamen werden hiermit anerkannt. • (Italiano) Eventuali altri
nomi di prodotto menzionati in questo manuale sono dei proprietà di rispettivi produttori. • (Español) Por medio
del presente se reconocen todas las demás marcas y nombres comerciales reconocidos a nivel nacional e
internacional.
(English) Disclaimer
THE INFORMATION IN THIS GUIDE IS SUBJECT TO CHANGE AT ANY TIME AND WITHOUT NOTICE.
Matrox Graphics Inc. reserves the right to make changes in specifications at any time and without notice. The
information provided by this document is believed to be accurate and reliable. However, no responsibility is
assumed by Matrox Graphics Inc. for its use; nor for any infringements of patents or other rights of third parties
resulting from its use. No license is granted under any patents or patent rights of Matrox Graphics Inc.
(Français) Responsabilité
LES INFORMATIONS CONTENUES DANS CE MANUEL PEUVENT ÊTRE MODIFIÉES À TOUT MOMENT
SANS PRÉAVIS.
Matrox Graphics Inc. se réserve le droit de modifier les spécifications à tout moment sans préavis. Les
informations contenues dans ce manuel sont reconnues comme étant précises et fiables. Cependant, Matrox
Graphics Inc. n’assume aucune responsabilité concernant leur utilisation, ni leur contrefaçon ou les autres droits
des tiers résultant de leur utilisation. Aucune licence n’est accordée sur aucun brevet ou droit d’exploiter un brevet
de Matrox Graphics Inc.
(Deutsch) Haftungsablehnungserklärung
DIE IN DIESEM HANDBUCH ENTHALTENEN ANGABEN UND DATEN KÖNNEN OHNE VORHERIGE
ANKÜNDIGUNG GEÄNDERT WERDEN.
Die Matrox Graphics Inc. behält sich das Recht vor, jederzeit und ohne Ankündigung technische Daten zu ändern.
Es wird keine Garantie für die Richtigkeit des Inhalts dieses Handbuchs übernommen. Weiterhin übernimmt die
Matrox Graphics Inc. keinerlei Verantwortung für die Benutzung dieses Handbuchs, weder für Verstöße gegen
Patentrechte noch für andere Rechte Dritter, die aus seinem Gebrauch resultieren mögen. Es werden keinerlei
Lizenzrechte gewährt für sämtliche Patente oder Patentrechte der Matrox Graphics Inc.
(Italiano) Discrezionalità
LE INFORMAZIONI CONTENUTE NEL PRESENTE DOCUMENTO SONO SOGGETTE A MODIFICHE SENZA
PREAVVISO.
Matrox Graphics Inc. si riserva il diritto di apportare variazioni di qualunque tipo alle specifiche tecniche in
qualunque momento e senza alcun preavviso. Le informazioni contenute in questa documentazione sono ritenute
corrette e attendibili. In ogni caso, non è imputabile a Matrox Graphics Inc. nessuna responsabilità per il loro
utilizzo, come nessuna violazione a brevetti o diritti di altri produttori derivante dal loro utilizzo.
(Español) Renuncia
LA INFORMACION QUE CONTIENE EL PRESENTE MANUAL ESTA SUJETA A CAMBIOS SIN PREVIO AVISO
EN CUALQUIER MOMENTO.
Matrox Graphics Inc. se reserva el derecho de realizar modificaciones en cualquier momento y sin previo aviso.
La información facilitada en este documento se considera que es exacta y fiable. Sin embargo, Matrox Graphics
Inc. no asume ninguna responsabilidad por su uso; ni por cualquier infracción de patentes u otros derechos de
terceras partes derivados de su uso. No se concede ninguna licencia bajo cualesquiera patentes o derechos de
patentes de Matrox Graphics Inc.
Matrox Graphics Inc.
Deutschland
1055 St-Regis Blvd.
Dorval, Quebec
Canada H9P 2T4
Matrox Electronic Systems GmbH
Inselkammerstaße 8
D-82008 Unterhaching bei
München, Deutschland
Tel: (514) 822-6320
Tel: 089 614 474-0
Fax: (514) 822-6363
Fax: 089 614 9743
Fax-back service: (514) 685-0174
BBS: 089 614 00 91
BBS: (514) 685-6008
BBS (ISDN): 089 614 474-91
Technical support: (514) 685-0270
In Quebec, call: (514) 822-6330
E-mail: [email protected]
Vertriebs Infoline: 089 614 474-44
E-mail: [email protected]
Web site: www.matrox.com/mga
Technische Unterstützung: 089 614 474-33
E-mail: [email protected]
Web-Site: www.matrox.com/mga/deutsch
France
Italia
Matrox France SARL
2, rue de la Couture, Silic 225
94528 Rungis Cedex, France
Tél: 01 45.60.62.00
Agenzia Italiana di Matrox Graphics Inc.
3G electronics
via Boncompagni 3B
20139 Milano, Italia
Fax: 01 45.60.62.05
Fax: 02-5253045
Assistance technique: 01 45.60.62.75
Courrier électronique: [email protected]
BBS: 02-5253044
Site Web: www.matrox.com/mga/francais
Informazioni commerciali: 02-5253095
Posta elettronica: [email protected]
United Kingdom
Assistenza tecnica: 02-5253099
Posta elettronica: [email protected]
Matrox (UK) Limited
Sefton Park
Stoke Poges
Buckinghamshire
England SL2 4JS
Sito Web: www.matrox.com/mga/italia
Hong Kong
Fax: 01753 66 55 99
Matrox Electronics Systems Ltd.
Rm. 1901, 19/F, Workington Tower
78 Bonham Strand E.
Sheung Wan, Hong Kong
Sales: 01753 66 55 44
Tel: 852-2877-5387
Technical support: 01753 66 55 22
E-mail: [email protected]
Fax: 852-2537-9530
Tel: 01753 66 55 00
E-mail: [email protected]