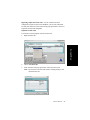
1
AltiView™
for AltiWare ACC Release 5.1
and AltiWare ACM Release 5.1
Manual
Revised: 11/2007 Version #3 4503-0001-5.1
WARNING!
Toll fraud is committed when individuals unlawfully gain access to
customer telecommunication systems. This is a criminal offense.
Currently, we do not know of any telecommunications system that is
immune to this type of criminal activity. AltiGen Communications, Inc.
will not accept liability for any damages, including long distance charges,
which result from unauthorized and/or unlawful use. Although AltiGen
Communications, Inc. has designed security features into its products, it is
your sole responsibility to use the security features and to establish security
practices within your company, including training, security awareness, and
call auditing.
NOTICE
While every effort has been made to ensure accuracy, AltiGen
Communications, Inc., will not be liable for technical or editorial errors or
omissions contained within the documentation. The information contained
in this documentation is subject to change without notice.
This documentation may be used only in accordance with the terms of the
AltiGen Communications, Inc., License Agreement.
AltiGen Communications, Inc.
4555 Cushing Pkwy.
Fremont, CA 94538
Telephone: 510-252-9712
Fax:
510-252-9738
E-mail:
[email protected]
Web site:
www.altigen.com
TRADEMARKS
AltiGen, AltiServ, AltiWare, AltiContact Manager, AltiLink, AltiConsole,
AltiAdmin, Alti-VRPlayer, Zoomerang, IPTalk, AltiReport, and SuperQ
are trademarks or registered trademarks of AltiGen Communications, Inc.
All other brand names mentioned are trademarks or registered trademarks
of their respective manufacturers.
Copyright © AltiGen Communications, Inc. 2006. All rights reserved.
Part Number 4503-0001-5.1
Contents
Warranty . . . . . . . . . . . . . . . . . . . . . . . . . . . . . . . . . . . . . . . . . . .vii
CHAPTER 1
About AltiView . . . . . . . . . . . . . . . . . . . . . . . . . . . . . . . . . . . . . 1
New in Version 5.1 . . . . . . . . . . . . . . . . . . . . . . . . . . . . . . . . . . . . . 1
Microsoft Outlook and Outlook Express Support . . . . . . . . . . . . . . 1
ACT!/GoldMine® Support . . . . . . . . . . . . . . . . . . . . . . . . . . . . . . . 2
Licensing . . . . . . . . . . . . . . . . . . . . . . . . . . . . . . . . . . . . . . . . . . . . . 2
CHAPTER 2
Installation . . . . . . . . . . . . . . . . . . . . . . . . . . . . . . . . . . . . . . . . . 3
Pre-Installation Checklist . . . . . . . . . . . . . . . . . . . . . . . . . . . . . . . . . 3
Installing AltiView on a Client System . . . . . . . . . . . . . . . . . . . . . . 3
Uninstalling AltiView . . . . . . . . . . . . . . . . . . . . . . . . . . . . . . . . . . . 4
Automatic Upgrade . . . . . . . . . . . . . . . . . . . . . . . . . . . . . . . . . . . . . 4
Downgrade Procedure . . . . . . . . . . . . . . . . . . . . . . . . . . . . . . . . . . . 4
CHAPTER 3
Getting Started . . . . . . . . . . . . . . . . . . . . . . . . . . . . . . . . . . . . . 7
Logging In . . . . . . . . . . . . . . . . . . . . . . . . . . . . . . . . . . . . . . . . . . . . 7
Version Mismatch Dialog Box . . . . . . . . . . . . . . . . . . . . . . . . . . . . 8
Reconnecting to AltiView . . . . . . . . . . . . . . . . . . . . . . . . . . . . . . . . 8
Logging In Remotely . . . . . . . . . . . . . . . . . . . . . . . . . . . . . . . . . . . . 9
IP Extensions Using IPTalk . . . . . . . . . . . . . . . . . . . . . . . . . . . . 10
Troubleshooting IP Connectivity . . . . . . . . . . . . . . . . . . . . . . . . 10
Exiting and Minimizing AltiView . . . . . . . . . . . . . . . . . . . . . . . . . 10
Using the Windows Tray Phone Icon. . . . . . . . . . . . . . . . . . . . . 11
Resizing the Display . . . . . . . . . . . . . . . . . . . . . . . . . . . . . . . . . . 11
Error Messages . . . . . . . . . . . . . . . . . . . . . . . . . . . . . . . . . . . . . . . . 11
AltiView Manual
iii
CHAPTER 4
Using AltiView . . . . . . . . . . . . . . . . . . . . . . . . . . . . . . . . . . . . .13
Handling Calls . . . . . . . . . . . . . . . . . . . . . . . . . . . . . . . . . . . . . . . .
Dialing . . . . . . . . . . . . . . . . . . . . . . . . . . . . . . . . . . . . . . . . . . . .
Placing Calls on Hold. . . . . . . . . . . . . . . . . . . . . . . . . . . . . . . . .
Using Call Waiting. . . . . . . . . . . . . . . . . . . . . . . . . . . . . . . . . . .
Transferring Calls. . . . . . . . . . . . . . . . . . . . . . . . . . . . . . . . . . . .
Conference Calls. . . . . . . . . . . . . . . . . . . . . . . . . . . . . . . . . . . . . . .
Station Conferencing . . . . . . . . . . . . . . . . . . . . . . . . . . . . . . . . .
MeetMe Conference . . . . . . . . . . . . . . . . . . . . . . . . . . . . . . . . . . .
Working in the MeetMe Conference Window . . . . . . . . . . . . . .
Creating a Meeting . . . . . . . . . . . . . . . . . . . . . . . . . . . . . . . . . . .
E-mailing a Meeting Invitation . . . . . . . . . . . . . . . . . . . . . . . . .
Starting and Stopping a Meeting . . . . . . . . . . . . . . . . . . . . . . . .
What the MeetMe Conference Host Can Do . . . . . . . . . . . . . . .
Continuing a Meeting Beyond Its Duration Time . . . . . . . . . . .
Joining a MeetMe Conference . . . . . . . . . . . . . . . . . . . . . . . . . .
Recording Calls . . . . . . . . . . . . . . . . . . . . . . . . . . . . . . . . . . . . . . .
Recording on Demand . . . . . . . . . . . . . . . . . . . . . . . . . . . . . . . .
Using Account Codes . . . . . . . . . . . . . . . . . . . . . . . . . . . . . . . . . .
Using Voice Mail . . . . . . . . . . . . . . . . . . . . . . . . . . . . . . . . . . . . . .
Listening to Your Voice Mail . . . . . . . . . . . . . . . . . . . . . . . . . .
Saving Remotely or Locally. . . . . . . . . . . . . . . . . . . . . . . . . . . .
Deleting a Message . . . . . . . . . . . . . . . . . . . . . . . . . . . . . . . . . .
Returning a Call . . . . . . . . . . . . . . . . . . . . . . . . . . . . . . . . . . . . .
Attaching a Note. . . . . . . . . . . . . . . . . . . . . . . . . . . . . . . . . . . . .
Forwarding Voice Mail . . . . . . . . . . . . . . . . . . . . . . . . . . . . . . .
Working with Voice Mail Groups (Distribution Lists) . . . . . . .
Monitoring Extension Activity . . . . . . . . . . . . . . . . . . . . . . . . . . .
Choosing Extensions to Monitor . . . . . . . . . . . . . . . . . . . . . . . .
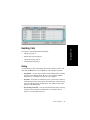
Reading the Monitor List . . . . . . . . . . . . . . . . . . . . . . . . . . . . . .
Calling or Picking Up Calls . . . . . . . . . . . . . . . . . . . . . . . . . . . .
Viewing the Call History . . . . . . . . . . . . . . . . . . . . . . . . . . . . . . . .
iv AltiView Manual
17
17
20
21
21
24
24
26
27
28
33
34
34
34
35
35
35
36
38
39
39
40
40
40
41
42
42
43
44
44
44
CHAPTER 5
Configuring Your Station Settings . . . . . . . . . . . . . . . . . . . . 47
General Information . . . . . . . . . . . . . . . . . . . . . . . . . . . . . . . . . . . . 48
Default Trunk Access . . . . . . . . . . . . . . . . . . . . . . . . . . . . . . . . . 48
Voice Mail Play Options . . . . . . . . . . . . . . . . . . . . . . . . . . . . . . 48
IPTalk . . . . . . . . . . . . . . . . . . . . . . . . . . . . . . . . . . . . . . . . . . . . . 49
Screen Pop, Audio Beep, and Auto Close . . . . . . . . . . . . . . . . . 49
Accessing Databases. . . . . . . . . . . . . . . . . . . . . . . . . . . . . . . . . . 49
Color Selection . . . . . . . . . . . . . . . . . . . . . . . . . . . . . . . . . . . . . . 50
Miscellaneous . . . . . . . . . . . . . . . . . . . . . . . . . . . . . . . . . . . . . . . 50
One Number Access (ONA) . . . . . . . . . . . . . . . . . . . . . . . . . . . . . 51
Before You Set Up ONA . . . . . . . . . . . . . . . . . . . . . . . . . . . . . . 51
Setting Up One Number Access . . . . . . . . . . . . . . . . . . . . . . . . . 51
Call Handling . . . . . . . . . . . . . . . . . . . . . . . . . . . . . . . . . . . . . . . . . 54
Message Notification . . . . . . . . . . . . . . . . . . . . . . . . . . . . . . . . . . . 57
Voice Mail Groups (Distribution Lists) . . . . . . . . . . . . . . . . . . . 58
Working on Voice Mail Group Lists . . . . . . . . . . . . . . . . . . . . . 59
Station Speed Dialing Setup . . . . . . . . . . . . . . . . . . . . . . . . . . . . . 61
System Speed Dial Numbers . . . . . . . . . . . . . . . . . . . . . . . . . . . . . 62
Index . . . . . . . . . . . . . . . . . . . . . . . . . . . . . . . . . . . . . . . . . . . . . . . 65
AltiView Manual
v
vi AltiView Manual
Warranty
What The Warranty Covers
AltiGen Communications warrants its hardware products to be free from defects in material
and workmanship during the warranty period. If a product proves to be defective in material
or workmanship during the warranty period, AltiGen Communications will, at its sole option,
repair, refund or replace the product with a like product.
How Long the Warranty Is Effective
All AltiGen Communications products are warranted for one year for all parts from the date
of the first end user purchase.
Whom the Warranty Protects
This warranty is valid only for the first end user purchaser.
What the Warranty Does Not Cover
1.
Any product on which the serial number has been defaced, modified or removed.
2.
Damage, deterioration or malfunction resulting from:
a) Accident, misuse, neglect, fire, water, lightning, or other acts of nature,
unauthorized product modification, or failure to follow instructions supplied with
the product.
b) Repair or attempted repair by anyone not authorized by AltiGen Communications.
c) Any damage of the product due to shipment.
d) Removal or installation of the product.
e) Causes external to the product, such as electric power fluctuations or failure.
f) Use of supplies or parts not meeting AltiGen Communications’ specifications.
g) Normal wear and tear.
h) Any other cause which does not relate to a product defect.
3.
Shipping, installation, set-up and removal service charges.
How to Obtain Service
End user customers should contact your Authorized AltiGen Dealer for service.
Authorized AltiGen Dealers must follow the steps below for service:
AltiView Manual
vii
1.
Take or ship the product (shipment prepaid) to your AltiGen distributor or to AltiGen
Communications, Inc.
All materials being returned to AltiGen must have an associated RMA number. RMA numbers
are issued by AltiGen Technical Support and can be obtained by calling 1-888-258-4436 or
faxing an RMA form to 510-252-9738, attention Technical Support. AltiGen reserves the right
to refuse return of any material that does not have an RMA number. The RMA number should
be clearly marked on the outside of the box in which the material is being returned. For
example:
Attn.: RMA #123
AltiGen Communications, Inc.
4555 Cushing Pkwy.
Fremont, CA 94538
Upon authorization of return, AltiGen will decide whether the malfunctioning product
will be repaired or replaced.
2.
To obtain warranty service, you will be required to provide:
a) the date and proof of purchase
b) serial number of the product
c) your name and company name
d) your shipping address
e) a description of the problem.
3.
For additional information contact your AltiGen Dealer or AltiGen Communications, Inc.
Effect of State Law
This warranty gives you specific legal rights, and you may also have other rights which vary
from state to state. Some states do not allow limitations on implied warranties and/or do not
allow the exclusion of incidental or consequential damages, so the above limitations and
exclusions may not apply to you.
Sales Outside the U.S.A.
For AltiGen Communications products sold outside of the U.S.A., contact your AltiGen
Communications dealer for warranty information and services.
viii AltiView Manual
CHAPTER 1
AltiView is call management software for the general desktop PC user. It
runs with the AltiWare AltiContact Center (ACC) or AltiWare AltiContact
Manager (ACM) systems. AltiView users can access, configure, and
perform several of the system’s PBX functions directly from the desktop,
including call handling, call forwarding, voice messaging, extension
monitoring, conferencing, and One Number Access.
In addition, AltiView integrates with Microsoft Outlook and Outlook
Express, ACT!, and GoldMine® for caller screen pops and dialing out from
these applications.
Call information can be stored to an internal or external CDR database for
future review and analysis.
New in Version 5.1
• MeetMe Conference scheduling, monitoring, and control.
• Dial Pad and Flash key.
• Ability to manage Activity greetings.
• Ability to transfer or conference by clicking on an entry on the Speed
Dial tab or Monitor tab.
• When the user clicks Delete All in Call History, confirmation is
required.
• IPTalk user can specify a different ring device when away from the
desk (for example, the PC speakers instead of the headset system) so
that the ring can be heard.
Microsoft Outlook and Outlook Express Support
AltiView supports Microsoft Outlook 2000, 2003, and Outlook Express
5.0, allowing you to obtain phone numbers to dial from a Microsoft Contact
list. AltiView also lets you see the incoming calls that have a matching
record in the Contact list.
You must set up the Outlook Contacts list prior to using this feature.
AltiView Manual
1
Installation
About AltiView
You can configure a Country Code field (in the Config window, General
Info tab) to help convert standard international phone numbers in Outlook
to correct digit strings for AltiWare.
ACT!/GoldMine® Support
AltiView supports ACT! and GoldMine® contact management software,
allowing you to obtain phone numbers to dial from the ACT! or
GoldMine® contact database list. AltiView also lets you see the matching
record from the contact database list of the incoming calls.
Licensing
AltiView requires an AltiView session license to be installed at the
AltiWare ACC/ACM system. A concurrent login session is governed by
the AltiView session license.
A system administrator can verify the licenses in AltiWare Admin by
selecting About AltiWare or About ACC/ACM Admin on the Help
menu, then clicking the License Information button, which opens a
window that displays licenses and session information.
The IPTalk feature requires the purchase, registration and activation of the
IPTalk License.
2
AltiView Manual
CHAPTER 2
Installation
Installation
The client system must meet the following minimum requirements.
• IBM/PC AT compatible system
• Intel 133 MHz Pentium or equivalent
• Windows 2000 Server/Professional with SP4, or Windows XP
Professional
• 250 MB available hard drive disk space
• 256 MB RAM
• SVGA monitor (800 x 600) with 256 color display, or better
• Keyboard and mouse
• AltiWare ACC/ACM 5.1 running on a server accessible to this client.
Pre-Installation Checklist
Before installing AltiView, make sure the following is done:
• AltiWare ACC 5.1 or AltiWare ACM 5.1 has been installed on the
system server.
• TCP/IP is enabled on both machines.
• The client is able to connect to the server on the network.
• The person installing AltiView has local administrator rights on the
client PC.
• The AltiView License Key has been installed and activated on the
system server.
Installing AltiView on a Client System
When the above items are done, follow these steps on the client machine:
1.
Exit all Windows applications.
2.
Insert the AltiWare 5.1 Clients CD into the CD ROM drive.
AltiView Manual
3
3.
Open the AltiView folder, and run the Setup program in that folder,
following the step-by-step installation instructions as they appear on
the screen.
Alternatively, if your system administrator has loaded AltiView on a
shared network server, you can copy the files in the AltiView folder to your
desktop PC, and run the AltiView Setup program.
Uninstalling AltiView
1.
From the Windows Start menu, select Control Panel > Add/Remove
Programs > AltiView to uninstall AltiView.
2.
Click Remove, and respond to any additional prompts.
Automatic Upgrade
Each time you start up AltiView, a comparison is made with the version of
AltiWare ACC/ACM that is running on the server. If updates were made
on the server, and your version of AltiView is out-of-date, you are
prompted for upgrade permission. If you automatically upgrade, the
AltiView startup is terminated and a software upgrade session is started.
Restart AltiView to run the newer version.
Note: For remote AltiView users outside the firewall, TCP port 10050 is
required to be open to allow automatic upgrade. Automatic
upgrade over the Internet requires the sending of 15 MB files over
the WAN, which may take some time, to perform the automatic
update.
Downgrade Procedure
1.
Go to Control Panel > Add/Remove Programs and remove the
AltiView 5.1 program and ALL OTHER 5.1 client applications
(including AltiAgent, AltiSupervisor, AltiConsole and CDR Search
5.1).
2.
Reboot your system.
3.
Go to “<local drive>:Program Files\AltiGen\Shared Files\” and
remove AlpInterface.dll.
4
AltiView Manual
4.
Install the AltiView 5.0A software.
AltiView Manual
5
Installation
Note: The AlpInterface might be located under
\WinNT\System32\, \Windows\System32\ or some
other location. Use the Search for Files and Folders feature to
locate and remove all AlpInterface.dll files from the system.
6
AltiView Manual
CHAPTER 3
Getting Started
Start AltiView from the Microsoft Windows Start menu, by choosing
Start > All Programs > AltiView.
If you are connecting to the Internet through a modem connection, before
you log in, establish a session connection from your PC to your local
internet service provider. If you’re using a low-speed connection, the login
may take some time, since a large amount of data is transferred to your
desktop.
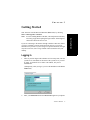
Logging In
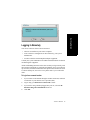
1.
If this is your first login to this AltiWare ACC/ACM system, enter the
system server’s IP address or the name of the system server you will
be using. To obtain the server name or IP address, ask your IT
administrator.
(Subsequently, when you log in, you’ll see the IP address in the Server
Name field.)
2.
Enter your Extension number and Password assigned to your phone.
AltiView Manual
7
Getting Started
Note: For users running Windows XP SP2, a firewall protection Security
Alert may pop up when opening the login window. If this happens,
click Yes to allow AltiView to run.
If you want to store your login password and have it entered
automatically the next time you log in to AltiView, check the Always
save password check box.
Note: Up to eight unsuccessful login attempts are allowed, after
which login will be disabled for from 1 to 24 hours (depending
on the duration set by your system administrator).
3.
If your extension is an IP extension and you will be using a headset,
check the IP Extension Integrated with IPTalk option.
Note: IPTalk is only supported on Windows XP and Windows 2000.
It is not supported on Windows 98.
(Even if you do not have an IP phone, as long as your extension is set
up as an IP extension by your system administrator, you can select the
IP Extension Integrated with IPTalk check box.)
See “Logging In Remotely” on page 9 for more information on using
IP extensions remotely.
4.
Click OK.
Version Mismatch Dialog Box
If your version of AltiView doesn’t match the version of AltiWare on the
system server, you are prompted for upgrade permission when you try to
log in. If you allow upgrade at this time, the AltiView startup is terminated
and a software upgrade session is started. Restart AltiView to run the newer
version. (See “Automatic Upgrade” on page 4 for more details.)
Reconnecting to AltiView
When a connection with the phone server is broken, a message box pops up
asking if you want to connect again. Clicking Yes will restore the
connection without you having to go through the log-in process again.
8
AltiView Manual
Getting Started
Logging In Remotely
You can use AltiView from a remote location if
• AltiView is installed on your remote computer.
• Your extension is configured as an IP extension by your system
administrator.
• You have AltiGen-certified IP phone/adapter equipment.
Consult your system administrator or authorized AltiGen dealer for details
on obtaining this equipment.
All the call handling functions are the same as when you log in locally, with
the exception of the ability to configure One Number Access. You can pick
up voice mail, forward local business office phone calls to another site such
as a home desktop PC, and even receive phone calls as you would at the
office.
To log in from a remote location
1.
If you connect to the Internet through a modem connection, establish
a connection to your internet service provider (ISP).
2.
Log in using your Extension and Password as usual.
3.
If you will be using a headset plugged into your PC, select the IP
Extension Integrated with IPTalk check box.
4.
Click OK.
AltiView Manual
9
IP Extensions Using IPTalk
To use IPTalk, you need an AltiGen-certified USB headset system
(Plantronics headset recommended).
Important: You can run only one instance of AltiView with IPTalk per
system.
To make and receive calls using IPTalk
1.
Connect your headset to your PC.
2.
Use the AltiView dialing and call accepting functions as usual to make
and receive calls.
Troubleshooting IP Connectivity
If problems occur, they may be due to a failure to connect to your ISP or
due to firewalls at your office preventing direct access to the AltiWare
server.
As a test, you can choose Run from the Windows Start menu, then enter
Ping <IP address> [ENTER]
where <IP address> is the AltiWare system you want to connect to. An
example of the IP address format is 123.234.231.143
If you do not get a response, contact your LAN administrator for support.
Also, check to verify that the necessary ports are open.
Exiting and Minimizing AltiView
To exit AltiView, click the X in the top right
corner of the screen. To minimize AltiView,
click the Minimize symbol
. AltiView shrinks to a phone icon in the
tray in the lower right corner of your screen.
To exit AltiView when it is minimized, right-click the phone icon and
select Exit.
Pop Up AltiView when You Get a Call
You can configure AltiView to pop up when you have incoming calls. Pop
ups work when AltiView is minimized but not when you have exited. See
“Screen Pop, Audio Beep, and Auto Close” on page 49.
10 AltiView Manual
Using the Windows Tray Phone Icon
After you log in, the AltiView icon (a yellow phone) is displayed in the
Windows tray, normally at the bottom right of your screen. When you have
new voice mail, the phone icon is replaced with a yellow envelope icon.
Resizing the Display
You can resize many AltiView windows using the standard Windows
method: place the cursor at a window edge or corner, then drag the window
to the size you want.
Columns can be resized by placing the cursor on a column divider in the
header area until the cursor changes to a movable double bar (||). Then
move the bar to resize the column.
Error Messages
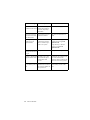
The following errors may be displayed as login or connectivity errors.
Error Message
Description
Solution
AltiWare connection
limit has been exceeded.
No license was found OR Maintain the number of AltiView
more than allowed num- license keys or add additional session licensing.
ber of AltiView users
have attempted to log on.
Cannot connect to
AltiLink. Please check
server name or network
connection.
You are not connected to
AltiWare.
Check the server field (IP address
or DNS name) by:
1. Pinging the network server
address OR
2. Try using the IP address of AltiWare (if using the DNS name in
the server field).
AltiView Manual
11
Getting Started
If AltiView is not on your Windows desktop, but either icon appears in the
Windows tray, double-click it to open the AltiView main window, or you
can right-click it to pop up a menu, then select the AltiView window you
want to open.
Error Message
Description
Cannot access voice mail Mail box is in use by the
list while mail box in use. AltiGen Voice Mail System and is temporarily
unavailable.
Solution
Wait awhile, then try again.
Mail service is unavailable. Please check with
your administrator.
Voice mail service is not
enabled on AltiWare.
Make sure voice mail service is
started.
Please register AlpInterface.dll (regsver32
AlpInterface.dll).
AltiView uses this dll to
communicate with AltiWare. It should be registered in user system.
Re-register this file. Type in DOS
command window, regsver32
AlpInterface.dll
Change directory to AltiView
directory, type regsver32
AlpInterface.dll
You have entered an
invalid password. Please
try again.
The password is incorrect. Enter your extension password.
Cannot use “IP Extension You tried to log in with
integrated with IP-Talk.” the IP extension option
without the IP-Talk
License.
Confirm that your extension is set
up as an IP extension with
dynamic IP address and that an IPTalk License has been registered.
Upgrade AltiView to match the
The version of AltiView The installed version of
on your desktop is out of AltiView does not match current running version of Altithe version of AltiWare on Ware.
date.
the system server.
12 AltiView Manual
CHAPTER 4
Using AltiView
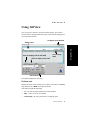
Once you log in to AltiView, the main window appears. This window
provides tools to manage and monitor calls, and to facilitate management
of your personal contacts.
Status panel
Configure your AltiView
Click to display voice mail
Using AltiView
Click to display calls in this table
Your activity
state
Call controls
The window displays the following:
The Status panel
Displays the status of the currently active call, the current time, an Activity
drop-down list and a DND (do not disturb) button.
Call statuses include the following:
• AA—the call is being transferred to an auto attendant
• Busy—callee is busy or not available
• Call Pending—the call is placed into a workgroup queue
AltiView Manual
13
• Conference—the call is in conference
• Connect—the call is connected
• Dial Tone—a dial tone is present, AltiView is ready to dial out
• Error—receipt of an error tone
• Hold—the call is on hold
• Hold Pending— the call is being transferred or conferenced
• Idle—the extension is not in use
• Music on Hold—an extension user placed the call on hold to take
another call
• Park—the call is parked
• Play—playing voice mail
• Proceeding—the outgoing call is in progress
• Record—recording an introductory message
• Ringback—caller sees this status while the callee’s phone is ringing
• Ringing—an outgoing call is ringing another phone
• Voice mail—the call is in voice mail
The table below the Status panel
Displays calls or voice mail. When you click the Calls tab, the table shows
a current list of calls, the name of the caller (if available from extension
information or from an external database), the number, workgroup number,
DNIS digits if available, call length, and conference status.
When you click the Voice Mail tab, the table shows a log of current and
past voice messages
The Activity drop-down list
Lets you select your whereabouts, so that others may be informed. Click the
Down arrow and choose Select beside the appropriate category:
In-System / In-Personal / Meeting / Away / Travel / PTO (personal time
off)
14 AltiView Manual
The remaining three activity codes (7, 8, 9) may or may not be customized
by your system administrator.
The activity category you select appears on the button.
You can record a greeting for each away-from-desk activity status by
selecting Record beside that activity, and then using your phone or headset
to record a greeting:
You can record and
review a greeting
for each awayfrom-desk activity
status
Using AltiView
To hear the greeting played back, select Review. Change your greeting
whenever you want to.
The DND button
Is a toggle that turns Do Not Disturb on and off. When Do Not Disturb is
on, the button label turns red and becomes DND/ON. All incoming calls are
forwarded according to your Enable Busy Call Handling settings.
Note: If the system administrator has disabled the Do Not Disturb feature
for the extension, the DND feature will not be available to you. If
you select DND, an alert pops up informing you that DND is not
allowed.
Call Controls
Provide single-click functions to HOLD, REDIAL, HANGUP,
TRANSFER, CONFERENCE, send calls to AA (auto attendant) or VM
(voice mail), and FLASH.
AltiView Manual
15
Mute and Volume Control buttons are displayed
when you have logged in as an IPTalk user.
• When IPTalk is enabled, a Volume Control button is available for
controlling headset volume. Click the button to open a volume control
box.
• When IPTalk is enabled, a Mute button is available. The button is a
toggle. When you mute the conversation by clicking the button, a
“mute” symbol appears in the main window.
Monitor, History, and Speed Dial Tabs
Clicking the
button gives you three more tabs to work with: the
Monitor tab, the History tab, and the Speed Dial tab. See the appropriate
sections for information on working with these tabs.
16 AltiView Manual
Using AltiView
Handling Calls
The AltiView call handling functions include:
• Dialing out, page 17
• Placing calls on hold, page 20
• Using call waiting, page 21
• Transferring calls, page 21
Dialing
To dial a number, click in the dialing field, enter a number or name, and
then click the Dial button or press Enter on your computer keyboard.
• By number—You can enter a number in the dialing field by clicking
the digits on the dialing pad in AltiView or by using the standard
numeric keys or the numeric keypad on your computer.
• By name—For names recorded in the system, you can enter a name by
using the keyboard on your computer to type the name. Then select the
name from the drop-down list that opens. The number for that name
appears in the dialing field.
• By selecting from a list—You can open the drop-down list by clicking
the Down arrow and then scroll down the list to find the name or
number you want and then select it.
AltiView Manual
17
Click to open a list of
names and numbers.
Or start typing a
name to open the list.
Dialing field
Dial button
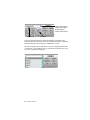
The drop-down list beside the dialing field displays extensions or the
names associated with extensions as well as names and numbers imported
from MS Outlook, Outlook Express, GoldMine®, or ACT!.
The list can display up to 2,000 entries. If you are working with more than
2,000 entries, you can find the entry by name search even if the entry is not
one of the 2,000 that are displayed.
18 AltiView Manual
The main window displays the status of the call.
Using AltiView
When Your Number Is Questionable
If your system's IP trunk access code is 7, when you dial "7101234567," the
number could have two meanings:
• "7" is the IP trunk access code, "101" is the IP dialing entry, and
"234567" is the target number.
• "710" is the area code, and "1234567" is the number.
In this case, an AltiView message box asks you: Is "710" an area code?
• If you click Yes, AltiView inserts the trunk access code ("9") and long
distance number ("1") automatically.
• If you click No, AltiView dials this number out directly, and "7" is
treated as an IP trunk access code.
If the number you dialed is shorter than 10 digits (3-digit area code + 7-digit
number), AltiView sees the "7" as an IP trunk number, and dials this
number out directly.
AltiView Manual
19
Each time you answer the question Is "710" an area code? the result is
recorded in a text file, AreaPrefix.txt, so that AltiView will not have
to ask you again about that number. If you want to remove the number,
open the file, delete the number, then restart AltiView. The typical address
for the file is: c:\program files\AltiGen\AltiView\AreaPrefix.txt.
Dialing Speed Dial Numbers
To dial Speed Dial numbers, click the
the Speed Dial tab:
button, and then click
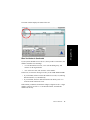
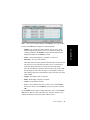
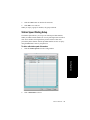
This tab lists Station Speed Dial numbers that you have configured in
AltiView, and it lists System Speed Dial numbers, if any, that have been set
up for your extension by the system administrator. You can see in the Type
column which numbers are station numbers and which are system numbers.
To call a speed dial number, double-click the row of the number you want
to call, or single-click the row in the Type column.
See “To add or edit station speed dial numbers” on page 61 for details on
setting up speed dial numbers.
Redialing
To redial the last number called, click the Redial button.
Placing Calls on Hold
During a phone call, click the Hold button in the AltiView main window.
The status of the call is changed from connected to a hold state and you will
hear the dial tone.
20 AltiView Manual
In the row displaying the call, the Status column shows the call on hold.
Click the Hold status cell to release the hold and reconnect the call.
Note: When a call is put on hold automatically by the system (to queue),
the system will ring you after two minutes, if the call is still on
hold.
During a call, you may hear a beep indicating that you have another
incoming call. To answer the call:
1.
Click the Calls tab on the AltiView main window to view the directory
of current calls.
2.
Find and click the row displaying the incoming call.
This places the current call on hold and connects the incoming call.
3.
When you are finished, click the Hold status cell for the call on hold
to reconnect.
Transferring Calls
AltiView supports both supervised transfer, in which you confirm the
transfer, and blind transfer.
1.
While connected to a call, click the Transfer button.
2.
Specify the extension or phone number to transfer the call to, then click
Dial. To specify the number, either enter the number on the dial pad or
click the appropriate number on the Speed Dial or Monitor tab.
3.
While AltiView dials the new number, you’re asked to confirm the
transfer by clicking the OK button in a confirmation dialog box.
You can click OK before the party answers to do a blind transfer, or
you can wait for the person to answer and then confirm or cancel the
transfer.
AltiView Manual
21
Using AltiView
Using Call Waiting
At any time before or after the person you’re transferring to answers
the phone, you can cancel the transfer by clicking the Cancel button
or by closing the dialog box.
If the transfer is canceled, AltiView reconnects the call to your
extension. The call is also reconnected if the third party doesn’t
answer.
Transferring to Voice Mail
While connected to a call, click the To VM button on the main window. In
the box that pops up, choose the extension you want to send the call to, then
click OK. (You can sort extensions by number or by name.)
Note: You can also forward a call to voice mail without answering it by
clicking the To VM button while the call is ringing.
Transferring to Auto Attendant
To transfer a call to an auto attendant, while connected to the call click
To AA on the main window. Use the drop-down list to select the operator
or an auto attendant to transfer to. (You can sort the list by number or by
name.)
22 AltiView Manual
Note: You can forward a call to an auto attendant without answering it by
clicking the To AA button while the call is ringing.
Forwarding Calls Using Do Not Disturb
Centrex Transfer
If you have a Centrex line, you can use this feature to transfer an external
call to an outside number without having to tie up two trunk lines. Once the
transfer is complete, the external caller’s line connects directly to the
outside number. Since there are no longer any connections to internal users,
internal trunk lines are then dropped, freeing up system trunk line resources
for other calls.
To perform a Centrex transfer:
1.
While connected to an outside caller from a Centrex trunk, type “F*”
in the number field and then press the Enter key on the keyboard.
2.
After the user hears a dial tone, type the second party’s outside number
in the number field and then press the Enter key on the keyboard
again.
3.
Now either click the Hang Up button or wait to announce the caller
and then click the Hang Up button.
AltiView Manual
23
Using AltiView
If allowed, click the DND button to forward all incoming calls according
to your “Enable Busy Call Handling” settings. See “Busy Call Handling
and No Answer Handling” on page 56.
Conference Calls
There are two types of conference calls in AltiView:
• Station conferencing. In this type of conferencing, when you’re on a
call, you can dial a third party and then conference that party in to the
call. Any internal user is able to add parties to this type of conference
call.
• MeetMe conference. If your company has this feature available, you
can schedule a meeting to take place at a specified time in the future
and invite people to the meeting. Invited people call the MeetMe
conference extension number to join the meeting at the designated
meeting time. (See “MeetMe Conference” on page 26.)
Station Conferencing
Note: In order to conference incoming calls, Single Call Waiting,
Multiple Call Waiting or Live Call Waiting must be checked in
the AltiView Configuration window, Call Handling tab.
While connected to the first party:
1.
Click the Conference button.
2.
In the dialing field, enter the extension or phone number you want to
conference with, then click Dial.
While AltiView dials the new number, the first party goes into Hold
Pending status, and you see a confirmation dialog box.
3.
After the third party answers, you can announce the conference by
clicking OK in the dialog box. If the third party does not answer, click
the Cancel button.
24 AltiView Manual
4.
Click the Conference button again to initiate the three-way
conference. Both calls will be displayed as Conference status.
Using AltiView
To add another party, click the Conference button and repeat steps 2-4.
When lines are holding, you can add parties to a conference call:
1.
Right-click on the hold call you want to add to the conference.
2.
Select Join To Conference.
3.
In the confirmation dialog box, click OK to conference the caller.
4.
Click the Conference button again to initiate the three-way
conference. Both calls will be displayed as Conference status.
AltiView Manual
25
To add another party, click the Conference button and repeat steps 2-4.
The maximum number of station-conferenced parties is 6.
Canceling Conference Calls
You can cancel the conference using any of the following methods:
• Click the Cancel button in the conference confirmation dialog box.
• Close the conference confirmation dialog box.
• Press your phone’s FLASH button.
• Right-click the appropriate call and select Drop From Conference.
Normally, after canceling you will be reconnected automatically to the
initial call. If you are not automatically reconnected and want to reconnect
to the first call, click the call’s Hold Pending status cell.
Note: The conference holder is the user who initiates the conference call,
and only the conference holder can drop a call from conference. If
the conference holder hangs up, no one else in the conference call
can drop a call from the conference.
MeetMe Conference
If your company has this feature available, you can schedule a phone
meeting to take place at a specified time in the future and invite people to
the meeting. Invited people call the MeetMe conference extension number
to join the meeting at the designated meeting time.
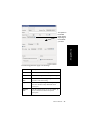
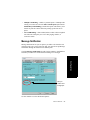
To schedule a phone meeting, click the
Conference window opens:
button. The MeetMe
Using this window, you can:
• Create a one-time or recurring meeting and set its parameters
26 AltiView Manual
• Open Microsoft Outlook to send an e-mail invitation to participate in
the meeting
• Start and stop a meeting
• Modify or delete a meeting
• See meeting ID, subject, scheduler, time, frequency, start time, end
time, the last time the meeting started, its status, and the resource being
used.
• Display or hide outdated meetings
• Modify column display
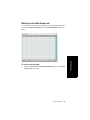
Working in the MeetMe Conference Window
• Select an existing meeting to perform a function on it (for example, to
start or stop the meeting). You can select one meeting at a time.
• Functions can also be performed on an existing meeting by rightclicking the meeting and selecting from the context menu.
• Click a column head to sort by that column. An arrow is displayed that
indicates the sort order, ascending or descending. Click again to
reverse the sort order.
Arrow indicates sort order
• Use the scroll bar at the bottom of the window to display additional
columns, if necessary.
• Change column size by clicking and dragging a column border.
• Change column order in the current window by dragging a column
head to where you want it.
AltiView Manual
27
Using AltiView
• Click a button to perform a function (for example, create a meeting).
The buttons at the bottom of the window are labeled with their
function; the buttons at the top of the window perform the same
functions. In addition, at the top of the window, you can choose to
display outdated meetings by checking the Display Outdated
Meetings check box. Deselect the check box to hide outdated
meetings.
• You can open more than one MeetMe Conference window and work
with different meetings and displays in each one. Modifications you
make to the display in a MeetMe Conference window are not retained
after you close the window.
• You can double-click a meeting to open the Modify Meeting dialog
box.
Using the Calendar Button
The Create Meeting and Modify Meeting dialog boxes use Calendar
buttons for date selection. To select a date, click the Calendar button.
When the calendar is open, use the Up/Down arrows to select the year, or
you can type in a year and then press Enter.
Click the Calendar button again to close the calendar.
Creating a Meeting
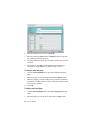
To create a meeting, click one of the Create buttons. The Create Meeting
dialog box opens.
28 AltiView Manual
The options in
the middle
panel change,
depending on
the schedule
you select
Using AltiView
The following parameters apply to all meetings:
Parameter
Description
ID
The conference ID is created by the system.
Scheduler
The name of the person scheduling the meeting.
Schedule
Time
The time the Create Meeting dialog box was
opened to create this meeting.
Subject
Identifies the subject or type of meeting. What you
enter here should be easily identifiable in the
meeting list.
Reserved
Seats
Use the Up/Down arrows or type in a number, up
to 30, to indicate the number of expected
participants.
AltiView Manual
29
Parameter
Description
Host
Select the extension number of the host of this
meeting. The host can start and stop the meeting
and can mute and drop meeting members.
Schedule
Select the frequency of this meeting from the dropdown list. A “weekly” or “monthly” meeting can
actually be specified as every 2nd week/month or
every 3rd week/month, and so on.
Middle panel:
Options in the middle panel vary according to the frequency of the
meeting. See the sections below this table.
Require
Conference
Passcode
If you check this, no one can participate who does
not enter the conference passcode that you supply.
Passcode
If you are requiring a passcode, enter it here.
Announce
Participant
Name
If you want participant names announced when
they enter the meeting, check this check box.
Fill in the fields of the Create Meeting dialog box, and click OK. See the
following sections for directions on filling in the fields in the middle panel
of this dialog box.
Note: If other scheduled meetings have already reserved resources for the
time period, and sufficient resources are not available for the
meeting you are attempting to schedule, a message pops up telling
you that there is a resource conflict.
One Time Only Meeting
If you select One Time Only from the Schedule drop-down list, these are
your options in the middle panel:
30 AltiView Manual
Specify the duration of the meeting, using the Up/Down arrows.
2.
If the meeting is to begin as soon as it is scheduled, select Now.
3.
If the meeting is to begin at another time, select On Date, and enter a
date and start time. To select a date, click the Calendar button. To
select a start time, click the Down arrow and use the slide bar.
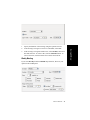
Weekly Meeting
If you select Weekly from the Schedule drop-down list, these are your
options in the middle panel:
AltiView Manual
31
Using AltiView
1.
1.
In the Duration field, specify the duration of the meeting, using the
Up/Down arrows.
2.
In the Start field, specify the start of the meeting by clicking the Down
arrow and using the slide bar.
3.
In the Every field, specify how often this meeting is to occur: every
week, every other week, every three weeks, and so on.
4.
Check the day of the week on which this meeting will occur.
5.
In the Range of Recurrence panel, use the Calendar button to select a
date for the first meeting.
6.
Select End after x occurrences and choose the number of times the
meeting is to occur or select End by and click the Calendar button to
specify a date at which the meetings will cease.
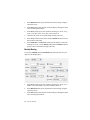
Monthly Meeting
If you select Monthly from the Schedule drop-down list, these are your
options in the middle panel:
1.
In the Every field, specify how often this meeting is to occur: every
month, every other month, every three months, and so on.
2.
In the Duration field, specify the duration of the meeting, using the
Up/Down arrows.
3.
In the Start field, specify the start of the meeting by clicking the Down
arrow and using the slide bar.
32 AltiView Manual
4.
Select either On Date to specify a day of the month by number (for
example, the 10th day of the month) or select On to specify a day of
the month by name (for example, the first Monday of the month).
5.
If you use On Date, the specified date (for example, the 10th day of
the month) may sometimes fall on a weekend day. Check the box Hold
during weekend, if the meeting will be held even on a weekend day.
6.
In the Range of Recurrence panel, use the Calendar button to select a
date for the first meeting.
7.
Select End after x occurences and choose the number of times the
meeting is to occur or select End by and click the Calendar button to
specify a date by which the meetings will cease.
E-mailing a Meeting Invitation
In the Invitation window, you can then click the
button to
open Microsoft Outlook. The meeting invitation is pasted into a new
message in Outlook, and the Outlook Subject field is filled in with
“Conference Call Invitation”. Choose the people to whom you want to send
the invitation, make any edits you may want to make, and click Send.
AltiView Manual
33
Using AltiView
In the MeetMe Conference window, click the
button to see an
automatically generated meeting invitation. It will look something like this:
Starting and Stopping a Meeting
The meeting host and the AltiWare Administrator (“altiadmin”) can start
and stop a meeting.
To start a meeting if you are the host, select the meeting in the MeetMe
Conference window and choose Start. Once the meeting is “started,” the
host can log into it (see “Joining a MeetMe Conference” on page 35).
To stop a meeting before its scheduled duration is over, select the meeting
and choose Stop. Manually stopping a meeting frees up resources.
Otherwise, the resources will not be freed until the scheduled meeting
duration is over.
What the MeetMe Conference Host Can Do
If you are the host of a MeetMe conference, in addition to starting and
stopping a meeting, you can:
• Mute other participants
• Drop participants from the conference
• Make someone else the host
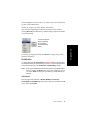
To do any of these, right-click the person’s name in the AltiView window,
and choose from the menu:
Continuing a Meeting Beyond Its Duration Time
When the scheduled meeting time is up, the meeting may continue if no
other scheduled meeting needs the resources. If another meeting is
scheduled and the resources are needed for that meeting, the current
meeting is terminated.
34 AltiView Manual
Joining a MeetMe Conference
Users calling from an extension can join a meeting by dialing the MeetMe
Conference extension number. Users calling through a trunk must first dial
the company number, then the MeetMe extension number.
Users are prompted to dial the meeting ID number. If the meeting has not
yet been started, the user hears an appropriate message and can try again
later.
If a passcode is required, the user is prompted to enter the passcode.
Recording Calls
Note: The voice recording feature is only available to Triton Analog
extensions and IP extensions.
WARNING: Listening in to or recording a conversation without the
consent of one or both parties may be a violation of local,
state and federal privacy laws. It is the responsibility of the
users of this feature to assure they are in compliance with all
applicable laws.
Recording on Demand
When the system administrator has set your extension to record on demand
(to a central location or to your voice mail), you can use AltiView to initiate
the recording.
AltiView Manual
35
Using AltiView
The voice recording feature in AltiView allows a user to record
conversations. Recorded conversations can then be played back through
voice mail or accessed at a centralized location.
To record a call:
1.
While connected to a call, right-click the call.
2.
Select Start Recording. The recording will be indicated by a small,
red cassette tape icon in the top right AltiView window. If your system
administrator has set the Insert Recording Tone option for your
extension, both parties will hear a beep when the recording begins.
3.
To pause recording, right-click the call and select Pause Recording.
4.
To end recording, right-click the call and select Stop Recording.
To listen to the recording
If the system is set to save the recording as your voice mail, you can hear
the recording through the AltiGen Voice Mail System.
If the recording is being saved to a centralized location, contact the system
administrator for the location.
Note: Do not enter an account code while recording; doing so will
disconnect the call.
Using Account Codes
If your system is set up to use account codes, you can associate calls with
specific codes for billing or tracking purposes.
Required account codes—If your extension has been configured to
require account codes, the system will prompt you to select an account code
from a pop-up window for all outbound calls.
36 AltiView Manual
Bypassing required account codes—If your extension has been
configured to bypass account code validation, you can enter a different
account code in the box at the bottom of the pop-up window or enter # to
bypass the account code altogether.
Optional account codes
To associate a call in progress with an account code:
Right-click the call.
2.
Choose Account Code.
3.
In the Account Code pop-up window, select an account code.
Using AltiView
1.
Note: Do not enter an account code while recording; doing so will
disconnect the call.
AltiView Manual
37
Note: If your extension is configured to bypass account code validation,
you can enter an account code in the box at the bottom of the popup window.
4.
Click OK.
To change the account code for a call in progress, repeat the steps above,
entering the new account code to assign the call to.
Using Voice Mail
When you click the Voice Mail tab in the main window, you see a list of
your voice mail messages.
• New voice mail messages are indicated by a white, closed envelope
icon in the status window of AltiView.
• If the new message is marked urgent, a red envelope icon is displayed.
• Heard voice mail messages are indicated by a white, open envelope
icon.
• If the message is saved, a blue, open envelope icon is displayed.
• A paperclip symbol on the envelope indicates an attachment—a voice
mail message forwarded from another extension.
38 AltiView Manual
Click on the column headings to sort the data. Right-click on a message row
to perform any of the actions (listening to, saving, or returning messages,
etc.) described in this section.
Listening to Your Voice Mail
In the Voice Mail list, select the message and use the voice mail controls
(shown below) to play, rewind, or fast forward. You can also use these
commands on the right-click pop-up menu.
You have several listening options which you can configure as described in
“General Information” on page 48. You can listen using the sound card on
your PC or your phone. You can play the message while it’s downloading
or wait until it’s completely downloaded to play it.
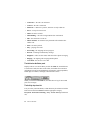
Use the tape player type buttons to perform the following functions:
Play
Rewind
Fast Forward
Return Call
Stop
Delete
If you click another message in the list, the current message stops playing.
Saving Remotely or Locally
To save a message as a .wav file that you can play back later, right-click the
message. A dialog box opens, letting you choose how you want to save the
file.
• Save in remote saves the message on a remote server in a location
designated by the system administrator.
• Save in local lets you name the .wav file and choose a directory on
your local computer in which to store it. You can then play the .wav
file on a media player.
AltiView Manual
39
Using AltiView
When you listen to a new message, the envelope icon changes from closed
to open, indicating that the message has been heard. As the message is
played, the status window displays Play.
Deleting a Message
To delete a message, select it and click the Delete button, or use the rightclick pop-up menu, and select Delete.
Returning a Call
To return the call, select it and click the Return Call button, or use the
right-click pop-up menu, and select Return Call.
Attaching a Note
To add a note to accompany a voice mail, either type it right into the Note
column, or right-click the voice mail, and select Note.
Type a note in the area provided and click OK. The entry will be displayed
in the Note field of the voice mail.
40 AltiView Manual
Forwarding Voice Mail
To forward a voice mail to an extension or a VM Group
In the Voice Mail view of the AltiView main window, right-click the
voice mail and select Forward. The VM Forward dialog box opens:
2.
Select the check box next to the extension, workgroup, or voice mail
group to which you want to forward the message.
Using AltiView
1.
If you need to search for a person by extension or group name or
extension or group number, type the first letters of the number/name
into the Search by Number or Name box. The matching extension/
group number or name displays in the list as you type.
Notes:
• Click on the column headings to sort the data.
• If the extension name is configured for an extension, it is used to
match the search string. If the extension name is not configured,
then the extension number is used to match the search string for this
extension.
3.
Optionally, you can leave an introductory message. Select the Record
Introduction Message check box and follow the steps below.
4.
Click OK to complete the forwarding.
AltiView Manual
41
To record an introductory message:
1.
If you selected the Record Introductory Message check box, then
when you click OK to complete the forward, pick up the phone hand
set and you’ll hear a prompt to record the message.
2.
Record the message and press the pound key (#). A confirmation
appears on the screen.
3.
Click OK to confirm and complete the action.
Working with Voice Mail Groups (Distribution Lists)
You can set up voice mail (VM) groups (distribution lists) to forward
messages to multiple recipients at the same time. You can set up to 100
personal voice mail groups, each with 64 members. Group members can be
any extension or another voice mail group.
There are two types of voice mail groups you can use:
• System-based groups are set up by the system administrator. You can
use but not edit these lists in AltiView.
• Personal groups are set up and modified in your AltiGen Voice Mail
System.
Monitoring Extension Activity
If your system administrator has configured your extension for monitoring
specific other extensions, you can monitor the activity on those other
extensions or view call history.
If you’re a manager, for example, you might monitor to determine whether
you need more resources in a busy environment. Or you might use
monitoring capability to cover calls for a co-worker, since you can click the
ringing phone icon in the monitor list and take the co-worker’s call.
42 AltiView Manual
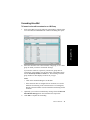
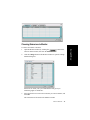
Choosing Extensions to Monitor
To choose extensions to monitor:
Open the Monitor window by clicking the
AltiView main window, then click the Monitor tab.
button in the
2.
Click the Change button in the Monitor window to open the Change
Monitor dialog box.
Extensions to which your system administrator has given you
monitoring rights are listed here.
3.
Select the check boxes next to the extensions you want to monitor, and
click OK.
The extensions will be listed in the Monitor window.
AltiView Manual
43
Using AltiView
1.
Reading the Monitor List
In the monitor list, each extension is listed along with its Status, Number,
Name, Activity, and Group (if applicable).
The state can be one of the following:
• Idle—the extension is not in use; you can click the Status field to ring
that extension
• Connected—the extension is in use
• Ringing—the phone on the extension is ringing; you can click the
Status field to pick up the call at your own extension
• Conference—the extension is on a conference call
• Voice Mail—the extension is in voice mail
• Auto Attendant—the extension is connected to an auto attendant
• Holding—the extension is on hold
• Hold Pending—the extension is awaiting hold
Calling or Picking Up Calls
If a monitored extension is Idle, you can click its Status field to ring the
extension.
If a monitored extension is Ringing, you can click its Status field to pick
up the call.
Note: If the call is coming in to a workgroup, as shown in the Group
column, you cannot pick up the call.
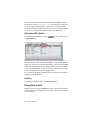
Viewing the Call History
Click the History tab in the Monitor window to view an informational
history of handled calls.
44 AltiView Manual
Note: Click on the column headings on the History tab to sort the data.
The list on the History tab displays the following fields:
Using AltiView
• Number—the extension or phone number. Upward arrow icons
indicate outgoing calls; downward arrows indicate incoming calls
Clicking a number in the Number column puts that number in the
dialing field and closes the History window.
• Name—Caller ID information, if available, or Unknown.
• Date/Time—the call’s date and time.
The history data is sorted by last disconnected and not in the order the
call was received. It is therefore possible to have a record with an
earlier timestamp followed by a record with a later timestamp.
Also, the timestamp for call data is based on the client system, while
the timestamp for voice mail messages is from AltiWare. Thus, the
times displayed here may not match those in the voice mail view in the
main window.
• Length—the length of time of each call.
• DNIS—DNIS digits collected, if available
• Group—Group number or name
• Note—a note attached to the call. To enter a note, click the Memo
button in the lower left of the History tab, type your note, and click
OK.
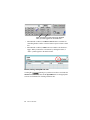
Use the Delete button to delete a single call history entry. Use the Delete
All button to delete the entire call history list. AltiView will ask you to
confirm the deletion; click Yes to delete or No to cancel:
AltiView Manual
45
46 AltiView Manual
CHAPTER 5
Configuring Your Station Settings
You can configure the following settings and options by clicking the
button in the upper right of the AltiView main window:
• General Info—password, default trunk access, and other settings.
• One Number Access (ONA)—forwarding of specific incoming calls.
This is available only when your extension configuration is set up to
allow ONA.
• Call Handling—forwarding, busy call, and no-answer call handling.
• Message Notify—how and when to notify yourself about incoming
voice messages.
• Station Speed—your personal speed dial numbers.
• System Speed—personal comments for system speed dial numbers
entered in the system by the system administrator (you cannot edit the
numbers or names themselves).
Configuration
Note: Some options may not be available to you.
Apply Button and OK Button
In the Config window, click Apply or OK to save your changes:
• Apply saves your changes and lets you continue in the Config
window.
• OK saves your changes and closes the Config window.
AltiView Manual
47
General Information
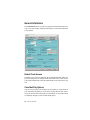
The General Info tab lets you edit your password, the default trunk access
code, voice mail settings, audio and video behavior, and external database
access options.
Default Trunk Access
The trunk access codes are defined by the system administrator. When you
get an incoming call over multiple trunks and cannot issue a return call, the
system will automatically select the default trunk access code to place your
call.
Voice Mail Play Options
You can choose to play your messages on your phone set, or play them on
your sound card and speakers. If you choose to play them on your sound
card, you can have the message play as it downloads, or you can download
it completely and play it on an external media player.
48 AltiView Manual
IPTalk
If you are using IPTalk, Echo Suppression is checked by default.
ToS Byte—The ToS byte indicates the type of service. For IPTalk, you
need high priority service, and the default of “00” set here indicates high
priority service. However, if your company router supports DSCP EF, then
set this field to “A0”. The ToS value is AltiGateway-based. For guidance,
see your system administrator. The ToS value is AltiGateway-based.
From the Voice Through drop-down list, choose the sound card that will
carry the incoming and outgoing voice. It could be a sound card in your PC,
or it could be a USB-based sound card in your headset system.
From the Ring Through drop-down list, choose the device that will carry
the incoming ring. When you’re away from your desk, you may prefer the
ring to come through your PC speakers, rather than your headset system.
Screen Pop, Audio Beep, and Auto Close
Select the Audio Beep check box if you want your PC to beep you when
you have a call.
Select the Auto Close check box to have AltiView close the pop up
window once you have finished with the call.
Accessing Databases
AltiView can access phone numbers from your Microsoft Outlook,
Outlook Express, ACT!, or GoldMine® database. During installation, the
install program reads which applications you have installed on your PC.
In the drop down list under Use Database, select the database you want to
use.
Note: If you select Outlook, AltiWare will load all the subfolders and
data in your main Contacts folder, which will take a few moments.
Once the data is loaded, you can close the Configuration window,
reopen it, and click the Select Folder button that now appears to
choose which Contacts subfolders you want to use.
You also have these additional options:
AltiView Manual
49
Configuration
Select the Screen Pop check box if you want an AltiView window to pop
up on your screen when you have a call. You can then click a call to take it
or perform other AltiView actions. For AltiView to pop up, you cannot
have closed the application entirely, but it can be minimized.
• Select the For Screen Pop check box if you want a database contact
window to pop up when you receive a call from someone for whom
you have a record in the database contact directory.
• Select the For Dial by Name check box if you want to have access to
the names in the database directory when you dial. With this option
checked, the names and their associated numbers in your Outlook,
ACT!, or GoldMine® directory are added to the contact list in the dial
pad window.
Note: If the contact entry has an extension number as part of the
dialing number, the extension number is displayed but will not
be included in the digits dialed by AltiWare.
• Match Digits—Select the number of digits to match for caller ID.
Matching starts from right and moves left. This option is for calls that
go through IP and for international calls that have a digit prepended,
like 0. For example, if you choose 7 (the default) in the Match Digits
field, and the number is 10.10.10.6- 915102529712, AltiView would
match the last 7 digits, or 2529712, to identify the caller for you.
• Check the Update database when click OK check box at the bottom
of the tab to refresh the data AltiView accesses from the database.
• Country Code—If you selected Outlook or Outlook Express, the
Country Code field becomes available. Enter the country code of the
local AltiView user; US country code is “1”.
Color Selection
Select either Nattierblue (default) or Burgundy as the color of the
AltiView window.
Miscellaneous
Release Link Tie (IP Trunk)—When checked, clicking the Transfer
button will automatically send “FLASH *” to release a tie trunk if the
incoming call is through an IP trunk. (Option is disabled by default.)
Important: Before checking this check box, see your phone system
administrator. If your company is using multiple systems
and the tie trunk feature, the administrator needs to have
used AltiEnterprise Manager to synchronize the systems.
Otherwise this feature will not work.
50 AltiView Manual
Note: The call being transferred must originate from an AltiWare system
running 5.0 or later.
Disable Auto Format—If the AltiWare server’s country code is US/
Canada, AltiView automatically adds the long distance/international
dialing prefix (corresponding to the server’s country code) when returning
a call from voice mail or when making a call from Call History. To prevent
this, check Disable Auto Format.
One Number Access (ONA)
If you are expecting calls that you want to receive regardless of where you
are, you can have the system forward those calls to you. You must specify
the Caller IDs for the calls you want forwarded, and the numbers where you
can be reached.
If the system is unable to connect the call (can’t identify a Caller ID or can’t
reach you at any of the numbers you specify), the call is sent to your voice
mail.
Before You Set Up ONA
• ONA must be enabled for your extension by your system
administrator.
• The settings on your AltiView Call Handling tab must not conflict
with ONA. Specifically:
— Enable Do Not Disturb must not be checked. If it is, when your
line is busy, all calls will go into voice mail and not to the ONA
forwarding numbers you specify.
— Enable Forward to must not be checked. If it is, all calls will be
forwarded according to this setting.
See “Call Handling” on page 54 for details on these settings.
Setting Up One Number Access
To set up one number access,
AltiView Manual
51
Configuration
When you answer an ONA call, you may be required to enter your
extension password, depending on the configuration for your extension set
by your system administrator
1.
Click the One Number Access tab in the Config window.
2.
Select the times you want to be available to ONA callers.
52 AltiView Manual
If you choose Enable schedule based access, you can set up to four
different schedules in the dialog box that pops up.
Check the Enable Call Screening check box if you want the system
to prompt the ONA caller to record a caller name to continue ONA.
4.
If you want, check the Verify Caller ID based on the following check
box and then specify the incoming phone numbers for ONA. If ONA
finds one of these numbers on an incoming call, it will forward the call
to you.
You can enter up to 10 phone numbers in the Caller ID Verification
fields. For local numbers, use 7 digits (5555555). For long distance
numbers, use 10 digits—area code + local number.
Note: If you enter no numbers in the Caller ID Verification fields and
ONA is enabled, ONA is made available to every caller.
Using a Password
You can use a Caller ID Verification field to enter a password number
such as “5555” so that a caller who knows this password can use
ONA to find you, regardless of where they are calling from. Tell the
caller to dial 1 during your personal greeting and then enter the password.
5.
Enter the Forwarding Numbers to be used by the system to find you
when ONA is active. You can set up to four different numbers—
extensions or outside numbers. For outside numbers, use the
drop-down list to select the trunk access code you want to use. Specify
whether the number is an extension or outside number and if a
password is required.
AltiView Manual
53
Configuration
3.
When ONA is active, the system dials the forwarding number(s) in
the order from Forwarding Number 1 through Forwarding Number 4.
Note that this number order does not correspond to the Schedule
order—for example, Forwarding Number 2 is not used first during
Schedule Number 2.
Note: If your system administrator has not configured your extension to
require you to enter your extension password when answering an
ONA call, then a call forwarded via ONA that is picked up by a
voice mail box, fax machine, or answering machine will connect,
and will not try any subsequent Forwarding Numbers. Therefore,
if you want ONA to use such an option as a last resort, it should be
Forwarding Number 4.
You can set the ONA ring duration from 5 to 45 seconds using the Ring
drop-down lists. Default value is 20 seconds. The system will ring the ONA
target during the specified time limit. If the ring time exceeds 30 seconds,
the system will play a phrase every 15 seconds (playing time is included in
ring time).
Call Handling
Click the Call Handling tab in the Config window to configure incoming
call handling for your extension.
54 AltiView Manual
If you want to forward calls to an external number, select a trunk access
code in the drop-down list, then begin with the outside trunk or route access
digit and any long distance prefix digits such as 1 and area code.
Note: Forwarding calls to a pager is possible but not recommended since
callers will only hear what is heard when calling a pager and might
not know to enter a return phone number unless instructed.
Do Not Disturb
If you check Enable Do Not Disturb, all incoming calls are forwarded
according to your Enable Busy Call Handling settings, described below.
If you check Enable Do Not Disturb, use the Activity drop-down list to
select the activity that applies to you:
1 In-System, 2 In-Personal, 3 Meeting, 4 Away from Desk,
5 Business Travel, 6 Personal Time Off
AltiView Manual
55
Configuration
Forwarding All Calls
The remaining three activity codes (7, 8, 9) may or may not be customized
by the system administrator.
Note: Checking Enable Do Not Disturb here has the same effect as
clicking the DND button in the AltiView main window. Also, if
"System" or "Personal" is the activity you select, it will not be
displayed on the AltiGen IP phone LCD; all other activities are
displayed.
Busy Call Handling and No Answer Handling
You can use these options to specify how you want to handle incoming
calls when you’re already on the phone or when you can’t answer the
phone, for example, when you’ve checked Enable Do Not Disturb.
If you want to use the auto attendant/IVR and you don’t know the number
of the phrase or menu you want to use, check with your system
administrator.
Place call in queue is available only if your system administrator has
enabled queuing for you.
Number of Rings Before Forwarding
The Number of Rings Before Forwarding setting pertains to almost all
the options on this tab. It is the number of times the phone rings before the
system forwards the call to an extension, voice mail, or the auto attendant.
To have AltiView automatically pick up the call, check the Enable
Automatic Answering after x Seconds check box and use the arrow keys
to choose the number of seconds.
Note: The default setting is 0 seconds. If the duration is set to 0, all
incoming calls will go to connect state right away. Neither caller
nor callee will hear a ring tone.
Call Waiting Options
Call waiting options are available only if the Enable Busy Call Handling
check box has been checked, but this option is available only for personal
calls.
• Single Call Waiting—sets up single call waiting. This feature gives an
alert tone (audio beep) to indicate that a call is waiting. Single Call
Waiting must be selected in order to conference incoming calls.
56 AltiView Manual
• Multiple Call Waiting—enables a “personal queue” of multiple calls
waiting. You must also select the Place Call In Queue option under
Enable Busy Call Handling to enable this option. This allows you to
transfer or park the current call before picking up the next call in
queue.
• Live Call Handling—when enabled, allows a caller to hear a ringback
tone when the called party is in voice mail, paging, transfer, or
conference status.
Message Notification
Message Notification lets you set up how you’d like to be alerted to new
messages when you’re away from your desk. You can also set up Message
Notification through the AltiGen Voice Mail System.
Click the Message Notification tab in the Config window to establish how
and when you want to be notified about incoming voice messages.
Configuration
Lets you
create voice
mail groups
Use this window to set the notification options:
AltiView Manual
57
• The types of messages about which you want to be alerted: none,
urgent voice messages only, or all voice messages.
• Schedule—Select during what hours you want to be alerted.
• How and where to notify you—Select an option in the Message
Notification or Reminder Message by calling section. If you want to
use an outside number, use the drop-down list to select the trunk access
code, and then type in the number.
Voice Mail Groups (Distribution Lists)
You can set up voice mail (VM) groups (distribution lists) to forward
messages to multiple recipients at the same time. You can set up to 100
personal voice mail groups, each with up to 64 members. Group members
can be any extension or another voice mail group.
There are two types of voice mail groups you can use:
• System-based groups are set up by the system administrator. You can
use but not edit these lists in AltiView.
• Personal groups are set up and modified in AltiView or in your
AltiGen voice mail system.
58 AltiView Manual
Working on Voice Mail Group Lists
To work on your personal voice mail groups, on the Message Notification
tab, click the VM Group Edit button. The VM Group Edit dialog box
opens.
1.
Click the New button in theVM Group Edit dialog box. The Create
Group dialog box opens.
AltiView Manual
59
Configuration
To create a voice mail group
2.
Click the drop-down list to select a Group ID.
3.
Enter the VM Group Name and any Comments. These are optional
but will help you identify the group.
4.
Select the member extensions by selecting the check box next to each
extension.
5.
When finished, click OK. Click the Clear button to deselect all
extensions or click Cancel to exit without saving your edits.
To change a voice mail group
1.
Click the VM Group Edit button. The VM Group Edit dialog box
opens.
2.
Select the group you want to change, and click the Change button.
3.
Make any changes you need to make for the group name, comments,
or members. To add or remove a member, select or deselect the check
box next to the extension.
4.
Click OK.
To delete a voice mail group
1.
Click the VM Group Edit button. The VM Group Edit dialog box
opens.
2.
Select the group you want to delete, and click the Change button.
60 AltiView Manual
3.
Click the Clear button to deselect all extensions.
4.
Click OK to save and exit.
When you empty a group of members, the group is deleted.
Station Speed Dialing Setup
The Station Speed tab lets you set up to 20 station speed dial numbers.
When you add an outside number, all relevant prefix digits such as trunk or
route access number, the long distance prefix 1 and area codes must
precede the phone number. Station speed dial numbers are also set up by
using the #25 feature code on your phone set.
To add or edit station speed dial numbers
Click the Station Speed tab in the Config window.
2.
Click a Station ID to select it.
Configuration
1.
AltiView Manual
61
3.
Click the Edit button. Or double-click the Station ID. The Station
Speed dialog box appears.
4.
Add or edit the Number, Name and Comment fields.
5.
Click OK.
To delete station speed dial numbers
1.
On the Station Speed tab, click the Station ID, and then click Edit, or
double-click the Station ID. The Station Speed dialog box opens.
2.
Click Clear, and then click OK.
System Speed Dial Numbers
Click the System Speed tab in the Config window to view speed dial
numbers set up by the system administrator. In AltiView, you cannot edit
system speed dial numbers or names, but you can edit the Comment
column. To do so, select the entry, click the Edit button, make your change,
and click OK.
62 AltiView Manual
Configuration
AltiView Manual
63
64 AltiView Manual
Index
Index
A
AA state 13
Account Codes 36
ACT 1, 49
Activity 55
all calls recorded 35
AltiAgent
configuration 47
AltiView
configuration 47
answer options 57
Apply button 47
auto attendant 22
auto upgrade 4
B
busy call handling
Busy state 13
56
C
call handling 17–25
Centrex transfer 23
configuration 54
call history 44
call holding 20
Call Pending state 13
call recording 38
call transfer 21
call waiting 21
multiple 57
Centrex transfer 23
color selection 50
conference call 24
Conference state 14
conferencing
MeetMe 26
station 24
configuration 47
call handling 54
general 48
message notification 57
One Number Access 57
station speed dialing 61
connected 14
D
databases 1
dialing
by name 17
by number 17
selecting from a list 17
speed dial 20
dialtone 14
distribution lists 42
Do Not Disturb 55
downgrade procedure 4
drop from conference 26
E
enable
live call handling 57
multiple call waiting 57
single call waiting 56
Error call state 14
error messages 11
exit 11
external databases 1
F
flash button 20
forwarding all calls 55
forwarding voice mail 41
G
general configuration
GoldMine 1, 49
48
AltiView Manual
65
Index
H
password 53
One Number Access
configuration 57
One Number Access setup
handling calls 17–25
history logs 44
history window 44
hold 14
hold button 20
hold pending 14, 44
P
I
idle state 14
installation requirements 3
IP extension, troubleshooting
IPTalk License 2
J
join to conference 25
L
licenses 2
live call handling
57
M
meeting
creating 28
MeetMe
creating a meeting 28
MeetMe conference 26
Microsoft Outlook 1, 49
minimize 11
monitor window 43
monitoring 42
multiple call waiting 57
Music on Hold state 14
N
no answer handling
notifications 57
56
O
ONA call screening 53
ONA ring duration 54
One Number Access
66 AltiView Manual
10
pager, and forwarding 55
Park state 14
password
One Number Access 53
phone icon 11
ping 10
Play state 14
pop-up windows 11
proceeding state 14
R
reconnecting 8, 11
record state 14
recording calls 38
recording on demand
release link tie 50
ringback state 14
ringing 14
35
S
saving changes 47
screen pop 11
session licensing 2
single call waiting 56
speed dial list 20
state column 21
station conferencing 24
station speed dialing
configuration 61
system requirements 3
system speed dialing 62
T
TCP socket 10
transfer
Centrex 23
transfer calls 21
51
Index
transfer to auto attendant 22
transfer to voice mail 21
transferring calls to voice mail 22
Troubleshooting IP Connectivity 10
U
uninstall 4
upgrade 2
V
VM groups 58
voice mail 21
forwarding 41
playing 39
voice mail group 42
voice mail state 14
voice recording 38
W
Windows tray 11
workgroup 42
AltiView Manual 67