1
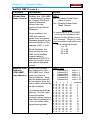
U
U
S
S
E
E
R
R
1560
M
M
AA
NN
UU
AA
LL
ProSoft Technology, Inc
1560-MBP Modbus Plus SCANport Gateway
Catalog Numbers:
1560-MBP-1
1560-MBP-2
Modbus Plus SCANport Gateway - 115 VAC
Modbus Plus SCANport Gateway - 24 VDC
Table of Contents
Quick Start Guide ..................................................................................... 4
Revisions ................................................................................................. 5
1 Product Specifications .................................................................... 6
1.1
Mobus Plus Specifications ........................................... 6
1.2
General Specifications ................................................. 6
2 Modbus Plus Functionality .............................................................. 8
2.1
Modbus Plus Communications ..................................... 8
2.1.1
Supported MSTR Programming Commands ................. 8
2.1.2
Modbus Register Map .................................................. 9
3 Hardware Setup ............................................................................... 10
3.1
1560-MBP Card Setup ................................................. 10
3.1.1
Connecting Power to the 1560-MBP Card ...................... 10
3.1.2
Dip Switch Configuration .............................................. 10
4. Programming Considerationations ................................................. 15
4.1
Writing to the 1560-MBP .............................................. 15
4.1.1
Global Data Enabled - MSTR Type 5 ............................. 15
4.1.2
Host Issued Write Commands - MSTR Type 1 ............... 18
4.2
Reading from the 1560-MBP ........................................ 19
4.2.1
Global Data - MSTR Type 6 .......................................... 19
4.2.2
Host Issued Read Commands - MSTR Type 2 ............... 20
4.3
The MBP Status Registers (40021 to 40100) ................. 22
5. Troubleshooting .............................................................................. 25
5.1
LED Locations ............................................................. 25
5.1.1
LED Troubleshooting Table ........................................... 25
5.2
MBPSTAT Diagnostics ................................................. 27
6. Cable Diagram ................................................................................ 28
7. Technical Support ........................................................................... 29
7.1
Technical Support Contacts .......................................... 29
Appendix A ........................................................................................ 30
1560-MBP Modbus Register Map ............................................... 30
Appendix B ........................................................................................ 31
Device Specific Hints ................................................................. 31
Appendix C ........................................................................................ 33
Single Drive Peer COP Application Example ............................... 33
Appendix D ........................................................................................ 39
Mounting and SCANport Cabling Instructions .............................. 39
Appendix E ......................................................................................... 41
Repair and Warranty ........................................................................... 42
Contents
Please Read This Notice
Successful application of the 1560-MBP card requires a
reasonable working knowledge of the Allen-Bradley hardware to
be interfaced with, and the application in which the combination
is to be used. For this reason, it is important that those
responsible for implementing the 1560-MBP satisfy themselves
that the 1560-MBP and Allen-Bradly hardware combination will
meet the needs of the application without exposing personnel or
equipment to unsafe or inappropriate working conditions.
This manual is provided to assist the user. Every attempt has
been made to assure that the information provided is accurate
and a true reflection of the product’s installation requirements.
In order to assure a complete understanding of the operation of
the 1560-MBP, the user should read all applicable
documentation on the operation of the Allen-Bradley hardware.
Under no conditions will ProSoft Technology, Inc. be responsible
or liable for indirect or consequential damages resulting form
the use or application of the 1560-MBP product.
Reproduction of the contents of this manual, in whole or in part,
without written permission from ProSoft Technology, Inc. is
prohibited.
Information in this manual is subject to change without notice
and does not represent a commitment on the part of ProSoft
Technology, Inc. Improvements and/or changes in this manual
or the product may be made at any time. These changes will be
made periodically to correct technical inaccuracies or
typographical errors.
WARNING
The 1560-MBP card will allow remote access to
commands in the Allen-Bradley drives and other
Scanport compatible devices. The User is
responsible for assuring that any applicable regulations
concerning the remote operation of
equipment are adhered to.
© ProSoft Technology, Inc. 1997, 1998
Modbus Plus is a Trademark of Schneider Automation
3
Quick Start Guide
Contents
Quick Start Guide
In this section we have assembled a simple step-by-step procedure for
installing and making the 1560-MBP unit operational. This discussion
presumes that the application decisions such as Modbus Plus
addressing and hierarchy, SCANport cable length, etc. have been
addressed prior to this point.
Step-by-Step
The following steps will allow the 1560-MBP to be setup in the shortest
period of time (the following steps refer to the Allen-Bradley drive
implementation. Similar steps are followed when interfacing to other A-B
Power Division products):
1 Set the dip switches
The 1560-MBP dip switch positions are detailed in Section 3
2 Mount the 1560-MBP on the DIN rail
See Appendix D for mounting instructions.
3 Connect power to the 1560-MBP
Refer to Section 3
4 Setup the Drive hardware
Refer to the appropriate drive manual to connect control and
power to the drive. This aspect of the drive installation is out
of the scope of this manual.
5 Setup the Drive parameters
See Appendix B of the manual to setup the drive parameters
6 Install the SCANport cable between the drive and the
1560-MBP.
7 Connect the Modbus Plus communication cable between
the host system and the 1560-MBP. The procedure follows
standard Modbus Plus cabling practices.
4
Revisions
Contents
Revisions
3/15/97
Rev 1.0
Initial Release
5/5/97
Rev 1.1
Modify product to allow slave addresses within any
group of 16 slave addresses on one PLC Host
when using Global Data. Also protect Control and
Reference words from overwrite if Global Control
Enabled.
1/98
Upgrade User Manual
5
Chapter 1 — Product Specifications
1
Contents
Product Specifications
The ProSoft Technology, Inc. 1560-MBP card is a hardware
product designed to be a communications front end for AllenBradley SCANport compatible products (1336 Plus/Force/
Vector, 1305, SMC Dialogue Plus, SMP3, etc.).
The product includes the following functionality:
1.1
Modbus Plus Specifications
•
•
•
•
1.2
Protocol modes:
Modbus Plus using licensed Schneider
Automation technology
Supported Modbus Plus Operations:
MSTR Type 1 - Write Data
MSTR Type 2 - Read Data
MSTR Type 5 - Write Global Data
MSTR Type 6 - Read Global Data
Supports Global Database Control from Host PLC
In this mode, the 1560-MBP will look for Control
Word and Reference in the selected Host Global
Database
Pre-assigned Modbus memory map
Read/Write
Command Control/Frequency
Datalinks Out : A to D
Up to 2000 drive parameter values
Read Only
Status/Feedback
Datalinks In : A to D
General Specifications
•
•
Configuration via dip switches
Slave Address
:
1 to 64
Host Address
:
1 to 64
Global Database Control Enable
Fault on Loss of Modbus Plus Enable
SCANport Messaging Options
No Datalinks
Datalinks A only
Datalinks A and B only
Datalinks A, B, C, D
Available packages:
Enclosed Power supplied externally (120 VAC)
Enclosed Power supplied externally (24 VDC)
6
Chapter 1 — Product Specifications
•
•
•
•
•
•
•
•
Contents
Mounting :
DIN Rail mounting
Dimensions :
44 mm (width) x 76 mm (height) x 123 mm (depth)
Communication port connections:
Modbus Plus - Female 9-pin D shell connector
SCANport - Standard SCANport connector
Status LED
SCANport Status (bi-color Red/Green)
Modbus Plus Status (green)
Current Consumption:
65 ma at 24 VDC
Input Voltage
85 to 264 VAC, 1 Phase, 45 to 63 Hz
24 VDC
Operating Temp
0 to 50° C
Storage Temp
-40 to 85° C
7
Chapter 2 — Modbus Plus Port Functionality
2
Modbus Plus Port Functionality
2.1
Modbus Plus Communications
Contents
The 1560-MBP Modbus Plus card supports the Modbus Plus
protocol using proprietary technology licensed from Schneider
Automation. With the Modbus Plus capability, the module is
able to communicate data from Allen-Bradley SCANport
compatible devices to a Modbus Plus host PLC, and vice-versa.
The following discusses the functional capabilities of the 1560MBP card.
2.1.1 Supported MSTR Programming Commands
The 1560-MBP uses several of the available MSTR ladder
logic commands to transfer data when using a Modicon PLC.
These are overviewed below:
Read Data: The following types of data read commands are
supported:
MSTR Type 2 Read Data
This command reads data from any place within the
Modbus Register map. This command allows a Modbus
host to selectively read data from the 1560-MBP as
required for the application.
MSTR Type 6 Read Global Data
This command gets data from the Global Data being sent
from the 1560-MBP. The 1560-MBP returns 2 to 10 words
of Global data. This is the fastest method of reading
values from the MBP.
Write Data: The following data write commands are supported:
MSTR Type 1 Write Data
This command writes data to any place within the 1560MBP Modbus Register map. This command can be used to
selectively write configuration values to the SCANport
device. In addition, if the Global Data Command Enable dip
switch is disabled, this command can be used to write to
the SCANport Control and Reference words (Modbus
addresses 40001 to 40010).
8
Chapter 2 — Modbus Plus Port Functionality
Contents
MSTR Type 5 Write Global Data
This command is used in a host processor to ‘publish’ Global
Data which all slaves on the Modbus Plus highway may
access. The 1560-MBP units can be configured to read the
Control and Reference values from this Global Data table.
2.1.2 Modbus Register Map
A pre-defined register map has been provided in the 1560MBP unit. This map is detailed in Appendix A, and shown
below. The full memory map is dependent on the A-B device
which is connected to the 1560-MBP unit.
On power-up, the 1560-MBP unit polls the remote device
and determines the maximum number of parameters that
exist in the SCANport device. If the number is greater than
2000 the parameter list is limited to 2000.
1560-MBP Modbus
Address Space
40001
Host
Write
MSTR 1
(1)
Control, Reference
and Datalink IN
Read
MSTR 2
Host
Global
Write
MSTR 5
Global
Read
(to Host)
MSTR 6
(2)
(3)
40011
Status, Reference
and Datalink OUT
40021
Miscellaneous
40101
Parameter
4xxxx
(1)
Note that 40001 and 40002 are only accessible with MSTR
Type 1 if ‘Global Control’ is disabled in the 1560-MBP.
(2)
Represents Control and Reference Words which are
controlled by host when ‘Global Control’ is enabled.
(3)
Words 40011 up to 40020 are ‘Published’ by 1560-MBP in the
mode Global Data space. A host can access these values
using a MSTR Type 6 instruction or Peer Cop (see Appendix
C), or an MSTR Type 2 data read.
9
Chapter 3 — Hardware Setup
Contents
3
Hardware Setup
3.1
1560-MBP Card Setup
3.1.1 Connecting Power to the 1560-MBP Card
Connecting power requires a simple termination of the 120
VAC or 24 VDC cable to the front of the module. The
connections are shown in the following diagram:
115 VAC Hot
L
24 VDC +
115 VAC Neutral
N
24 VDC Common
Ground
G
Ground
+
Com
G
3.1.2 Dip Switch Configuration
Configuration of the 1560-MBP consists of setting up some
dip switches. The dip switches are as follows:
Host & Slave Address
Add values of switches and then add 1 to total
to calculate address
Examples
Value
1
2
4
8
16
32
SW
1
2
3
4
5
6
ON=Enable
Address 1
ON
OFF
(0+0+0+0+0+0)=0+1=1
6 5 4 3 2 1
ON
SLAVE
OFF=Disable
6 5 4 3 2 1
Address 8
HOST
Fault on Loss of
Modbus Plus
8
8
Global Database
Control
7
7
ON=Enable
OFF
(0+0+0+4+2+1)=7+1=8
OFF=Disable
Datalinks
87
87 87 87
8 7 6 5 4 3 2 1
ON
OFF
A,D,C,D
A&D only
A only
8 7 6 5 4 3 2 1
ON
ON
OFF
OFF
NONE
Please note that dip switch configuration is read
by the 1560-MBP during the power up process.
Power must be cycled if dip switches are changed
under power.
10
Chapter 3 — Hardware Setup
Contents
Switch SW 1
Function
Datalink
Options
Description
Details
SW1-7 and 8
Allows the User to
select the level of
Datalink support the
1560-MBP unit will
have when talking to
the SCANport device.
8
off
off
on
on
7
off
on
off
on
No Datalinks
Datalink A only
Datalink A&B only
Datalink A,B,C,D
Some devices do not
support Datalinks, in
which case the ‘No
Datalinks’ option must
be selected.
Host
PLC
Address
(when Global
Data Control
Enabled)
If the Global Data
Control is Enabled
(SW2-7 is set to 1)
then the 1560-MBP
must be told which
Host PLC Global
Database to get the
control values from.
To select the
appropriate Host,
determine the Host’s
Modbus Plus address
and select that
address using the dip
switches SW1- 1 to 6.
11
SW1-1 to 6
1 Address Bit 0
2 Address Bit 1
3 Address Bit 2
4 Address Bit 3
5 Address Bit 4
6 Address Bit 5
Value = 1
Value = 2
Value = 4
Value = 8
Value = 16
Value = 32
Example Addresses = 1 to 64
6
off
off
off
off
off
off
off
off
off
off
off
off
off
off
off
off
off
off
off
off
off
off
off
off
off
off
off
5
off
off
off
off
off
off
off
off
off
off
off
off
off
off
off
off
on
on
on
on
on
on
on
on
on
on
on
4
off
off
off
off
off
off
off
off
on
on
on
on
on
on
on
on
off
off
off
off
off
off
off
off
on
on
on
3
off
off
off
off
on
on
on
on
off
off
off
off
on
on
on
on
off
off
off
off
on
on
on
on
off
off
off
2
off
off
on
on
off
off
on
on
off
off
on
on
off
off
on
on
off
off
on
on
off
off
on
on
off
off
on
1
off
on
off
on
off
on
off
on
off
on
off
on
off
on
off
on
off
on
off
on
off
on
off
on
off
on
off
Address
1
2
3
4
5
6
7
8
9
10
11
12
13
14
15
16
17
18
19
20
21
22
23
24
25
26
27
Chapter 3 — Hardware Setup
Contents
off
off
off
off
off
on
on
on
on
on
on
on
on
on
on
on
on
on
on
on
on
on
on
on
on
on
on
on
on
on
on
on
on
on
on
on
on
on
on
off
on
on
off
off
off
off
off
off
off
off
off
off
off
off
off
off
off
off
on
on
on
on
on
on
on
on
on
on
on
on
on
off
on
on
on
on
on
on
on
off
off
off
off
off
off
off
off
on
on
on
on
on
on
on
on
off
off
off
off
off
off
off
off
on
on
on
on
on
on
on
on
off
on
on
on
on
off
off
off
off
on
on
on
on
off
off
off
off
on
on
on
on
off
off
off
off
on
on
on
on
off
off
off
off
on
on
on
on
on
off
off
on
on
off
off
on
on
off
off
on
on
off
off
on
on
off
off
on
on
off
off
on
on
off
off
on
on
off
off
on
on
off
off
on
on
on
off
on
off
on
off
on
off
on
off
on
off
on
off
on
off
on
off
on
off
on
off
on
off
on
off
on
off
on
off
on
off
on
off
on
off
on
28
29
30
31
32
33
34
35
36
37
38
39
40
41
42
43
44
45
46
47
48
49
50
51
52
53
54
55
56
57
58
59
60
61
62
63
64
Switch SW 2
Details
Function
Description
Fault on
Loss of
Modbus
Plus
When enabled, the
SW2-8
1560-MBP will fault the Off = Disable fault on loss
connected SCANport
of Modbus Plus
device if the Control
On = Enable fault on loss of
Word is not updated
Modbus Plus
within 10 seconds.
Note that the fault is not
enabled until after
Modbus Plus
communications have
been initially
established.
12
Chapter 3 — Hardware Setup
Contents
Switch SW 2 (cont’d.)
Function
Details
Description
Enables the 1560-MBP SW2-7
Global Data
Base Control to automatically gather Off = Disable Global Data
the Control Word and
Base Control
Speed Reference
On = Enable Global Data
values from the
Base Control
selected Host Global
Database.
Important
When enabled, the
1560 will use two
words from the global
database based on the
selected Modbus Plus
address (SW1-1 to 6).
When disabled, the
Host must write into
1560 unit's Modbus
register table at
addresses 40001/2 to
write the Control word
and speed reference
values
Modbus Plus
Address
(1560-MBP
unit address)
Selects the Modbus
Plus Address for the
1560-MBP unit. Each
node must have a
unique address. Note
that the addresses will
be one higher than the
binary value selected by
the dip switches.
A maximum of 16 1560-MBP
units can be enabled in the
Global Control Mode on one
PLC network. These 16 units
must be addressed within one
of the following ranges:
1 to 16
17 to 32
33 to 48
49 to 64
SW2-1 to 6
1
2
3
4
5
6
6
off
off
off
off
It is recommended that off
address 1 not be used off
off
to avoid possible
off
confusion when using a off
off
local default address of off
off
1 at a controller node
off
programming panel.
off
off
off
off
off
13
Address Bit 0
Address Bit 1
Address Bit 2
Address Bit 3
Address Bit 4
Address Bit 5
5
off
off
off
off
off
off
off
off
off
off
off
off
off
off
off
off
on
on
4
off
off
off
off
off
off
off
off
on
on
on
on
on
on
on
on
off
off
3
off
off
off
off
on
on
on
on
off
off
off
off
on
on
on
on
off
off
2
off
off
on
on
off
off
on
on
off
off
on
on
off
off
on
on
off
off
Value = 1
Value = 2
Value = 4
Value = 8
Value = 16
Value = 32
1
off
on
off
on
off
on
off
on
off
on
off
on
off
on
off
on
off
on
Address
1
2
3
4
5
6
7
8
9
10
11
12
13
14
15
16
17
18
Chapter 3 — Hardware Setup
Contents
off
off
off
off
off
off
off
off
off
off
off
off
off
off
on
on
on
on
on
on
on
on
on
on
on
on
on
on
on
on
on
on
on
on
on
on
on
on
on
on
on
on
on
on
on
on
14
on
on
on
on
on
on
on
on
on
on
on
off
on
on
off
off
off
off
off
off
off
off
off
off
off
off
off
off
off
off
on
on
on
on
on
on
on
on
on
on
on
on
on
off
on
on
off
off
off
off
off
off
on
on
on
on
on
on
on
on
off
off
off
off
off
off
off
off
on
on
on
on
on
on
on
on
off
off
off
off
off
off
off
off
on
on
on
on
on
on
on
on
off
off
on
on
on
on
off
off
off
off
on
on
on
on
off
off
off
off
on
on
on
on
off
off
off
off
on
on
on
on
off
off
off
off
on
on
on
on
off
off
off
off
on
on
on
on
on
on
off
off
on
on
off
off
on
on
off
off
on
on
off
off
on
on
off
off
on
on
off
off
on
on
off
off
on
on
off
off
on
on
off
off
on
on
off
off
on
on
off
off
on
on
off
on
off
on
off
on
off
on
on
on
off
on
off
on
off
on
off
on
off
on
off
on
off
on
off
on
off
on
off
on
off
off
off
on
off
on
off
on
off
on
off
on
off
on
off
on
19
20
21
22
23
24
25
26
27
28
29
30
31
32
33
34
35
36
37
38
39
40
41
42
43
44
45
46
47
48
49
50
51
52
53
54
55
56
57
58
59
60
61
62
63
64
Chapter 4 — Programming Considerations
4
Contents
Programming Considerations
Transferring data to/from the 1560-MBP is performed either
using the standard MSTR instruction, or using the Peer Cop
functionality available in some Schneider processors. (Note that
Peer Cop functionality is somewhat limited. See Appendix C.)
Specifically, the following functionality is supported:
MSTR Type 1 - Write data
MSTR Type 2 - Read data
MSTR Type 5 - Write Global Data
MSTR Type 6 - Get Global Data
The following sections will detail the programming requirements
for each of these commands, as well as discuss speed tradeoffs between the different commands. An application note
detailing the configuration of a Peer Cop solution is also
available in Appendix C.
4.1
Writing to the 1560-MBP
4.1.1 Global Data Enabled - MSTR Type 5
If Global Data Control Mode is enabled, the 1560-MBP will look
to the Host’s Global Data space for the Control and Reference
values. All other values must be written by the host using the
MSTR Type 1 instruction in the PLC.
The location of the Control and Reference values in the Global
Data is determined by the 1560-MBP Modbus Plus address.
The 1560-MBP uses the following algorithm to obtain the values:
If Modbus Plus Address < 17
Global Table Index = ( Modbus Plus Address - 1 ) * 2
else if Modbus Plus Address < 33
Global Table Index = ( Modbus Plus Address - 17 ) * 2
else if Modbus Plus Address < 49
Global Table Index = ( Modbus Plus Address - 33 ) * 2
else if Modbus Plus Address < 65
Global Table Index = ( Modbus Plus Address - 49 ) * 2
Note
The Global Data Table has a limit of 32 words,
therefore there can only be 16 1560-MBP
units with Global Control Enabled on one
Host processor. Care must be exercised that
all 16 Global Control Enabled 1560-MBP
devices are in the same block of addresses.
15
Chapter 4 — Programming Considerations
Word
0
2
4
6
8
10
12
Contents
Slave 33
1560-MBP
Control Word
Reference
Adaptor I/O-A1
Adaptor I/O-A2
Adaptor I/O-B1
Adaptor I/O-B2
Adaptor I/O-C1
Adaptor I/O-C2
Adaptor I/O-D1
Adaptor I/O-D2
Slave 37
30
Slave 48
Global Data Sent from Host
(2 words per slave)
From Global Data Table
MSTR Type 1 accessible
only
Global Write Space
(Slave 37)
Relationship between Global Data from Host and 1560-MBP Control & Reference
Words: The diagram shows an example if Slave 37 was configured for Global Data
Control and where the Control/Reference words would come from in the Global Data
from a Host.
The following table details the relationship between the Modbus Plus
addresses and the Global Data Table:
1560-MBP
Modbus Plus
Address
Global Data
Table
Index
1,17,33,49
0
1
2
3
4
5
6
7
8
9
10
11
12
13
14
15
16
17
18
19
20
21
22
23
2,18,34,50
3,19,35,51
4,20,36,52
5,21,37,53
6,22,38,54
7,23,39,55
8,24,40,56
9,25,41,57
10,26,42,58
11,27,43,59
12,28,44,60
Description
Control Word
Reference Word
Control Word
Reference Word
Control Word
Reference Word
Control Word
Reference Word
Control Word
Reference Word
Control Word
Reference Word
Control Word
Reference Word
Control Word
Reference Word
Control Word
Reference Word
Control Word
Reference Word
Control Word
Reference Word
Control Word
Reference Word
16
Chapter 4 — Programming Considerations
1560-MBP
Modbus Plus
Address
Global Data
Table
Index
13,29,45,61
24
25
26
27
28
29
30
31
14,30,46,62
15,31,47,63
16,32,48,64
Contents
Description
Control Word
Reference Word
Control Word
Reference Word
Control Word
Reference Word
Control Word
Reference Word
Modicon Programming Example - MSTR 5
enable abort -
40400
40410
MSTR
00032
Contents of registers in control block
- active
- error
- success
40400 = 5 Global write data instruction
40401 = 0 Error code
40402 = 32 Global Data block length
(Max 32 words)
40403 = 0 N/A
40404 = 0 N/A
40410 = Source of the Global Out Data
This instruction “publishes” Global Data on the Modbus Plus network
from the Host PLC. Up to 32 words can be transmitted from the Host,
allowing up to 16 1560-MBP units to be controlled. When the 1560-MBP
reads the Global Data it first examines the source node address to
assure it matches the dip switch configured Host Node Address, and
then retrieves the two words that relate to its node from the packet.
Controller
Address
40410
40411
40412
40413
•
•
40420
40421
•
•
40440
40441
Node
33
34
•
•
37
•
•
48
17
Description
Control Word
Reference Word
Control Word
Reference Word
•
•
Control Word
Reference Word
•
•
Control Word
Reference Word
Chapter 4 — Programming Considerations
Contents
In the example (at the bottom of the previous page) the 1560-MBP
responding at Node 37 would retrieve its control and reference values
from the 8th and 9th words of the Global Data block. In the Host PLC we
have placed this data in registers 40418 and 40419, as this corresponds
to the 8th and 9th position in the Global Data packet.
4.1.2 Host Issued Write Commands - MSTR Type 1
If the Global Data Control Mode is not enabled, the 1560-MBP
will not look to the Global Data Table to obtain the Control and
Reference values. In this mode, the Host PLC must execute a
write command (MSTR Type 1) to the 1560-MBP to register
addresses 40001 and 40002, per the following drawing, to
control the drive.
40001
Write Data – Control Reference & Data Link IN
40011
40021
Not Accessible
by Write Command
40101
Parameter Register Space
This register space contains the parameter table from the
SCANport device. This paramaters are stored in their
numerical order (example):
40101 = Parameter #1
40102 = Parameter #2
The full length of this space is a function of the SCANport
device connected. Max size is 2000 parameters.
4xxxx
MSTR Type 1 Accessible Data Registers: The memory map for the registers
which a PLC programmer can access from the 1560-MBP using the MSTR
Type 1 command. Note that a write to the Read Only space between 40011
and 40100 will place an Error Code in the MBP Status register.
18
Chapter 4 — Programming Considerations
Contents
Modicon Programming Example - MSTR Type 1
Contents of registers in control block
enable abort -
40001
40010
MSTR
00002
- active
- error
- success
40001 = 1 Write instruction
40002 = 0 Error code
40003 = 1 Length of the write
40004 = 119 slave register to Write (40119)
40005 = 37 MBP Node address to write to
40006 = 1 Slave Input Path for routing
40010 = Source of the data to the
device attached to the 1560-MBP
This instruction would write one value into parameter 19 of the device attached to
1560-MBP node address 37. In the 1560-MBP register map this would be register
40119.
Note that the Slave Input Path value must be
entered in order for the command to execute
successfully. Valid values are from 1 to 8. Any
other values will cause the command to fail.
4.2
Reading from the 1560-MBP
Reading data from the 1560-MBP is independent of the Global
Data Control mode selection. There are two methods for
obtaining data from the 1560-MBP units as outlined in the
following section.
4.2.1 Global Data - MSTR Type 6
The 1560-MBP publishes Global Out Data which can be accepted by any
other node on the Modbus Plus port. The structure of the Global Data sent
out in is as follows:
0
1
2
3
4
5
6
7
8
9
Status Word
Feedback
Adaptor I/O-A1
Adaptor I/O-A2
Adaptor I/O-B1
Adaptor I/O-B2
Adaptor I/O-C1
Adaptor I/O-C2
Adaptor I/O-D1
Adaptor I/O-D2
Global Out Data
(1)
(2)
(3)
Optional Global Data
(1) Datalink A only - 4 words
(2) Datalink A & B only - 6 words
(3) Datalink A, B, C & D - 10 words
Global Data from each 1560-MBP unit: Note the minimum
length of 2 words can be increased up to 10 words by
selectively enabling Datalinks using the dip switches
19
Chapter 4 — Programming Considerations
Contents
Please note that not all A-B Scanport devices
support Datalinks. In particular, the SMC Dialogue
Plus does not. To operate with the SMC Dialogue
Plus do not enable Datalink Messaging.
Modicon Programming Example - MSTR Type 6
enable abort -
40500
40510
MSTR
00010
Contents of registers in control block
- active
40500 = 6 global read data instruction
40501 = 0 Error code
40502 = 10 length of the global data
40503 = 0 number of words available
- success 40504 = 37 slave address to retrieve data from
40510 = Destination address for global data
from slave 37
- error
In the example we configured the Allen-Bradley device to use Datalink output words.
The MSTR 6 instruction (Read Global Data), when programmed in a Host PLC, will
retrieve the Global Data from the 1560-MBP and place it in the Host PLC register
space beginning at address 40510.
4.2.2 Host Issued Read Commands - MSTR Type 2
If the PLC Programmer does not want to use Global Data or if
there is a desire to read more data out of the 1560-MBP, the
MSTR Type 2 Read Command can be used. The MSTR Type 2
Read command has access to all available parameter values
(40101 to 40xxx), in addition to the Control and Status registers
(40001 to 40100).
40001
Write Data – Control, Reference & Data Link IN
40011
Read Data – Feedback & Data Link OUT
40021
Miscellaneous data space
Used for MBP status data (See Section 4.3)
40101
Parameter Register Space
This register space contains the parameter table from the
SCANport device. This paramaters are stored in their
numerical order (example):
40101 = Parameter #1
40102 = Parameter #2
The full length of this space is a function of the SCANport
device connected. Max size is 2000 parameters.
4xxxx
MSTR Type 2 Accessible Data Registers: The memory map for the
registers which a PLC programmer can access from the 1560-MBP using
the MSTR Type 2 command.
20
Chapter 4 — Programming Considerations
Contents
Modicon Programming Example - MSTR Type 2
enable abort -
40050
40060
MSTR
00020
Contents of registers in the control block
40050 = 2 Read Instruction
40051 = 0 Error Code
40052 = 13 Length of the read
- error
40053 = 21 slave register to read (40021)
40054 = 37 Node address to retrieve data from
- success 40055 = 1 Slave Input Path for routing
40060-40092 = data returned from the 1560MBP
- active
The MSTR instruction shown above reads the status registers (40021- 40033) from
the 1560-MBP at Node Address 6, and stores the values in the processor starting at
register 40060. Note that the instruction reserves 20 words for the data block, but we
have chosen to only fill 13 when configuring the command.
Note that the Slave Input Path value must be
entered in order for the command to execute
successfully. Valid values are from 1 to 8. Any
other values will cause the command to fail
21
Chapter 4 — Programming Considerations
4.3
Contents
The MBP Status Registers (40021 to 40100)
The register space between 40021 and 40100 has been set
aside for miscellaneous status data. This data is intended to be
used for assisting in troubleshooting. The following table details
the Status values which are available:
Modbus
Address
Name
Description
Values
40021
SCANport
Status
0 = Offline
1 = Online
40022
Control/Status 0
to
Update
0xFFFF
Counter
This is a rollover counter which
increments each time the 1560MBP received a Status word
update from the SCANport device
40023
Datalink A
Update
Counter
0
to
0xFFFF
This is a rollover counter which
increments each time the Datalink
A update is received from the
SCANport device
40024
Datalink B
Update
Counter
0
to
0xFFFF
This is a rollover counter which
increments each time the Datalink
B update is received from the
SCANport device
40025
Datalink C
Update
Counter
0
to
0xFFFF
This is a rollover counter which
increments each time the Datalink
C update is received from the
SCANport device
40026
Datalink D
Update
Counter
0
to
0xFFFF
This is a rollover counter which
increments each time the Datalink
D update is received from the
SCANport device
40027
Parameter
Read Update
Counter
0
to
0xFFFF
This is a rollover counter which
increments each time a Read
Parameter command (used to
update 40101 to 40xxx) is
received from the SCANport
device.
22
Indicates if 1560-MBP is logged
into the drive. If Drive is powered
down or if SCANport cable
becomes disconnected, the value
will go to offline
Chapter 4 — Programming Considerations
Modbus
Address
Name
Values
0
to
0xFFFF
Contents
Description
40028
Parameter
Write Update
Counter
40029
Not Defined at
this time
Reserved for future use
40030
Not Defined at
this time
Reserved for future use
40031
Product
Revision Firmware
Release
Provides the firmware revision
level. The data should be viewed
in hex mode as follows:
Revision 1.0
0x0010 = 1.0
40032
Product Batch
Number
Provides an independent firmware
batch number used for internal
tracking purposes. This value
should be viewed in hex as follows:
Batch
0x0001 = 1
This is a rollover counter which
increments each time a Write
Parameter command (used to
transfer MSTR Type 1 write data to
the SCANport device) is executed.
23
Chapter 4 — Programming Considerations
Modbus
Address
40033
Name
MBP Status
Contents
Description
Values
This register is used to
communicate the last Invalid
MBP Status value. Possible
values are as follows:
0
to
3
0
1
2
3
No error since power
cycle
Invalid Global Cmd
Request Most likely the
slave address for the
MBP is > 16 and is
configured for Global
Cmd
Invalid Global Length
The host is not configured
to send enough Global
Data to support this
node’s Modbus Plus
address
Invalid Write Range
An MSTR Type 1 write
cmd was received
attemtpting to write into
the 40011 to 40100
address range. The cmd
was disregarded by the
MBP with a successful
response returned to the
host.
Note that this register is only
cleared on power up, and will
only be updated when a new
error condition arises. Therefore
be aware that a non-zero value
will stay in the register after an
initial error condition until the
next power cycle.
40034
to
40100
Not Defined
at this time
Reserved for future use
24
Chapter 5 — Troubleshooting
5
Contents
Troubleshooting
Several hardware diagnostics capabilities have been
implemented using the LED indicator lights on the front of the
1560-MBP card.
5.1
LED Locations
The location of the LEDs on the units are shown in the following
diagrams:
L
Modbus Plus Port Status
N
SCANport Status
G
LED Locations
5.1.1 LED Troubleshooting Table
The following table details the meaning of the LEDs in the 1560MBP unit.
NAME
Modbus Plus
Port Status
Color
Status
Green
Six flashes
per second
The 1560-MBP is working normally in
that it is successfully receiving and
passing the token. All nodes on the link
should be flashing this pattern.
Indication
One Flash
per second
This node is off-line after just being
powered up, or after exiting the four
flashes per second mode. In this state,
the node monitors the network and
builds a table of active nodes and
token-holding nodes. It remains in this
state for five seconds, then attempts to
go to its normal operating state.
25
Chapter 5 — Troubleshooting
NAME
SCANport
Status
Color
Green
Red
Contents
Status
Indication
Two Flashes
then OFF for
two seconds
The node is hearing the token being
passed among other nodes, but is
never receiving the token. Check the
network for an open circuit or defective
termination.
Three Flashes
then OFF for
1.7 seconds
The node is not hearing any other
nodes. It is periodically claiming the
token but finding no other node to
which to pass it. Check the network for
an open circuit or defective termination.
Four Flashes
then OFF for
1.4 seconds
The node has heard a valid message
from another node that is using the
same address as this node. The node
remains in this state as long as it
continues to hear the duplicate address.
If the duplicate address is not heard for
five seconds, the node then changes to
the pattern of one flash every second.
Steady
SCANport connection if OK
Blinking
Check cable connections. Indicates that
the 1560-MBP unit is not able to link up
with the drive’s SCANport. Make sure
that the A-B device supports Datalinks if
the 1560-MBP Datalinks are enabled.
Steady
The SCANport connection has faulted.
Check configuration switch settings,
SCANport cable connections, cycle
power. Contact ProSoft factory support
if problem persists.
26
Chapter 5 — Troubleshooting
5.2
Contents
MBPSTAT Diagnostics
This troubleshooting section applies to Users that have access
to a utility from Modicon called MBPSTAT. This utility is shipped
with the SA-85 Modbus Plus Communications Card, and allows
easy access to Modbus Plus Network status and statistics.
The data that is available with the utility includes:
Active Node List: If there is doubt as to whether or not the
MBP node is seen on the network, this list will show all
active nodes
Global Data: The utility will read the Global Out Data being
transmitted from each node, allowing a user to see the
actual values coming out of any node
Node Statistics: This screen will show you the
communication status and error counters within each node.
This data is useful if unusual communication problems are
occurring
27
Chapter 6 — Cable Diagram
6
Contents
Cable Diagram
The communication connection to the 1560-MBP card is made via a DB9 pin female connection on the front of the card. The physical
terminations are shown in the following diagram:
1560-MBP
DB-9 Female
Modbus Plus
Network
TxRxD+
1
TxRxD+
TxRxD-
2
TxRxD-
COM
3
COM
Refer to the Modicon Modbus Plus Network Planning &
Installation Guide (publication No. GM-MBL-001) for additional
information.
28
Chapter 7 — Technical Support
Contents
7
Technical Support
7.1
Technical Support Contacts
ProSoft Technology survives on its ability to provide meaningful
support to its customers. Should any questions or problems
arise, please feel free to contact us at:
ProSoft Technology, Inc.
9801 Camino Media
Suite 105
Bakersfield, CA 93311
(661) 664-7208
(661) 664-7233 Fax
e-mail : [email protected]
http://www.prosoft-technology.com
Before calling for support, please prepare yourself for the call.
In order to provide the best and quickest support possible, we
will most likely ask for the following information (you may wish
to fax it to us prior to calling):
1.
2.
Product Serial and Version Number
1560-MBP Configuration Information
- Dip Switches
- Communication cabling
29
Appendix A — Modbus Register Map
Contents
Appendix A
1560-MBP Modbus Register Map
1560-MBP
Modbus
Type
R/W
R/W
R/W
R/W
R/W
R/W
R/W
R/W
R/W
R/W
Addr
40001
40002
40003
40004
40005
40006
40007
40008
40009
40010
Description
Command Control Word
Reference Control Word
Adaptor I/O - In A1
Adaptor I/O - In A2
Adaptor I/O - In B1
Adaptor I/O - In B2
Adaptor I/O - In C1
Adaptor I/O - In C2
Adaptor I/O - In D1
Adaptor I/O - In D2
R
R
R
R
R
R
R
R
R
R
40011
40012
40013
40014
40015
40016
40017
40018
40019
40020
40021
–
40100
Status Word
Feedback Word
Adaptor I/O - Out A1
Adaptor I/O - Out A2
Adaptor I/O - Out B1
Adaptor I/O - Out B2
Adaptor I/O - Out C1
Adaptor I/O - Out C2
Adaptor I/O - Out D1
Adaptor I/O - Out D2
MBP Status Registers
See Section 4.3 for details
R/W
R/W
R/W
R/W
R/W
R/W
R/W
R/W
R/W
R/W
40101
40102
40103
40104
40105
Global Data Write if Enabled
Global Data Write if Enabled
Datalink A
Datalink A
Datalink B
Datalink B
Datalink C
Datalink C
Datalink D
Datalink D
Datalink A
Datalink A
Datalink B
Datalink B
Datalink C
Datalink C
Datalink D
Datalink D
Device Parameter List
1
Sequential listing of
2
parameter table in the
3
drive. See A-B Device
4
documentation for
5
complete listing
–
Modbus Address = Parameter Number + 40100
–
Up to
40xxx
Max Parameter in Device
(Up to 2000 max)
All register values in the 1560-MBP are presented in unscaled units.
Please refer to the drive User manual for any necessary scaling
information
30
Appendix B — Device Specific Hints
Contents
Appendix B
Device Specific Hints
SMC Dialogue Plus
The SMC Dialogue Plus does not support Datalinks, therefore the
configuration of SW1-7 and 8 should not include any of the Datalinks
Enabled. If a Datalink is enabled, the SCANport Status LED will toggle,
indicating an error in the SCANport communications.
The version of SMC which was tested (Rev 1.05) had 88 parameters.
Each parameter was accessible in the Modbus register listing shown in
Appendix A. Note that if one of the 88 parameters is to be changed from
a host that the host must enable the EEPROM Storage function by
writing a 2 into the Parameter Management parameter (Parameter 17 Modbus address 40117 ).
SMP 3
The SMP3 does not support Datalinks, therefore the configuration of
Datalinks should not include any of the Datalinks Enabled. If a Datalink
is enabled, the SCANport Status LED will toggle, indicating an error in
the SCANport communications.
The 1560-MBP is able to read all of the parameters out of the SMP3
unit.
Variable Speed Drives
In order to enable Frequency control from the 1560-MBP, the drive
parameter FREQUENCY SELECT 2 must be configured for the
appropriate Adapter ID representing the 1560-MBP module. This will
normally be Adaptor #2, unless a SCANport expander is being used (in
which case this Adaptor number will be based on the port the 1560-MBP
is plugged into).
Setting up the Adaptor I/O - Datalinks Out
Selects the parameter values which will be made available from
the 1560-MBP via Global Data Out. Placement of the values in
the 1560-MBP is referenced in Appendix A.
Data Out
Image
A1
A2
B1
B2
Suggested
Parameter
54
1
23
53
31
Description
Output Current
Output Volts
Output Power
DC Bus Voltage
Appendix B — Device Specific Hints
C1
C2
D1
D2
19
4
Contents
Maximum Frequency
Last fault
Setting up the Adaptor I/O - Data In
Selects the parameters which will be made accessible for configuration/
writing from the 1560-MBP. As with the Data Out parameters, there are
eight possible selections. These may be chosen by the programmer to
meet the needs of the application.
Logic Control Word
Since the most common implementation of the 1560-MBP is with the
variable speed drives, we have included the following table for the more
commonly used control bits. This word should be verified in the A-B
User Manual for the particular device being controlled.
Bit
0
1
2
3
4, 5
Function
Stop
Start
Jog
Clear Faults
Direction
Description
1 = Stop, 0 = Not Stop
1 = Start, 0 = Not Start
1 = Jog, 0 = Not Jog
1 = Clear, 0 = Not Clear
00 = No Command
01 = Forward
10 = Reverse
11 = Hold Direction
Drive Status Word
Since the most common implementation of the 1560-MBP is with the
variable speed drives, we have included the following table for the more
commonly used Status bits. This word should be verified in the A-B
User Manual for the particular device being monitored.
Bit
0
1
2
3
4
5
6
7
8
Function
Enabled
Running
Cmd Direction
Actual Direction
Accel
Decel
Alarm
Fault
At Speed
32
Description
1 = Enabled
1 = Running
1 = Forward, 0 = Reverse
1 = Forward, 0 = Reverse
1 = Accelerating
1 = Decellerating
1 = Alarm Active
1 = Fault Active
1 = At Speed
Appendix C — Peer Cop Example
Contents
Appendix C
Single Drive Peer Cop Application Example
Overview
This example shows how to configure a PLC to control and monitor a
single drive using Peer Cop. Note that this example may easily be
extended to 16 drives on one network. Additional sets of 16 drives may be
controlled by adding Modbus Plus Network Option Modules to the PLC.
In this example, a 984-785E is connected to a 1560-MBP controlling a
1336Plus drive. It is strongly suggested that the user initially follow this
application closely and then modify the application to suit his
requirements. This should minimize the effort required to get your
implementation up and running.
Hardware Configuration
In this application, we have made the following assumptions:
984 Processor Node Address
7
1560-MBP Configuration
Node Address
Data Links Enabled
Global Control
Comm Loss Fault
6
A, B, C, D
Enabled
Disabled
The 1560-MBP Dip Switch 1 Configuration is as follows:
Switch Position
Description
1
Off
Set the Global Data Host PLC to Node 7
2
On
This tells the 1560-MBP which PLC is
3
On
controlling the drive
4
Off
5
Off
6
Off
7
On
8
On
Enable Datalinks A, B,C,D
33
Appendix C — Peer Cop Example
Contents
The 1560 MBP-1560 Dip Switch 2 Configuration is as follows:
Switch
Position
Description
1
On
Set the 1560-MBP Node Address 6
2
Off
3
On
4
Off
5
Off
6
Off
7
On
Enable Global Data Control from a host. Allows
the Control and Reference words to be
obtained from the Host PLC Global Data Block
8
On
Enables Drive fault on loss of Mobus Plus
communication
The Host PLC (984) must also have its dip switches set to Node Address
7 and a proper Modbus Plus cable connected between the PLC and the
1560-MBP.
Configuration Extension Blocks
This section is a PLC printout (using Modsoft) that shows how the PLC’s
Peer Cop is configured.
PEER COP
Timeout : 500 ms Total Links:1 Link Id:1 - Internal
On Error : CLEAR
USED 20 OF 512 WORDS
Access to Node : 6
MODE
REFERENCE
SPECIFIC INPUT
SPECIFIC OUTPUT
GLOBAL INPUT
GLOBAL INPUT
GLOBAL INPUT
GLOBAL INPUT
GLOBAL INPUT
GLOBAL INPUT
GLOBAL INPUT
GLOBAL INPUT
LEN
TYPE
INDEX
1
9
BIN
1
2
-
100001-100016
400200-400208
-
TO ALL NODES ON LINK
GLOBAL OUTPUT 400100-400131 32 BIN
34
Appendix C — Peer Cop Example
Contents
This configuration indicates that PLC words 40100 through 40131 will be
sent in Node 7 (this PLC) Global Data. Since the 1560-MBP is configured to look at Node 7 as the Host, words 40110 will be the Drive
Control word, and 40111 will be the Reference to the drive (The remaining registers are for 1560-MBP units located at nodes 1-5 (words 4010040109), and 7-16 (words 40112-40131). Note that the user could have
configured a length of only 12, and only words 40100-40111 would have
been sent.
The above configuration also has the first Global Input word from Node
6, offset 0, assigned to PLC reference 100001, with the remaining
values (Feedback and Datalinks) stored beginning at 400200.
The Drive Status word will be returned in inputs 100001-100016, as
noted below:
PLC REF
100001
100002
100003
100004
100005
100006
100007
100008
100009
100010
100011
100012
100013
100014
100015
100016
DRIVE STATUS
Bit 15
Bit 14
Bit 13
Bit 12
Bit 11
Bit 10
Bit 9
Bit 8
Bit 7
Bit 6
Bit 5
Bit 4
Bit 3
Bit 2
Bit 1
Bit 0
35
Appendix C — Peer Cop Example
Contents
The Global Input Data from Node 6, starting with offset 1 for a length of
9 words, will be assigned to PLC registers 40200 through 40209. These
are mapped as follows:
PLC RefOffset
40200 Offset 1
40201 Offset 2
40202 Offset 3
40203 Offset 4
40204 Offset 5
40205 Offset 6
40206 Offset 7
40207 Offset 8
40208 Offset 9
Description
Drive Feedback
Datalink Input Word A1 (Configurable in Drive)
Datalink Input Word A2 (Configurable in Drive)
Datalink Input Word B1 (Configurable in Drive)
Datalink Input Word B2 (Configurable in Drive)
Datalink Input Word C1 (Configurable in Drive)
Datalink Input Word C2 (Configurable in Drive)
Datalink Input Word D1 (Configurable in Drive)
Datalink Input Word D2 (Configurable in Drive)
Ladder Logic Programming
Finally, a small amount of programming is added to simplify drive
control. A group of 16 coils, 00001-00016, are block moved into the
word that is mapped to the Drive Control word, 40100.
In our example, coils 00001-00016 are assigned the specific name and
function as shown below:
PLC Ref
000001
000002
000003
000004
000005
000006
000007
000008
000009
000010
000011
000012
000013
000014
000015
000016
PLC Name
MOP DECREMENT
REF SEL1
REF SEL2
REF SEL3
DEC SEL1
DEC SEL2
ACC SEL1
ACC SEL2
MOP INCREMENT
LOCAL LOCKOUT
DIR SEL1
DIR SEL2
DRV RESET
DRV JOG
DRV START
DRV STOP
Description
1 = Decrement, 0=Not
Binary Reference Source Selection 20
Binary Reference Source Selection 21
Binary Reference Source Selection 22
Decellaration Rate Selection
Decellaration Rate Selection
Accelaration Rate Selection
Accelaration Rate Selection
1 = Increment, 0=NOT
1 = Local Lockout, 0 = Not Local
Direction Selection
Direction Selection
1 = Clear Faults, 0 = Not Clear Faults
1 = Jog, 0 = Not Jog
1 = Start, 0 = Not Start
1 = Stop, 0 = Not Stop
36
Appendix C — Peer Cop Example
Contents
This allows a coil to control a specific function in the drive. You could
use bit manipulation instructions operating on word 40100 (such as
MBIT), but it is far simpler to just assign coils to specific functions, and
then move these coils into the Control Word. These coils are then moved
into word 40100 using the simple instruction shown below:
enable abort -
00001
400110
BKLM
00001
- active
- error
- success
Now the user may control specific functions by turning on and off these
coils. For example, to start the drive, the user would turn on coil 15,
which is block moved to word 40100, setting Modicon bit 15 on.
Register 40100 is then transmitted over Modbus Plus via the Peer Cop
to the 1560-MBP, which then turns on bit 1 in the drive control word,
starting the drive. Inputs 100001-100016 may then be examined to
observe feedback, such as run acknowledgment.
Note that by using this approach, the complexity is minimized by setting
up a control structure (peercop) up front once, which may now be easily
copied and duplicated. Also, additional drives may be very easily
controlled by simply adding a few entries to the peercop tables and a
block move to transfer bit states to the drive.
Special Precautions and hints
Timing
Because all parameters to and from the drive must pass through the
SCANport, be careful about adding additional devices, such as the HIM
module, when critical drive communication timing is required. While it
does not affect the transfer of parameters, it does affect the throughput,
which may cause unexpected problems in speed critical applications.
Other devices placed on the network will affect the speed of the Modbus
Plus network. Programming panels and operator interfaces can add
significant network load. Nodes going online or off-line momentarily
disrupt the token passing pattern. For critical drive control, a separate
dedicated Modbus Plus network is recommended.
37
Appendix C — Peer Cop Example
Contents
Addressing
Pay careful attention to the dip switch address configuration. EACH
1560-MBP on the network must have it own unique address. This
MUST also be different from the PLC address. ALL drives should in
general have their Host address set to the PLC ís address.
Hints
Note that the Stop bit is set to 1 to stop drive. If communication is lost,
the PLC is unable to remotely stop the drive. In general, when
controlling drive functions, SW2-8 should be set ON so that the drive will
fault on loss of Modbus Plus communications. In addition, when drives
are controlling hazardous operations, a hard wired interlock to the drive
should be provided.Other devices may be used on the same Modbus
Plus network, but the user must pay close attention to any use of Global
Data to insure compatibility.
38
Appendix D — Mounting & Cabling
Contents
Appendix D
Mounting and SCANport Cabling Instructions
Mounting Instructions
Following are the mounting dimensions and layout drawings for the
enclosed style communication module, such as the 1560-MBP. The
following drawings are excerpted from A-B document 1203-5.5.
44mm
(1.75)
70mm
(2.7)
DIN Rail
DIN Rail
Mounting Clip
45mm
(1.8)
Top View
123mm
(4.8)
45mm
(1.8)
25mm
(1)
DIN
Rail
DINN
Rail
76mm
(3.0)
Side View
Front View
39
25mm
(1)
Appendix D — Mounting & Cabling
Contents
Cable Requirements
SCANport cables are available in either Male to Male or Male to Female
configurations. Cables of up to 10 meters (33 feet) can be connected
from the SCANport device to the 1560-MBP. If a Port Expander is used,
the cable length from the master to the Port Expander must be
subtraced from the cable length used to connect the device to the
expander (B1 + C = max 10 meters).
Generally when selecting a SCANport cable, the Male-Male
configuration will be used. This is true in all cases when
connecting to Ports 2 through 5. If connecting to the HIM
port (Port 1) the Male-Female cable will be required.
Please verify with the Installation Manual for the A–B device the correct
cable configuration. The following drawing, excerpted from A-B
document 1203-5.2, is an example for a 1305 drive installation.
1305 Drive
Port Expander
Port 2
Port 1
2 3 4 5
C
B
Optional
Male-Female
Cable
B
A
Optional
Male-Female
Cable
Human Interface Module
Remote I/O
Communication Module
40
Remote I/O
Communication Module
Appendix E — SCANport Datalinks
Contents
Appendix E
SCANport Datalink Operation
(Excerpted from A-B Publication 1203-5.2 - May 1995)
In the following discussion, the term ‘Datalink’ is used
extensively. When configuring some SCANport devices, the
term ‘Adaptor I/O’ is used in place of Datalink.
A Datalink is a type of pointer used by some SCANport devices to
transfer information between a SCANport communication interface (such
as the 1560-MBP) and a SCANport device (such as a VFD, SMP3, etc.).
Datalinks allow parameter values to be written when the Control
Command and Reference are sent to the SCANport device. Datalinks
also allow parameter values to be read whenever the Status and
Feedback values are read from the SCANport device.
SCANport devices that support Datalinks have a group of parameters for
Datalink configuration. These parameters are identified as ‘Datalink In’
and Datalink Out’ parameters. The Datalink functions are enabled by
setting the appropriate dip switches on SW1 and by configuring the
‘Datalink In’ and Datalink Out’ adapter I/O parameters in the SCANport
device.
Each Datalink consists of two 16-bit words of input and two 16-bit words
of output. Each of the two input words can be configured to write to a
different destination parameter inside the SCAnport device by setting the
two ‘Datalink In’ parameters for that Datalink to the desired destination
parameters. Similarly, each of the two output words is configured by
setting the two ‘Datalink Out’ parameters for that Datalink.
If a Datalink is enabled the value of the parameters pointed to by the
‘Datalink Out’ parameters will be transferred to the 1560-MBP.
Conversely, data values sent into the Datalink registers will be written to
the parameter locations configured in the ‘Datalink In’ parameters. If a
Datalink is not enabled, any data sent to the corresponding 1560-MBP
data space will be ignored.
If no ‘Datalink In’ parameter is configured the SCANport device will
ignore it. The same is true for a ‘Datalink Out’ parameter. A zero usually
represents an un-configured Datalink.
41
Repair and Warranty
Contents
Repair and Warranty
Service and Repair
The 1560-MBP card is an electronic product, designed and
manufactured to function under somewhat adverse conditions. As with
any product, through age, misapplication, or any one of many possible
problems, the card may require repair.
The 1560-MBP product has a one year parts and labor warranty
according to the limits specified in the warranty. Replacement and/or
returns should be directed to the distributor from whom the product was
purchased. If you need to return the card for repair, it is first necessary
to obtain an RMA number from ProSoft Technology. Please call the
factory for this number and display the number prominently on the
outside of the shipping carton used to return the card.
General Warranty Policy
ProSoft Technology, Inc. (Hereinafter referred to as ProSoft) warrants
that the Product shall conform to and perform in accordance with
published technical specifications and the accompanying written
materials, and shall be free of defects in materials and workmanship, for
the period of time herein indicated, such warranty period commencing
upon receipt of the Product.
This warranty is limited to the repair and/or replacement, at ProSoft’s
election, of defective or non-conforming Product, and ProSoft shall not
be responsible for the failure of the Product to perform specified
functions, or any other non-conformance caused by or attributable to: (a)
any misapplication of misuse of the Product; (b) failure of Customer to
adhere to any of ProSoft’s specifications or instructions; (c) neglect of,
abuse of, or accident to, the Product; or (d) any associated or
complementary equipment or software not furnished by ProSoft.
Limited warranty service may be obtained by delivering the Product to
ProSoft and providing proof of purchase or receipt date. Customer
agrees to insure the Product or assume the risk of loss or damage in
transit, to prepay shipping charges to ProSoft, and to use the original
shipping container or equivalent. Contact ProSoft Customer Service for
further information.
42
Repair and Warranty
Contents
Limitation of Liability
EXCEPT AS EXPRESSLY PROVIDED HEREIN, PROSOFT MAKES NO
WARRANT OF ANY KIND, EXPRESSED OR IMPLIED, WITH
RESPECT TO ANY EQUIPMENT, PARTS OR SERVICES PROVIDED
PURSUANT TO THIS AGREEMENT, INCLUDING BUT NOT LIMITED
TO THE IMPLIED WARRANTIES OF MERCHANT ABILITY AND
FITNESS FOR A PARTICULAR PURPOSE. NEITHER PROSOFT OR
ITS DEALER SHALL BE LIABLE FOR ANY OTHER DAMAGES,
INCLUDING BUT NOT LIMITED TO DIRECT, INDIRECT, INCIDENTAL,
SPECIAL OR CONSEQUENTIAL DAMAGES, WHETHER IN AN
ACTION IN CONTRACT OR TORT (INCLUDING NEGLIGENCE AND
STRICT LIABILITY), SUCH AS, BUT NOT LIMITED TO, LOSS OF
ANTICIPATED PROFITS OR BENEFITS RESULTING FROM, OR
ARISING OUT OF, OR IN CONNECTION WITH THE USE OR
FURNISHING OF EQUIPMENT, PARTS OR SERVICES HEREUNDER
OR THE PERFORMANCE, USE OR INABILITY TO USE THE SAME,
EVEN IF PROSOFT OR ITS DEALER’S TOTAL LIABILITY EXCEED
THE PRICE PAID FOR THE PRODUCT.
Where directed by State Law, some of the above exclusions or
limitations may not be applicable in some states. This warranty provides
specific legal rights; other rights that vary from state to state may also
exist. This warranty shall not be applicable to the extent that any
provisions of this warranty is prohibited by any Federal, State or
Municipal Law that cannot be preempted.
Hardware Product Warranty Details
Warranty Period: ProSoft warranties hardware product for a period of
one (1) year.
Warranty Procedure: Upon return of the hardware Product ProSoft will,
at its option, repair or replace Product at no additional charge, freight
prepaid, except as set forth below. Repair parts and replacement
Product will be furnished on an exchange basis and will be either
reconditioned or new. All replaced Product and parts become the
property of ProSoft. If ProSoft determines that the Product is not under
warranty, it will, at the Customer’s option, repair the Product using
current ProSoft standard rates for parts and labor, and return the
Product freight collect.
43
Contents
Power, input and output (I/O) wiring must be in accordance with
Class I, Division 2 wiring methods, Article 501-4 (b) of the
National Electrical Code, NFPA 70 and Section 18-152 for
installation within Canada.
A. This equipment is suitable for use in Class I, Division 2,
Groups A, B, C, and D or nonhazardous locations only.
B. Warning – Explosion hazard – Substitution of components
may impair suitability for Class I, Division 2.
C. Warning – Explosion hazard – When in hazardous locations,
turn off power before replacing or wiring modules.
D. Warning – Explosion hazard – Do not disconnect equipment
unless power has been switched off or the area is known to
be nonhazardous.
9801 Camino Media
Suite 105
Bakersfield, CA 93311
(661) 664-7208
(661) 664-7233 Fax
e-mail : [email protected]
http://www.prosoft-technology.com
44