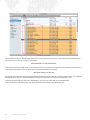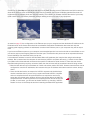
1
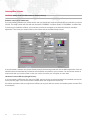
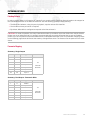
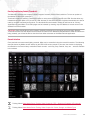
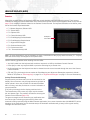
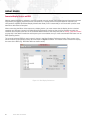
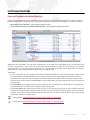
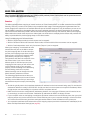
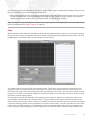
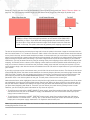
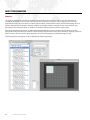
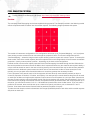
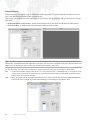
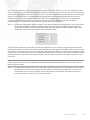
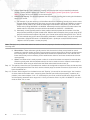
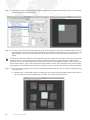
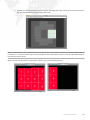
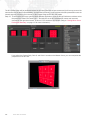
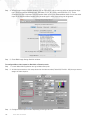
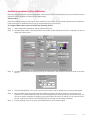
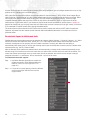
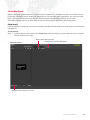
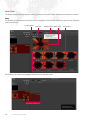
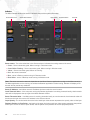
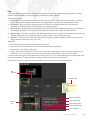
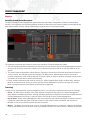
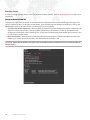
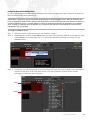
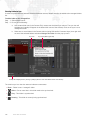
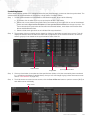
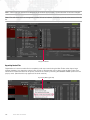
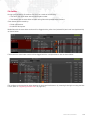
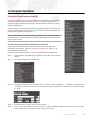
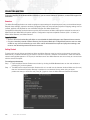
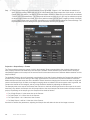
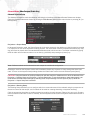
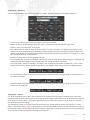
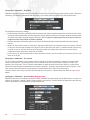
ADVANCED PIXEL-MAPPING
Creating Custom Fixtures
Mbox Mini allows you to create custom fixture profiles for
use in your patch. At the Pixel Map tab, click on the
Fixture Type pop-up menu and choose Create New
Profile. A window will open to enable you to set up a new
fixture profile.
You can select the shape of the pixels (rectangle or circle)
that your new fixture will display on the screen, the type
of fixture (RGB, CMY, CYM, and so on), and its rotation
(in degrees). The "Pixel Fill" slider will determine the fill
factor of the fixture’s pixels, i.e. whether they completely
fill their context grid rectangle or not. The pixel fill control
has no effect on the Art-Net or KiNET output, it is merely
used to help you better visualize certain fixtures. On the
other hand, the "Fixture Level" slider does have an effect
on the Art-Net output. The fixture level is a mastering
control for the Art-Net or KiNET levels generated by this fixture type. At any level below 100%, the fixture will be
dimmed proportionally.
The "Mask" checkbox allows you designate fixtures that will be suppressed (all color or intensity levels sent to 0)
when the pixel map control channel on the Camera fixture is set to 254 (suppress masked fixtures). The mask attribute
is intended for use with fixtures that have two sources of color information - from both the Mbox server and a lighting
console. For shared control in these situations, a DMX512 merger (in HTP mode) can be used to merge the outputs of
the Mbox server and the lighting console. In order to give the lighting console control over the fixtures’ color, Mbox
must reduce its pixel-map output levels for the fixture to 0. At times it may be impractical to reduce output on only a
few fixtures, especially if the Mbox server is also outputting video. Suppressing fixtures (even just a few) would require
dimming the output or removing content to make screen pixels black and would affect other fixtures and the video
output as well. The mask attribute allows you to turn off fixtures without affecting the overall video composition, while
still retaining output from fixtures that do not have the mask attribute turned on. When masked fixtures are
suppressed, the lighting console can be used to modify the attributes that the Mbox server would otherwise have
control over. For CMY and CYM fixtures that use a value of 0 for open white, use the mask attribute to give control to
the console. In this case, a value of 255 is sent for black and, since 255 is higher than 0, the console cannot take
control if Mbox dims the pixel.
The "Slew Rate" setting provides the ability to limit the speed at which fixtures can change color. This control is
particularly useful with moving lights as the rapid color changes possible when pixel-mapping may cause excessive
noise or even damage to the fixture. The default slew rate is 0 seconds - Mbox will allow the fixture to change color as
fast as it can. The other settings allow you to reduce the speed of the changes progressively, up to a maximum of 8
seconds. While the slower speeds are impractical for realistic video mapping, they can be used to create a particular
"look."
The final step in fixture creation is to define the scan order of the pixels in the fixture. A fixture’s scan order is the order
in which the pixels of the fixture are addressed. For a fixture that is a single line of pixels this is easy; it goes from one
side to the other in order. If you create a linear fixture, the only scan order selection that matters is the origin setting;
the direction and sequence will be determined by the height and width. A horizontal fixture’s origin would be left or
right and a vertical fixture’s origin would be top or bottom. For either of these linear fixture types you can select either
of the choices that include the side on which you want the origin to be placed. For example, if your fixture is 16px x 1px
(W x H), then its orientation can be on the left or the right. Choosing either Top-Left or Bottom-Left for the origin pixel
will ensure that the origin is at the left side of the fixture.
For a rectangular fixture the origin is far more important. Again, width and height should be set to match the
orientation in which the fixture will typically be used. Now you must select the origin of the fixture, which is always in
one of the corners of the fixture. You then select whether the scan moves in a vertical or horizontal fashion – this will
MBOX® MINI USER MANUAL
83