1
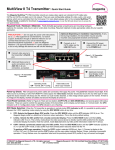
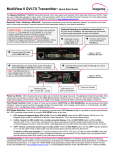
TM MultiView II DVI-TX Transmitter Installation and User Guide Document # 5310258-01 Rev-01 (12/19/2011) © 1998-2011 by Magenta Research, Ltd. All rights reserved. Magenta Research, Ltd. 128 Litchfield Road New Milford, CT 06776 USA This document and the Magenta Research Ltd. products to which it relates, and the copyright in each, is the property of Magenta Research Ltd. Neither the document nor the products may be reproduced by any means, in whole or in part, without the prior written permission of Magenta Research. Magenta Research makes no warranty or representation, either express or implied, with respect to this software or documentation, including their quality, performance, merchantability, or fitness for a particular purpose. As a result, this software or documentation is licensed "as is" and you, the licensee, are assuming the entire risk as to their quality and performance. In no event will Magenta Research be liable for direct, indirect, special, incidental, or consequential damages arising out of the use of or inability to use the hardware, software or documentation. Magenta Research and the Magenta Research logo are trademarks of Magenta Research, Ltd. All other brands, product names, and trademarks are the property of their respective owners. Magenta Research reserves the right to change product functionality and/or specifications at any time without prior notification. MultiView™ II DVI-TX Installation and User Guide ii Precautions Precautions Safety Instructions ● English This symbol calls attention to important information. This symbol is intended to alert the user of important maintenance (servicing) and operating information. This symbol is intended to alert the user to the presence of un-insulated dangerous voltages or other conditions in or around the product enclosure which may present a risk of electric shock, damage to equipment or facilities. Caution: Read instructions: Read and understand all operating, installation and safety instructions before using this equipment. Avoid Attachments: Do not use accessories, attachments, tools or materials that are not recommended by the equipment manufacturer. Doing so may compromise operating performance, create an unsafe condition, damage equipment, or violate the terms of usage or warranty. Follow Warnings: Always follow all instructions and warnings marked on the equipment or as detailed in the related user documentations. MultiView™ II DVI-TX Installation and User Guide iii Contact Information Contact Information For sales or technical support, contact your nearest Magenta Research sales office. REGION CONTACT DETAILS North, Central and South Americas: Magenta Research, LTD Corporate Headquarters 128 Litchfield Road New Milford, CT 06776 USA Main: 800-805-0944 (USA only) or +1 860-210-0546 Fax: 1-860-210-1758 Web: www.magenta-research.com Sales: [email protected] Support: [email protected] Sales/Support phone hours: 8:30-17:30 (EST: GMT-0500) Asia: Magenta Research Asia Limited Unit 1 21/F Cheung Tat Centre Chai Wan, Hong Kong Main: 852.3105.1493 Fax: 852.3105.1491 Contact: [email protected] Sales: [email protected] Pan European Office: Magenta Research, LTD Main: +44 7708-850582 Contact: [email protected] Sales: [email protected] For all RMA return shipments, use this address unless you are advised otherwise: Magenta Research, LTD RMA Department 128 Litchfield Road New Milford, CT 06776 USA Prior to returning any products, please contact Magenta’s support line to obtain an RMA number. This RMA number is essential for tracking your returns and for ensuring they are processed in a timely manner. Support Phone: 800-805-0944 (USA only) or +1 860-210-0546 Support e-mail: [email protected] Support phone hours: 8:30-17:30 (EST: GMT-0500) MultiView™ II DVI-TX Installation and User Guide iv Table of Contents Table of Contents Page Chapter 1 About this Manual ...................................................................................................................... 1 Chapter 2 Product Overview....................................................................................................................... 2 2.1 Front Panel interfaces ..................................................................................................... 2 2.2 Rear Panel interfaces ..................................................................................................... 2 Chapter 3 Specifications ............................................................................................................................. 3 3.1 General Specifications .................................................................................................... 3 3.2 DVI Interface ................................................................................................................... 4 3.3 DDC/EDID Support ......................................................................................................... 5 3.4 Auxiliary Signal Support .................................................................................................. 6 3.4.1 Auxiliary Signal support: (A) and (S) versions ................................................ 6 3.4.2 Auxiliary Signal support: (232) version ........................................................... 7 3.4.3 Auxiliary Signal support: (SA) version ............................................................ 7 3.4.4 Auxiliary Signal support: (SAP) version .......................................................... 8 3.5 CAT5 Cable Compatibility ............................................................................................... 8 Chapter 4 Installation .................................................................................................................................. 9 4.1 Prerequisites ................................................................................................................... 9 4.2 Installation Procedure ................................................................................................... 10 4.3 Configuration ................................................................................................................. 12 4.3.1 User-Configurable Settings........................................................................... 12 4.3.2 DDC/EDID Settings ...................................................................................... 13 4.4 Sync Settings ................................................................................................................ 14 4.5 4th Pair Settings ............................................................................................................. 15 Chapter 5 Troubleshooting ....................................................................................................................... 16 Appendix A Connector Pinouts ................................................................................................................... 18 Appendix B Option Module Settings: DVI-TX-232....................................................................................... 23 Appendix C Option Module Settings: DVI-TX-SAP ..................................................................................... 25 Appendix D Mounting Kits ........................................................................................................................... 28 Appendix E System Design Drawings ......................................................................................................... 29 Appendix F Regulatory Compliance Information......................................................................................... 30 INDEX 31 MultiView™ II DVI-TX Installation and User Guide v About this Manual Chapter 1 About this Manual This manual contains information about the Magenta MultiView™ II DVI-TX transmitter (hereafter referred to simply as “DVI-TX”). This includes: Product overview (Chapter 2). Product specifications (Chapter 3). Installation and configuration instructions (Chapter 4) Troubleshooting (Chapter 5). Additional information (Appendices). The Magenta MultiView™ II family of products introduces greater compatibility for handling HD video standards, as well as making nearly all user-configurable options “jumperless” via a digital front-panel user-interface. The DVI-TX is available in five factory-configured versions: MVII-DVI-TX-A: o Supports L+R summed audio (user-configuration setting). MVII-DVI-TX-S: o Supports simplex serial (user-configuration setting). MVII-DVI-TX-232: o Supports 9-wire RS-232 serial (simplex or duplex TX/RX with hardware handshaking). o Contains the (232) option module. MVII-DVI-TX-SA: o Supports 3-wire RS-232 serial (simplex or duplex), and true stereo audio. o Contains the (SA) option module. MVII-DVI-TX-SAP: o Supports 3-wire RS-232 serial (simplex or duplex), and true stereo audio. o The serial feature is POLLABLE, so that multiple receivers on a daisy-chained link can be addressed individually for display control or status-query. o Contains the (SAP) option module. This equipment is not intended for, nor does it support, distribution through an Ethernet network. Do not connect these devices to any sort of networking or telecommunications equipment! Use only Magenta Research LTD approved MultiView™ II power adapters. Failure to do so may damage this device and will void the warranty. MultiView™ II DVI-TX Installation and User Guide 1 Product Overview Chapter 2 Product Overview The DVI-TX is a video transmitter compatible with the entire Magenta MultiView™ family of products. This is the first device capable of effectively bridging the digital-to-analog gap. Previously, MultiView™ video extension and distribution systems were only compatible with analog video standards. The DVI-TX allows high-resolution DVI digital video to be fed into an otherwise purely analog system, not only for new systems, but also enabling digital-video upgrades to existing MultiView™ extension and switching systems. 2.1 Front Panel interfaces The front panel of the DVI-TX has the following ports, controls, and indicators: DB9 serial port (optional) Auxiliary signals DC input power port COPY/CFG button CFG mode indicator Video-status & DDC-copy indicator DDC MODE/SEL button Power-on indicator There are two buttons (COPY/CFG and DDC MODE/SEL) and several green LED status indicators. All are used to display and control the operating modes of the transmitter, with the LEDs having multiple functions. In “normal mode”, the CFG indicator is off. In “configuration mode”, the CFG indicator is on. 2.2 Rear Panel interfaces The rear panel of the DVI-TX has the following ports: UTP (link) output port Local video output to display (optional) MultiView™ II DVI-TX Installation and User Guide Video input (from source) 2 Specifications Chapter 3 3.1 Specifications General Specifications Item Description Cable Required Category 5, 5e, 6 cable. Shielded or unshielded twisted pair. Low-skew. Compliance CE, FCC Class A, IC Class / Class A, UL listed I.T.E Device, RoHS. Video Support DVI-D, and HDMI by using a connector adapter for unprotected content only (non-HDCP). Resolution & Refresh Rate See DDC/EDID chart located in section 3.3. Interface Signal Details Video-input: Standard DVI-D interface specifications apply. DDC/EDID is supported. Standard auxiliary Signals (including -A and –S versions): L+R summed audio input: 47K ohms input impedance. A source device with 600 ohms maximum output impedance is recommended.(analog audio input mode). Simplex RS-232 input: 4.75K ohms input impedance (RS-232 mode). SPDIF input: 75 ohms input impedance (S/PDIF input mode). Duplex (232) option module: Audio: Not supported. Duplex input: 4.75K ohms input impedance. Duplex (SA) or (SAP) option modules: Stereo L/R audio input: 10K ohms input impedance. A source device with 600 ohms maximum output impedance is recommended. RS-232 input: 4.75K ohms input impedance. Local-output port drive impedance Standard DVI interface specifications apply (at local video-output port). DDC/EDID is supported. Audio Characteristics Standard (A) version: Left+Right summed audio. (232) version: This option module does not support audio. (SA) & (SAP) versions: Left/Right true stereo audio. Serial Characteristics Standard (S) version: Simplex-serial, any speed up to 115.2K baud. Transparent to format and protocol. Duplex (232) version: Any speed up to 115,200 baud (depending on application). Transparent to format and protocol. Refer to Appendix-B for more information. Duplex (SA) version: Speed fixed at 9600 baud. Transparent to format and protocol. Duplex (SAP) version: Speed is adjustable in 9 steps from 1200 to 115K BAUD; format is fixed to 8 data no parity; transparent to protocol. Connectors Standard connectors: (2) DVI-female: Video in/out. (1) RJ-45: MultiView CAT5 link output. (1) 4 position phoenix: Auxiliary signal input. (1) Coaxial (5.5mm OD, 2.5mm ID, 11mm L) jack: DC power input. For (232), (SA) or (SAP) versions: (1) DB9-F: Serial I/O. Temperature Tolerance Operating: 32 to 104°F (0 to 40°C) Storage: -4 to +140°F (-20 to +60°C) Humidity Tolerance Up to 80% noncondensing Enclosure Steel, black powder-coat finish. Power Input voltage: +5 VDC @ 1.2 Amps max. Consumption: 6 watts maximum Size 1.2"H x 4.2"W x 4.3"D (3.1 x 10.4 x 10.9 cm) Weight 1.0 lb. (0.45 kg) MTBF 100,000 hours MultiView™ II DVI-TX Installation and User Guide 3 Specifications 3.2 DVI Interface The DVI interfaces (video-in and local video-out) have the following characteristics: Item Video Support Video Connectors Audio Characteristics EDID/DDC HDMI HDCP CEC Description Video input formats (video input port): Maximum resolution supported = 1080p or 1920x1200. Maximum color-depth = 24 bits per pixel (8 bits per color). Maximum refresh rate = 60Hz @ 1920x1200. Preferred image aspect ratio: 16:9. Video output formats (local output port): The local port is essentially a direct copy of the video input port. (1) DVI-I input connector, (1) DVI-I output connector. * Note: The analog VGA signals on the DVI-I connector are not supported. Embedded digital audio is not supported. * For summed L+R analog-audio input, please select the 4th-pair configuration setting accordingly. * For stereo analog-audio input, please use an SA or SAP option module. This module supports the EDID/DDC connections on the DVI-I connectors. It is usually possible to connect to HDMI devices (via a plug-adapter or cable-adapter) if the source device is providing un-protected content only (non-HDCP). Embedded HDMI audio is not supported. Not supported, even if a “HDMI-to-DVI” plug-adapter or cable-adapter is used. Not supported, even if a “HDMI-to-DVI” plug-adapter or cable-adapter is used. MultiView™ II DVI-TX Installation and User Guide 4 Specifications 3.3 DDC/EDID Support For best compatibility with source devices (ex: a PC), an extension device (DVI-TX in this case) should provide an appropriate DDC/EDID profile with the proper resolution and timing information. This helps ensure best compatibility with display devices connected at the remote end. The DVI-TX supports a simple yet very flexible DDC/EDID management scheme: The built-in factory-default DDC/EDID profile supports a number of standard resolutions and timing information that is widely compatible with many displays. A specific DDC/EDID profile can be copied from a particular display and stored inside the DVI-TX’s nonvolatile memory. This method enables the best possible compatibility with a specific display that would otherwise not work properly if simply using the factory-default DDC/EDID profile. Finally, the DVI-TX supports a “pass-through” mode, where the DDC/EDID profile of a locally attached display is passed directly to the video source. This can be very helpful in diagnosing certain resolution or timing related display issues, but generally is not used on a permanent basis (though it is safe to do so). DDC/EDID Parameter: Manufacturer name string Monitor name string Established timings Detailed timings CEA video formats Specific timings Presented to the source when using the DVI-TX transmitter: MRI Magic Display 640x480@60Hz 800x600@60Hz 1024x768@60Hz 1280x1024@60Hz 1360x768@60Hz 1600x1200@60Hz 1680x1050@60Hz 1920x1080@60Hz 1920x1200@60Hz 1920x1080@60Hz 720x480p@(59.94,60Hz)@4:3 720x576p@50Hz@4:3 1280x720p@50Hz@16:9 1280x720p@(59.94,60Hz)@16:9 1920x1080p@50Hz@16:9 1920x1080p@(59.94,60Hz)@16:9 1280x720@60Hz [email protected] [email protected] MultiView™ II DVI-TX Installation and User Guide 5 Specifications 3.4 Auxiliary Signal Support The DVI-TX is available in five factory-configured models, which allow different types of signals to be passed over the 4th-pair on the CAT5 cable. These are configured differently by a front-panel setting, or may include an internal hardware option-module. MVII-DVI-TX-A: o Supports L+R summed audio (user-configuration setting). MVII-DVI-TX-S: o Supports 2-wire RS-232 serial in simplex mode (user-configuration setting). MVII-DVI-TX-232: o Supports 9-wire RS-232 serial (simplex, or duplex with hardware handshaking). o Contains the (232) option module. MVII-DVI-TX-SA: o Supports 3-wire RS-232 serial (simplex or duplex), and true stereo audio. o Contains the (SA) option module. MVII-DVI-TX-SAP: o Supports 3-wire RS-232 serial (simplex or duplex), and true stereo audio. o The serial feature is POLLABLE, so that multiple receivers on a daisy-chained link can be addressed individually for display control or status-query. o Contains the (SAP) option module. Note: A user-configuration setting allows either the (A) or (S) versions to support digital S/PDIF audio. The option module (232/SA/SAP) is a factory-installed option. However, a field upgrade to a (232), (SA) or (SAP) version is possible. It will require some minor technical skill to install the module. Please contact Magenta Research for information and assistance for these upgrades. Note that for each DVI-TX version above, the accompanying receiver device (MV500, AK600, AK1200, XR2000, etc.) must be similarly configured. For more specific information on MultiView™ receivers, please refer to the user-guide provided with your desired receiver. 3.4.1 Auxiliary Signal support: (A) and (S) versions The DVI-TX models without any option module installed are capable of one of these auxiliary functions at a time, selected by a user-configuration setting: (A) Version: Analog L+R summed audio. (S) Version: Simplex RS-232 support. o Provides simplex (TX-only) serial data, even with daisy-chained receivers. o Data is transmitted to all attached receivers. No data can ever be received. o Receivers are not individually addressable. o RS-232 interface supports a 2-wire interface: TX/GND. o Baud rates up to 115.2K is supported. No settings required. o Transparent to format and protocol. User-configurable option: S/PDIF digital audio. MultiView™ II DVI-TX Installation and User Guide 6 Specifications 3.4.2 Auxiliary Signal support: (232) version The DVI-TX-232 comes equipped with an internal hardware (232) option module, enabling full-duplex RS-232 serial. This includes hardware handshaking signal support. Note that the (232) module itself does have some user-configurable settings which must be selected by internal jumpers (not through the front-panel buttons). It is important to set these internal jumpers correctly for your specific application. See Appendix-B. Simplex or Duplex RS-232 support. o Provides simplex serial data to single or daisy-chained multiple receivers. o Provides duplex serial data for point-to-point links (1 transmitter 1 receiver). o Data is transmitted and received using “broadcast” mode. o Receivers are not individually addressable. o RS-232 interface supports a 9-wire interface: TXD/RXD/RTS/CTS/DTR/DSR/DCD/RI/GND. Handshaking modes depend on (232) module configuration. See Appendix-B. o Baud rates up to 115,200 are supported. Available baud rates depend on (232) module configuration. See Appendix-B. Audio: No audio is supported when the (232) module is installed. The AUX-I/O connector on the DVI-TX is ignored. In applications where a DVI-TX-232 transmitter is routed through a DA (Distribution Amp, such as a MultiView 9D for example), or a Mondo (or other) video switch, the (232) module will provide simplex serial (TX-only) and transmit-direction handshaking signals (RTS/DTR). In this configuration, all receive-direction signals (RX/CTS/DSR/DCD/RI) are ignored. 3.4.3 Auxiliary Signal support: (SA) version The DVI-TX-SA comes equipped with an internal hardware (SA) option module, enabling full-duplex RS-232 serial (no hardware handshaking signals) and stereo audio. Note that the (SA) module itself does not have any user-configurable settings. Simplex or Duplex RS-232 support. o Provides simplex or duplex serial data, even with daisy-chained receivers. For duplex support with daisy-chained receivers: It is required that the display devices have their own “addressing” capability. o Data is transmitted and received using “broadcast” mode. o Receivers are not individually addressable. o RS-232 interface supports a 3-wire interface: TXD/RXD/GND. o Baud rate is fixed at 9600. Audio: L/R true stereo audio is supported simultaneously with serial data. Note that in cases where a DVI-TX-SA transmitter is routed through a DA (Distribution Amp, such as a MultiView 9D for example), or a Mondo (or other) video switch, the (SA) module will provide simplex serial (TX-only) and audio. In this mode, receive-direction serial data (RX) is ignored. MultiView™ II DVI-TX Installation and User Guide 7 Specifications 3.4.4 Auxiliary Signal support: (SAP) version The DVI-TX-SAP comes equipped with an internal hardware (SAP) option module, enabling full-duplex RS-232 serial (no hardware handshaking signals) and stereo audio. Note that the (SAP) module itself does have some user-configurable settings that can be changed by on-board DIP-switches (not through the front-panel buttons). Simplex or Duplex RS-232 support. o Provides simplex or duplex serial data, even with daisy-chained receivers. o Data is transmitted and received using “broadcast” mode by default. o If desired, receivers are individually addressable. o RS-232 interface supports a 3-wire interface: TX/RX/GND. o Baud rate is adjustable in 9 steps from 1200 to 115K BAUD. The factory-default speed is 9600 BAUD. o Note: The SAP transmitter and receivers modules must have their SAP-address configured correctly. The factory-default setting for all (SAP) modules is address-0. This is the “broadcast” address. Note: All SAP-address configuration changes (via DIP switches, see Appendix C) should be done before making any cable connections and applying power. Audio: L/R true stereo audio is supported simultaneously with serial data. o Audio gain/mute settings are under serial control. The (SAP) module provides many additional user-configurable settings, available through the serial port. Please refer to the SAP-II Programmer’s Guide for additional details. Note that in cases where a DVI-TX-SAP transmitter is routed through a DA (Distribution Amp, such as a MultiView 9D for example), or a Mondo (or other) video switch, the (SAP) module will provide simplex serial (TXonly, though the addressable-receiver feature still works), and audio. In this mode, receive-direction serial data (RX) is ignored. 3.5 CAT5 Cable Compatibility The MultiView™ family of products enable the highest quality video extension over common Category 5 (CAT5) cable. In some applications, system design or environmental factors can require the use of CAT5e and CAT6 cabling (with and without optional shielding). Each installation may have special requirements, and it is up to the system designer to determine the most appropriate type of cable to deploy with MultiView™ products. In any case, if there is any doubt with regards to a specific type of cable it is strongly advised that actual testing be performed using an appropriate length of the desired cable – BEFORE that cable is specified and installed. The DVI-TX transmitter supports a daisy-chain CAT5 connection to multiple receivers. This allows one video source to be sent to many displays at the same time – with the absolute minimum amount of signal degradation possible. Magenta Research products are compatible with standard CAT5/5e/6 data cabling as well as specialized “low skew” cabling manufactured primarily for video applications. Note that some “low skew” cabling is specific to a particular equipment vendor or application and may not compatible with MultiView products. Please ensure any “low-skew” CAT5 cable is non-proprietary prior to purchase/installation. Standard CAT6 cable, due to the manufacture method, can exhibit much greater skew than standard CAT5/5e and may require skew compensation beyond what the standard product offers. Please contact Magenta Research for assistance. The CAT5/5e/6 cable should be suitably rated Listed cable (DUZX) communication cables, TYPE CMP, CMR, CMG or CM as designated in the NEC. Cables are to be installed in accordance with the NEC and local building and electrical codes. This is the responsibility of the end user/installer of this product. MultiView™ II DVI-TX Installation and User Guide 8 Installation Chapter 4 Installation CAT5/5e/6 cabling for the Magenta MultiView™ II Series must be pinned to the TIA-EIA T568B wiring specification. Figure 1 T568B CAT5 Specification We also highly recommend that all CAT5 cables be pre-terminated and tested. Cables terminated on-site or in an existing infrastructure should be tested before use to ensure compliance with the TIA-EIA T568B specification. Using incorrectly terminated CAT5 cables can damage the Magenta MultiView™ II Series. This equipment is not intended for, nor does it support, distribution through an Ethernet network. Do not connect these devices to any sort of networking or telecommunications equipment! Do not connect DC power until instructed to do so. 4.1 Prerequisites Depending on the specific installation requirements, some common tools (screwdrivers, nut-drivers) and related hardware (mounting screws) may be required. These are not provided with Magenta products. The following items may be necessary, which are available from Magenta Research: Appropriate audio cabling. DVI video cable and/or HDMI/DVI connector adapter, as needed. Serial cable with DB9 connectors. Of course, you will need appropriate CAT5 cable, as previously described, to connect the DVI-TX to MultiView receivers and other MultiView devices. MultiView™ II DVI-TX Installation and User Guide 9 Installation 4.2 Installation Procedure All units must be the same type for all supported features to function correctly. For example, a “DVITX-232” transmitter must be connected to a MultiView “-232” type receiver for the serial interface to function properly. You cannot mix one version of a DVI-TX with a different version of a MultiView receiver. Video modes may function normally, but 4th pair options will not. Ensure all connectors are clean and free of contaminants prior to making the connections. Appropriate connector locking hardware (screws/latches) should be used to prevent cables from disconnecting or causing intermittent operation. At the DVI-TX transmitter end: 1. Connect the source video to the Magenta MultiView™ II Series transmitter video input port, which is a standard DVI connector labeled DVI IN. 2. If desired, attach a local monitor to the DVI connector labeled LOCAL OUT. 3. Connect the CAT5 cable to the transmitter LINK OUT port. 4. Make your audio or serial connections via the phoenix AUX I/O connector or DB9 “IOIO” serial connector, as appropriate for your DVI-TX transmitter model. 5. Apply power on the transmitter. a. The power-on LED should turn on. All other LEDs should execute a power-up test sequence. b. If the video source is providing a valid video signal, the Video status indicator should turn on. c. If there’s a local monitor attached, a video image should appear on the monitor’s screen. 6. Remember to make any required configuration changes via the LED/button user-interface. Connect the CAT5 cable to the LINK OUTOUT port. (Optional) Connect local display to the LOCAL OUT port. Connect a video source to the DVI IN port. DVI-TX Transmitter Rear View (Optional) Make your serial and/or audio connections via the DB9 IOIO or AUX I/O connectors, as needed. Note: The DB9 serial port is only available when the “232”, “SA” or “SAP” option is present. Connect the DC power cable (+5VDC @ 3A. max) to the POWER port. DVI-TX Transmitter Front View Power-on indicator Video status and DDC-copy indicator MultiView™ II DVI-TX Installation and User Guide 10 Installation At the receiver end (these steps are generic - refer to the appropriate receiver manual): 1. Connect the VIDEO OUTPUT connector to the display, and attach any audio (AUX I/O) and/or serial connections (IOIO) depending on the model of MultiView™ receiver and option module installed. 2. Connect the CAT5 cable to the LINK IN connector. If you are daisy-chaining multiple receivers, also connect the downstream CAT5 cable to the LINK OUT port on the receiver. 3. Apply power to the receiver. a. The power-on LED should turn on. b. The status-LED should turn on (Green). 4. Make any required configuration changes via the LED/button user-interface, if the receiver is equipped with this capability. 5. Adjust the receiver’s EQ and/or SKEW (optional) settings. If this adjustment is not made, it can result in a poor or no image on the display. MultiView™ II DVI-TX Installation and User Guide 11 Installation 4.3 Configuration 4.3.1 User-Configurable Settings The DVI-TX has a number of configurable operating parameters, and the factory-default settings will work in most applications. However, some applications may require configuration changes. Nearly all settings are available from the front-panel buttons/LEDs. The enclosure does not need to be opened unless an option module is being installed or removed, or settings specific to the option module need to be changed. The DDC MODE selection is done in NORMAL operating mode (CFG indicator is off). Just press the DDC MODE button to change the DDC operating mode. For all other configuration settings, the DVI-TX must be in CONFIG mode (CFG indicator is on). Once in CONFIG mode, any changes are effective immediately and are saved in non-volatile memory. To enter configuration-mode: Press CFG button once. The CFG indicator will turn on, confirming you are in configuration-mode. Once in this mode, the LED indicators 1-8 will display the current settings as described in the tables below. To exit configuration-mode: Leave the buttons untouched for 10 seconds. The CFG indicator will turn off (normal-mode). To quickly reset all user-configurable options back to factory-default settings: Disconnect the DC power cable (or AC power). Press and hold the CFG button. Connect the DC power cable (or AC power). All LEDs blink 3 times, indicating all settings are now changed back to factory-defaults. Release the CFG button. MultiView™ II DVI-TX Installation and User Guide 12 Installation 4.3.2 DDC/EDID Settings These settings are accessed in NORMAL operating mode (CFG indicator is off). The MultiView™ II DVI-TX features the ability to send DDC/EDID display identifiers to the video source in order to determine display capabilities. The DDC/EDID interface is a data communication channel used between plug and play devices to accurately report a display's capabilities and identify the manufacturer. If this data is not available, the video source may revert to a low resolution or not display at all. The DVI-TX unit has three DDC/EDID modes of operation. When the DVI-TX is operating in “normal mode” (CFG indicator is off), it is possible to quickly select between the three operating modes simply by using the DDC MODE button at any time. STD: Selects the Magenta Magic DDC/EDID profile This is the factory default mode which uses generic DDC/EDID information stored within the transmitter. It is also referred to as the Magenta Magic profile, and it is comprised of a set of common video resolutions which are intended to support the most popular VESA standards in standard or widescreen formats. To activate STD mode, press the DDC MODE button until the STD indicator is on. LOCAL: Selects the DDC/EDID profile from a locally-connected display The DDC/EDID information is transferred from a display connected to the local port of the transmitter back to the video source. This is only effective if a display is connected to the “local out” port - and it must remain connected at all times. This mode does not store any DDC profile information inside the DVI-TX device. To activate LOCAL mode, press the DDC MODE button until the LOCAL indicator is on. COPY: Selects a previously stored copy of a DDC/EDID profile In this mode, DDC/EDID information comes from a DDC profile that was previously copied into the DVI-TX’s non-volatile memory from a display device. To use this mode, a DDC/EDID profile must already have been stored into the DVI-TX. To perform a DDC-copy operation: Set the DDC mode to “COPY” using the DDC MODE button. Connect a display to the LOCAL OUT port. The display must be powered on. Push and hold the COPY button until the copy-status indicator flashes 3 times, indicating the operation was successful. If it only flashes once, the operation failed and the previously stored DDC profile (if any) will remain unchanged. MultiView™ II DVI-TX Installation and User Guide 13 Installation 4.4 Sync Settings The DVI-TX is factory-configured for auto-detecting the proper sync-mode (RepliSync-I normal/stretched). This mode is generally compatible with all existing MultiView™ receiver products that support RepliSync (if they are also using their factory-default settings). However, some video sources may require a custom sync-mode setting (most especially at 1080p and 1920x1200 video resolutions). For these cases, one of the other available syncmodes can be selected. Note that any connected MultiView™ receiver should generally be set to the same sync-mode and may require other configuration adjustments (such as sync-polarity). Otherwise, you may not get a proper video display output at that receiver, or none at all. Perform the procedure below while the transmitter is in the normal operating state (CFG indicator is off): Press and release the CFG button once to access configuration-mode (CFG indicator = on). Press and release the SEL button once. You will now be able to change sync-mode settings. LED indicators 1-3 should be illuminated (either DIM or ON); all others (indicators 4-8) should be off. Press the CFG button repeatedly to step through the available sync-mode settings as shown below. To leave configuration-mode step through all the options OR leave the buttons untouched for 10 seconds. LED1 LED2 LED3 FRONT PANEL VIEW dim dim dim dim dim ON dim ON dim dim ON ON Force RepliSync-II. ON dim dim Force fixed-sync mode. NOTE: A connected MultiView receiver must also be in fixed-sync mode and with H/V polarities selected at the receiver. MultiView™ II DVI-TX Installation and User Guide SYNC-MODE SETTING The DVI-TX will auto-detect the required RepliSync-I mode (“normal” or “stretched”). This is the factorydefault setting. Force RepliSync-I normal Horizontal sync-pulse encoding. Force RepliSync-I “stretched” Horizontal sync-pulse encoding. 14 Installation 4.5 4th Pair Settings The DVI-TX provides several options for using the 4th-pair signals (pairs 1-3 are generally used for video). Note that any connected MultiView™ receiver must be configured with a matching 4th-pair operating mode. Otherwise, the desired 4th-pair signal will not work as expected. If an optional daughterboard is installed (232, SA or SAP options), then the 4th-pair utilization is defined by the installed daughterboard. It will not be possible to change any of the 4th-pair settings as described below. Perform the procedure below while the transmitter is in the normal operating state (CFG indicator is off): Press and release the CFG button once to access configuration-mode (CFG indicator = on). Press and release the SEL button twice. You will now be able to change 4th-pair option settings. LED indicators 4-6 should be illuminated (either DIM or ON); all others (indicators 1-3, 7 and 8) should be off. Press the CFG button repeatedly to step through the available 4th-pair settings as shown below. To leave configuration-mode step through all the options OR leave the buttons untouched for 10 seconds. LED4 LED5 LED6 dim dim dim dim dim ON dim ON dim dim ON ON ON dim dim FRONT PANEL VIEW MultiView™ II DVI-TX Installation and User Guide 4TH-PAIR OPERATING MODE The 4th-pair operating mode is defined by presence of option-module. This setting cannot be changed because an option-module is installed (232, SA or SAP). Note: If an option module is not installed, this setting will effectively “mute” the 4th-pair signals. This can be useful sometimes for diagnostic purposes. Direct pass-through of 4th-pair wires (custom applications). External analog (L+R summed) audio. This is the factory-default mode for an (A) model transmitter. External S/PDIF digital audio. Input-impedance = 75ohms. Simplex-serial. This is the factory-default mode for an (S) model transmitter. 15 Troubleshooting Chapter 5 Troubleshooting In most cases, nearly every issue with the MultiView™ II CAT5 Video System can be resolved by checking the CAT5 termination and making sure that it’s pinned to the TIA/EIA 568B wiring specification. However, there may be other problems that cause the system to not perform as it’s designed. Below are solutions to the most common installation errors and their solutions. Problem Solution No video signal at the transmitter local port or at the receiver Check that both units are powered. Ensure receiver EQ and SKEW adjustments are set correctly. Change EQ settings slowly to allow the display to re-acquire a valid signal and display the image. Make sure the CAT5 cable is terminated correctly per the TIA/EIA 568B wiring specification. Is the display device powered on and functioning? Check to ensure display settings (resolution, refresh rate, etc) are compatible with input signal. In some cases, the video termination may be mismatched. Generally, transmitters and receivers ship with 75-ohm termination as the default. Refer to applicable user-guides to change the termination settings. There may be a DDC/EDID compatibility problem. Try changing the DDC mode setting, or copying the DDC/EDID profile directly from the display. Poor video quality at receiver Ensure receiver EQ and SKEW adjustments are set correctly. Change EQ settings slowly to allow the display to re-acquire a valid signal and display the image. Check all cable connections. The video signal’s refresh rate may be set too high. Reset to a lower refresh rate in your display-configuration menu (for example, under Windows on a PC). There may be a video-skew delay issue. See section on skew adjustments in the applicable receiver manual. There may be a DDC/EDID compatibility problem. Try changing the DDC mode setting, or copying the DDC/EDID profile directly from the display. Poor audio quality The audio output at the receiver is line-level only. An amplifier or powered speakers are required. Make sure amplifier or speaker power is ON. Check input source levels from the source device. Ensure the audio source level does not exceed the audio-input ratings for the DVI-TX. Clipping or distortion can result. Audio is summed left and right for “A” versions. If using a single channel, both audio inputs must be connected at the transmitter end to obtain proper audio gain through the link (1:1, input to output). If daisy chaining, audio termination must be removed in DP receivers (AK600/1200DP and XR2000DP). Only the last receiver requires termination. This does not apply to SA or SAP units. SA units no longer require separate daisy chain or end of line units as of April 2009. Refer to the appropriate receiver user manual. Serial communication doesn’t work correctly Are the serial devices connected properly? Are the serial parameters correct for source/destination devices? Are the serial cables terminated correctly? Is a null-modem cable required at the TX or RX end? When using RS-232 capable receivers with video switches, distribution amps, or multi-output transmitters, the serial data is sent transmit-only. Please take this into account when trying to control displays or other devices. For assistance, contact Magenta Technical Support. MultiView™ II DVI-TX Installation and User Guide 16 Troubleshooting Problem Solution When utilizing a receiver’s RJ45 daisy chain port, the following rules apply: Notes on daisy chaining • If using L/R summed audio, simplex serial, or SPDIF units, a maximum of 12 units may be daisy changed within the rated cable length of the receiver. • When using SA units, a maximum of 4 units may be daisy chained within the rated cable length of the receiver. • When using SAP units, a maximum of 12 units may be daisy chained within the rated cable length of the receiver if using standard CAT5/6 or a maximum of 8 units may be daisy chained within the rated cable length of the receiver if using low-skew cable. • When daisy chaining, the maximum cable distance is not increased beyond the rated distance of the receiver used. For example, an AK600 can only daisy chain within 600 ft of the transmitter. It is possible to daisy chain out of a short range receiver into a longer range receiver to increase the range. For example, over 600 ft an AK600 can be daisy chained into an AK1200 which allows for daisy chaining to 1,200 ft. MultiView™ II DVI-TX Installation and User Guide 17 Connector Pinouts Appendix A Connector Pinouts DVI-D connector pinout (DVI-in, Local-out): Pins #1-8 Key holes, to prevent wrong type of cable being plugged in Pins #9-16 Pins #17-24 DVI (Digital Visual Interface) is a robust and popular video interface standard that can include digital and analog options in the same connector (the “DVI-I” version). However, as the DVI-TX is a digital-input only device, it supports the “DVI-D” subset of the DVI standard interface. The pinout table below provides the pin out for all 24 pins, which are used in the DVI-TX unit, providing 2 x 165MHz bandwidth. Pin # Signal Name Pin # Signal Name Pin # Signal Name 1 TMDS Data 2- 9 TMDS Data 1- 17 TMDS Data 0- 2 TMDS Data 2+ TMDS Data 2/4 Shield TMDS Data 4- 10 TMDS Data + TMDS Data 1/3 Shield TMDS Data 3- 18 TMDS Data 0+ TMDS Data 0/5 Shield TMDS Data 5- 5 TMDS Data 4+ 13 TMDS Data 3+ 21 TMDS Data 5+ 6 DDC Clock (SCL) 14 +5V Power 22 TMDS Clock Shield 7 DDC Data (SDA) 15 Ground (for +5V) 23 TMDS Clock + 8 Analog Vertical Sync 16 Hot Plug Detect 24 TMDS Clock - 3 4 11 12 MultiView™ II DVI-TX Installation and User Guide 19 20 18 Connector Pinouts Auxiliary I/O (AUX-I/O) connector pinout: Pin #1 Pin #4 4-pin Phoenix connector pinout: DVI-TX DVI-TX-232 DVI-TX-SA DVI-TX-SAP PIN# (A) Audio (S) Simplex Serial SPDIF Audio Composite Video - SA Audio* SAP Audio 1 (SIG1) Left Channel Tx Signal + Signal + - Left Channel Left Channel 2 (GND) Ground ground Signal - Signal - - Ground Ground 3 (SIG2) Right Channel - - - - Right Channel Right Channel 4 (GND) - Shell - - - - - * Note: SA audio channels are reversed at the MultiView™ receiver end! Left audio is on pin 3 and right audio is on pin 1. MultiView™ II DVI-TX Installation and User Guide 19 Connector Pinouts Serial port (IOIO) connector pinout (232/SA/SAP versions only): The DVI-TX’s serial port connector is configured to look like a standard 9-pin “DCE” serial port. Therefore, in most applications a straight through serial cable or adapter-plug (DB9-Female-to-Male) is used to connect an external serial device (for example, a PC) to the DVI-TX transmitter. Pin #5 Pin #1 Pin #9 Pin #6 DB9-F Serial Port The DB9-F serial port is only available on DVI-TX-232, -SA and –SAP models. DVI-TX (232) Simplex DVI-TX (232) Duplex DVI-TX (SA) Simplex DVI-TX (SA) Duplex DVI-TX (SAP) Simplex DVI-TX (SAP) Duplex Pin# 4 wire 9 wire 2 wire 3 wire 2 wire 3 wire 1 - DCD - - - - 2 - RX - RX - RX 3 TX TX TX TX TX TX 4 DTR DTR - - - - 5 Ground Ground Ground Ground Ground Ground 6 - DSR - - - - 7 RTS RTS - - - - 8 - CTS - - - - 9 - RI - - - - MultiView™ II DVI-TX Installation and User Guide 20 Connector Pinouts RJ45 (MultiView Link) Wiring Standard: PIN # COLOR PAIR 1 White / Orange Stripe 2 2 Orange Solid 2 3 White / Green Stripe 3 4 Blue Solid 1 5 White / Blue Stripe 1 6 Green Solid 3 7 White / Brown Stripe 4 8 Brown Solid 4 MultiView™ II DVI-TX Installation and User Guide Pins on plug face (socket is reversed) Typical RJ-45 plug 21 Connector Pinouts DC Power Connector: Magenta provides ready-to-use power supplies for MultiView™ II products. However, if there is a reason a substitute power supply must be used, then the following information is important for maintaining product reliability and performance: Magenta AC/DC Power supply output rating: Regulated +5VDC @ 3Amps. Power-input rating for MultiView™-DVI-TX: 5VDC, 1.2Amps max. The DVI-TX’s DC power input connector accepts an industry-standard coaxial-DC plug with the following specifications: Coaxial power connector OD = 5.5mm ID = 2.5mm (accepted center-pin diameter) Length = 11mm (overall length of insertable plug end) Inner contact (pin-socket) = +5VDC Outer contact (sleeve) = Ground It is highly recommended that the inner contact (center-pin contact) of any mating DC plug utilize a “tuning-fork” shaped design, rather than a plain barrel shape. The tuning-fork design greatly increases the reliability of the power connection. The plain barrel style connector can cause intermittent operation, often resulting in “mysterious” system problems that are difficult to identify. Plain barrel center contact. NOT RECOMMENDED Tuning-fork center contact. PREFERRED The Magenta-provided power supply already comes with the correct output ratings and DCplug configuration MultiView™ II DVI-TX Installation and User Guide 22 Option Module Settings: DVI-TX-232 Appendix B Option Module Settings: DVI-TX-232 The (232) option module has internal jumper settings that can be configured for various serial modes and CAT5 cable lengths. To access the (232) module board: Example of jumper-plugs Make sure the unit is powered OFF. If necessary, unplug all cables to the unit. Unscrew the top cover screws. Unscrew the DB9-F hex-standoffs. Lift the cover off. Carefully unplug the (232) module from the main board. Transmitter (232) module jumper settings Mode Type Baud (Max) JP1 1-2 JP1 3-4 OUT IN 1 Simplex (one way) (to 1500 ft) 115k 2 Full Duplex (2 way) Short (< 500 ft) 19.2K OUT OUT 3/5 Default Setting Full Duplex (2 way) Long (to 1500 ft) 19.2k IN OUT 4 Half Duplex (2 way) Long (to 1500 ft) 115k IN IN JP1 Pins (side view) 8 7 6 5 4 3 2 1 NOTES: Mode 1 is required when using multi output transmitters and when daisy chaining receivers. Mode 3 may introduce noise in video over 1,000 ft when serial communication occurs. This does not apply if Mode 5 is used on the receiver. JP1 5-6 & 7-8 terminate the serial bus and must be IN on the transmitter. MultiView™ II DVI-TX Installation and User Guide 23 Option Module Settings: DVI-TX-232 JP2 Pins Receiver (232) module jumper settings Baud (Max) Mode Type 115k 1 Simplex (one way) (to 1500 ft) 1-2 See Notes 1-2 IN 3-4 See Notes 3-4 OUT 5-6 IN 5-6 OUT 7-8 OUT 7-8 OUT 9-10 OUT 9-10 IN Full Duplex (2 way) Short (< 500 ft) 19.2K 1-2 See Notes 1-2 IN 3-4 See Notes 3-4 OUT 5-6 OUT 5-6 OUT 7-8 OUT 7-8 IN 9-10 OUT 9-10 OUT 19.2k 3 Full Duplex (2 way) Long (to 1000 ft) 115k 4 Half Duplex (2 way) Long (to 1500 ft) 19.2k 5 Default Full Duplex (2 way) Long (to 1500 ft) 2 JP4 Pins JP1 JP2 JP3 Pins 2 4 6 8 10 3 3 1 3 5 7 9 2 2 1 1 JP1 Pins (side view) 1-2 See Notes 1-2 IN 3-4 See Notes 3-4 OUT 5-6 OUT 5-6 OUT 7-8 IN 7-8 IN 9-10 OUT 9-10 OUT 10 9 8 7 6 5 4 3 2 1 1-2 See Notes 1-2 IN 3-4 See Notes 3-4 OUT 5-6 IN 5-6 OUT 7-8 IN 7-8 IN 9-10 OUT 9-10 OUT 1-2 OUT 3-4 OUT 5-6 OUT 7-8 IN 9-10 OUT 1-2 OUT 3-4 IN 5-6 IN 7-8 OUT 9-10 IN *JP3 and JP4 are OUT for all models except MODE 5. In MODE 5, JP3 & JP4 should be jumpered across pins 2-3 NOTES: Mode 1 is required when using multi output transmitters and when daisy chaining receivers. Mode 3 may introduce noise in video over 1,000 ft when serial communication occurs. JP1 1-2 and 3-4 terminate the serial bus and must be IN on the last receiver in a daisy chain or if using a point to point link UNLESS using Mode 5. MultiView™ II DVI-TX Installation and User Guide 24 Option Module Settings: DVI-TX-SAP Appendix C Option Module Settings: DVI-TX-SAP The SAP option module allows a bi-directional session to be established between a SAP-equipped transmitter (DVI-TX-SAP), and a specific SAP-equipped receiver even in a multiple-receiver daisy chain installation. The SAP transmitter devices (DVI-TX-SAP for example) do not have address DIP-switches. The factory-default address of the transmitter is “0”. The SAP receiver devices (AK600-SAP for example) have address DIP-switches. Each SAP-equipped receiver must have a unique address set first, via DIP-switch settings or by a serial command entered directly at the receiver. Once this has been done, a special “set destination address” command is sent into the transmitter to specify which receiver to open a session with. If the DVI-TX-SAP is commanded to use destination address 0 (zero), serial data will be broadcast to all receivers. This is the factory-default behavior. To set the SAP receiver’s address switches, you will need to open the receiver enclosure and set the DIPswitches directly on the SAP module. The DIP-switch has 8 switches, one for each address bit position. Use the SAP addressing chart provided on the next page to determine the proper switch addresses. All receivers must have a unique address. It is recommended to write the address on each receiver once this step has been completed. It is also recommended to keep a list of receiver addresses and locations to make it easier to determine which receiver/display is desired to communicate with. General instructions for setting SAP address DIP-switches (at SAP-receiver units): 1. Remove the top cover assembly of the receiver. 2. Locate the 8 position dipswitch on the internal daughterboard assembly and using the SAP-addressing chart, set the receiver address as needed. 3. Replace cover assembly and install unit. Note: It is also possible to set a SAP receiver’s address by a serial-command entered at the receiver itself. In this case, simply ensure all DIP switches are set to address 0 (zero). Please also refer to the SAP II Programmer’s Guide for additional information on SAP related settings and operation. MultiView™ II DVI-TX Installation and User Guide 25 Option Module Settings: DVI-TX-SAP SAP Addressing Chart ADDR 00 01 02 03 04 05 06 07 08 09 10 11 12 13 14 15 16 17 18 19 20 21 22 23 24 25 26 27 28 29 30 31 Switch Settings 1 ADDR 2 3 4 5 6 7 ON 8 OFF 2 3 4 5 6 7 8 ON OFF 33 3 4 5 6 7 8 ON OFF 34 3 4 5 6 7 8 ON OFF 35 4 5 6 7 8 ON OFF 36 4 5 6 7 8 ON OFF 37 4 5 6 7 8 ON OFF 38 4 5 6 7 8 ON OFF 39 5 6 7 8 ON OFF 40 5 6 7 8 ON OFF 41 5 6 7 8 ON OFF 42 5 6 7 8 ON OFF 43 5 6 7 8 ON OFF 44 5 6 7 8 ON OFF 45 5 6 7 8 ON OFF 46 5 6 7 8 ON OFF 47 6 7 8 ON OFF 48 6 7 8 ON OFF 49 6 7 8 ON OFF 50 6 7 8 ON OFF 51 6 7 8 ON OFF 52 6 7 8 ON OFF 53 6 7 8 ON OFF 54 6 7 8 ON OFF 55 6 7 8 ON OFF 56 6 7 8 ON OFF 57 6 7 8 ON OFF 58 6 7 8 ON OFF 59 6 7 8 ON OFF 60 6 7 8 ON OFF 61 6 7 8 ON OFF 62 6 7 8 ON OFF 63 1 2 1 1 2 3 1 2 1 3 2 2 3 1 1 2 3 4 1 2 3 2 3 1 4 2 1 1 4 3 2 4 3 3 1 4 2 1 3 4 2 2 3 4 1 1 2 3 4 5 1 2 3 4 2 3 4 3 4 3 4 1 5 2 1 1 5 2 5 3 1 2 1 3 2 2 5 4 3 1 1 5 4 5 4 2 3 5 4 4 1 2 3 2 3 1 4 2 1 1 4 5 5 5 3 2 4 5 3 3 1 4 5 2 1 3 4 5 2 2 3 4 5 1 1 2 3 4 5 32 Switch Settings ADDR 7 ON 8 OFF 64 7 8 ON OFF 65 7 8 ON OFF 66 7 8 ON OFF 67 7 8 ON OFF 68 7 8 ON OFF 69 7 8 ON OFF 70 7 8 ON OFF 71 7 8 ON OFF 72 7 8 ON OFF 73 7 8 ON OFF 74 7 8 ON OFF 75 7 8 ON OFF 76 7 8 ON OFF 77 7 8 ON OFF 78 7 8 ON OFF 79 7 8 ON OFF 80 7 8 ON OFF 81 7 8 ON OFF 82 7 8 ON OFF 83 7 8 ON OFF 84 7 8 ON OFF 85 7 8 ON OFF 86 7 8 ON OFF 87 7 8 ON OFF 88 7 8 ON OFF 89 7 8 ON OFF 90 7 8 ON OFF 91 7 8 ON OFF 92 7 8 ON OFF 93 7 8 ON OFF 94 7 8 ON OFF 95 6 1 2 3 4 5 2 3 4 5 3 4 5 3 4 5 4 5 4 5 4 5 4 5 1 6 2 1 1 6 2 6 3 1 2 1 3 2 2 2 6 3 1 1 6 6 3 6 4 1 2 3 2 3 1 4 2 1 1 4 3 2 4 3 4 6 5 3 4 6 5 3 4 1 1 6 5 2 2 6 5 2 1 6 5 3 1 6 5 6 5 2 3 4 6 5 5 1 2 3 4 2 3 4 3 4 3 4 1 5 2 1 1 5 2 5 3 1 2 1 3 2 6 6 6 6 4 2 5 6 4 3 1 1 5 6 5 6 4 2 3 5 6 4 4 1 2 3 2 3 1 4 2 1 1 4 5 5 5 6 6 6 3 2 4 5 6 3 3 1 4 5 6 2 1 3 4 5 6 2 2 3 4 5 6 1 1 2 3 4 5 6 MultiView™ II DVI-TX Installation and User Guide Switch Settings ADDR 7 1 2 3 4 5 6 2 3 4 5 6 3 4 5 6 3 4 5 6 4 5 6 4 5 6 4 5 6 4 5 6 5 6 5 6 5 6 5 6 5 6 5 6 5 6 5 6 1 2 2 2 2 3 2 3 2 3 1 2 2 3 2 3 2 3 2 3 4 2 3 4 ON OFF 101 8 ON OFF 102 8 ON OFF 103 8 ON OFF 104 8 ON OFF 105 8 ON OFF 106 8 ON OFF 107 8 ON OFF 108 8 ON OFF 109 8 ON OFF 110 8 ON OFF 111 8 ON OFF 112 8 ON OFF 113 8 ON OFF 114 8 ON OFF 115 8 ON OFF 116 8 ON OFF 117 8 ON OFF 118 8 ON OFF 119 8 ON OFF 120 8 ON OFF 121 8 ON OFF 122 8 ON OFF 123 8 ON OFF 124 8 ON OFF 125 8 ON OFF 126 8 ON OFF 127 7 3 4 3 4 7 6 5 2 1 2 5 3 5 3 5 3 5 4 3 2 3 1 2 5 5 4 5 7 6 4 5 2 7 6 3 4 5 2 2 7 6 3 1 7 6 4 3 7 5 3 2 7 6 6 4 1 7 6 4 2 7 6 4 2 7 6 4 1 7 6 4 2 2 7 6 5 2 1 7 6 5 3 7 6 3 4 5 1 1 8 7 4 1 1 100 7 5 1 ON OFF 7 4 1 1 8 7 4 2 1 99 7 4 2 1 1 ON OFF 7 4 3 1 8 7 4 3 3 1 98 7 4 1 1 ON OFF 7 4 1 8 7 3 1 1 97 7 3 2 1 ON OFF 7 2 1 1 8 7 3 1 96 7 1 1 ON 8 OFF 7 6 2 3 4 5 7 6 Switch Settings 6 1 2 3 4 5 2 3 4 5 3 4 5 3 4 5 4 5 4 5 4 5 4 5 1 6 2 1 1 6 2 6 3 1 2 1 3 2 2 2 6 3 1 1 6 6 3 6 4 1 2 3 2 3 1 2 4 3 2 4 3 4 3 4 6 4 6 3 4 6 5 2 3 4 2 3 4 3 4 3 4 1 5 2 1 1 5 2 5 3 1 2 1 3 2 6 6 6 6 5 6 3 5 6 3 5 6 4 2 3 2 3 1 4 2 1 1 4 5 5 5 6 6 6 4 5 6 3 4 5 6 3 4 5 6 3 4 5 6 2 3 4 5 6 ON OFF 8 ON OFF 8 ON OFF 8 ON OFF 8 ON OFF 8 ON OFF 8 ON OFF 8 ON OFF 8 ON OFF 8 ON OFF 8 ON OFF 8 ON OFF 8 ON OFF 8 ON OFF 8 ON OFF 8 ON OFF 8 ON OFF 8 ON OFF 8 ON OFF 8 ON OFF 8 ON OFF 8 ON OFF 8 ON OFF 8 ON OFF 7 7 7 7 7 7 7 7 7 7 7 7 7 7 1 1 8 7 2 2 ON OFF 7 2 1 8 7 3 1 ON OFF 7 3 2 8 7 4 1 ON OFF 7 4 2 8 7 4 1 ON OFF 7 4 2 1 5 6 8 7 5 1 ON OFF 7 5 2 8 7 5 3 ON OFF 7 5 1 1 6 8 7 5 2 2 6 ON OFF 7 5 2 1 6 8 7 5 3 1 6 ON OFF 7 5 4 1 1 6 8 7 7 26 Option Module Settings: DVI-TX-SAP SAP Addressing Chart (cont’d) ADDR 128 129 130 131 132 133 134 135 136 137 138 139 140 141 142 143 144 145 146 147 148 149 150 151 152 153 154 155 156 157 158 159 Switch Settings ADDR 8 1 2 3 4 5 6 7 2 3 4 5 6 7 3 4 5 6 7 3 4 5 6 7 4 5 6 7 4 5 6 7 4 5 6 7 4 5 6 7 5 6 7 5 6 7 5 6 7 5 6 7 5 6 7 5 6 7 5 6 7 5 6 7 6 7 6 7 6 7 6 7 6 7 6 7 6 7 6 7 6 7 6 7 6 7 6 7 6 7 6 7 6 7 6 7 1 8 2 1 1 8 2 8 3 1 2 1 3 2 2 2 8 3 1 1 8 8 3 8 4 1 2 3 2 3 1 4 2 1 1 2 3 3 3 2 3 8 4 8 4 1 1 8 4 2 2 8 4 2 1 8 4 3 3 1 8 8 4 8 5 1 2 3 4 2 3 4 3 4 3 4 1 5 2 1 1 2 3 1 3 3 4 2 3 2 3 1 4 2 1 1 4 4 3 4 3 4 3 4 2 3 4 8 5 8 5 8 5 1 1 8 5 2 2 8 5 2 1 8 5 3 1 8 5 3 2 8 5 4 1 8 5 4 2 8 5 4 1 8 5 4 2 2 8 5 2 1 8 5 3 1 8 8 5 8 ON OFF 160 ON OFF 161 ON OFF 162 ON OFF 163 ON OFF 164 ON OFF 165 ON OFF 166 ON OFF 167 ON OFF 168 ON OFF 169 ON OFF 170 ON OFF 171 ON OFF 172 ON OFF 173 ON OFF 174 ON OFF 175 ON OFF 176 ON OFF 177 ON OFF 178 ON OFF 179 ON OFF 180 ON OFF 181 ON OFF 182 ON OFF 183 ON OFF 184 ON OFF 185 ON OFF 186 ON OFF 187 ON OFF 188 ON OFF 189 ON OFF 190 ON OFF 191 Switch Settings ADDR 6 1 2 3 4 5 2 3 4 5 3 4 5 3 4 5 4 5 4 5 4 5 4 5 1 2 2 1 2 3 2 3 2 3 1 2 1 1 1 6 5 4 6 4 3 6 4 6 5 2 3 4 2 3 4 3 4 3 4 1 2 1 2 1 1 6 6 6 5 4 2 3 2 3 1 6 2 1 5 6 5 4 5 6 5 6 4 5 6 3 4 5 6 8 7 3 4 5 6 1 1 8 7 2 2 8 7 2 1 8 7 4 3 8 7 3 1 8 6 3 2 8 7 7 4 1 8 7 4 1 8 7 5 3 8 6 4 2 8 7 5 3 8 6 4 1 8 7 5 3 2 6 4 2 8 7 5 3 1 6 7 5 2 8 7 7 5 1 8 7 5 1 8 7 5 2 8 7 5 3 8 7 6 4 1 8 7 5 3 2 6 4 2 8 7 5 2 8 7 6 4 3 1 6 5 3 8 7 5 3 2 8 7 6 4 1 8 7 6 4 1 8 7 6 3 1 8 7 6 3 2 2 8 7 6 2 1 8 7 6 3 1 7 6 1 1 8 8 7 2 3 4 5 6 MultiView™ II DVI-TX Installation and User Guide 8 7 ON OFF 192 ON OFF 193 ON OFF 194 ON OFF 195 ON OFF 196 ON OFF 197 ON OFF 198 ON OFF 199 ON OFF 200 ON OFF 201 ON OFF 202 ON OFF 203 ON OFF 204 ON OFF 205 ON OFF 206 ON OFF 207 ON OFF 208 ON OFF 209 ON OFF 210 ON OFF 211 ON OFF 212 ON OFF 213 ON OFF 214 ON OFF 215 ON OFF 216 ON OFF 217 ON OFF 218 ON OFF 219 ON OFF 220 ON OFF 221 ON OFF 222 ON OFF 223 Switch Settings ADDR 7 1 2 3 4 5 6 2 3 4 5 6 3 4 5 6 3 4 5 6 4 5 6 4 5 6 4 5 6 4 5 6 5 6 5 6 5 6 5 6 5 6 5 6 5 6 5 6 1 7 2 1 1 7 2 7 3 1 2 1 3 2 2 2 7 3 1 1 7 7 3 7 4 1 2 3 2 3 1 4 2 1 1 2 3 3 3 2 3 7 4 7 4 1 1 7 4 2 2 7 4 2 1 7 4 3 3 1 7 7 4 7 5 1 2 3 4 2 3 4 3 4 3 4 1 2 2 1 3 2 3 1 2 1 7 7 5 8 8 8 8 8 8 8 8 8 8 8 8 8 8 8 7 8 6 4 5 7 8 6 4 5 7 8 6 3 4 5 7 8 6 3 4 5 1 1 7 5 2 2 7 5 2 1 8 6 4 3 8 6 3 1 8 6 3 2 8 6 4 1 7 5 4 2 8 6 4 1 7 5 3 8 6 4 2 7 5 3 8 6 4 1 1 7 5 3 8 6 4 2 2 7 5 3 1 8 6 5 2 8 6 5 1 1 7 8 7 8 6 2 3 4 5 7 6 8 ON OFF 224 ON OFF 225 ON OFF 226 ON OFF 227 ON OFF 228 ON OFF 229 ON OFF 230 ON OFF 231 ON OFF 232 ON OFF 233 ON OFF 234 ON OFF 235 ON OFF 236 ON OFF 237 ON OFF 238 ON OFF 239 ON OFF 240 ON OFF 241 ON OFF 242 ON OFF 243 ON OFF 244 ON OFF 245 ON OFF 246 ON OFF 247 ON OFF 248 ON OFF 249 ON OFF 250 ON OFF 251 ON OFF 252 ON OFF 253 ON OFF 254 ON OFF 255 Switch Settings 1 6 7 8 ON OFF 6 7 8 ON OFF 6 7 8 ON OFF 6 7 8 ON OFF 6 7 8 ON OFF 6 7 8 ON OFF 6 7 8 ON OFF 6 7 8 ON OFF 6 7 8 ON OFF 6 7 8 ON OFF 6 7 8 ON OFF 6 7 8 ON OFF 6 7 8 ON OFF 6 7 8 ON OFF 6 7 8 ON OFF 6 7 8 ON OFF 5 6 7 8 ON OFF 5 6 7 8 ON OFF 5 6 7 8 ON OFF 5 6 7 8 ON OFF 5 6 7 8 ON OFF 5 6 7 8 ON OFF 5 6 7 8 ON OFF 5 6 7 8 ON OFF 4 5 6 7 8 ON OFF 4 5 6 7 8 ON OFF 4 5 6 7 8 ON OFF 4 5 6 7 8 ON OFF 3 4 5 6 7 8 ON OFF 3 4 5 6 7 8 ON OFF 2 3 4 5 6 7 8 ON OFF 2 3 4 5 6 7 8 ON OFF 2 3 4 5 2 3 4 5 3 4 5 3 4 5 4 5 4 5 4 5 4 5 1 2 1 1 2 3 1 2 1 3 2 2 3 1 1 2 3 4 1 2 3 2 3 1 4 2 1 1 5 5 4 3 2 5 4 3 3 1 5 4 2 1 5 3 4 2 2 5 3 4 1 1 5 2 3 4 5 1 2 3 4 2 3 4 3 4 3 4 1 2 1 1 2 3 1 2 1 4 3 2 2 4 3 1 1 4 2 3 4 1 2 3 2 3 1 2 1 1 3 2 3 1 2 1 2 1 1 27 Mounting Kits Appendix D Mounting Kits There are several kits available for mounting the DVI-TX: Mounting Kit # 2211053-01 Description Rigid-mount bracket. This mounts a single device to a surface (wall/desk/etc.). Comes with 4 self-tapping screws. 8310207-01 1U Rack-mount Plate for standard 19” rack. Mounts 4 devices in a 1U space. Comes with (8) device-mounting screws, (4) rack-mounting screws. 8310208-01 2U Rack-mount Plate for standard 19” rack. Mounts 8 devices in a 2U space. Comes with (16) device-mounting screws, (4) rack-mounting screws. Note: When installing DVI-TX devices in an area susceptible to elevated operating temperatures (near the maximum specified operating temperature), it is important to give careful consideration to maintaining adequate air flow. Within a rack assembly, cable bundles and other equipment in the same rack can impede proper cooling. In some rack-mount applications you may even need to leave a 1U gap (using a blank filler plate) between DVI-TX groups. For surface-mount applications, ensure the device will have adequate air circulation and that air-vents on the enclosure are not blocked. DVI-TX with Rigid-mount Bracket: DVI-TX with 2U Rack-mount Plate: DVI-TX with 1U Rack-mount Plate: MultiView™ II DVI-TX Installation and User Guide 28 System Design Drawings Appendix E System Design Drawings The following drawings are available from Magenta Research as an aid in system design and configuration. You may download them from the Magenta website (www.magenta-research.com). There is no charge for obtaining these drawings. Drawing # 2500131-01 2510001-01 Description MultiView-II DVI-TX Sales Drawing (.dwg and .pdf format) MultiView-II DVI-TX Autocad Symbols (.dwg and .pdf format) MultiView™ II DVI-TX Installation and User Guide 29 Regulatory Compliance Information Appendix F Regulatory Compliance Information FEDERAL COMMUNICATIONS COMMISSION AND INDUSTRY CANADA RADIO FREQUENCY INTERFERENCE STATEMENTS This device complies with part 15 of the FCC Rules. Operation is subject to the following two conditions: 1) This device may not cause harmful interference, and 2) this device must accept any interference received, including interference that may cause undesired operation. This equipment has been tested and found to comply with the limits for a Class A digital device, pursuant to part 15 of the FCC Rules. These limits are designed to provide reasonable protection against harmful interference when the equipment is operated in a commercial environment. This equipment generates, uses, and can radiate radio frequency energy and, if not installed and used in accordance with the instruction manual, may cause harmful interference to radio communications. Operation of this equipment in a residential area is likely to cause harmful interference in which case the user will be required to correct the interference at his/her own expense. Canada (ICES-003) notice: This Class A digital apparatus complies with Canadian ICES-003. Cet appareil numerique de la classe A est conforme a la norme NMB-003 du Canada. EUROPEAN UNION DECLARATION OF CONFORMITY Warning: This is a Class A product. In a domestic environment this product may cause radio interference in which case the user may be required to take adequate measures. Magenta Research (New Milford CT USA) declares under our sole responsibility that the Magenta MultiView video-extension products to which this declaration relates is in conformity with the following standard(s) or other normative documents: EN 55022:2006 + A1:2007 Class A ITE emissions requirements. EN61000-3-2:2006 Limits for harmonic current emissions (equipment input current up to and including 16A per phase). EN 61000-3-3:1995/A1:2001/A2:2005 Limitation of voltage fluctuations and flicker on low-voltage supply systems for equipment with rated current up to and including 16A. EN55024:2003 Immunity for ITE. SAFETY WARNING Connection: Not for direct connection to Telecommunication Network Circuitry (TNV) Power sources: This equipment should be operated only from the power source indicated on the product. Disconnect all power sources before servicing. Servicing: Refer all servicing to qualified service personnel. There are no user-serviceable parts inside. Slots and openings: If the equipment has slots or holes in the enclosure, these are provided to prevent overheating of sensitive components inside. These openings must never be blocked by other objects or equipment. MultiView™ II DVI-TX Installation and User Guide 30 INDEX INDEX About this Manual, 1 Configuration 4th-pair Modes, 15 DDC/EDID, 13 Factory defaults, 12 general, 12 Sync modes, 14 Contact Information, iv Default Settings, 12 Drawings, 29 Front Panel, 2 Installation, 9 CAT5 Pinout, 9 Prerequisites, 9 Procedure, 10 Mounting Kits, 28 Option Module Settings 232 option module, 23 SAP option module, 25 Pinouts, 18 Auxiliary Signal Port, 19 DVI Ports, 18 MultiView™ II DVI-TX Installation and User Guide Phoenix Connector, 19 Power Connector, 22 Serial Port, 20 UTP/CAT5 Link Port, 21 Precautions, iii Product Overview, 2 Rear Panel, 2 Regulatory Information, 30 Reset to factory defaults, 12 SAP Address Chart, 26 SAP Addresses, 26 Serial Addressing, 25 Specifications, 3 Auxiliary signals, 6 CAT5 Cables, 8 DDC/EDID Support, 5 DVI Interface, 4 System Design Drawings, 29 Table of Contents, v Troubleshooting, 16 31